Resolution (Dpi) in print module

The only way to change the document format (the image file) is to resample it. Print resolution only affects what gets sent to the printer.

In the Image Properties dialog that you show from IrfanView, the Resolution setting is for (image) resolution and allows you to see what kind of size the image would print at with a given pixel resolution. I must emphasise that the use of dpi (instead of ppi) in this context is totally wrong and this number will not be communicated to the printer.

Example :

Take an image from a 24Mpx camera and you will have a document with dimensions of around 6000 x 4000 pixels.

If you do absolutely nothing to the image in the way of cropping or resizing, if you specify 240 ppi as the image resolution, you will be able to print it at 25" x 17" regardless of what print resolution you set. Take a look at @OXiDant Peter’s excellent post on this further up.

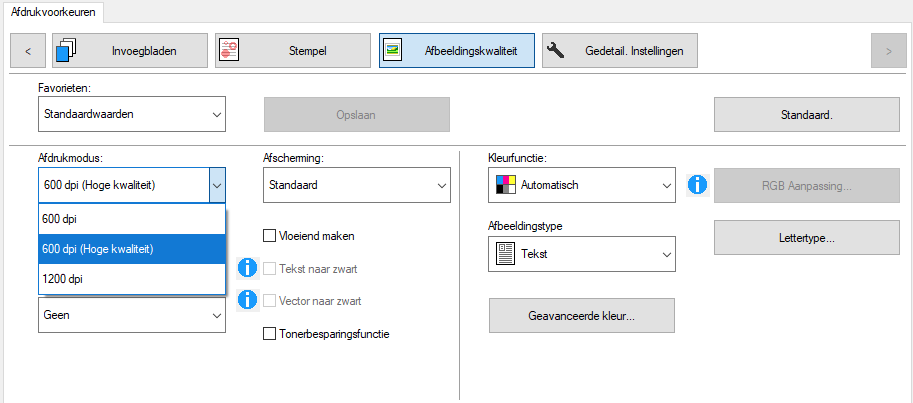
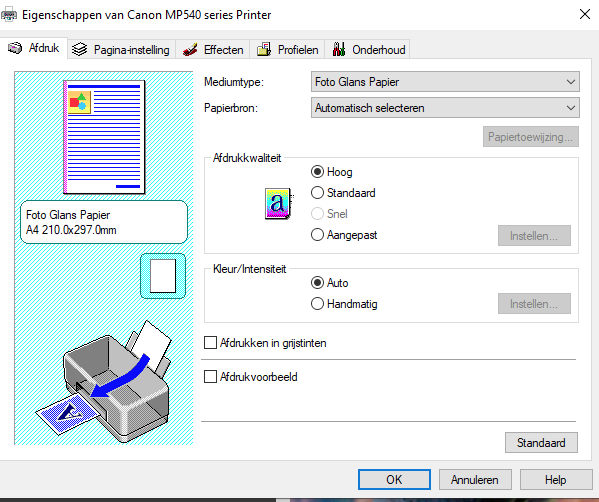
If you set the printer dot resolution to 1200 dpi, you will get a high quality print; if you set it to 300 dpi, you will get a very poor quality print, despite having a high quality image at 240 ppi. This is because the printer’s dpi resolution is at a totally different scale to that of the pixels in the image.

One dot on the print at 1200 dpi occupies a mere 1/1200 of an inch. one dot on the print at 300dpi still occupies 1/1200 of an inch but there is four times the space between the dots.

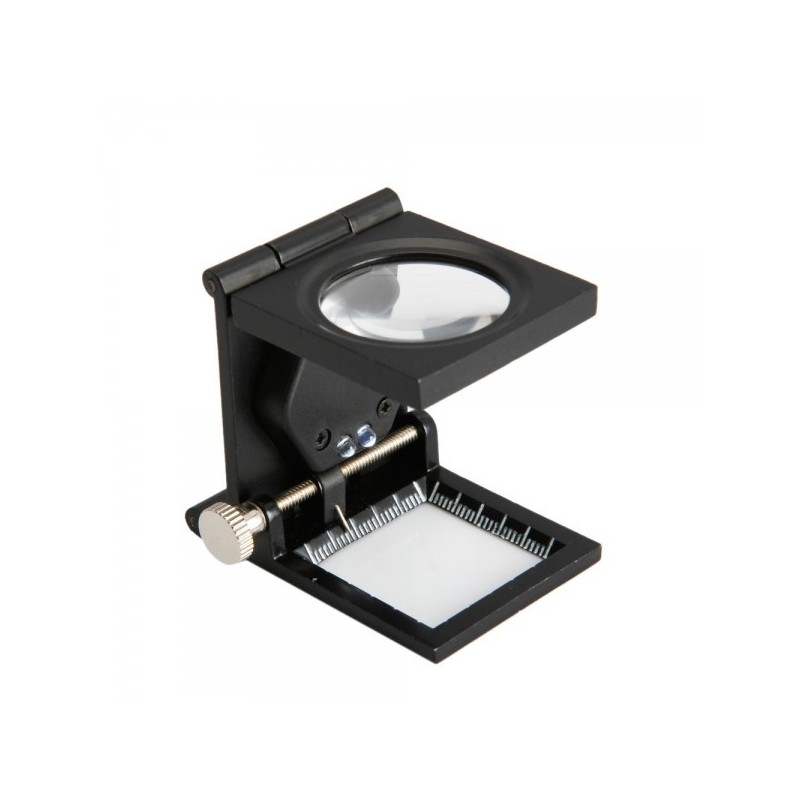
One pixel at 240ppi in the “document” occupies 1/240 of an inch when printed - a size that is small enough not be apparent to someone viewing the print at arm’s length. But if viewed on a screen, it occupies 1/109 of an inch on an average monitor if the image is viewed at 100% magnification (if you take look at the screen with a loupe, you can see the individual pixels).

Since you’ve posted this in a DxO forum, it’s important to note how PhotoLab handles this when it comes to printing :

If you simply use the printer dialog, the ppi resolution will be determined but the scaling you apply to the image in relation to its fit on a given paper size. Unfortunately, you cannot set the desired print size, only the margins, thus it is impossible to determine the actual ppi used in the scaling process.

Because PhotoLab is non-destructive, if you want to determine the actual size of an image in either pixels or inch/cm, you need to export the image, specifying the finished size. This will then create a copy of the image, resized at whatever resolution you specify.

Capture d’écran 2020-10-10 à 11.01.26

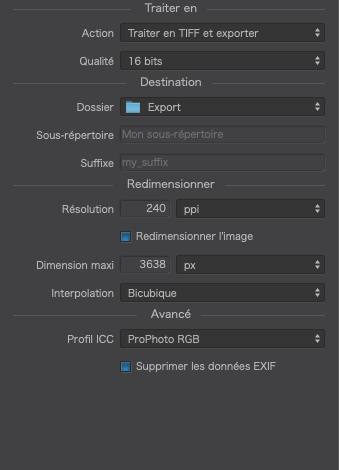
Then you need to open the exported file in a utility that allows you to specify printing at 100% (without any auto-fit, etc). The printer driver will then send the file to the printer, translating the 240 ppi into whatever print quality resolution you specify without changing the actual image size. The printer dot resolution chosen determines the quality of the print and does not, in any way, affect the size of the print.

THIS is the key of quality understanding.
When the dpi/ppi of the image < then the physical resolution/dpi of the printer you get a resampling in a way there WILL BE added pixels to the image to fill the gaps if you have A4 full filled checked.(The blocked “pixels” in a worse case scenario) see the autum image.)
if you not allow to full fill but have 1:1 as lowest quality it will print a smaller image then the A4 and leave some white borders. (edit: the printer is at it’s native resolution (or max if you want to call it that.))

the third option is what @Joanna mentioned: (edit: lower the resolution of the printer by dialing down the amount of “dots”.)
Which is often used for billboards and large printing.(keep the amount of pixels and spread them over the surface equaly as dots.)
By creating “space” between the dot’s i could clean up the autum image and print on a A4 or A3 make it less blotchy blocked. the punishment is i need to view it from a further distance other wise i see the background/paper between the image.

take your pick which will be yours.
non of this is a problem if your source resolution is > then dpi of printer at the chosen papersize.
(you can’t cramp in more dots then the highest print resolution so the printerdriver throws away the overcount of pixels by a algorithm as :

Nearest Neighbor

A fast but less precise method that replicates the pixels in an image. This method is for use with illustrations containing edges that are not anti-aliased, to preserve hard edges and produce a smaller file. However, this method can produce jagged effects, which become apparent when you distort or scale an image or perform multiple manipulations on a selection.

Bilinear

A method that adds pixels by averaging the color values of surrounding pixels. It produces medium-quality results.

Bicubic

A slower but more precise method based on an examination of the values of surrounding pixels. Using more complex calculations, Bicubic produces smoother tonal gradations than Nearest Neighbor or Bilinear.

Bicubic Smoother

A good method for enlarging images based on Bicubic interpolation but designed to produce smoother results.

Bicubic Sharper

A good method for reducing the size of an image based on Bicubic interpolation with enhanced sharpening. This method maintains the detail in a resampled image. If Bicubic Sharper oversharpens some areas of an image, try using Bicubic.

A document is hardware, I can hold it, the result of the print procedure and has 2 dimension, forgetting the thickness of the paper.

An image exists out of pixels. Non metric pieces of info. There is no way of resolution attached to it except for the wrong used word resolution for the size.

The attached field of printresolution, the dpi field, is just a request to the printer to print that document at a size that will coorespond to the formule ‘size in inch = amount of pixels/resolution in pixels per inch’. As you can see in the Irfanview window any editor can change that without changing the image.
What is so difficult to understand on this formula that is used in every editing program, if available.

What I want to know is how that resizing is done. There’re 2 possibilities: resample the image with a factor printer resolution/wanted resolution or change the resolution of the printer to the wanted resolution.

I don’t believe the printer can change the resolution outside of its hardware resolution(s). So I believe the image size is changed. Still, not sure.

George

Take this and go to a TV store.
watch a old home video of say 480x560 2005 small sensor 4mp video on different sizes and types of tv’s 720p 1080p 4K and 20 inch 56 inch 80inch

Two things can happen:
it keeps the pixels in 1:1 and your image get very small on a 4k 60inch tv.
or in blows up to full screen and you see nothing then blocks of color until you step some feet further back.

Now take a 4k movie source and do the same:
(the older tv’s will say “video not comaptible” because they can’t handle the format.)
The one they can will render this overflow of pixels acordenly to there capacity.
Place a 720p a 1080 and a 4k next to each other look at them at say 10 meters away and it wil be generly the same look. take you eye’s to a point of 1meter of the screens and then you see the difference of the native capacity of the screens. (i am not bringing contrast depth or colordepth in thise equation because that’s an other chapter.)

Same with printing, but it’s no pixel but a dot and thus frozen for ever no motion.
I hope this will give you some handle to grab the “picture”. :smiley:

I’m sorry, we are getting confused over terminology. Normally, we talk about the image file as a document; the physical sheet of paper is usually known as the print.

You really have to understand that the printer’s resolution is measured in dpi and has absolutely nothing at all to do with the size of the finished print. But has absolutely everything to do with the quality of the print.

To repeat - my printer has resolutions like 720, 1440 and 5760 dpi. No matter which of these resolutions I choose, the image will come out at exactly the same size (once again, see Peter’s posts); what will change is the space between the printed dots, with the higher resolutions having much less space and, therefore, smoother colours and tonal transitions.

It is possible to add a resolution to the EXIF data of an image file but this is by no means a definitive resolution and can be changed at any time, depending on the anticipated viewing distance for the print. There is an excellent article here which discusses this subject further.

IrfanView’s dialog allows you to change the image resolution in ppi, despite its label; it does not specify the printing resolution, which is something that you will be able to set on the printing dialog at the time you actually go to print the image.

Peter also discusses the options for resizing an image but, at no time does this refer to using the printer resolution in the process/calculation.

1 Like

I have to say, I learned a lot by reading this thread!!!

1 Like

Correct. This is preparing/prepping an image, lining up, converting, call it as you like, you re-aline the pixels at a way it’s best for your planned export of a pixelfile (jpeg/tiff/bitmap) towards a printerdriver.
So the actual printer can get a file as good as possible suited for his capabilities convertion to CMYK. “plotting/painting/ lasering/ spitting, throwing buckets of paint” al have different native resolutions and colordepths.

Example of the old days in plotting:
If you only have two options black or "not black"on a paper(this can also have a color) and you send a 256 shades black and white pixel file to this black marker plotter, you get a different image out the printer then when you convert the 256 shades in to black or not black first (defining yourself which area may have called “black” and which shall be not written) and keep the pixel black as one dot black.
shades it’s line go as 256-128 black to 1/2black wil be interpreted as “black” or push marker on the paper. the other 127-0 will be “lift the marker up” and no line writed.

Thus the line got much thicker and the image will be less arcuate following the edges which defines the face/ object.So the resolution LOOKS low and blotchy but it has nothing to do with the resolution of the printer only with it’s colordepth capability’s.

To enhance the image i must downsizing the colordepth of the image in 1 or 0 before i send it to the printer.
note the printer has still the same “markerpen” on the plotter and thus the same “resolution”.
i have much more non written space on the paper but due the lines i see much more a “face” or a object.
if i want a RGBK=>CMYK of this file i need to make 4 different exports of every color one.
send black: plott. return paper to home position.
fysicly change the marker for an other color(say green) send the Green file.
return paper to home position, change marker again… you get the point.
I can make a colored high resolution print IF i send my file suited for the printers capabilities.

Now we have CMYK plotters and it calculates it’s own single color plotting raster and it has colordepth and shading but in the earlydays it was a robot picking up a pen/stift/marker (0.5-4mm point) which you put yourself in a designated hole. and the robot/plotter used that to run it’s raster.

Maybe this helps:

(ships sorry @Joanna wassn’t answering to you, used your post as a anker.)

Ok. I can accept that the image print dialog of Irfanview and a lot of others is wrong and that that request to the printer should mean: print this image with a dimension if it was made with x ppi. And that the printing quality in dpi doesn’t change. Sounds logical. Sorry for my expresion. I did try it and the dimensions are equal when the dpi/ppi resoltution was set to 0. I found out that that means 300.
But it leafs me still with what happens in the printer with that resizing. I still think there’s some resampling done so that the output will be 1 pixel to 1 dot beeing the smallest piece of info of both image and print. That would explain why there’s no difference in value between dpi and ppi. Numerical they are equal.

George

Technical PPI is variable and DPI also on varies of screens and printers. (a 720p or 1080p or 4k screen the PPI differs with the same “sensor resolution”. Setting a 4K screen in 1080p modes means every data pixel is viewed 4 times to mimic a 1080p screen.)

This same thing happens in a printer only it has several algorithms to do so. lineair/ vectorial, gamma types cmyk ICC profiles inbetween, sharpening/edge cleanup, overlaying under color, subrastering with black(microcontrast.) and often done to fill the space if resolution is lower, bleeding or no bleeding. too much to keep track on.
The only thing you need to keep track of is "does my pixeldata, the number -x line and the number y-line dive under the by me wanted minimum resolution. if so:
option 1: print physical smaller piece of the paper.
option 2: leave it and get more “blocked” print image. (printer resolution is the same.)
option 3: lower actual printer resolution to enlarge it’s printing zone. aka piece of paper. (printer is making space between the dots instead of laying them against to each other to create a bigger print.

option 2 is the less pritty print. it’s ugly at all viewing distance but can be usefull if the printing surface is something you don’t like to see.

So the best thing is lower resolution of the printer and getting the dots wider out each other to hide the lower res of the image.

(Before we had 24Mp cams there was also billboard prints so it’s done before. only we have the technical progress that we have high res camera’s and highres screen to view and high res large format printers for fabric and paper.
So we can now make 4k/8k photo’s ánd print them on a A0 or bigger in a 200dpi or more.
72dpi was early a billboard print , i think it was 72 never bin printing this, we looked at it at meters away and not 1 meter so that was fine.

1 Like

What I want to know is how that resizing by the printer is done.

Printer resolution is 600dpi. File size is 1800x1200pixel. My request to the printer is: print this with a resolution of 300dpi or ppi to gain a print being 6"x4".

When resizing the image should be resampled to 3600x2400pixel to gain the wanted output.
As far as I know now the print resolution can’t be adjusted.

George

If your file size is 1800 x 1200 pixels and you set the file’s pixel resolution to 240 ppi (which is fine for viewing the print at arm’s length), you will end up with an image that will be printed at 7.5" x 5".

You can set the printer resolution to whatever you want, the image will still be printed at 7.5" x 5".

There are two ways to make that print larger :

  1. set the file’s pixel resolution to 120 ppi

  2. keep the file’s pixel resolution at 240 ppi and resample the image to 3600 x 2400 pixels

Both ways will give you an image that will print at 15" x 10" and both ways will lose you quality and definition, regardless of the printer’s dpi setting.

Here is an example of what happens to an image when you resample it too much :

screenshot at 50%

screenshot at 400%

You said that 1 pixel = 1 dot - in which case, look at this screenshot taken at 1600%, which shows the individual pixels

Since only one ink colour can be applied to one dot at one time, which of the eight colours in the following chart would you use to match the colour in the pixel marked with a red square?
8-channel-printer-a

It’s simple. Take your image with a long side size 1800 pixels and an image resolution of 240ppi. That gives you an printed length of 7.5". If I set the printer resolution to 1440 dpi, that gives me 10,800 dots for the 7.5" length. In other words, 6 dots per pixel side or 36 dots to fill the square of the pixel.

The printer driver works out how many dots of which of the 8 colours to spray onto the paper, within that square, so that the mix of colours gives you the colour you see in the image on the screen.

See this interesting article on Pointillism to get some idea of what that looks like.

1 Like

The Technical resolution maximum can’t be changed/adjusted.

I am not a fse of inktjets but if you have a shower with a adjustable showerhead you know you can adjusting the water spread. Same with a waterhoze.

Don’t know if it’s posible (at this moment in the inkjet’s as in do they use it.) but to get droplet differences you can have serveral options in mechanical way.

  • spray presure, more presure means more ink exited more ink wil spread more.
  • nozzle adjustment, to open and close the nozzle in order to widen or narrow the spray.
  • (this is for fabric/sticker/ paper A0 printers a thing.) changeble heads to change resolution.

Your home inkjet wil be have non of these options i recon. But it stil can change resolution by software. If it skips every next step of the x (main) and skips every next y line (sub) it has 50% less resolution and thus about twice as large on paper without resizing as in adding pixels. So get that out of your system. It is possible on your printer if it’s supporting this software feature!

Edit it can even do both software wise.
Spit three drops of the same color and skip a x position and y line to enlarge a image.
Better way doh is propper resizing by calculation extra “pixels” with the propper color.
Smoother lines and edges.

@Joanna, I find that my printer does not do as you say :wink:

I printed, in DPL3, one image, setting the printer to 600 dpi for one print and 300 dpi for another.
The printed image is not of the same size on these prints. One fills the paper, the other fills only 1/4.

(Canon iP7250 on macOS Mojave)

Do you have a loup? This is best type, a steady view.


I try to find if your printer has software to lower resolution without resampling (edit: Adding pixeldata to enlarge the image it wil resample the rasterfilling.)
Couldn’t see in the specs

If you look at the prints are the droplets spread the same or do you see difference?

Draft, normal, fine, extra fine. These are none resize functions (image size on paper wil be the same) but do change the amount of ink placed on the paper using adjusting the amount of space between the droplets in order to save inkt.

This same function can be used as resize function IF the printerdriver has this feature.

So in your example i bin interested to see if this is the case.

Would you be so kind to use your phone and zoom in both to see the dots?
Take a image and place it here.

Are you trying to explain to me something as a print triangle? :grinning:

Take care, what you show me are screen pixels.

None of the shown colors match the image pixel color. Print colors are a combination of subtractive colors. Every dot can be spread with the different inks the printer has to gain the right color.

That looks like a kind of resampling with a factor printer resolution/image resolution. Why not in the editing software where I’ve more control over the result? Ok, I’ve to take in count the printing resolution and that might give different results on different printers.

George

If you look at my earlier post, you will see a screenshot of the DPL print dialog Resolution (Dpi) in print module. I am guessing what you are doing here is changing the dpi setting on the main print dialog, effectively setting the image resolution, even though it uses the term “dpi”, something that will result in a different sized image on the print. I can’t see, on that dialog, anywhere where you would set the printer resolution instead.

The Mac dialog is much more comprehensive and has a separate tab for printer (dpi) resolution. What happens if you click on the “Printer properties…” button? Is there not a separate means of setting the printer resolution there?

And that is why we leave the conversion from ppi to dpi to the printer driver. There are just too many variables with different printers and each manufacturer’s driver looks after the whole messy business. All you need to do is to resize the image to the correct pixel dimensions by exporting from DPL, then open the exported, resized, image and send that to the printer at 100% size. Although it would appear, in the Windows version of, that it is not as easy to print at a specified size without messing around with margins, etc.

1 Like

Let me summarize in my own words.

  1. Print dialog is using something as a print triangle,sorry, print size=image size in inch x size in pixels.
    2)The printer has it’s own printer resolution(s).
    3)If that image is send to the printer, the printer driver is doing some recalculation so the image size will be the same for every printer. In this the image size is the important variable, or maybe the constant.
    4)Both dot and pixel are pieces of the smallest info. Printing is done in 1 pixel is 1 dot.
  2. recalculation or resampling is done with new image size = old image size x (printer resolution/image resolution)

@platypus
I think you can only change the printer resolution in the printer properties. In my case anyway.

George

It would appear that, on the main dialog, in the Printer Settings section, there is a label that says “Resolution” - albeit that it is on the Print dialog under settings, this has nothing to do with printer resolution.

I do not have Windows. Can somebody confirm that, behind the “Printer properties…” button is a sub-dialog which allows the setting of the printer resolution, as opposed to the image resolution on the main dialog?

Correct. These should be on the “Printer properties…” sub-dialog

Again, assuming you mean what I think you mean, this is also correct.

Once again, I must remind you that 1 pixel does not equate to 1 dot. 1 pixel has to equate to more than 1 dot in order to allow dots of more than one colour to fit within it (see pointillism).

Resampling is only ever done at an image level, with pixels. Printer resolution plays absolutely no part whatever. If you want to increase the size of an image, you will always lose quality to a lesser or greater degree. You can either 1. double the number of pixels or 2. halve the ppi.

ok i installed a printerdriver of my serviced mfp’s
it’s in dutch(my window is dutch so it installs in dutch.)
first to resolutionsettings:


Then dot space setting: space between the dots.
afbeelding
Way the dot raster is layed out.
afbeelding
this matters how the printer places the CMYK-colors.
This is the advanged colorsettings:
profiles, level of colors in grey, how much “bleeding”

The way it emphasis the edges/lines/ coloredges.
afbeelding

This is only a office printer, i can tel you when you see a printer for digital printing in high quality it’s even more options to choose from for finetuning.

In comparison my (not working inkjet because i hate buying inkcardridges and heads who dry’s out every month.) Canon mp540
nothing to do in fine tuning:
all depending on the software infront aka DPL)