What a lovely surprise! Thank you. I’ve bought and installed it, and read the whole article once. Beautifully thought out, obviously works great, and so simple to “see” on the phone screen:
I did some more searching for how to adjust the tones in VueScan. I think you’ll like this.
Here is my VueScan screen. You’ll notice that in the histogram, I moved the triangle at the right until it lined up just about at the right edges of the histogram. The left triangle was all set. Instantly the preview window brightened up, and looked to me what I would have done in PL4.
So, it is possible to do this in VueScan before I scan the image and open it in PL4.
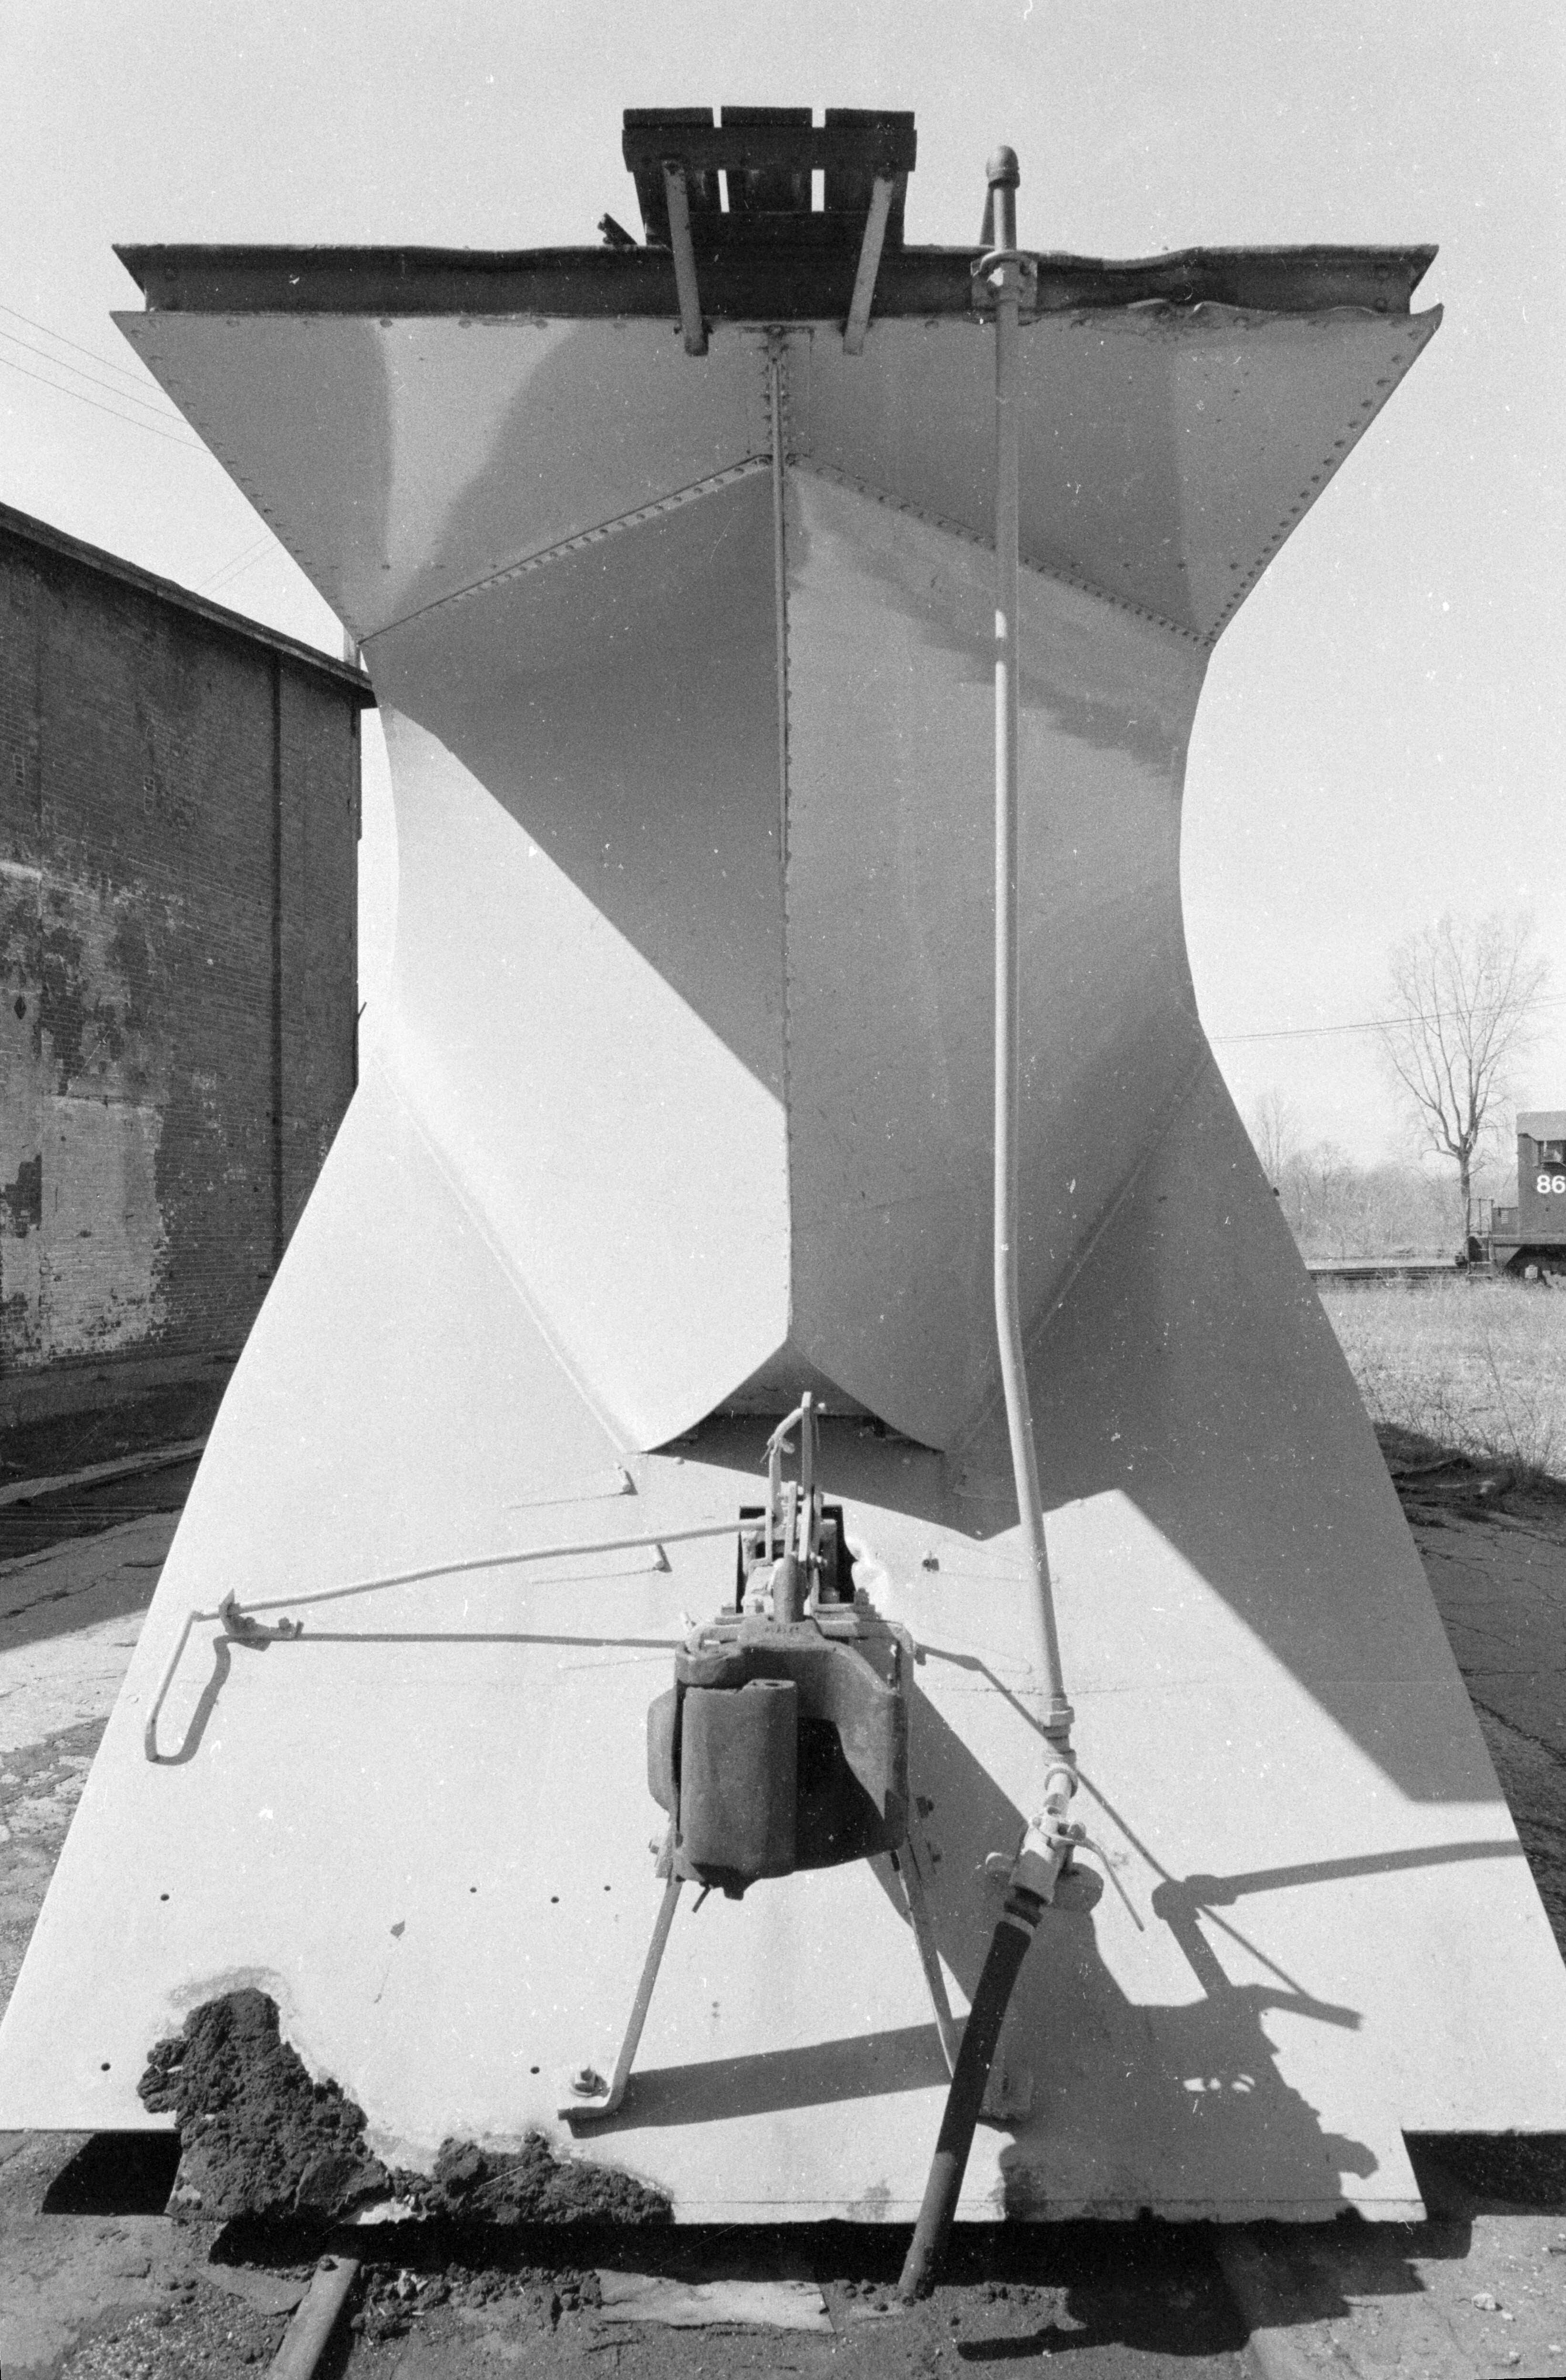
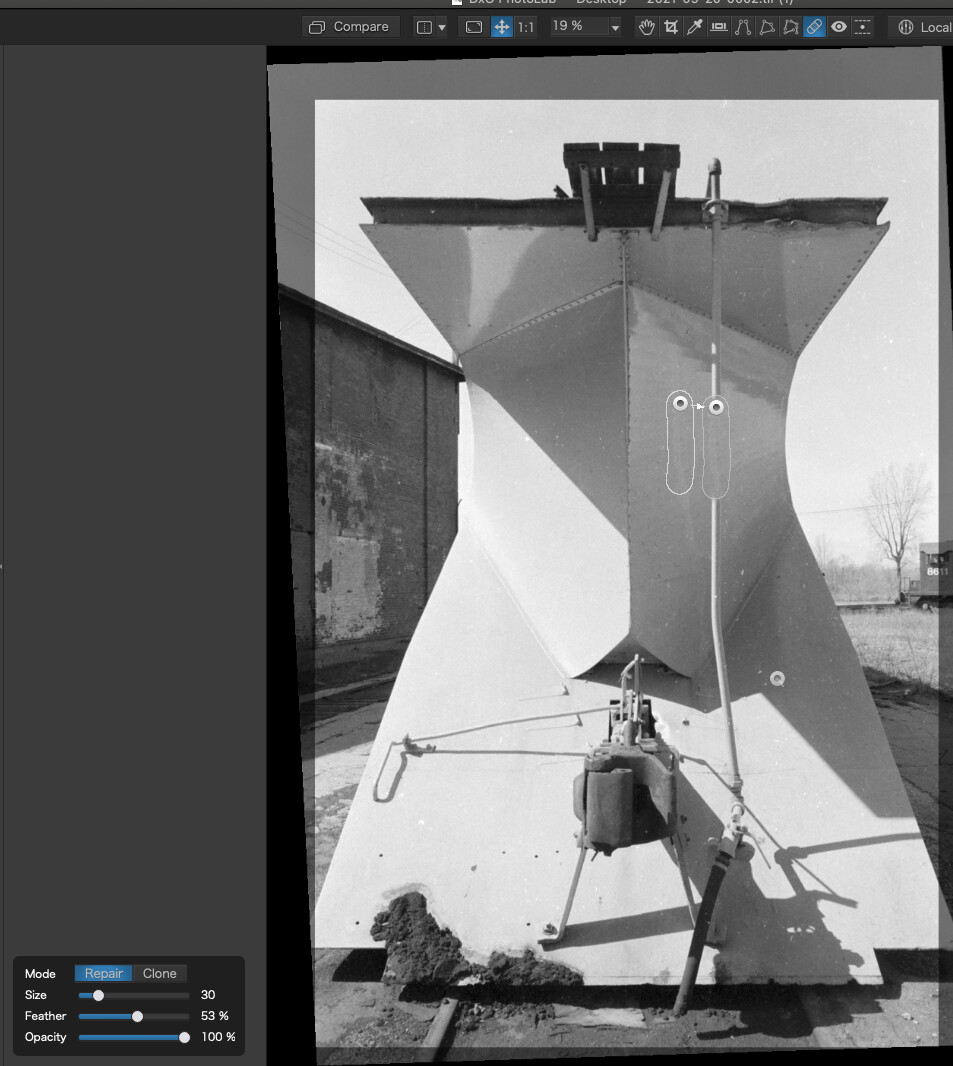
Here’s the finished image (of a railroad snow plow), with the 8-point perspective applied, and cropping but nothing else. I used the DxO Standard Profile.
@mikemyers let me start by saying Wow! What a great scan.
Indeed, this is what I do and, combined with flattening the curve, I have found gives you the best chance of it working well in PL.
Once you get the hang of correcting in the scanning software, it’s amazing what you can do. If I can ever dig it out of the over 600 LF negs and transparencies we have, I have one neg that was accidentally under-exposed by 4 stops, giving us a virtually clear piece of film with just the hint of a few leaves. Carefully scanning it actually gave us a printable image!
Not me
Love the perspective correction. The only minor critique is that you lost the corners of the plough blade due to the perspective correction and you left a couple of pixels of black when you cropped.
I suggest you go back and take it again, this time allowing more room for perspective corrections
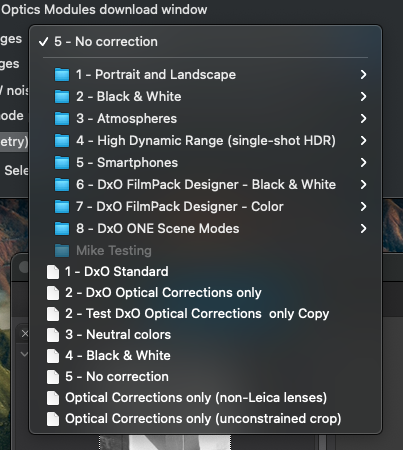
But I would question why you used the Standard preset. I removed all but the perspective and crop corrections and could see no visible difference.
I would highly recommend you use the 5 - No Correction preset instead.
To be honest, I wasn’t paying much attention to the VueScan image, only the histogram. I was (pleasantly) surprised that when I aligned the triangles as I did, the image suddenly looked a lot more “finished”. As long as I’m careful to place the triangles at the ends of the histogram, I should be safe - I would never adjust the triangles by looking at the image, as that would be more likely settings that clip some of the data. (I’m slow about a lot of things - I’m good at trying to do what I learn here, but the reasons for doing so take more time to become part of my thought process. I guess better late than never…)
Sadly, and unfortunately, I lost the corners of the plough blade when I took that photo. I should have stepped backwards until I had some “buffer room” around what I wanted to photograph, something I’m better at now. This would have been in the 1960’s, meaning I was using my Leica M2, and it would have warned me, so I am the guilty part of this - but I can’t go back and re-do the image unless I find a time machine.
I wasn’t going to select any pre-set, as I wanted to keep the image just the way it is from the scanner. I didn’t even notice the #5, for “No Correction”. DxO should make that the first preset people see, at the top left corner of the presets, but I guess for newcomers, this will help improve most images? At any rate, using #5 for “no correction” needs to be my default (none) preset, so none of the switches get turned on unless I physically select them. This is obvious now - but it wasn’t last night, or for all the time I’ve been using presets.
Maybe this is already the case, but if I don’t physically select a preset, PL4 shouldn’t be doing anything in the presets. For a long time, I wasn’t selecting one. Your suggestion implies that PL4 won’t do anything “behind my back”.
My fault. I had the mistaken idea that I shouldn’t do corrections in the scanning software, but I should instead do them in my editor. That idea didn’t come from this forum, but I read it before asking all the recent questions. From now on, this will be part of my scanning procedure.
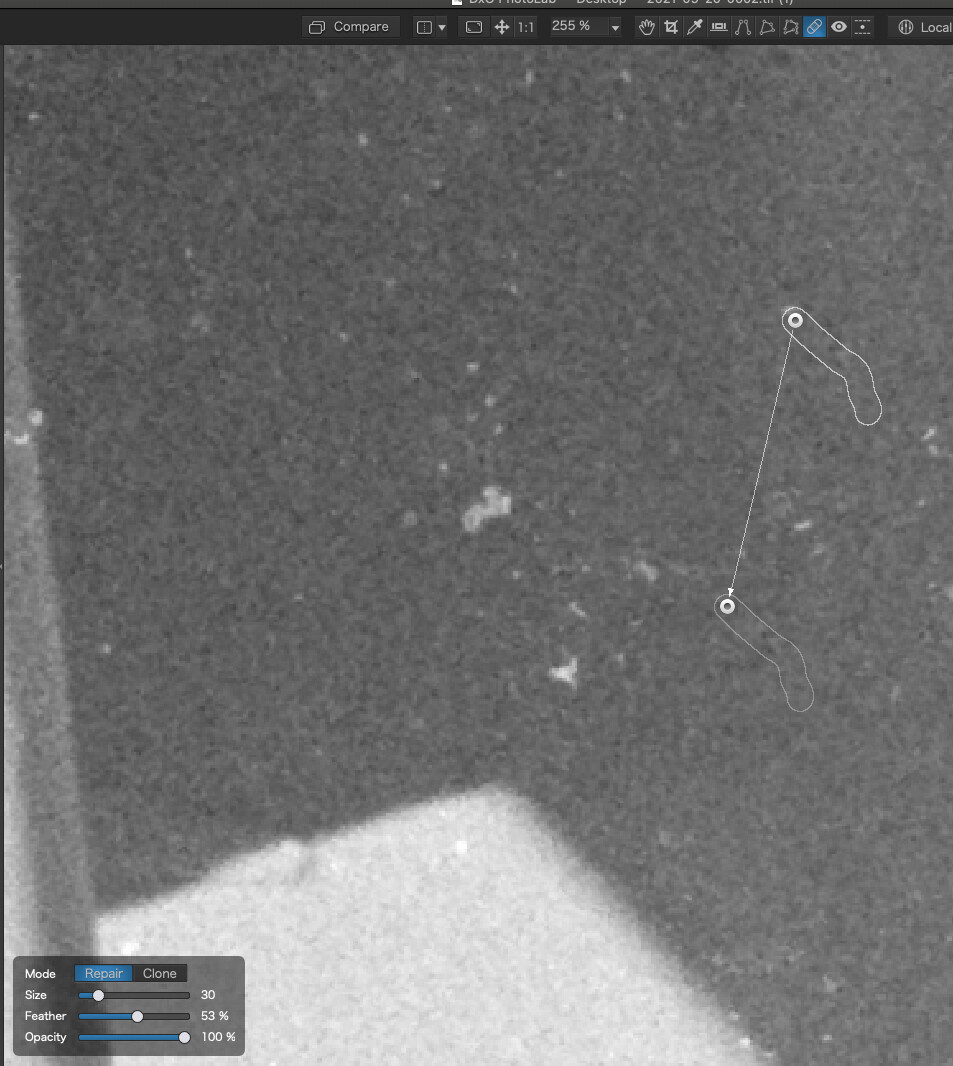
From now on, I will check at 100% when I’m trying to be so careful. I didn’t want to crop any more than was absolutely necessary, and the only way I’ll know I did it correctly in the future is to view at 100%.
If you ever find that 4-stop underexposed negative, it would be fascinating to see how well you got it to scan. I’ve got a few negatives that look sort of like that - just for the heck of it, I’ll try to scan one of them later today. They were taken at night, inside a subway tunnel (the trains were not running that day), and I didn’t have a light meter - I just guessed, incorrectly.
Joanna, is there a “magnifier” tool hidden away in PL4, that I could hold over any place in the image, and within that magnifier I would see the image at 100 or 200% size? If there is, I would find that very useful. If not, I could suggest it for future improvements in PL4.
It wouldn’t hurt anything, and would be like placing a magnifying “loupe” in front of my eye, to show me a close-up image of the spot I’m examining.
What I do now is to view the image at 100%, which also works, but in real life, I would use a hand-held magnifier over the specific area I am interested in. Would be nice to have this tool in PL4.
Hold option key, then scroll! Amazing. This is just as quick as what I wanted, and probably more useful. It instantly showed me those black pixels. I will make good use of this from now on. It’s faster than going to the top of the screen and selecting 100%, and just as useful, possibly more, as it goes way beyond 100%. 1600%???
I see if I use this to zoom in, the image remains zoomed in, unless I move the mouse wheel the other way. I also have better control of how much to zoom.
Wonderful!!! Thank you!!
Are there on-line videos of other PL4 “tips and tricks”? I’ll have to look.
And you can also double-click on the image to toggle between zoom to fit and 100%.
Another useful tip is that all the repair/clone brushes stay at the same size on screen when you zoom, so they effectively change size in relation to the zoom level.
This will leave your images and scans (mostly) as they are. You can still add the things that you really need to make the image look like you want them to look. Presets tend to render images in a possibly-pleases-everyone way that might suit your taste - or not. You’ll find out…
Hmmm. I’m afraid I’m going to have to disagree with half of that. I tend to use my own Optical Corrections only preset for RAW files. It’s only non-RAW files from scans that I would not want any corrections at all.
I should spend more time looking over all the menus in PL4 - maybe I’ve learned enough that they will makes sense to me now, unlike before when I had no idea what all that stuff meant.
I have selected (5 No correction) as per your screen capture. I never really understood how presets worked. Does this change mean that PL4 will forcibly select #5 No correction by default, if I don’t select anything? That would make sense, from what you’ve written.
I don’t understand what the two choices for “Compare” are. I hope they mean the original image will be shown with no corrections, and no geometry corrections. I selected (without geometry). Presumably this will now alternate between my image with all my modifications, or the original image with no corrections for anything.
I don’t know enough about why I would want one of these or the other for raw files.
Most important question for right now - if I open a new image, and if I don’t select any preset, then PL4 will automatically select #5 and show me the image as-is, without having done anything at all to enhance it?
If it’s an image I really care about, I think I would want to manually select things, so none of you would be asking why I turned on some correction that PL4 turned on, not me. If it’s an image that I’m not all that interested in, the Presets will get me something closer to what I want in one click. I don’t intend to spend two or three hours each on images I’m not all that interested in, just as I don’t even edit my digital images other than for straightening, cropping, and adding my watermark…
@mikemyers, the presets defined in PhotoLab’s settings are applied when an image is opened for the first time by PhotoLab.
I used to set PhotoLab as Joanna does. I’ve now switched to No Correction for RAW files too.
Here’s why: I have a lot of images that don’t need distortion corrections. I could leave CA correction on as a default though.
Just to confirm, once I have selected a pre-set, if I load a new image, that same pre-set will automatically applied to an image I select?
If I change my preset to “ugly” (if it had one), and load another image, will it use my new default, or will it use “ugly” because I used that last?
The strange thing about all my new settings is that when I load them into PL4, they often don’t look like they need much correction. My scanner has already done most of the work.
Until now, almost every time I use “Clearview” I get negative feedback, that it is hurting my image. It does a lot of things, but one of them is it adds “grit”.
I was editing a photo of a steam train, but when I had it looking what I thought was great, it lacked “punch”. The histogram was fine, nothing clipped, and it is every bit as good a photo (to me) as had I used the most exotic digital camera I could buy. It’s “sharp” without being razor sharp, and the grain shows up a little.
On a whim, I used Clearview, and to me, it instantly became a more effective photo, adding “grit” which would have spoiled most photos, but steam engines throw real “grit” all over, from the burning coal, and if you sit too close to the locomotive, it’s constantly getting into your eyes.
If I had used a 4x5 LF camera, every last bit of detail would be there, but this was with my old M2 Leica, and the only lens I had back then was a 50mm. If I had waited half a second (or used “burst mode” which didn’t exist back then) I’d have gotten the telegraph pole out of the photo. If the train had been any closer, I’d have a photo of the train, but as it is, it a photo that happens to include the train. I love the old-style trestle bridge.
Here’s the image and my “.dop” file, for better or worse… I’d like to know your very first impression of the image, before you scrutinize it.
If you select “ugly” to be your default preset, it would be applied to every new image. Applying “beautiful” to an image while in either Library or Customize view, all other new images still keep their “ugly” appearance.
That’s great and it means that you’ve done a good job with your scans or photos.
I see that you get the hang of it, trying things that you’d not tried before. Stay in that mood of exploration to find out the tools that make an image mellow or rough, cry or hum, be cinematic or “CSI-Style” etc. - and also which images you want to be mellow or cry out loud. I’d probably reduce the toning effect. Try 50% of what you have now.