B&W Ilford HPS5 Plus + Plustek Scan, then PL4

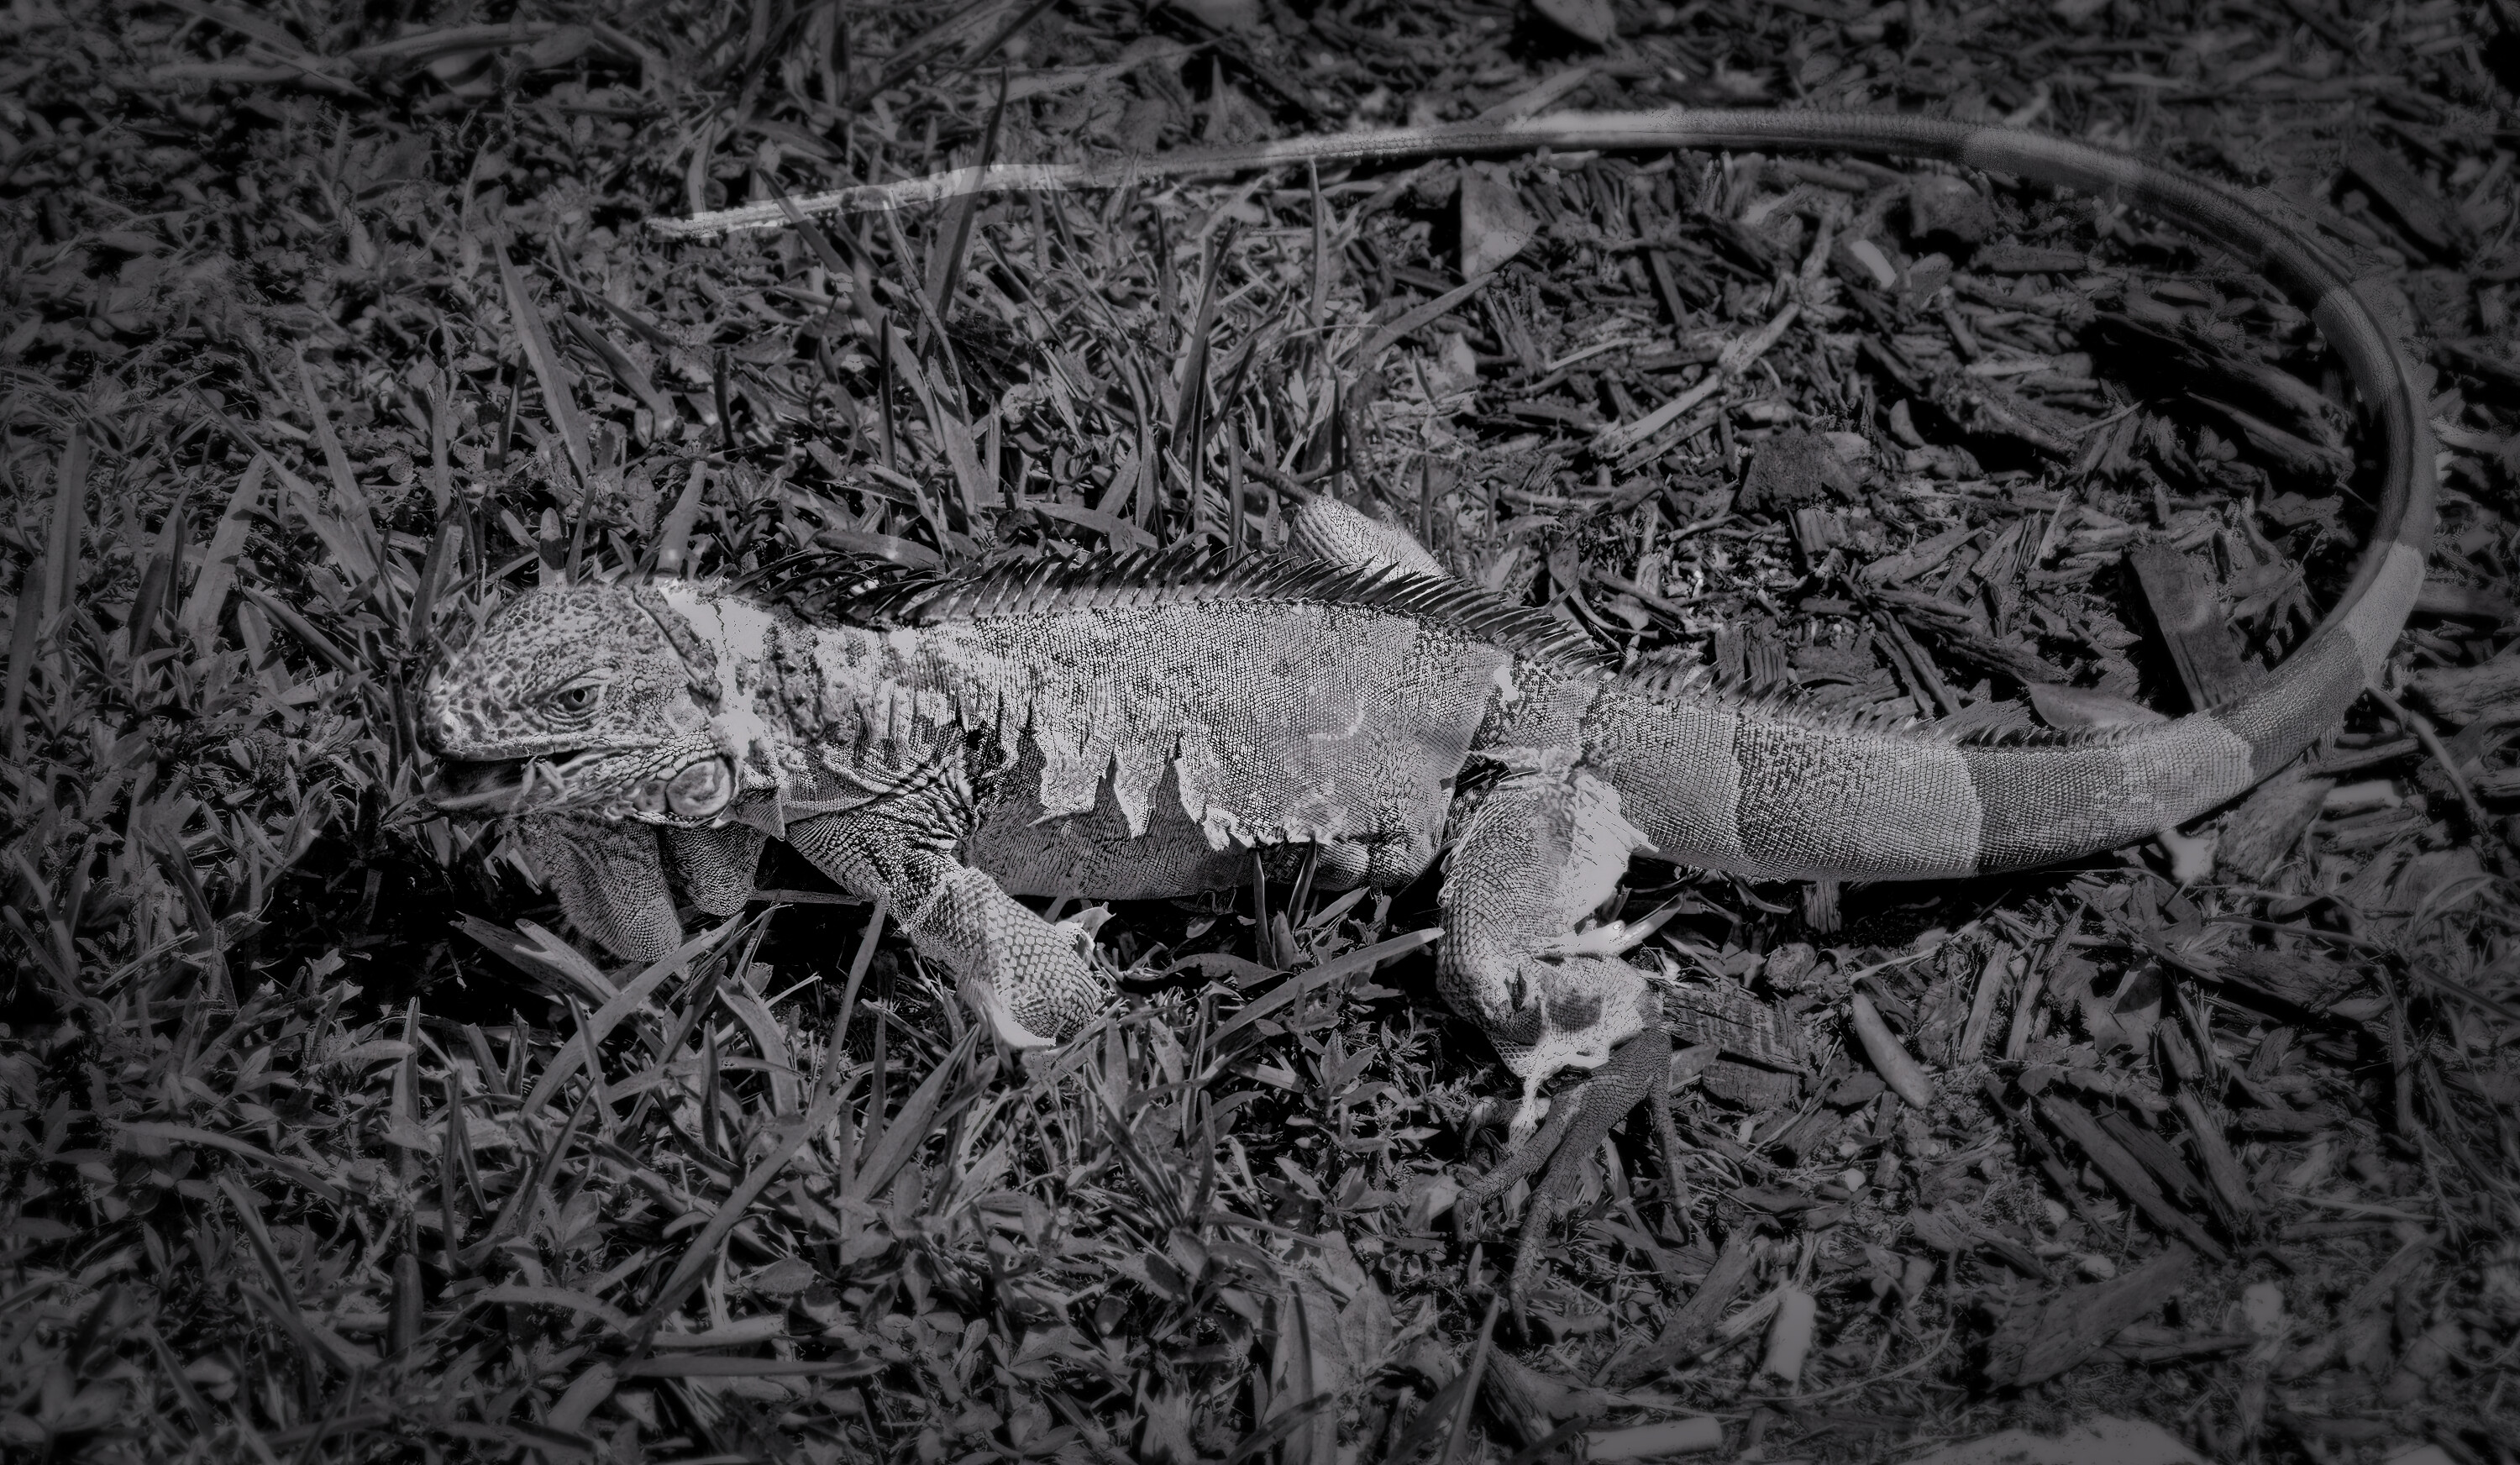
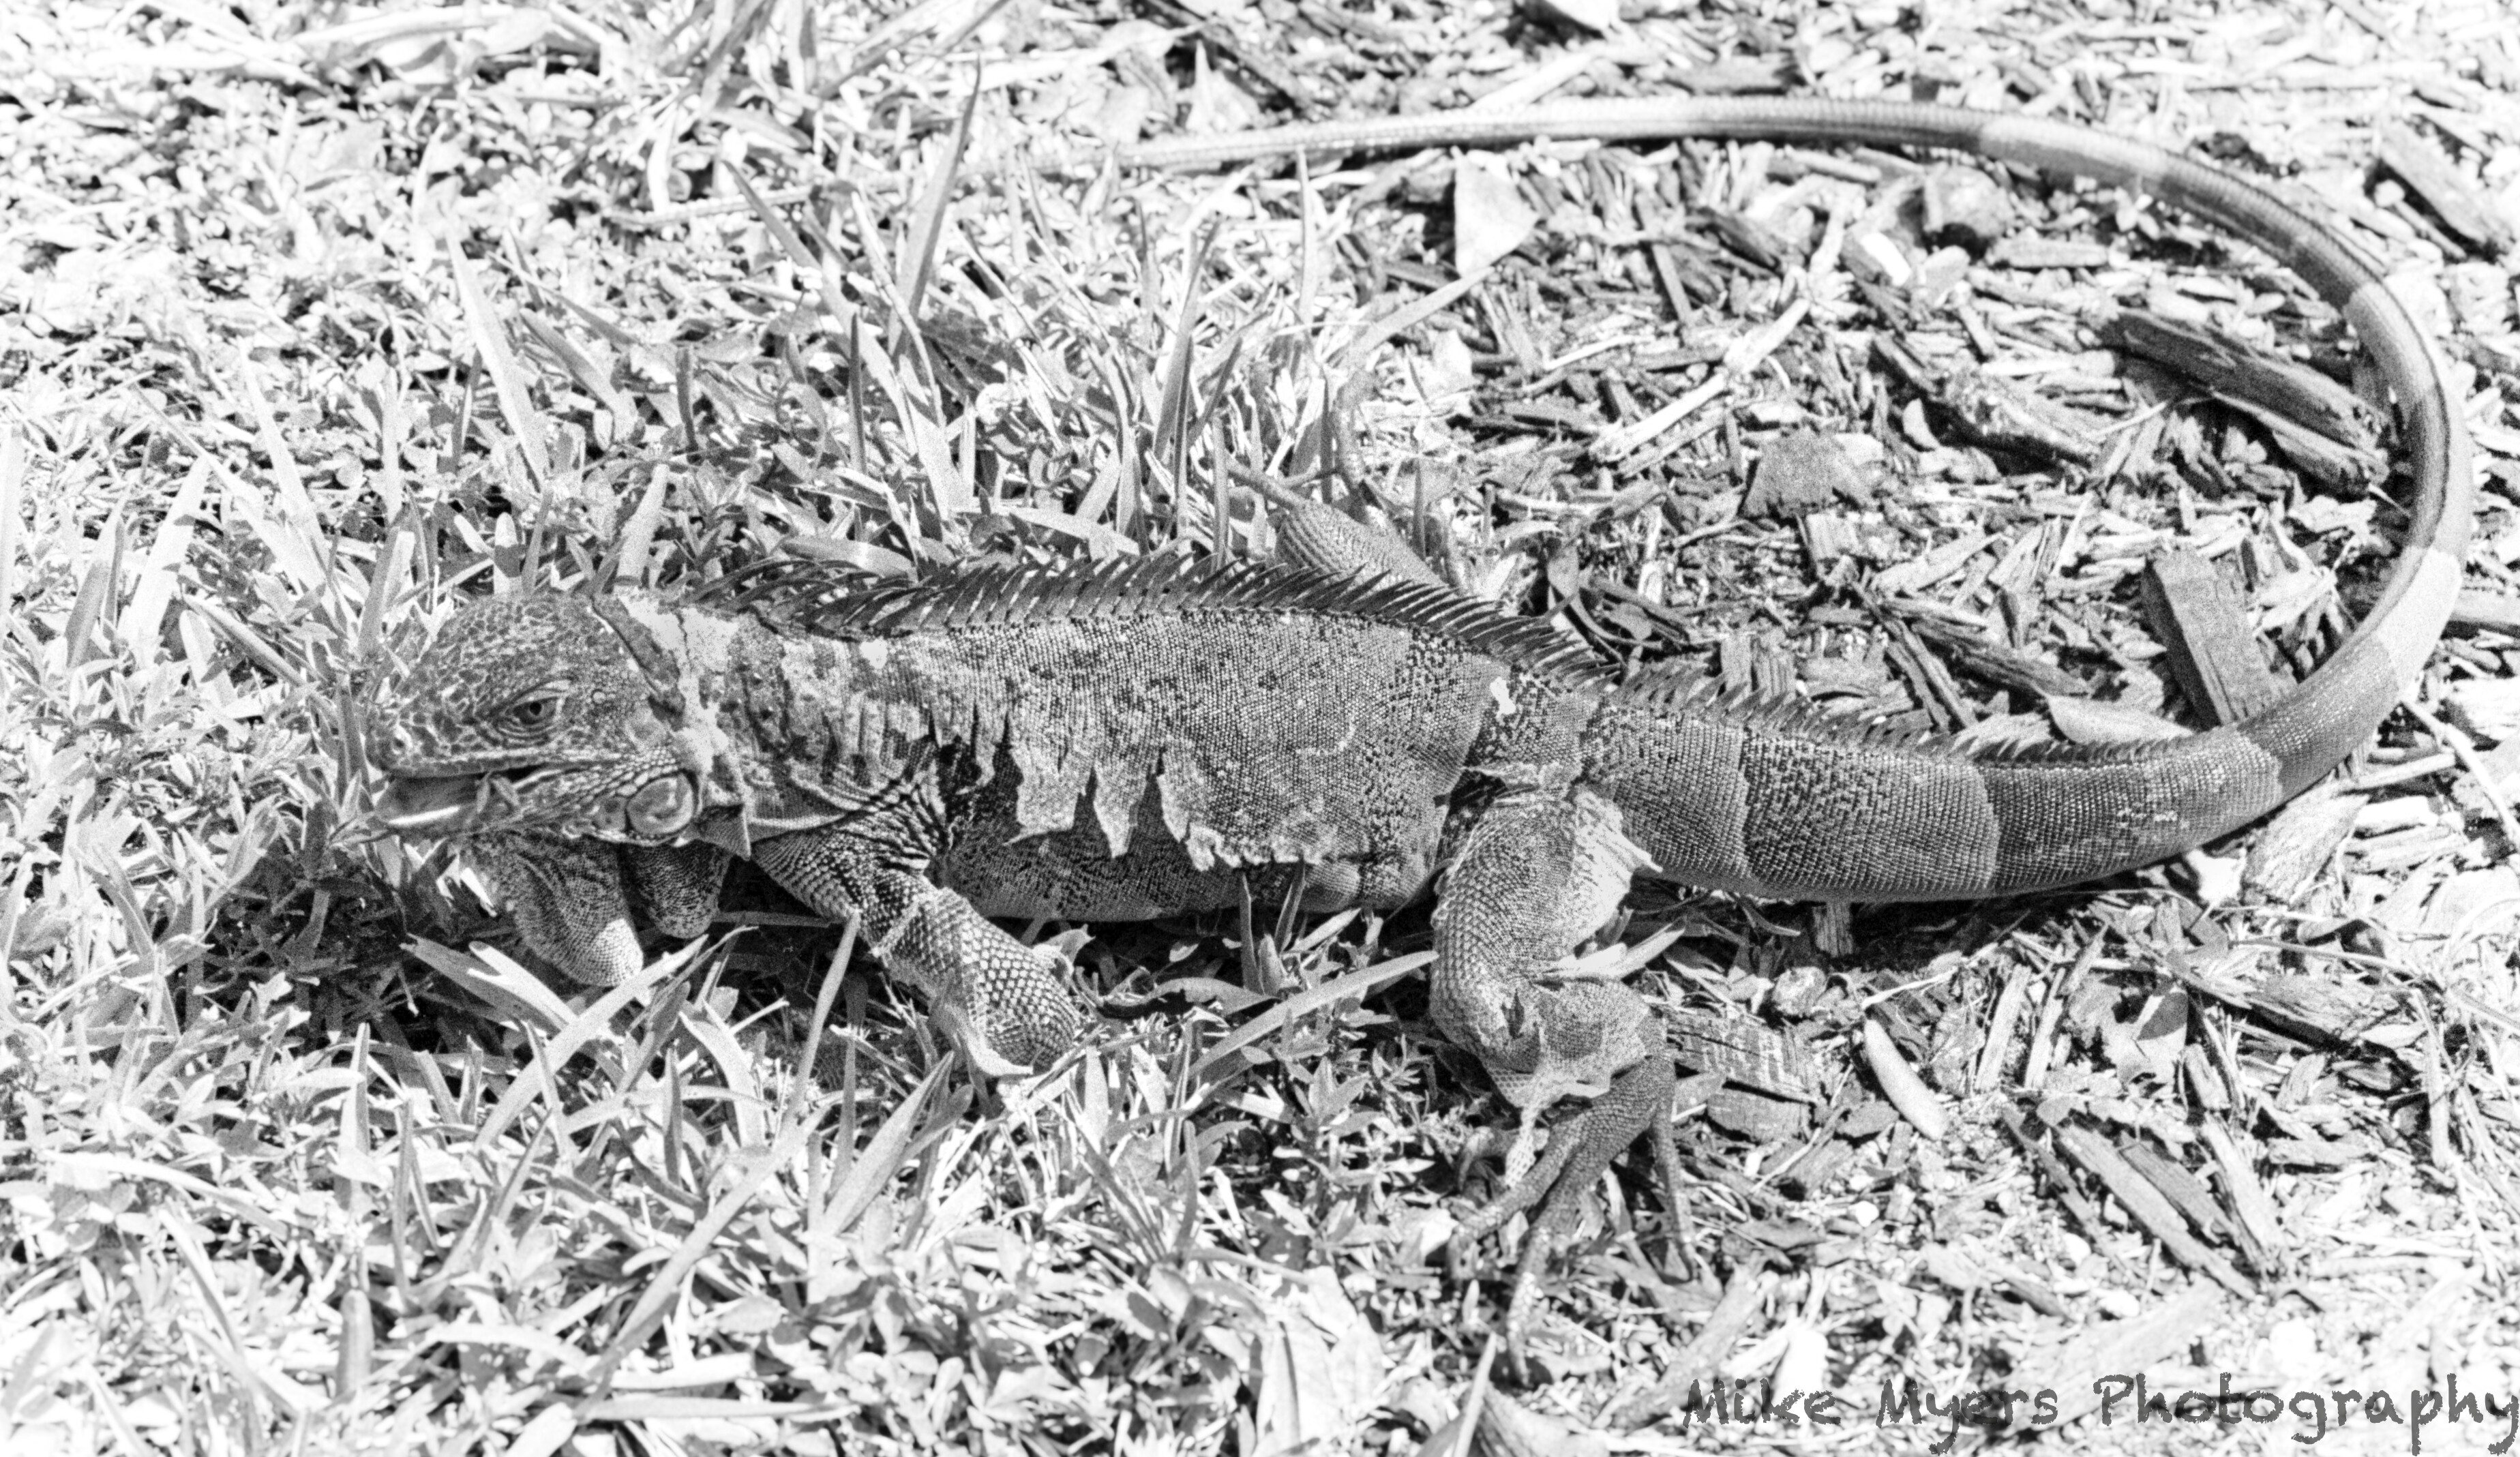
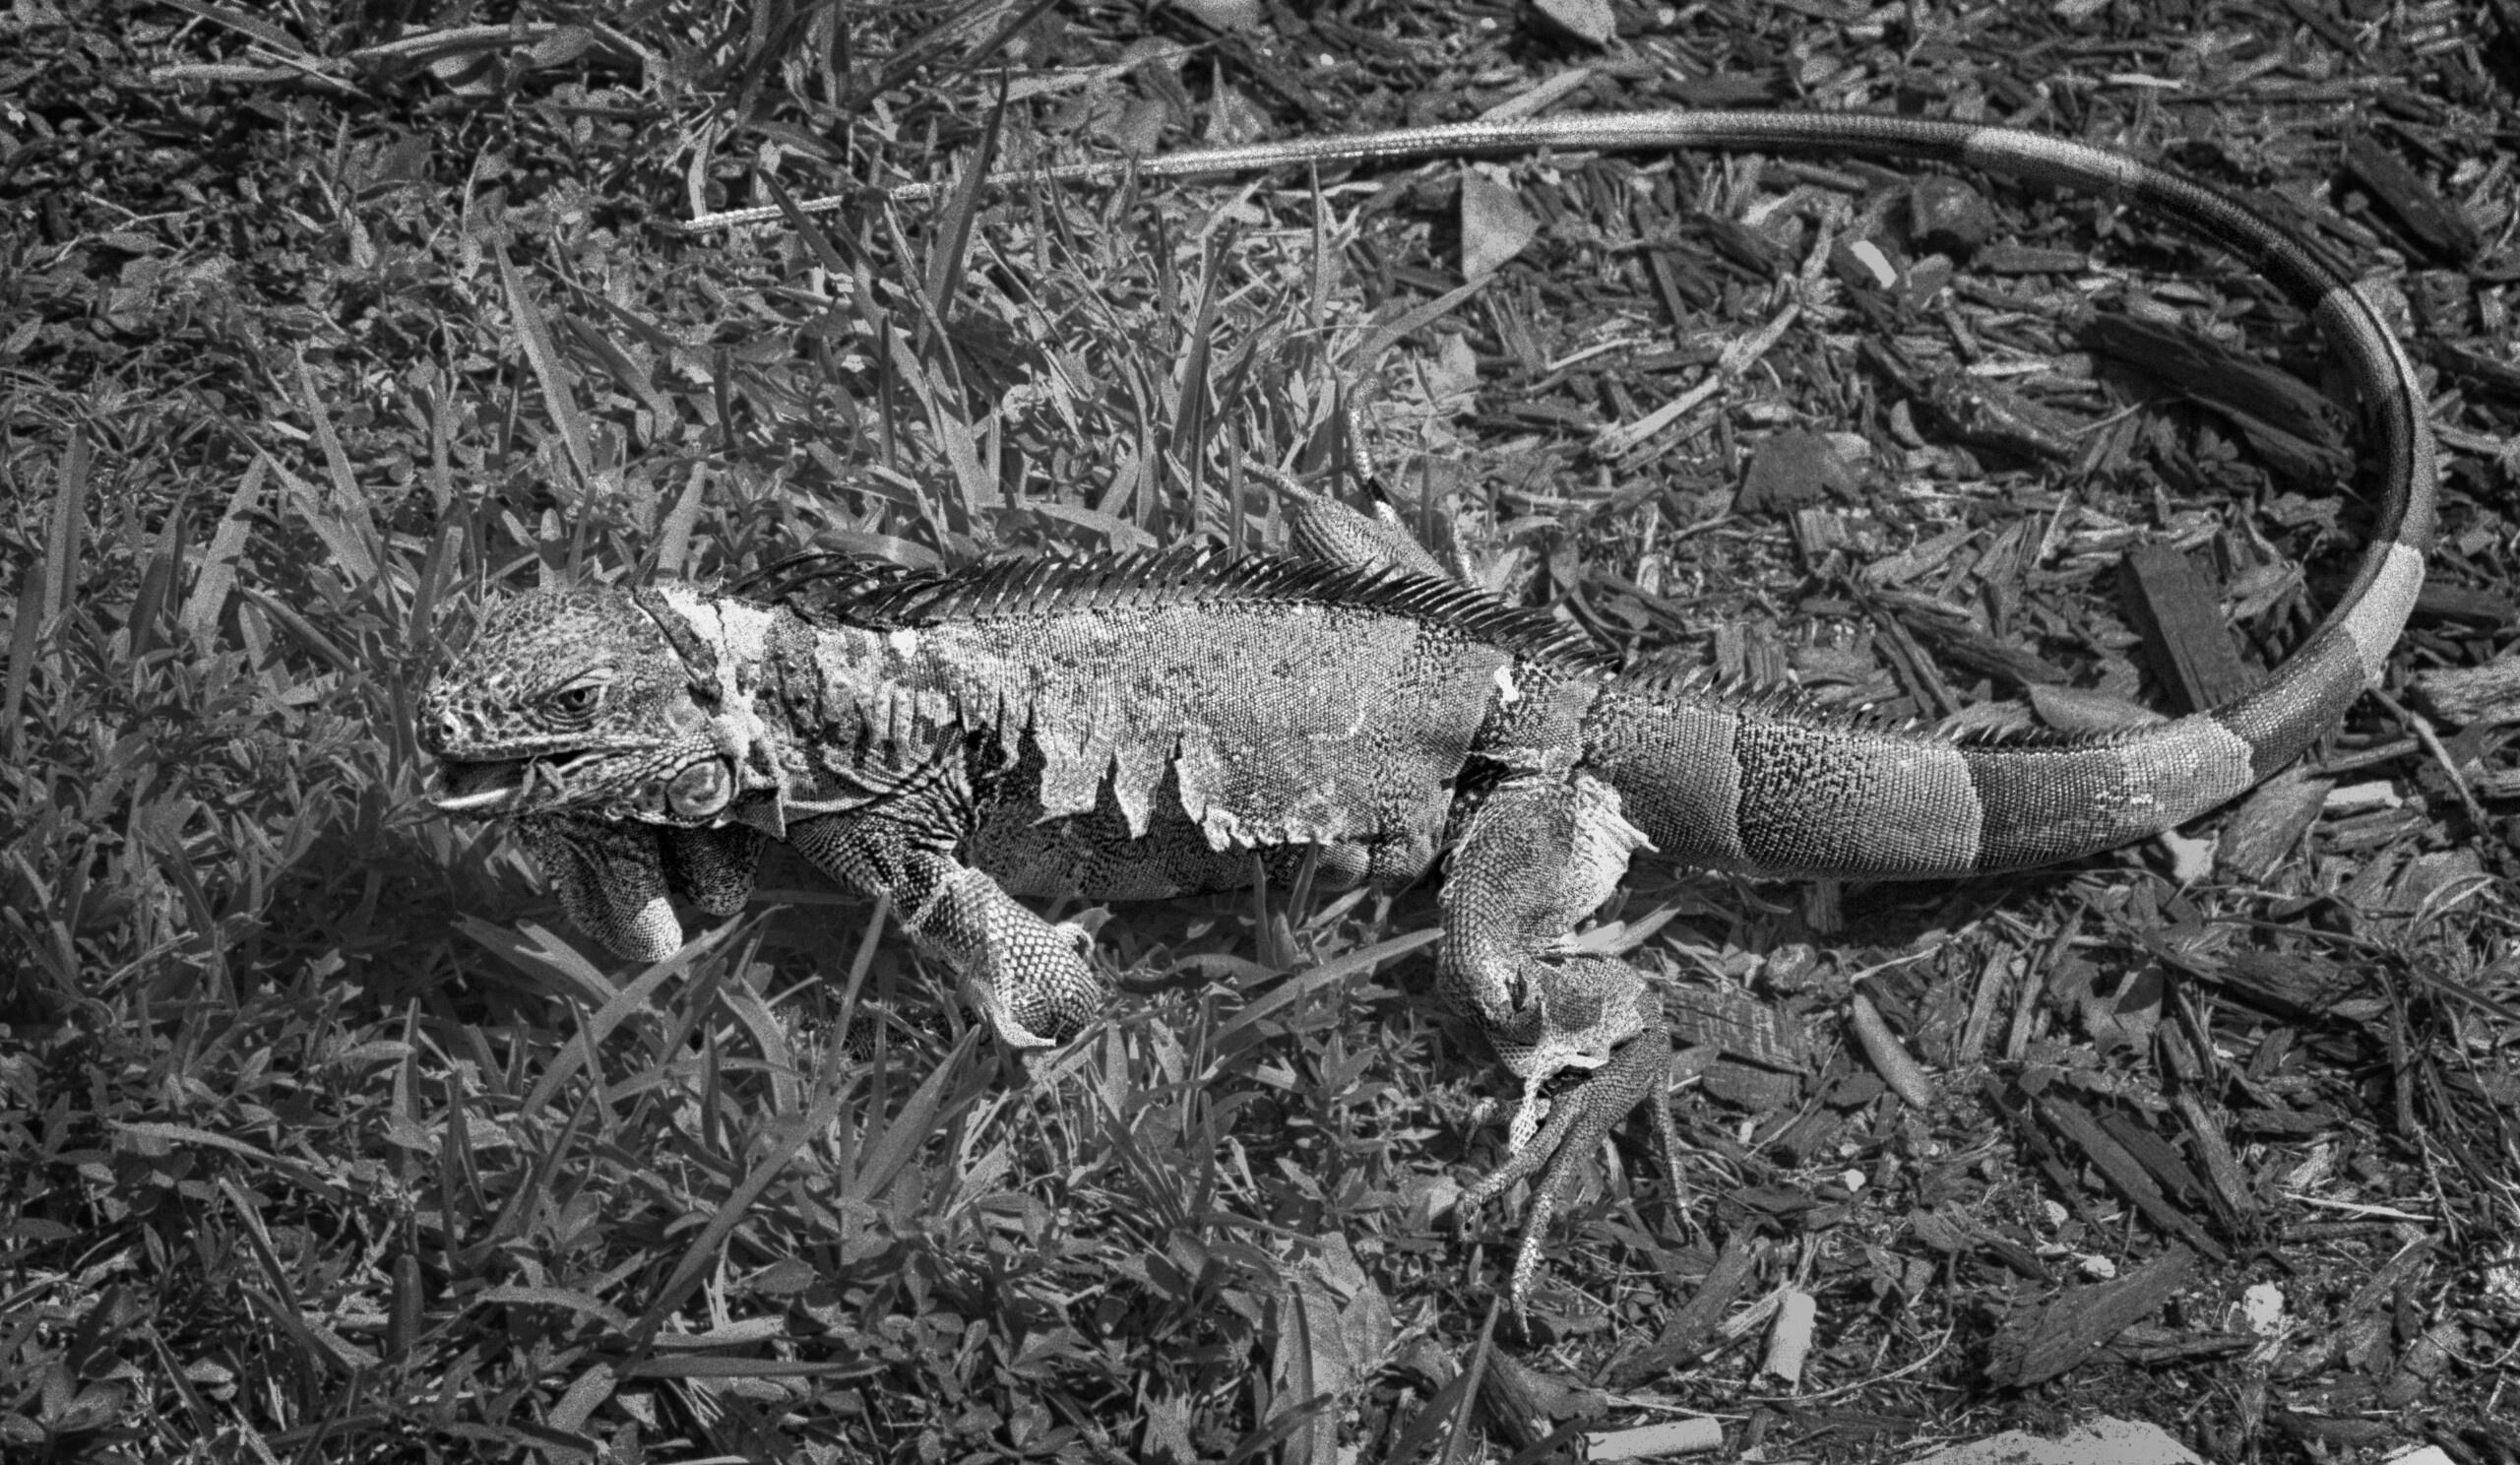
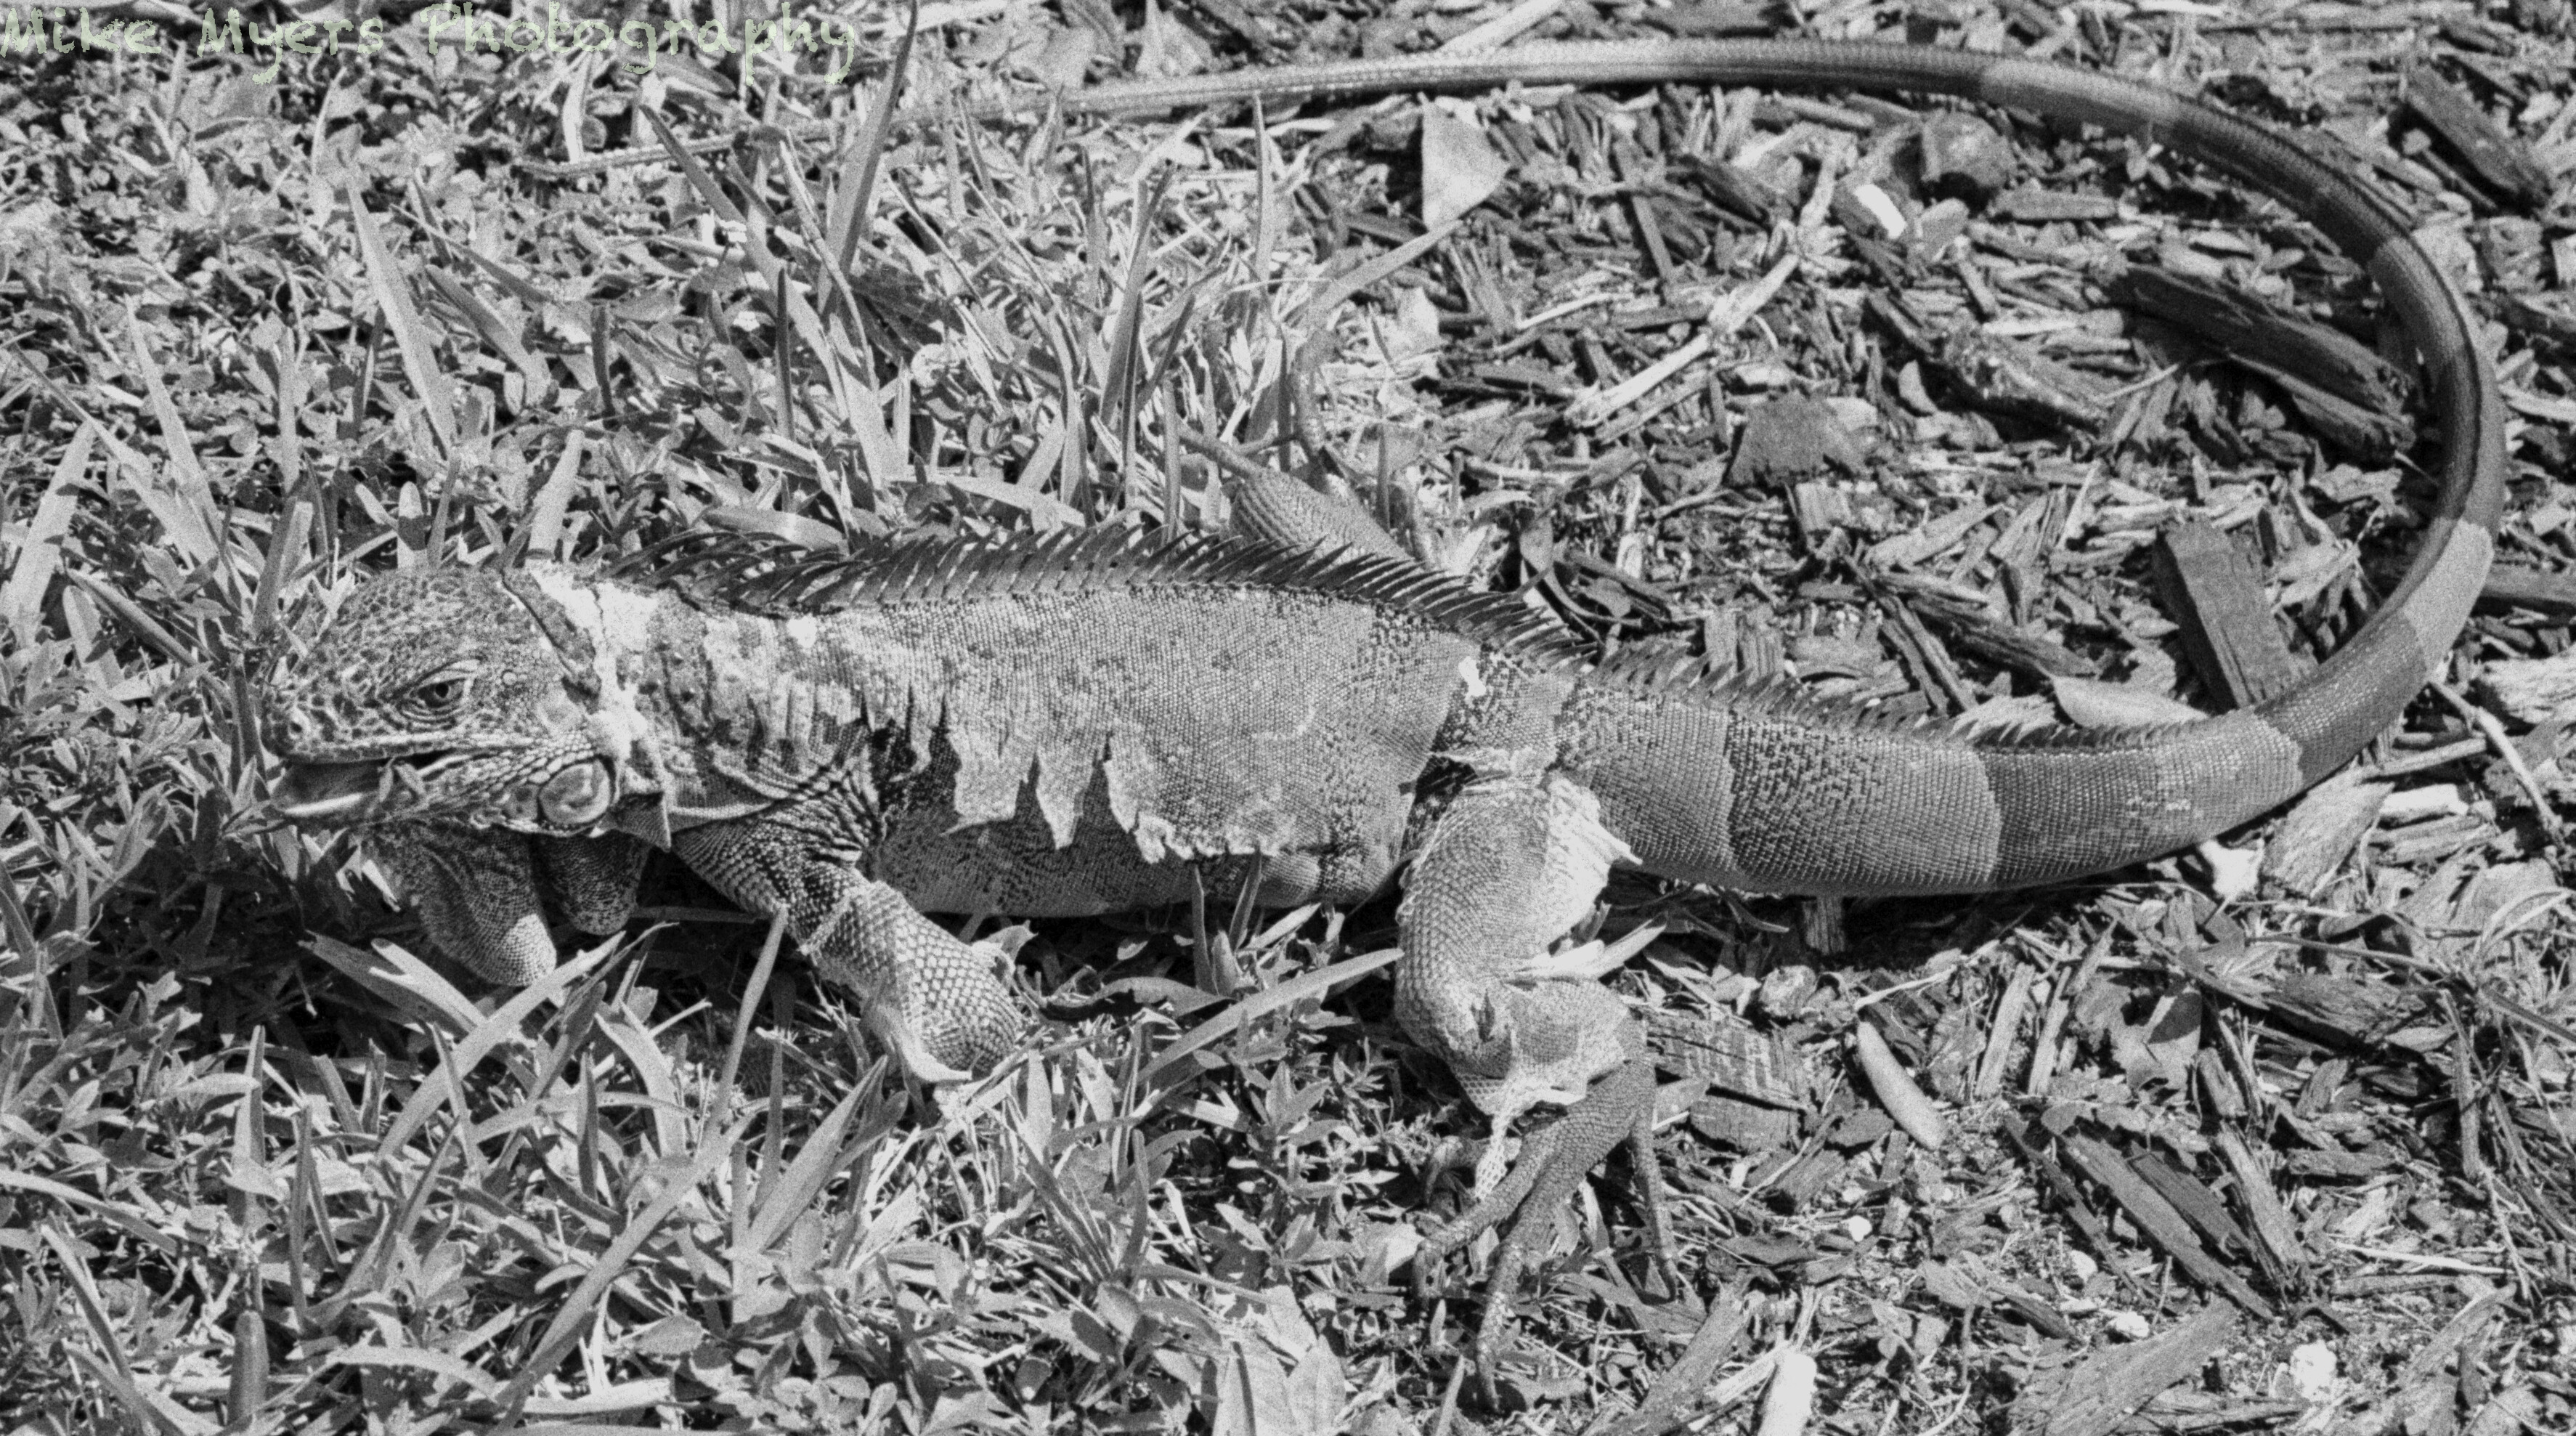
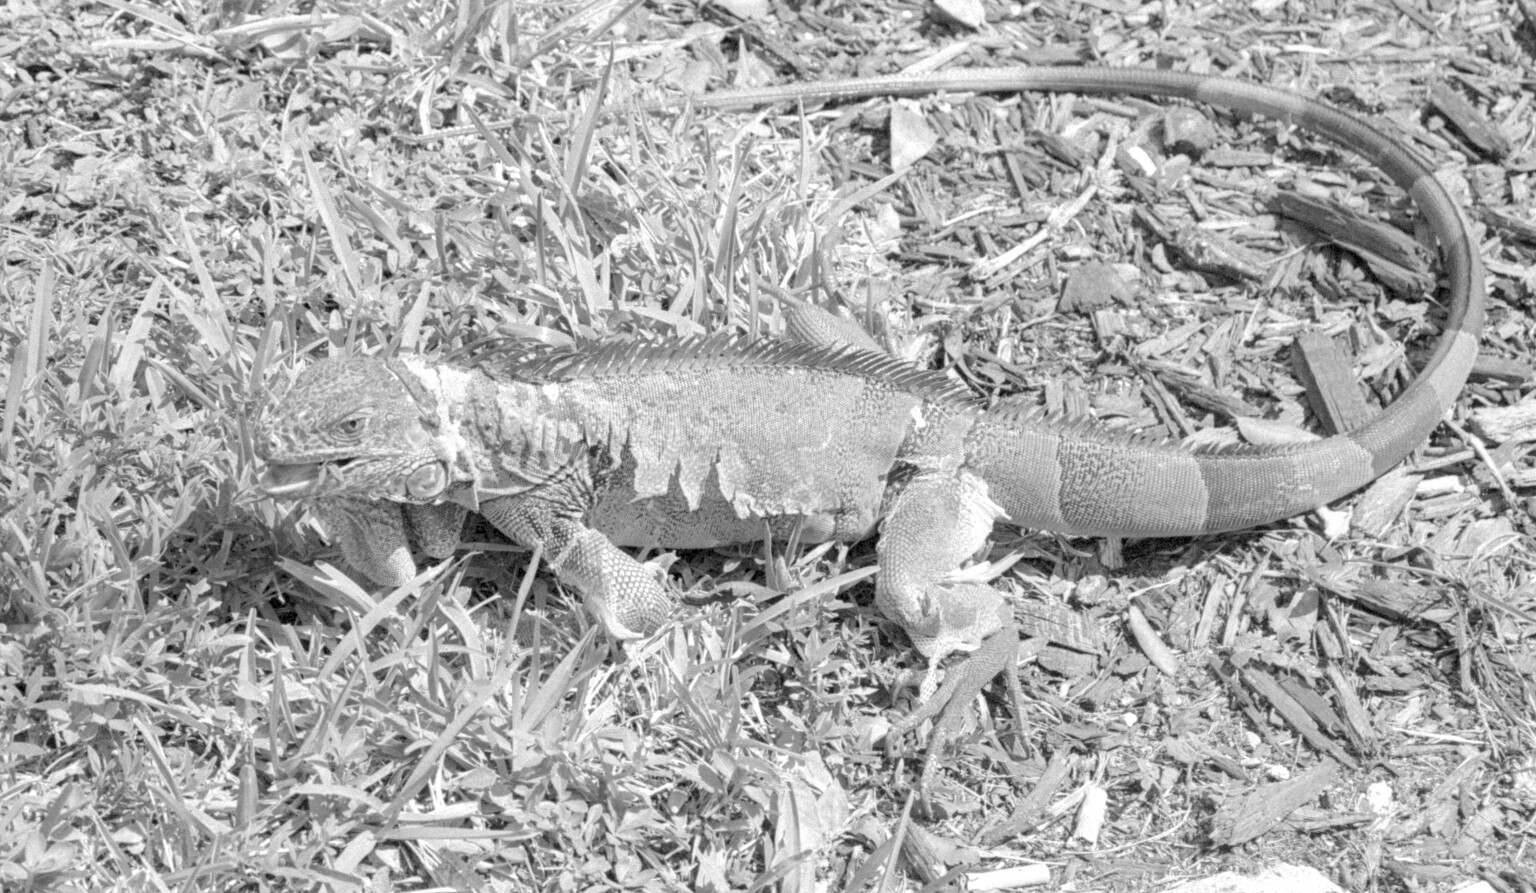
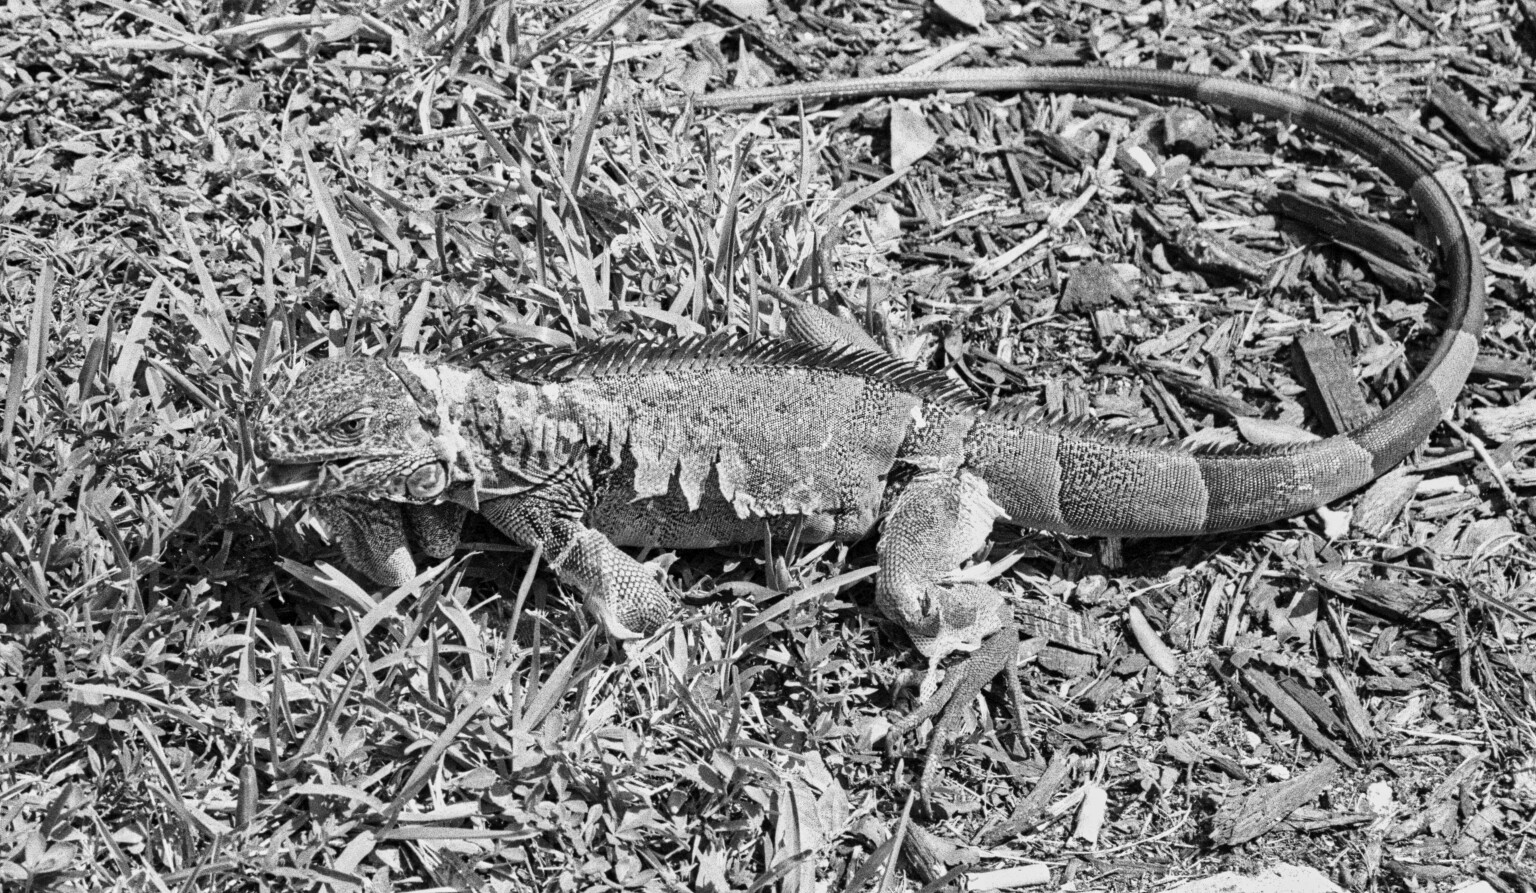
MOULTING IGUANA EATING

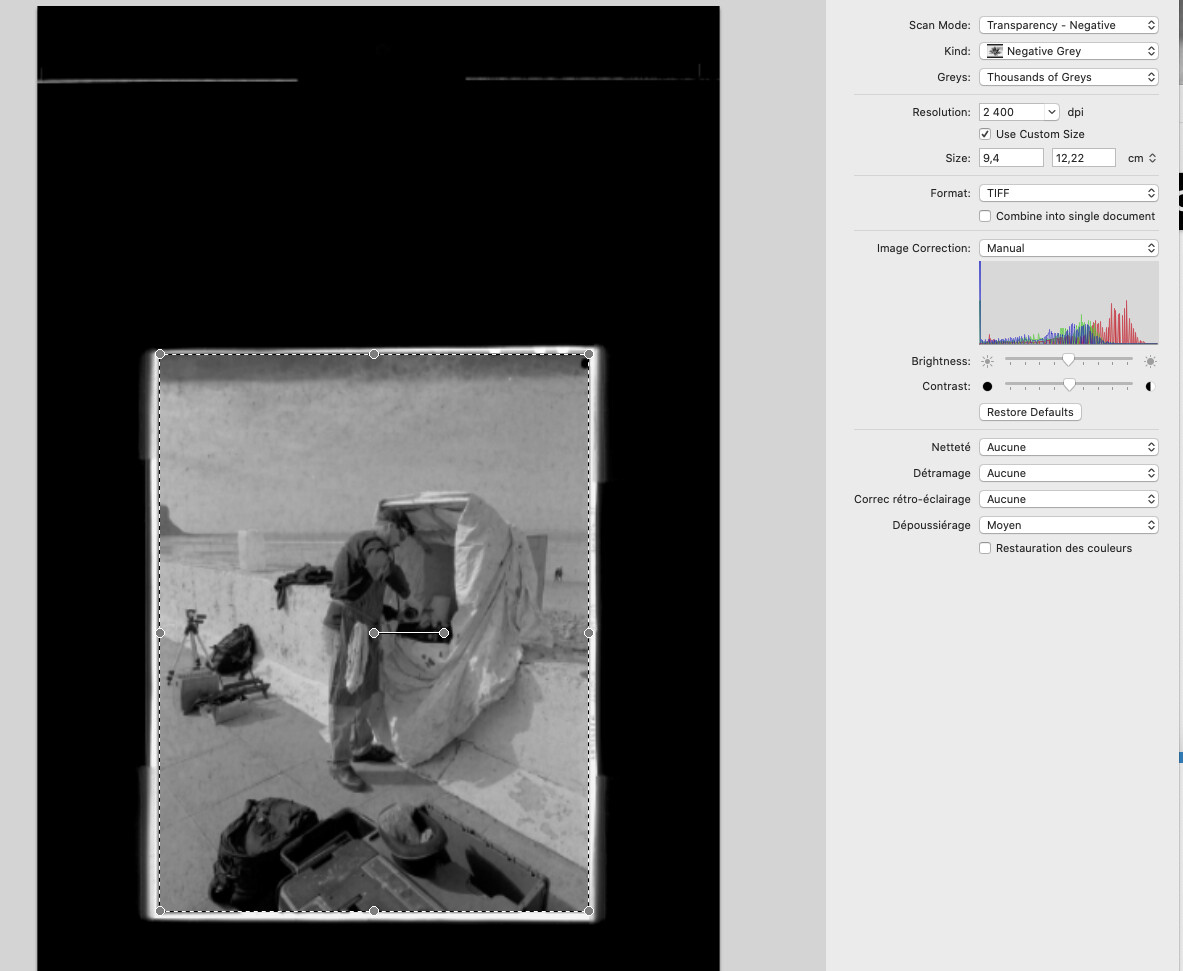
I thought I had a little insight as to how to scan B&W 35mm images with a Plustek scanner, and edit in PL4. From today’s scanning, I learned a lot more about what NOT to do, then what TO do.

For starters, I bought some 400 ASA Ilford HP5 Plus film thinking it might be a good all-around film, but for shooting anything with detail, from now on I’ll use 100 ASA if there’s enough light. I like the results more.

Second, while shooting boats and buildings was relatively easy, shooting an iguana was absolutely not - as while I was trying to get the critter to show up better, it was doing its best to become invisible, to “blend in” The result is a great shot of the tail, but not so good of the head and body. I guess it didn’t know that the tail was over a different texture of “ground”.

Third is I need to pay more attention to these critters before even raising my camera. This iguana was moulting, with the skin coming off, and this probably doesn’t make for the prettiest iguana photo of the day. Fortunately, the iguana was far more interested in snacking down on fresh grass, than the big hulking thing getting quite close to it - I guess it decided I wasn’t a threat. In retrospect, a picture of a moulting iguana maybe is something rare enough to make it more interesting, even if not so pretty?

I used the same PL4 tools I’ve used in the past, and not very many of them, and what I did (based on earlier feedback) was to use them sparingly. Showing the front part of the critter isn’t as good as I hoped, as the iguana was trying to become invisible and blend in, but the iguana never realized its tail was VERY visible. I took about eight photos, then left, so it never needed to scurry off, and it could continue its leisurely lunch. (Joanna may tell me about a lot of things I didn’t do, but I don’t expect to read that I “over-did” it.)

If anyone has any advice (other than the obvious - find a more photogenic iguana, and use color film!), I’m curious what could make this still better.

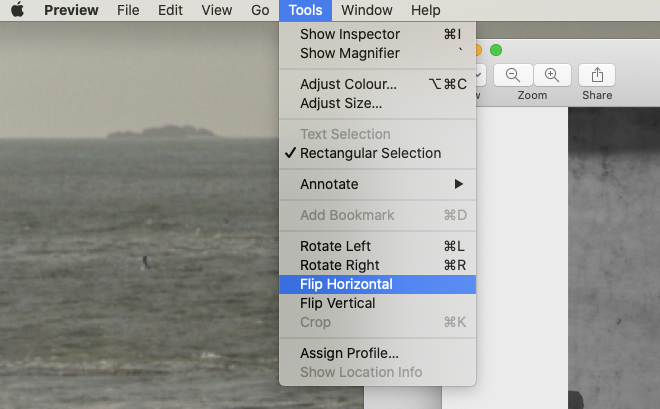
(Getting down on the grass and shooting it from eye level would make for better composition, but no way I’m doing that without a telephoto lens so I can stay further away. I don’t think iguanas attack people, but I don’t want to risk finding out that idea is wrong. To me, from ground level, the iguana would look a lot more threatening. I’m going to start looking for my right-angle Nikon view-finder attachment, or buy a waist-level finder - which will also show me a reversed upside down image like what Joanna gets to see…)

2021-09-17-0001.tif (16.5 MB)

2021-09-17-0001.tif.dop (11.7 KB)

Take the following, not so much as you did it wrong, because I think you made a pretty good stab at it, but more as things I noticed and would have done differently.

  1. Stripping out all adjustments from PL, the scan was “over-exposed” and lacking in contrast…

    You need to get the best possible tonal range and contrast in the scanning software.

  2. As you noticed, HP5 has grain the size of golf balls and really isn’t the best choice for a shot with fine detail, especially “dotty” detail :wink:

  3. I wouldn’t have bothered with the barrel distortion correction or reframing, they were fighting each other. Reducing the barrel distortion made the Iguana smaller in the frame and reframing took it back to filling the frame more.

  4. Denoising doesn’t help reduce grain on film without losing a lot of detail. You shoot film, you don’t get noise, you get grain which, as you well know is why you shoot film.

  5. Smart Lighting reduces contrast and wasn’t needed because the dynamic range wasn’t excessive (it rarely is from a scan) and you had to increase the contrast to compensate anyway.

In the end, here’s a low-res export from my version…

And here’s a screenshot of the only adjustments I deemed necessary…

Note I used fine contrast and unsharp mask in preference to any other means of bringing out detail.

Oh, and one trick you could use to separate the Iguana from its background is to “reduce the depth of field” by using the Miniature Effect tool…

…but that might offend your journalistic integrity :laughing: 
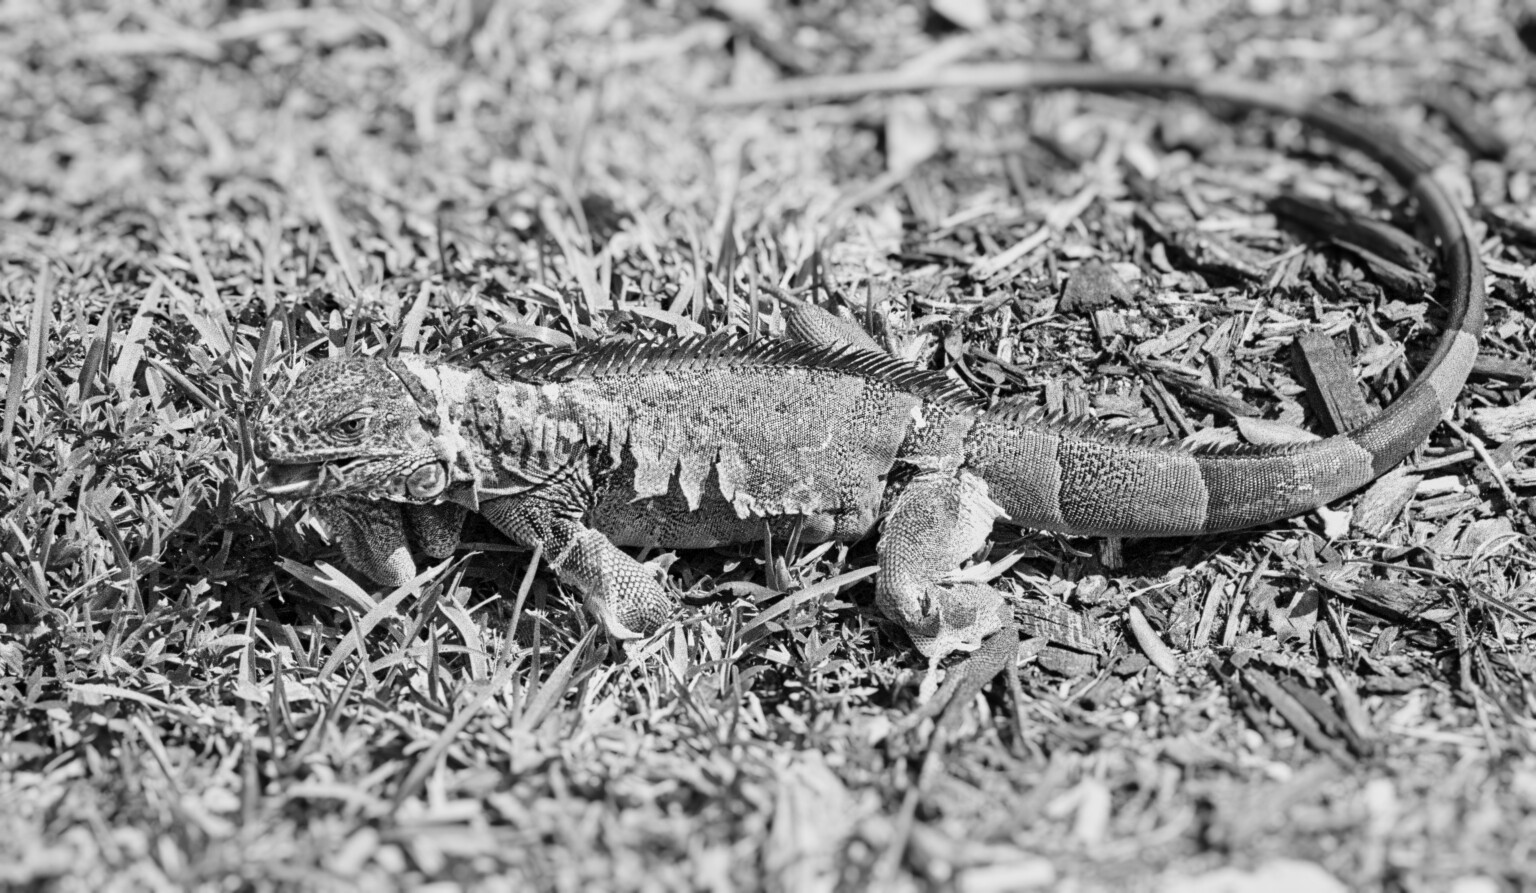
In which case, open up the aperture when you shoot. Depth of field isn’t one of those things you can “fix later”

:teddy_bear:


Addenda

Ansel Adams once said something about needing the best possible negative to produce the best possible print. A lot of digital photographers forget about “getting it right” in the camera because they can always “fix it later”. And I would think that this element of the craft of photography is one of the reasons why you feel drawn back to film.

I found I started to enjoy my D810 more when I decided to follow the same kind of process that I do with LF film.

  1. Taking the time to frame the shot, or being quick off the mark to get it right if the subject is moving.
  2. Working in manual mode and choosing an exposure that will best match the majority of shots for a given location.
  3. Choosing an aperture that gives me an appropriate depth of field before pressing the shutter.
  4. Telling myself that I shouldn’t “waste electrons” by shooting lots of images and choosing the best later.
  5. Challenging myself to only taking one shot per subject.

I’m starting to get to the point of wanting to take the Ebony out and I am starting to use the Nikon as a “reconnaissance” camera to give me some idea of what I will finally commit to film. In much the same way as artists make sketches of a subject before creating the final canvas.

Shooting with an orange or red filter could have helped to differentiate the dry-skin iguana from the green of the grass.

Well said. B&W has always benefitted from them but, because most digital cameras use colour sensors, they seem to have fallen out of use for all but the most dedicated film photographers.

I use Fuji Acros Neopan 100 film because it has a certain tonal response to different colours - different from Ilford Delta 100 and other films. Colour sensors lack that difference of response and, thus, coloured filters on a digital camera rarely produce the same nuanced tonality that you get with this or that film.

In this particular image, I am guessing that it might not be the answer because, in Miami, the Iguanas are green, so maybe a green filter would brighten them up in contrast to the brown bark mulch?

1 Like

…yes, and their skin turns grey before it comes off.

I always had the red, yellow and green filters with me when I used b&w film. It would have been quite a thing to change filters while chasing the iguana…

2 Likes

I still have a box full of filters, including a huge red filter, and so many others I almost got rid of because I figured I’d never use them again. All I need to buy is adapters so I can use them on my lenses. Colors similar to the iguana’s skin should make it lighter, but the iguana is trying to match the colors of things around it, in this case usually grass, so if the green filter makes the iguana lighter, it will likewise make its surroundings lighter. Interesting idea. I never even thought of filters, other than trying to find a red filter to make the sky darker. Thanks. I’ll do some measuring later today. Step-up and step-down rings probably don’t cost very much.

I have one more roll of Ilford B&W, and two or three rolls of Tri-X. Instead of buying more Ilford, I’ll search for the Fuji Acros Neopan 100. Never heard of it. It seems like the cost difference between 24 and 36 exposures is so little, that I might as well buy the 36. Developing is $9 and change per roll.

Actually, as long as I don’t move, the iguanas ignore me. I can get much closer than I expected. These shots were taken with a 50mm lens. So changing filters and stuff is no issue, as long as I stay put in one place. The shutter sound is also quite quiet - much quieter than a DSLR. Nikon used a lot of expensive technology to accomplish that, and the Leica is so quiet I can barely hear it. I can “see” the iguana much better in the large Nikon viewfinder, or with the various waist-level finders or the right-angle finder I already have. If I can sit down on the grass without scaring the iguana, the lower I can get the camera, the better - but when I stand up, this would surely scare it away. The lens on my F4 zooms between 24 and 105mm, which might be what I want. Filling the frame is mandatory - cropping a 35mm image doesn’t seem to work very well.

Joanna, this is the first image I have ever posted without seeing a better version from you! I suspect if I had shot in color, you’d have corrected me again, but I deliberately wanted to shoot in B&W, to see if I could. This iguana was screaming for color film, but none of the color film I ordered has arrived yet. Strange, lots of people wrote me back about the images - I guess they’re not used to seeing B&W photos.

Because I needed large filters for LF work, I splashed out and got the Lee Filters 100mm system, so I only need one holder and one 100mm filter of each colour, then one adapter per lens diameter.

It’s not cheap but, over the years, it’s saved me a fortune in circular filters for each lens.

https://www.bhphotovideo.com/c/product/1558047-REG/fujifilm_16648282_neopan_acros_ii_100.html

Hey! What do you mean, not better? What do you expect from a lousy neg? :roll_eyes: :joy: :woozy_face:

Seriously though, my only reason for what I did was to show you how little you need to do, compared to shooting digital and then “faking” film :slightly_smiling_face:

Gee, I never heard of anything like the Lee Filter System. Sounds fascinating, but I’m not sure how much I’d use it for hand-held 35mm photography. KEH has a huge collection of LF gear, and all formats, and the prices are very reasonable. I’m not sure I’m ready for that - and if I’m moving in that direction, I guess I would need to use my tripod. For a “walkabout”, I’m not likely to have all that other gear with me.

I enjoy photographing the iguanas, but when they’re in the grass and I look away for a second, I usually have trouble spotting them again. Unless they move, I usually don’t even notice them. I think I’ll get more effective photos with color, but one of the challenges I have made for myself is to see how well I can capture the world in B&W.

You’re certainly right about one thing, “faking film”. Most of my old photos “look like” film, but of these recent photos, the grain isn’t so noticeable, and I’m not sure they even “look like” film. I do think my recent digital cameras capture more detail. Maybe I’ll find something “static”, and shoot it both with film and with digital, then compare.

Specifically for this forum, I’m shooting film probably the same way I did 50 years ago, then scanning the image in settings to make it appear very “flat”, so I don’t lose any information on the negative. Then I’m using PL4 to make the whites and blacks show up again, along with everything in-between. I think PL4 does a better job of this than what I did long ago in my darkroom. It’s nice to have so much more control over the image as I’m processing it. I feel like I have more control, than had I been using Adobe software or the other processing programs I now have. Because of what you, and others here have taught me, I’m beginning to think I have much more control over what I’m doing than ever before.

Some local adjustments, a creative vignette and a slight selenium toning.

1 Like

I’m not so sure about the vignetting, or the toning, but I NEED to find out what you did with the local adjustments to get the iguana to stand out so clearly. That makes a world of difference. My eyes go right to its head.

Either can you explain what you did, or please upload your “.dop” file so I can see for myself, by turning your local adjustments on/off, one at a time. Wow.

I can’t tell what the toning is/did, and the vignetting is too much for my taste, but your darkening the ground all around the iguana make the iguana stand out brilliantly.

I had a one-track mind, try to emphasize the iguana. What I think you’ve done is to de-emphasize everything around the iguana, which obviously is much more effective.

Thank You!

Yes, they are green, when they are out on the green grass eating, but if they move off the grass, the green vanishes and they again blend in to their new surroundings.

When they are on grass, the green blends perfectly with the grass, and until they move, I usually don’t even notice them. I’ve learned to look very carefully for shapes or movement.

Before I go further, I didn’t deliberately use “barrel distortion”. If PL4 used this on its own, why did that happen? Could barrel distortion be in the default settings? I’ve never deliberately tried to use barrel distortion yet.

DxO presets correct lens correction… What preset(s) have you used?

You can check which tools are used by looking at the switches at the left edge of each tool. If the distortion tool is on (the switch is blue), corrections have been applied.

Depending on which workspace setting you use, tools can be hidden, but still be active. Use the switches at the top of the right dock to show all used tools.

You have me very confused. I’m using a workspace from Joanna, so I now think those “blue” switches were on when I installed the Workspace.

So, is there a “reset” command for the Workspace, that turns off ALL the (blue) switches, so nothing is on? I’ve been going through all the possible switches, turning off anything that I didn’t deliberately turn on.

If I’m going to edit ten similar images, I can see the benefit of leaving the settings as-is when I load the next image, but shouldn’t I start the session with everything deliberately turned off?

I thought about this for several hours. It’s an interesting photo, but to me, the iguanas are “darker” than the ground they are on top of, grass or whatever. The image you posted looks fascinating, and effective, but it’s not what I remember seeing.

I thought over all the posts all of you have made, and started again from scratch with local adjustments, got frustrated, deleted them and did it again - three times. The last time seemed to work the best - I made the whole image lighter, then with local adjustments made the iguana darker. Then I applied Joanna’s trick to make the top and bottom less sharp. Here’s the result, and also the latest ‘dop’ file:

2021-09-17-0001.tif.dop (18.2 KB)

I guess B&W isn’t the best media for photographing an iguana.

same idea as @rrblint , but different realisation (PS, Nik Filter)

@mikemyers,
to take green on green with B&W film + this distracting background = not the best decision

B&W needs clear graphic!


edit:

  • I forgot the vignetting – so here is the corrected version.
  • To answer post #15: “… it’s not what I remember seeing”.
    You better develop your pic, so that it works best and not as you rembember seeing it.
  • As you already said, you better had chosen colour.
  • Don’t make your life so complicated and take your Digital – instead of all this ‘merry-go-round’.

The negative being over-exposed is something I need to check out. I don’t know if the meter on the F4 is accurate. I will take along a more modern meter, and see how the readings compare with what the F4 says. I’m no expert, but to my eye, the negatives looked “good”.

As to the scan being flat with minimal contrast, that’s what I was told to do - to deliberately do the scan so the image is “flat”, so no data is lost, and then bring the contrast back in the editing.

I started searching and found this:
https://www.photo.net/discuss/threads/how-to-increase-contrast-of-b-w-scans-from-vuescan.95637/
…but that’s what I’m doing now.

I also found this:
https://www.largeformatphotography.info/forum/archive/index.php/t-85184.html

From that page:
“That low contrast is called information! Actually it is one of the reasons to like Vuescan. If you want to adjust the contrast during the scan, under the color tab there is a “curve low” and “curve high”. The default for these is .25 and .75 respectively. As those numbers move inward towards .50 the contrast increases. I have found generally that .30 and .70 produce a more normal look. It sounds as if you may find that as well. These two sliders have more effect on the way the image looks than nearly anything else. Play with them a little and you will see. A good scan doesn’t need much adjustment in Photoshop.”

Unless you agree that a scan should have low contrast and look “flat”, I will leave this alone. I can try a scan with the above settings, .30 and .70, and see how that works.

Workspace and presets are independent of each other.
While a workspace setting tells PhotoLab how to look, a preset tells the image how to look.

Workspace

  • arranges palettes and tools in the left and right docks (sidebars) of Photolab

Preset

  • a set of tools with their settings
  • active tools can be recognized by the blue switch that sits left of the tool’s name
  • the setting of the tool is defined by the positions of the tool’s slider(s)

Hi Mike. I didn’t say the negative was over-exposed, I said the scan was “over-exposed” :slightly_smiling_face:

I decided to scan a neg to demonstrate my workflow

If your negs look like this…

… I would consider them properly exposed, with a good mix of highlights and shadows.

I have a copy of VueScan but can’t get on with it (at least for B&W negs), so I use macOS Preview instead.

You mean you didn’t know macOS Preview could scan? :flushed:

This particular neg needed virtually no correction but here is a screenshot of the capture screen in Preview…

At this stage, the image is flipped L-R, but that is easily solved once the image has finished scanning and it opens in Preview…

Capture d’écran 2021-09-19 à 10.13.37

… to give you…

At which point, you can see that the emulsion of the neg suffered from something in the development process (more than likely developer exhaustion or reticulation), but that is irrelevant to this demo.

Finally, save the scan to disk as an uncompressed TIFF…

Opening the TIFF in PL shows that this particular scan is “under-exposed”…

At which point, I would normally rescan…

Capture d’écran 2021-09-19 à 10.29.01

… which gives me a flatter contrast that now sits in the middle of the histogram…

Capture d’écran 2021-09-19 à 10.34.21

… that can then be “expanded” to better fill the histogram by using the tone curve, something like this…

Capture d’écran 2021-09-19 à 10.36.44

With a couple more adjustments to fine contrast and unsharp mask and ignoring the emulsion fault, I get…

… with a 100% magnification sample from the image of…

… but this was a 5" x 4" neg :crazy_face:


I could do more but, with such a gash neg, it really isn’t worth the effort. As they say, GIGO :woozy_face:

You are running into the common issue of inaccurate reflected light exposure readings (all cameras that I know of measure reflected meters). Where critical readings are needed it’s much better to measure incident light, if possible.

In-camera meters measure light reflected from the subject and then process it and deliver an estimated reading. Errors, errors, errors, everywhere… An outdoor scene taken on a cloudy day has sunny areas and areas shaded by the clouds – the exposure can vary by 2-3 stops. And then there are shady areas under trees, by buildings, etc. Then backlighting. Then a bright spot in the scene such as the sun reflecting off the windshield of a car. The list goes on and on. The photographer must interpret the scene and make a judgment based upon experience to modify the reading given by the camera to get what he/she thinks will be the most appropriate exposure.

Not only that, the colors that are predominate in the scene can affect the light reading because the sensors in light meters don’t have an exactly level response throughout the light spectrum.

Modern cameras now have the advantage of matrix metering, better sensor materials, and microprocessors using sophisticated algorithms to process the readings, so they can give more accurate readings in most situations than the older cameras. But they are not magic and still must be used carefully and intelligently because they are still processing reflected light readings.

I have a fond memory of the Gossen Super Pilot light meter I had back in my college days when I was a staff photographer for the student newspaper and the school annual. It was a quality, easy-to-use handheld meter that wasn’t too expensive at the time and could measure either reflected or incident light. Sadly, it is no longer available. Sekonic now makes a cheapie incident meter that is probably just as accurate but it is nowhere near as flexible nor as easy to use as the old Gossen.