In earlier versions of Silver Efex, you could protect a region from inclusion in a control point by dropping a “default” control point in the region you want to protect. That new control point would act as a subtraction from the existing control point.
That functionality seems to be gone in SEP3. Perhaps DxO thought they were providing the same functionality via the luminance and chrominance sliders, but IMO they don’t provide nearly as much control as the previous behavior did. Is that old behavior gone for good?
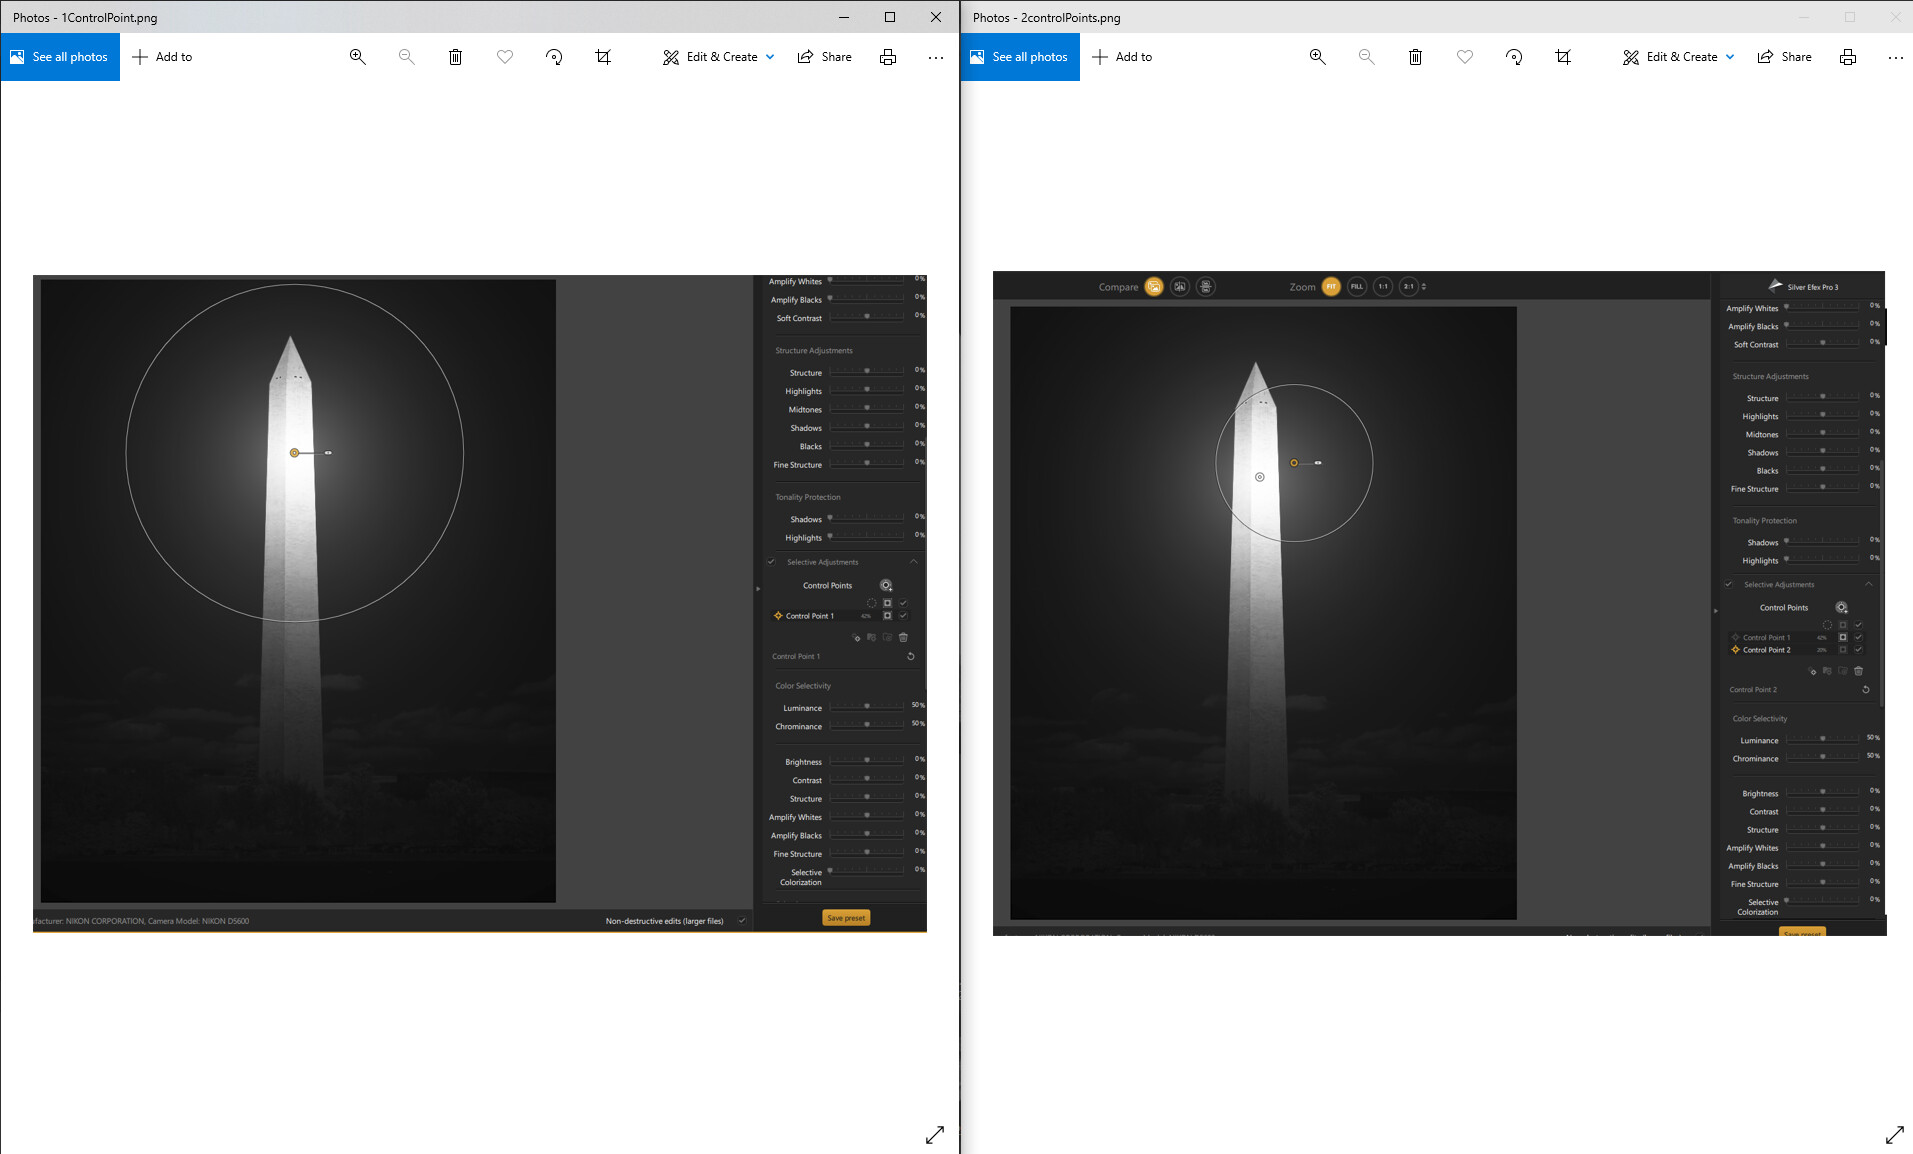
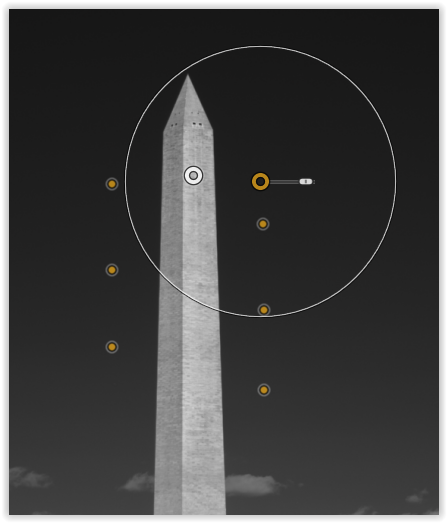
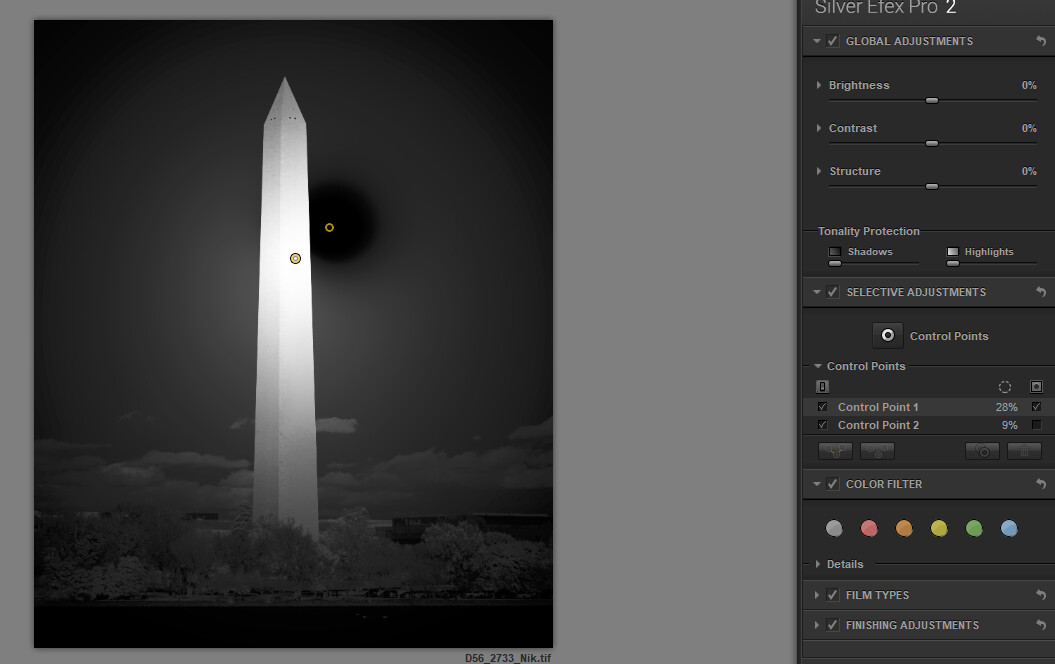
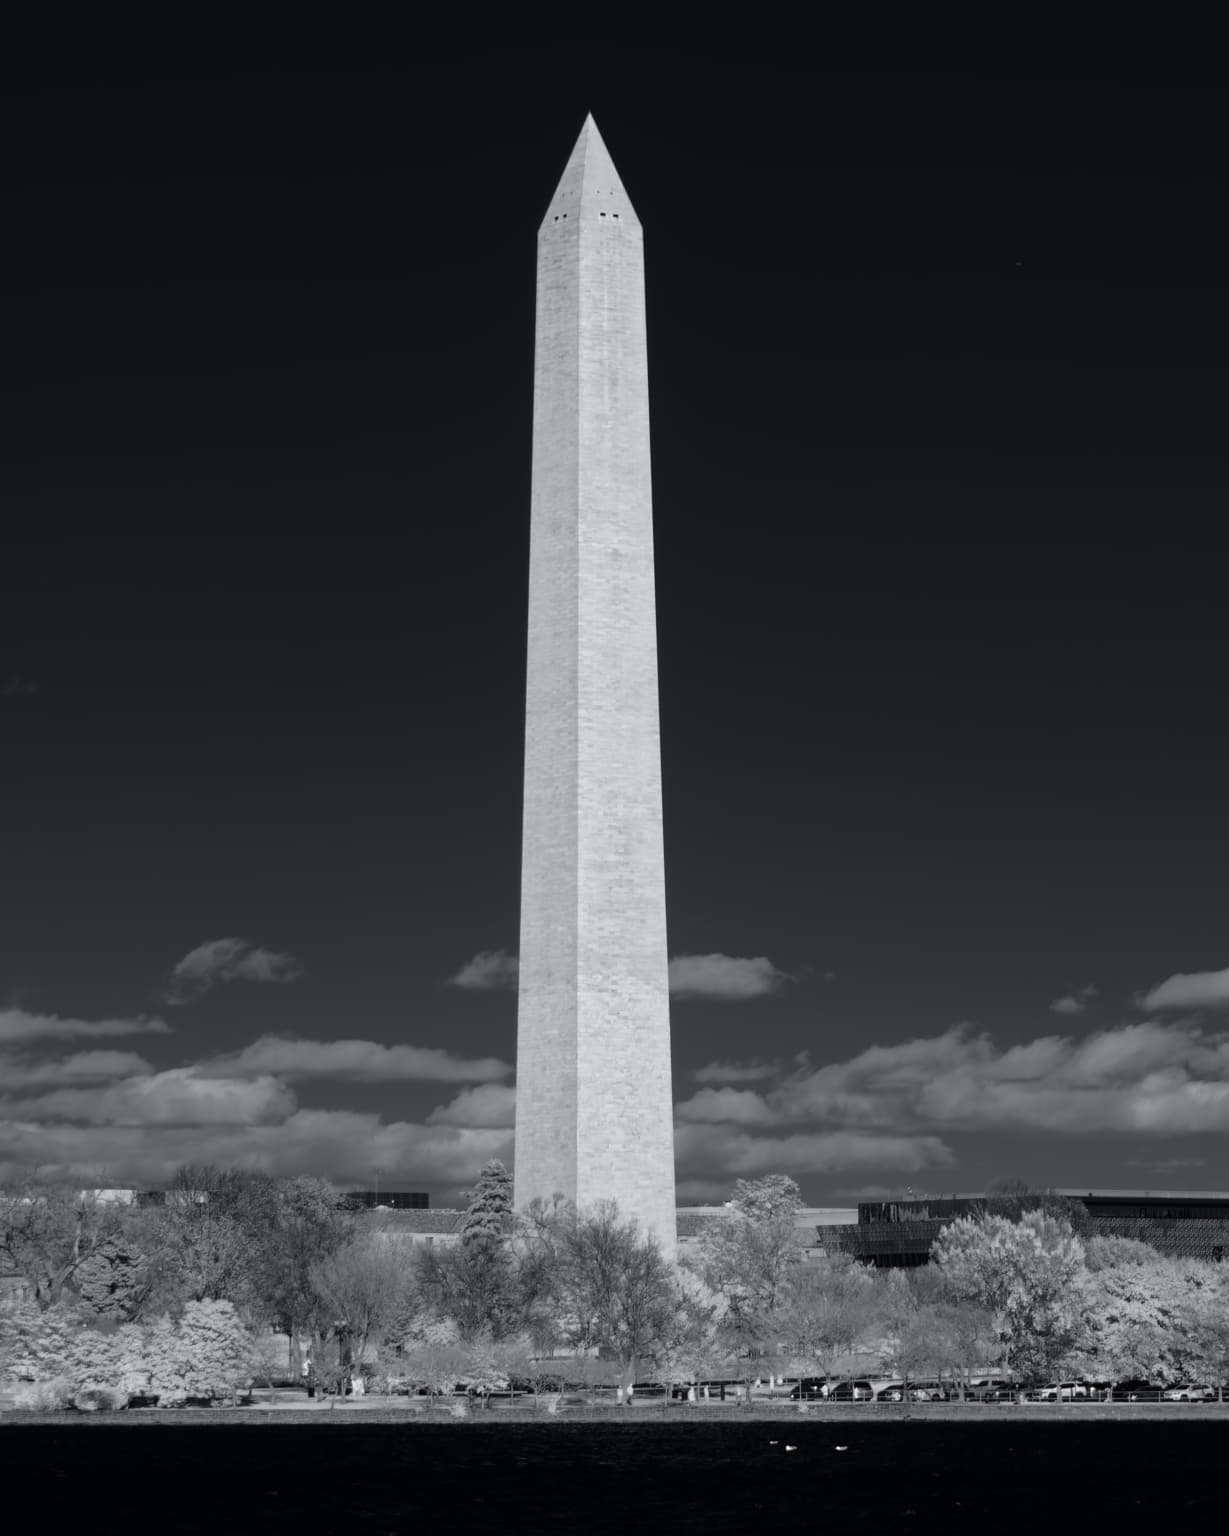
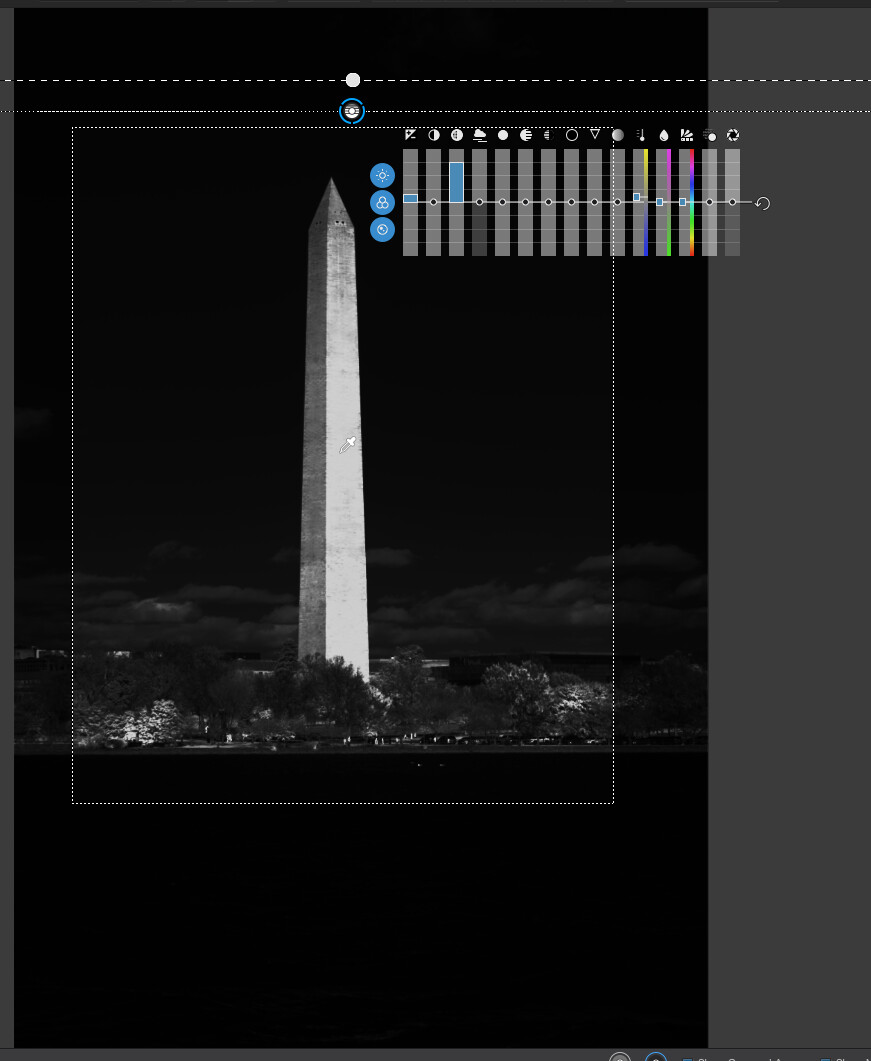
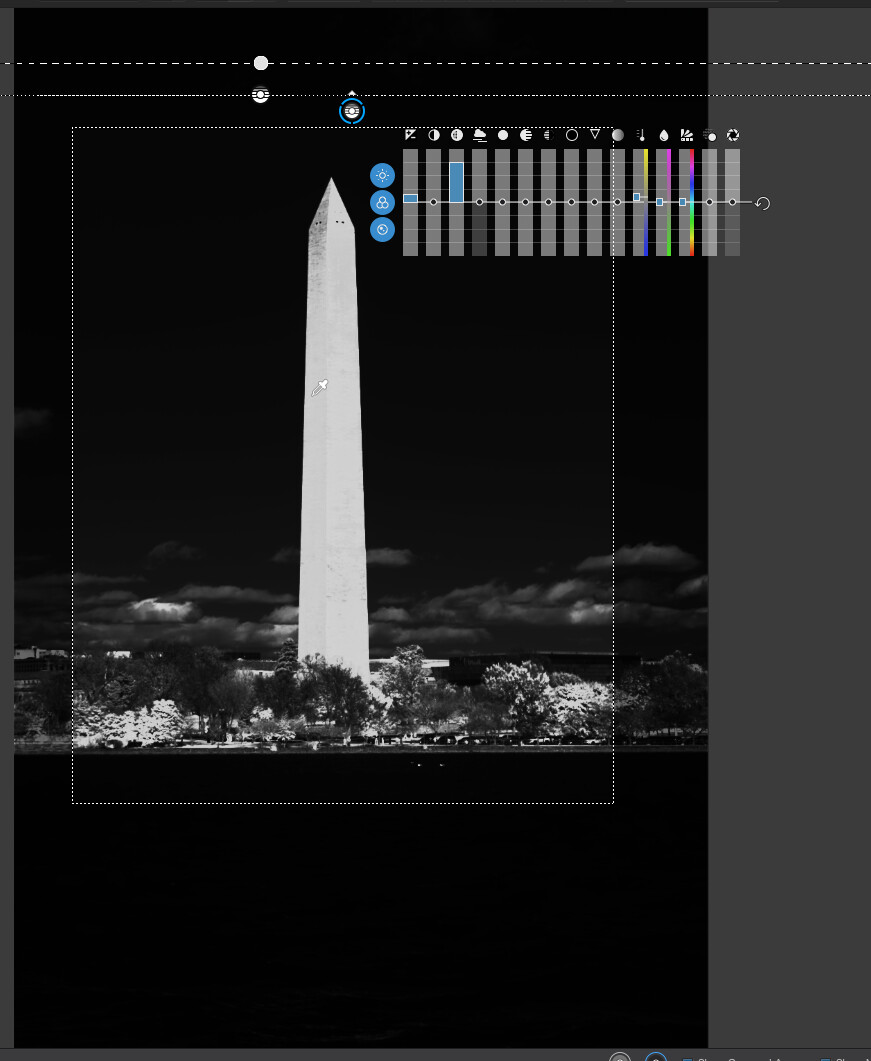
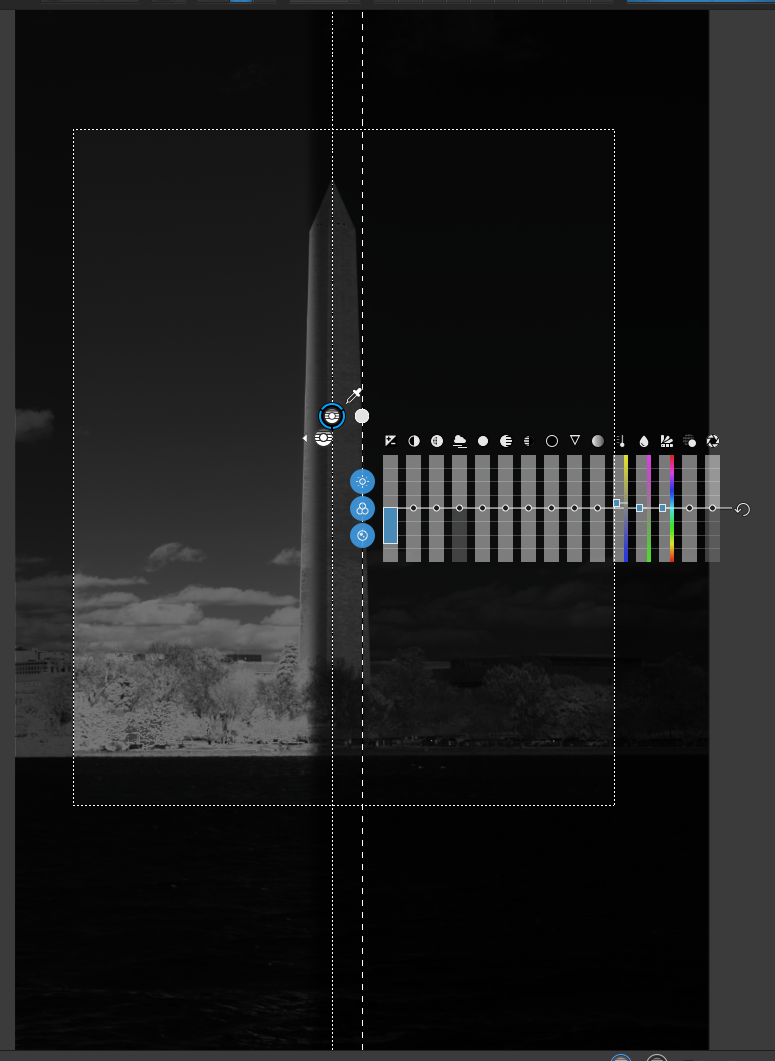
That’s not what I’m seeing. The left image is with a control point on the monument, bleeding into the sky. The 2nd one has an added control point on the sky, but with only the selection from the monument control point visible. There does not seem to be any change in how much sky is selected. I would have expected the sky near the 2nd control point to be deselected.
I am just trying to understand why functionality that worked really well in previous versions of SEP doesn’t seem to work the same way anymore. I’d be curious to see if you can make the selection from a primary point change by dropping other points around it.
But why do you want to work on it in SEP3, when it’s already converted?
Then also, in PL 4, 5 I would use other masking tools than the control points you have in SEP3.
I use PL5 for initial processing (DeepPrime, sharpening, some basic adjustments), then SEP for better control of B&W appearance.
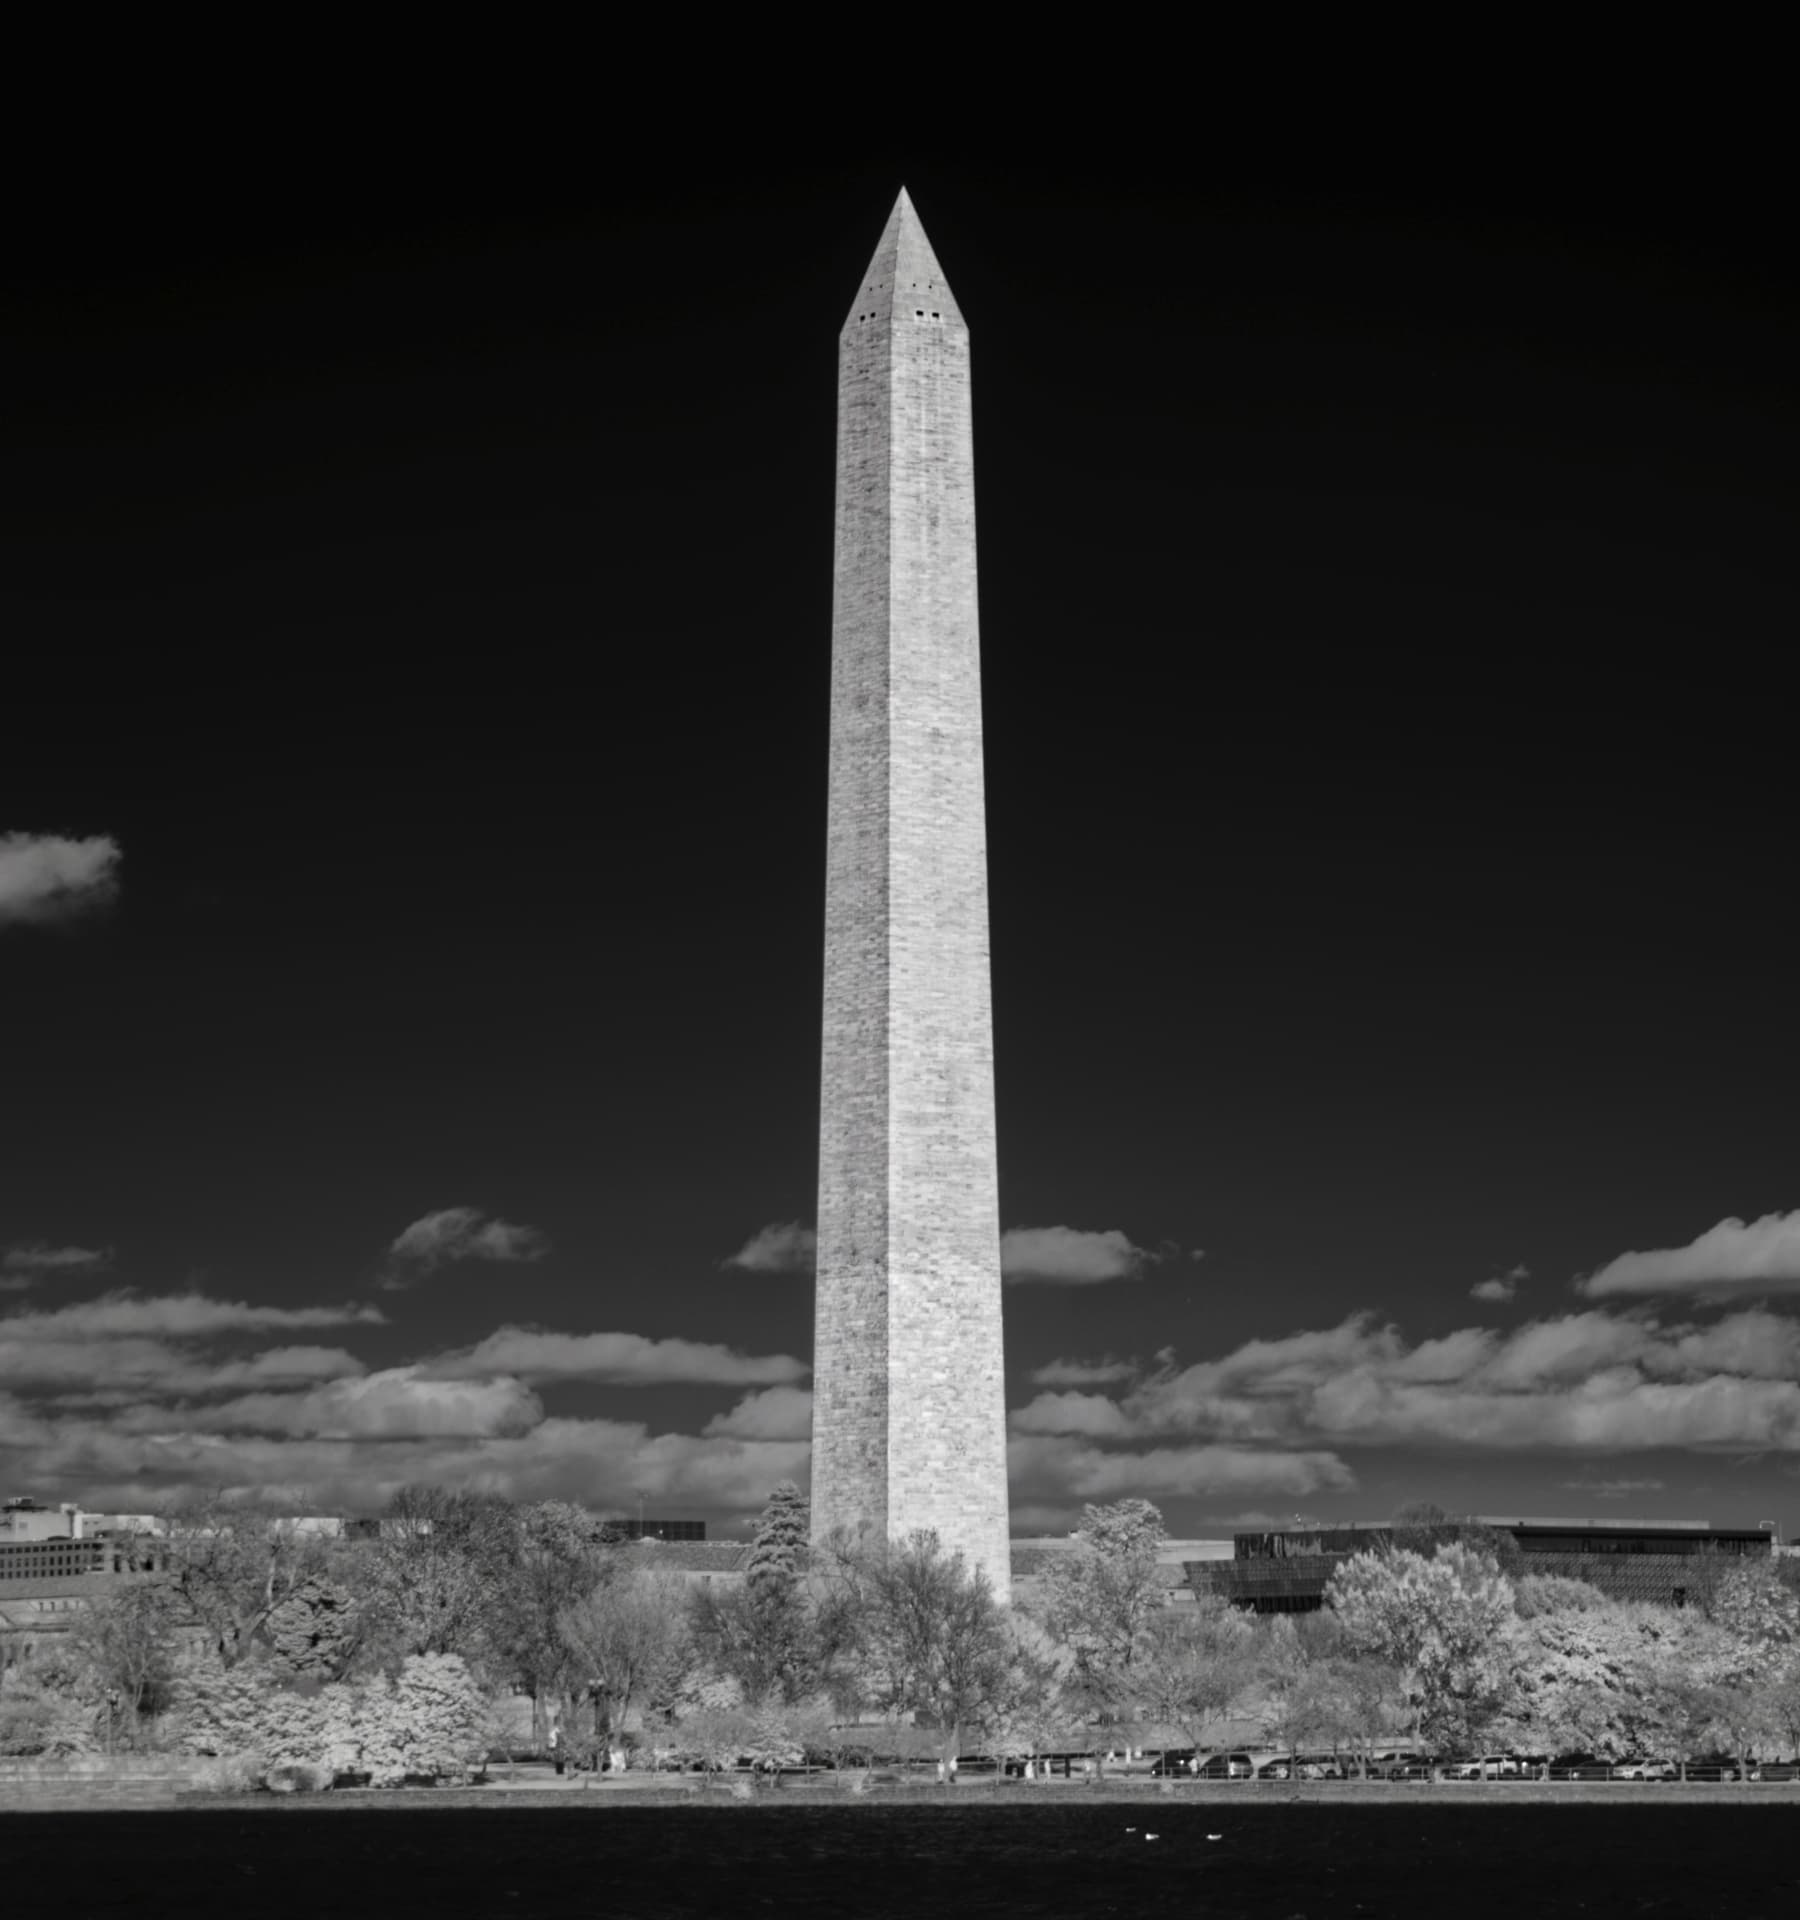
I’m not sure what you meant by “it’s already converted”, but perhaps it’s because I was a little loose with my language when I described 850nm as “B&W straight out of the camera”. It’s not really B&W. It still has to be demosaicked - it’s just that at those high wavelengths, the red, blue, and green Bayer elements have pretty much the same response (if you are curious, I have written something up about how the different Bayer elements work at near infrared wavelengths). The result is that the image “looks” B&W.
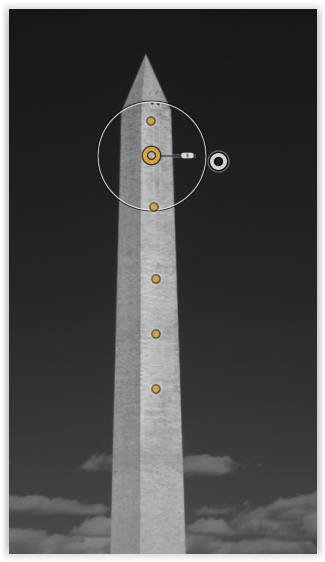
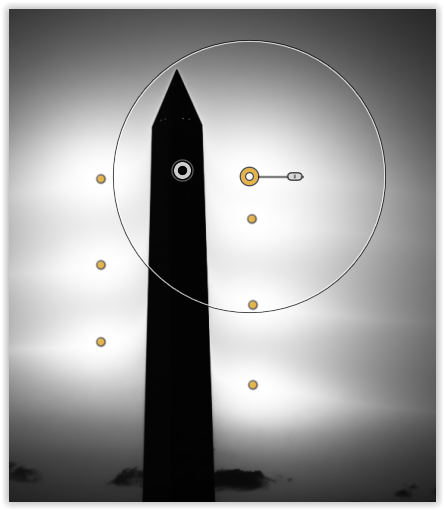
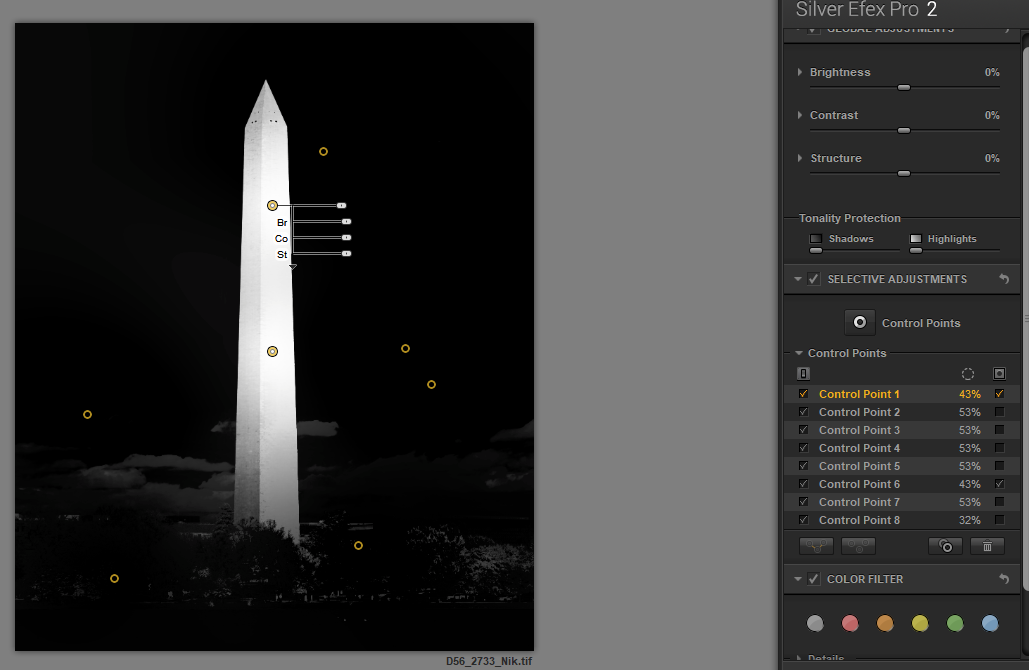
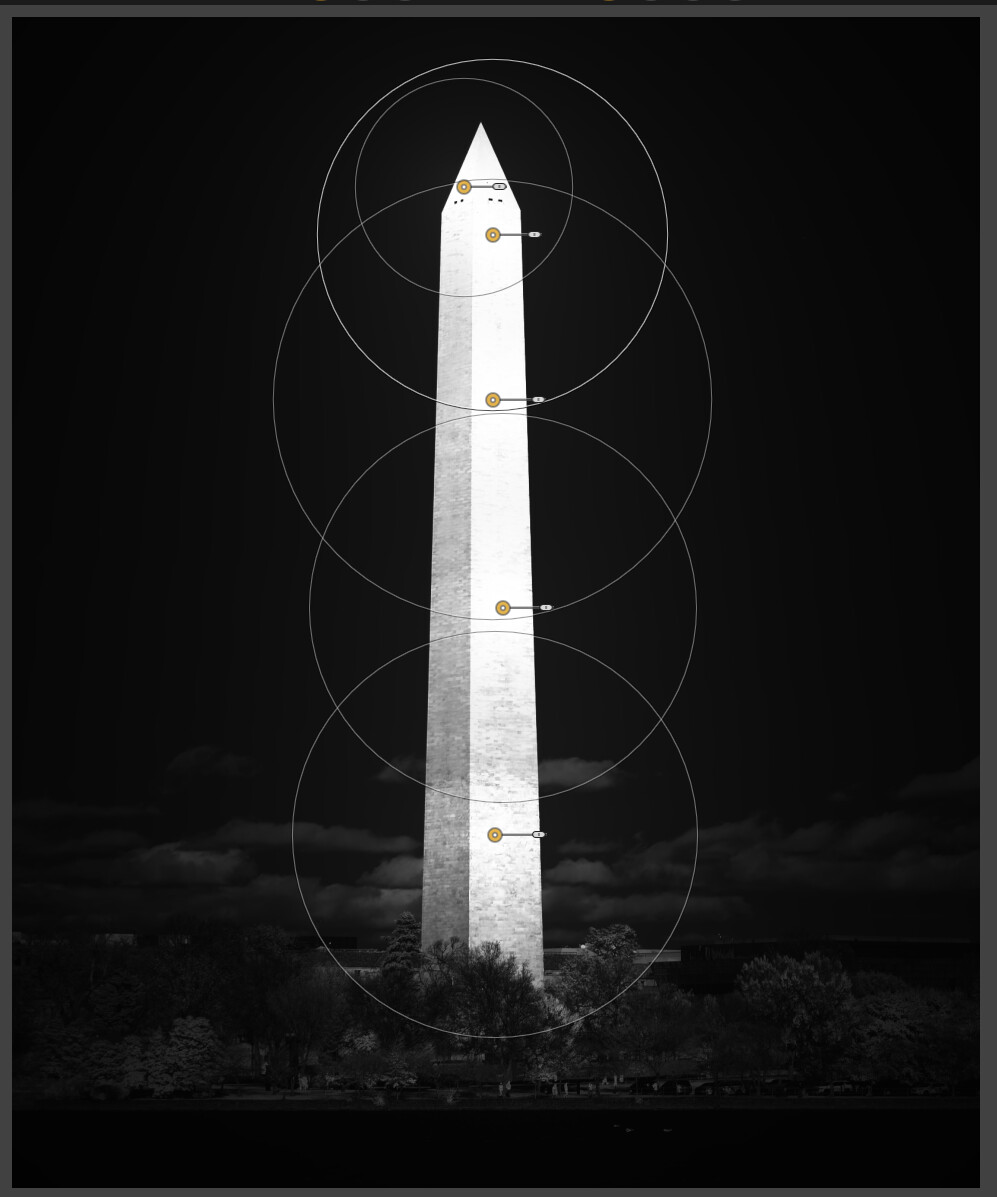
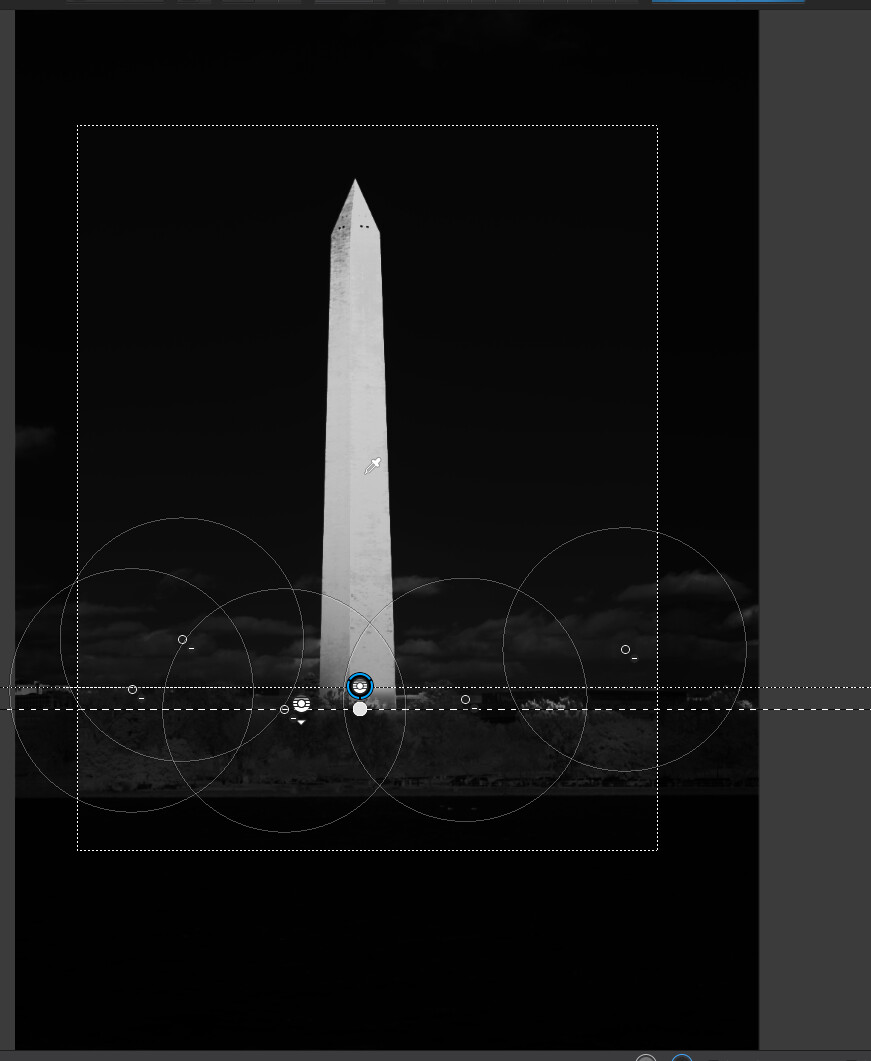
I suspect that you and are talking past each other a little bit in terms of what behavior I’m expecting to see, so I reinstalled my old Google-era NIK package to confirm that I’m remembering the past behavior right. See this screenshot. This is the behavior that I am trying to achieve in SEP3. Notice how the selection from the monument control point picked up the sky, but that part of the sky selection was negated by the 2nd control point placed just to the right of the monument.
This is exactly the behavior that I am used to from SEP, but cannot figure out to achieve in the latest version. It also happens to be the behavior you described in your first reply to me earlier today. To me, this behavior was the most powerful aspect of NIK control points and probably the biggest reason I became a SEP user. The fact that I can’t seem to get this behavior anymore frustrates me, particularly as the change seems to have been a conscious decision on the part of DxO.
BTW, thank you for all the time you have spent trying to help with this.
@grubin
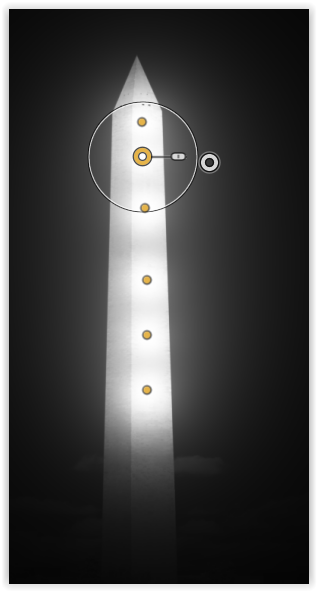
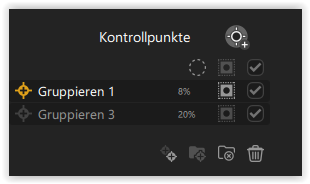
Ok, tried again – and edited screenshots / description of post #9 (SEP3).
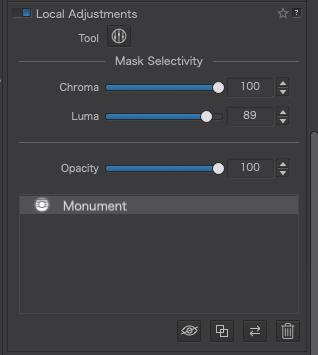
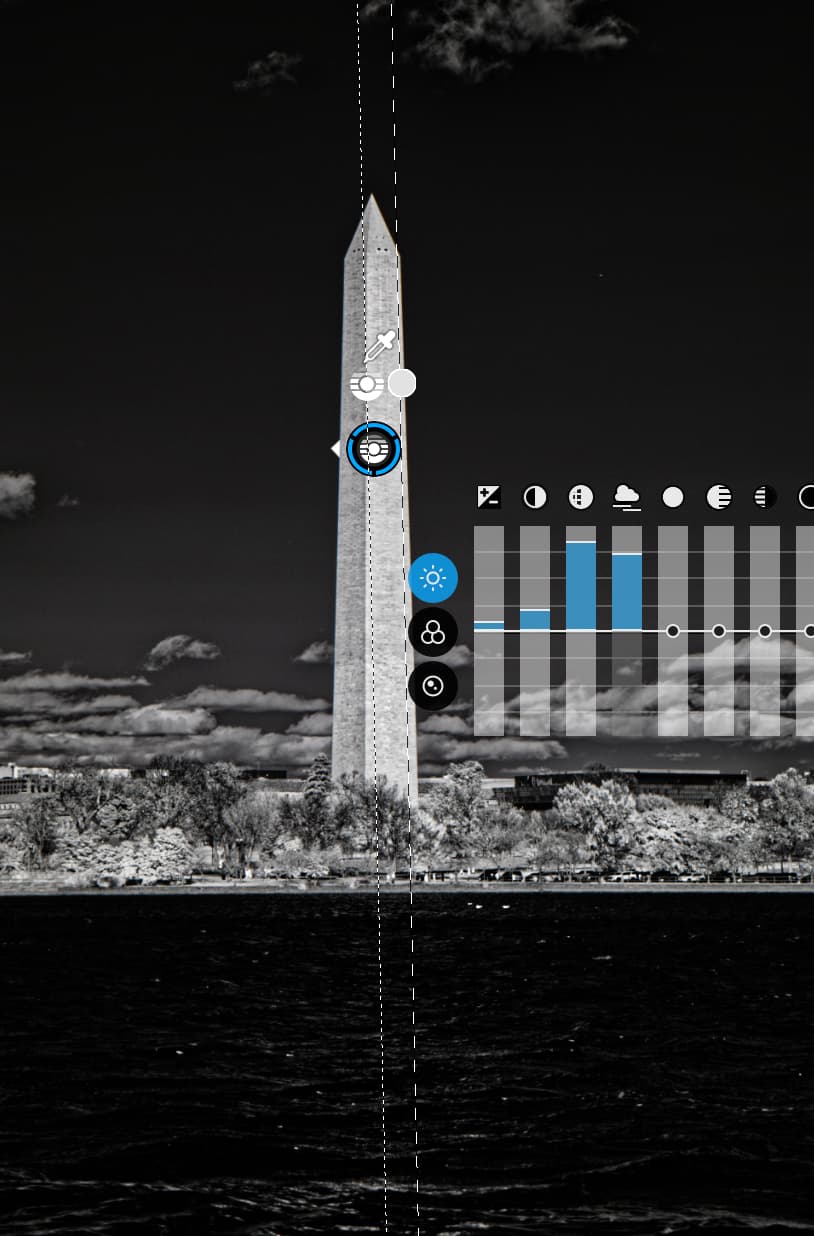
I set the CPs on the obelisk to Structure 100%, inspite that might not be very noticeable in the sky.
Then I used negative control points in SEP3 in the same manner like in SEP2 (= no Luminance or Chrominance slider),but the masking from SEP2(your post #10)looks more effective !
Well, that is a question for DxO.
Personally, I would stay within PL – but then, I’m not familiar with infrared …
I’m not sure why you wouldn’t just use FilmPack from within PL5. There are so many superb film emulations, including IR, and it means you don’t have to convert to TIFF, thus losing any tweaks you might want to do to any RAW processing after you’ve done the B&W conversion.
I used the Fuji Acros 100 film preset, which is an exceptionally fine grain, low reciprocity film that I use in my LF film work.
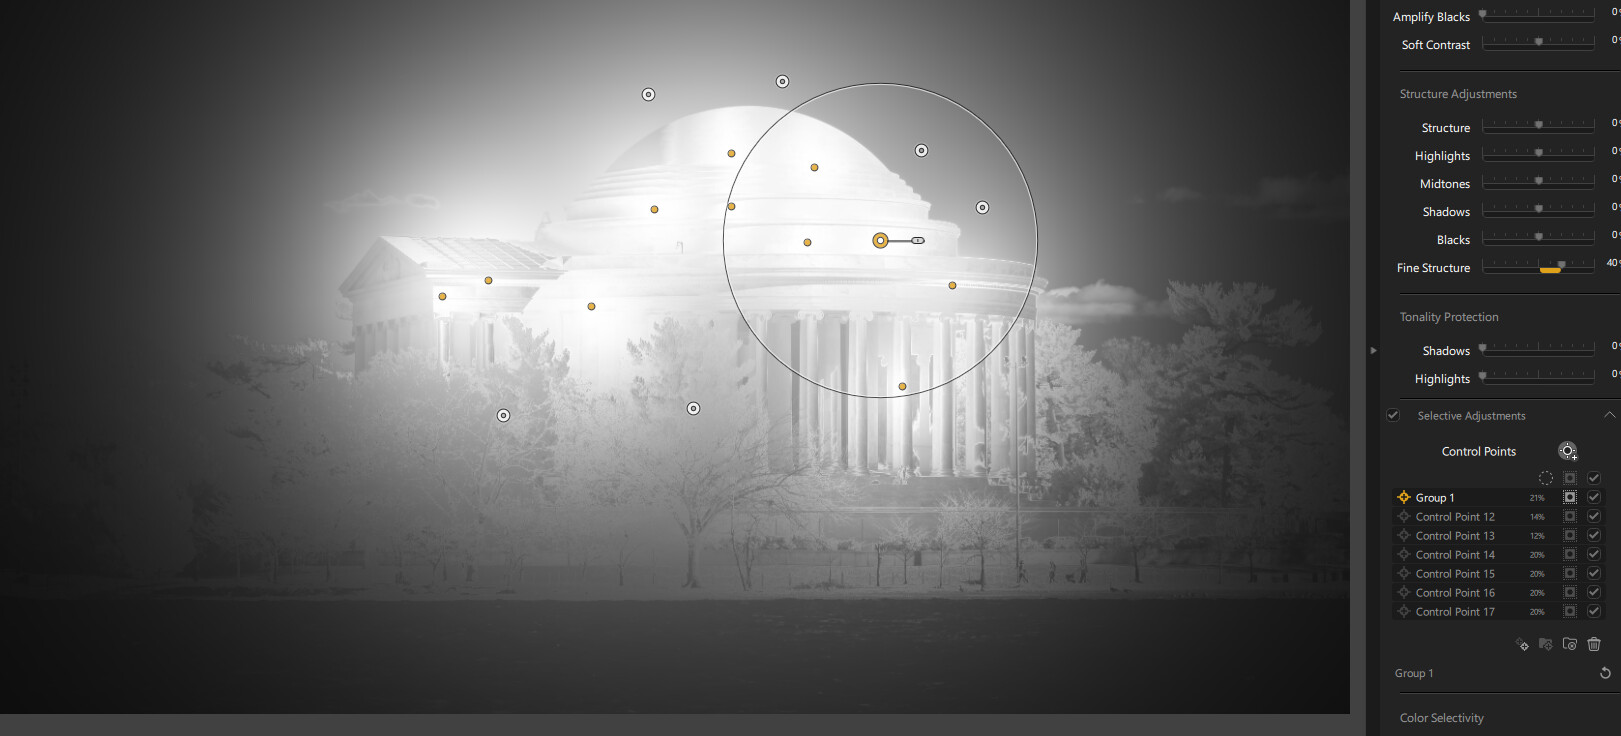
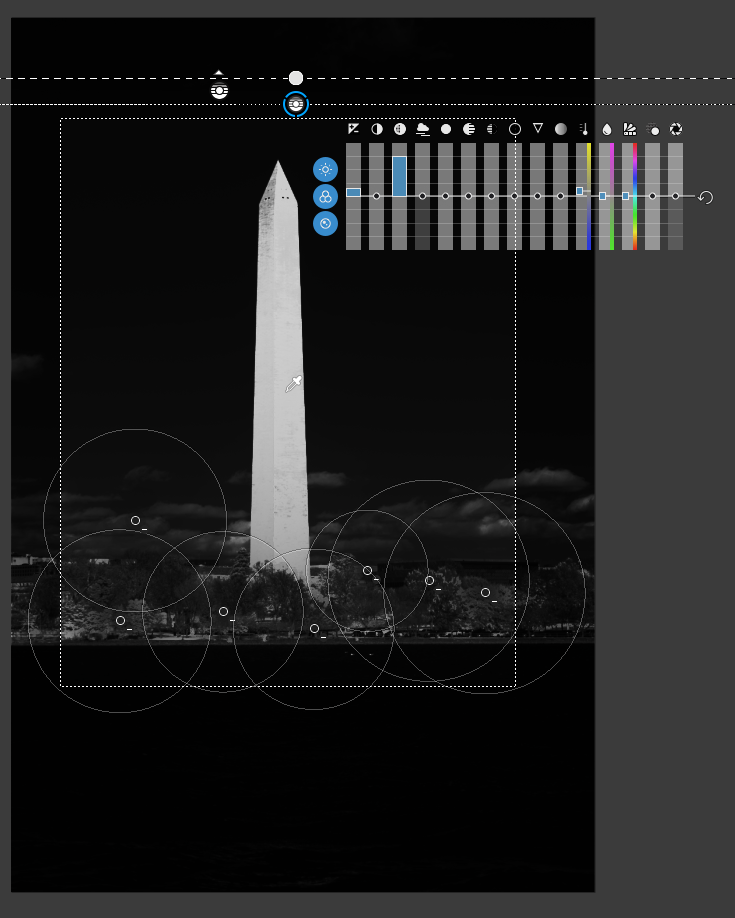
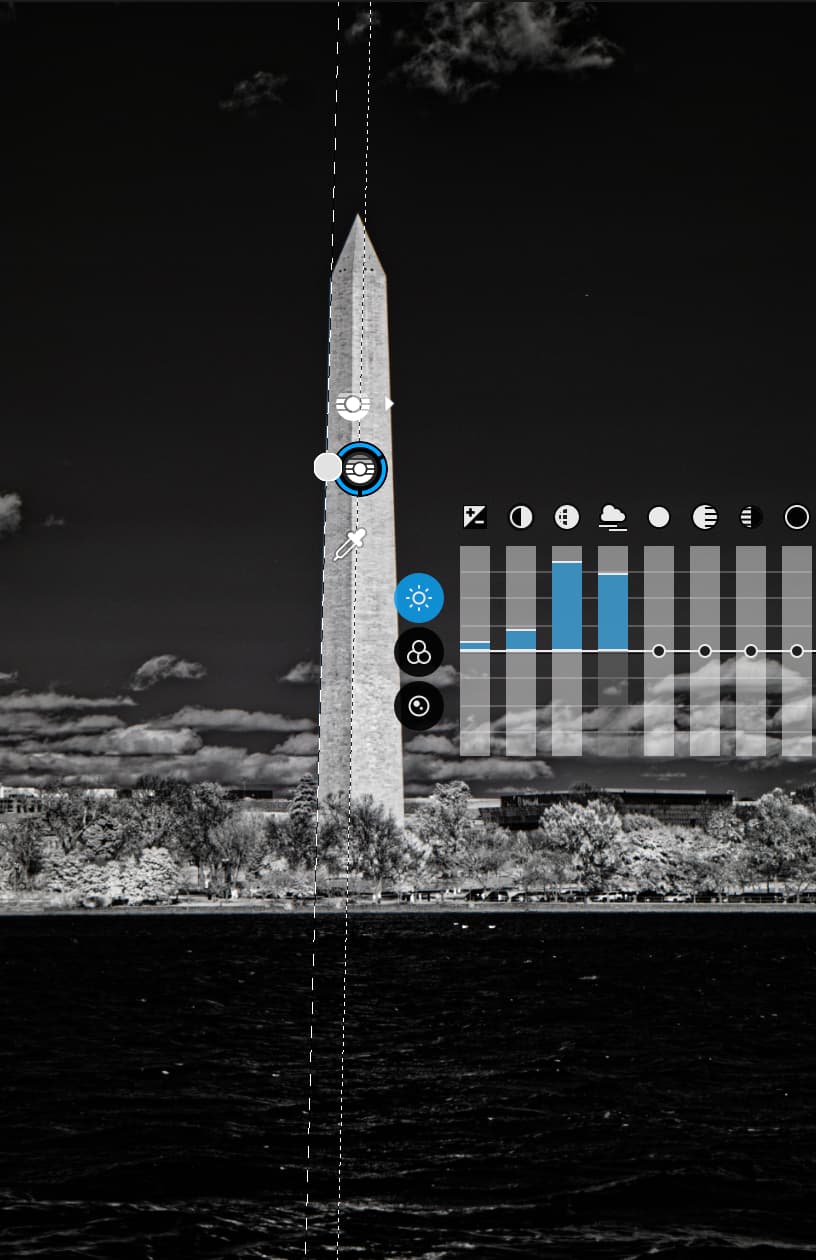
Here’s what I did to get a very accurate mask on just the monument, using the new Control Line tool in PL5, with a few negative Control Points to remove everything apart from the monument from the mask…
Note, there is a second Control Line with the pipette on the left face to add that in to a very selective mask…
You can see I added bit of micro-contrast and slightly lifted the exposure. Not knowing what exactly what you want to achieve, this is just an example. Here is the exported JPEG…
Out of interest, I did notice that the image was a bit soft, so I upped the lens sharpness to +2. This is the kind of interactivity that is so much easier if you stay in PL5.
I never normally use SEP but thought I would give it a go.
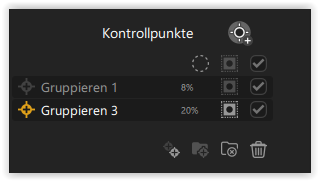
It looks like you may not have changed the selectivity on the Control Points that you added. Here is the mask that I created with only 5 points but with a Luminance selectivity of 65% instead of the default 50%…
Only a question, because I’ve no experience with Control Lines in PL5.
Why not set one control line from the middle of the obelisk to the left side, and one from middle to the right side, and place the picker anywhere you like on the obelisk.
What you have done is set a gradient over one side of the obelisk, not a complete filter. From the “big blob” to the right, the image has a 100% mask but the part on the left of the obelisk graduates from 100% at the '“mid-line” to 0% at the left edge.
By placing the Control Line and its gradient outside of the cropped part of the image, I have a 100% mask over the entire image area. Then I placed the pipette on the right side of the obelisk and increased the selectivity until only that was selected…
As you can see, because the mask covers the entire image, lots of stuff at the bottom also got included, which is why I then switched the tool to negative Control Points and placed some of those to remove those areas from the mask.
I also tried applying the mask, with a very narrow downwards gradient, at the bottom of the obelisk instead of at the top, but I still needed a few (although less) negative points…
And because I was on hurry because my fridge was empty I made only 4 fast adjustments.
What I tried to implement was more structure at the obelisk and a darker sky with some structure at the top.
But I will check your suggestion tomorrow and play a bit round the control lines