I don’t have FilmPack, but I might consider getting it if it lets me to things like SEP does, but without having to leave Photolab.
Joanna and Guenterm,
Thank you both for the time you spent playing with this and trying to answer my question. I did some side-by-side experimentation with SEP2 and SEP3 and discovered something that may cause me to file a bug report. It also may explain why Guenterm and I had trouble getting on the same page about what is and isn’t an issue.
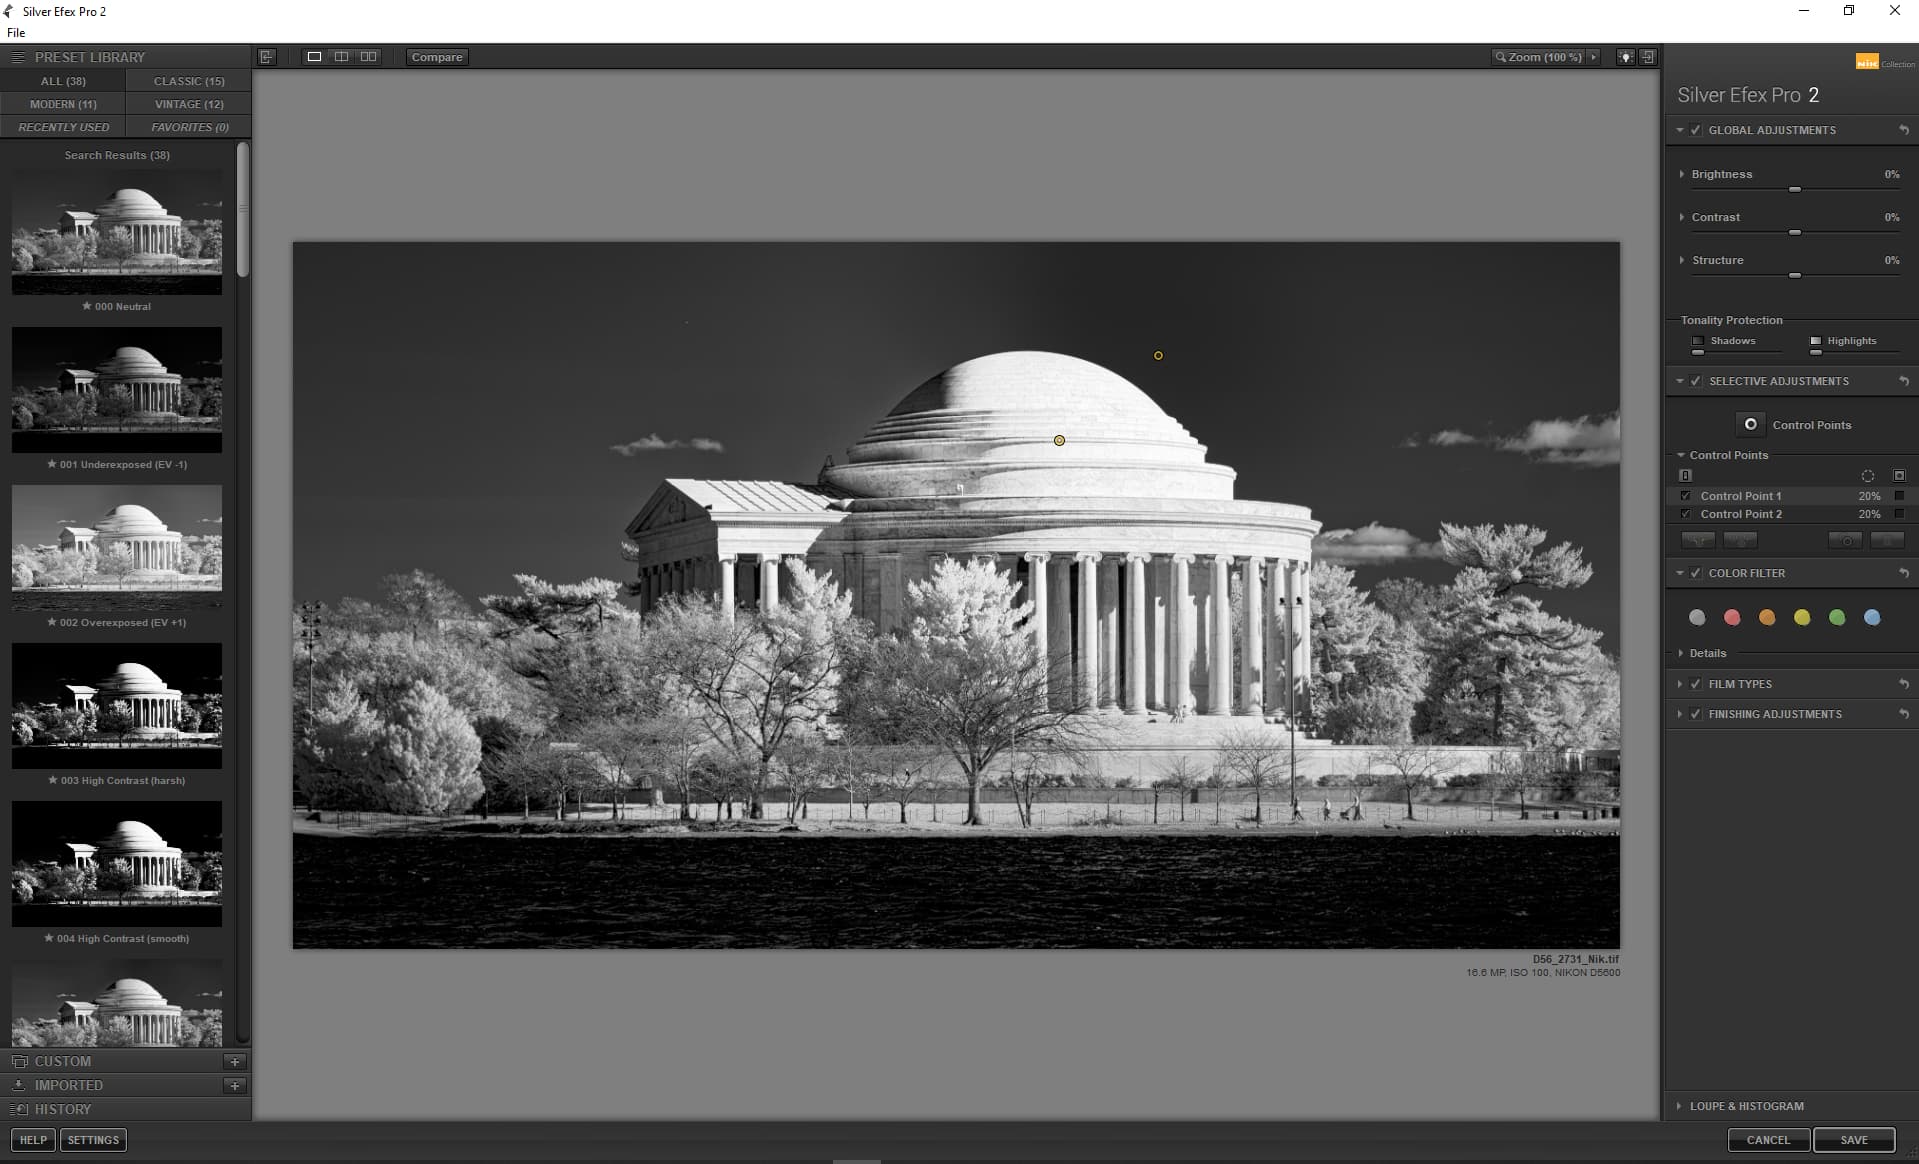
In these 2 images, I have places 2 control points - one on the dome and one on the sky. I am showing only the selection for the one on the dome. In SEP2, it is very clear that the control point on the sky has served to deselect the sky from the dome’s control point. In SEP3, that doesn’t appear to have happened. This was why I thought that DxO changed the behavior for deselecting from a control point.
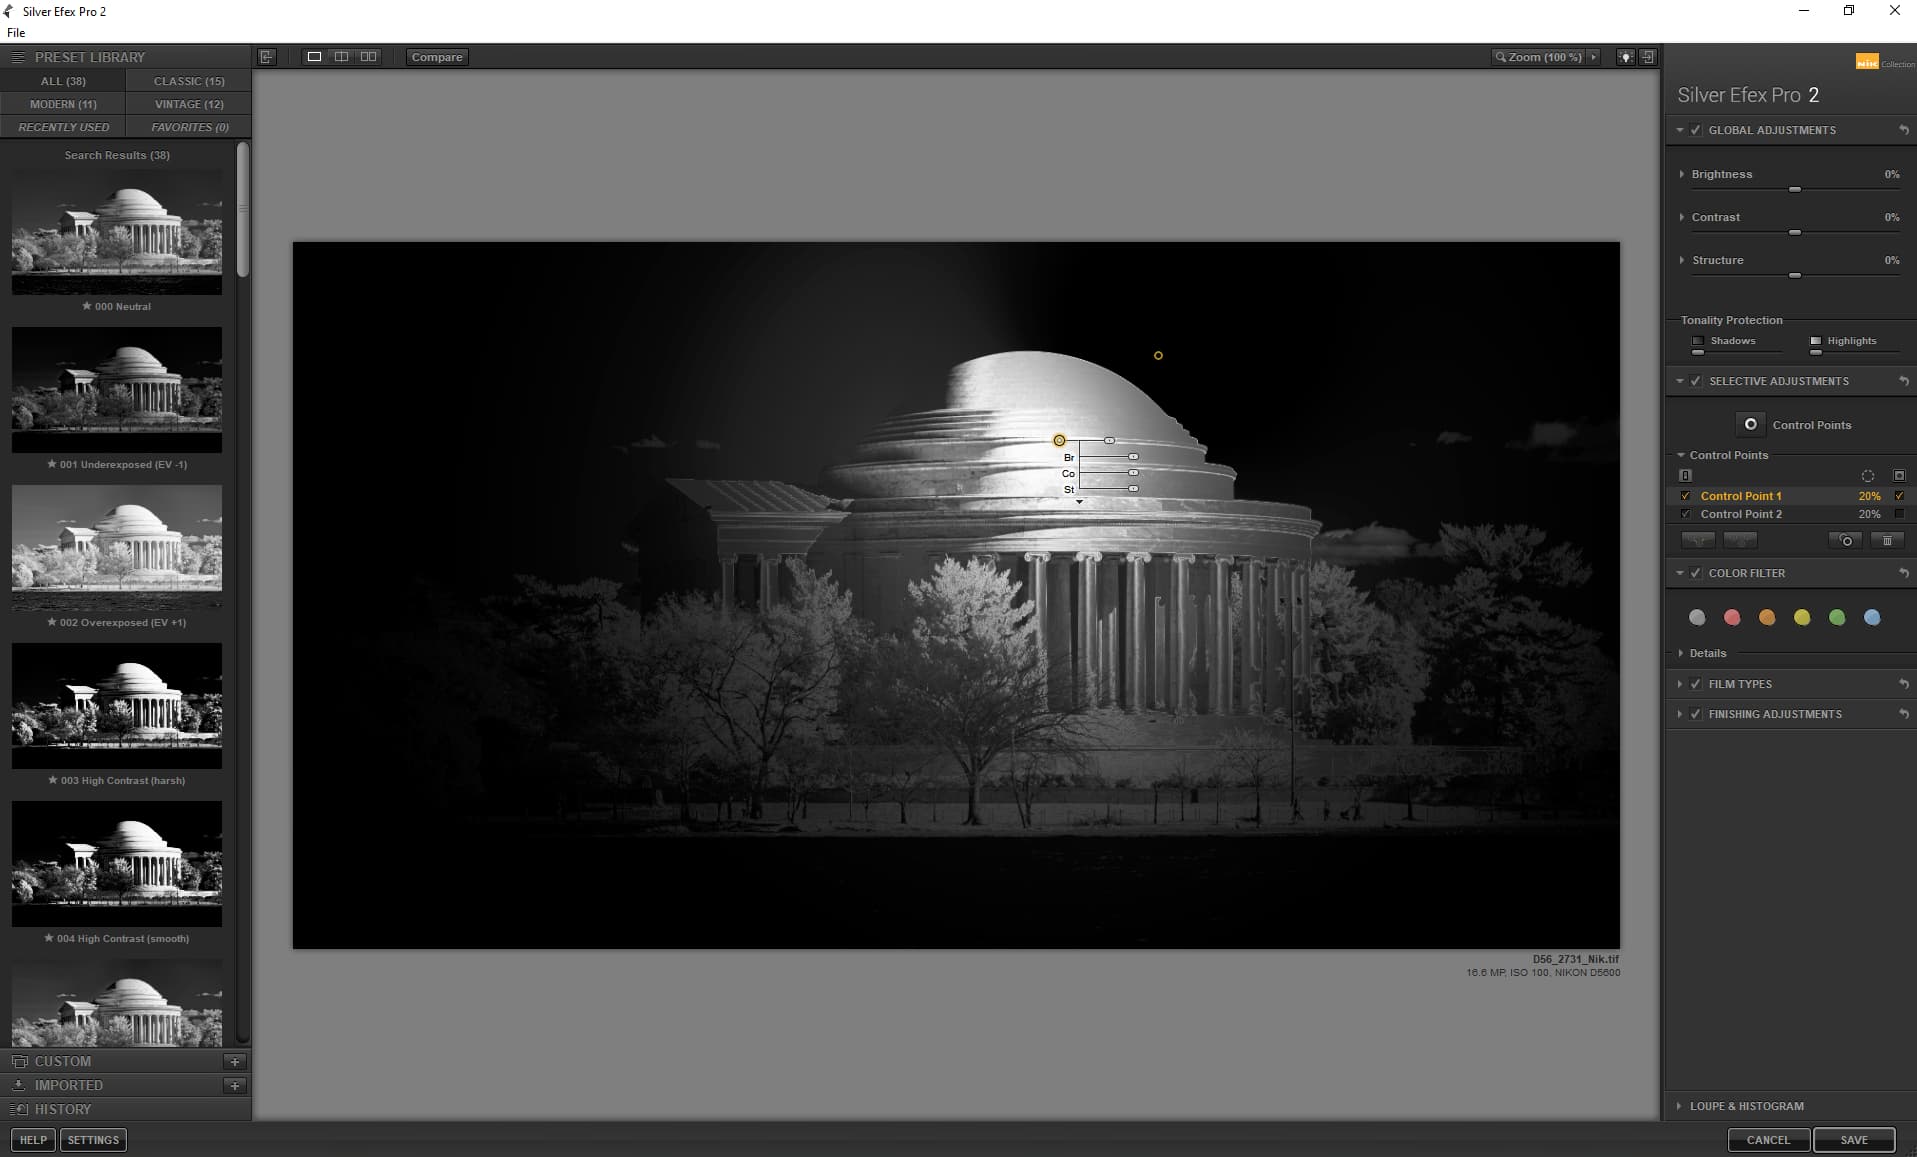
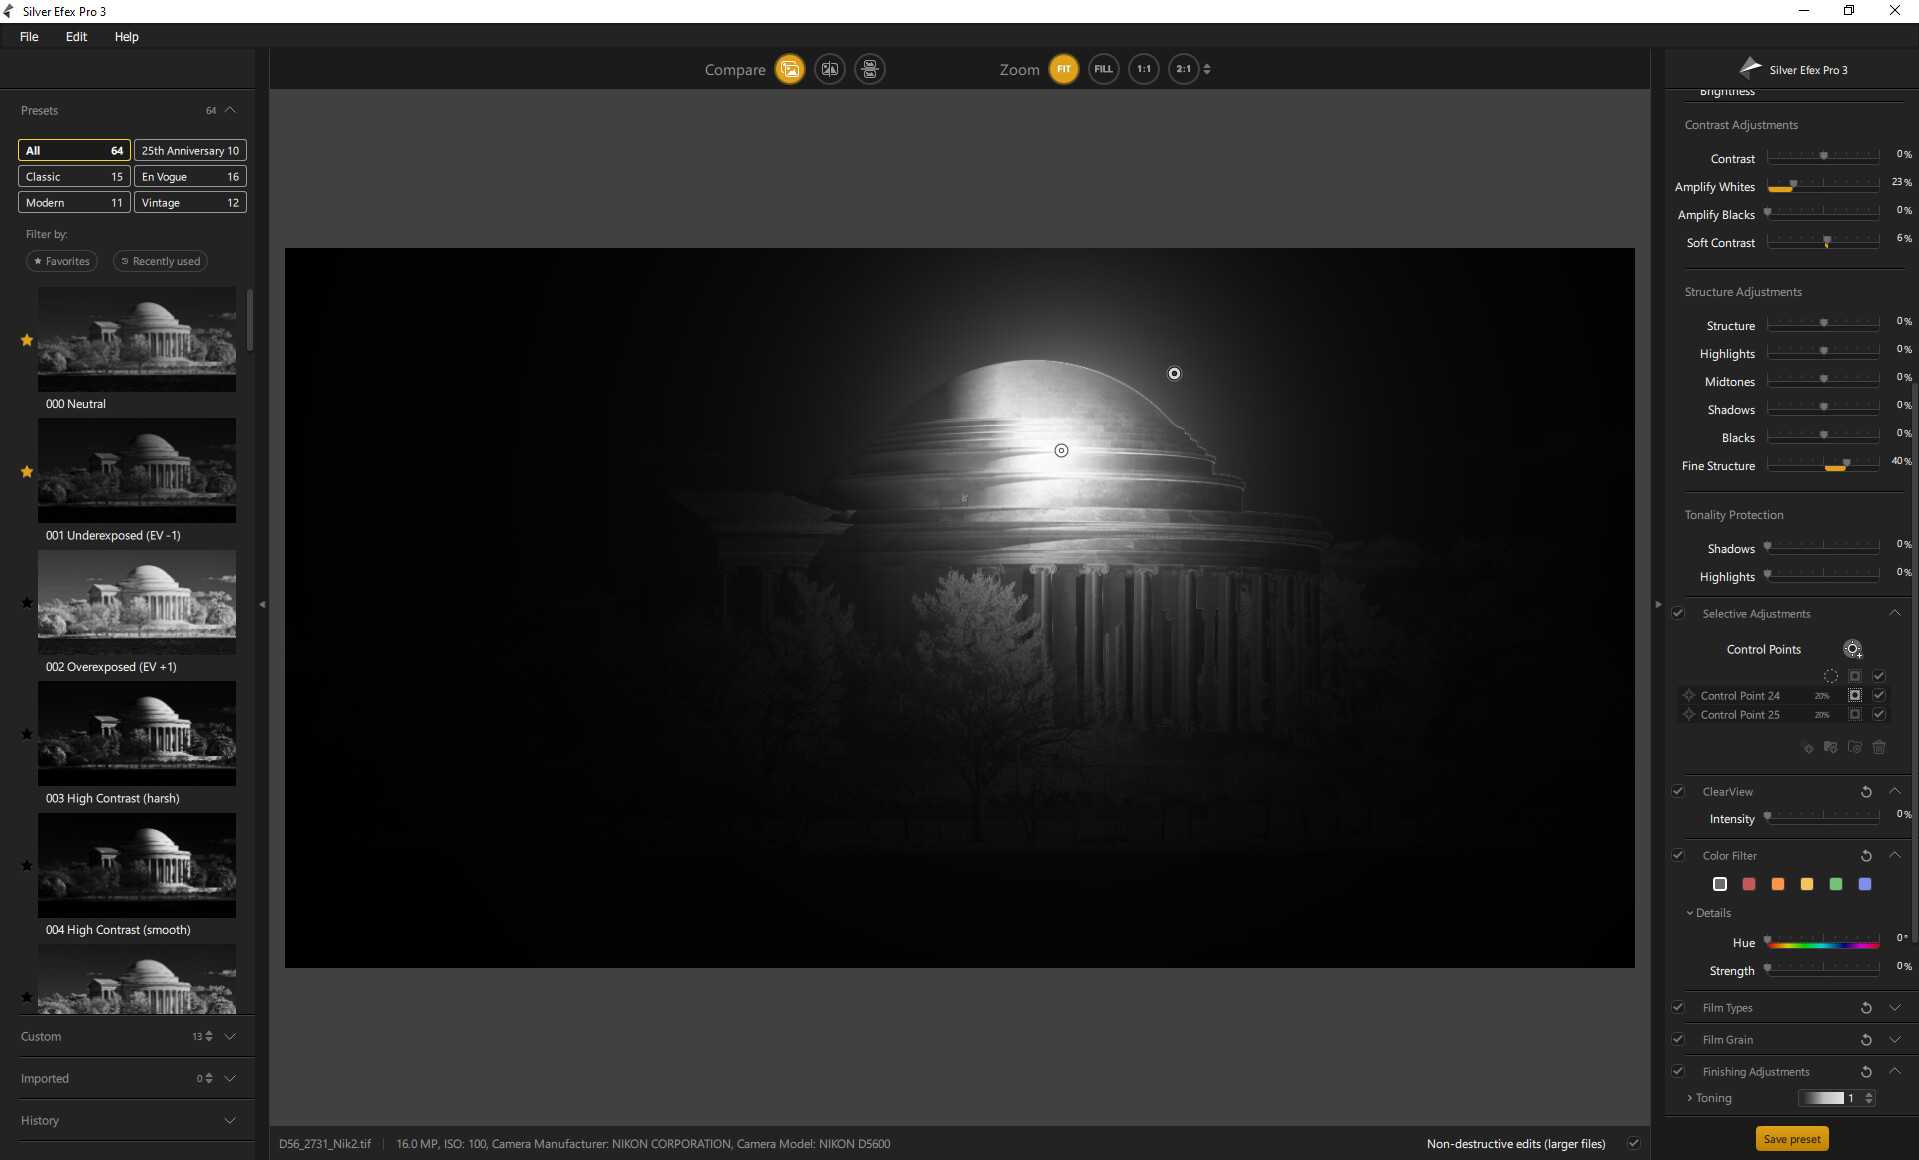
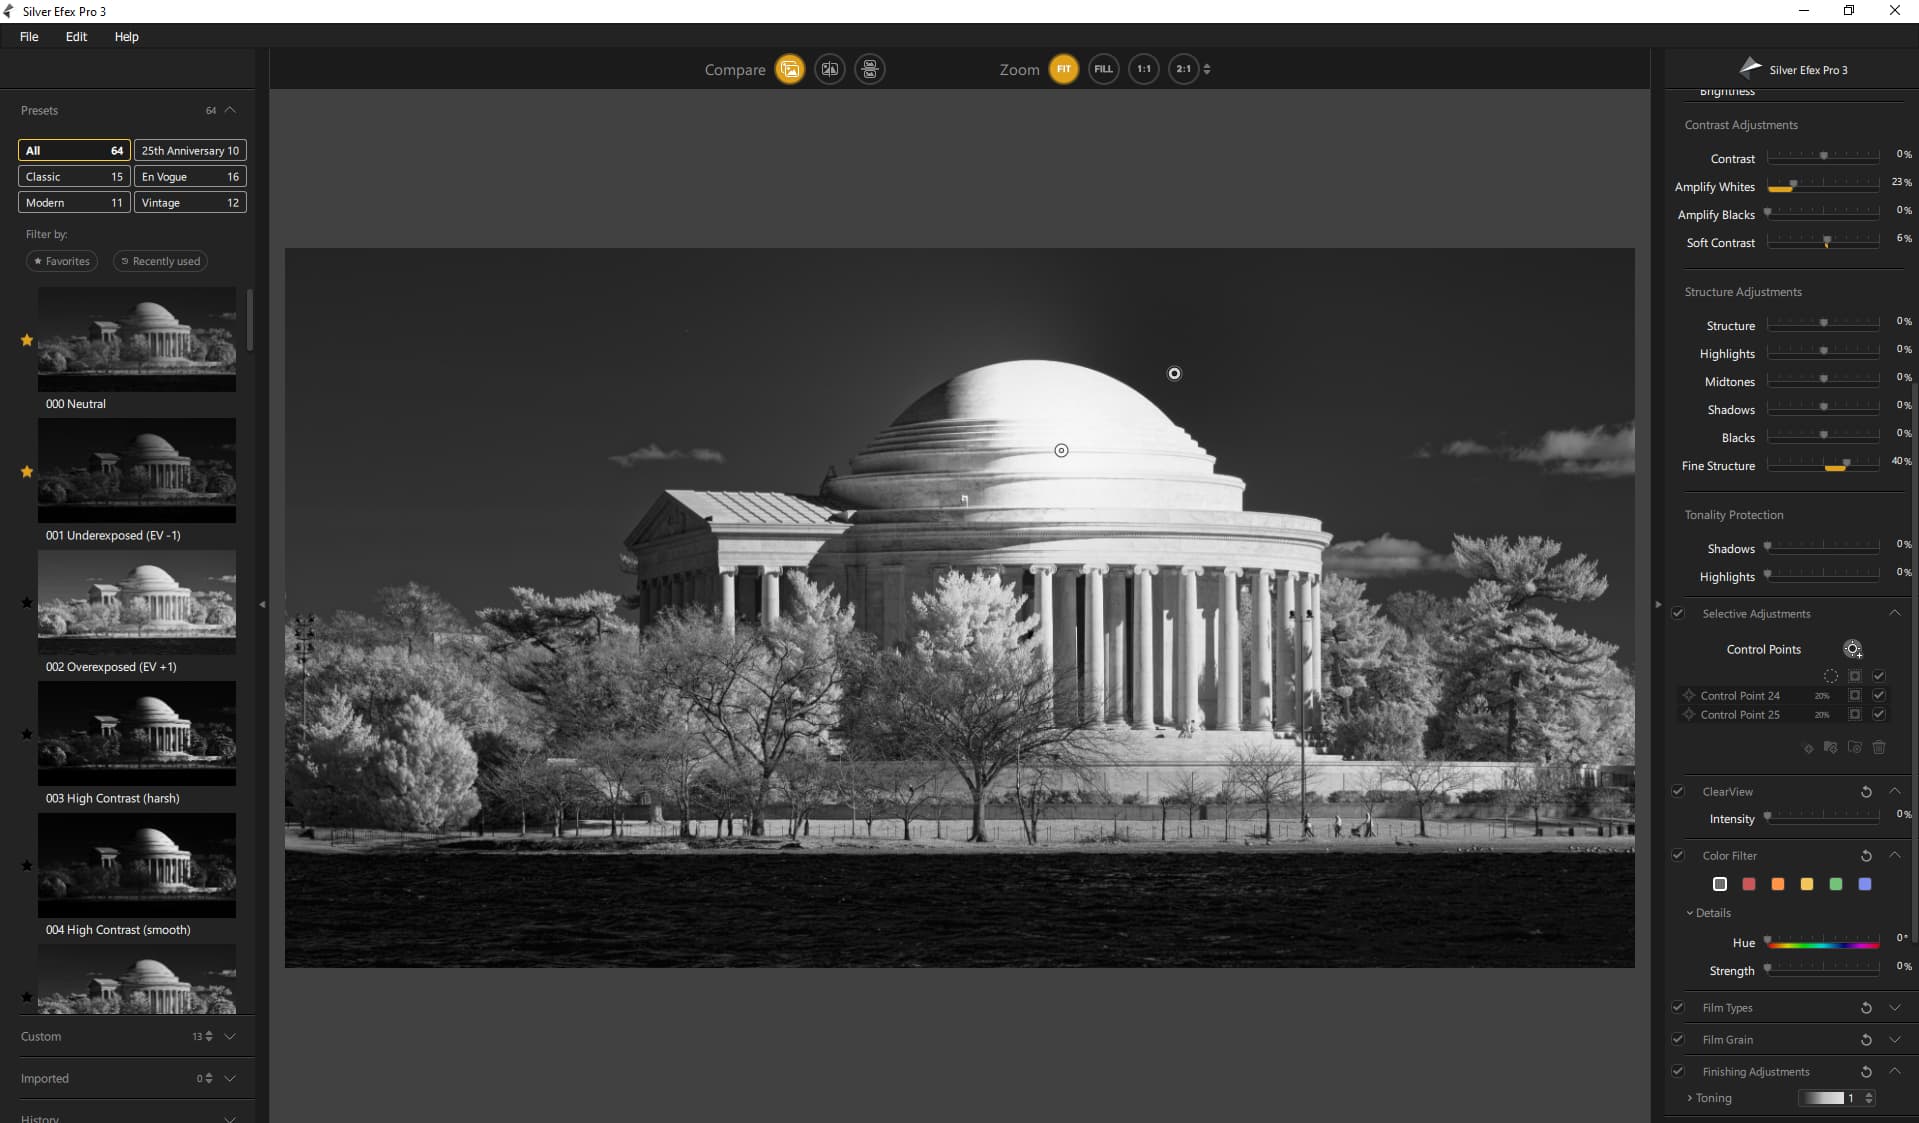
Now look at these two images. I am no longer looking at the reported selection, but instead at the effect of the control points. For the dome control point, I have pushed the Brightness and Amplify White to their max values. The control points seem to be tuned a little differently between SEP2 and SEP3, but in both cases, you can see a dark region around the sky control point.
Takeaway: In SEP3, the secondary control point IS serving to modify (through exclusion) portions of what the primary control point selects. That can be seen when the control points are used to modify the image. The problem is that when you use the selection view, that selection modification is not shown in SEP3 as it is in SEP2. This is what I intend to report as a bug.
1 Like
I will definitely have to play with this. Thanks!
Gary,
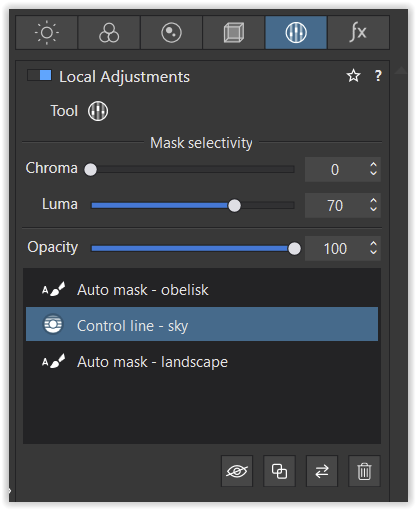
when you check your example (post #12) you’ll notice, that Auto mask resulted in a precise selection for the monument. While at the bottom part the Auto mask went a bit overboard, it was easy to correct (Windows: hold < ALT > to switch from Auto mask to Eraser function).
The sky was quickly darkened with a Control line (set the picker and adjust Mask selectivity).
→ Being an (almost true) B&W pic, the Chrominance slider had very little influence.
The not really ideal Auto mask for the landscape was ‘quick & dirty’, but worked in this case as I only changed microcontrast and didn’t touch any brightness.
have fun
I remember a photoclub colleague got his D200 modded for IR and did B&W,
where a dark sky contrasted the bright trees.
Gary, are you using the selectivity sliders? This is the “new” way of limiting selection, rather than trying to use just negative control points on positive ones that are not selective enough.
I am not. I tried briefly, but liked the old way better and then got fixated on trying to figure out where it went or if I was just imagining a difference. 
I’d encourage you to persist, Gary - - I struggled with it initially (it seemed to work in reverse of my expectations !) - but I’m now over that, and I find it enables much finer control.
John M
1 Like
Thanks, John. I’ll give it a shot.
That’s what I’ve got. A D5600 that’s been modded to 720nm, but then I found that I like 850nm better and use a screw-on filter.
It can certainly be a problem when you’ve been used to using an older tool and got used to its shortcomings.
Such is the case with Control Points, which were always a bit “woolly” in what they selected and, in order to deselect parts of the selection, you needed to apply negative points, which were also equally “woolly”. And, for sharp geometric shapes like your obelisk, you needed quite a lot of both positive and negative points in order to avoid ghosting around the edge of a selected area.
With the introduction of selectivity, we can now avoid all that hassle by being able to place fewer, larger control points and, instead of having to then start applying negative control points to limit the extent of an adjustment, we now have a better way of doing that.
If I take your image, I can create a basic mask with only five points…
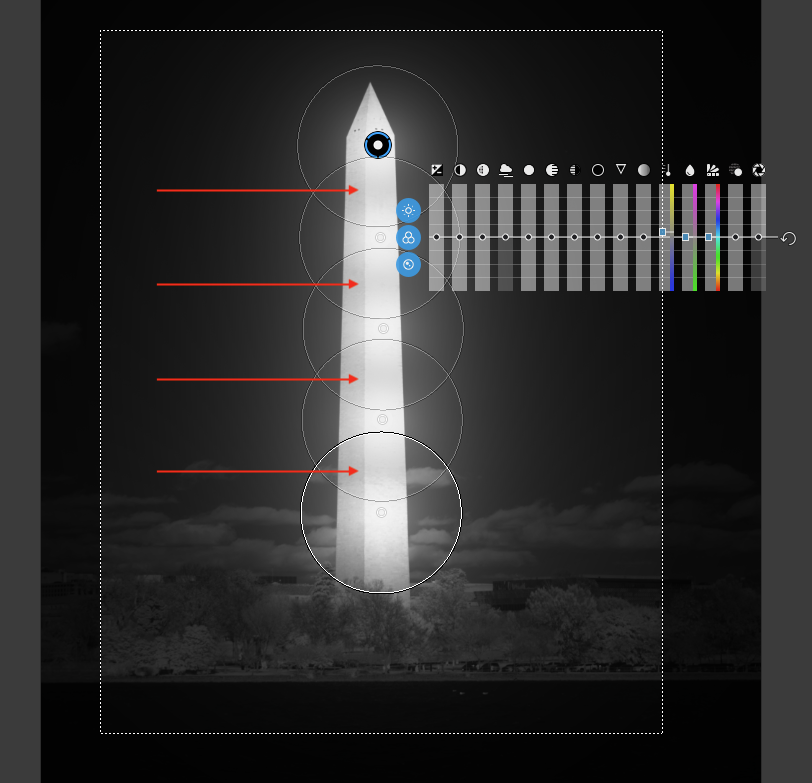
… but you can see there are parts of the selected area, between points, that are not as strongly masked as directly under the centre of the points. You can also see that, with the default selectivity, the mask isn’t particularly well defined and is quite “woolly”.
Simply increasing the Luma selectivity, in this case to 80, reduces the woolliness and better limits the selection to just the obelisk…
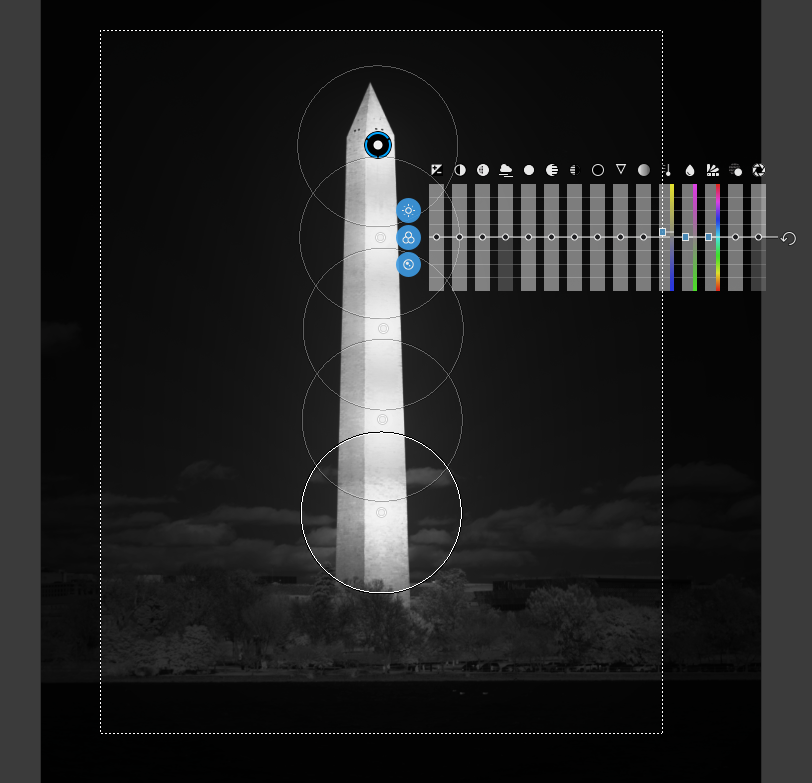
There are still those parts of the selection that are not as strongly defined, between the points, and, with SEP 3, you would need to add more control points on the obelisk to avoid this. But you would not have to add negative control points as before because the selectivity takes care of limiting the effect of the mask by detecting the border between the area you want to select and the rest of the image.
However, in PL5, Control Lines takes this one stage further, in allowing you to select an area, sometimes, with only one control line, placing a pipette and adjusting the selectivity to automatically remove anything outside the selectivity range, using the nearest available border. See my previous post for how that works.
The Control Line tool has been a complete game changer for me, allowing me to precisely select areas and objects for local adjustment without having to worry about overspill and ghosting.
At least try using selectivity in SEP 3 but, for the ultimate control, you really ought to try moving over to PL5 and using Control Lines as and when appropriate.
Out of interest, what is it about SEP that you think you would miss if you moved to PL5 for B&W conversions?
Joanna,
Thanks again for taking the time for such an in-depth answer.
I find that SEP provides more fine-tuning capability than the sliders available in PL5 Local Adjustments, specifically the tonal-based structure adjustments and the Amplify Whites and Amplify Blacks controls.
Gary
1 Like
When it comes to B&W rendition (well, from colour to … not talking about IR), anytime I prefer SEP over PL / FP – and still like the simple user interface of SEP2.
I wonder, if DxO is willing to revise some of their ‘new’ design.