All of which I would agree with but, there are quite a few images that I have made that would not have been possible without an iPhone - especially for candid shots where it looked like I was taking a photo of the glass on the table in front of me but was actually taking a picture of someone in the bar/café. With the iPhone, I not only get an interesting shot, reasonably exposed, I also get almost infinite DoF with both the glass and the subject in focus.
Now, what did I say the other day - it’s not the camera that makes the picture…
In general we can see a circle of 0.25mm as a point at a arm length distance. A A4 print is about 8.5 times the sensor size of a FF camera. That means that the max coc will be 0.25/8.5 = 0.029. These figures don’t have a scientific value.
I think your way of thinking is much to difficult. Start with what you want and then calculate what you need.
That’s not always possible. If your sensor has a pixel pitch of 12µm, then you are limited to that as the blur spot diameter and, subsequently, to the maximum print size that can be satisfactorily viewed at a given distance.
I just used the PhotoPills calculator and ended up with virtually the same results as TrueDoF-Pro. I don’t see what you are arguing about - they are two tools that both do the same job. I also use OptimumCS-Pro, also from George Douvos, which works the other way around but didn’t want to confuse folks with too many ways of doing things.
I have set my CoC, in PhotoPills to 0,009mm. Explained here, depending on the print size.
Also well explained in generell here.
And also to mention, “Secrets to exposure and metering for Nikon” from Steve Perry. This includes a 60 pages “Deep Focus Techniques” supplement, which explains all around this topic.
The first thing I thought, as I read through all this, is that with the illustrations along with the text, it all made sense. I’d like to say it became “obvious”, but that’s not what I mean… better to say that it became understandable.
Close the lens down to get more depth of field, but closing it too far creates diffraction.
My “mental picture” until now was that f/22 and smaller will probably create diffraction errors, and if I want a lot of depth of field, I will probably be somewhere between f/8 and f/16. Because of this discussion, my new “mental picture” is that f/10 is likely to work well, and I need a shutter speed to compliment that, which may mean raising the ISO accordingly. This reminds me of what one of the photographers in the Leica forum was suggesting, manually set the aperture to what I want, manually set the shutter speed to what I want, and leave the ISO set to “Auto ISO”, and let it set itself as needed, unless it goes beyond the ability of the camera - which is less of a concern to me, thanks to DeepPRIME.
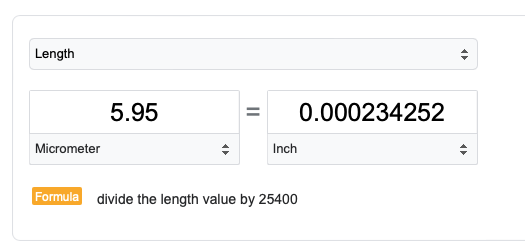
To be honest, my mind doesn’t know how to relate to something like “5.95µm”. Looking it up, I found this:
My mind still struggles. I think the only way I’ll get used to this is to learn what the desired value is in “µm” and then calculate what value I am about to use in capturing my image, and if it exceeds the desired value, to make adjustments.
To be honest, I find this as confusing as using “binary numbers”. At least with those, I know how to convert them to something I’m comfortable with.
Bottom line, I need to get comfortable at dealing with “µm”. Then, for me, the “reality” will seem more intuitive. OK, back to what you first wrote:
This leaves out one critical thing for ignorant people like myself - what is one “µm”
From this page: https://www.infinitioptics.com/glossary/microns-um
I learned this:
“Microns, also known as micrometers (represented as µm) are a length of measurement equal to one millionth of a meter. (1,000µm is equal to 1mm.)”
OK, I’m slow. But now I know that 30µm means 30 microns, or 30 millionths of a meter.
Back to the real world - I now need to get familiar with using this measurement, and will be able to use TrueDoF-Pro (I hope).
Depending on your hair, it can vary from 17μm to 181μm, so 30µm is about twice the thickness of fine hair and 1/6 the thickness of coarse hair. Now imagine a dot on a piece of paper made by a hair that has been dipped in ink.
Or you can do what I have done for that last few years and believe George Douvos and just use f/10 unless you want to restrict DoF or for macro work.
And don’t forget that diffraction is only relative to final image size. Unless you are printing big, 20µm is the smallest you need to go and will work for all but macro shots when you just adjust the camera until as much as is possible is sharp - known as empirical setting or suck it and see.
Peter, depending on what I’m photographing, I may want to use my dSLR, or my (Leica or Fuji) Mirrorless, but not for the reasons you are referring to. To me, it’s much more important how each type of camera fits into my photography. A mirrorless camera may have those technical advantages, but until I can’t tell the difference in the viewfinder between one and the other, I’m unlikely to change. Both the Fuji and the Leica give me a choice of whether I want to see a live optical view, or a digital view. To me, that is huge. The Nikon Z removes that choice.
Eventually I’ll get to try one, and see how I feel about it. For now, I will comfortably shoot my X100f or my M10, where I can pick whichever viewing method I prefer.
Or, I could buy one of these: Fuji X Pro 3
This could potentially replace all my current camera gear.
Hi mike,
I think where on different tracks.
I revere to the original header. Photolab5, sharpnes and focus.
Shuttershock is one of the unsharpnes factors. Point.
A bigger factor then say diffraction which you can avoid very easy
About your use of different systems, i agree : if you have them use them all in there strongholds.
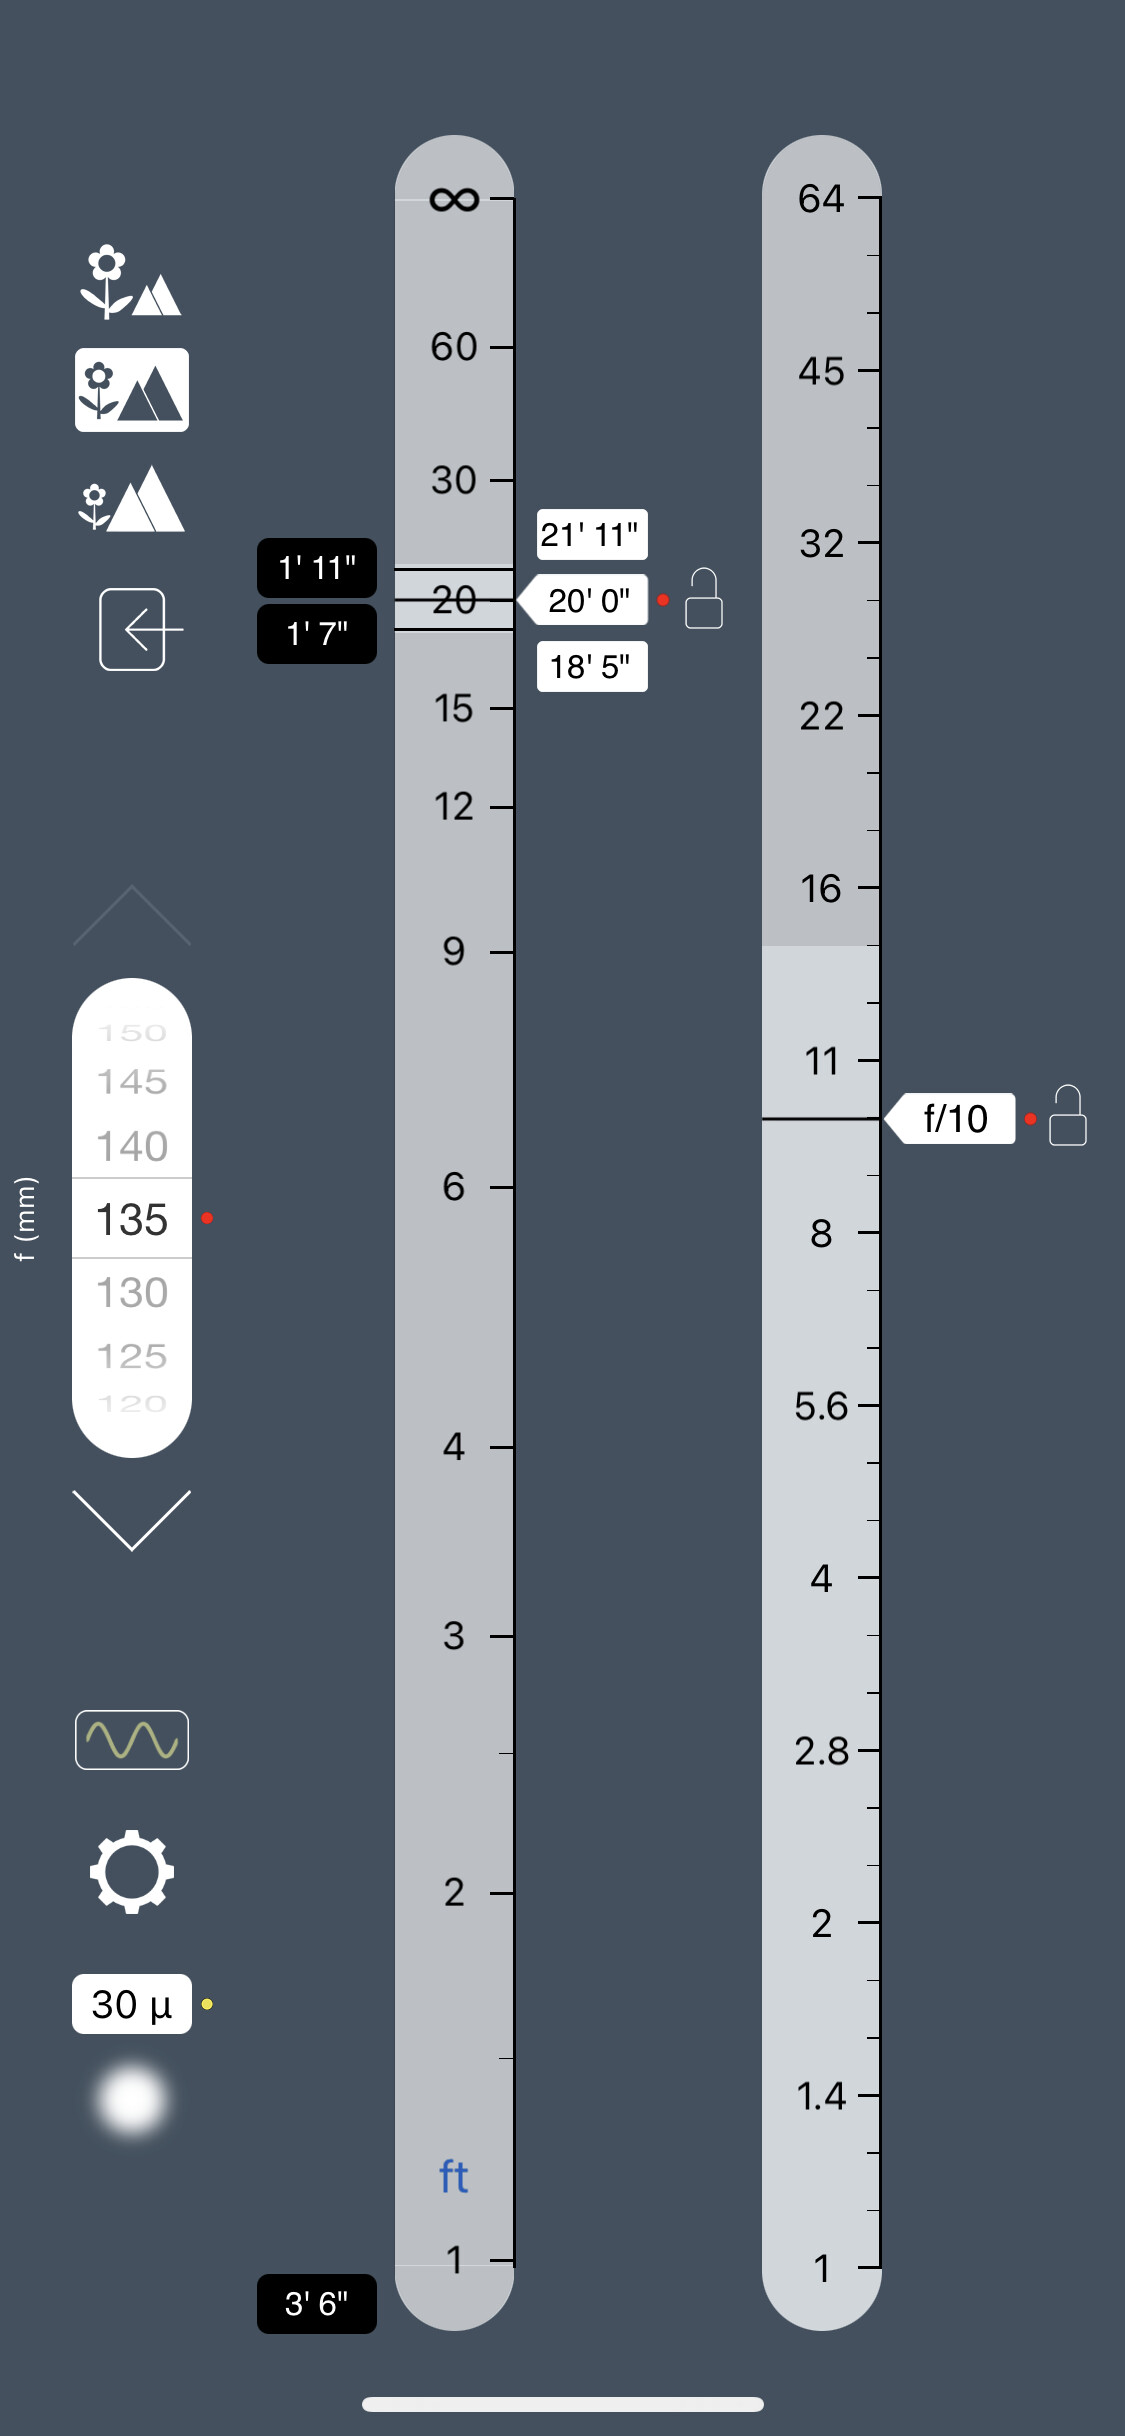
Aperture is set to f/10
Lens focal length is set to 135mm
The value at the bottom is 30u (how can I type the correct greek letter, rather than “u”?)
There are three icons at the top left, and the middle one seems to be highlighted - what do they mean?
It seems to already be using feet, not meters.
Fascinating.
I guess this might be a very handy tool, but I probably need to buy a rangefinder so I know how far away things are. Maybe by next month I’ll be able to use this fluently, without feeling so “lost”.
To add further complexity to this thread, I notice that no one has discussed focus stacking. But that really deserves a completely separate post. (And it’s a method that DxO PhotoLab doesn’t currently support.)
None of the thread opener’s cameras can do focusstacking with on board menus. And it’s not a help for every situation but best for landscape (best without wind), macros and other rather static work. Focustacking has it’s own challenges and I’m pretty happy, neither C1 nor DxO PL dip their toes into this deep water. Instead of adding more features I’d rather prefer to make some of the more troublesome parts work.
You need to hold down the Option key and press the ‘m’.
These are to change the distance scale for far away, medium distance and close-up.
That follows the region settings for your iPhone. If you want to use metres, simply tap on the ‘ft’ label at the bottom of the scale and it will change to ‘m’.
To set the blur spot diameter, tap on the blur spot and use the scale that pops up. Warning, don’t set it to 2, there is a bug that stops the app working until you reinstall it, that I have reported to George.
Tapping on the cog takes you to the settings and, from there, you can find the user guide, which is very wordy and something you don’t need to read end to end.
One setting that is useful is the ‘f Presets’, which you can add and remove your favourite focal lengths and, when you return to the main screen, you can tap on the arrows above and below the focal lengths and it will jump to the next preset.
The lighter grey parts of the slider are those parts that are not diffraction limited. You can see the default 30µm gives you a limit of f/14 - changing the blur spot diameter to 20µm will move this limit to f/10.
Time to open my experimental images taken this afternoon, trying to capture scenes that seemed difficult.
Stenis
(Sten-Åke Sändh (Sony, Win 11, PL 6, CO 16, PM Plus 6, XnView))
75
Don’t you think it’s an advantage to be able to see how the image is going look BEFORE it’s taken, with the settings you have chosen, than to have to chirp afterwords with the display and then maybe discover the settings needs to be adjusted before you make another new try?
… and what about taking pictures with OVF in really poor light? One advantage too is that since it’s easier to see in the dark in an EVF, you can also help the AF-system easier to lock aiming at some contrasty detail you can’t even see in a completely dark optical viewfinder.
Before I take the image? Why? I want the clearest possible view of what’s going to happen when I press the shutter release, so I try to capture the scene at the perfect moment. I almost always know what the image is going to look like, as long as I’m using the right settings. Chimping? I no longer do that, I gave it up ages ago. If my camera is on a tripod, I’ll take a test shot, but I don’t see much use in “chimping”; I’d rather be concentrating on the next shot.
As to the OVF, if I can see with my naked eye what I want to capture, I can see it just as well in the OVF of my Nikon D750. If it’s too dark to see what I’m trying to capture an image of, it’s unlikely to be a good image at all. Not so much with my Leica - sometimes that becomes a real challenge.
Yes, if the EVF and AF would help me focus on something I can’t see, that could be useful, but my d750 seems to focus anyway, even if I don’t “see”.
My Fuji X100f can switch back and forth between OVF and EVF. EVF is sometimes very handy, and I enjoy having it, but with the flick of a lever, it goes back to OVF. This kind of system I would be very happy with on my Leica or Nikon. I guess I’m saying I would like to have the EVF, as long as I also had my OVF. If it’s either/or, I’ll stick with OVF.
If I really want EVF, I could skip my cameras completely, and just use my iPhone…
But the problem is that you are only seeing an image already processed by the camera, not the final RAW. You are never going to see what the final image is going to look like on the camera.
The biggest problem I find with trying to use LiveView in low light is the noise that it creates by amplifying the light so it can be seen on the monitor. Added to which, it gives a terrible rendering of how bright the image is going to be and, if I use the DoF preview button, the image is less visible than it would have been through the OVF. I (thankfully) don’t have a mirrorless camera but, if the EVF, which is only really a small monitor, looks anything like LiveView, all I can say is no thank you.
What you see in the viewfinder is what the sensor sees. This IS the final RAW. You are seeing the actual image after the camera adjusted the exposure within the limits you set in the camera’s settings. The camera is not “processing” the image.
LiveView in lowlight with a Nikon DSLR is close to torture. Although, while I could “guess” my framing in the D850’s OVF in a very dark situation, the AF was still working, cool. I just didn’t know on which part it would focus. Or missing focus.
One of the advantages of an EVF for sure is a possible enlargement of the focus point. On a Lumix, I can even use the AF within an enlaged field, meaning the AF point is much smaller and much more precise. After 5 years of experience with Nikon Z and Lumix S I simply don’t need flapping mirrors anymore. I keep the D850, if there’s fast action going on and Nikon Z first gen or Lumix with their CDAF are not up to that task. But most of my “usual stuff” got better since I use ML.
I can appreciate some of the advantages of the OVF on my Canon 7D Mark II, but last August I acquired my first mirrorless body, the Nikon Z fc and I am really enjoying the EVF. When I shoot with the intention of creating black & while raw conversions I find it helpful to be able to visualize and frame my images when the EVF is set to monochrome. The camera is lighter to hold and use with my small prime lenses, the Nikkor Z 28mm f/2.8 SE and the Nikkor Z 40mm f/2. It is a simple light weight kit with lenses that meet my current indoor and low light shooting requirements, and even most of my outdoor requirements. The Z fc with one of those lenses mounted only weighs around 19 oz. Even with the elegant SmallRig L bracket grip add-on, the weight of the whole kit is still only a little over 21 oz in total, less then 600g.
Even though the camera does not have IBIS and the lenses don’t have VR, I can still get sharp images at fairly very low shutter speeds hand held. With focus peaking and the ability to magnify the area of focus I find it easy to manual focus and to also ensure that I am focused on the exact area I want for AF. I can also see the effects of adding Exposure Compensation directly in the viewfinder. No guessing…
Another advantage of mirrorless is that, unlike a DSLR, there is no need for a separate focus sensor which can occasionally not AF correctly.
While I still use my 7D Mark II and a variety of lenses I find I am relying on my Nikon Z fc more and more.