PhotoLab 5, sharpness and focus

Over the past few days, I’ve been involved in discussions in this forum for how to create sharper images. Over those discussions, several terms and formula and guidelines have come up that I don’t understand. My thoughts on focus, and depth of focus, are what I can see printed on my lenses, so I can see at what distance things will be sharp (focused) and over what range of distances things will be acceptably sharp. Most of my education, along with my confusion, has come from @Joanna but I felt like an Algebra student walking into a Calculus class - meaning LOST.

Maybe, if those of you who know these things have time to do so, you can please explain two things, starting simply, and working up to more complicated information. At the same time, I’ve learned that PhotoLab has tools that can help make things look “better” (I wanted to write “sharper”, but I’m not sure any more if that is the right word.)

I don’t know if these two things are done independently of each other, or if they are considered and adjusted simultaneously.

Also, based on what I’ve been told to do, which I agree with, I am shooting only in raw, and all the settings on my camera to enhance the image are turned off. Any and all enhancing will come from PhotoLab.

Not sure if I’m a slow learner, or if I’m just ignorant. Those earlier posts about settings and sharpness and circles of confusion made as much sense to me as looking at the schematic of an electronic device… none.

It’s not too complicated to be both. :grin: just saying… Talking about me, not you.

Forget the DoF scales on lenses, they are simplifying, generalizing and not valid for some “exceptions” (although good for “quick and dirty focusing”), but I understand the confusion. I once thought, the scales are really giving me sharpness from x to y, so if I want “everything sharp”, just stop down until the end of the aperture scale. If an illusion is too nice to be true, it might not be true. Maximum sharpness is where you focus at, everything in front or back of the pane of focus is less sharp. “Less” like in “more or less”.

2 Likes

Aaaarrrrggghhhh!!! I’m so sorry.

This stuff is complicated if you’ve never encountered it before, so let me try to explain more clearly here and if I go too technical, say so and I will explain another way.

Let me start in this post by trying to explain about CoC (circle of confusion). This is usually what someone looking at this subject ends up going around in :stuck_out_tongue_winking_eye: :laughing:

Seriously though, possibly easier than me writing my interpretation, try looking at only the first sections on the subject on Wikipedia.

When you’ve done that, let me know if you have understood that, then I can use the term to explain further.

Apparently you’re a confusing educator. I like them, they challenge their students instead of making them sleepy. :grin:

1 Like

Oh yes! I couldn’t have put it better myself. Thank you. Especially since many newer lenses no longer have such scales.

As long as I can stay just the right side of not being a confused educator :crazy_face:

I learnt how to teach from one of my university tutors - if you didn’t understand something, she would explain it another way. On one particular principle in programming, it took her five different explanations and me two weeks to finally grasp it. Once I had got it, I wondered how on earth I had had so much trouble grasping it - it was just so simple.

So, Mike especially, if you don’t get it, it’s likely because your brain sees things differently and I need to draw the right picture.

Example - What is the difference between a JPEG file and a RAW file? A JPEG file is like a ready made cake - a RAW file is a bag of ingredients to make the cake, with a label on the outside to show you what the manufacturer thinks it could look like.

Well, as soon as I expect something to be really complicated to get, I tend to ignore or even refuse simple explanations like in “naaaw, that’s far too simple…” and using different perspectives / views is a very good way to approach understanding. So, it’s not only teacher’s abilities but also student’s expectations.

And with the “confusing educator” I was just teasing, but you already got that, I believe :blush:

I’m curious @mikemyers : what has PL5 to do with “focus”? After taking a RAW-picture you can manipulate it a lot. But “missed focus” will remain a difficult to “correct” flaw, especially if details and a fair bit of changing light/shadows within the picture are involved. I just like to understand what you want to find out. Maybe not “sharper” but “clearer”? It all starts with your composition, and that starts with your decision what you want to “talk about” with your image. Don’t take it bad, but in some of your pictures I’ve seen I could not discover the reason to press the shutter-button and I thought (and might be completely wrong) “he wants the picture to show ALL of it, and even that is not enough for him”

1 Like

@mikemyers , I don’t know if you like to read other articles on how to focus. Maybe the following articles may help you:

Hyperfocal distance explained: Hyperfocal Distance Explained

and an easy way to focus as sharp as possible: Double the Distance Method Explained.

Both articles are from Photography Life. This site has a lot of articles explaining a lot of topics on photography.

1 Like

Several points have to be invoked to get sharper pictures, some are evident :

  • better camera, full frame with plenty of pixels
  • better lenses
  • fine focusing
  • lightning
  • process adapted
  • clean your lenses.

I have made a trip in Iceland with 2 mates that had Nikon D600 and 24-85 mm ; rather good stuff but it is windy, eventually rainy and they never used the lens hood and cleaned the lens with the knitting ; compared to my pictures, the loss of sharpening was evident though I cleaned only once my lens.

On this page, the first example illustrate the case of very low light ; processing with Deep Prime is astonishing.

The second example, a crop from an identity picture, the high definition is not at all necessary but the sharpening is completely visible at the size of the identity picture ; the light was bad, thanks again to Deep Prime.

Another example, this picture has been shot from an airplane at 80 km ; this time, Clearview was the good tool.

On this picture, focusing is perfect on the right eye ; though a short difference of distance, the left eye is not quite as sharp ; this is because lower contrast due to defocusing. This picture has been shot f/6,3, the maximum aperture at 240 mm.

For the process, you can add some micro contrast but without exaggeration. I add some because my lens is not upperclass.
You also may do like well famed photographers : ad much contrast and saturation, like Steve Mccurry (I have seen an exposition recently) ; but I find that the images are not realistic.

That said, you must adapt to the size of your pictures ; on my 23" display, I need not the best only if I want to magnify.

HTH

1 Like

Very good examples especially the first and second ones.

Deep Prime and ClearView are very useful even if too much ClearView definitely can ruin your image instead.

You use Micro Contrast too but I almost never don´t. I have never got all that friendly with it since it has been a total disaster on my repro photographed dia positives. In that case I really has to draw the slider in the very left corner and increase Fine Contrast instead. Otherwise it totally ruins every sky in my pictures. Digital images doesn´t seem as sensitive as my old dia but I am very aware of the Micro Contrast functions very powerful impact - maybee to aware.

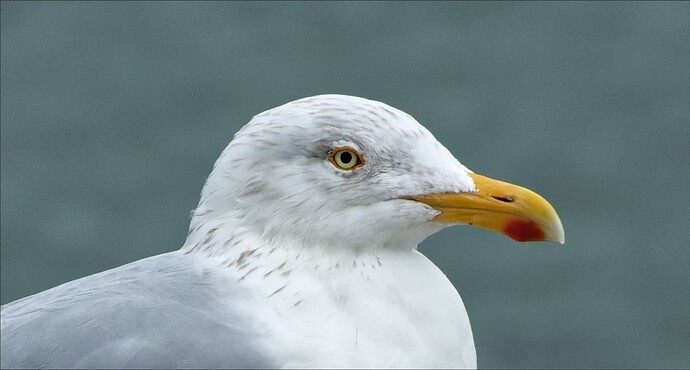
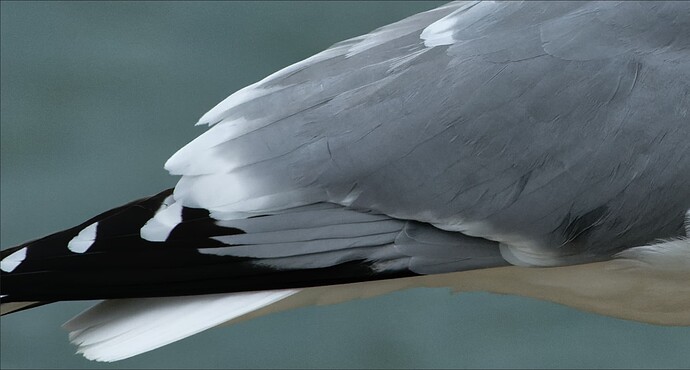
Just an example of what can be achieved with the focus perfectly on the eye of a seagull at f/10, with the Nikon 28-300mm lens. Just a tad (23) of fine contrast and 74 of highlights fine contrast, but nothing more.

Screenshot of 100% view in PL5…

… and the feathers…

Not bad for a zoom lens at 300mm :wink:

Here’s a small export of the full image…

@mikemyers maybe this short video can help? (if you are wondering how Dept of Field works…, or maybe this is not what you’d like to know at all? I couldn’t fully understand your need :wink: )

Let me know.
Steven.

Skin and grain texture are rather similar, I think. Excluding the grain and the microcontrast can enhance skin. It’s another question if that helps to improve the portraits in the judging eye of the model. Photogs love to see tons of details, kind of a reward for all the effort and cost. But it’s easier to soften the details than to detail a blurred photo.

1 Like

Try these tutorials on:
sharpness: Tutorials – Sharpness
depth of field: Understanding Depth of Field in Photography

The complete list of CiC tutorials is here: Digital Photography Tutorials

Hi,

I think there are different notions here : in focus/ out of focus, sharpness, depth of field, bluriness.

If something that is out of focus will not be sharp, you can have something on focus that is not sharp, or not as sharp as you would like it to be : imagine a landscape with mist or fog, it can be in focus and not sharp.
Second case that comes to my mind is lense quality (third could be from the other thread af lense not calibrated which comes back to out of focus case).

Movement bluriness is another case.

Dxo can help for sharpness/dehaze, not so for out of focus or bluriness (might be if slightly).

Some new softwares are promising miracles for out of focus pics, or blured pics, i have not tested them. You can also use PS in a very technical way ( see tuto by piximperfect, a PS master ).

So to sum up, i would say (and feel free to challenge this)

Bluriness : stay steady, don’t drink too much, use tripod, adapt speed to subject, lens, Mpixels (buy an hybrid with dual stabilization for stills)

Focus : use magnifier (live view/hybrid evf) of course don’t shoot automatic AF, (buy an hybrid).

Depth of field : back to my Nikon F50 era, i printed hyperfocale distances of all my lenses on a notebook. You have lots of app now but I don’t use it anymore, I use rule of the thumb: focus at third of the distance, ( not easy on the filed to estimate 1,74 m for a hyperfocale distance) and use focus peaking (buy an hybrid) ; i also focus stack (macro/lanscapes) in Affinity (buy an hybrid to take bursts with focus changes) ; of course choose right focale.

Sharpness : prime lenses. Dxo tools with LA…too sharp not good (a cloud is not sharp in the sky).

Enjoy !

Those scales might not be perfect, but they’ve worked for me since the 1960’s. Only one distance is “sharp”. The scales apply for “acceptably sharp”, which is not the same thing. If I want more depth of field, I stop down, assuming it’s reasonable to do so. Everything in photography is a compromise.

@StevenL - I’ve known this since the 1960’s, when I used to use the depth of field scale on my old lenses, and if I was shooting at f/11, I would line this up on my lens for infinity, then check the closest something could be “in focus” - as was said in this video - which is WRONG The reality is only one distance from the lens will be IN FOCUS. Other distances may be in acceptable focus, as they will look acceptably sharp to someone viewing an 8x10" print at arm’s length, which I think is what the scales are all based on.

I thought I knew and understood Depth of Field just fine, but reading through this thread over the past few days, there are lots of things noted here that I never heard of before. That’s why I started this thread, and I was hoping to learn about all those new things here, and gradually improve my understanding.

I think most of my questions are about things @Joanna posted, which I either don’t understand well enough, or never heard of before.

I tried to change the title of the thread to “PhotoLab 5, Sharpness, and focus”, but apparently that change didn’t “stick”. Focus is only one thing that can lead to lack of sharpness. I hope I explained this in my first post here.

Yes, what you just linked to is valid, but it’s not complete. A photo that looks good when the 8" x 10" print is viewed at hand’s length is going to look awful when it’s printed ten feet wide to be posted on the side of an airport walkway, where I’m only a few feet away from this giant poster - unless adequate attention is used in making the print, it’s going to look terrible. And if I were going to print my photos on a deck of playing cards, a few inches wide, and held at hand’s length, it will be the opposite. Much more will appear to be in focus.

How about me, right now, viewing my images full-size on a 24" wide monitor at arm’s length from me?

Be aware: These tables and DoF scales all come from a time when pixelpeeping needed a microscope to check the negative. It’s far too easy to get lost in 400% viewing ratio. Are you sometimes printing your files to get images? The things hanging at some walls? It’s so tempting to get lost in pixelpeeping but these days my prints say the final word of judgement. And if I do like the print, I really don’t care about noise, 0.5% more or less resolution - not even 5%…

2 Likes

Yes, did it, and (once again) understood it, up until the point where the math formulas and equations started up. I think long ago, even those made sense to me, but it’s all ancient history, along with other things I’ve learned and forgotten. I used to be able to calculate the height to the “center of mass” of a ship, something one wants to know, as in how much can a ship roll before it rolls over. Now I remember the basic concepts, but none of the details.

I don’t see much need for re-learning how to do the math, for naval architecture and marine engineering, or photography. I read stories on how someone examined the artwork of old photography masters, and figured out how their photos worked so well - but I suspect the photographers never even considered any of that, and just positioned people and things until the image came together in their mind. Also, for every masterpiece we see and discuss, how many other dozens, or hundreds, or thousands, did they discard?