I have constantly been clicking on “show masks” during this procedure. I guess instead of posting images, I should capture a short video. In the meantime, I’m stuck, until I learn how to add an additional (negative) correction to go along with my control line correction. I suspect there is some tiny thing I’m missing, to get this to work. Later today, I just woke up.
Hmm, here is what I see:
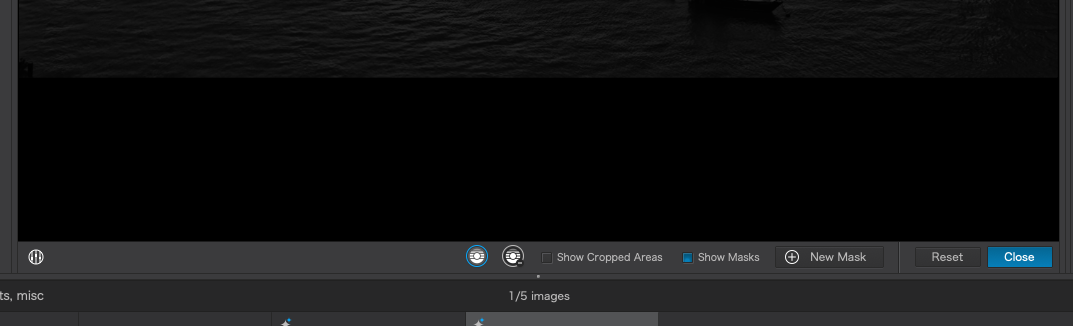
For whatever reason, the “Protect an Area” is missing on my screen??
I think there are demons inside my computer, deliberately trying to make me more confusabobbled than usual…
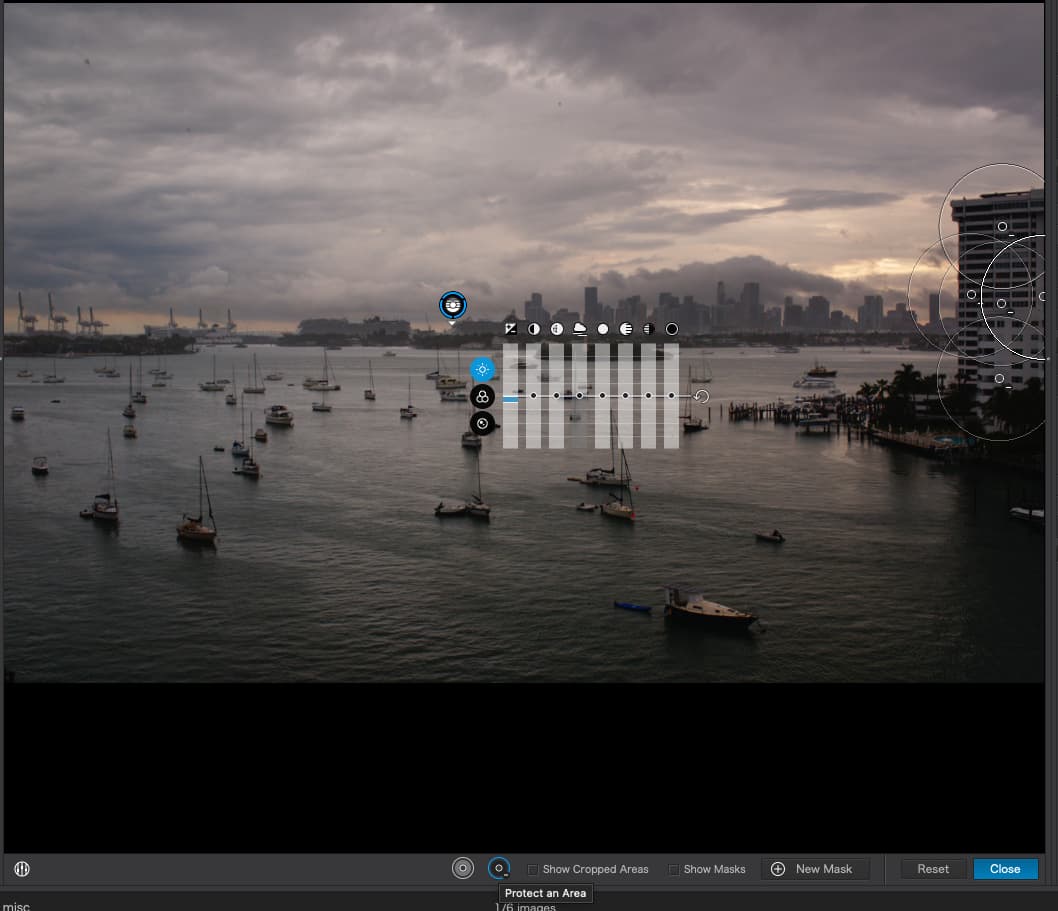
Just hover the mouse cursor over the icons to the left of the Show Marks / Show Cropped Areas boxes on the bottom of the Control Line window and you will be surprised…
Aha!!!
“Hover”
Well, that explains why I don’t see the words for about two seconds.
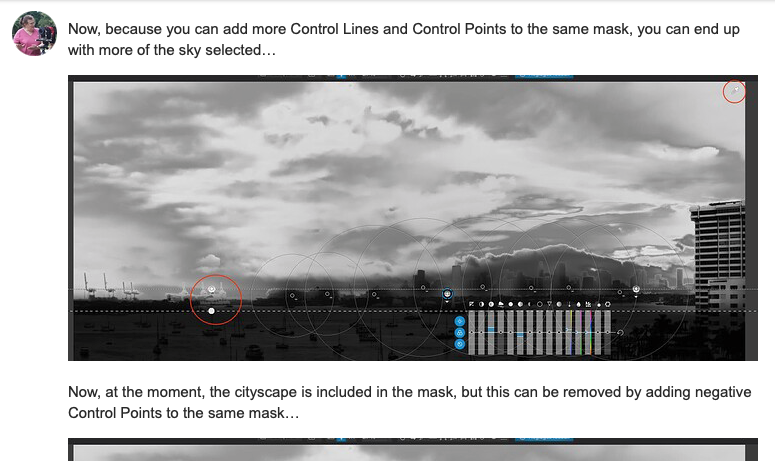
Since I wanted to “paint out” the building with a mask, which I now accept is not possible, I will do what @Joanna did, lots of “negative control points” to not only cover the building, and also the skyline, the buildings off in the distance. Being much smarter than I am, @Joanna added the graduated filter to lighten up the water - which I guess was a good time to do that. I was going to deal with the water as another step, much later.
In retrospect, I wasted a lot of time in trying to use a mask to protect the building at the right.
So, I will go back to the original image, and do all this on my own, using what I have learned here.
One last question - is there any way to leave a ‘note’ about each virtual copy, that I can read as I hover my mouse over the VC images at the bottom of my screen? I know what all five of them are right now, but a year from now I won’t unless I can leave some kind of note.
No you cannot. But on the Mac version you can give your virtual copies a unique name which may help. This feature is not available on the Windows version.
Mark
I usually create a textile in the same folder as the ‘master’ image to jot down notes.
In my workflow these text files have the same name as the master file, just the extension is different, so it would be something like DSCF4930 | 2023-04-09.txt
A simple text file created with TextEdit suffices for me, although you can make it as fancy as you like.
These files are not visible from within DPL but they are visible from my DAM which is good enough for me.
Well, I’m closer, but not quite.
I made a new VC, did some of my basic revisions (horizon, crop, exposure), then went to add the control line.
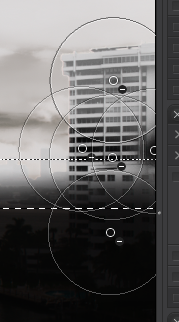
After creating my control line, I now knew how to create a “-” control point and how to bring up the message “protect area”. But when I went to the control point, wanting to change the (negative) strength of the control point, there was no way to do so. The settings in the box in the middle were for the original control line. Here’s a full image at this point:
The negative control points don’t seem to be doing anything yet??
I think I’m a lot closer, but it’s not obvious how to make the control points “stronger”.
Where did you place the pipette and what were your selectivity settings?
You can’t change the strength of a negative control point or control line. They just protect the area from the effects of the associated control point and/or control line. When you look in mask view you can see what areas are protected and which aren’t . You can enlarge or add more negative control point and lines as needed. It would be nice if you could just paint a mask or erase the affect on a specific area with control pointsand lines, but that feature is unavailable. There is an erase feature with the graduated filter. It would be great if something similar was available for control lines.
Mark
Pipette was placed in the top right corner, like what you did.
Oops, it moved to near the center of the image??
I moved it back to the top right, but nothing changed.
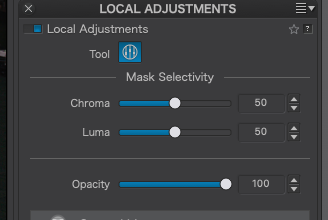
Sensitivity settings, as shown in Local Adjustments Palette:
Hmm, you are right, when I look at the mask view, but they’re not doing very much.
If I make many, many, more control points, there starts to be the desired effect.
Eventually, I got this:
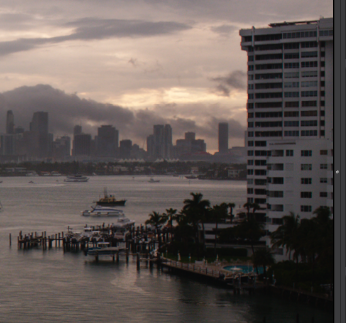
I think I ended up with the result I wanted, but was this done correctly??
The sky is close to where I want it, and it no longer looks like the control points are being darkened by the control line. If so, more control points to be added…
Also, how do I move the controls for the control line out of the way, so I can work on the area behind them?
So, you left the sensitivity on default, which does nothing to separate the sky from the rest of the image. Play with the sliders and see how much of the mask turns white or not.
Nope, see above.
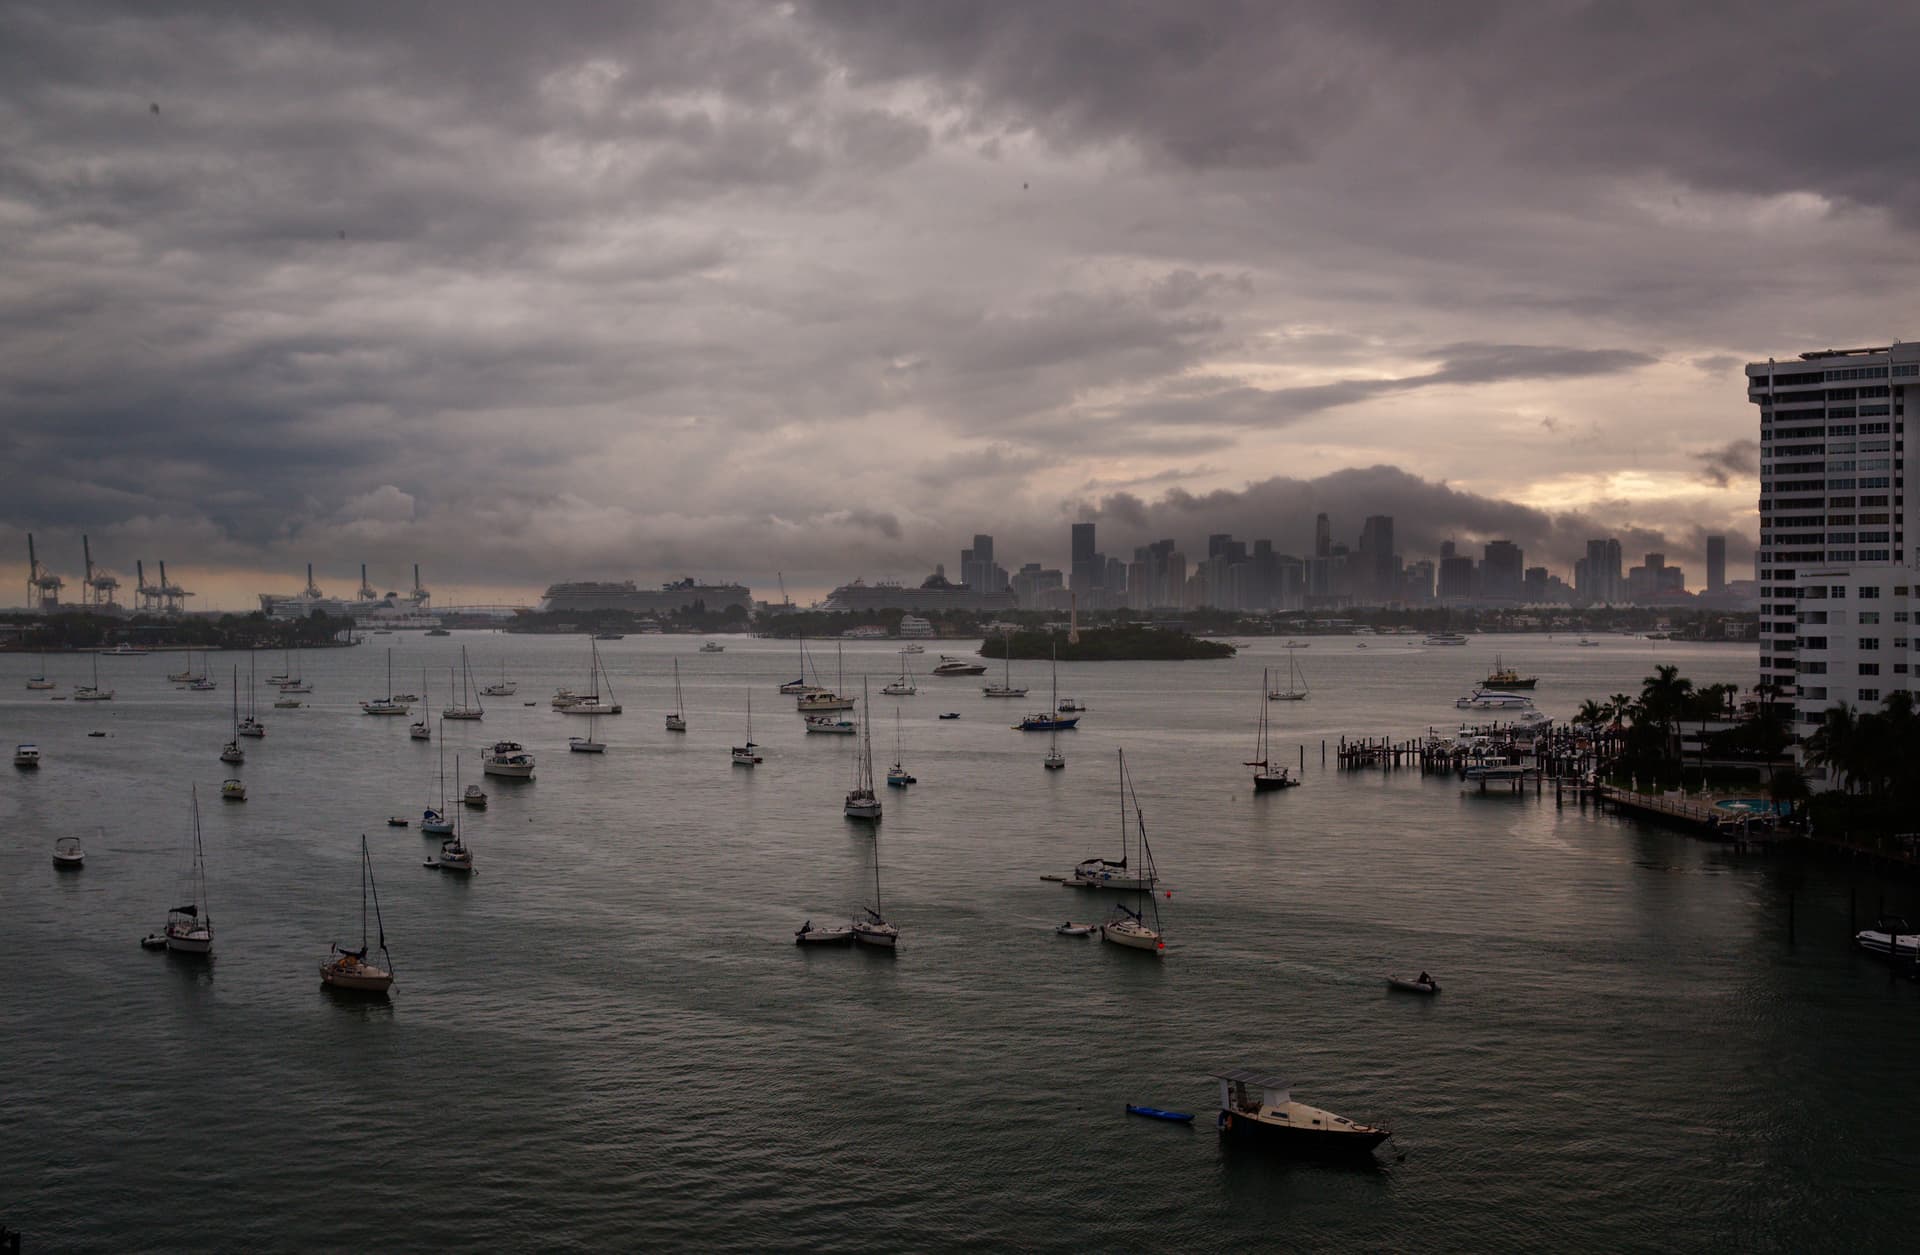
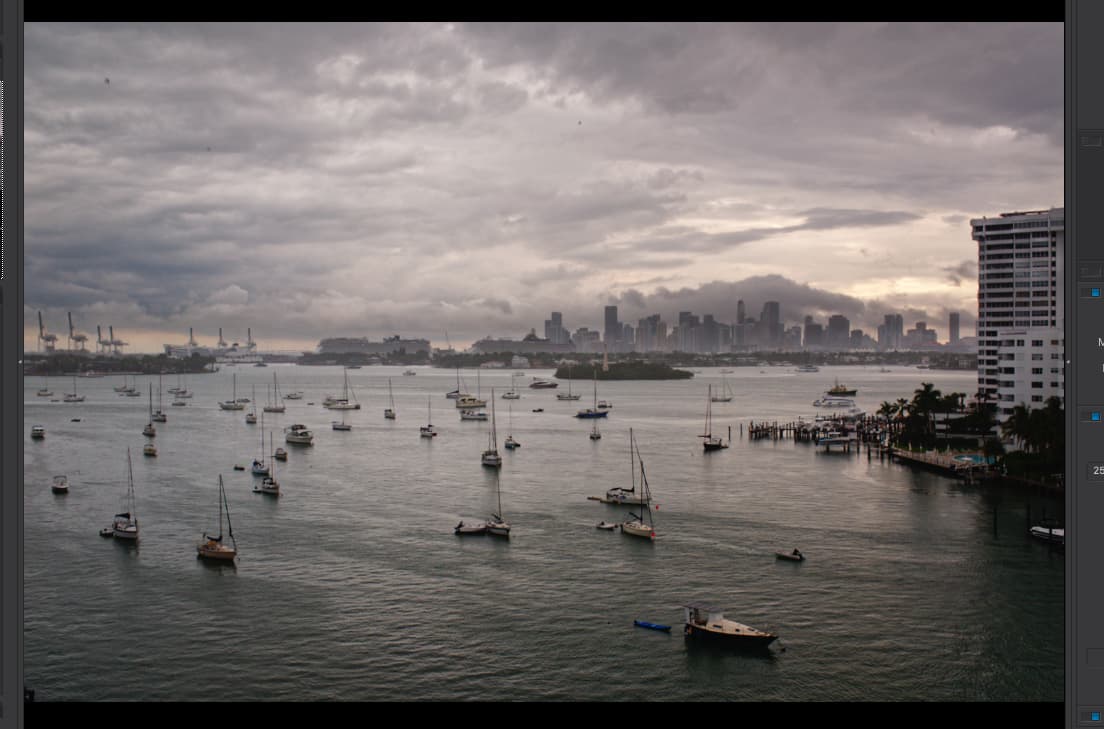
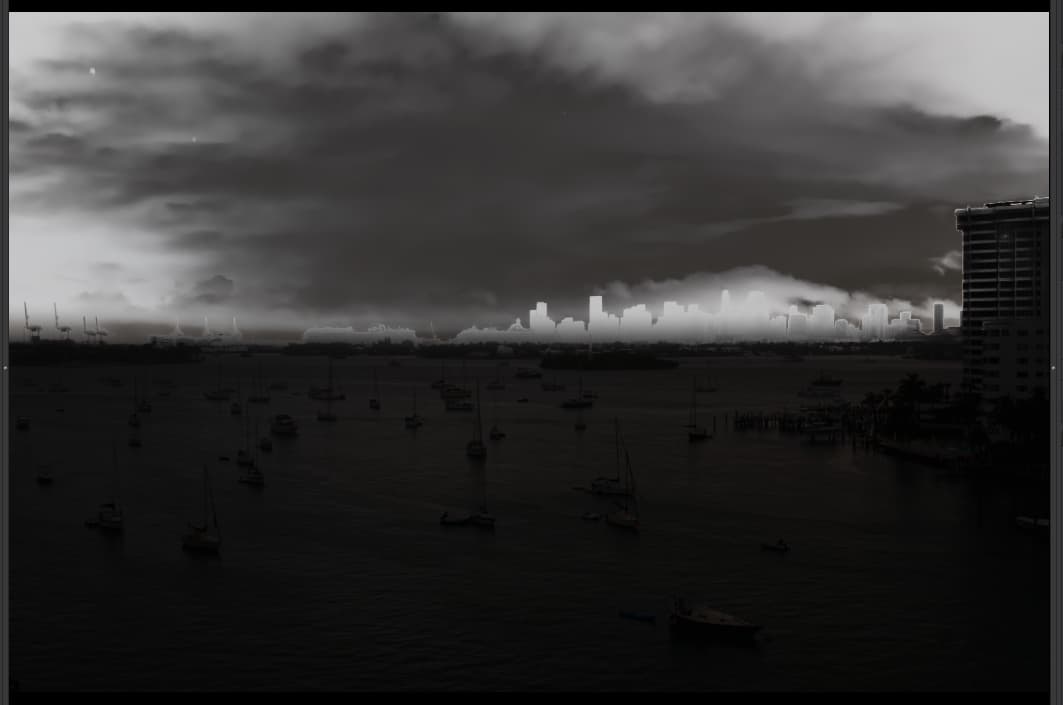
This is an export from the image as-is right now:
…and this is the .dop file as of now:
DSCF4930 | 2023-04-09.raf.dop (108.7 KB)
Time to stop, catch my breath, and sort out what to do next.
Few of the other suggestions are done yet, and I’m not even sure this is done.
The sky matches the image, the building isn’t darkened too much.
I think the whole image needs to be a bit lighter, and maybe with more punch/impact.
Which will get me something like this:
I would be tempted to stop here, and move on.
I’m not a @Joanna, and I don’t notice anything else I need to do.
I like the water dark, like it is here.
I need to practice all the above more often, so I don’t forget.
Just noticed this - will try now…
I prefer the way it looks without changing “Luma” or “Chroma”. Both are still set at 50.
But this is not how Control Lines are meant to work. You might as well stick to graduated filters.
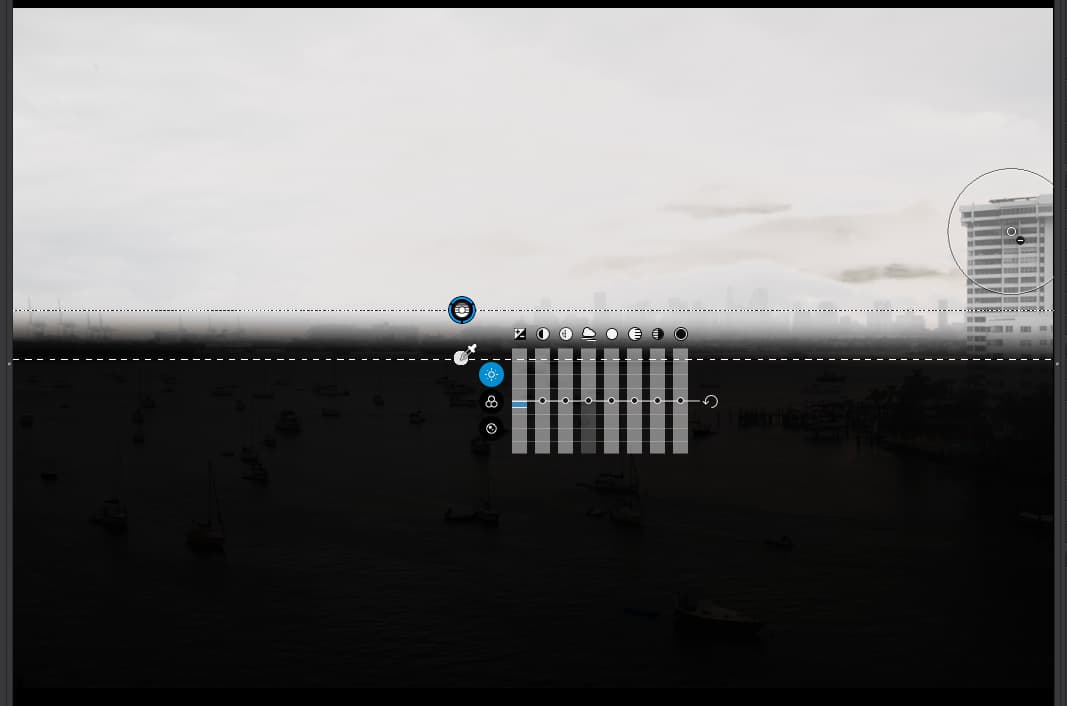
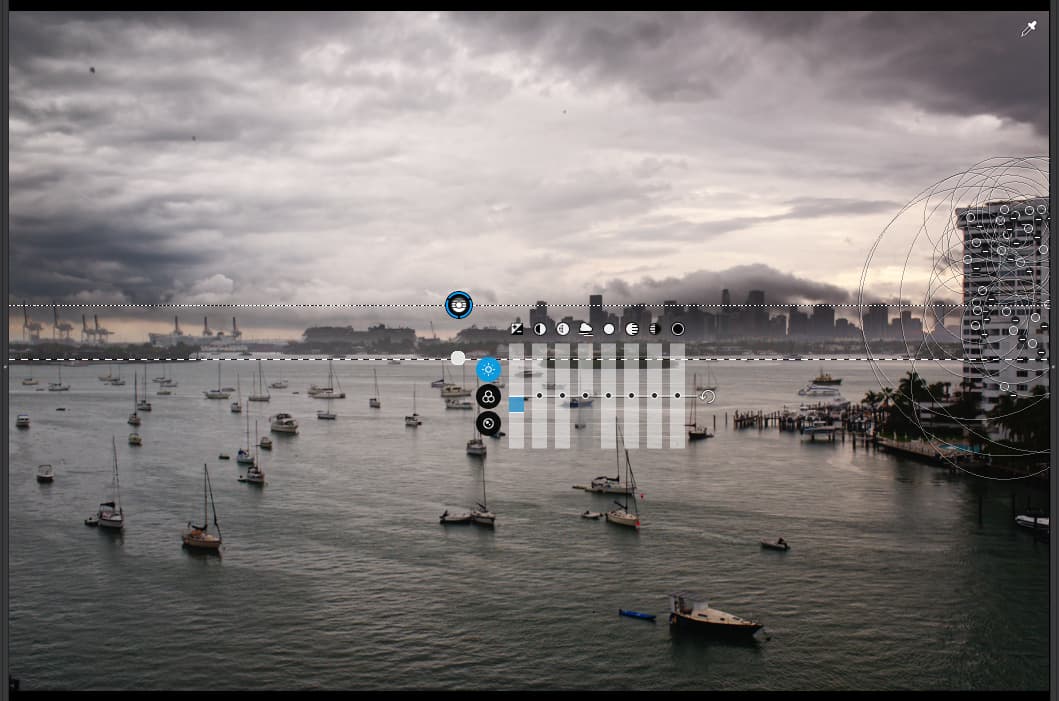
Here is an mage with the default 50/50 sliders…
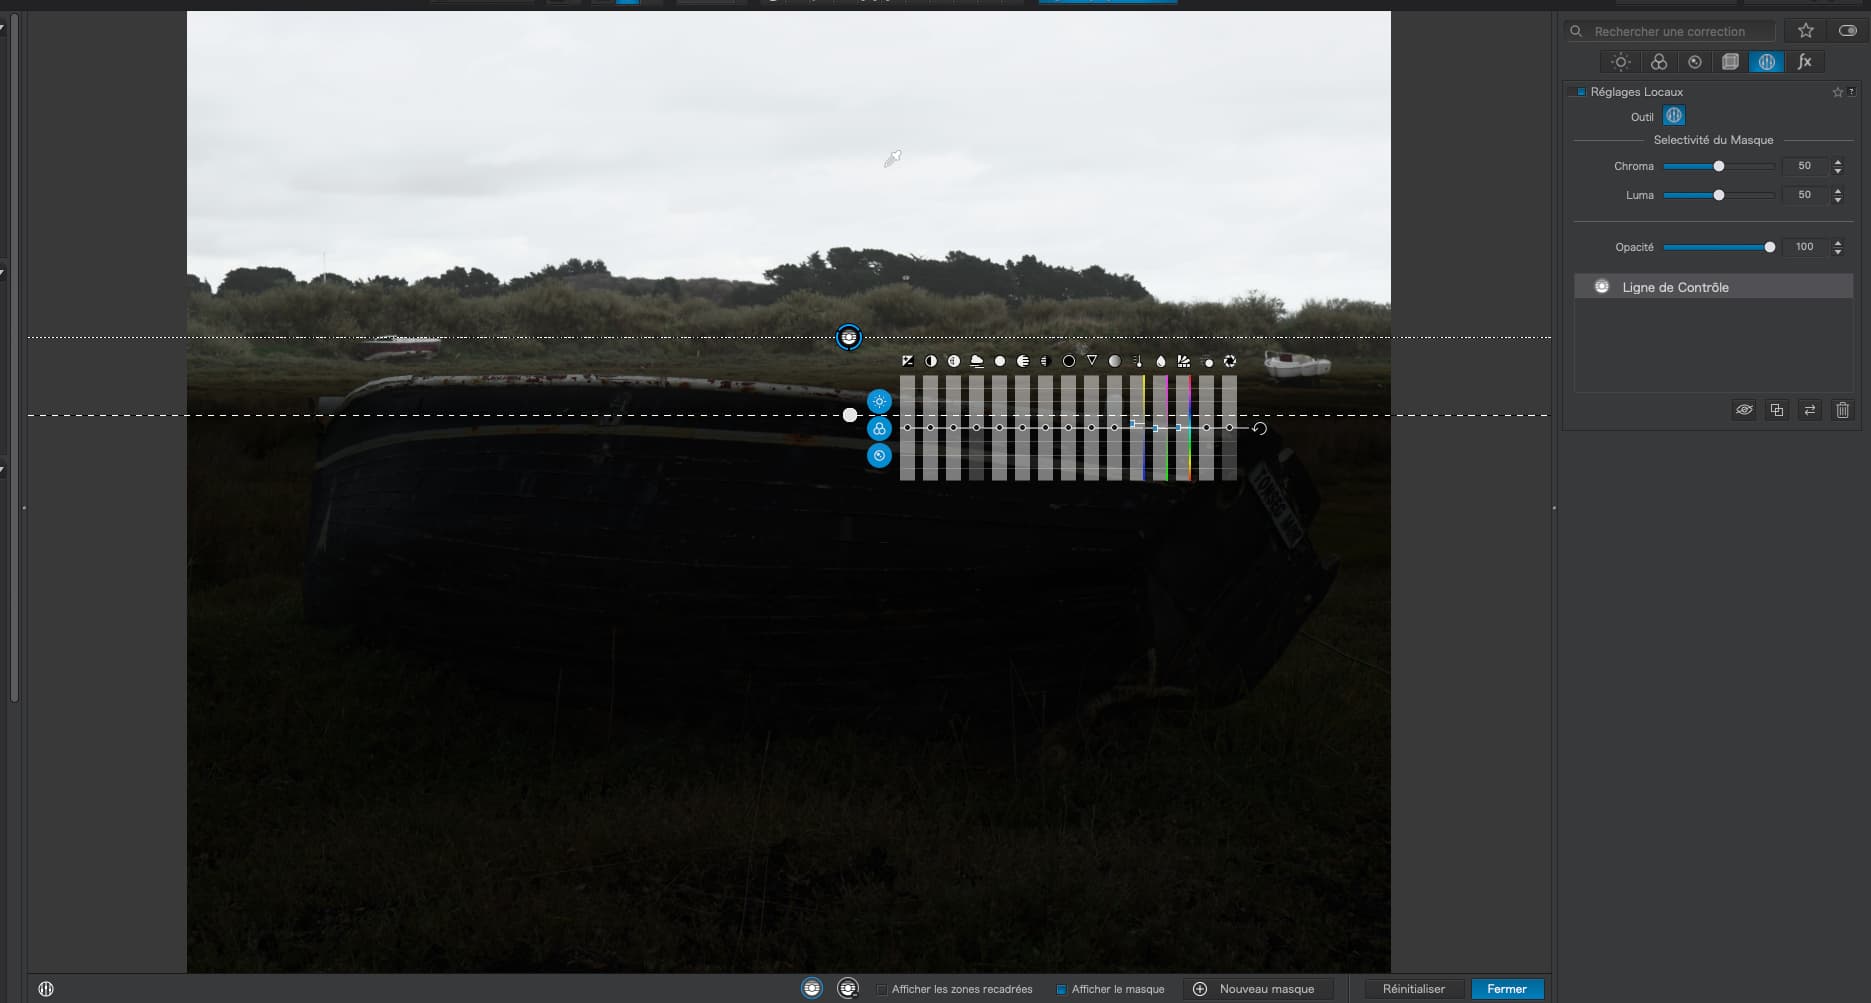
Notice how the top part of the foreground is not properly black, indicating that the mask will partially affect it, just as a graduated filter.
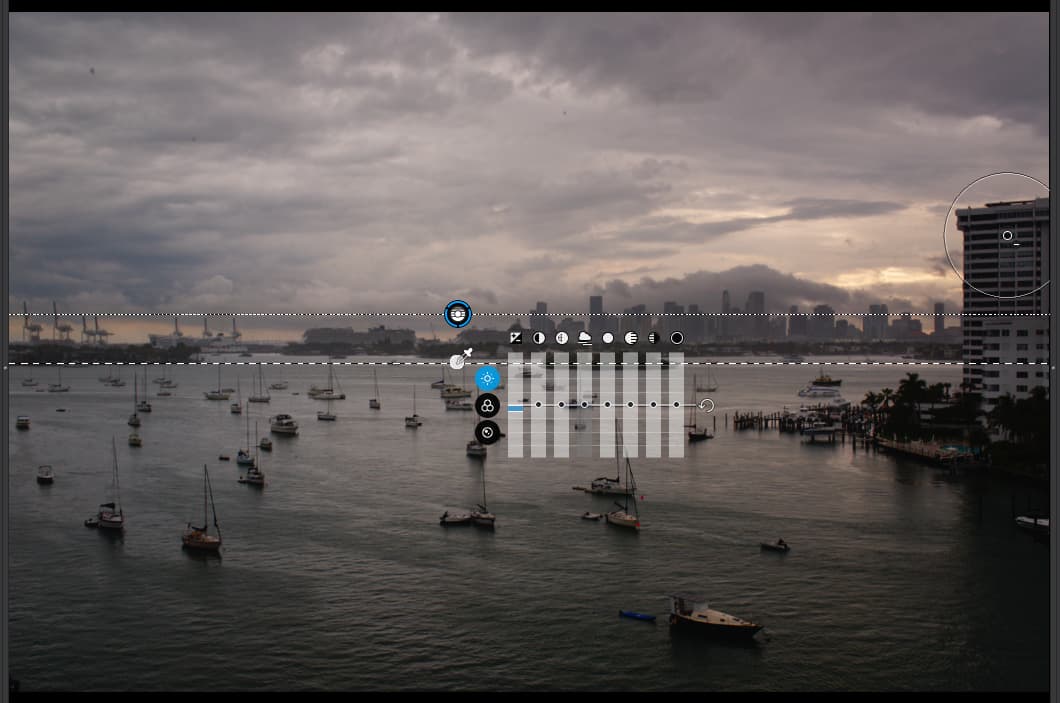
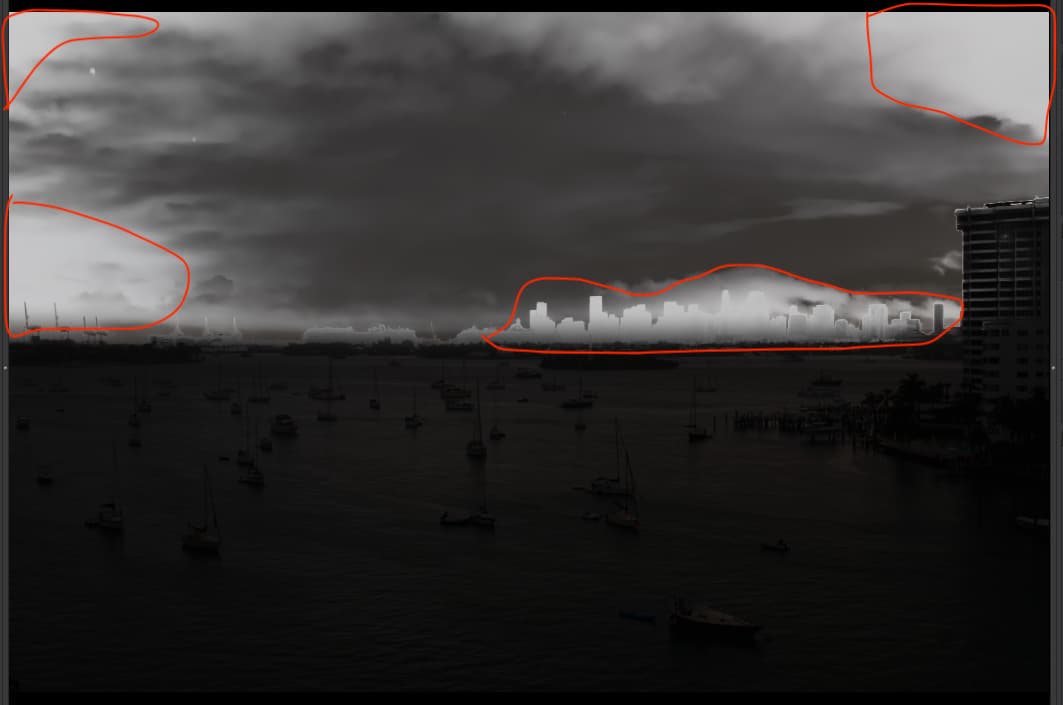
Now, if I adjust the selectivity sliders…
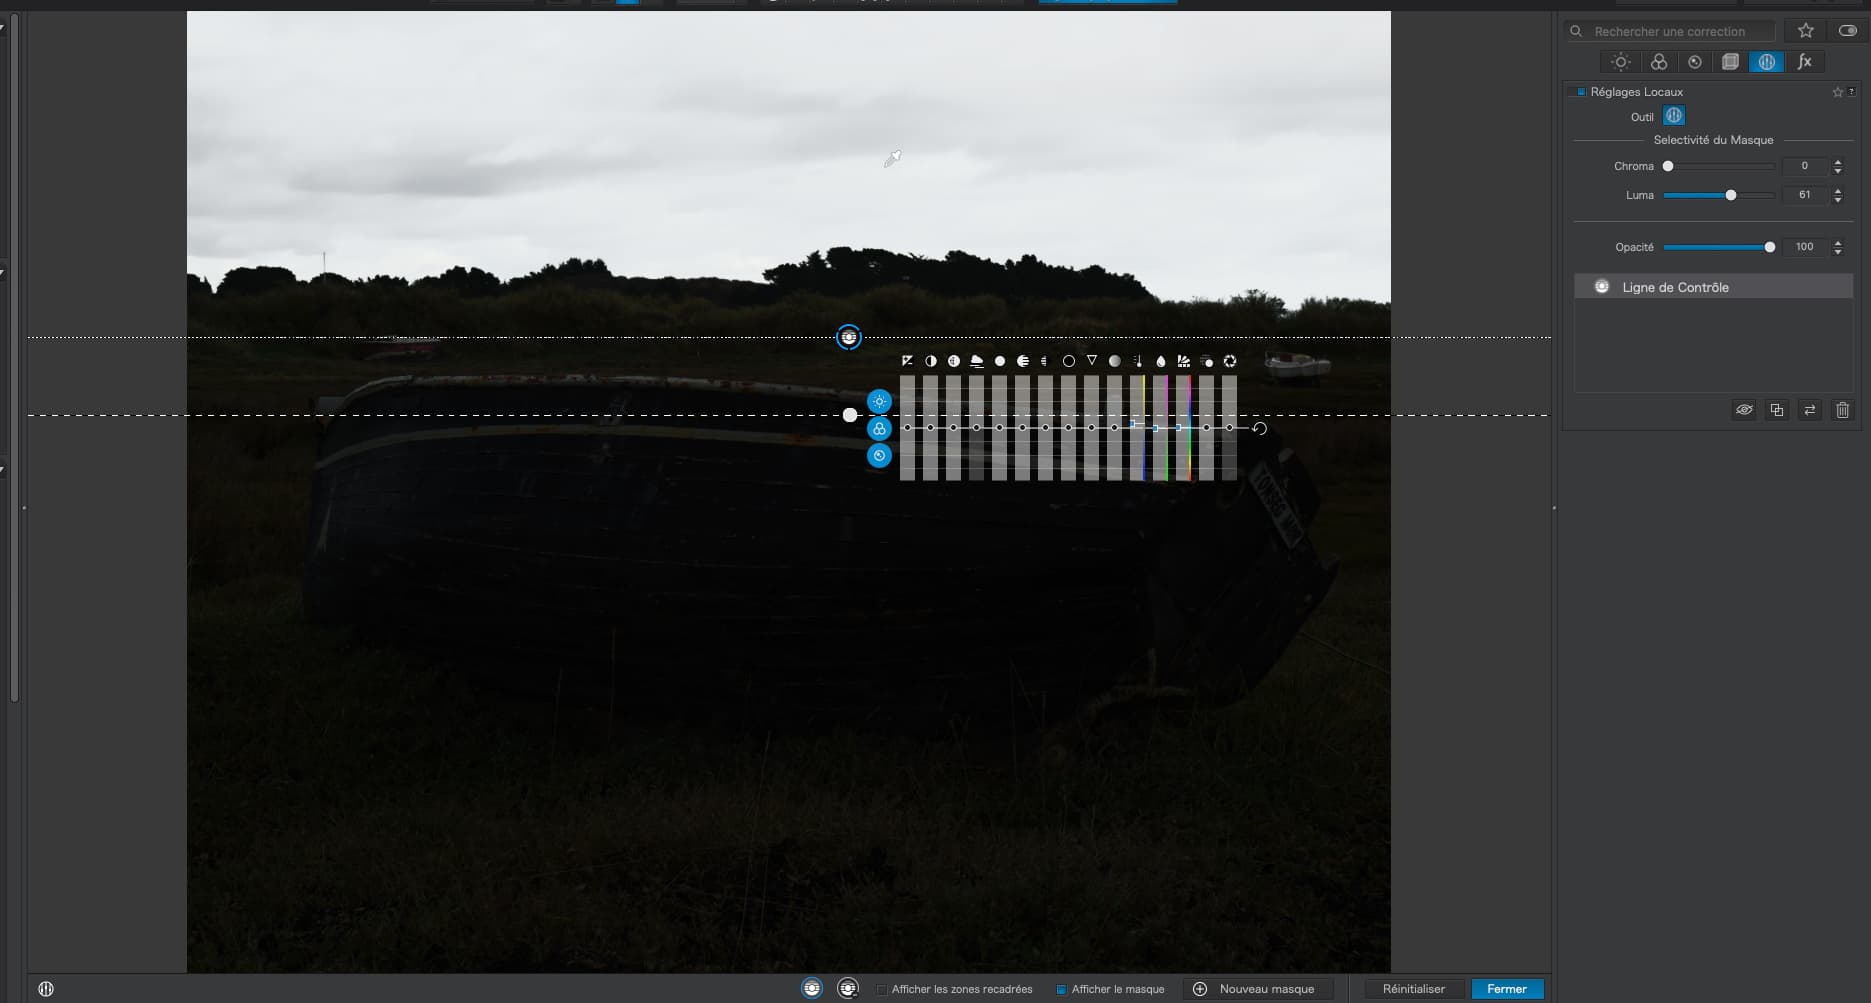
… you see how I have managed to turn the foreground almost completely black, whilst keeping the sky almost completely white. Thus ensuring that only the sky will be affected by any adjustments I make to the Control Line.
So, before…
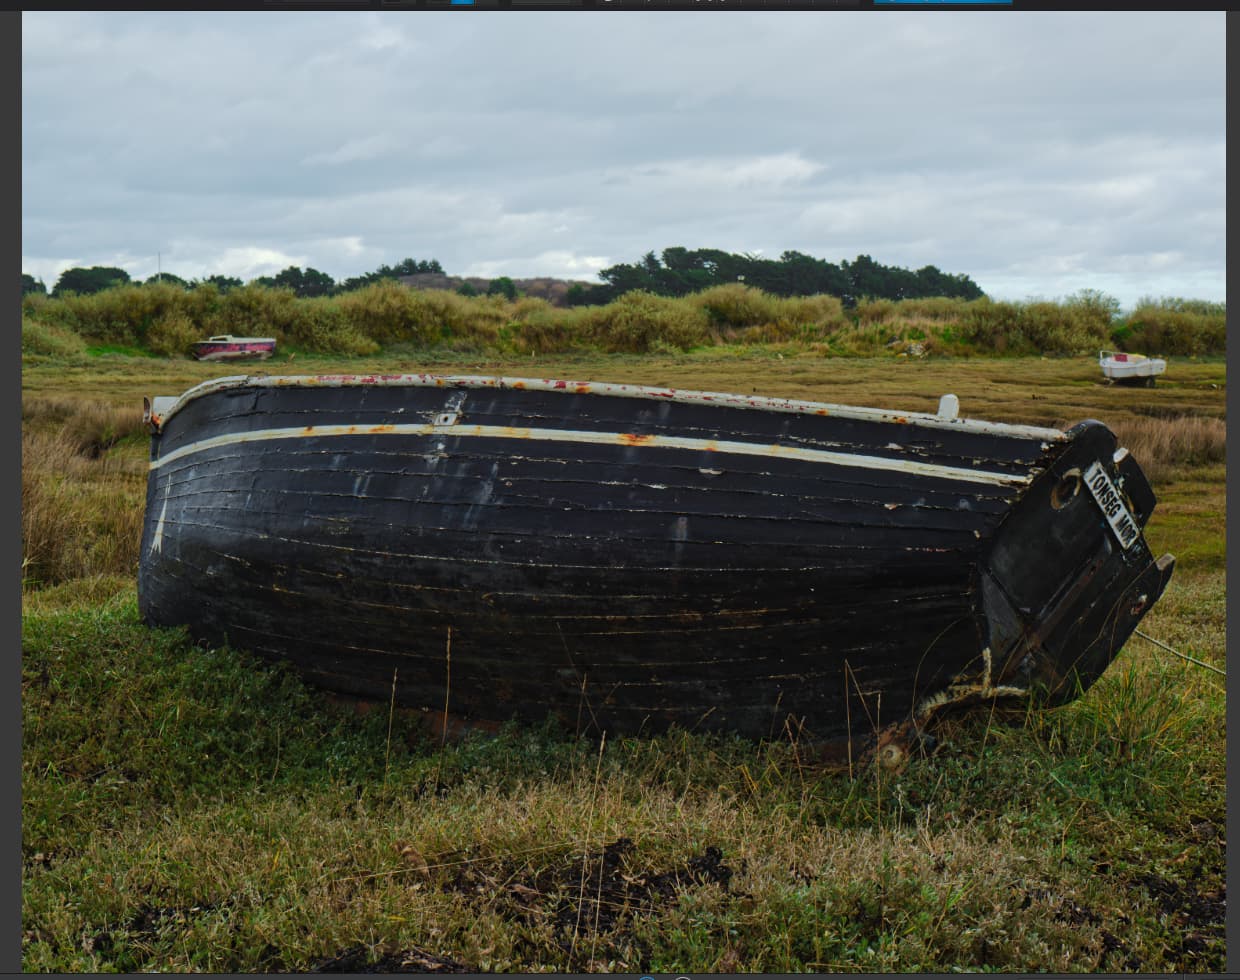
After…

Well, let’s see - yes, in your first photo, the “trees” near the top are dark gray, not black, so the control line isn’t properly protecting that area.
In the second photo, yes, those trees are now black, so presumably, the control line is not affecting them.
And yes, in the bottom pair of photos, the sky looks best in the lower photo.
So, I just tried it on my image, in this case to 75, the sky got much brighter, as if the control line was no longer doing as much as I wanted. So, I re-adjusted the “Exposure” setting on the control line, which darkened the edges of my image, and left the middle of the image brighter than I expected. Interesting effect. It’s not what I was trying to do, but maybe it is better???
I prefer your version, in the comparison I made between my image, your image, and Wolfgang’s image in the other thread.
Thinking about this for a while now - best thing for me to do is make another VC, reset to the way it was before editing, and once again try this from the beginning, with a blank slate.
I may make a list of what steps I used, and in what order I used them.
check where you position(ed) the picker …

1 Like
This is very important since the filter only really affected those parts of your image that appear white…
1 Like
However ignorant I am today, I was much more ignorant a few days ago. The reason I put the “picker” there is that ever since @Joanna did this, I’ve simply copied her.
I didn’t really understand what I was doing, and a lot of what I thought I understood was wrong. Heck, even the guy who wrote the instructions on how to do this stuff got things wrong. I bet not more than 10% of the people in this forum understand the things that you and especially @Joanna have been trying to teach me - eventually I WILL get it right, and I’m closer to it now, and will be more so in a day or two.
As Joanna pointed out, there are a huge number of settings, and to be proficient in PhotoLab one needs to understand most of them, the more the better, and to understand how they relate to the rest of the settings.
Now I understand how important it is to position “the picker”. Later tonight, I plan to take one of my images, and move it around on my screen, watching how it affects the mask, and the results.
…hey, for everyone else reading this “off-topic” thread, how well do you think YOU understand how control lines work? …every time I used to think I did, I was proven wrong. ![]()