Editing high dynamic range images in PhotoLab 5

Worse (better?) than that - I put the D750 in Live View, so the horizon line was visible and green, and I tried to ignore the image, but carefully watched the histogram.

Perfection - I don’t think I will ever reach “perfection”. I am never satisfied, and each new day is an attempt to do “better”, not “perfect”. Maybe in 20 years, should I live that long, and still be taking photographs… Maybe in a year or two, if I continue to study what you say and do?

Aha!!! Now I understand!

Interesting - my camera doesn’t focus unless I press the “back” button. So I should have set the camera to manual focus? I know it’s unimportant, but it was re-assuring to see the camera of whatever it did, and I have no idea why it focused at all? If I press the shutter release on top, it does not focus, only when I press the back button.

I used to dream of being able to do that - never could. Amazing what new technology and good glass, and a solid tripod, and an electronic shutter release can achieve!

More things I didn’t realize, and wasn’t aware of…

For even more, see my addenda, which I didn’t think of at the time :nerd_face:

Just because the top button doesn’t activate auto-focus doesn’t mean that auto-focus isn’t activated. If I’m working on a tripod and just awaiting the light, I will always turn off AF in case something flies in front of my focus point at the wrong moment.

Also, if you are using Live View, you don’t need a shutter delay because the mirror is already up, hence no mirror slap.

I’ll remember both of those points for next time. Will read your addenda later today, am leaving now for a day-after-thanksgiving-dinner/lunch. Turkey!!

Doing it your way, I won’t have to plan in advance where a plane or boat might be at the moment the image is captured. With the camera on the tripod, LiveView seems like a natural way to view the scene for “timing”, when/if I need or want to.

Today it’s bright and sunny and clear outside - who knows, maybe I will get a more spectacular sunset…

Here’s a version of your earlier shot. Nothing much wrong with it.

Here’s an export…

And here’s the DOP…

_MJM9830 | 2021-11-25.nef.dop (10,6 Ko)

I really like the crepuscular rays that I managed to find and bring out.

@mikemyersNikon ML-L3

Using PhotoLab 4 to process sunset photos - #37 by Wolfgang

  • usually I don’t use LiveView not to drain the battery to much
    (I’m out, not on a balcony)

  • instead of settings the camera to delay exposure by let’s say 2 sec, I do that manually – and determine myself when to trigger the camera (avoiding birds or to catch a plane)

Me too - I noticed them, and was hoping they would get larger and more visible, but they just went away after this shot.

It’s very clear outside, and the daylight is “warmer” than usual. Now I pay attention to that. :slight_smile: No clouds in the sky though, so it might still be a boring sunset.

I did that today - changed my remote control to “no delay”, and left on Live View so the mirror didn’t need to do anything.

I don’t think I would ever try to “not” include a bird in a photo - if I see one in the photo I take the image immediately, in case the bird improves the photo.

I just read your link - I didn’t realize the remote worked that way - press once to raise the mirror, and press again to capture the photo. I’ll have to try that.

I took several photos tonight, experimenting. My ML-L3 no longer had a two second delay. Tripod was rock steady, and my 80-200 lens was securely mounted to the tripod. All the images before the sun set were useless, as the sun was burnt out. I guess next time I need to underexpose, or just accept that on a clear day, I shouldn’t try to capture the sun in my images. The “best” images shortly after that didn’t look good after editing. This is the last image of this evening, and the color in the sky was quickly fading.

Without going back and literally copying Joanna, I tried to accomplish the same effect with control lines to make the city area lighter, and brighten up the sky. I used the graduated filter to get some gray/blue up on top, which was real. Anything I tried to emphasize the golden sunset color failed - what you see here is the best I could do. At that point the whole image looked too “flat”, so I adjusted that with the Tone Curve. Because of the time when I took the photo, the lights on the cruise ship and the city were just coming on, but this hadn’t happened by the time I finished. The “Ferris wheel” is all dark too, but I cropped it out. For reasons I can’t explain, I wanted the buildings at either end of my photo to be “low”, which in reality is meaningless, but I liked the composition. Finally, I changed the White Balance of the image to something that looked good - it ended up at 7090K.

It’s now 10pm in Miami, and I’m actually pleased with the image - but when I step away, it was just a pinch too dark - so I bumped the Exposure Compensation up by 0.10 - anything more, and the sky loses its color.

I’m hoping all of you can point out what I can still do to improve the image, and I’ll even accept “wait for a better day”. I disagree with that though, as practicing on doing the best I can on “average” images should help me do a better job when Mother Nature provides me with an awesome sky during an upcoming sunset.

_MJM9873 | 2021-11-26.nef (26.4 MB)
_MJM9873 | 2021-11-26.nef.dop (23.4 KB)

On my non-calibrated Apple iMac, here in the forum, with a white background on the screen, it looks awful. On my calibrated display, in PL5, with a black background, it looks good to me. That’s discouraging, as most people who view it on their browser will have it surrounded by white. Oh well. Hmm, maybe my white balance of 7090 is the problem. Here’s the same image with a WB of 5311 which is what my PL5 feels is correct:

I like that more, but it still looks bad surrounded by white. Here’s the new DOP, and I’m heading off to bed.
_MJM9873 | 2021-11-26.nef.dop (23.6 KB)

Greetings.

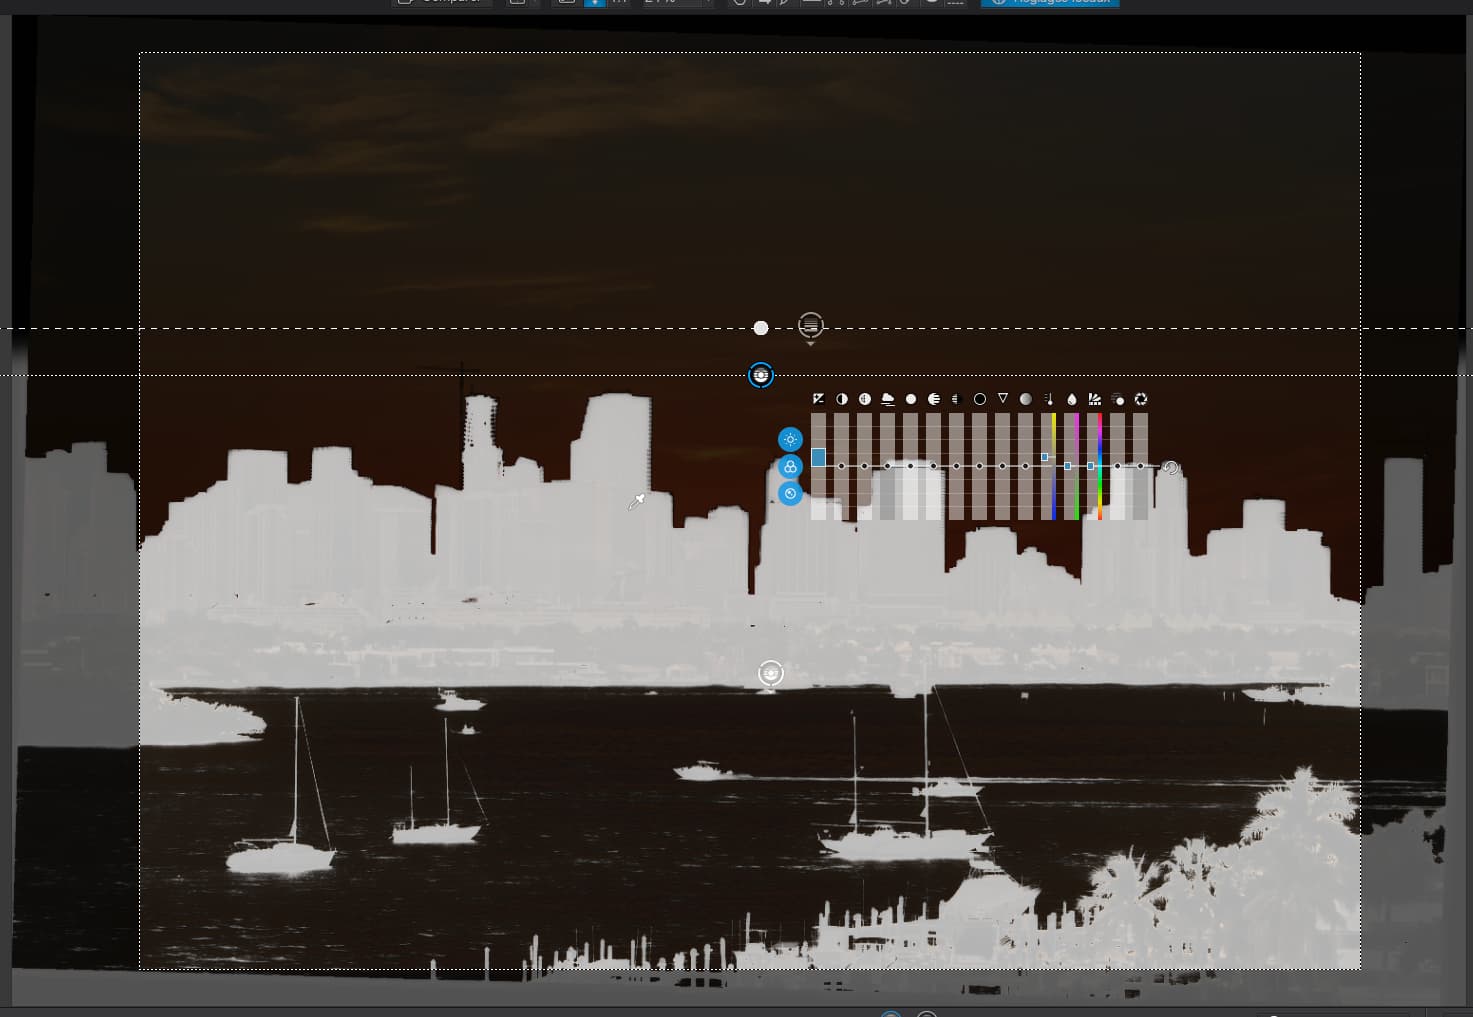
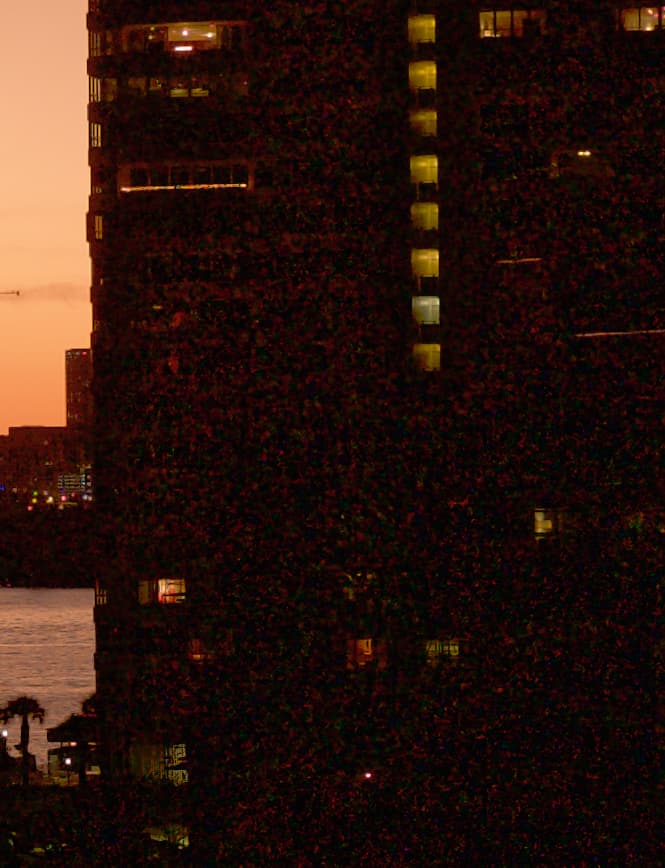
When you are creating control lines, I’ve noticed that you are not always placing the pipette correctly and you are not using any selectivity . So you are getting masks like this…

… where the pipette is on the water below the gradient, which means that only those tones that match where the pipette is placed on the water, will be affected where they are found above the control line. And, as you can see, there is very little pure white in the mask, so very little of the buildings are affected.

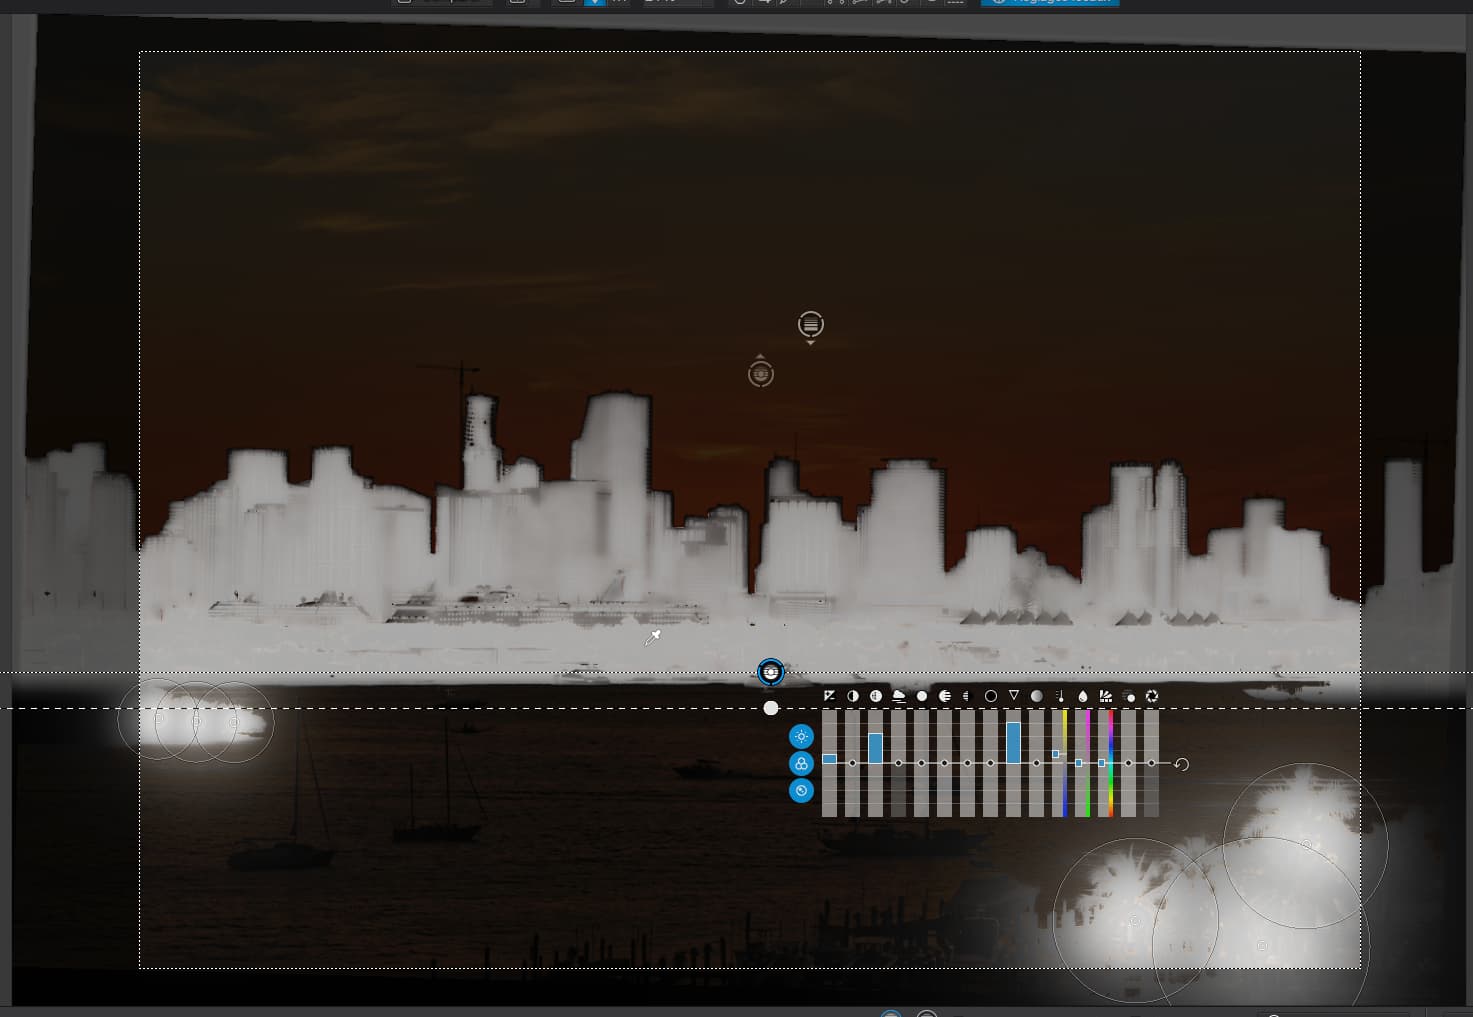
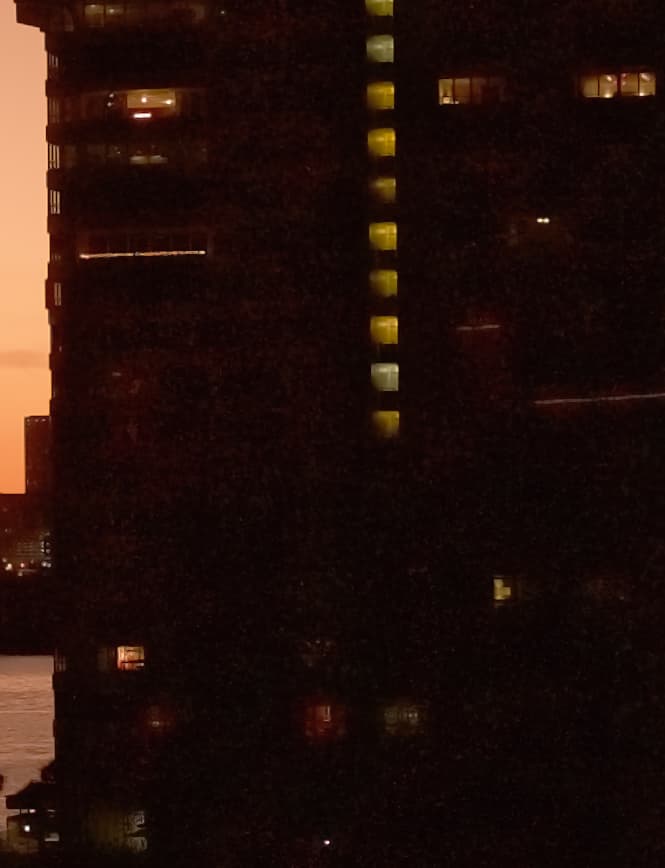
Then you placed a negative control line, presumably to protect the sky…

… but, in fact, all this does is to gradually mask the sky, but the gradient is quite long, so this means that, were it to have any effect, that effect would only fully work above the negative control line and then gradual diminish as it approaches the lower line, finally having no effect at all below that.


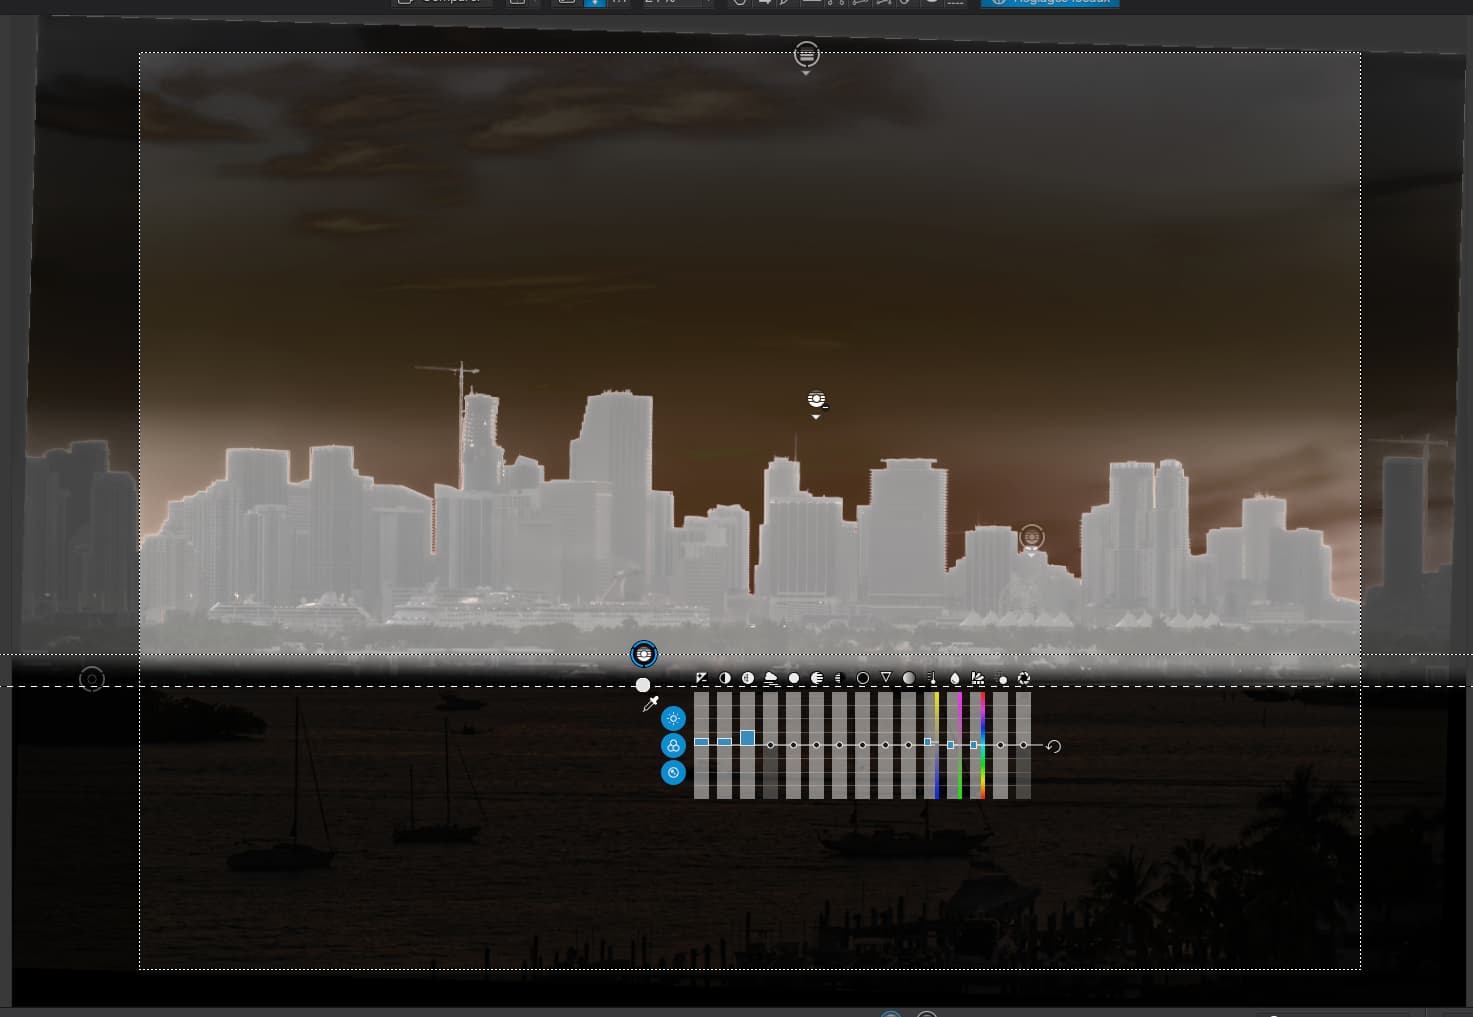
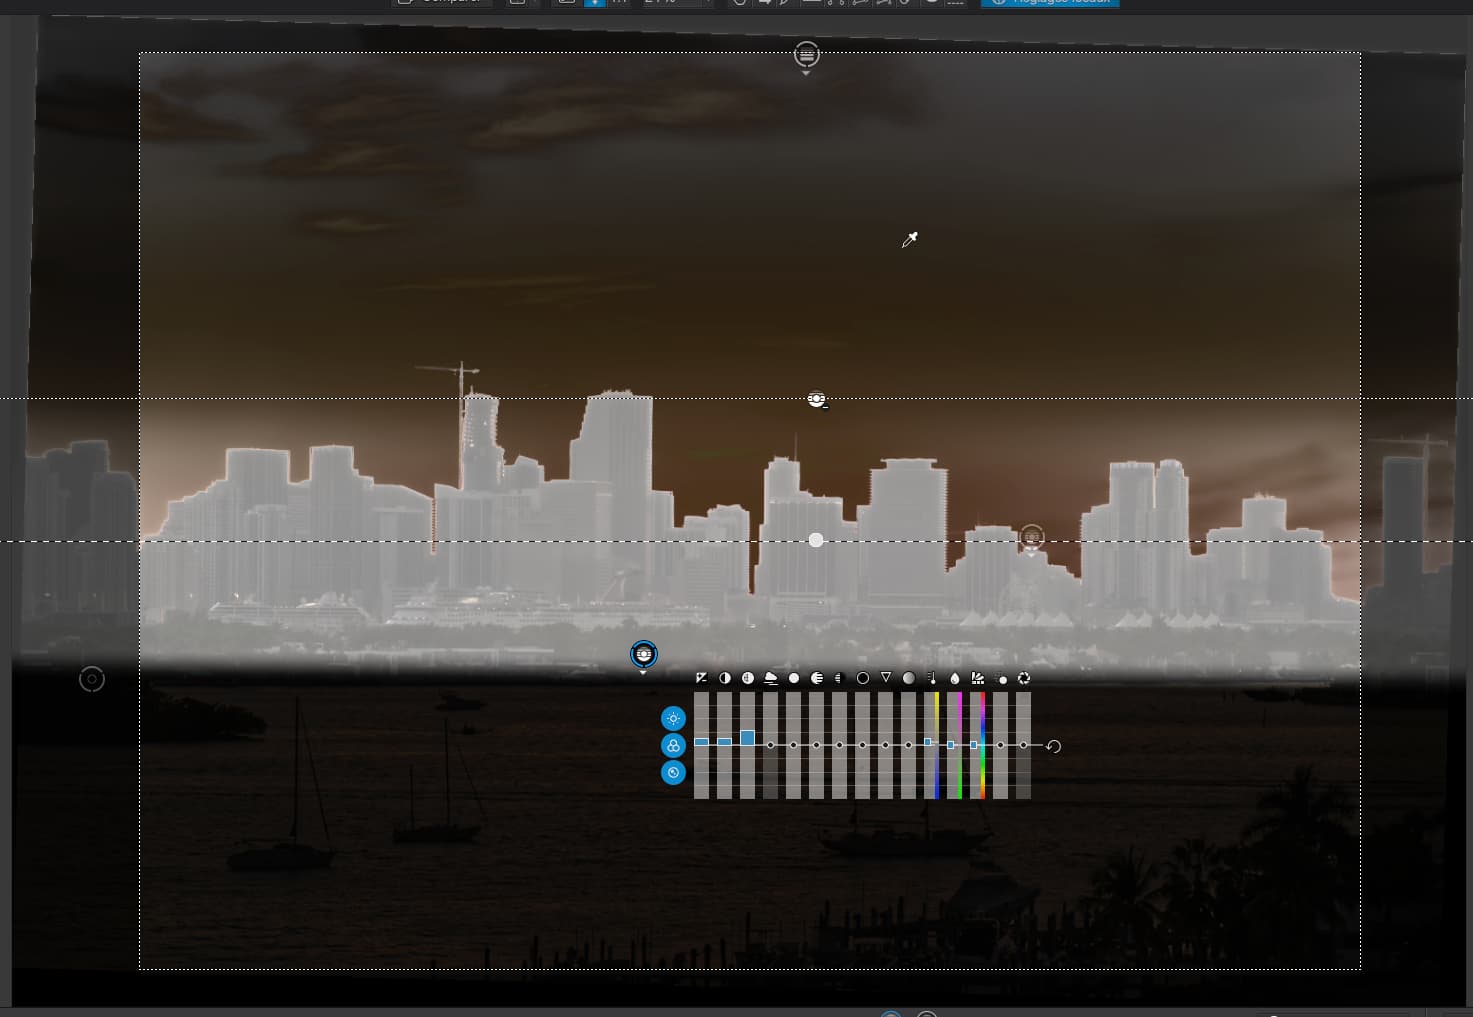
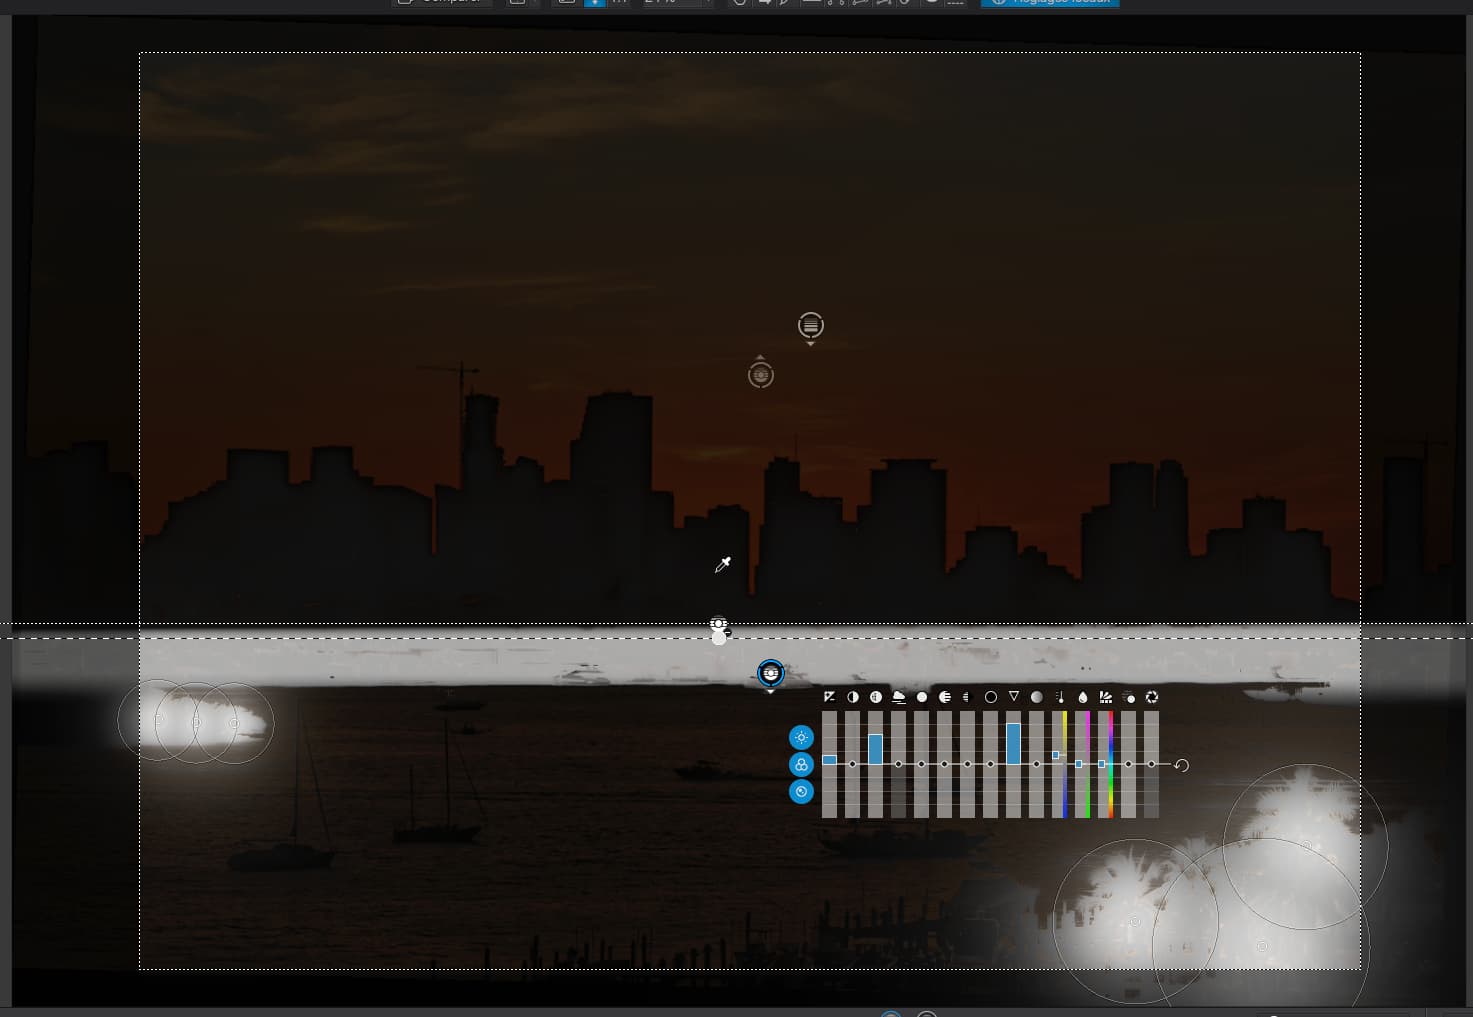
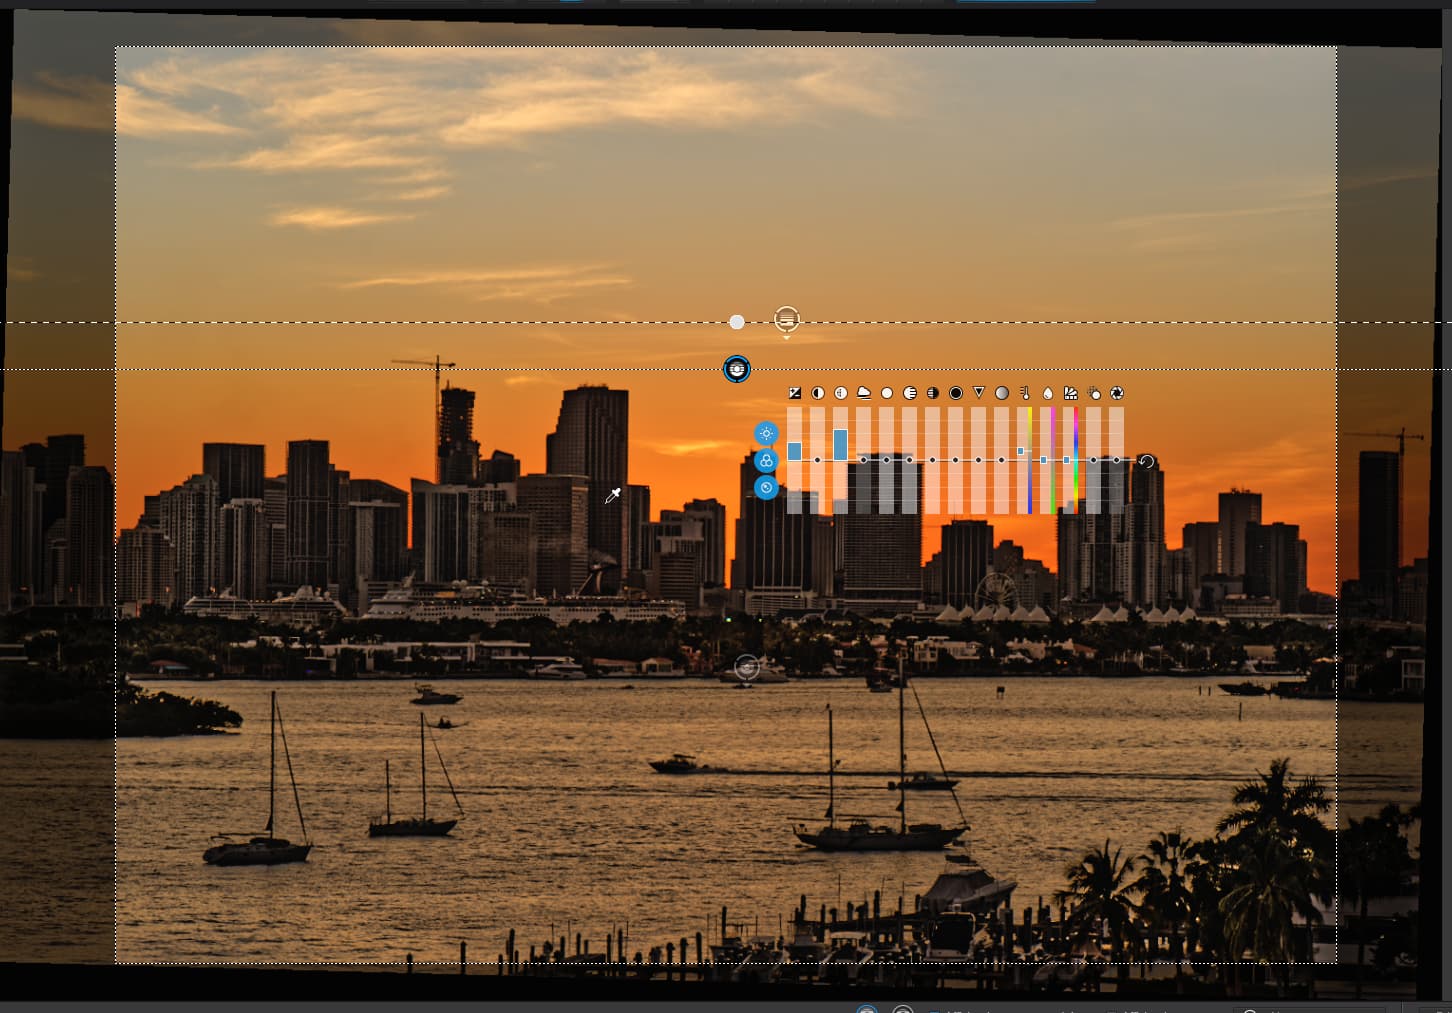
In my version, to affect only the buildings and boats, I placed a control line above the top of the building tops, with a short gradient towards the top, placed the pipette on one of the buildings and adjusted the selectivity to Chroma 73 and Luma 69 to ensure that only the buildings (and incidentally, the boats) are selected.

At this point, I could have “negated” the boats but I thought they could do with the same treatment as the buildings, which amounted to a slight increase in exposure, whilst avoiding changing the sky and water in any way.

I then applied a control line and a couple of control points, with the pipette in the trees and selectivity at 100 for both Chroma and Luma…

… and its negative, with a very narrow gradient and with its pipette on the buildings…

… in order to only affect the trees…


I get the impression you are still treating control lines in the same way as you would gradients? I believe this is a common mistake, since placing them is done in the same way, by drawing a gradient.

However, if you want to isolate areas of the image, you have to start thinking of control lines as “layers” that can, optionally, be graduated. It is not uncommon, when using control lines, like we have here to isolate areas, to zoom out a tad and draw the gradient outside of the image area, so that the entire image is covered; and then you can start masking just those areas that you want to affect using the pipette, the selectivity sliders and negative control points/lines.


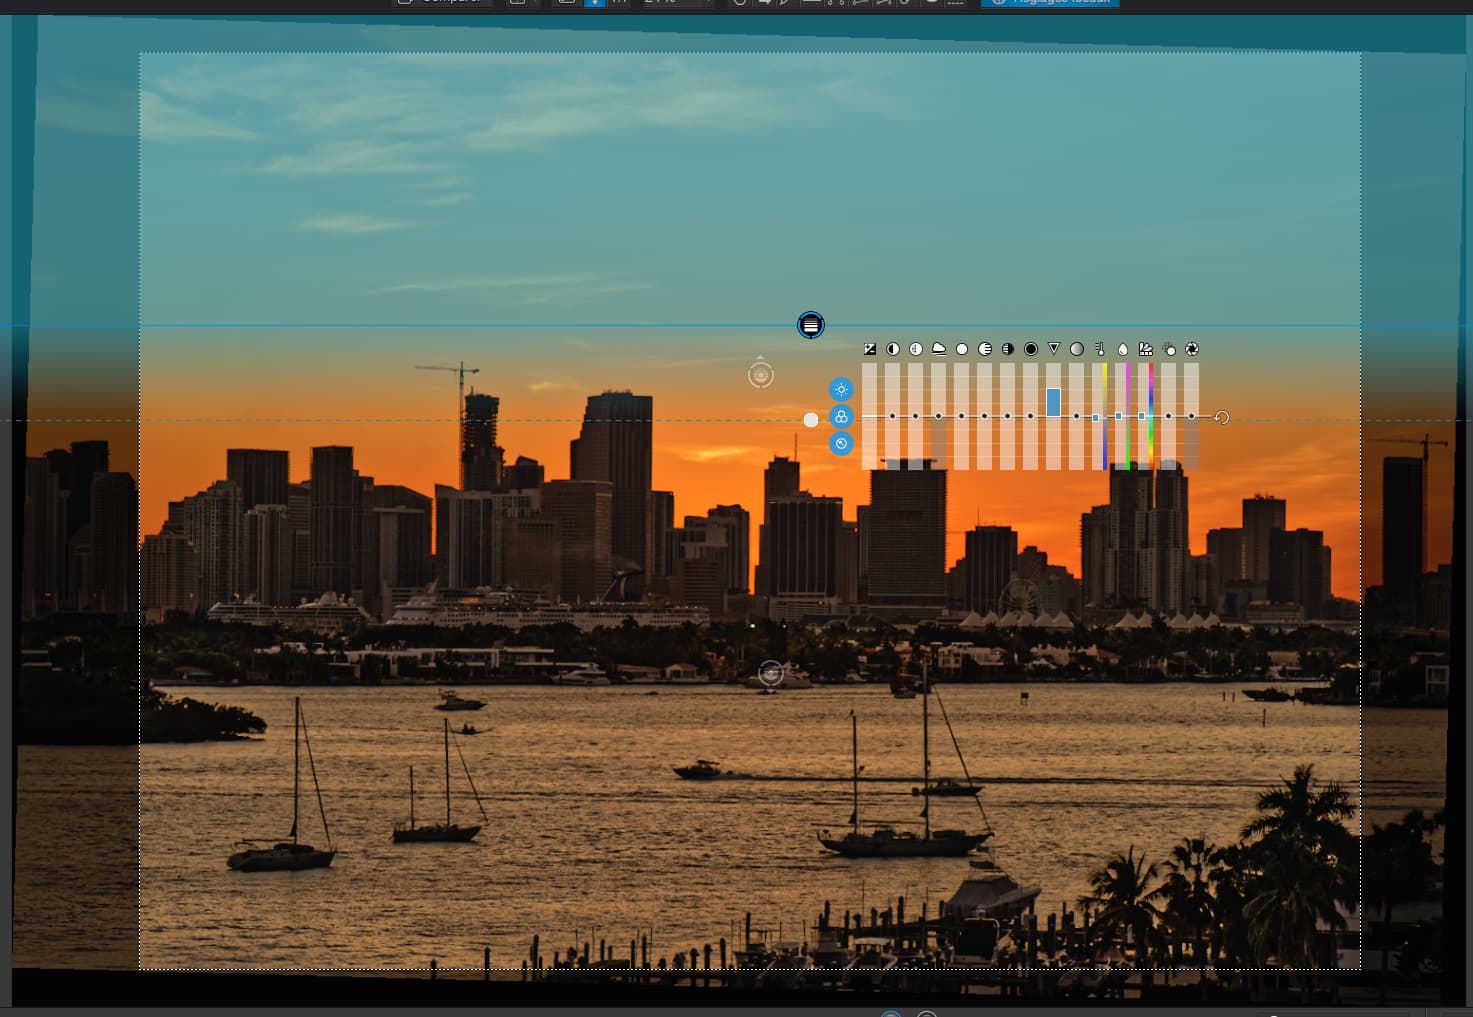
The only other local adjustment I added was a standard gradient to the sky above the buildings…

Note the blue is the mask, not as a result of the increase in vibrance and lowering of colour temperature that I used to bring out the blue in the upper sky.


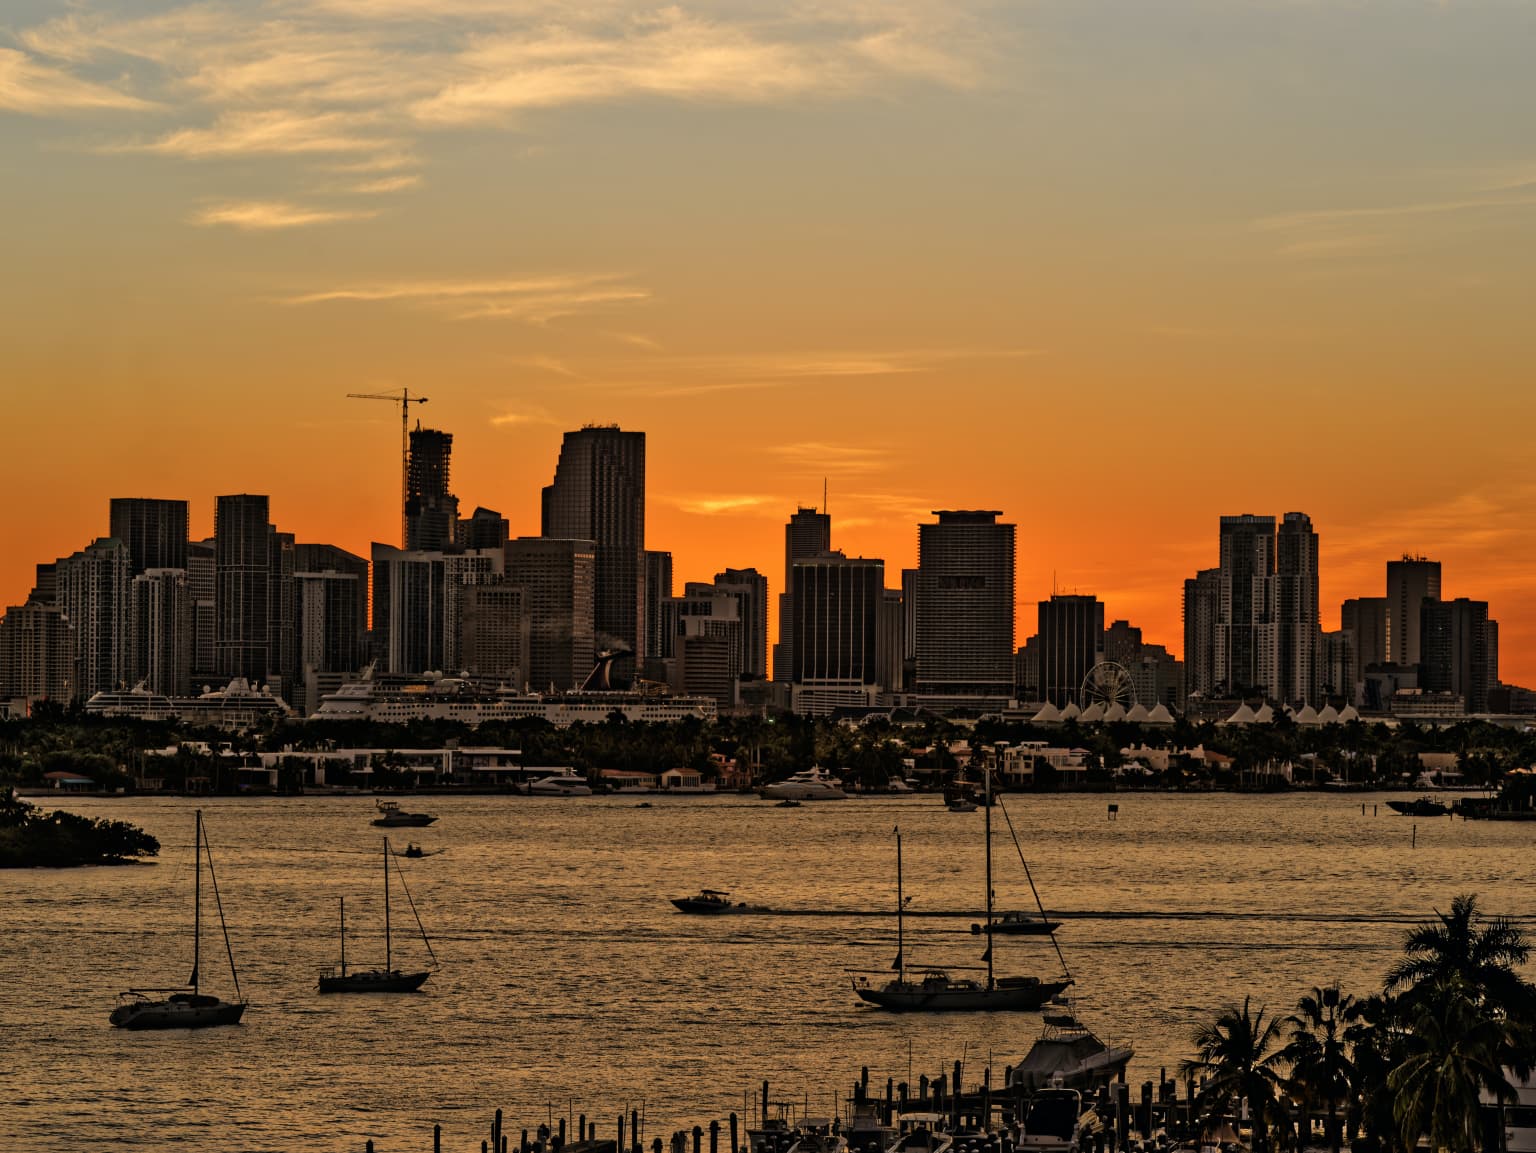
Globally, I raised the colour temperature to 6500, boosted the orange saturation and lowered its luminance in the colour wheel and, finally, applied a bit of fine contrast, with a slight boost in shadow fine contrast.
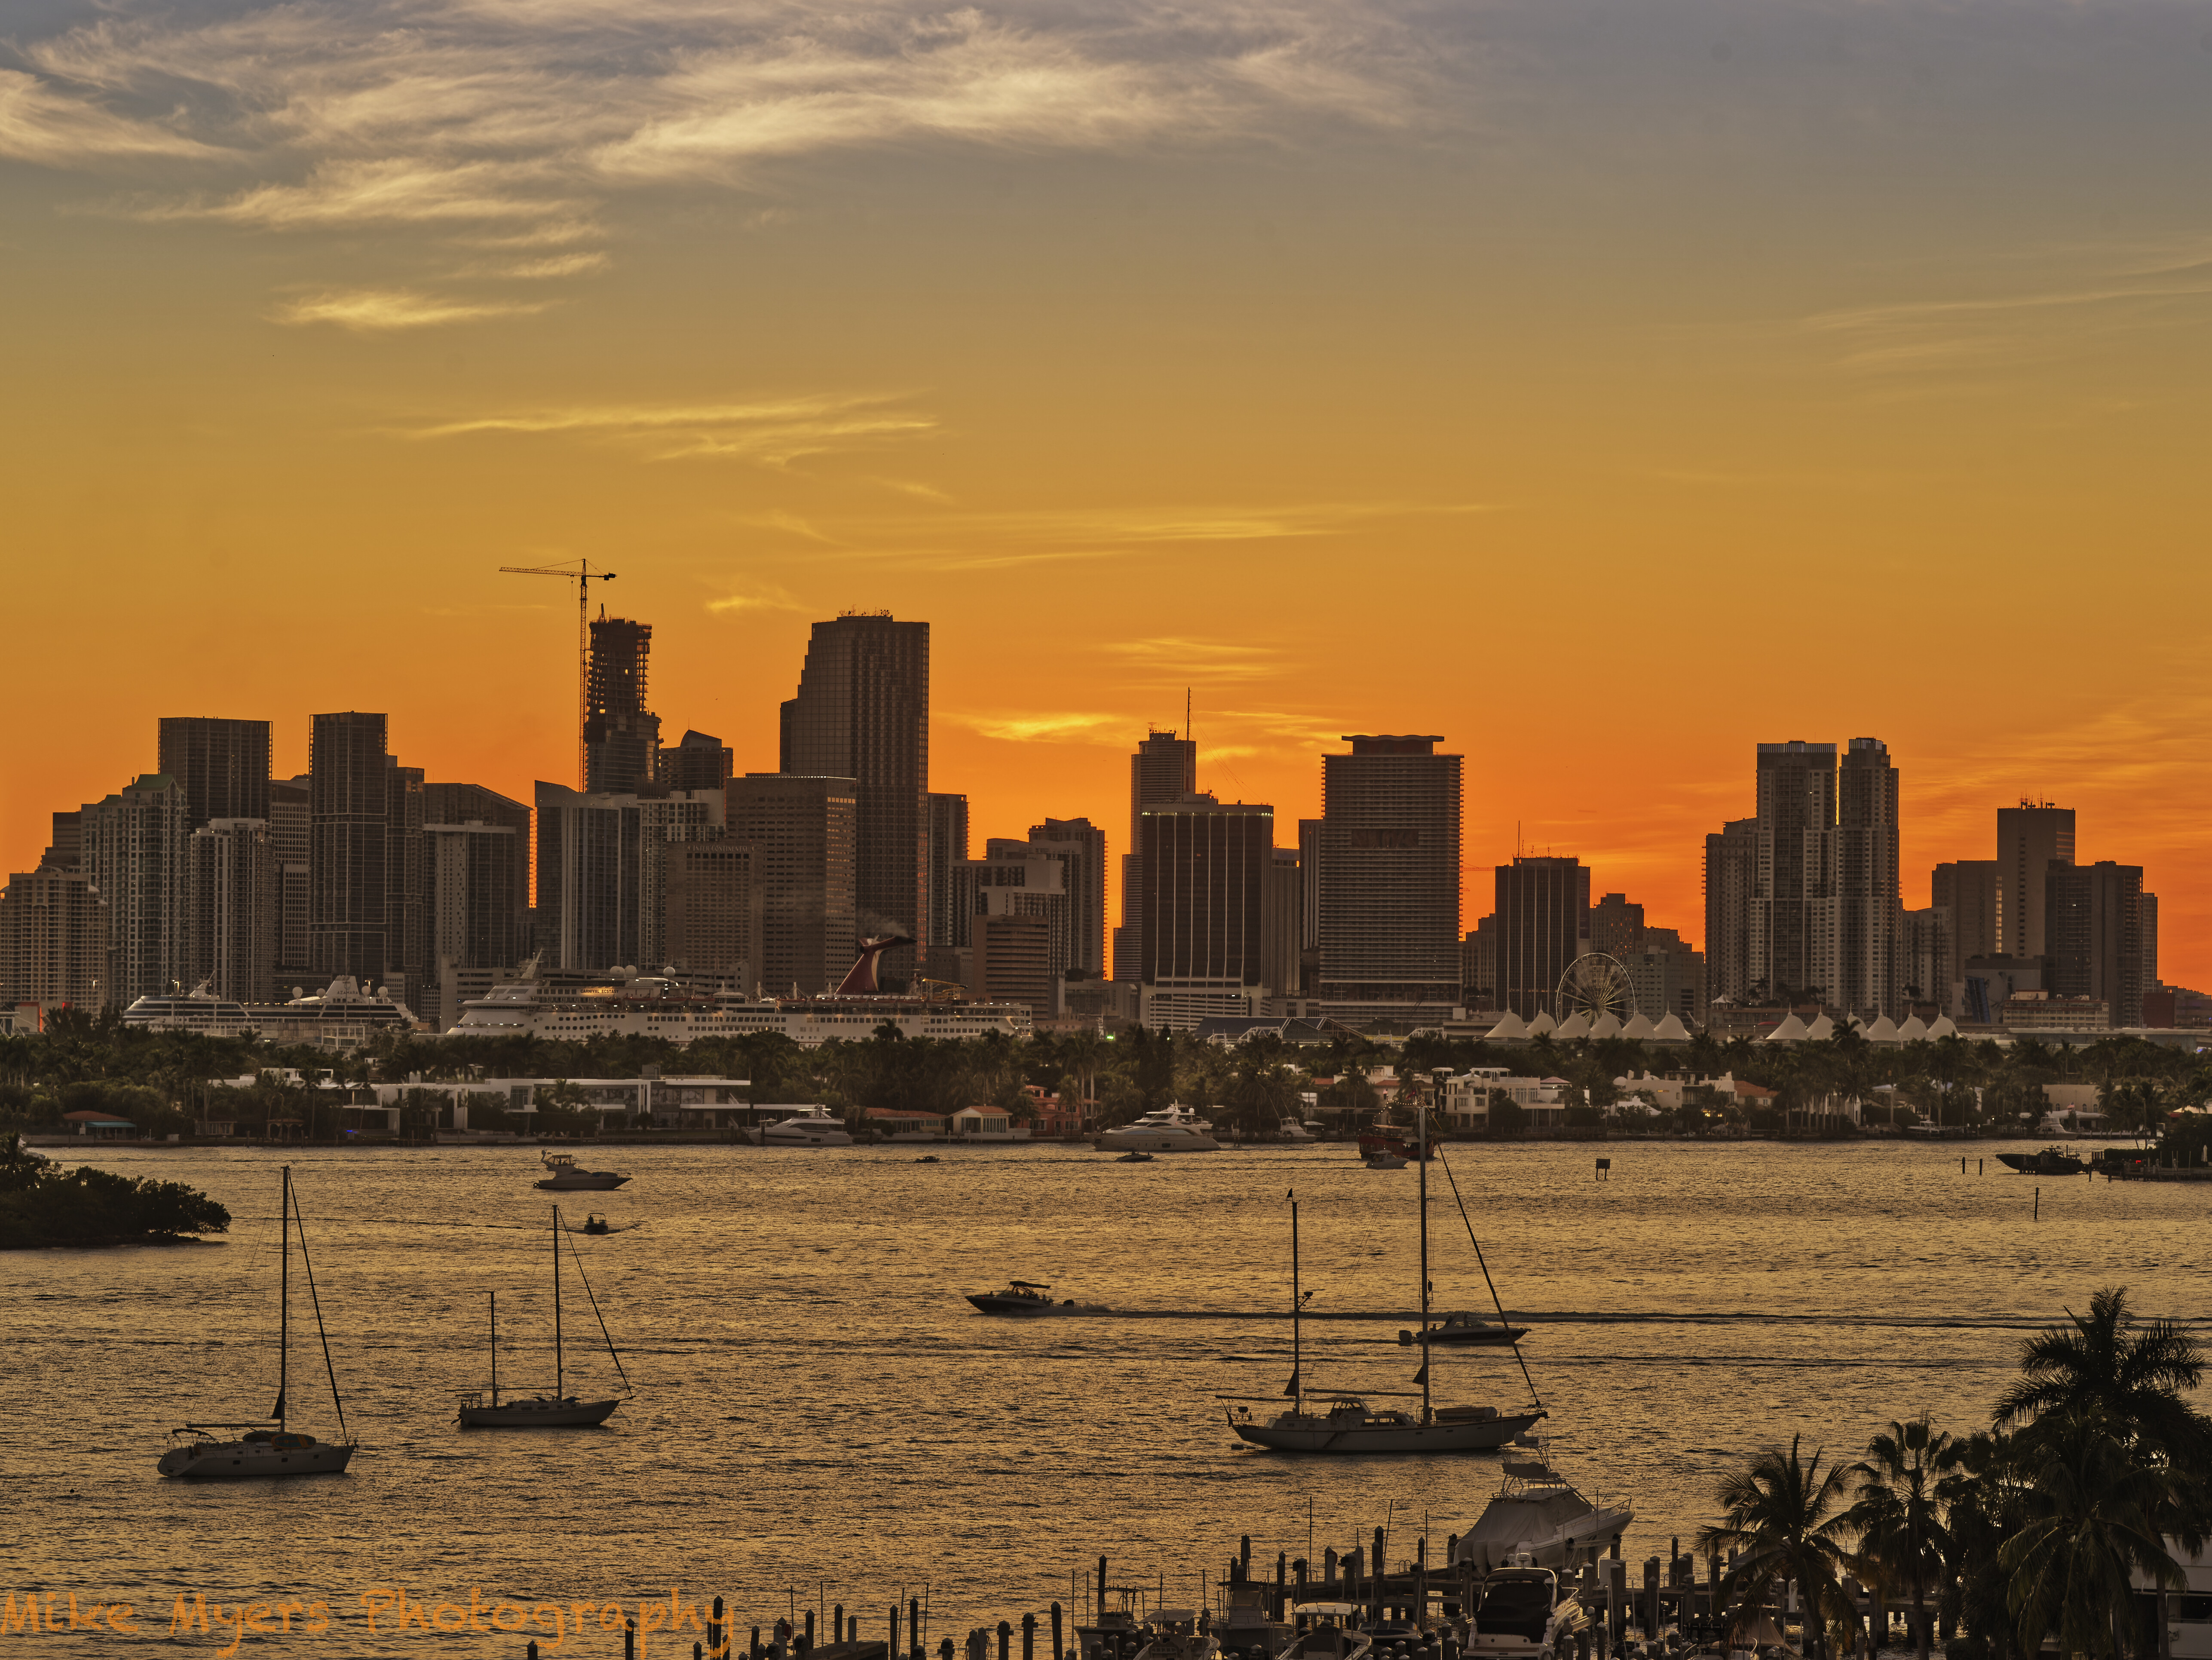
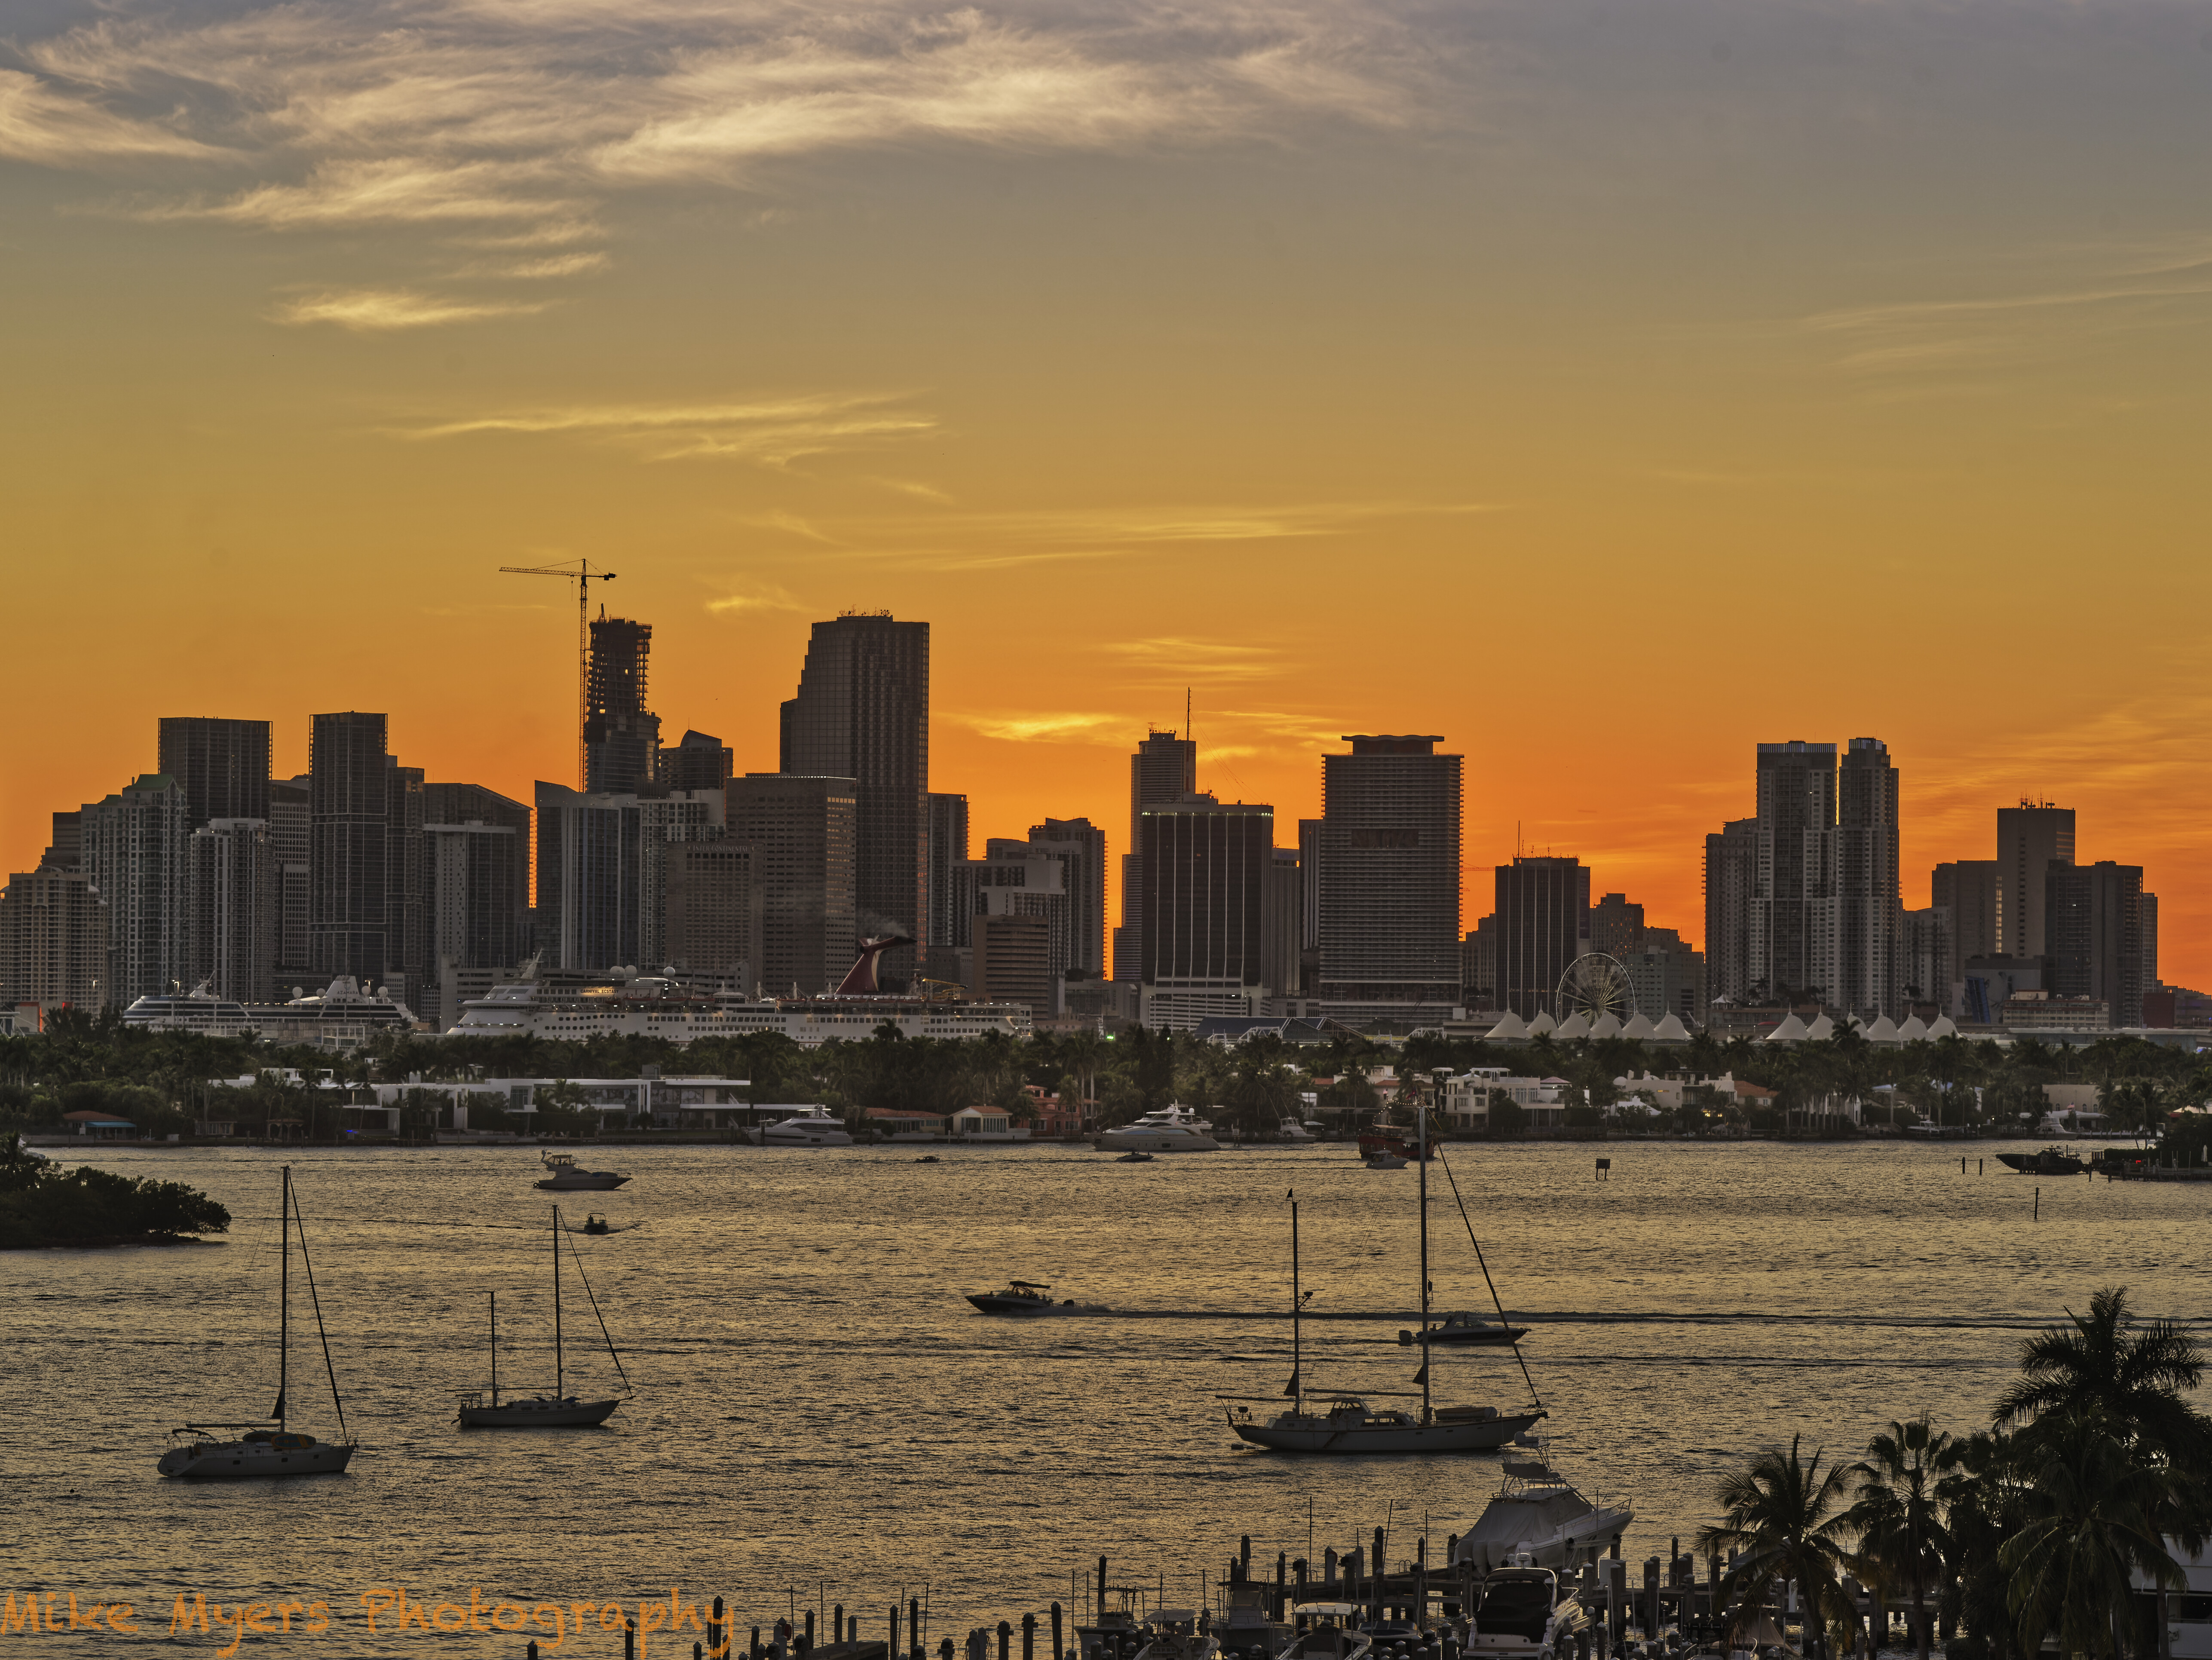
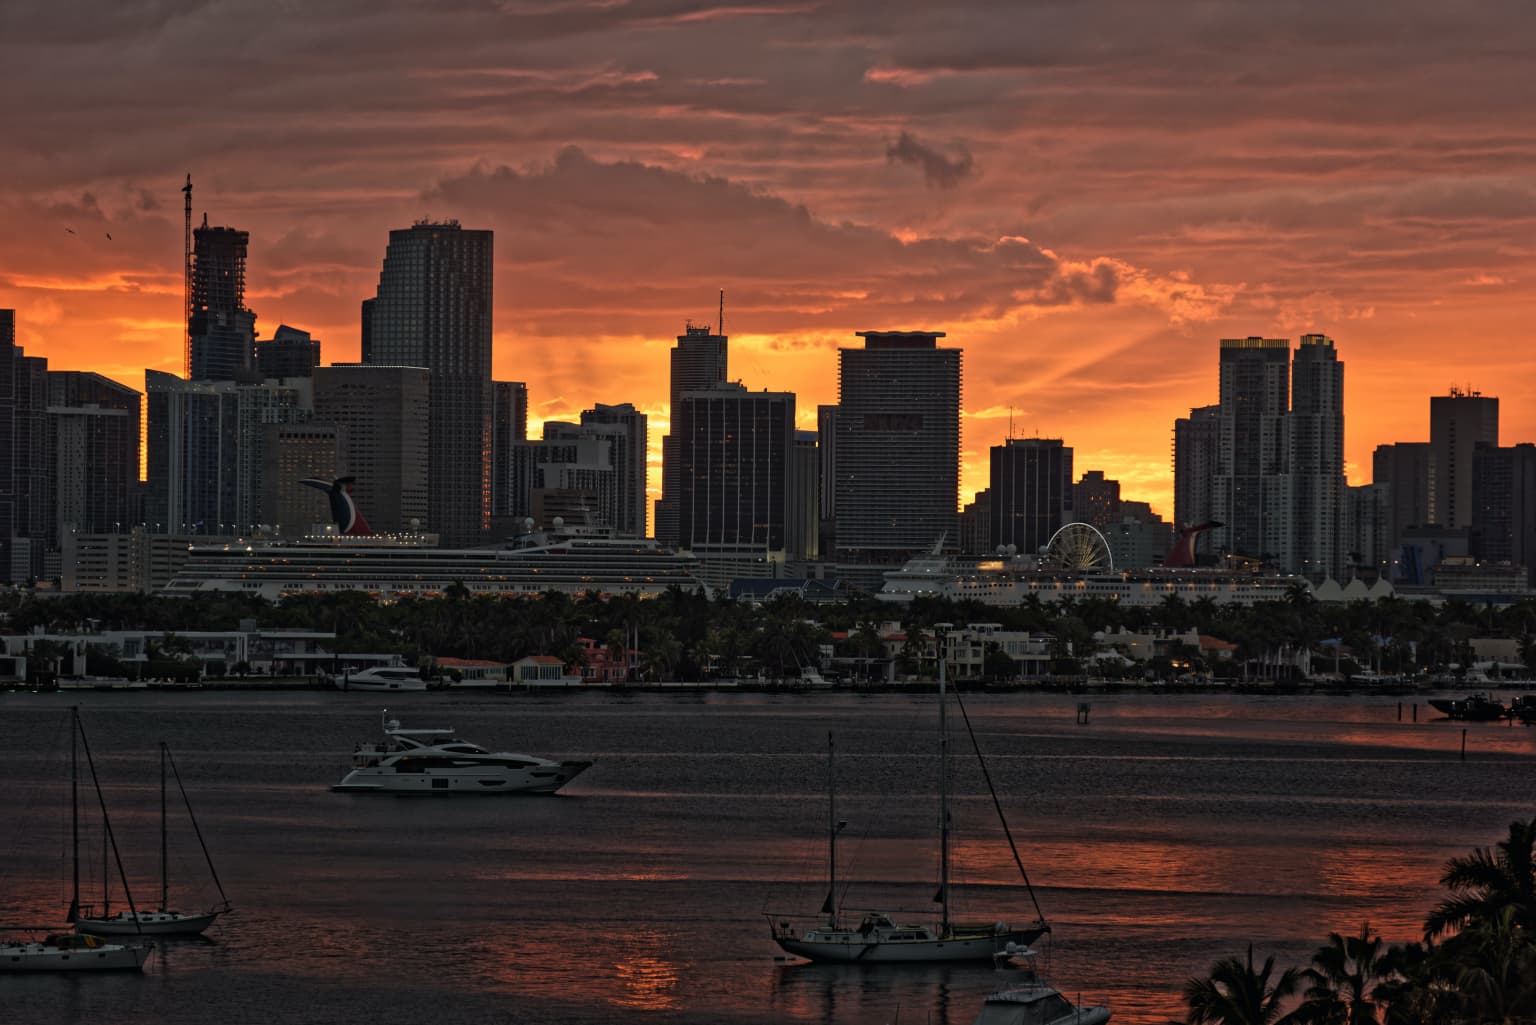
Here is an export…

… and here is the DOP…

_MJM9873 | 2021-11-26.nef.dop (42,0 Ko)
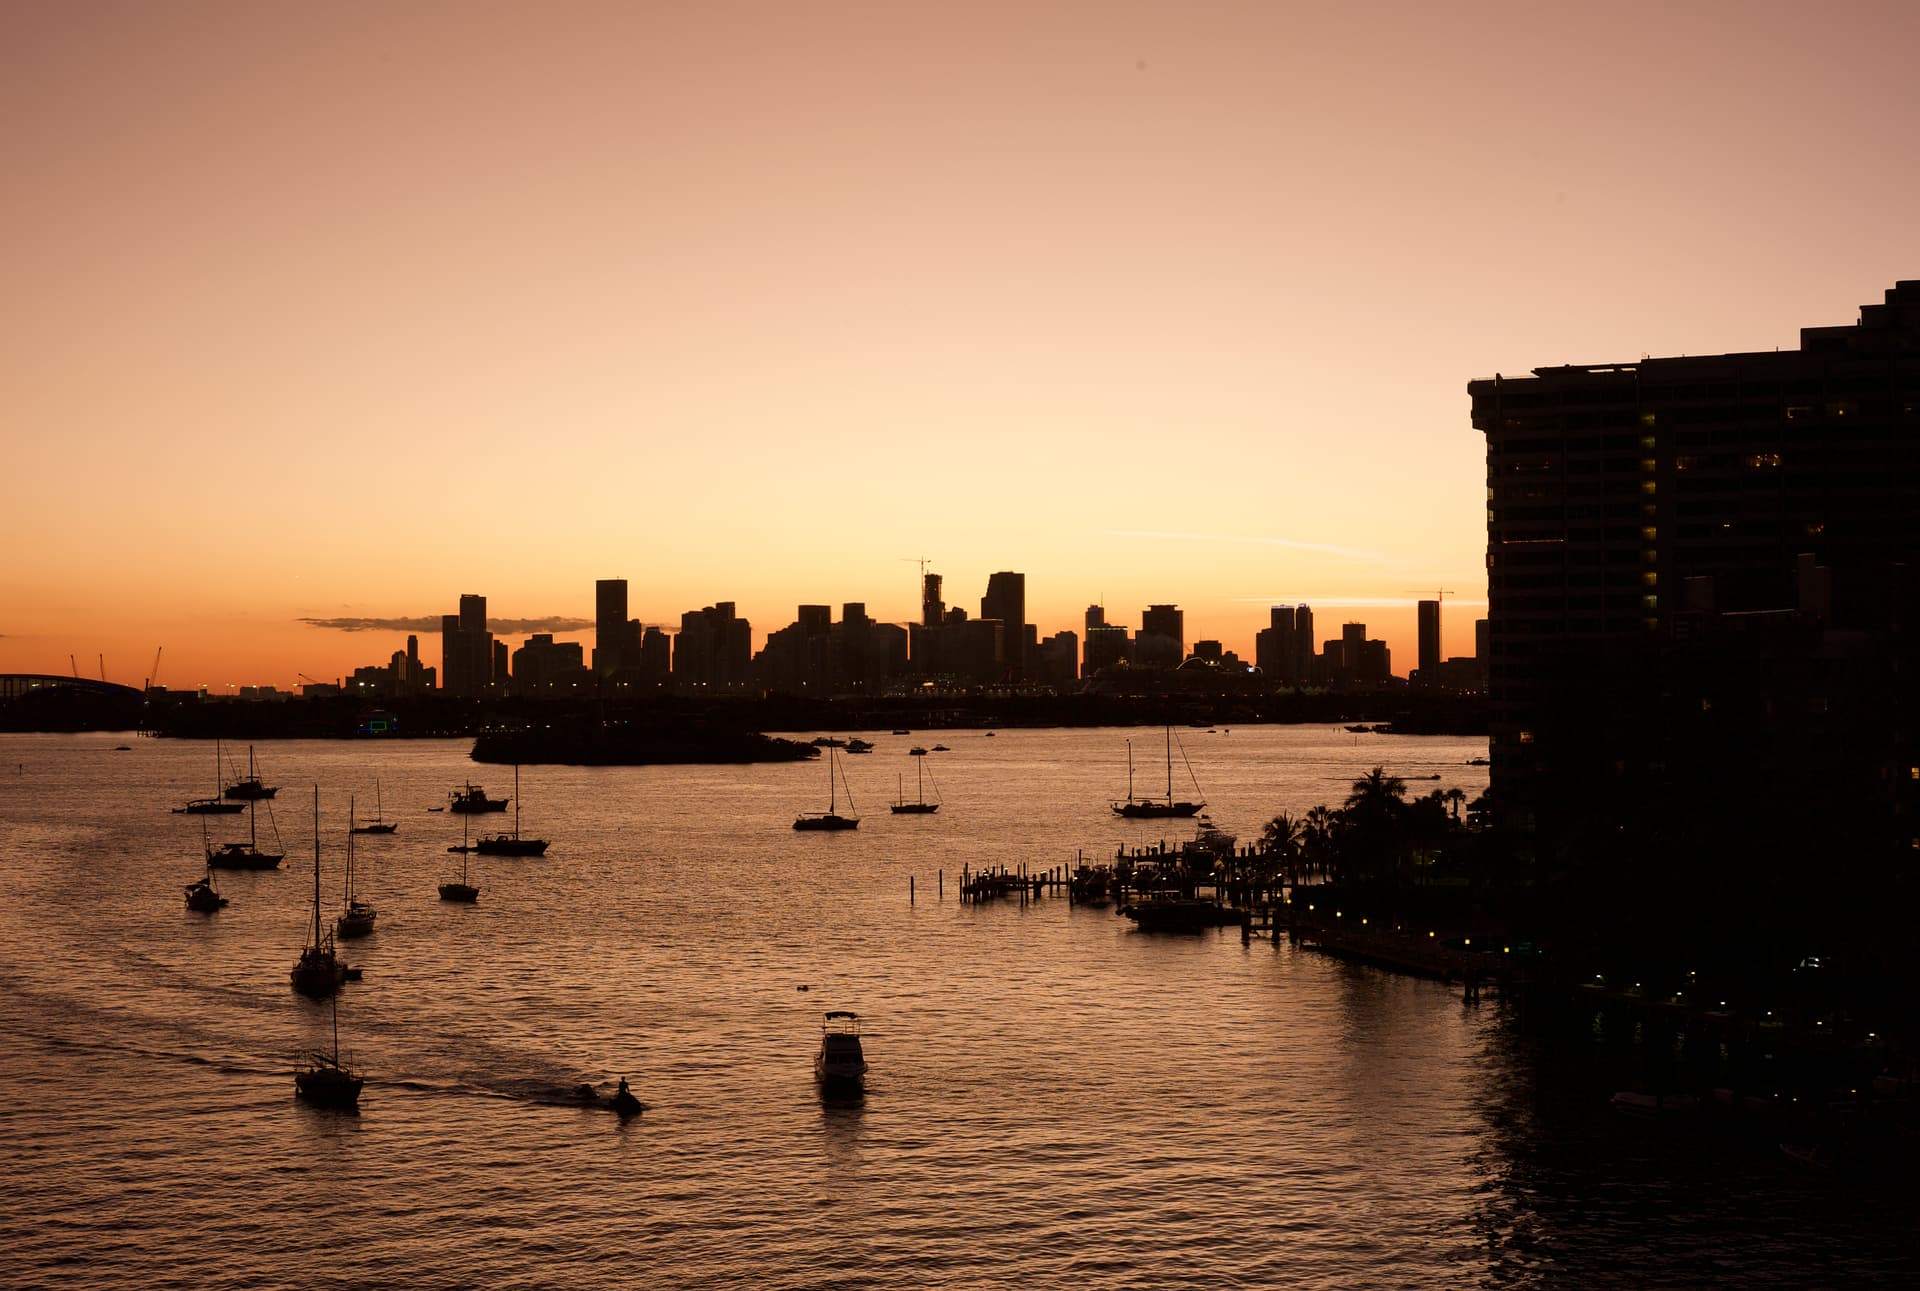
1 Like

I think you are right - you are doing things with “precision”, and I am doing things by looking at the image on the screen From now on, I will look at the views that show the masking - that will give me much better “control”.

One quick thought - several weeks ago, you showed me how to get the buildings to look like they do in my final upload, clearly showing the detail in the buildings. That REALLY impressed me, and has been one of my goals ever since then. I’m now looking at those two images, side by side, on my other display (Apple iMac) and in the final result I prefer what I did (which was to emulate what you did so long ago) of the buildings, cruise ships, and trees. The lower part of both images is similar, and the sky looks “smoother” in your version. The water looks slightly better in your version, and you show the reflection of the sky in the water which I wanted to do, but couldn’t.

I will download your DOP file, look at what you did, along with your explanation, and then make a VC with no editing, and try to do what you did on my own, following your words, not copying your masks.

Meanwhile, if you changed your edits, so the buildings look more like my buildings, which you showed me how to do so very long ago, that would make your version complete. The cruise ships are white, and you brought out detail in the buildings that looks so wonderful - thanks to the 80-200 lens which is sharp, and the tripod holding things perfectly still, and the remote control so I didn’t have to touch the camera.

You’ve shown what I can easily call “precision”, changing parts of the image exactly as you want. I was placing control lines, and moving things around until I thought they looked good - but I would much rather do it your way. It took me between one and two hours until I stopped, and I suspect you did this in under ten minutes. For me, I have all these new tools, but in effect, I’m “taking a micrometer and using it as a glue clamp”. I get where I want to go, but it’s a very inefficient way to do it.

Yes, this is “new”. With control lines (and points), using selectivity to create masks is what they are all about, instead of the vague “sort of” “almost” soft circle of influence that their non-selective predecessors gave us.

That’s relatively easy, just increase the micro-contrast in the mask for the buildings…

To give an export of…

1 Like

Everything is “easy” once a person knows what to do. For me, there is no such thing as “easy”, because every time I think I know something, I learn that there is so much more yet to learn.

But yes - I will do that, until the buildings look the way I want them to look, which is what you showed me long ago - now it’s stuck in my mind as one of my goals, along with the image being straight, and not crooked, and all the other silly mistakes I work so hard to avoid nowadays.

I just posted my infrared attempt from a new lens I bought, and I’m leaving now for a brunch with a good friend. Later today re-doing my image, using the tools you have shown, is at the top of my list. Your words will be open as if they are an instruction book in one screen, and I will do them all, one at a time, in order.

If all goes well, I will take a new photo tonight or tomorrow, and apply those guidelines without looking at your notes. :slight_smile:

Oh, and I think I will take one more image with my D750, and upload it with no editing, and ask all the people reading this discussion to do the editing themselves, and post the results. I won’t even upload a DOP file, just the image. Then, maybe you can help those who do this, the same way you’ve helped me. I won’t post an image, just watch, and hopefully learn from, what others do.

Your starting to gain the medal of expertise…:grin:
Do you find your self often after a smal basic setup in global adjustment directly in local adjustment?
I do.
Every time i have some real editing to do i start with
Smartlighting plus ev correction. Then perspective horizon, some cleaning in cloning repair. (those are the right sequence in order not shift earlier adjustments.)
Then turn on local adjustment and start modelling color and tonality.
Return to some selective tone and contrast as finishing then check crop version.

Most of the improvement is done in locals.
:grin:

That seems to be fairly much how it goes.

Yes, but that’s sort of the digital equivalent of dodging and burning and multigrade printing filters. Something I did little enough of but appreciated when I came across the work of my good friend who was a master of darkroom printing and whom I try to emulate in my work.

In the filmdays i just sent the film to a shop and waited for the bundle of printed photo’s.
Earlier digital i used a jpeg editor, rather basic stuff. Burn and dodge isn’t done by me.
My learning curve was with a fz200 and Silkypix 5pro. (LR4.x i tried but was lost in possibility’s) SP does talk about burn and dogde when you alter dynamics of a image.
My present g80 m43 ilc did caused sparkle my interest in raw development and pre-work, the how can i work out the image taking so that post is easier.
I stepped in DxOPL just in the right time, v1.2. I grow with the grow of PL in editing.
Specially upoint tech was an eye opener in how color and luminiation worked.
The strength of colors Around the subjects.

I believe most people who are talking about a mediocure upgrade from v4 to v5 doesn’t fully understand the possibilities of the new control line and control point.
So the more we show the better it reveals the secrets.

1 Like

Yes, I do. I have arranged my right panel such that the first things I do are at the top, and then one by one, I work my way down - this is all the “basics”. Then I get into Local Adjustments, which takes much, MUCH more time.

Doing things in order also helps me to not forget steps that I think should be done early in the process.

Oh, when this is all done, I go back to the top, and go through everything again, looking for things I neglected to do the first time 'round. Also, by then, I may have changed my mind about the crop, and other things. Adjusting “Local Adjustments” takes far more time than everything else put together. It’s like “fine tuning”, and so hard to get it set to what I feel is “perfect”, especially so because my vision of “perfect” changes as I edit…

Following up on an idea I posted earlier, I am going to upload two images here with no editing. For everyone who is reading this thread, but not posting, here’s your chance to jump in and see how well you do with a sort of high-dynamic-range image. You can edit either or both images, but you have to use PhotoLab - any version.

The image is a very un-tech image, taken with a rangefinder camera introduced way back in 2008. That’s over 30 years ago! The lens is a brand new “China-lens” that sells new for only $280 - a 7Artisans 35mm f/2 lens, stopped down to f/8. You’re probably all using better photo gear than this, but the challenge is to get the best you can out of the image.

Anyone in this forum can join in. Since I took the photo, I’m not going to edit it, and any “copyright” that comes with the image should be taken to include all of you, to edit, enhance, modify, or whatever else you want to do with it. Think of it as an old “coloring book”, where you do the coloring. :slight_smile:

The first image I like because there’s some “action” in the image, but the second image is a sunset photo that I was trying to capture for this purpose. Hopefully the experts here in the forum will refrain from editing, but instead offer helpful suggestions to any of you who join in the fun, just as they have for me. Use your imagination - the image I posted is just a starting point.

There is one small detail - the images came from my Leica M8.2 camera, and PhotoLab doesn’t accept raw images from that camera. So, once you look over the images, if you’re using a Mac computer, you need to do what I do - open an image in Apple Preview, and then export the image as a jpg or TIFF. I converted them to TIFF images, but that makes the new TIFF image too big to upload into the PhotoLab forum server.

I’ll also convert them into ‘jpg’ images and post below. Feel free to use the ‘jpg’ images if you wish to.

L1000154 | 2021-11-27.dng (10.1 MB)

L1000169 | 2021-11-27.dng (10.1 MB)

Have fun!

I don’t fully understand them, but every day I know more. I figure the best thing I can do, is “do the best I can” and then learn from the feedback.

I just posted a photo for others to edit, not me. I wonder how many people will take the challenge???

I’m sorry Mike but, as far as I can see, these images are un-processable unless you like that weird and wacky pointillist thing that comes with trying to drag detail out of black…

Even using denoising, I just get fuzzy variations in tone with no real detail…

Sorry, but what’s the point to (continously) use a cam that is not supported, but asking to use PL?