Especially if the only option is to convert to TIFF or other non-RAW format. Converting it “straight” in something like Preview effectively kills all chance of recovering highlight and shadow detail.
I opened one of them in Affinity Photo and managed to get it to look something like…
I then saved it as a TIFF, reopened it in PL and had a fiddle around but there really isn’t anywhere near the amount of detail I would have hoped for given it is supposed to be from a Leica.
Mind you, it is only a 10Mpx sensor and the glass looks like you were shooting through the bottom of a Coca-Cola bottle
But, if I have to use external software to get an only slightly viewable TIFF, to then work on in PL, like Wolfgang, I really don’t see the point and am inclined to think you need to either sell it or use it as a paperweight
Hint: With this sensor and these lighting conditions, expose to the extreme right, even if it blows a few highlights. This old sensor has a lot of noise and is best suited for shooting in daylight or for IR. I’d not invest in off-brand lenses for this sensor and I think that you have enough Leica glass to use instead (even though this lens is not too terrible imo)
Other than that, I think that we should now stop this thread…
Well, for starters, the two photos you processed look quite nice to me, so you did what I was wondering if others can do. Both images look finished, even if neither one looks like what a modern Nikon can capture (for those of us who own a modern “pro” camera.
The body is an old Leica, but the lens is a new Chinese lens that sells for $280. Leica lenses sell for $3,800. (I have no intention of taking a $4,000 lens and wandering the dirty, dusty places I go to in India.)
It is supported, but PL5 doesn’t recognize the camera - I’ve been using Lightroom with this camera from when I first bought the camera. It’s not worthwhile for DxO to create software for such an old camera, but I enjoy using this camera.
I’m only doing that because I want to use PhotoLab. I’ve got lots of other editors sitting around unused, none of which complain about Leica DNG images.
This is the same camera and lens that created the infrared image that you liked so much. I don’t own any other cameras that lack an anti-IR filter over the sensor.
I agree, but in this case, my “investment” was only $280, and even if I only keep it for IR photography, it’s “a keeper”. I got better results from this lens than from my old 50mm f/2 collapsible Summicron.
Sorry - I probably should have used my Fuji camera to create an image for others to process. I wanted to use something “average”, rather than a top-of-the-line camera. But despite everything, the two images you posted above look great to me. I was hoping someone new would have tried to edit them, and posted the results, but I guess that wasn’t to be.
I agree - there’s a goldmine of wonderful information up above, and there are some things towards the end that I will be trying as soon as I finish breakfast. I want to do, on my own, what Joanna did with control lines, but without copying what Joanna did. I want to read what she explained, close that window, and do it on my own, and get the same effect. If so, I will have a big smile on my face - and know how to use this tool more effectively in the future.
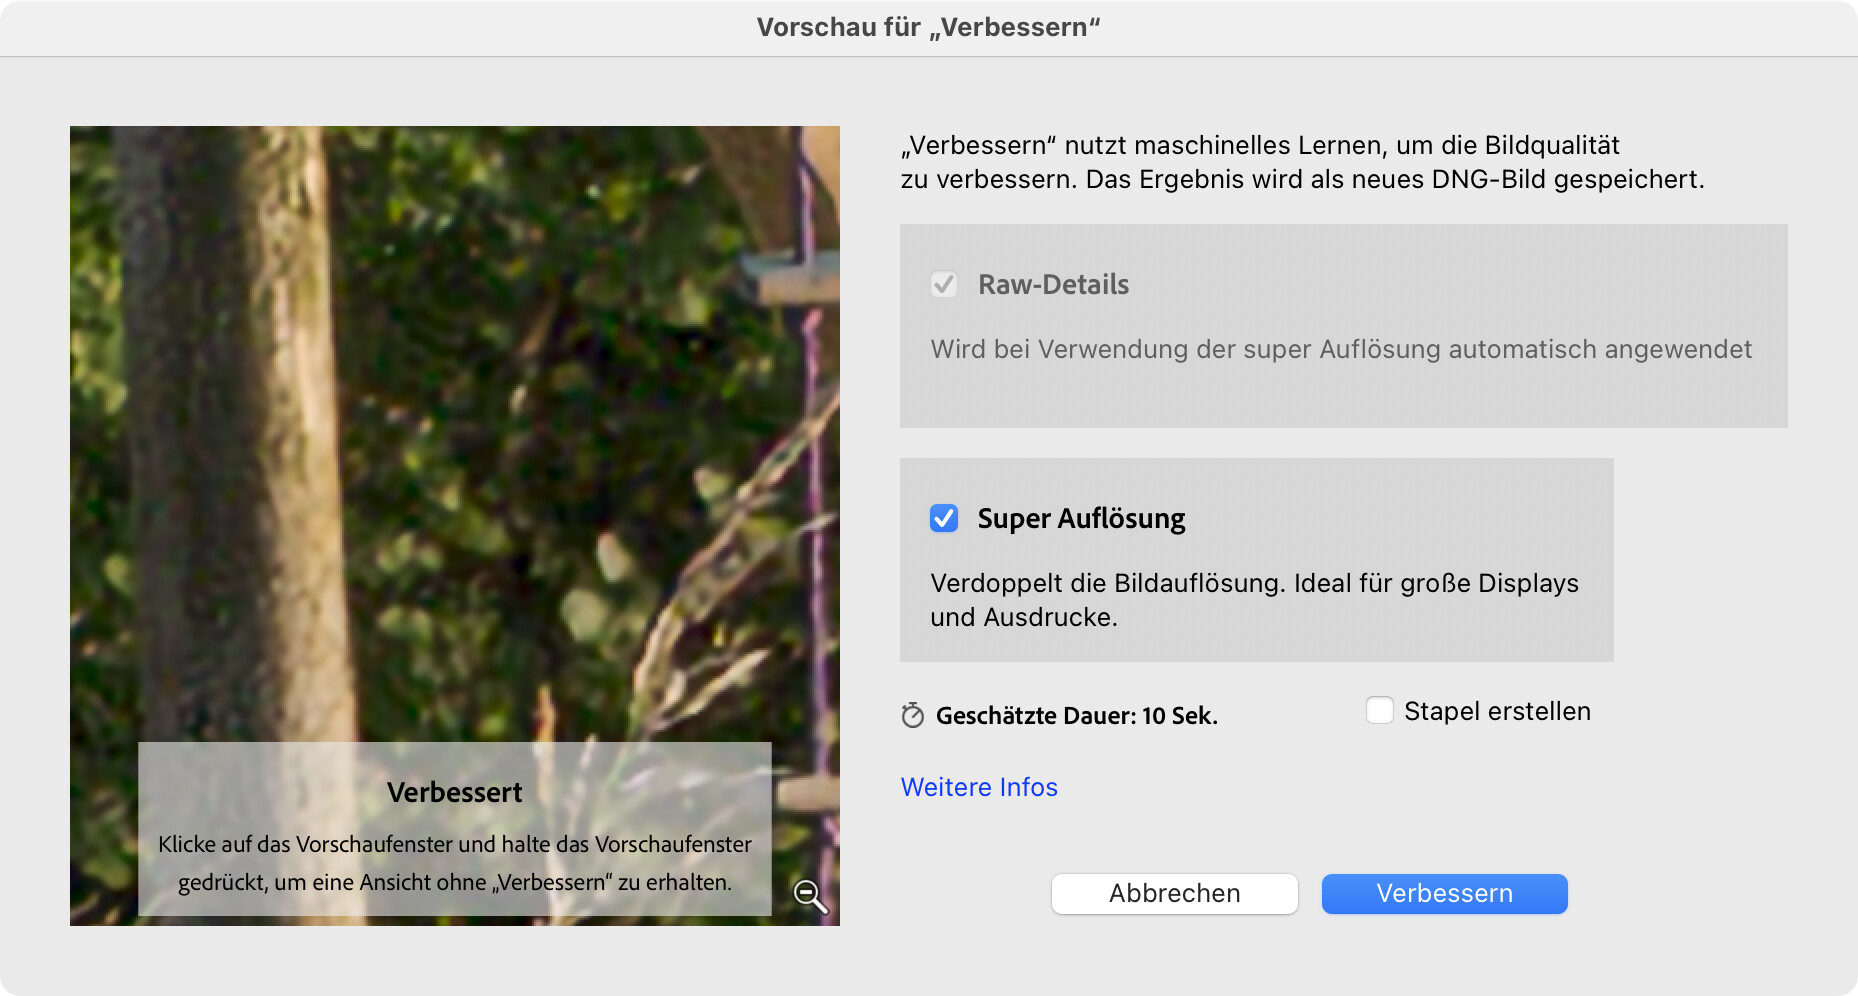
Disclosure: I used the Kirk maneuvre to improve the image = Lightroom’s excellent image improvement which gives me 4times the number of pixels to work with.
Hmm, I never heard of this. I’m still paying the monthly charge for Photoshop+Lightroom, and they are up to date on my computers. Since I may need Adobe anyway for color infrared, I’d like to try what you did. Where do I find out more about “the Kirk maneuver”??
It seems to me:
My M10 is better for most of what I do than my M8.2
My D750 is better for most of what I do, than my M10
Buying a Nikon Z6 II has better dynamic range than my D750.
Maybe I should have a long talk with Santa…?
On the other hand, for the types of photos I’m taking for this forum, the D750 is as much as I need.
For “walkabout” photos, the M10 is better than the D750.
For infrared, my M8.2 is better than all my other cameras.
That’s good enough for me, and what I’m mostly doing now.
Please do let me know. Maybe for future M8.2 photos, I’ll start processing in Lightroom, and eventually send the image to PhotoLab as a TIFF.
…and regarding this new software, does it work on the Open Source image processing software “DarkTable”? Rather than being hooked again by Adobe, I would prefer to use the Open Source software, which apparently is very similar to Lightroom.
Joanna, if you’d like to smile and say “I told you so!!”, read this:
I bought mine before I knew any of this. Ken Rockwell wrote the most negative review I’ve ever read from him, mocking the M8. Meanwhile, the M8.2 was better than the M8, not as good as the M9 in many ways, but I’ve always enjoyed it, being aware of its limitations. Anyway, you’ll probably be nodding your head in agreement as you read this article.
Note that you need to export the file in order to get the extra pixels. The super-res DNG file is still read to have the original pixel dimensions by PhotoLab. Export to 16 bit TIFF with ProPhoto colour space.
For everyone following this discussion, DxO will be having a Webinar on Monday, November 29. You can sign up at the DxO Webinar page.
From the first paragraph in the description in my calendar entry:
“With DxO PhotoLab 5, you can enjoy even more precise handling of Control Points by adjusting their level of sensitivity. New Control Lines let you change the direction of the mask, and alter the width and angle of the selected region. Perfect for Landscape images when you want to adjust the light, color, and sharpness to just your skies!.…”
I don’t know how to reply to Wolfgang: “Sorry, but what’s the point to (continously) use a cam that is not supported”. I think many people in this forum are quite professional, and use equipment that best allows them to get the most out of the camera gear, and PL5 is now a huge part of that. I can appreciate that, and it is a good part of the reason why I’m now using my D750 on a tripod.
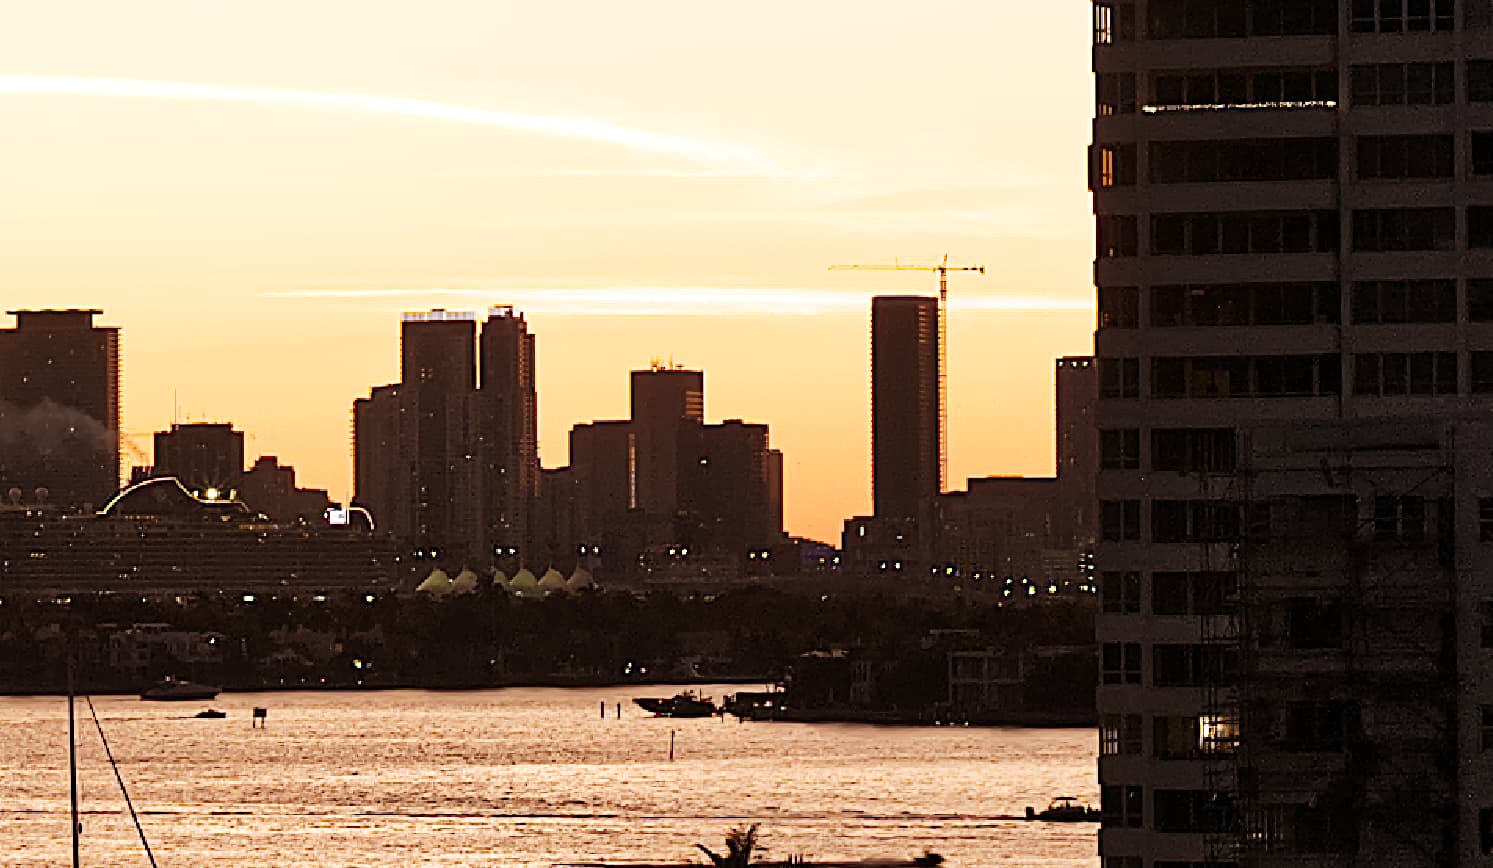
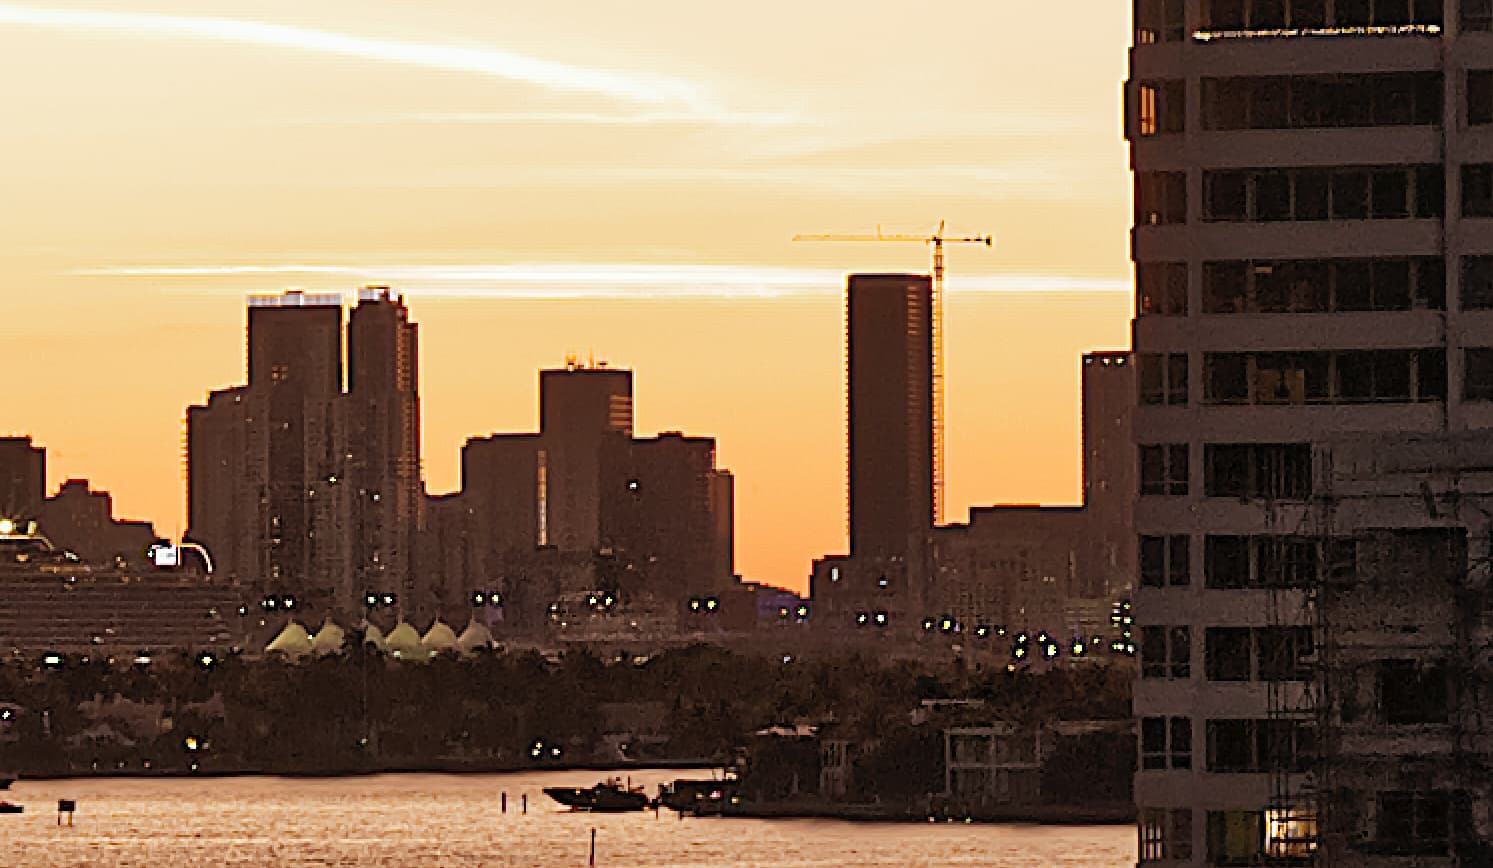
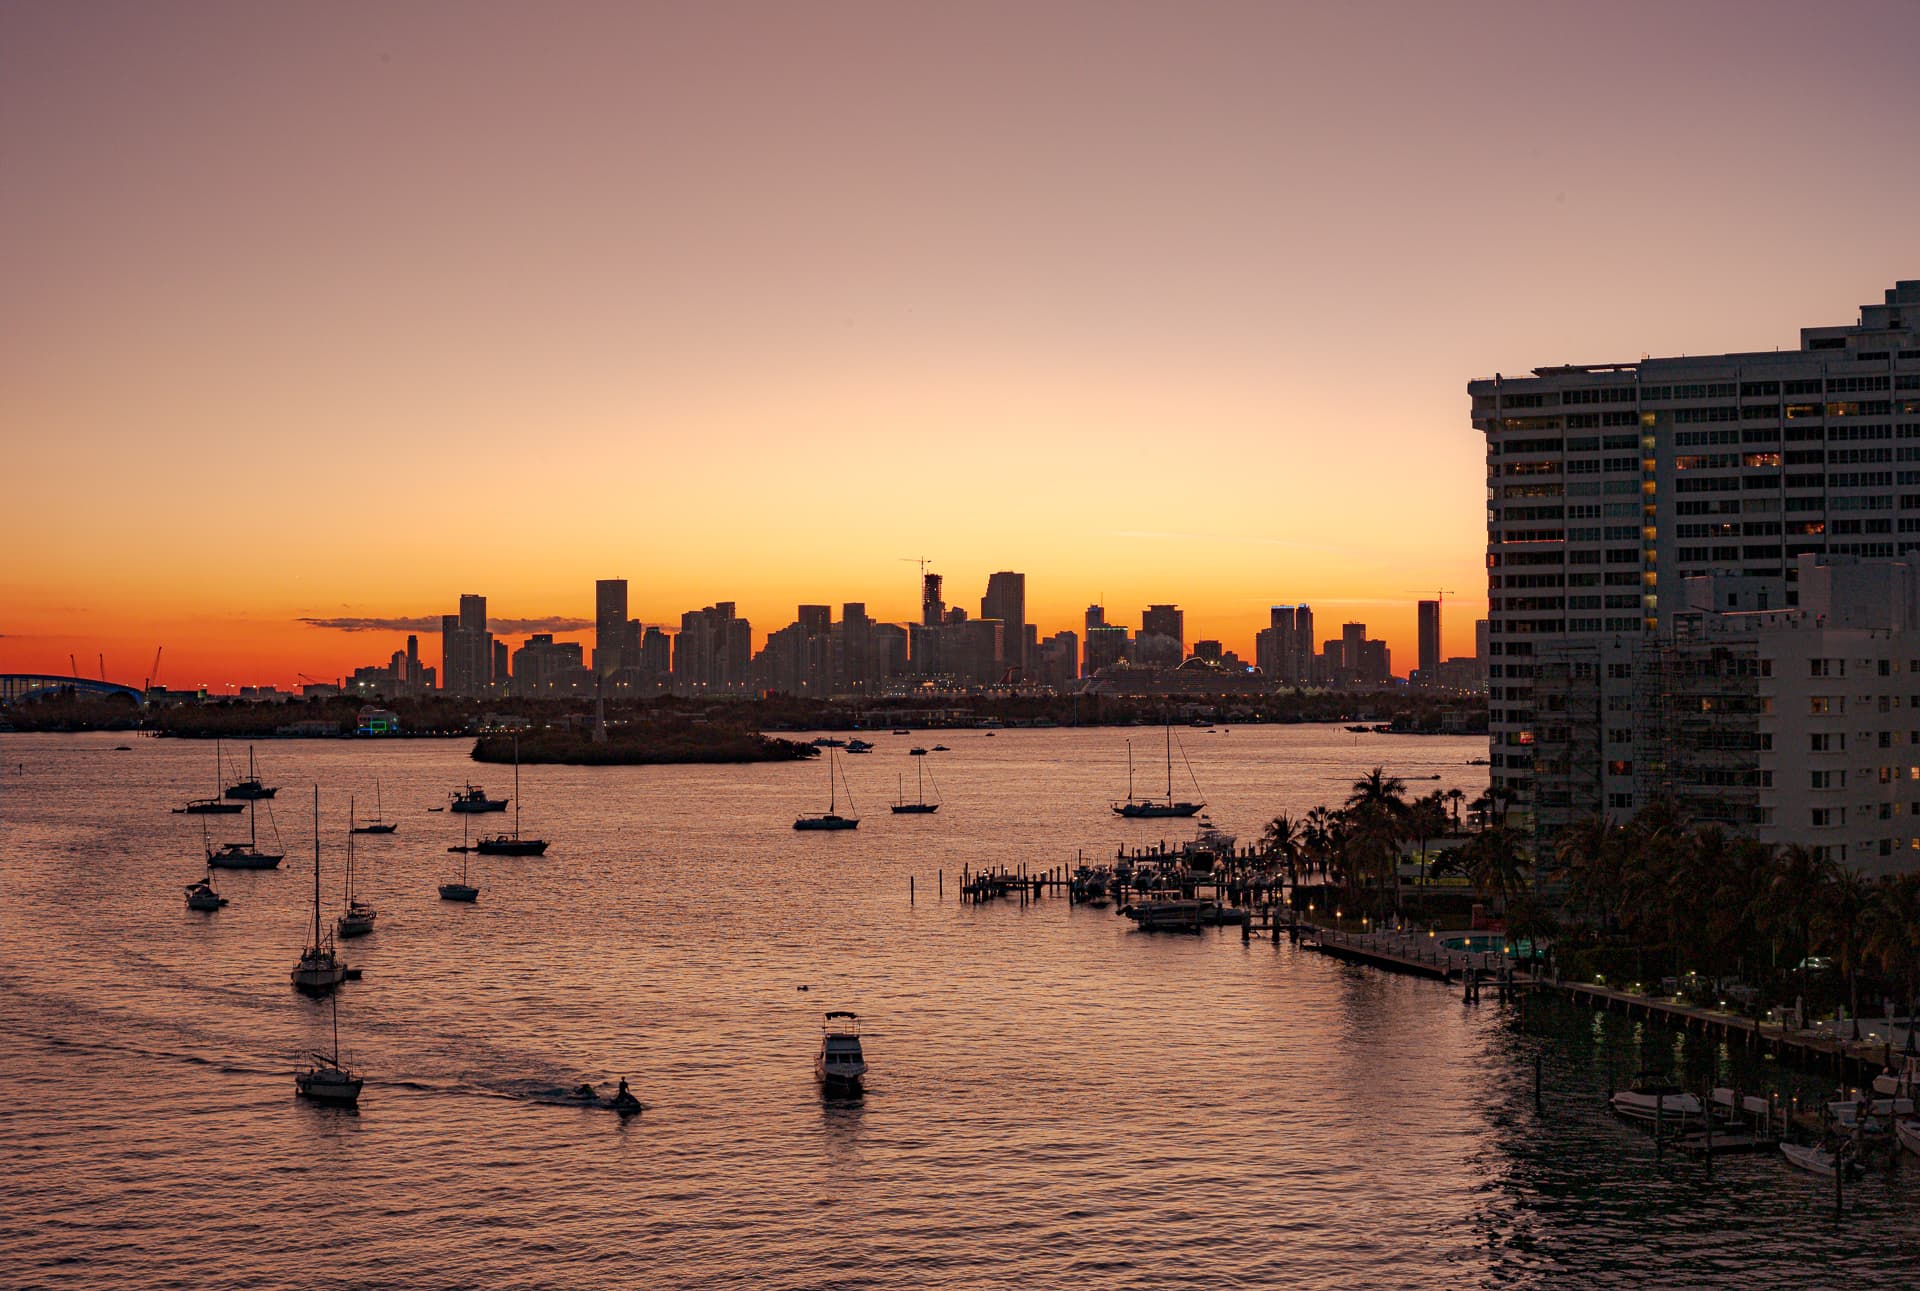
I went walking around South Beach today, near Biscayne Bay, and I left my high-tech stuff at home, taking only my M8 and my new inexpensive lens. The only person who asked about it thought it was an old film camera. I set it to f/8 and whatever shutter speed the camera’s meter indicated was proper, shot everything in raw, then used Apple’s “Preview” app to open them and save as TIFF files. The only editing I needed to do was making them level, and cropping, but I used the PL5 tools anyway because I’m used to doing so.
The camera looks so un-threatening, and is so quiet, everyone ignores it, other than my fisherman who was curious about it. My big Nikons have always been too “imposing”, and people react to them differently, both here, and in India. With my non-DSLR cameras, people just give me a pleasant expression, as they’re relaxed. I’ll post one image here, of the fisherman. Had the camera been a DSLR, he would probably be posing, not relaxing…
From now on, photos of sunsets, sunrises, buildings, and landscapes will come from my “best” camera, currently my D750. But when I’m trying to get somewhat “candid” photos of people, I do better with cameras that are small, quiet, and look ancient, so people don’t “pose” when I aim my camera at them.
(…and I now need to order a step-up ring so I can put my anti-IR filter over my lens, so leaves will be more “green” and less “yellow”, one of the problems from no infrared blocking filter in the camera body.)
Small update for Joanna - I just watched the PhotoJoseph webinar, and figured something out I didn’t properly understand before.
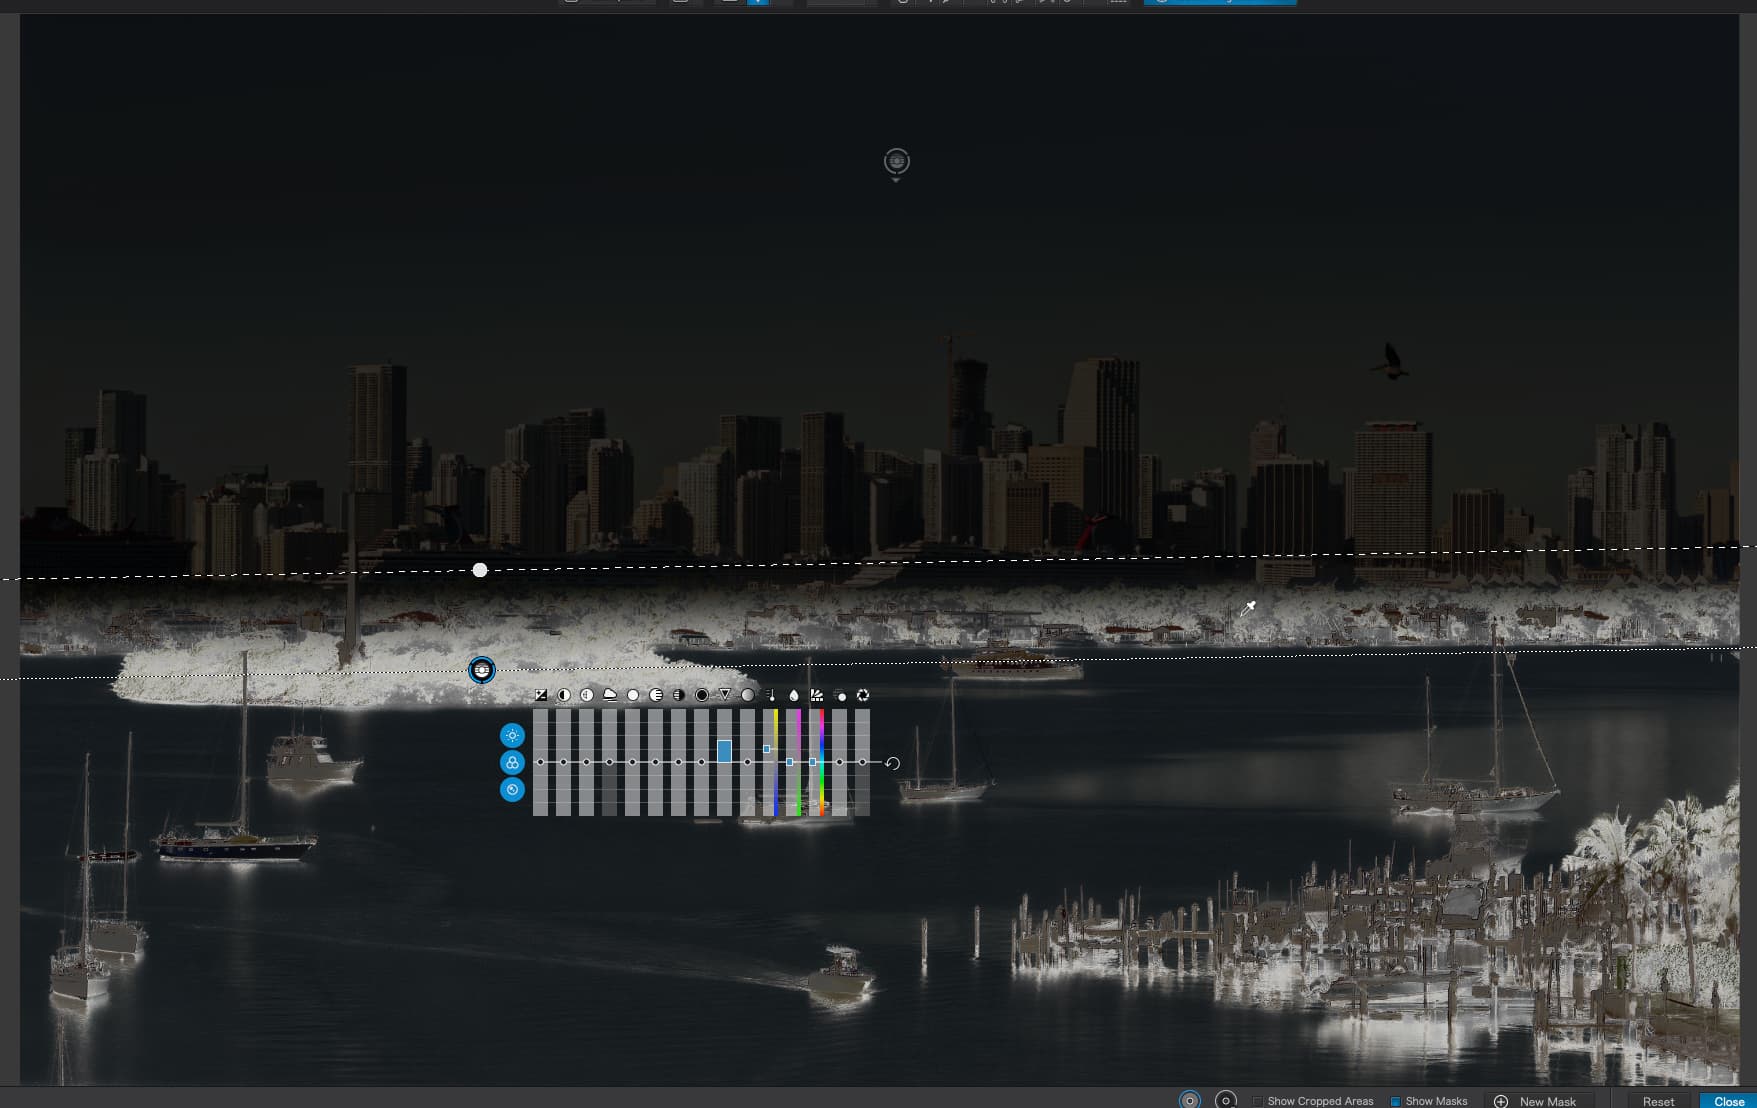
Control Line:
a) start at a point, and drag down to another point, and I get two parallel lines.
b) Starting at the upper line, and anywhere above it, my modifications will be applied at 100%.
c) Starting at the lower line, and anywhere below it, my modifications will not be applied at all.
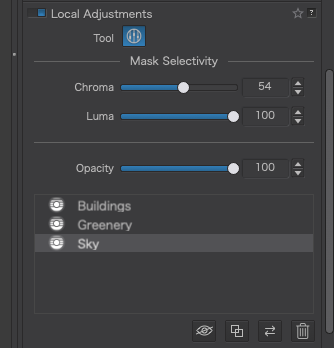
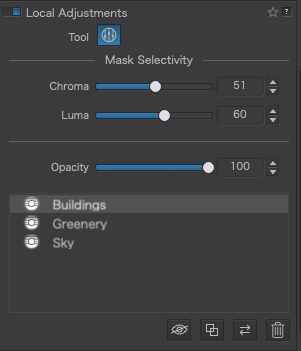
I can then put the “pipette” somewhere in the image, and that spot, along with the “Chroma” and “Luma” settings, will determine what parts of the image will be affected.
Like I said, I’m a slow learner, and somehow I got lost with “a” and “b” above.
My fault. My question for PhotoJoseph was “When I drag down to create a control line, how much should the lower line be, under the upper line? How does this affect the image?” …and I ought to have asked you this weeks ago.
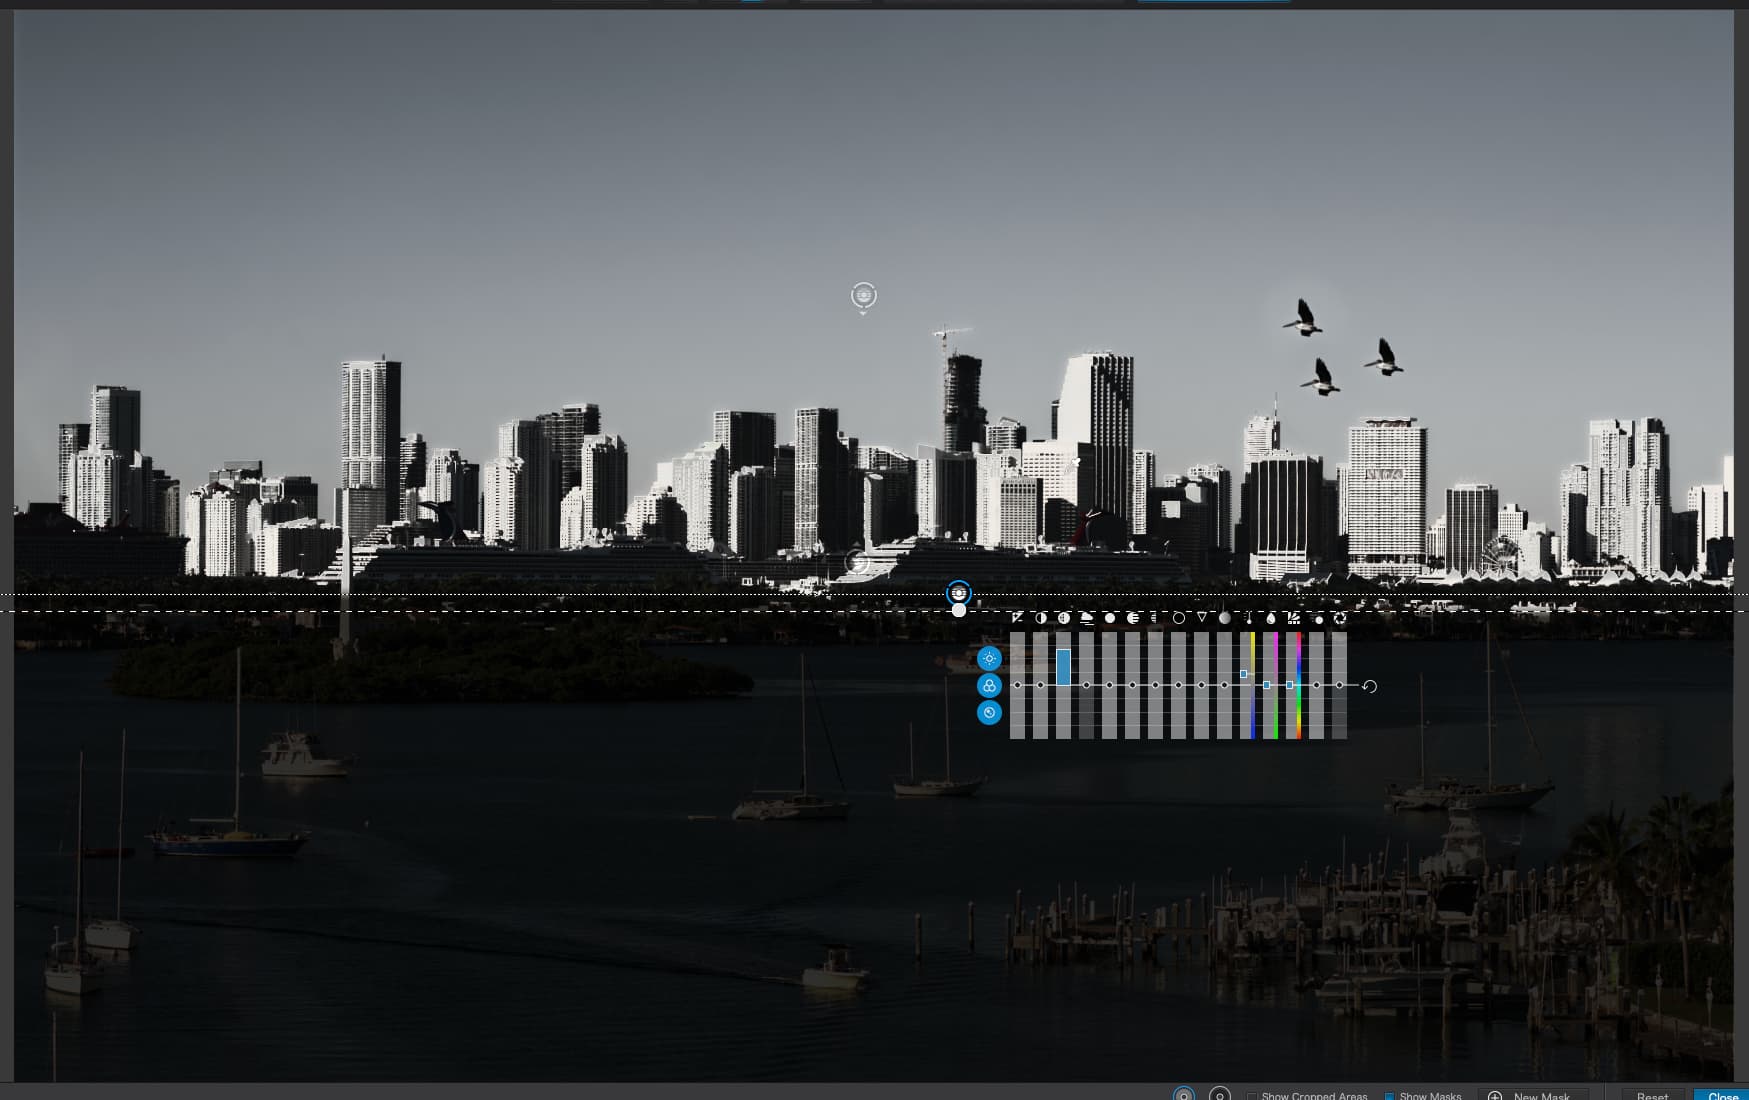
I didn’t really understand this image before. The control lines are inverted, obvious right now, but not before - so anything UNDER that lower line will get the full affect from the pipette, which is over one of the buildings.
All of a sudden, I “see the light” (or is it the dark??) and it makes sense.
Like I wrote, I’m sometimes a very slow learner, and in this case I thought I understood what you wrote, but I obviously did not. Thank you for being so patient with me!!!
Added bonus: drag both control lines outside of the image to get a global mask that depends on chroma and luma settings (based on your pipette/pickup).
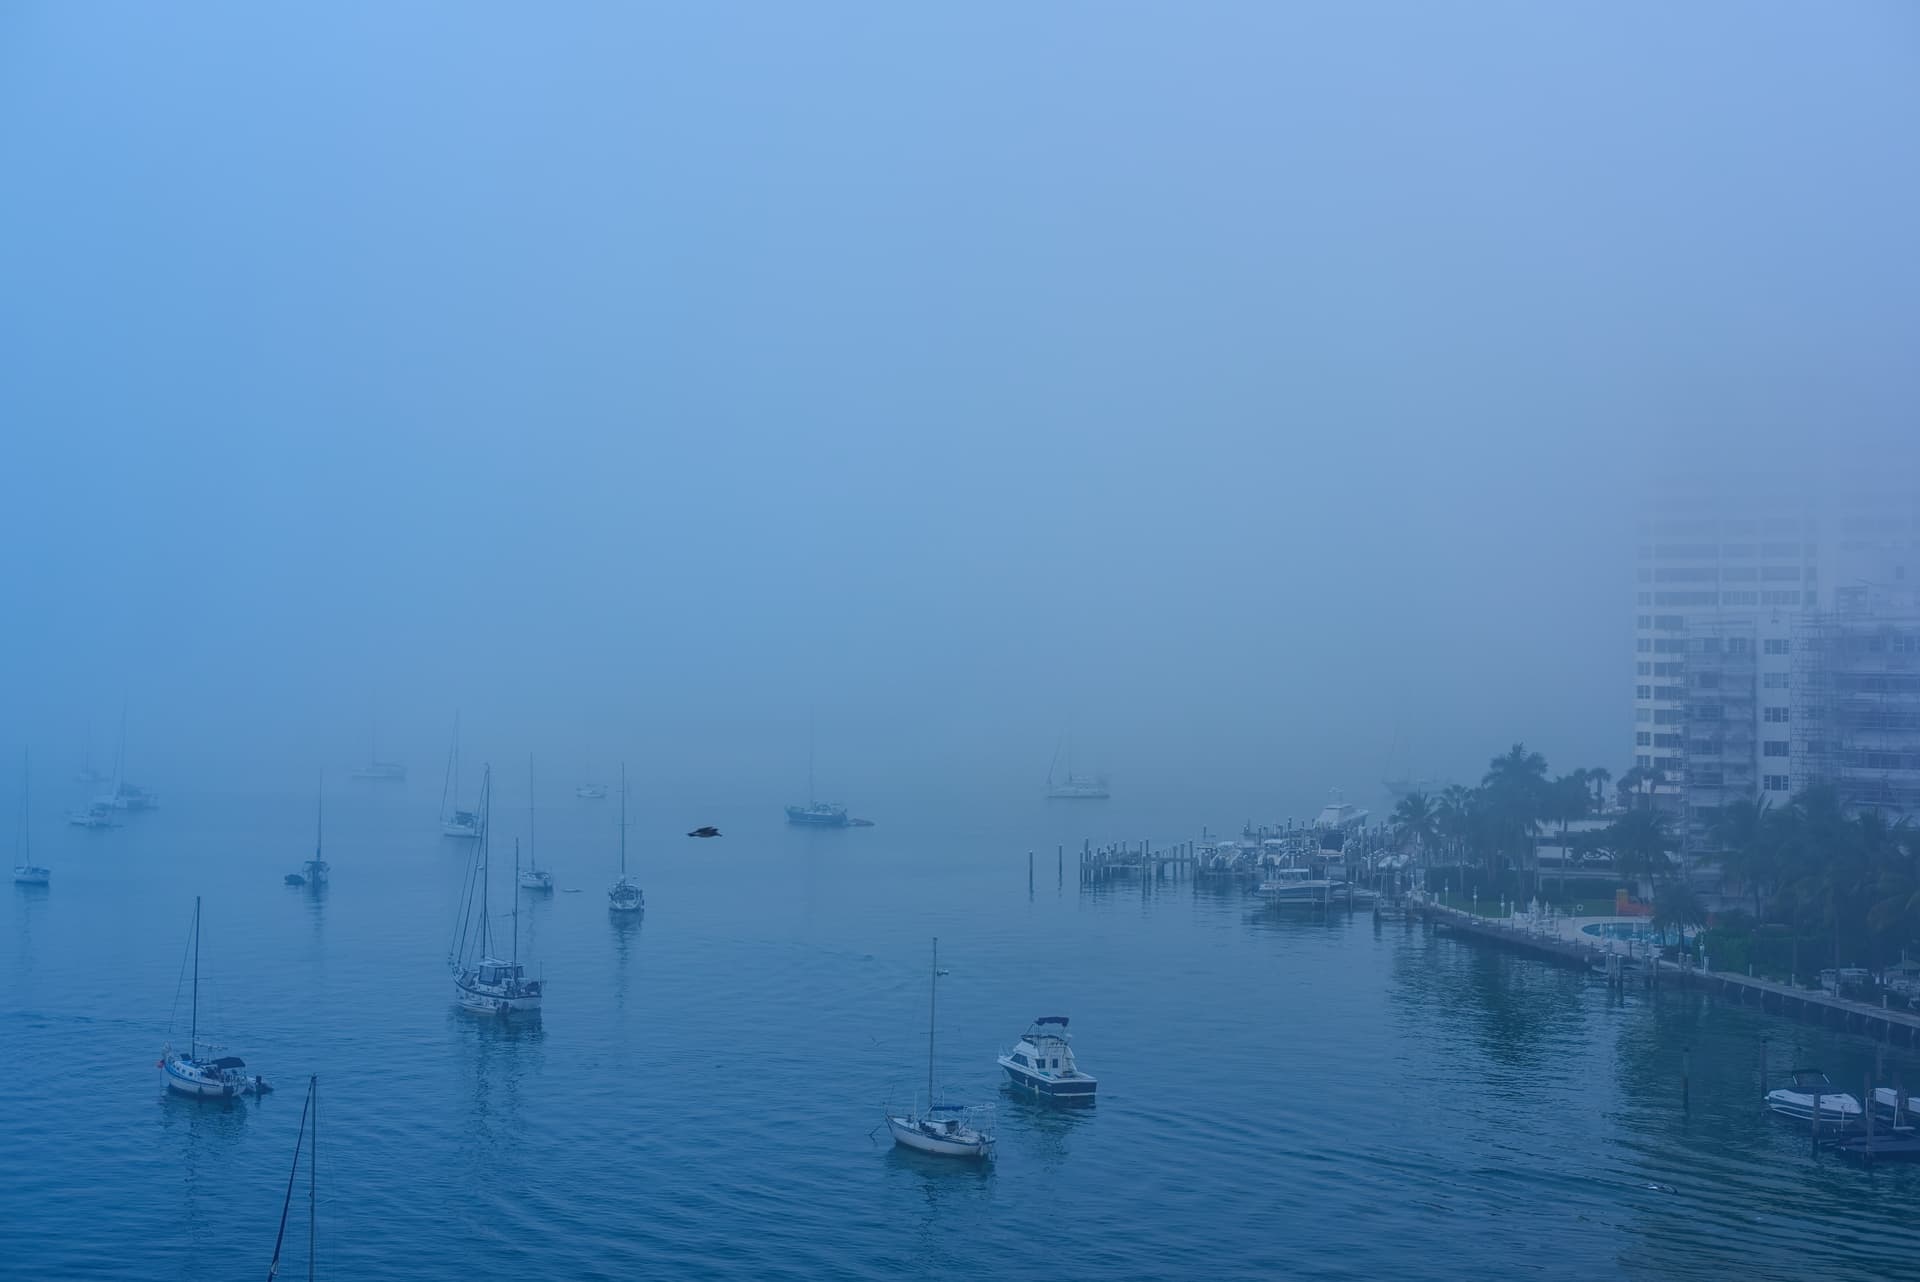
This one i just overblow blue, HSL.
Not natural but it gives something “off”. the green looks green, but there is a yellow flame from there to the left.
it’s creative on a “boring” image. (not much to watch i mean)
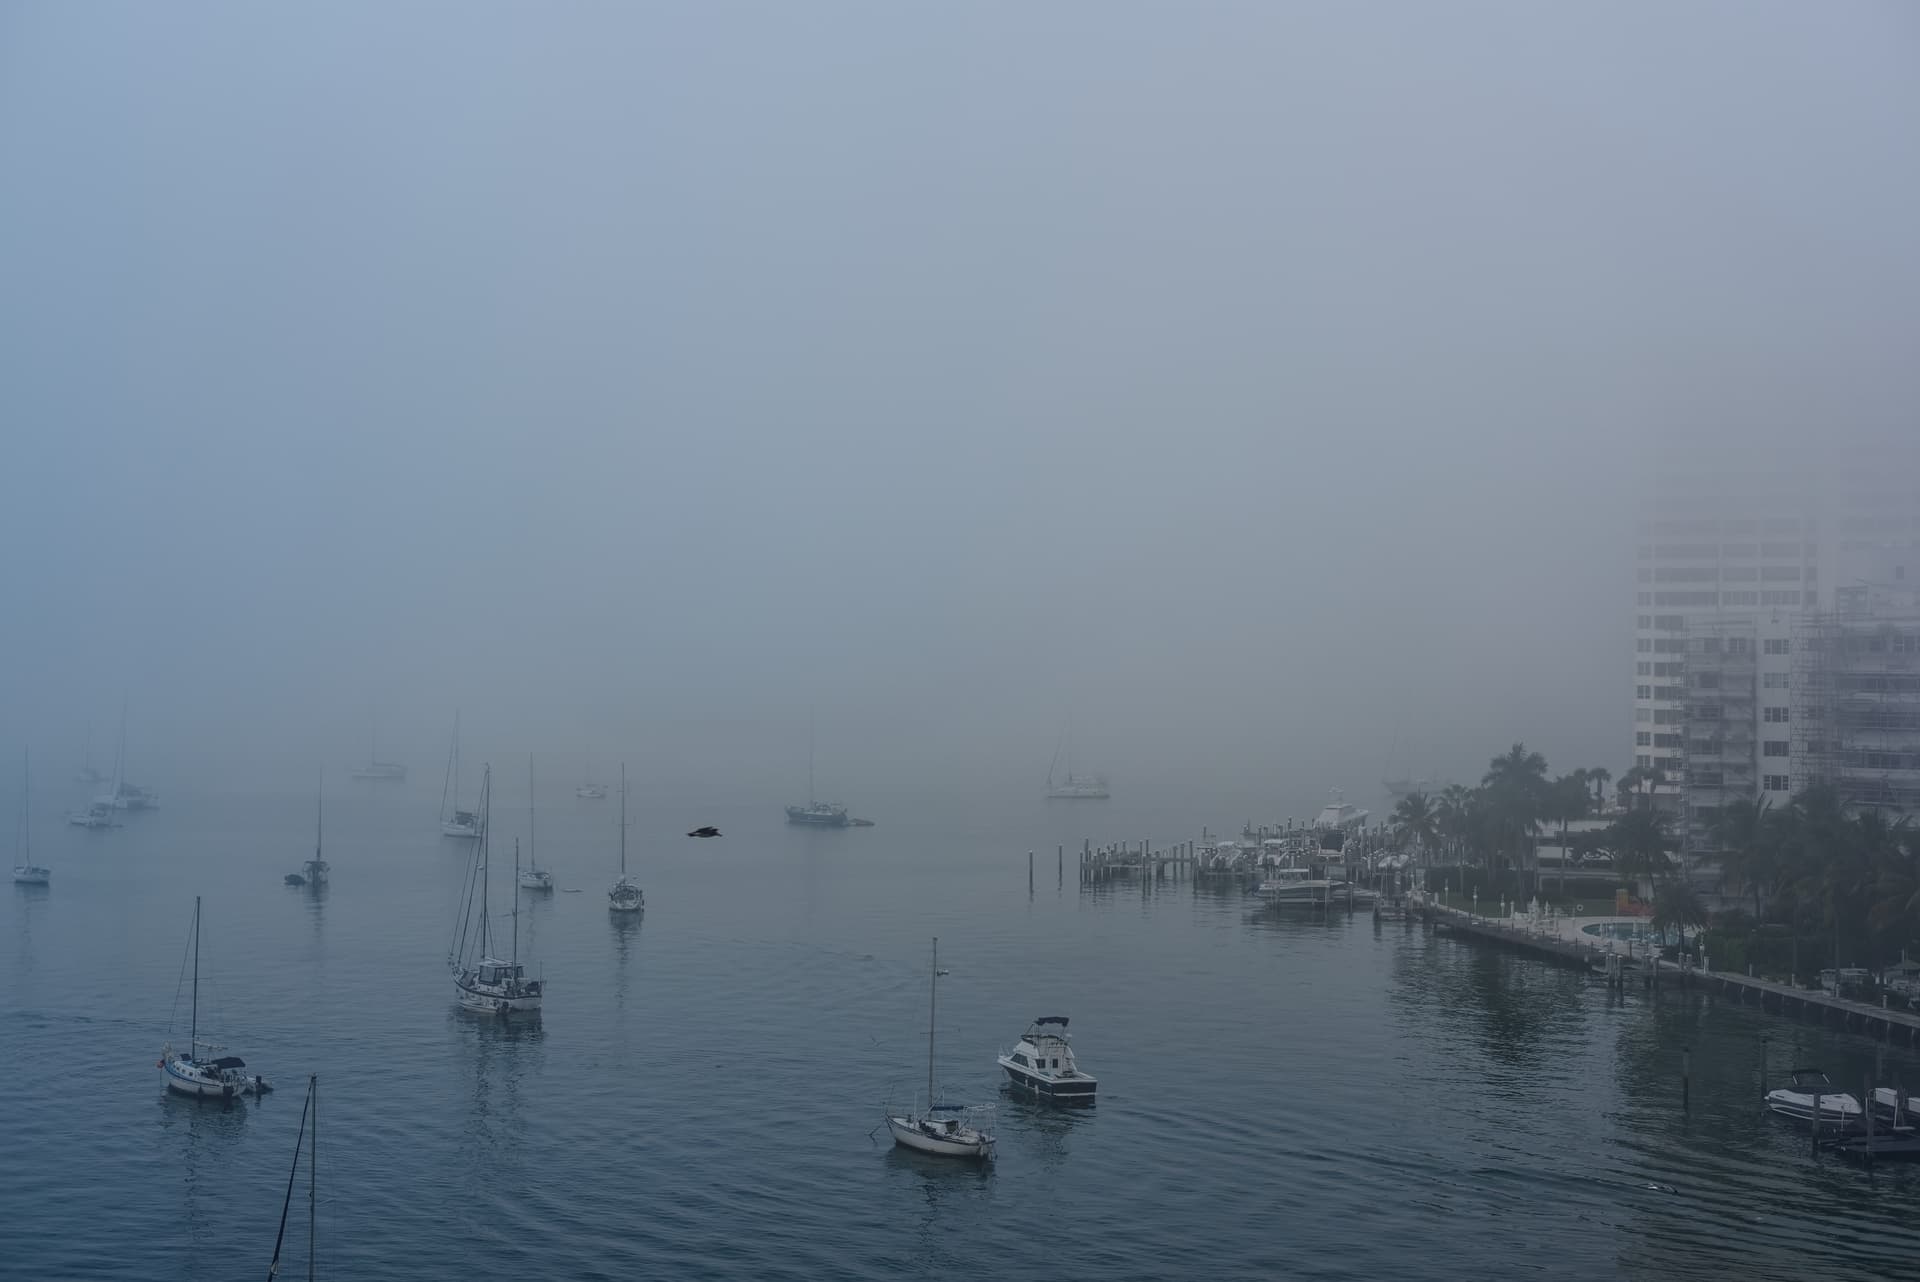
this is the same but wb on “clouded” to neutralise the blue.
They all small differences, the last is which i think i would choose.
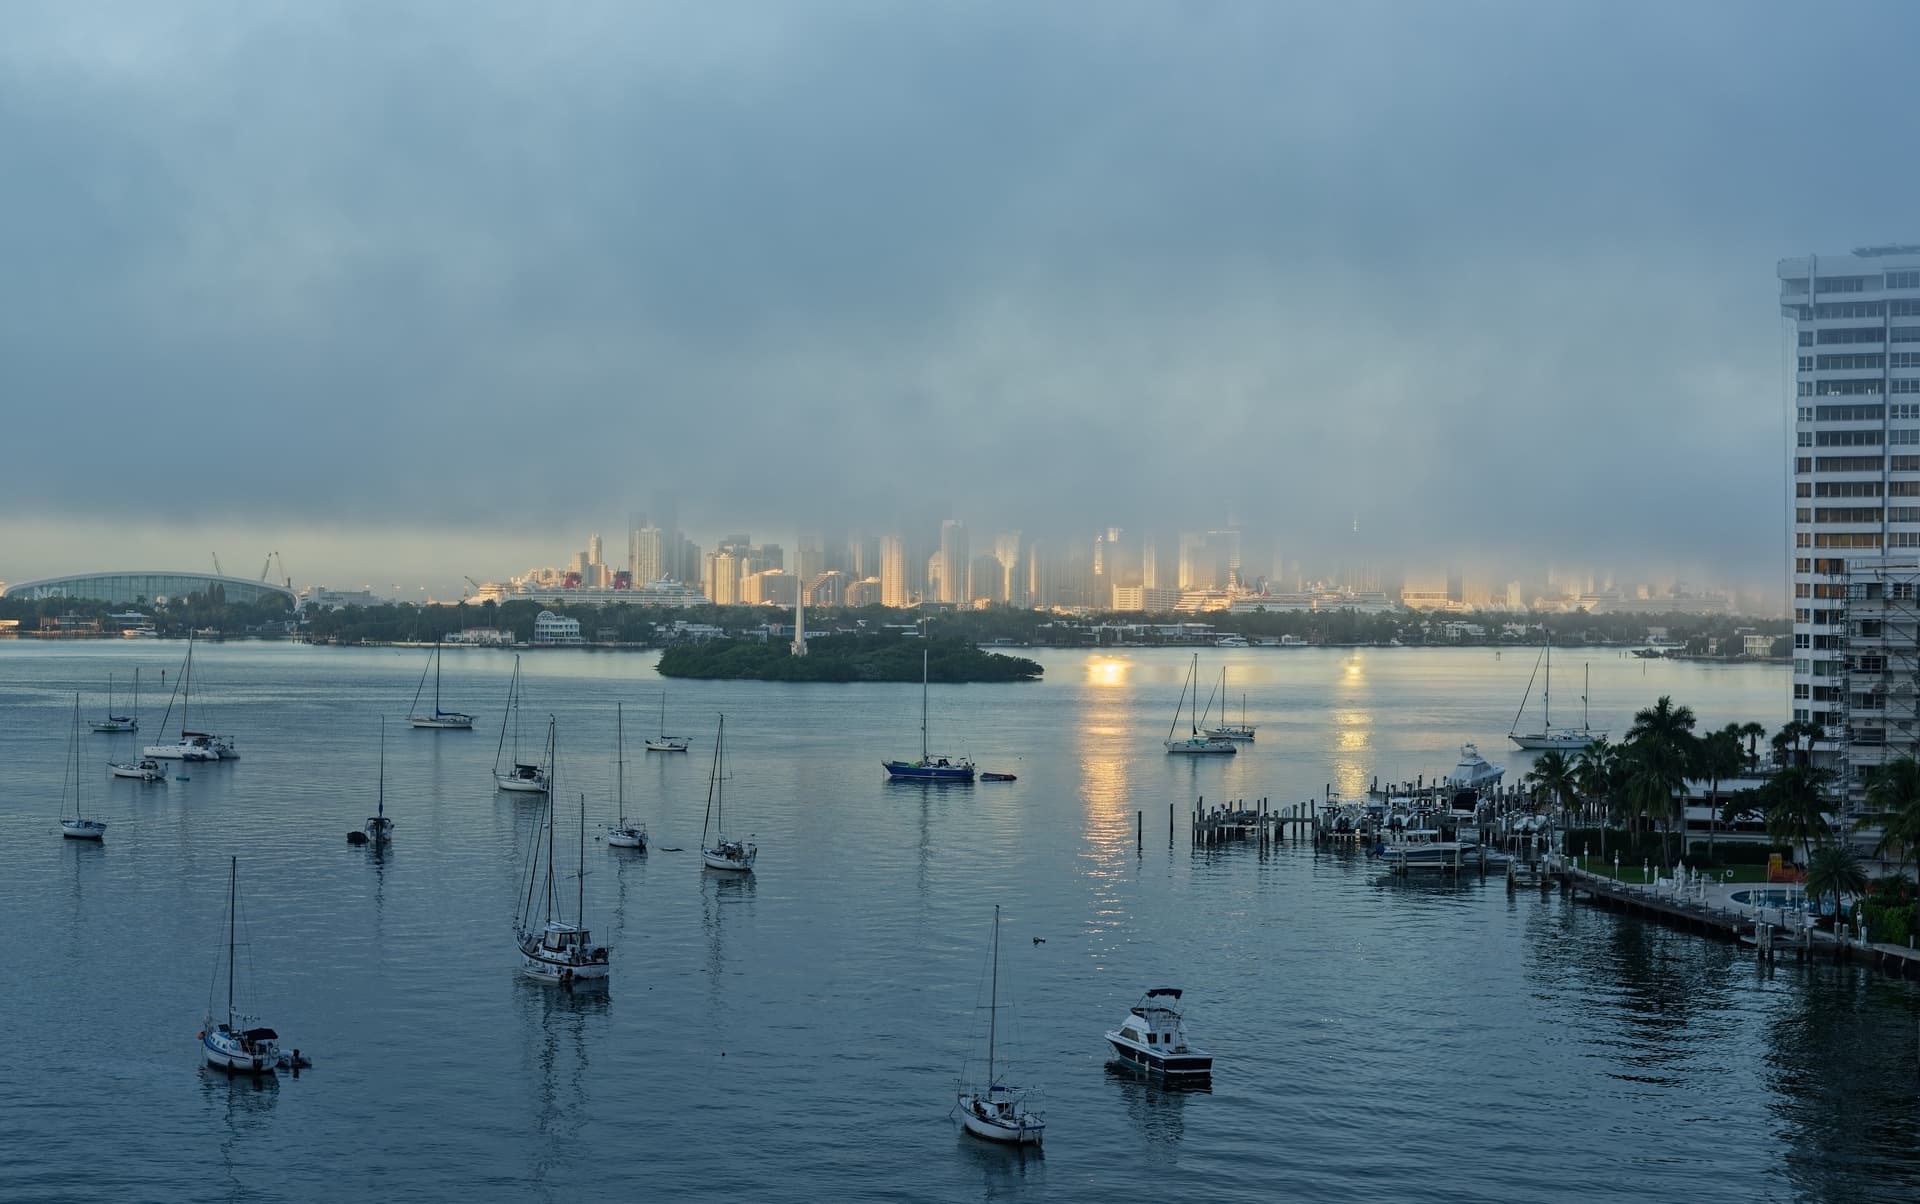
my eye start right folowing the line to the centre along the sun reflection wander of to the red chimneys of the cruiseschip and from there around the boats in front wile glansing the fog hanging on the building right side.
enough colors in the middle and some blue glans to keep the creep of the fog visible.
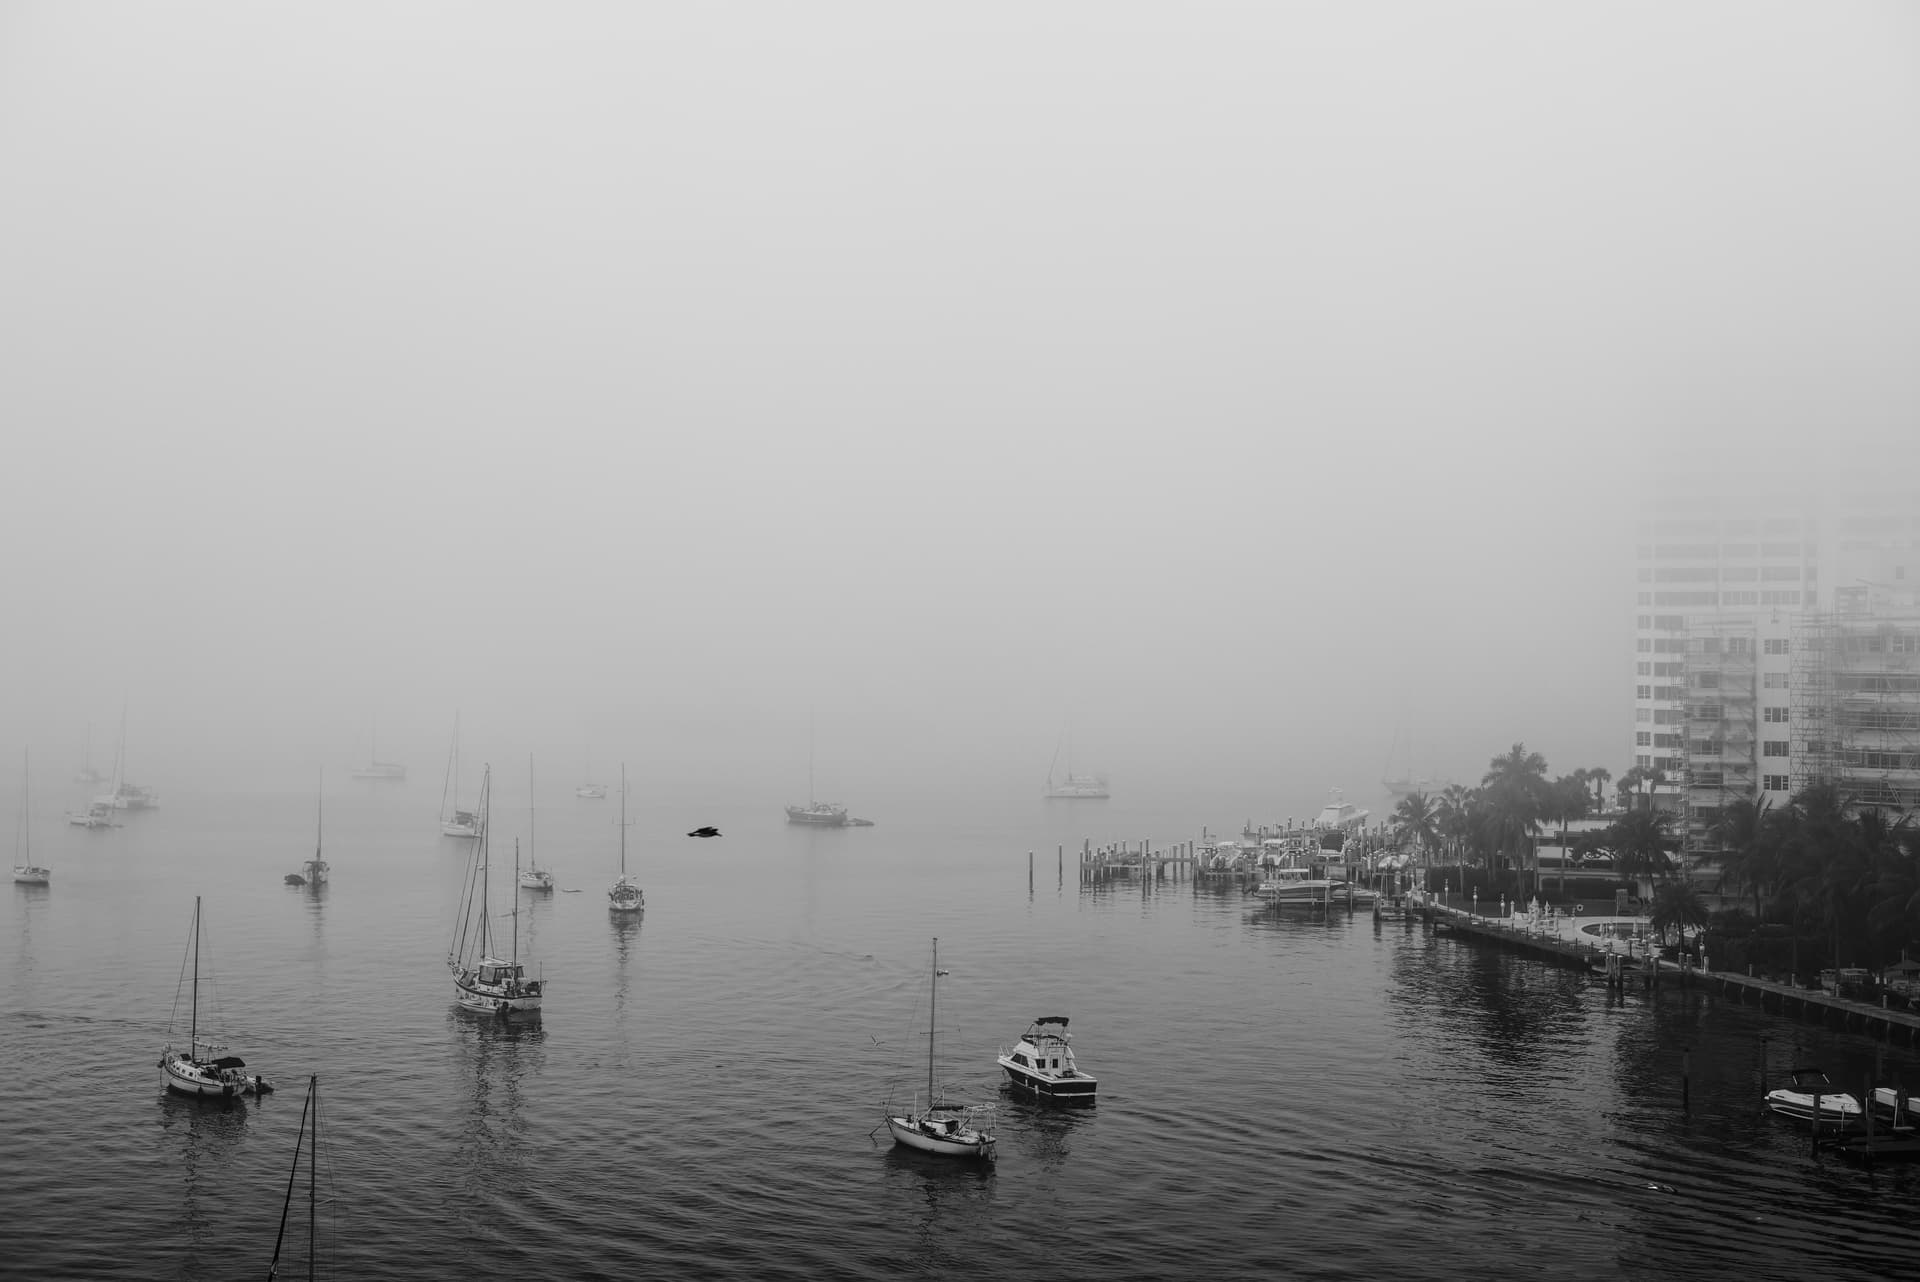
I enjoy the third one from the top, as no explanation is necessary, and there is no “blue” to confuse people. It’s simple, and obvious. I need to remember this for the future.
The last one I prefer out of those three choices, but now you have me wondering what it would look like if the fog were to be gray, not blue. The buildings would probably regain the warm early morning sunshine.
I actually understand what you mean, and can picture doing it, and why.
I thought I understood before, but I didn’t - I was wrong.
Perhaps tonight I will capture another sunset if it’s nice, and in the morning capture the early morning sun if it’s a clear day. For any more photos like these, I’ll use the D750. For infrared and candids, I’ll use the M8.2. I’ll be spending several days in the near future at my brother’s home in “the country”, and I haven’t decided which camera(s) to take, along with which lenses.
(I won’t be posting any more photos here from my Leica M8.2 - instead of all the workarounds, I can process M8 dng images in DarkTable, no more 80-meg TIFF files. I enjoy using PhotoLab more, but I’ll stick to cameras that work with it - as Wolfgang has been suggesting for a long time now.)
Weather permitting, I hope to capture a perfect sunrise photo tomorrow morning with my D750.
@platypus suggested this thread should be closed. It’s so long now, I agree with him. If others keep posting, I will too, but maybe we should start over again with a new thread.
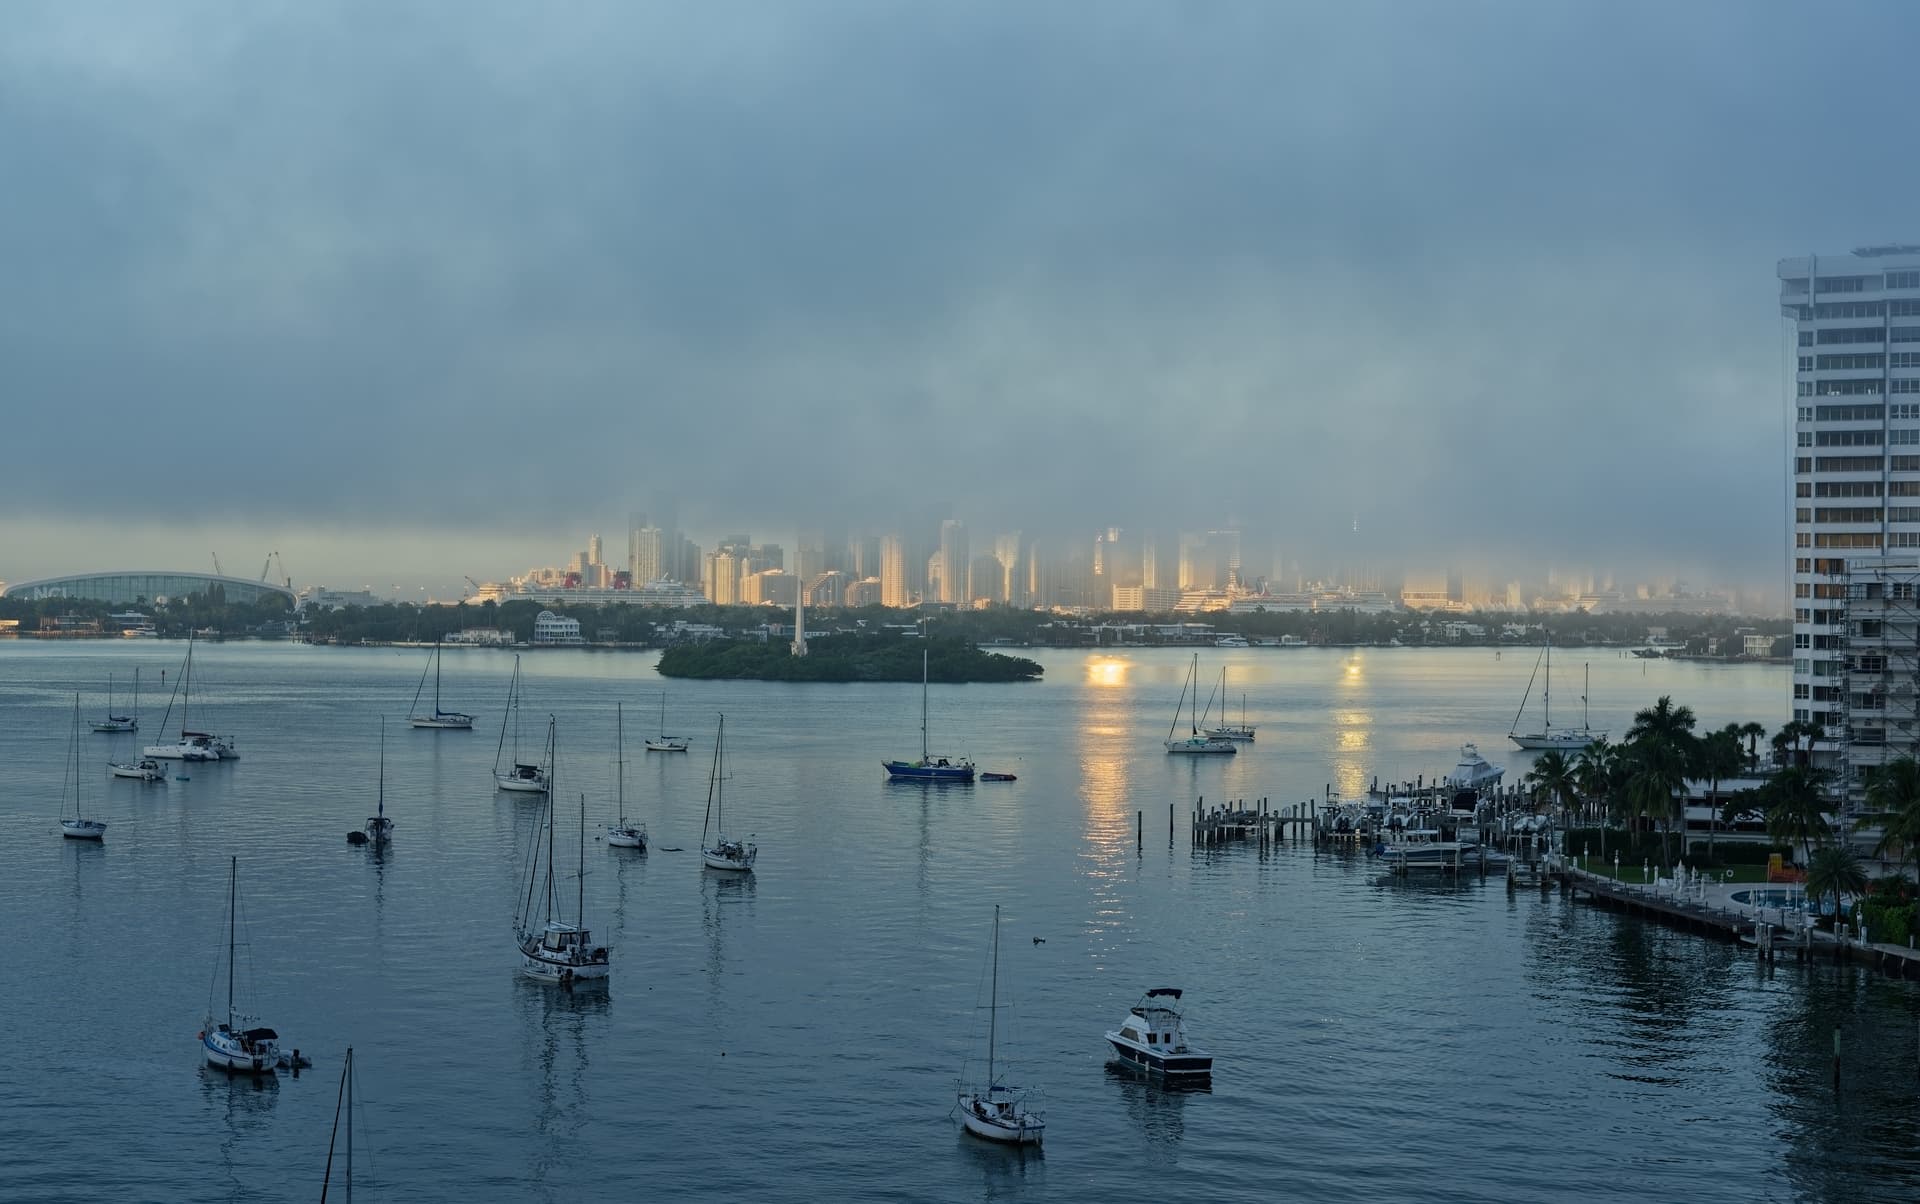
This may be my final entry for this thread. Taken early this morning with Nikon D750 and my 80-200 lens. I’d rather finish on an “upnote”, rather than my not-so-good images from my less capable Leica M8.
I was outside with my camera around 8am, but everything seemed to come together around 9:30am. The sunlight came out from behind a building to light up the boat docks at the lower right. One boat came cruising across the image to give the photo some life, and at just the right moment, Mr. Pellican flew into my image frame. There is only one control line to darken the blue sky - I thought it would do it better than with a graduated filter, but that too would have worked. Camera was on a tripod of course, and I used my remote release until the battery seemed to be getting weak. I captured the green trees and shrubs just the way I wanted on the island and elsewhere.
I probably took 40 or so images total, from “too early” until “I can’t do any better than this”, when I put the camera away and made breakfast. If I look at it on my display, it looks like exactly what I want. Even if I view it at 100%, ditto. Finally, if I examine Mr. Pellican, also ditto. I thought this was the best place to capture it, in a more or less “empty” part of my image.
Morning is a good time to take photos like this. The air is fresh and clear, sometimes I have beautiful clouds, and if anything, the saturation and vibrance is almost too high. The sun is high enough that there are no reflections to be concerned about. That, and I’m all excited inside as to getting something as close to “perfect” as I know how. No excuses.
As you can see, the Pelican breeding season has arrived
But seriously… Mike, your version is pretty good and, if you are satisfied with it, no problem. But I did want to just discuss a couple of things that I found “interesting” in what you did.
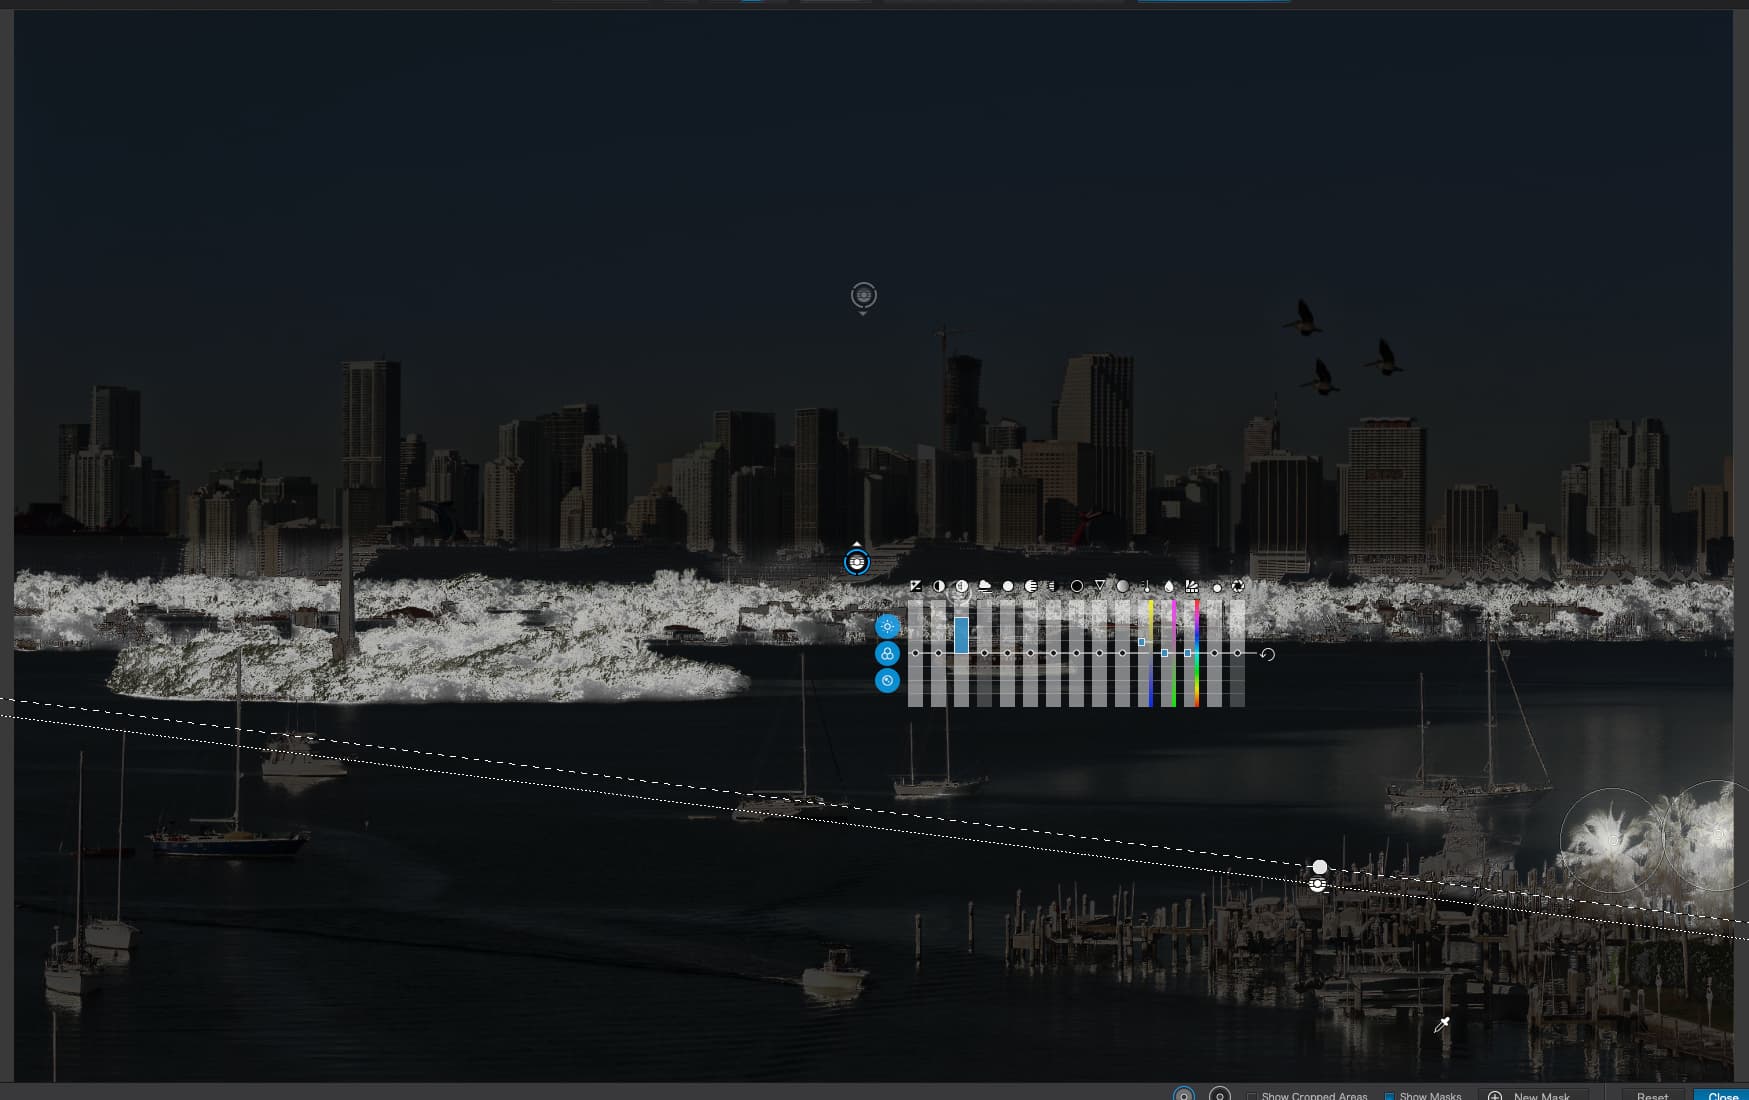
The control line you put on the sky adjusts the exposure, whereas mine adjusts the colour temperature to make it a slightly deeper blue, which better matches the reflection on the water. I also used mainly Luma selectivity to avoid the change affecting the building that intruded into the lower sky…
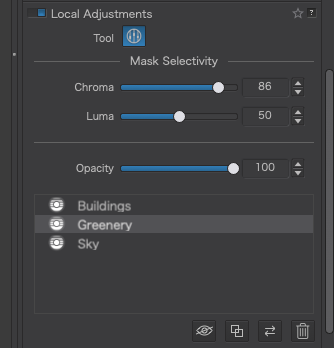
However, the lower control line that you added, presumably to increase the vibrance of the greenery, has way too much gradient, which means it barely affects the trees on the far shore.
You don’t have to start a control line on the colour/tone you want it to affect, like you did on the trees on the left. That point is irrelevant - it is solely the pipette placement that determines that. Once again you didn’t change the selectivity, which would have have helped to include less of the shadows under the docks on the lower right.
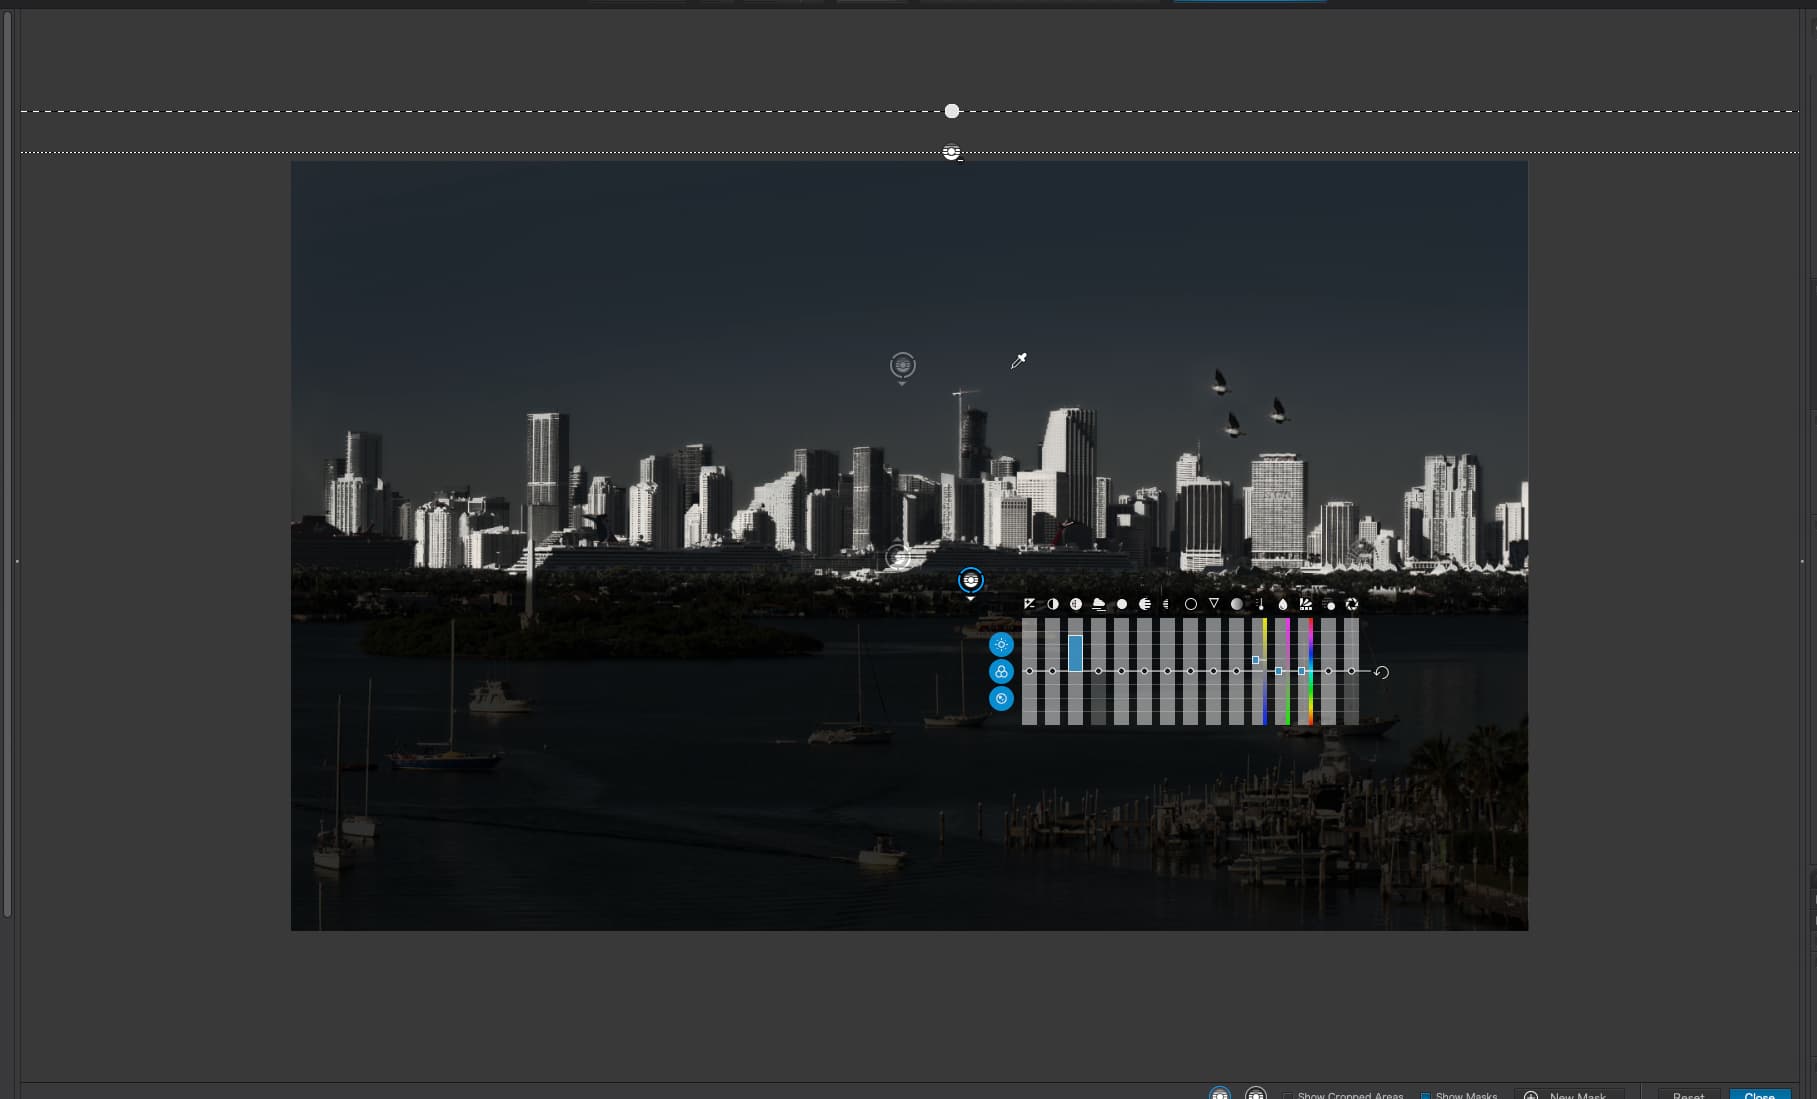
Here is my mask(s). First, the main mask (with a couple of control points to add in the trees on the right)…