DxO PhotoLab 4 and Candid Photos

Once again I must stress that how you think you remember the scene looking doesn’t necessarily make for a great picture. This image has a lot of potential, but in its current state it seems too flat and dull to me. In addition, the helicopter is an unnecessary distraction that does noting to enhance the image but instead draws the eye away from the sky. It is an interesting shot, but I think few people would find it terribly exciting as is.

Mark

1 Like

I find myself agreeing with Mark about everything being too dull and flat to make an interesting image.

Here is my version so far…

I have often been aware that you can sometimes get a slight blueish feel to the light from the sky opposite a setting sun, so I did lift the buildings a bit to give more interest and detail and it gives a contrast from a soft sky to the angular patterns of the facades of the buildings.

And, yes, I did get rid of that darned helicopter, which was really pulling the eye away from exploring the mid-ground.

I also tried to keep a balance between bringing out the beautiful crepuscular rays and putting too much detail in the rest of the clouds.

And here’s the dop file…

_MJM8669 | 2021-01-31-Sunset over Miami.nef.dop (44,2 Ko)

1 Like

The biggest problem for me with this image is the halo’s around the skyscrapers. Very Very visible around the most right shape.
Typical for using smartlighting too heavy i think.

I agree about the helicopter, it’s just to small for it’s use. A much bigger one more in front would create a D3 effect but now it’s a “blob”
But the shape is destinctive enough to be seen as helicopter imidiately.
So in or out is not a bigg issue.

@mikemyers If you aimed exposure on the light hole’s and got them just from blowing out you got skyscraper silluette’s , dark nearly black buildings. And a mid toned clouds with detail. Because the light is beaming on the back side of the skyline you can’t get it natural looking and detailed…

So turn it the other way and create a silluette image…
I will try it later to create a example if you like.

The other way was expose more on the buildings and boats, let the sky litt up with blown lighthole’s to create that “heaven is opend the doors” feeling…

This one is just in the middle, too dark in the mid tone’s but not dark enough to have detailed highlights and not dark enough to get that shadowed skyline.
Ergo no punch. No “mystery”

I need to think about this.
I love what you did to the sky, and
I love what you did to the actual buildings (not the halos).

But, it no longer looks “real” to me.
Maybe that’s because the sky isn’t reflected in the water enough.

But it is a beautiful, spectacular, image.

…and my small helicopter shows the sky did not come from Luminar.

I downloaded your ‘dop’ and re-opened the image with your settings. The “halo” around the buildings makes it look edited. I think the reflection in the water needs to be stronger. I’m not sure how to do these things.

It’s prettier, but I think it goes too far.

ok two very quick and dirty edit’s just to make my points:
my what if you shot it darker:

and this one is over pushed because it’s not in there i think but i just shuffled it to the bright point as example:

_MJM8669 2021-01-31-Sunset over Miami.nef.dop (22,6 KB)

there both not “good” because the the exposures arn’t there for what i like to show.
edit: a very dark version which i think would be the most interesting look for this scene:


final edit: i think this would be my end result: the helicopter is flying out a dark world into the bright sun up through the clouds to the light. i use that helicopter to give it a “story”… (the sunbeams are your objective the reason to shoot the image not the city so light’s off there.

_MJM8669 2021-01-31-Sunset over Miami.nef.dop (24,1 KB)


i would remove this “bird blobs” in the hole image the are spots not to identify as bird’s

Yep, I’ll spend this afternoon trying to blow the bird blobs off the sensor, starting with my M10:

Here is my version. I tried to maintain a similar crop to Mike’s version since that is the one he chose. I wanted to keep the helicopter for him, but doing so really hurts the image in my opinion. I played with the lighting and moved it more towards the reds. I also increased the reflection of the lighting on the water and changed the lighting on the buildings using control points. after that I darkened the overall exposure. Since I wasn’t there I can’t comment on how it might have actually looked.

Mark

My favorite version is what you just did. The sky is realistic, the buildings can be seen, and I guess my helicopter can go. I picked the image I did specifically because of the helicopter. I think the attached version shows the sky best, but I haven’t done anything to it:
_MJM8667 | 2021-01-31-Sunset over Miami.nef (26.1 MB)
I’ll work on this image in an hour or so. I like what I’ve learned from all of you, but I need to be able to do it on my own.

Also, sensor cleaning on Leica - effortless. I was so concerned with doing it, but all went fine. I just used a “rocket air blower”. Now I need to do it on the D750. The first photo isn’t a “picture” of the dust, it is highly exaggerated to make the dust easier to see.

OK. You are totally right about the halos - I must have gotten a bit image-blind. So, I’ve turned off the Smart Lighting completely and added a local adjustment to brighten the water just a tad.

Here’s the revised dop file…

_MJM8669 | 2021-01-31-Sunset over Miami.nef.dop (41,3 Ko)

Great example of the bad site of smartlighting.

Much better this one but my eh issue with the image is , it’s me probably, the city is unnatural bright in this light type and or ive seen this city too much or i find it not interesting enough to lift shadows to reveal details that much.

Somehow the image would be better if the sunbeams where striking the front side of the buildings. Which you can’t plan by the way.
Wasn’t there so can’t tell how it looked in real live. I think that would help to find the balance between shadows and details of the bottom half of the image.

Ouch… I wonder if there is a way to turn the city around, so the buildings face West, not East… I do get similar effects to what you describe if I go out on the balcony a few minutes after sunrise, when the city is bathed in bright sort-of-orange light. If I wake up early enough, I’ll try that tomorrow.

As to what the city looked like… My screen captures at the left is pretty much what I could see with my eyes, but it was brighter. I thought stopping down my lens a little would help with the ultra-bright parts of the sky. Obviously it wasn’t enough. I was hoping for more color, but the sun wasn’t low enough for that. This latest view is now my favorite.

I did some more thinking about this image. I love the way you all made the buildings look, so I left that as-is. I toned down the sky, and added yet more reflection to the water. I also stretched the image out which I think looks better. Time to go to sleep, I’m getting tired, and in two minutes more, it will already be “tomorrow”…

Maybe I should add your names to the credit watermark?
I think my original jpg looks like scrap compared to what WE have come up with !!!

_MJM8669 | 2021-01-31-Sunset over Miami.nef.dop (47.1 KB)

Right. What I’m about to write is not meant to be in any way critical - more just pointing out odds and ends that I would like to question about what you have done.


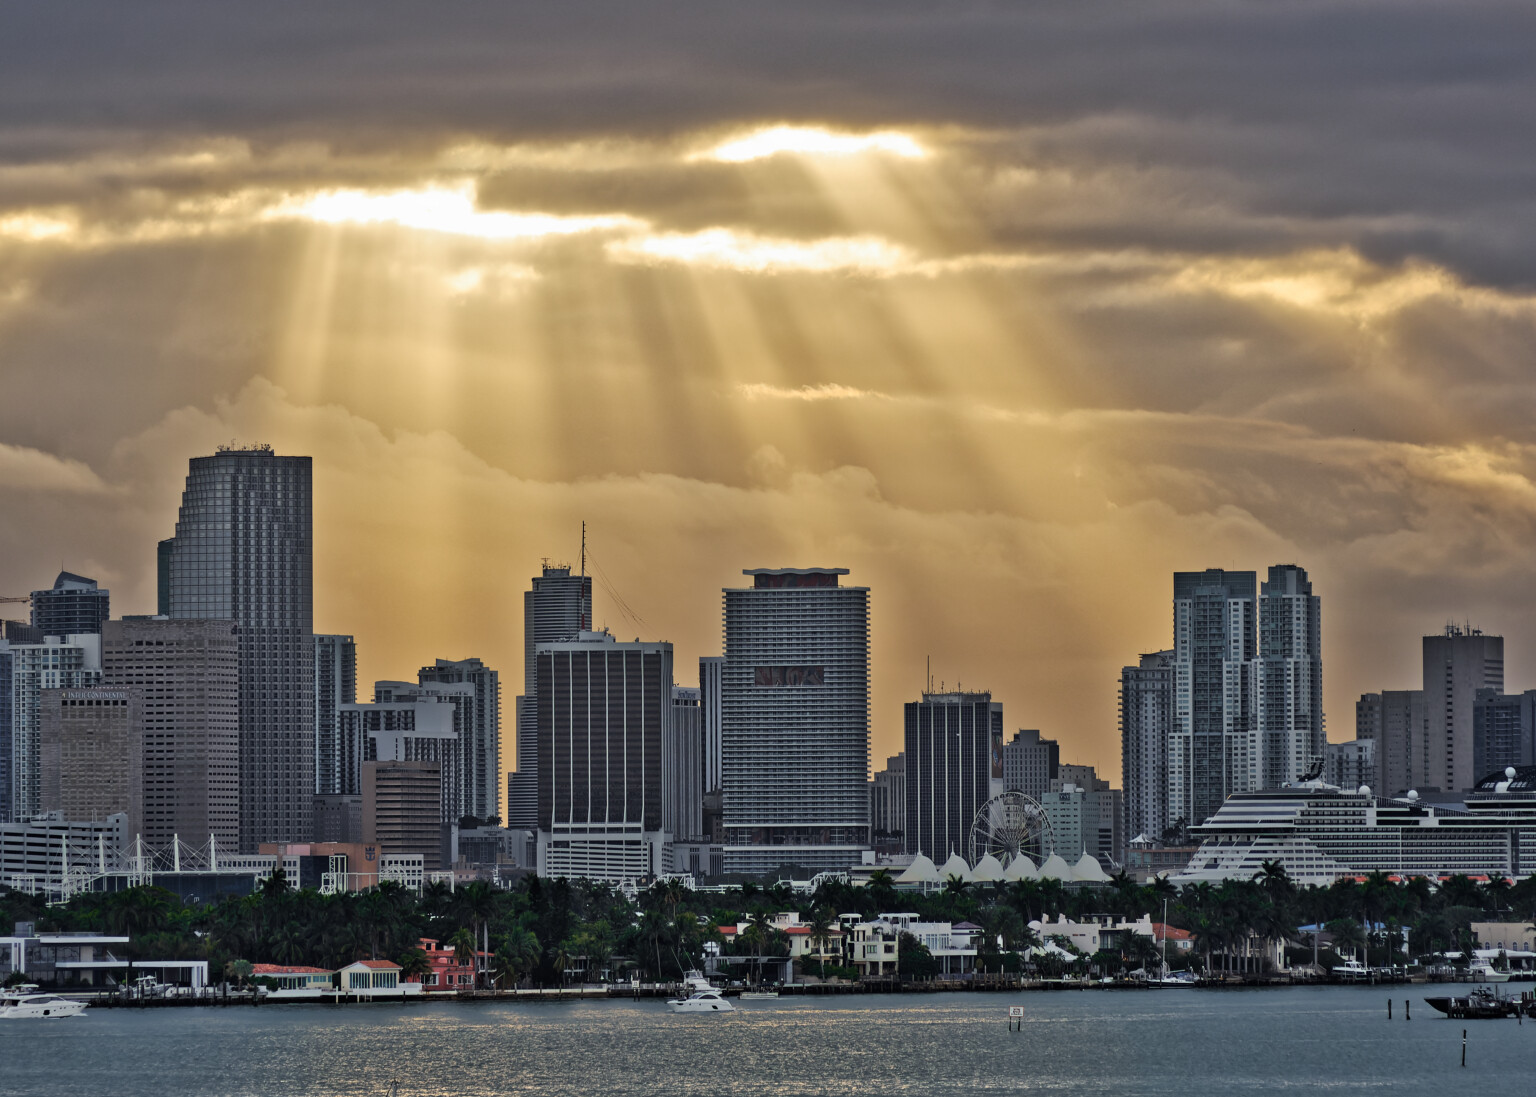
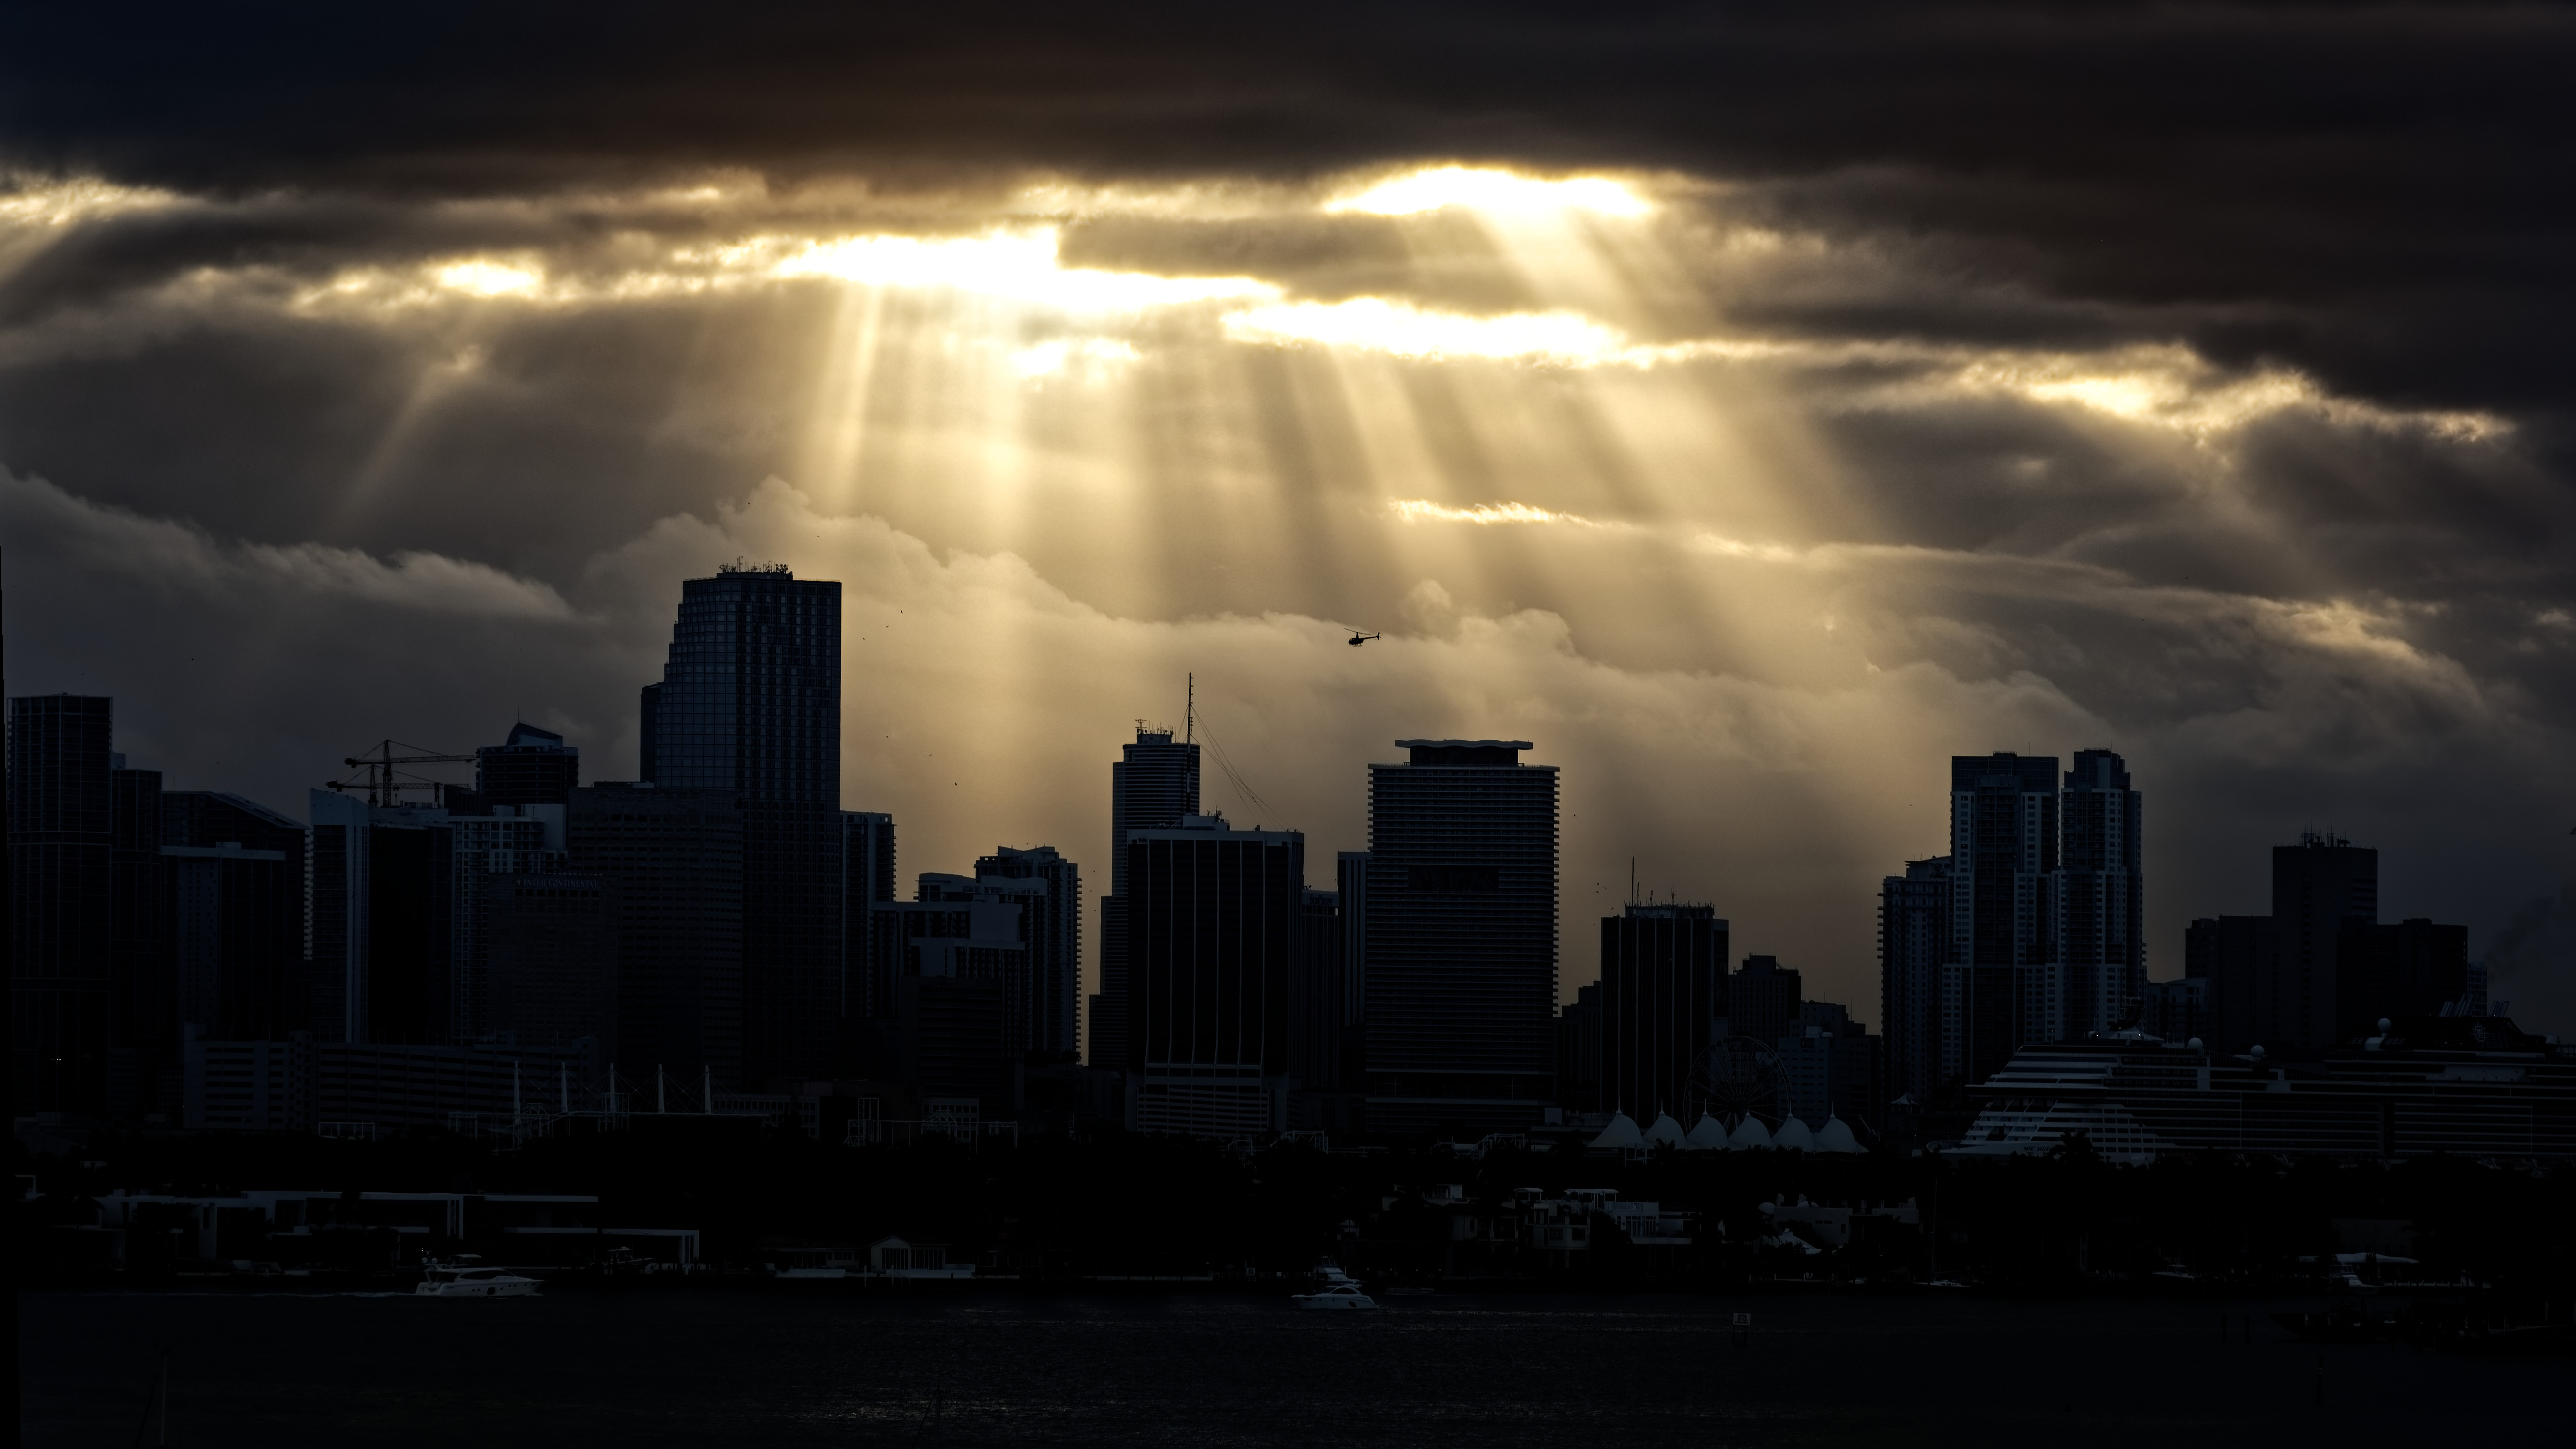
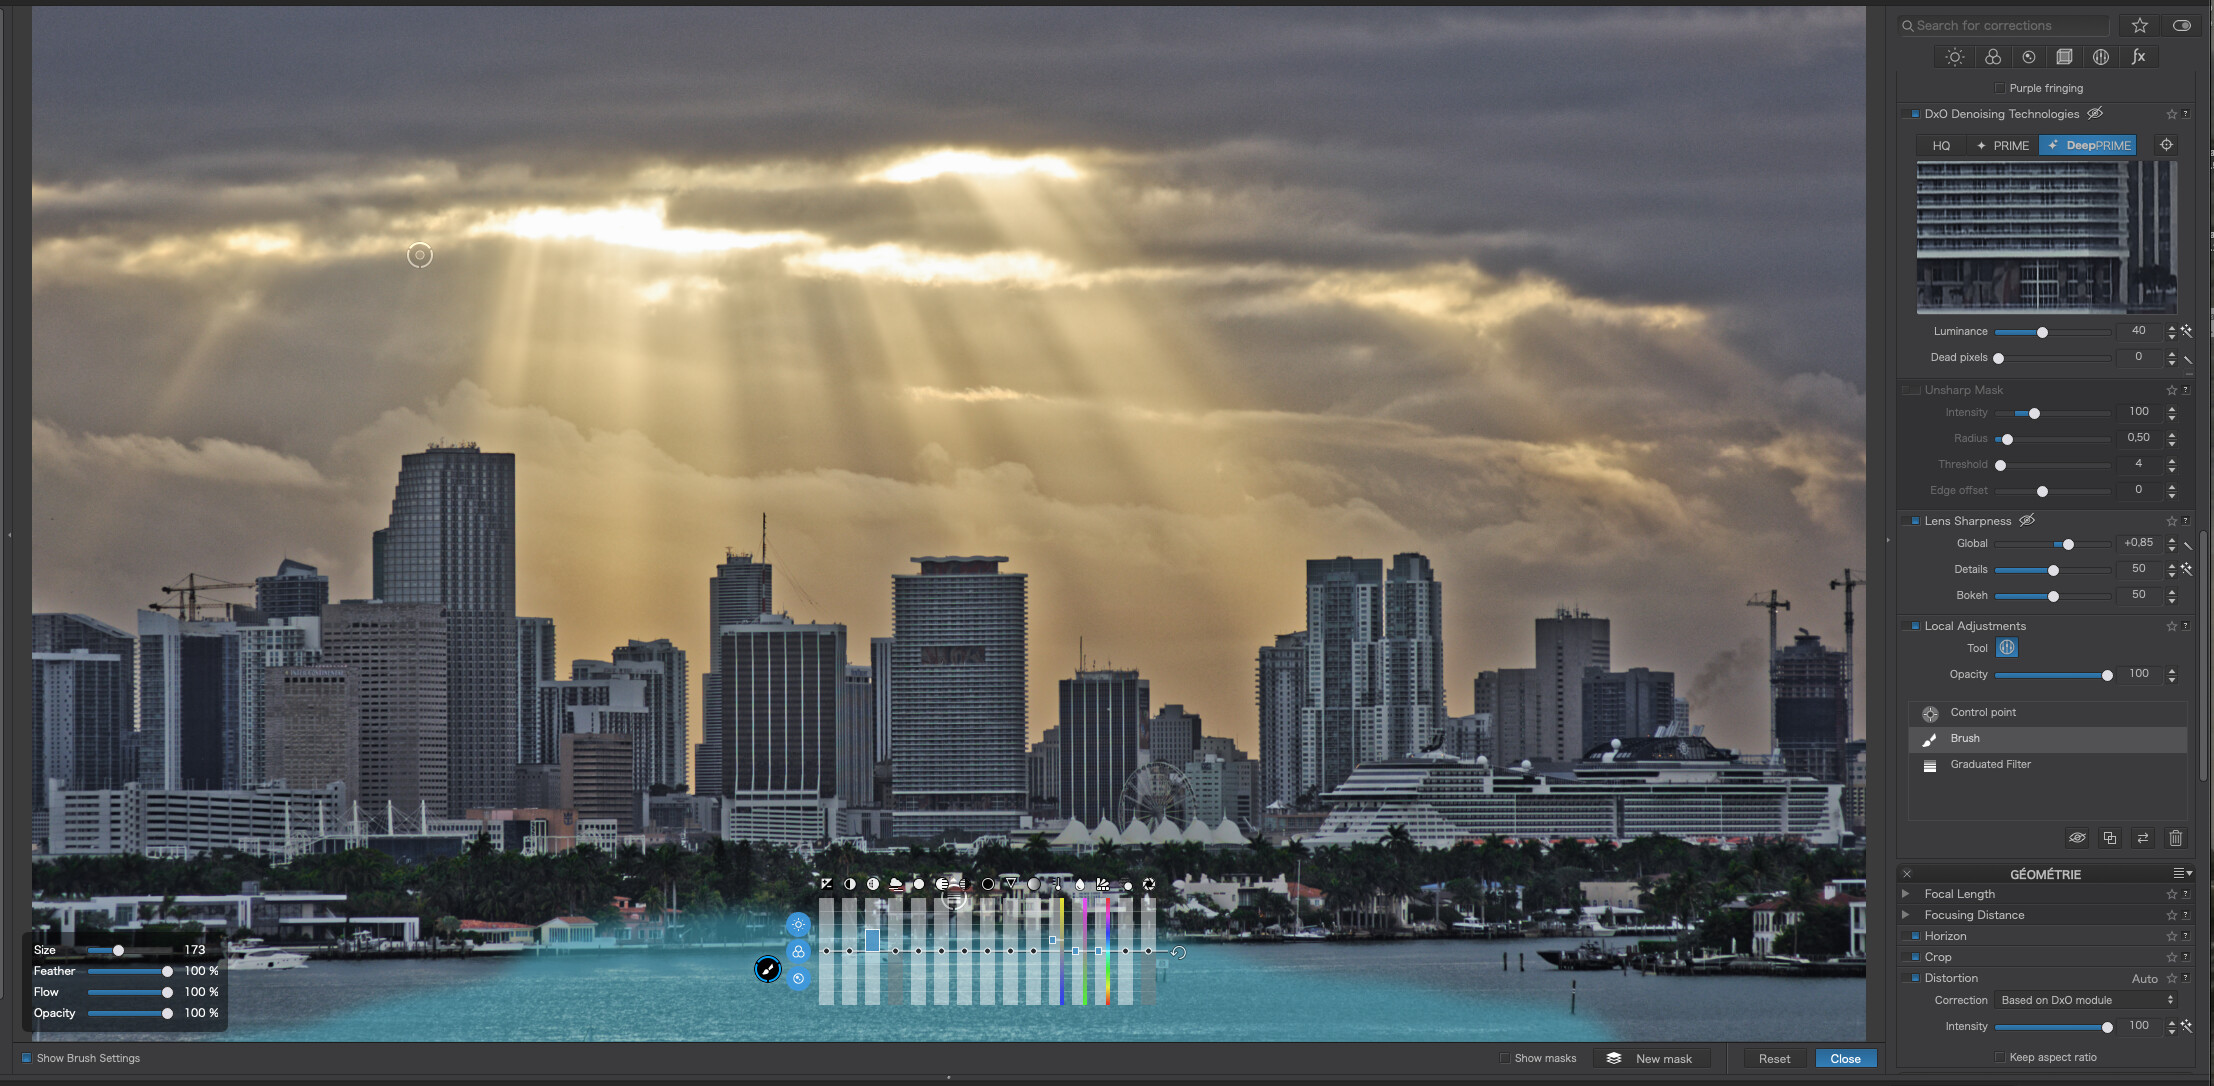
I notice that you had left the Smart Lighting in, thus causing the “halo” effect that @OXiDant mentioned and that I got rid of in the later version I posted.

Getting rid of Smart Lighting then left the sky too strong for your liking, so you attempted to “weaken” it by adding control points, which, although not obvious in this case, can leave a “blotchy” effect on a plainer sky.

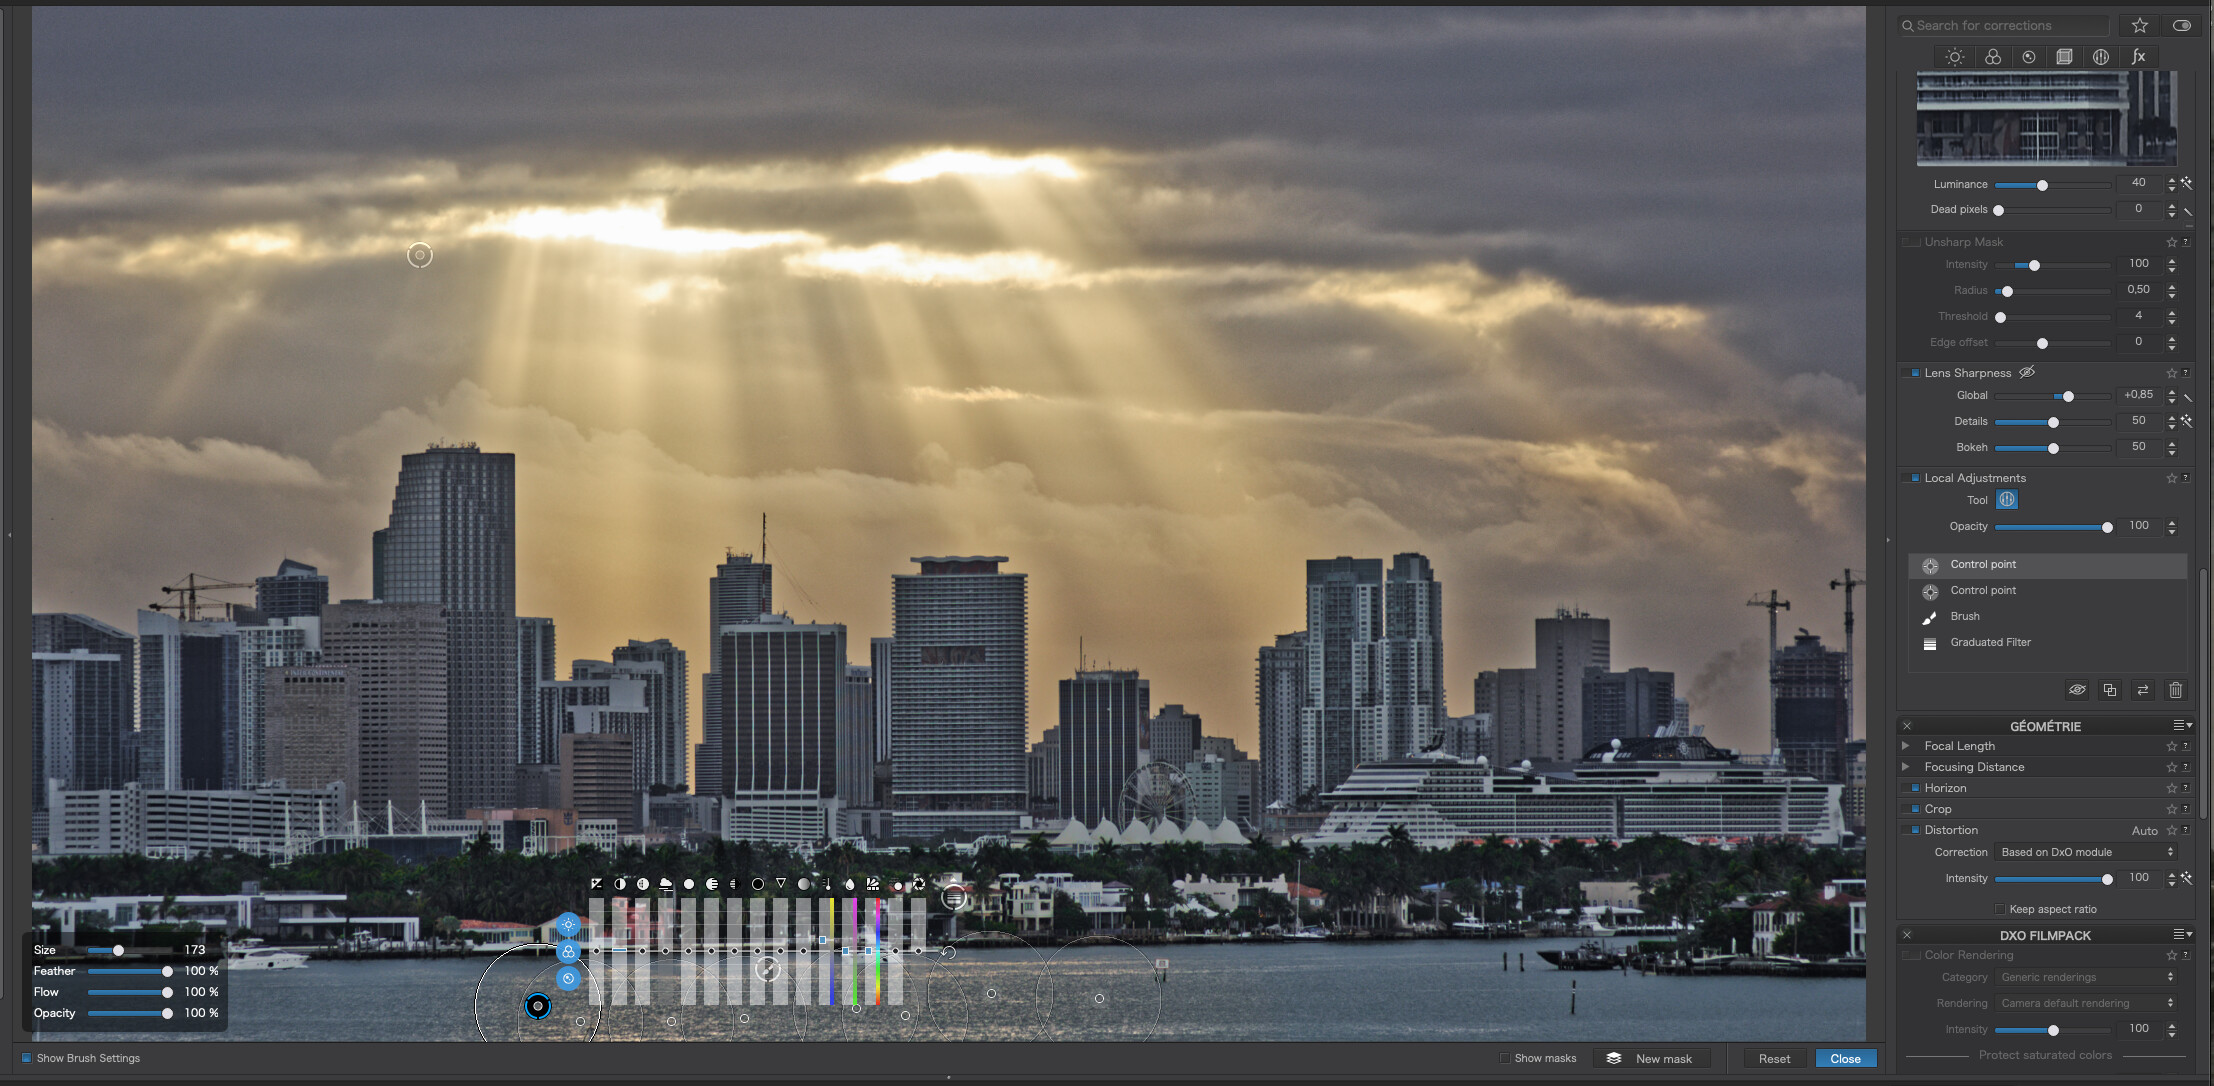
So, for the sake of a learning exercise, I replaced the control points with an auto-mask, which detects the boundaries with the buildings and, effectively, covers the whole sky without overlapping the buildings.

Now that the sky is separately manipulable, you can then adjust it without fear of affecting anything else.


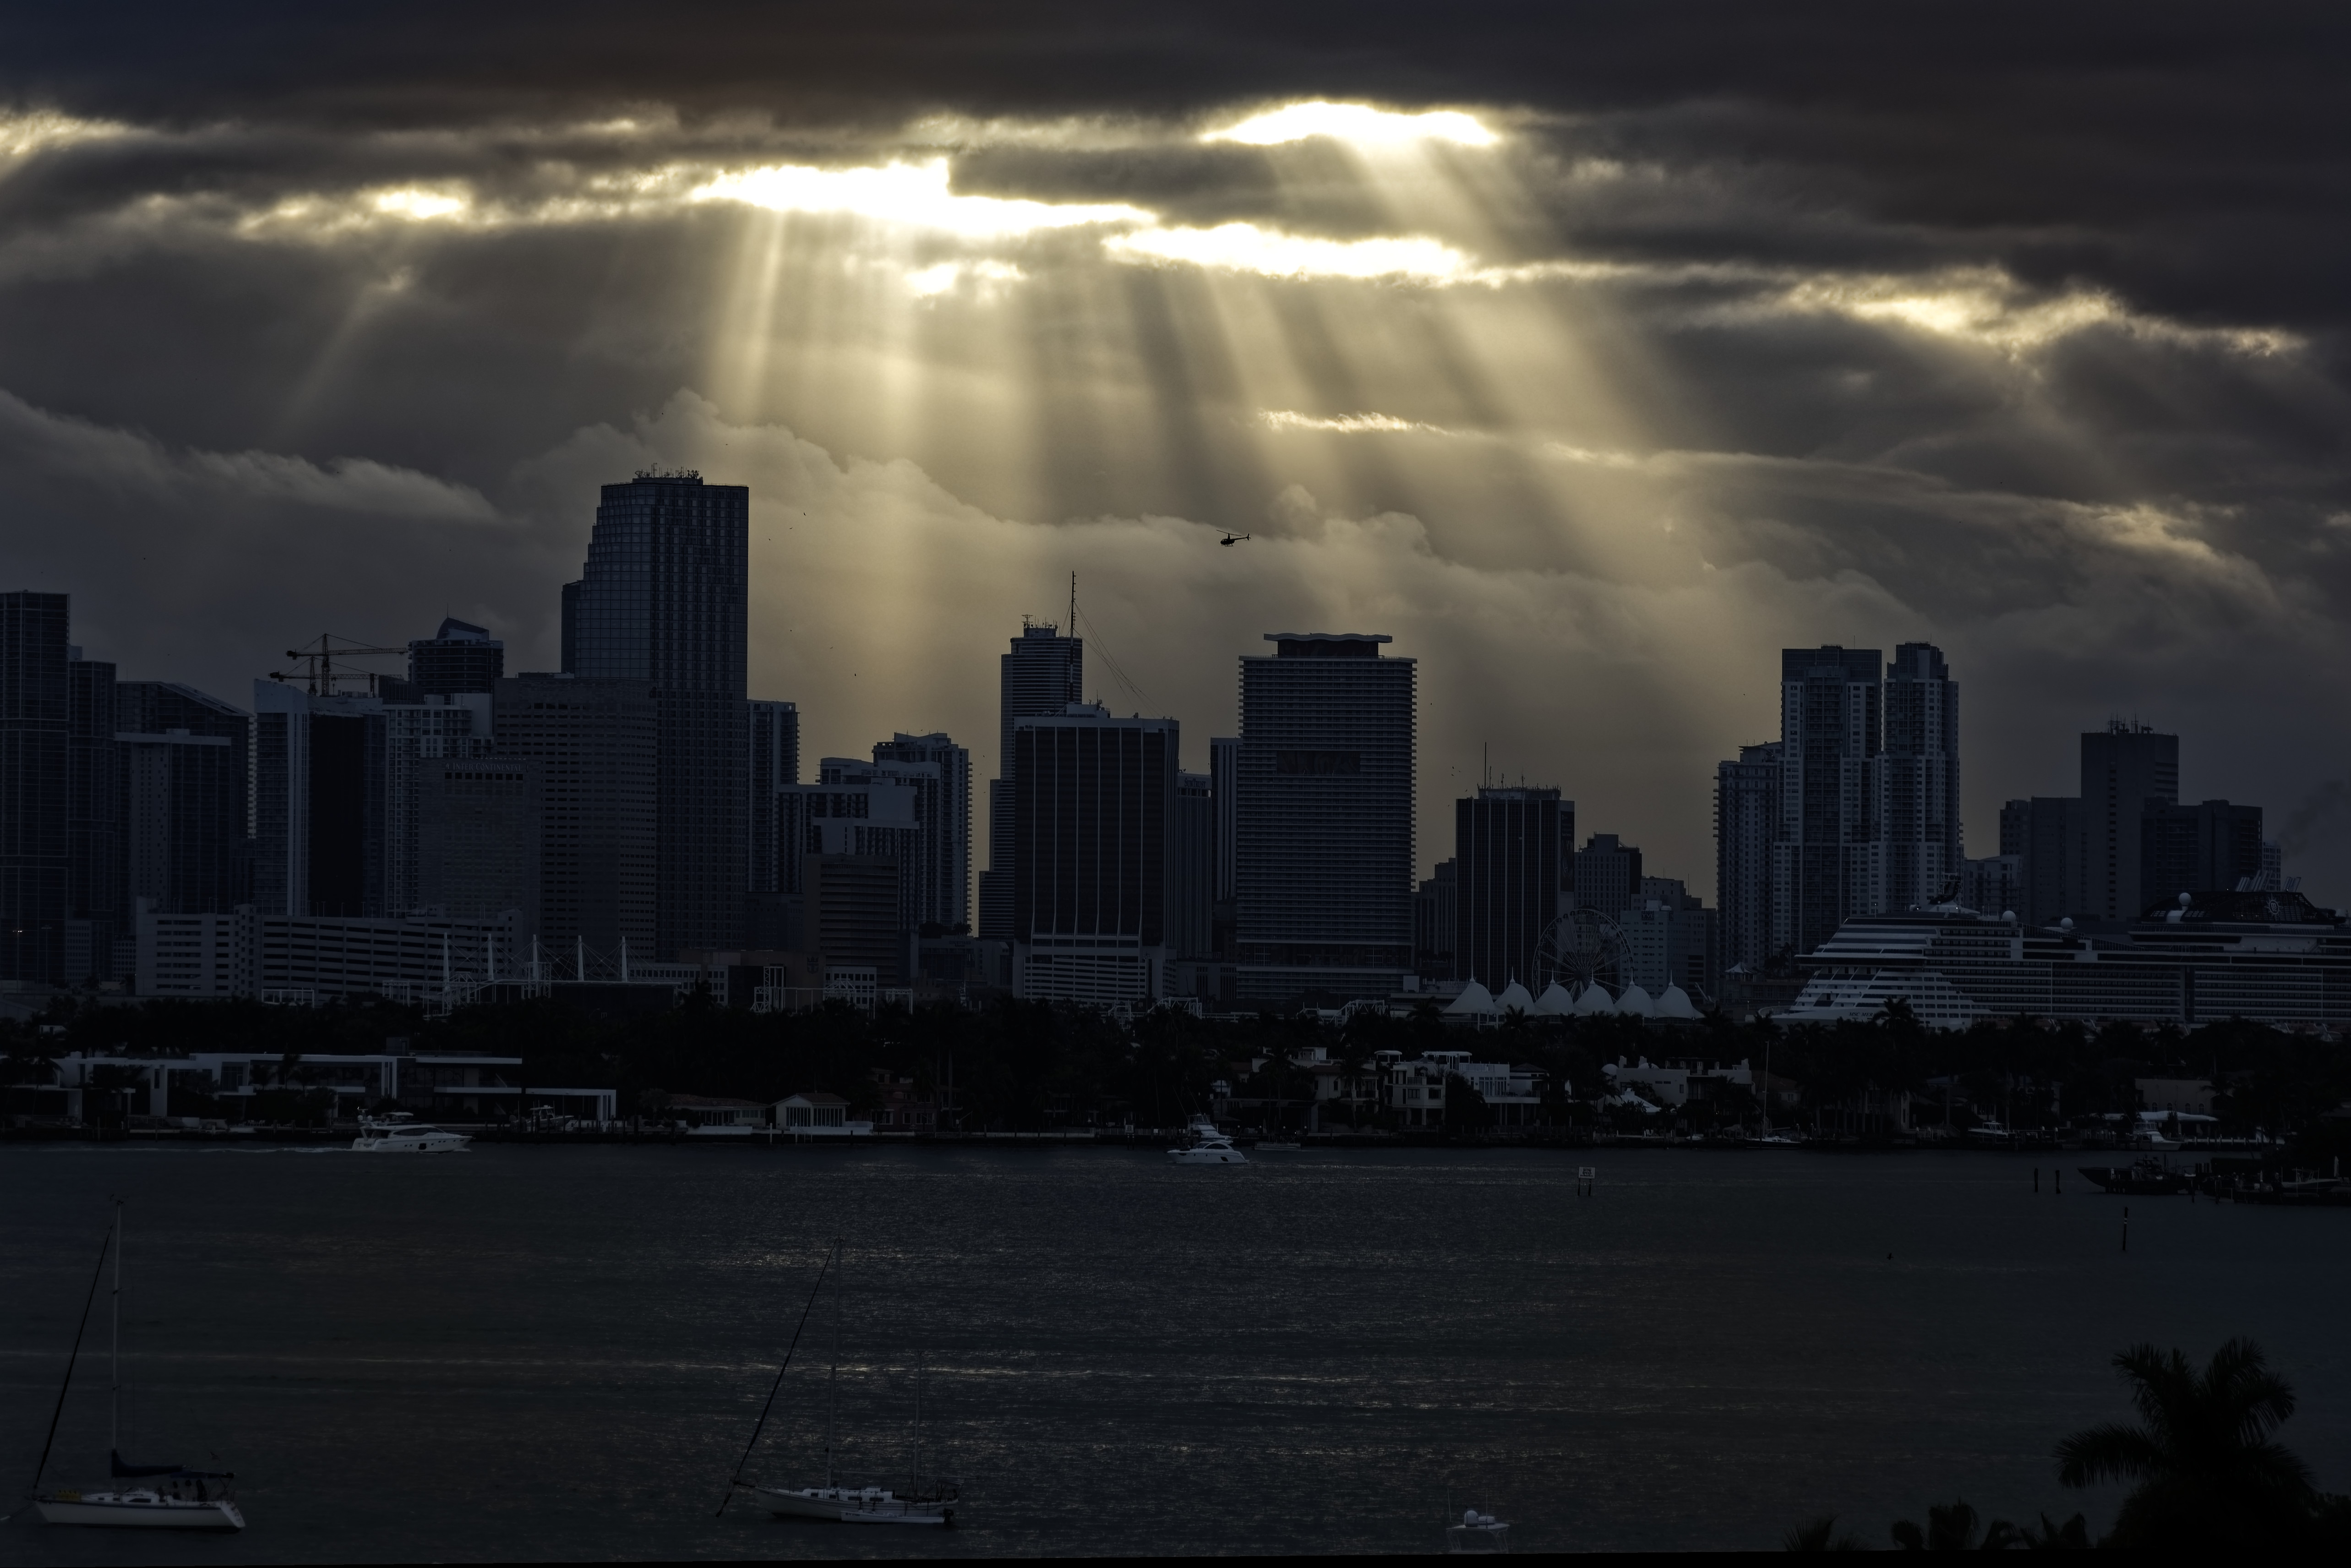
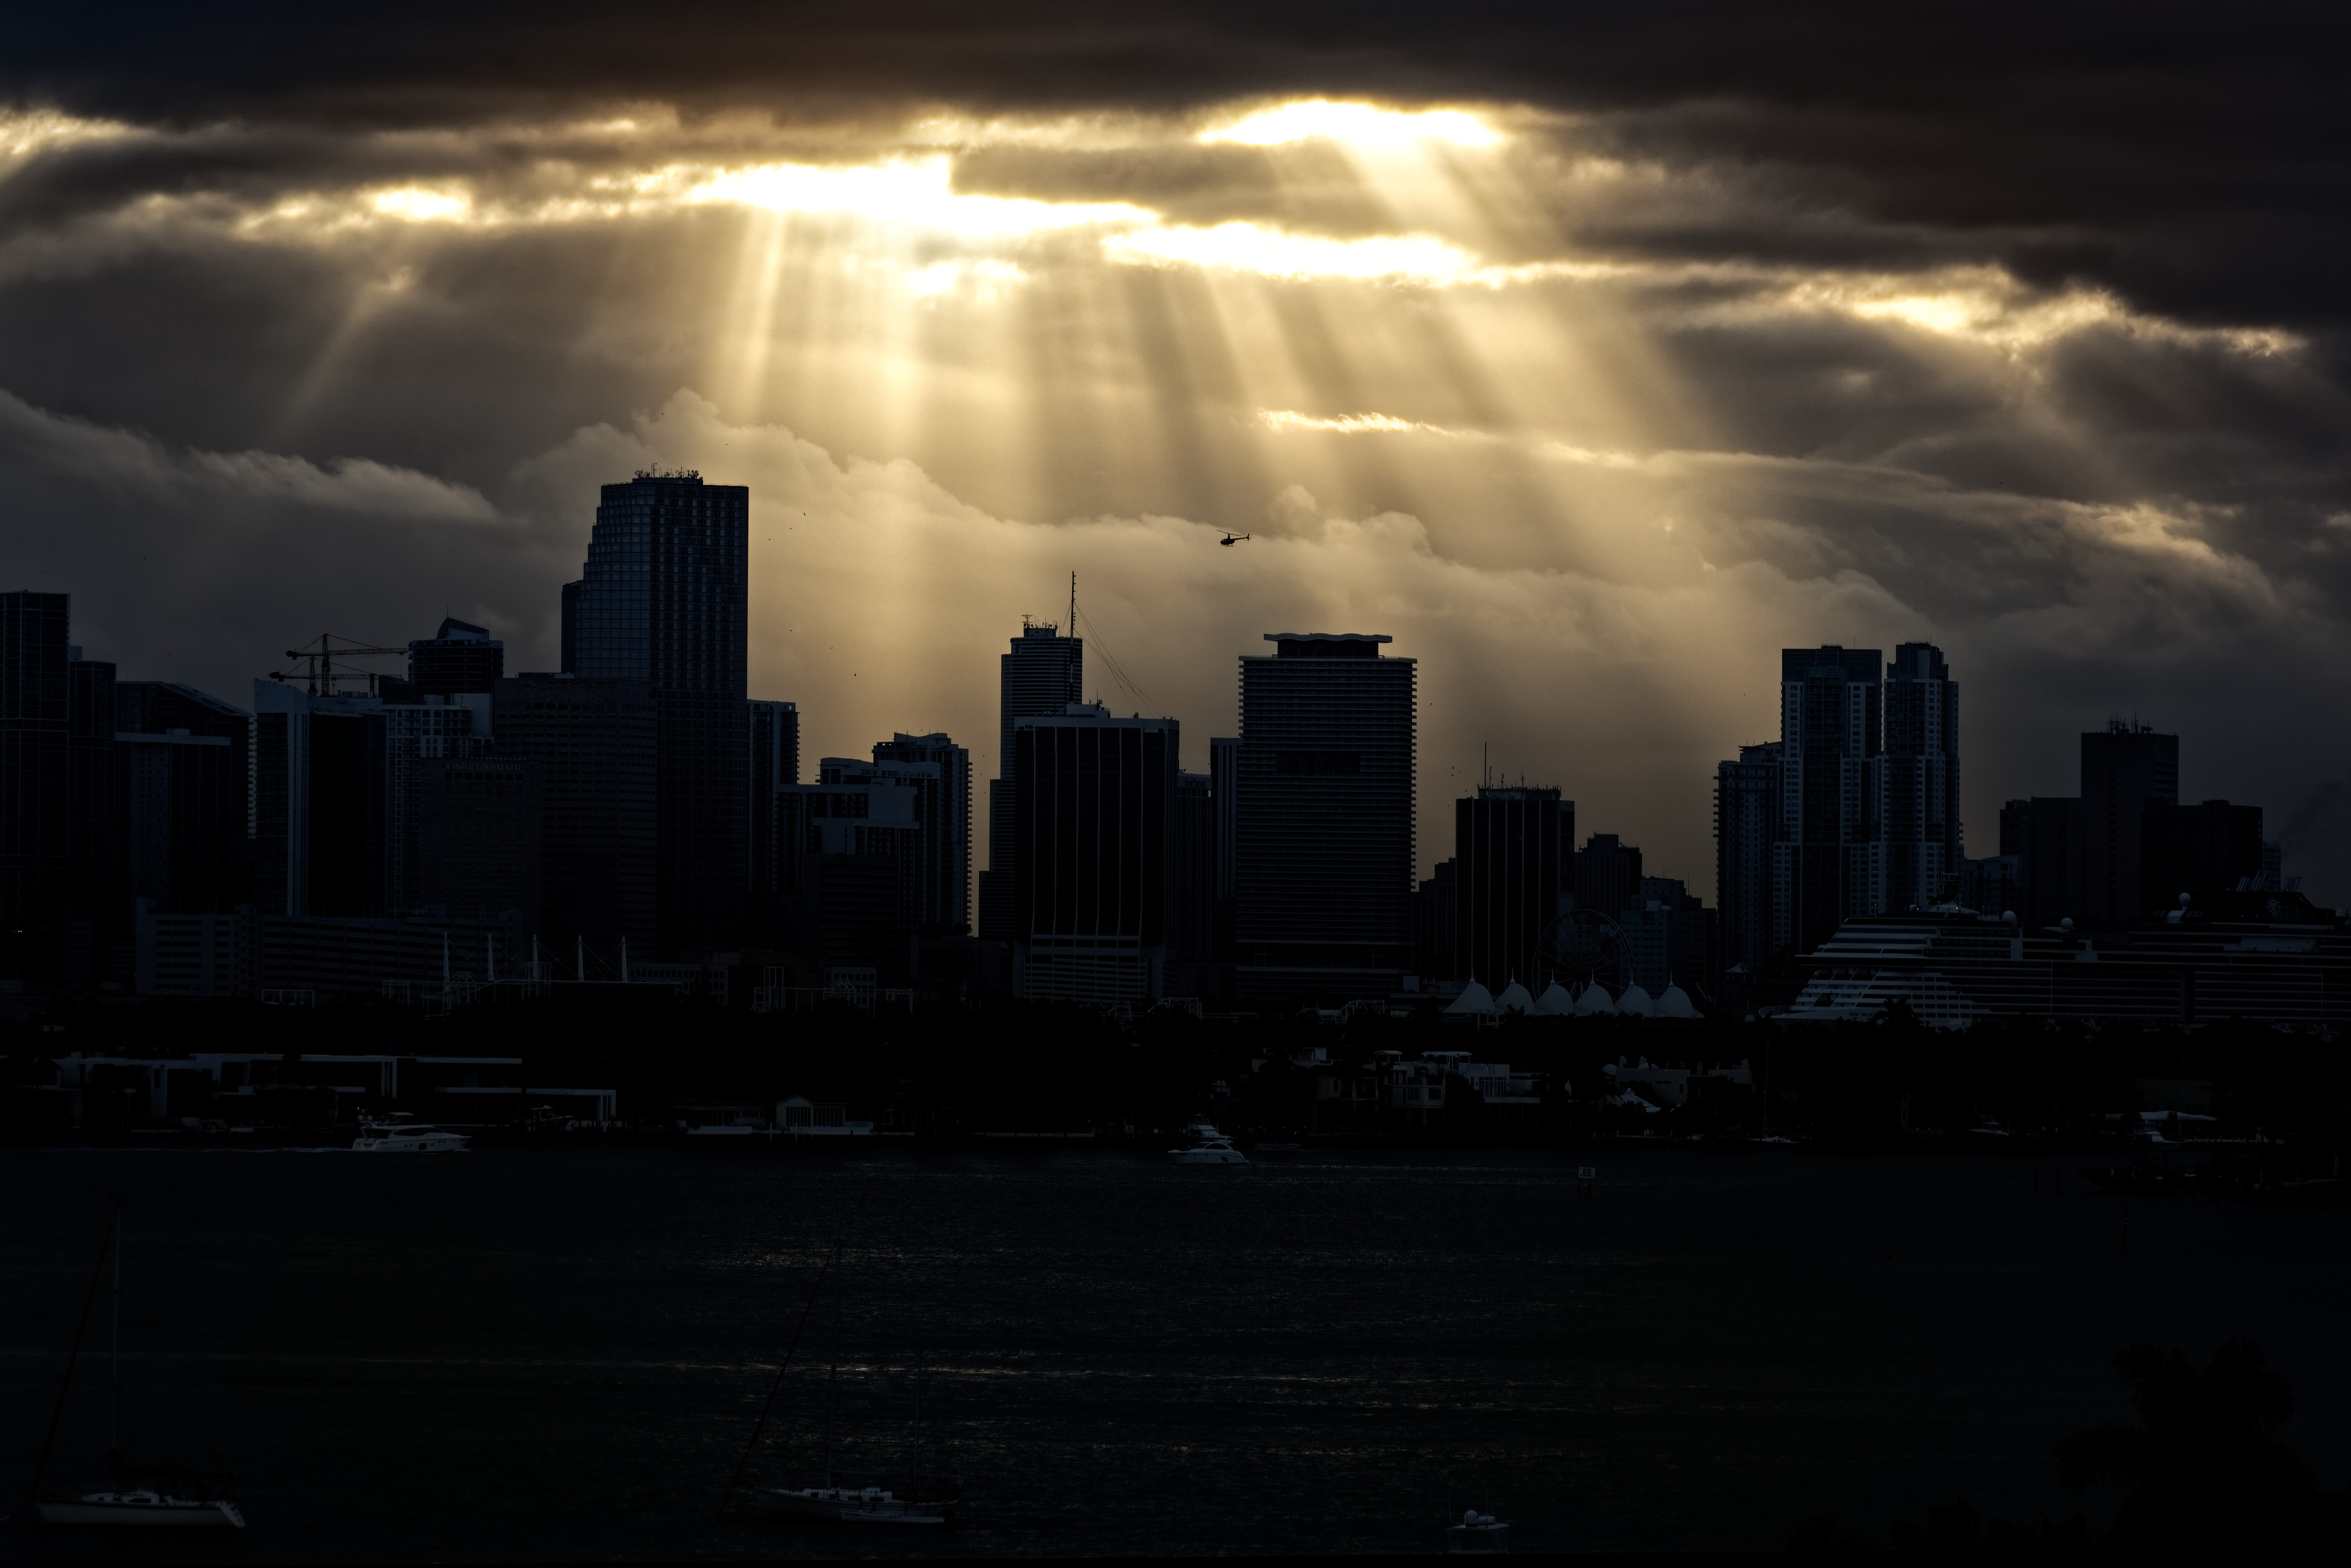
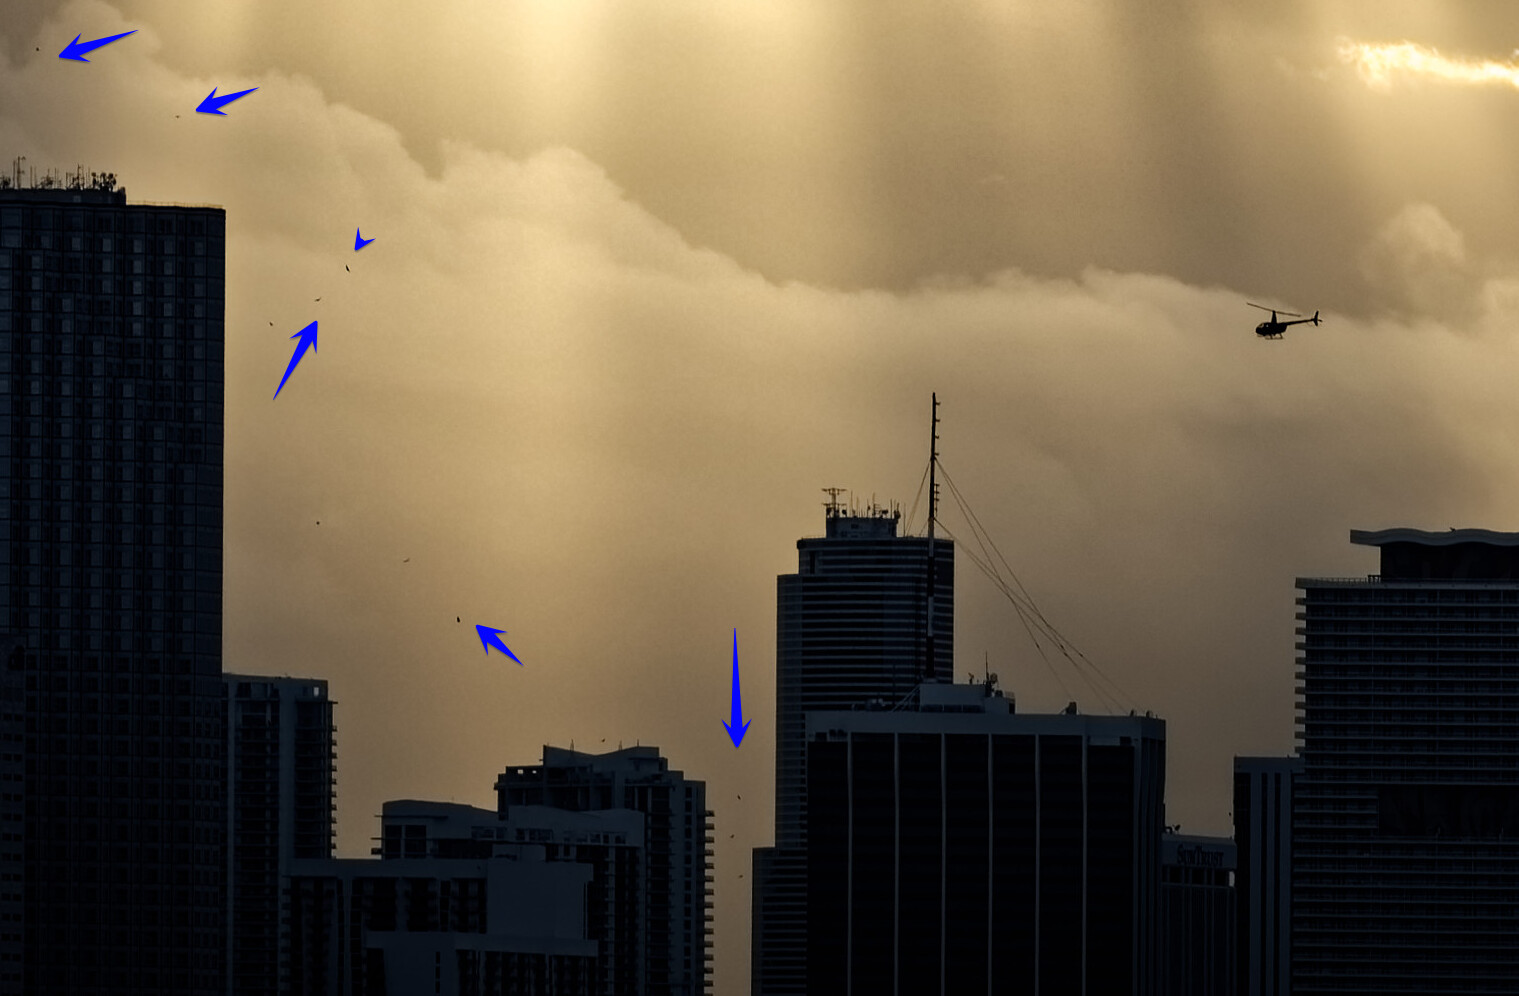
In trying to add more reflection to the water, you actually added a (line of) control point…

… but there was already a brush mask in place that you could have altered…

:wink:

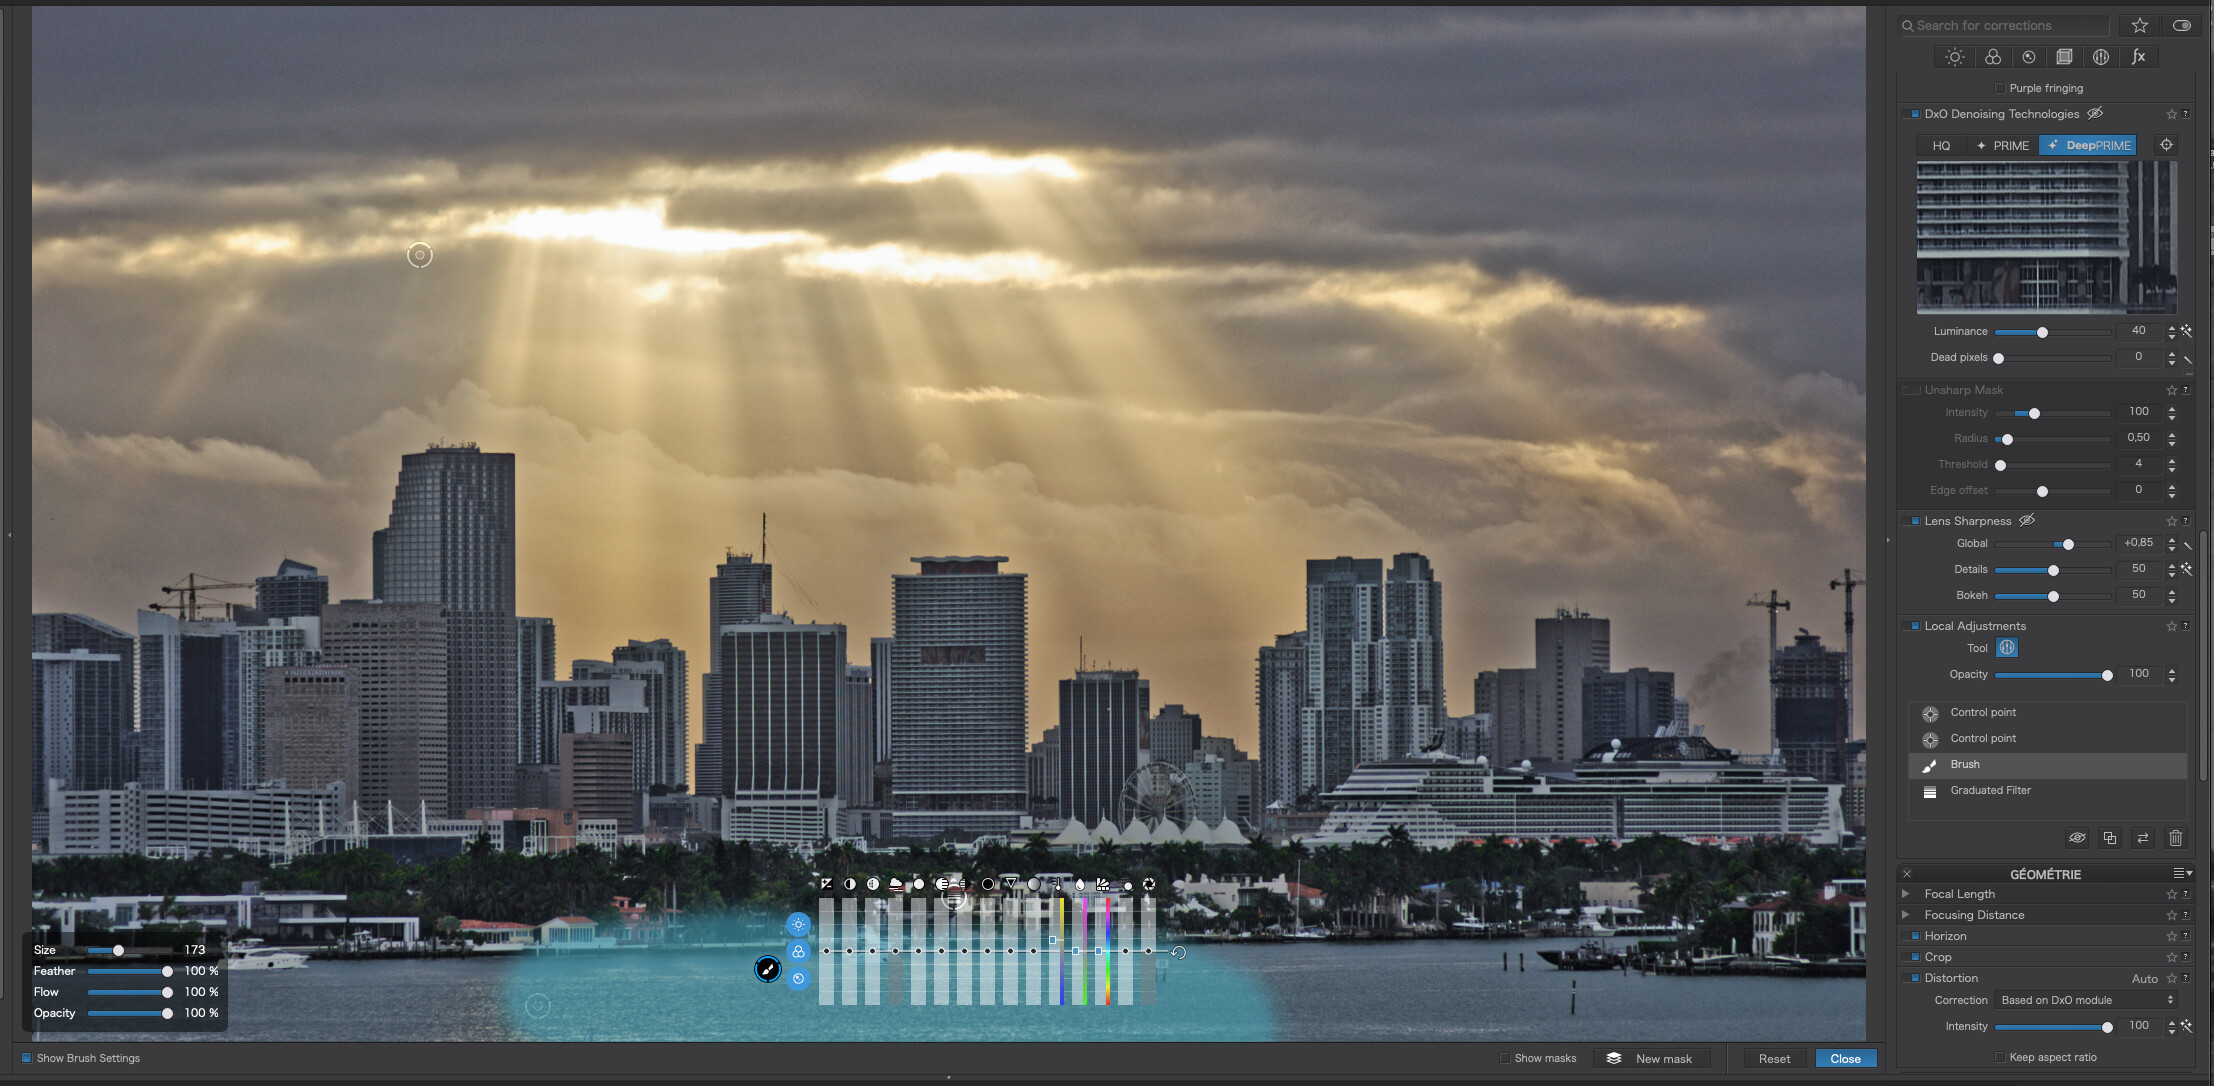
Unfortunately, I hadn’t done enough to make the difference so, here is how I have removed the control points and just edited the brush mask…

Note how I have used micro contrast instead of straight contrast, since it is “gentler” and less likely to be obvious at the edge of the mask.


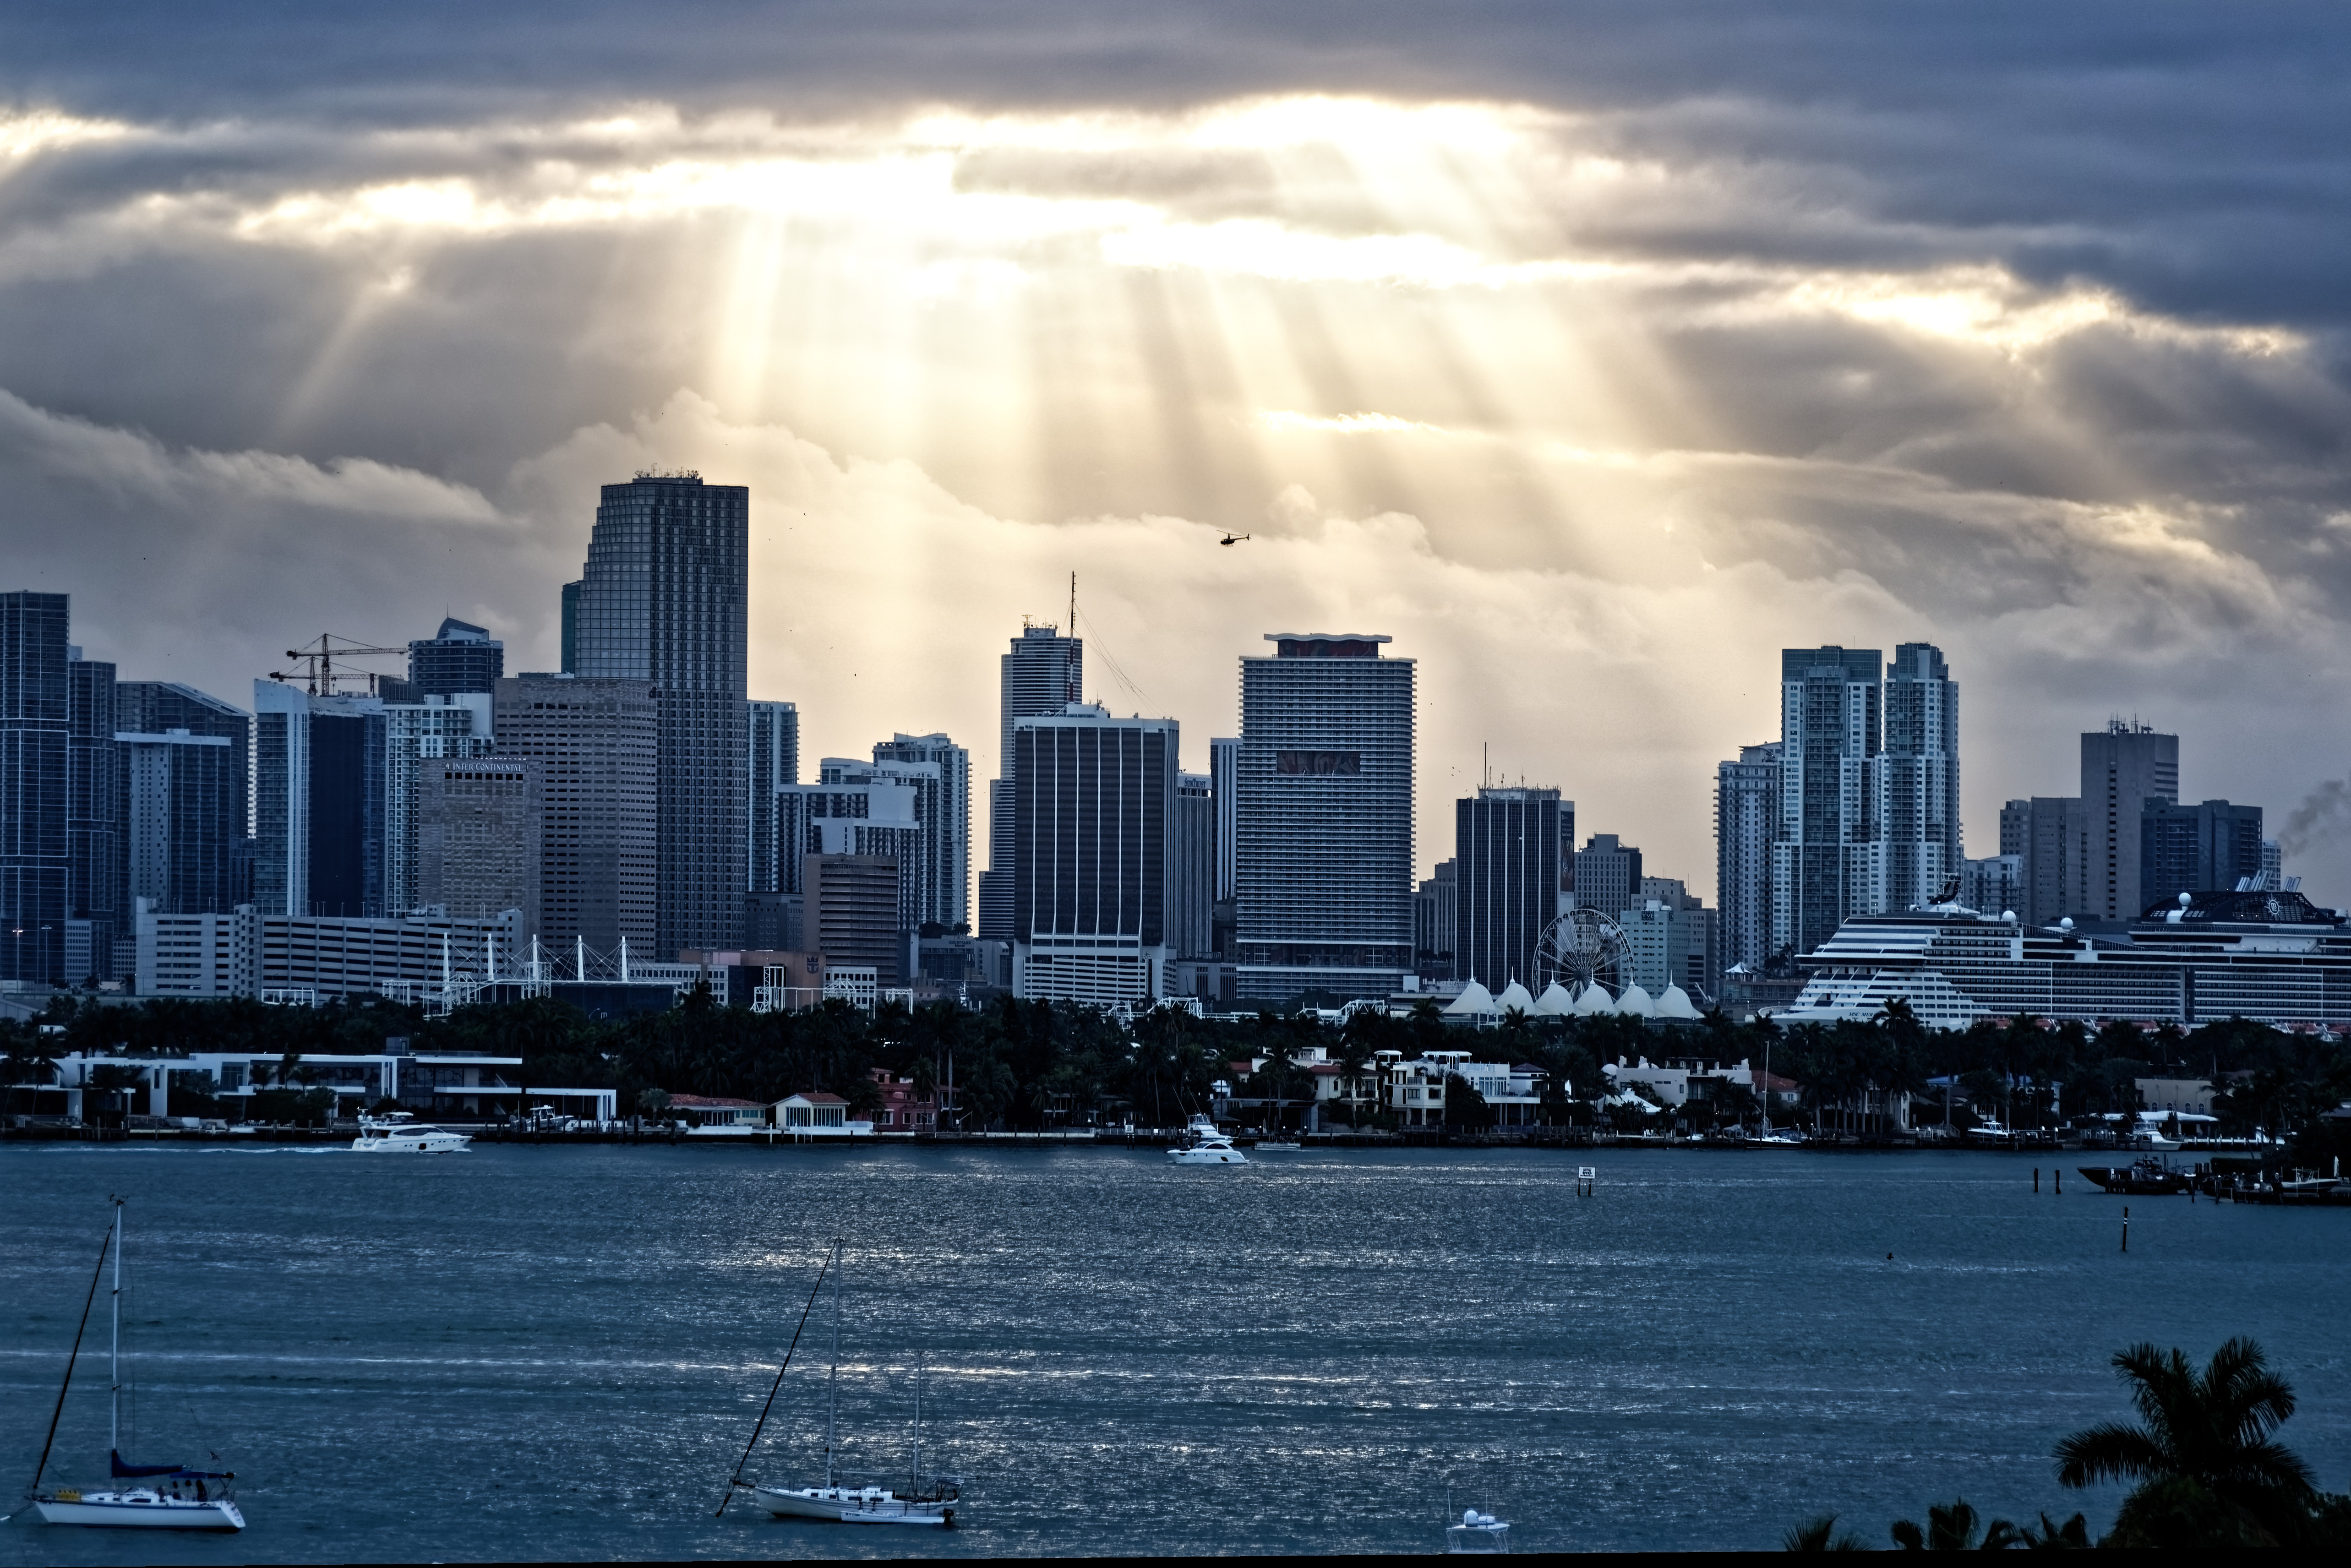
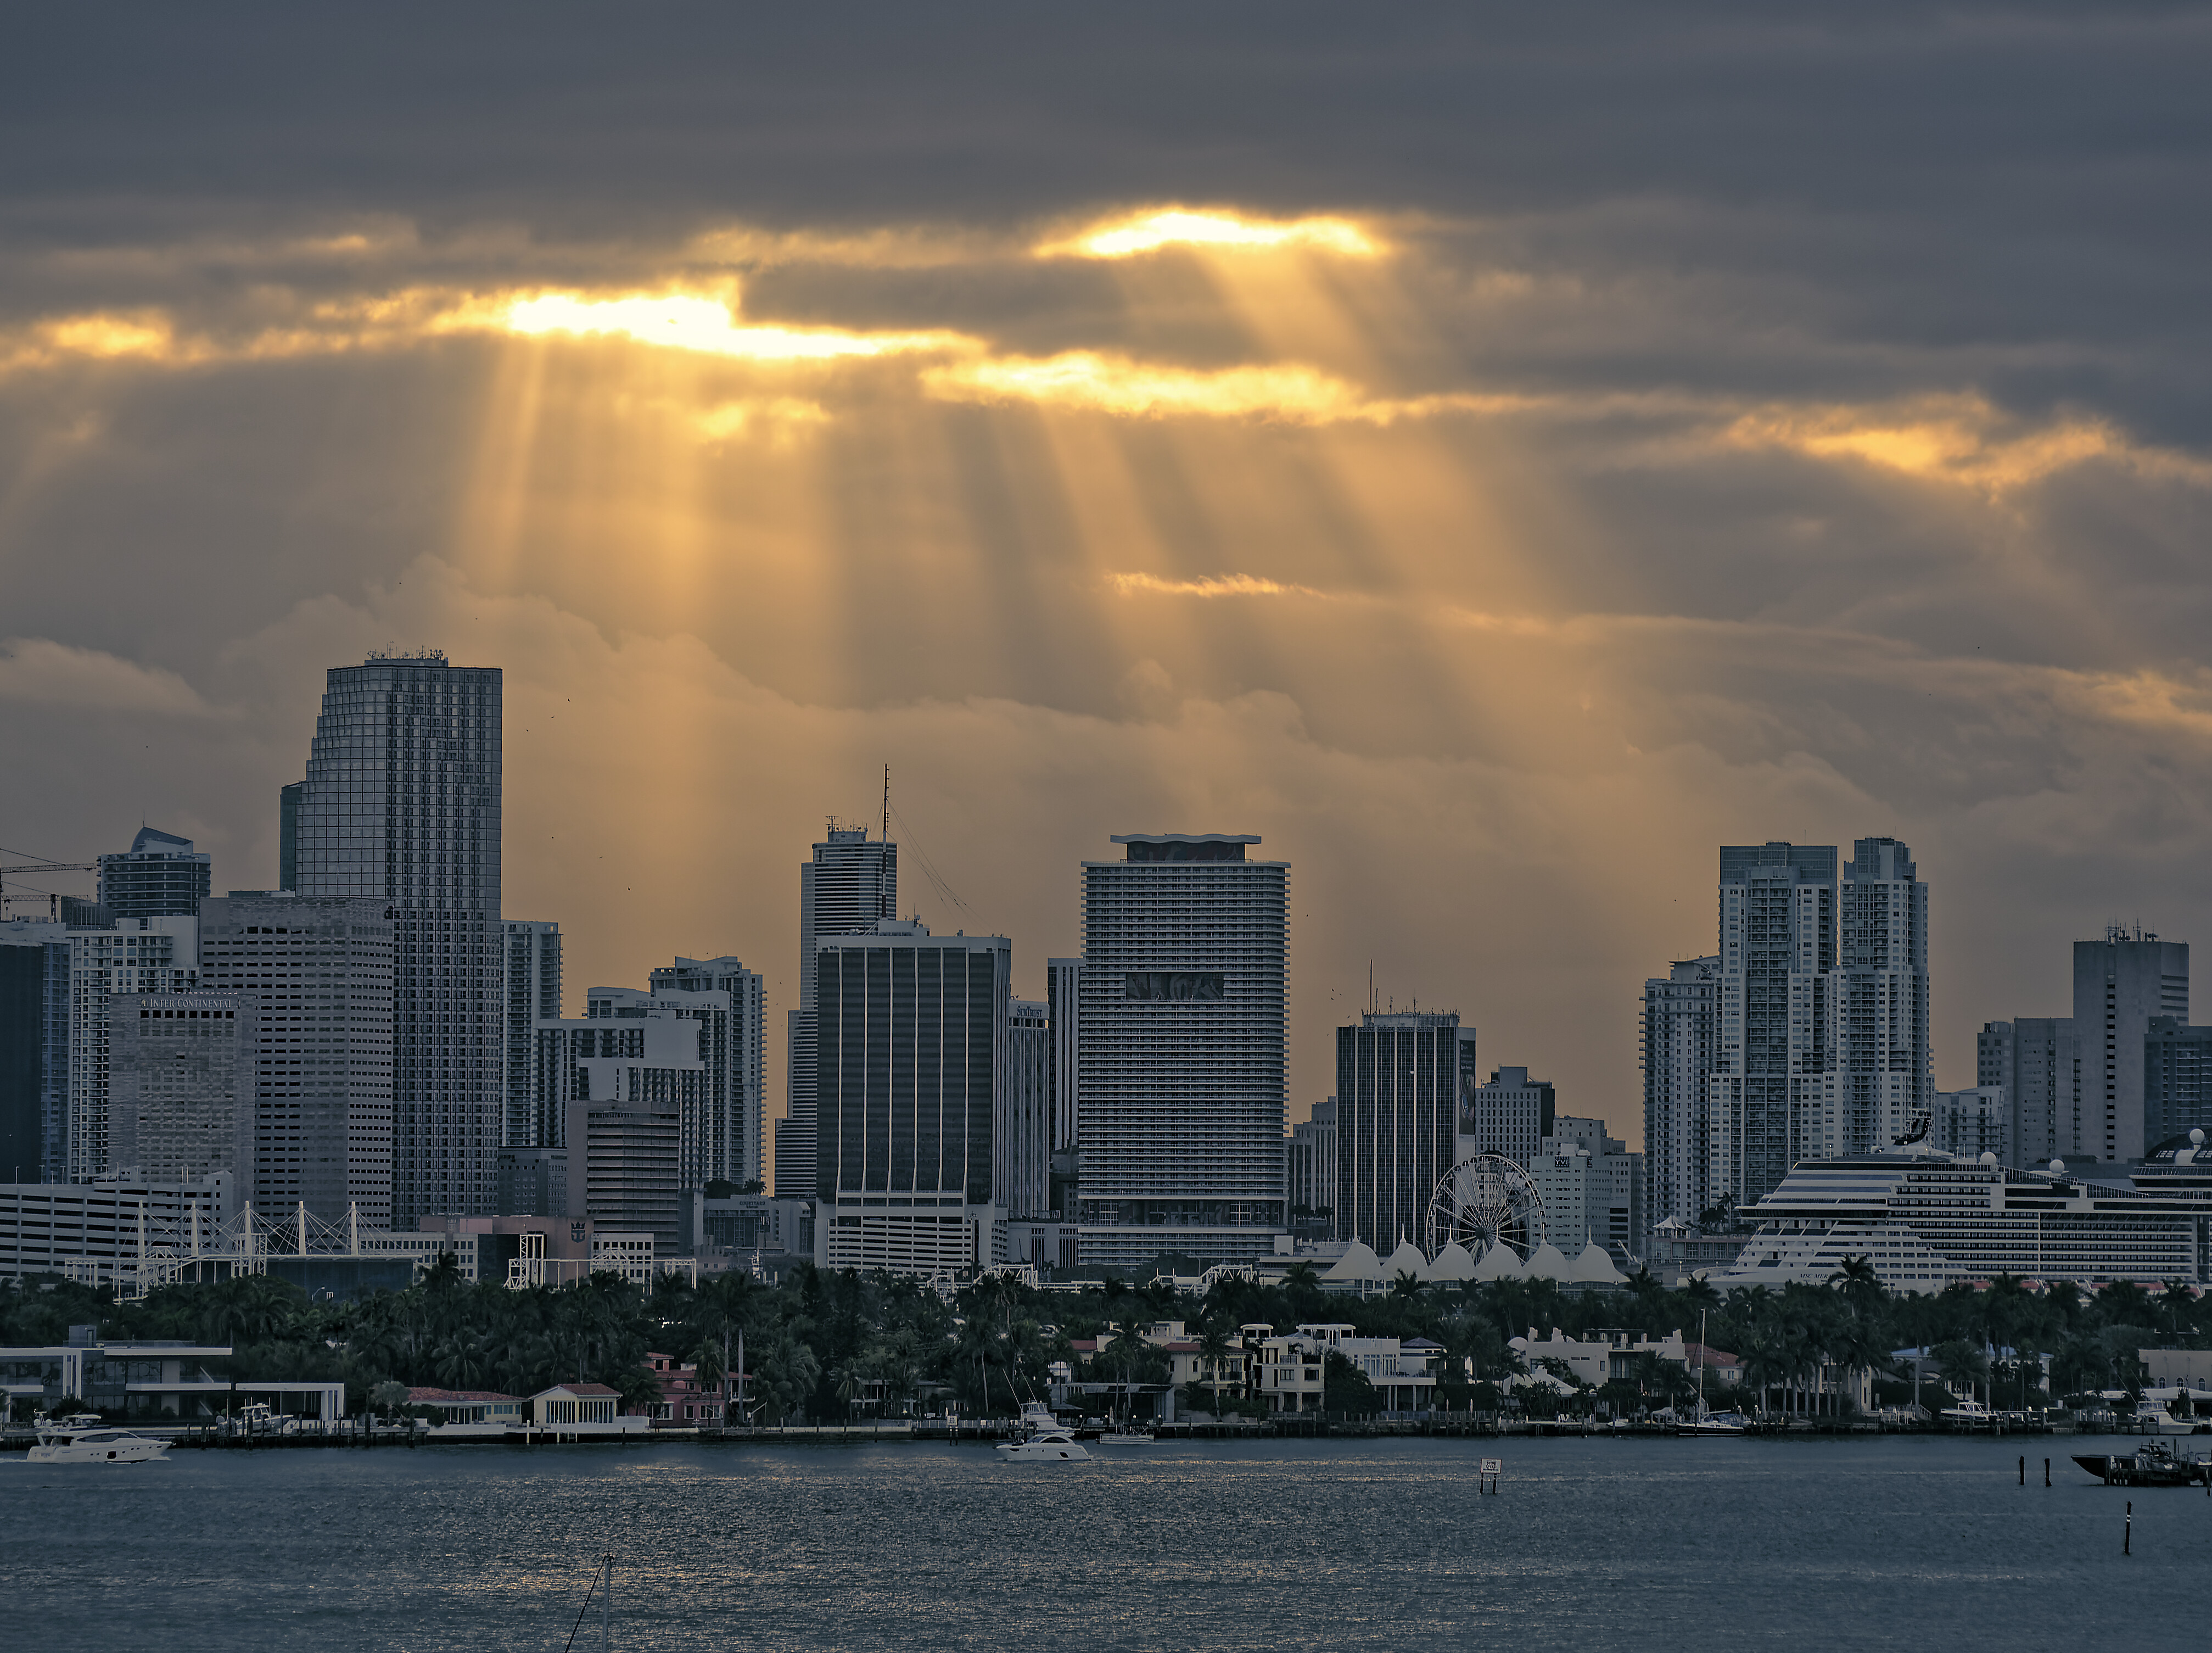
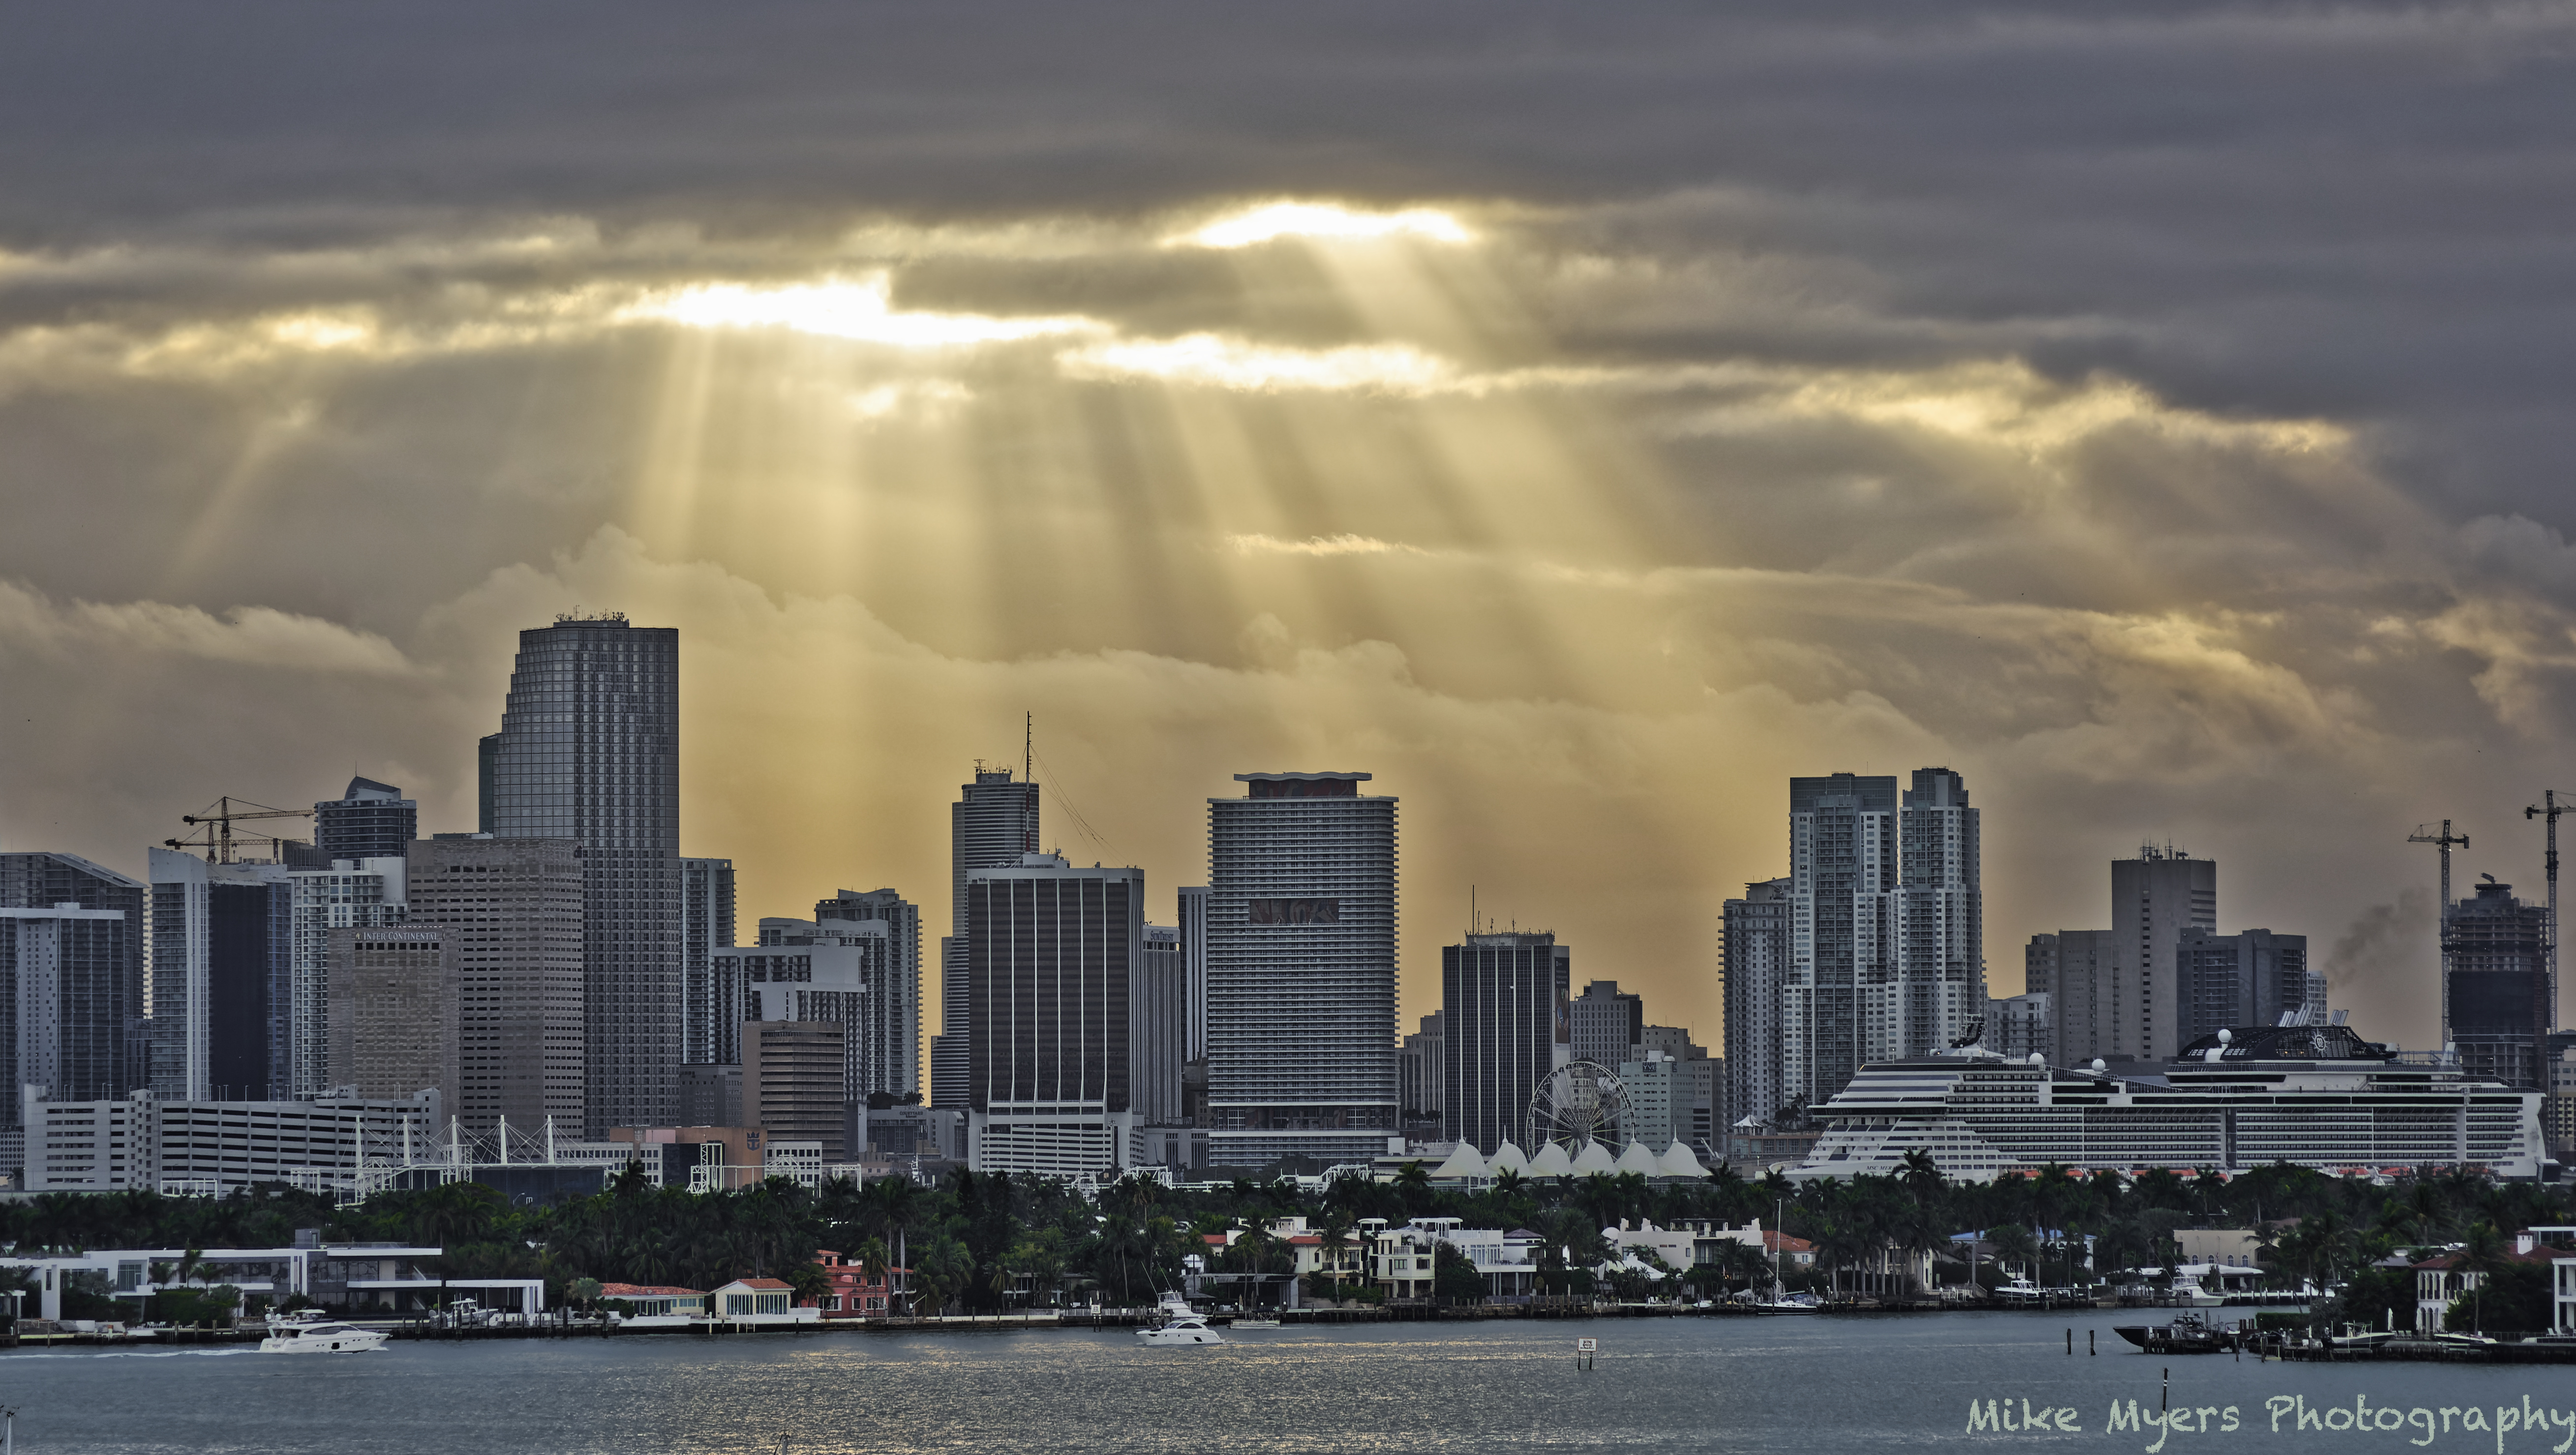
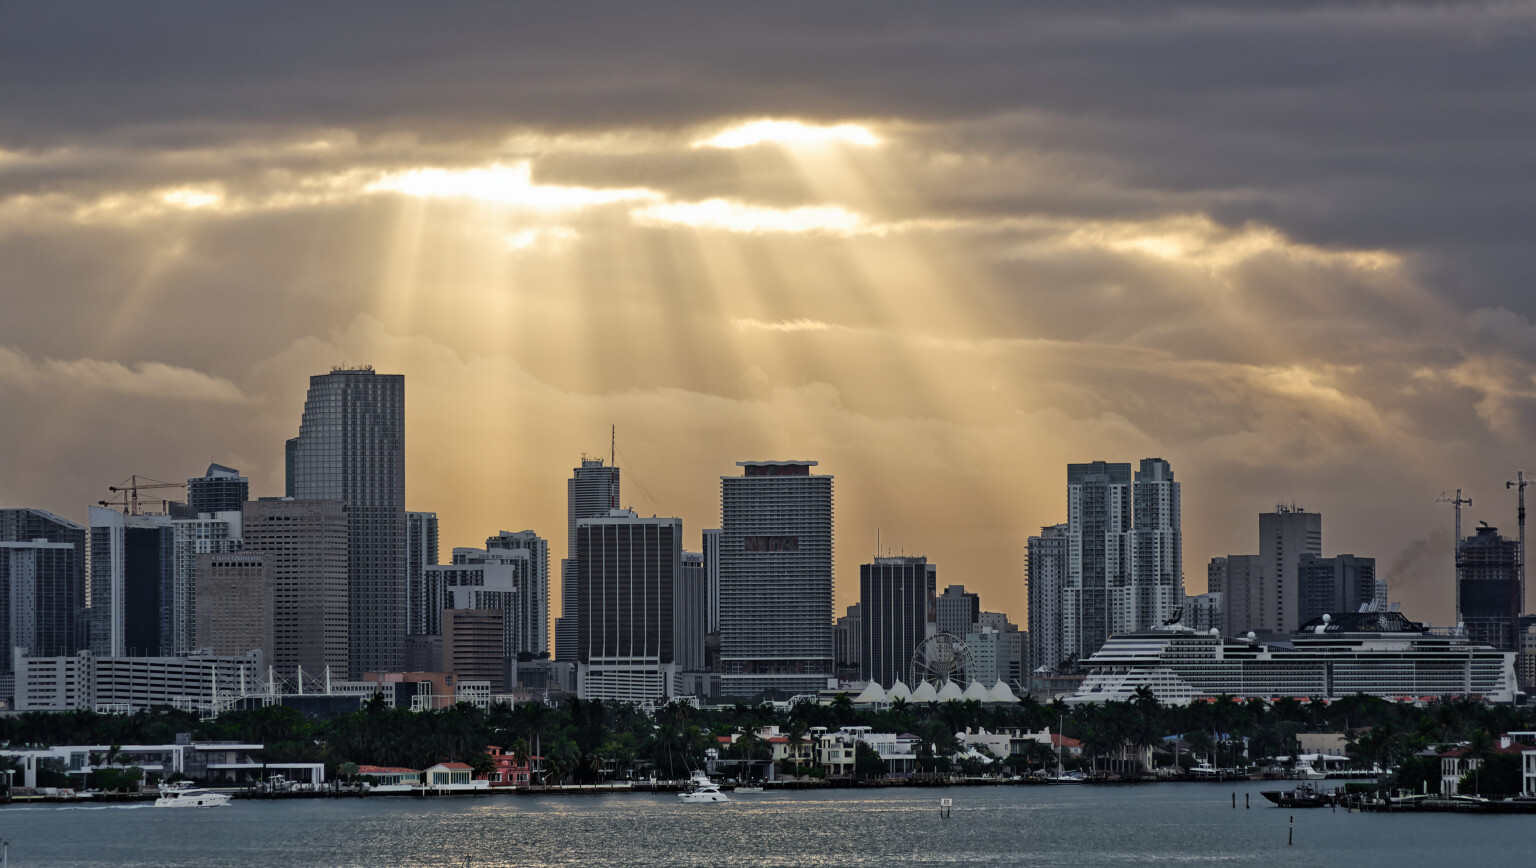
So, here’s my latest version…

Here’s the dop with this latest version added…

_MJM8669 | 2021-01-31-Sunset over Miami.nef.dop (346,1 Ko)


Don’t forget, what I have done is not necessarily how you would want the finished tonalities, it is more to demonstrate how to separate out the parts of the image for local adjustments.

Side track, the use of Virtual Copies who can be renamed is starting to make sense right?
This image is an perfect example of a casecwhich bennefit from serveral attemps in a slightly different way and different tools to get a result which stick.
The only way to keep track of what’s what is naming the different types.
No you can use starrating to mark the “best of the rest” so in the end you know which one to use for last effort.

Haha yes that would be handy, nothjng else to do then setting the alarmclock i am afraid… :wink:

I didn’t know I could do that. Sure enough, I found the “command”. VERY useful!!! I already use stars, but I thought changing a file name would confuse PL4. Great that I can do this from within PL4.
My files were already getting confused, with different versions, and my pathetic memory wasn’t much help. This is great!!
The name will identify different versions
The star will identify which image is best.

I thought about doing this, but didn’t - will do it this way next time.

NO! you can’t at this time. (it changes also the master…) it WOULD BE great if we can.
i hope it is a future feature: -)

Eh who did?

Aha! So I click on Local Adjustments at the top of the screen,
then click on “show masks”, then
then look for the tool group for “Local Adjustments”, then…

…one by one, turn the “eye” at the right side off and back on, to verify the one I want to change.

I sort of knew this, but it wasn’t as obvious as it is right now.

I see you changed the temperature of the reflection in the water to 7156K.
Did you measure the temperature of the sky to get this, or do it just with your eye? ???

If so, how do I pick a spot on the image, and measure the temperature?

Then by using “exposure” for the control points, I can make the reflection stand out a little more.

I wasn’t really sure how to direct what you had done before, but if what I just wrote is correct, I now know how to do it.

If I would have blocked the sky with my hand, and looked at the buildings, I think I would have seen them more clearly. But they look much better with more detail, and the cruise ship clearly looks like a cruise ship, and I can even see the exhaust coming out of the smokestack.

One more thing I learned. While I love my Nikon Df, it is “only” 16 megapixels, which is plenty. But the D750 has 24 megapixels, and some newer software. As Joanna pointed out, how can I justify using the Df when the D750 is so much better? In a photo like this one, I think it makes a big difference. It’s not LF photograph, but closer. If the Df had a 100 megapixel sensor, or 500, would it create an equivalent image to a LF image?

I took some daytime photos early this morning, as the sun was just coming up from behind the horizon. The buildings do have a “golden” tint, but not very much. I’ll copy those to my computer in an hour or so.

I don’t think pixel count is an essential characteristic between sensor sizes.

George