Hi
Interesting test.
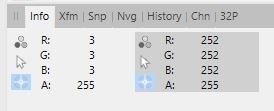
Strangely,i don’t have same values measured in PL5. (black line is for me (3,3,2) and white is (252,252,252).
I did a quick test in C1 v20.
Not same measures ( the black is 5.5.5 and white is 253.253.253). I don’t know if default setting is applied, i couln’t find it.
measures give in C1 BEFORE
5.39.68.95.120.145.168.190.212.234.253
with black slider at -100
measures are as follows:
0.0.2.35.85.116.141.165.188.210.232.251
So in conclusion, C1 black slider is more selective than the black slider of PL5.
White slider increase is fairly common. Lightroom, when set to automatic tone correction, often reduces brightness and increases whites in order to keep white things white. The same also happens with blacks: when brightness is raised, black values are lowered.
I found a difference between the ‘11-step-wedge.tif’ of platypus and my ‘greyscale.tif’ (Lex).
The ‘11-step-wedge.tif’ of platypus doesn’t start with (0,0,0) but with (3,2,2) in my version of PL5 on windows. Also the last bar is (252,252,253) instead of (255,255,255).
I’ve checked this also in Affinity Photo: (3,3,3) and (252,252,252):
This is an interesting conversation although the observations made in the Butterfield video are by no means new. Long-term users of LR have seen all this before (I think I learned it some years back from one of Martin Evening’s books): that the ‘shadows’ and ‘whites’ adjustments in the “Basic adjustments” panel work on edge contrast as well as luminance whereas the “Tone curve” — especially the ‘constrained’ or ‘parametric’ curve — is designed, in theory, to work only on luminance across the ranges designated by each “parameter”.
The distinction is however usually less clear-cut than the Butterfield video implies. That is because, in color-image development, the Tone curve in LR (as in PL) is working on a ‘master’ RGB curve where changes in luminance contrast (i.e. contrast between wide-spread tonal ranges such as blacks and shadows or mid-tones and highlights) also affect color contrast. The apparent result is often both a luminance change and a contrast change even when, in principle, the tone curve has changed only luminance over a certain range of tones.
In both LR and PL, the developers have given priority to making each tool have the effect they think the user will like most as a result of moving the slider. They put less priority on transparency of the mechanism and strict isolation of effect between tools. They are probably right to do so from a marketing perspective. But it makes things mighty confusing from another perspective.
… Or, let me put that in a more positive way: the effective overlap between tools and their multi-valent operation means there is always more than one way to achieve (approximately) the same result.
Excellent reference video, Wolfgang … Following along in PL is most instructive.
Yes, that’s the process I use a lot … and if you try it with an image with graduated luminosity steps (such as provided by LexB, above, for download) you can see that Smart Lighting achieves its result (even at 100% intensity) without losing distinction between any of the luminosity bands.
And then you can refine the result using Selective Tone.
The video concludes by advising LR users to use highlight/shadows sliders in some cases, and Tone Curve in others; but my observation is that’s necessary mainly because LR doesn’t have Smart Lighting
I agree that adjustments (either with sliders or by changing the tone curve) in a color image not only change luminance but also effects the color contrast. And maybe also changing the saturation of colors when working in a RGB colorspace.
I agree. And we also have to be careful to compare the functionality of sliders in different applications although they have the same name.
So returning to the topic of this thread, i.e. missing the ease of use of the white slider of LR in Photolab. What is missing in Photolab that can not be easy achieved with others tools in Photolab?
So far, the answers mainly referred to the behavior of decreasing the white slider of LR. So bringing back texture in the brightest parts of an image.
What about the effect of increasing the white slider of LR? I think the effect is just more then only moving the white point in the tone curve.
Then maybe someone can share a RAW-file and only adjust the image by increasing the white slider in LR and share this as a TIF file. So that we can see what the effect is and can try to achieve the same result in PL
If you follow the video you shared and this post by @platypus you will see the effect is very similar. Both the whites slider in Lr and the highlights slider in PL introduce a subtle contrast whilst changing the levels.
How this affects an image will depend on the content of the image. I suggest you play with the highlights slider vs the tone curve in PL to see what it does and if the results are good enough for you.
But bear in mind that all of the Selective Tonality sliders in PL don’t just act like the tone sliders in LR, they also seem to affect the Tone Curve in a similar manner to the Lr Parametric tone curve adjustment mode, with overlapping ranges being affected. There really isn’t a one-for-one comparison. If I were you, I would ignore trying to emulate Lr and just learn what does what in PL for the results that you want.
I got into Lightroom with its version 1, which was cheaper and much more responsive that Apple’s Aperture, which was also a resource hog. Never got sick of Lr, even tough I was not amused at all, when they switched to subscription. At that time, DPL was nowhere near what Lr could do in “keeping alive” the application infrastructure and managing images with keywords.
Other than that, I’ve updated the step wedge file: 11 step wedge Gamma.tif (66.5 KB)
…and discovered an interesting detail about how Lr reduces exposure: Up to a value of -1, white stays put while darker slices move towards black, while DPL just moves everything towards black in what seems to be proportional moves…etc. There are a lot of more or less subtle differences to discover, nevertheless, we need to cope with the tool(s) at hand.
In general / depending on the picture, I would start correcting the Exposure and also exclude disturbing and overly bright spots with LA, then after set Black & White points with the Tone Curve, adjust hightlight and shadow texture with the SmartLighting SpotWeighted tool and finally apply Selective Tones & Contrast as necessary – if not better done in LA …
But beware, the procedure is not set in stone. And I even didn’t mention to alter contrast with the Tone Curve [and colour/channels - back then in PS’ Lab mode].
When checking PL’s sliders with the step wedge, I didn’t expect to see the Selective Tone sliders introducing (some) tonal contrast, while obvious with ClearView Plus and Contrast & Cie. Also interesting to see how ClearView Plus affects brightness.
 .
.


