What's the best thing about PL5?

I have the X100F and the X-T3 in Fugi.

For me, it’s not an either/or.

I have canon cameras and lenses…a 5Diii is my current one. I have three canon film cameras as well.

I’ve used canon for years but got curious about Fuji. I started with the X100F because of its size and compactness. I didn’t want to lug around the 5D full-frame camera and lenses. Added the X-T3 for changeable lenses. Also liked its size.

Also have various film cameras. But I’m trying to control myself lately. I went a little crazy during the pandemic buying some vintage film cameras.

mike see here the full difference between only controlpoints and having both.
a full direct in the sun low aim. Used the tree to overcome too much direct sun in the lens.
it’s an oldie, i took the walk to have sky sun and to the sun shooting as learning task.


controlines v5

my controlpoints and one gradient v4

v4 controlpoints

v5 controlines version 1
P1030364.RW2 (18,9 MB)
P1030364.RW2.dop (33,9 KB)

horizon straighted:
did a new fresh one and it’s much less work. to partial select area’s much more easy to fine tune selection, much less fiddling around.


version 2 (more “shadow blue” left.)

P1030364.RW2.dop (30,1 KB)

But is there some superior image quality that makes people prefer the Fuji sensor?

Peter - random thoughts as I view your four landscape images.

Image on top has what looks like a simple correction using Control Lines. It also looks “tilted” to the left, assuming the trees are supposed to be vertical. The sky looks strange, like it is un-naturally blue at the right, quite a ways away from the sun which is hidden behind the trees. The nearby foreground looks like someone spray painted it a blueish color. In ways I can’t describe, it looks “wrong”.

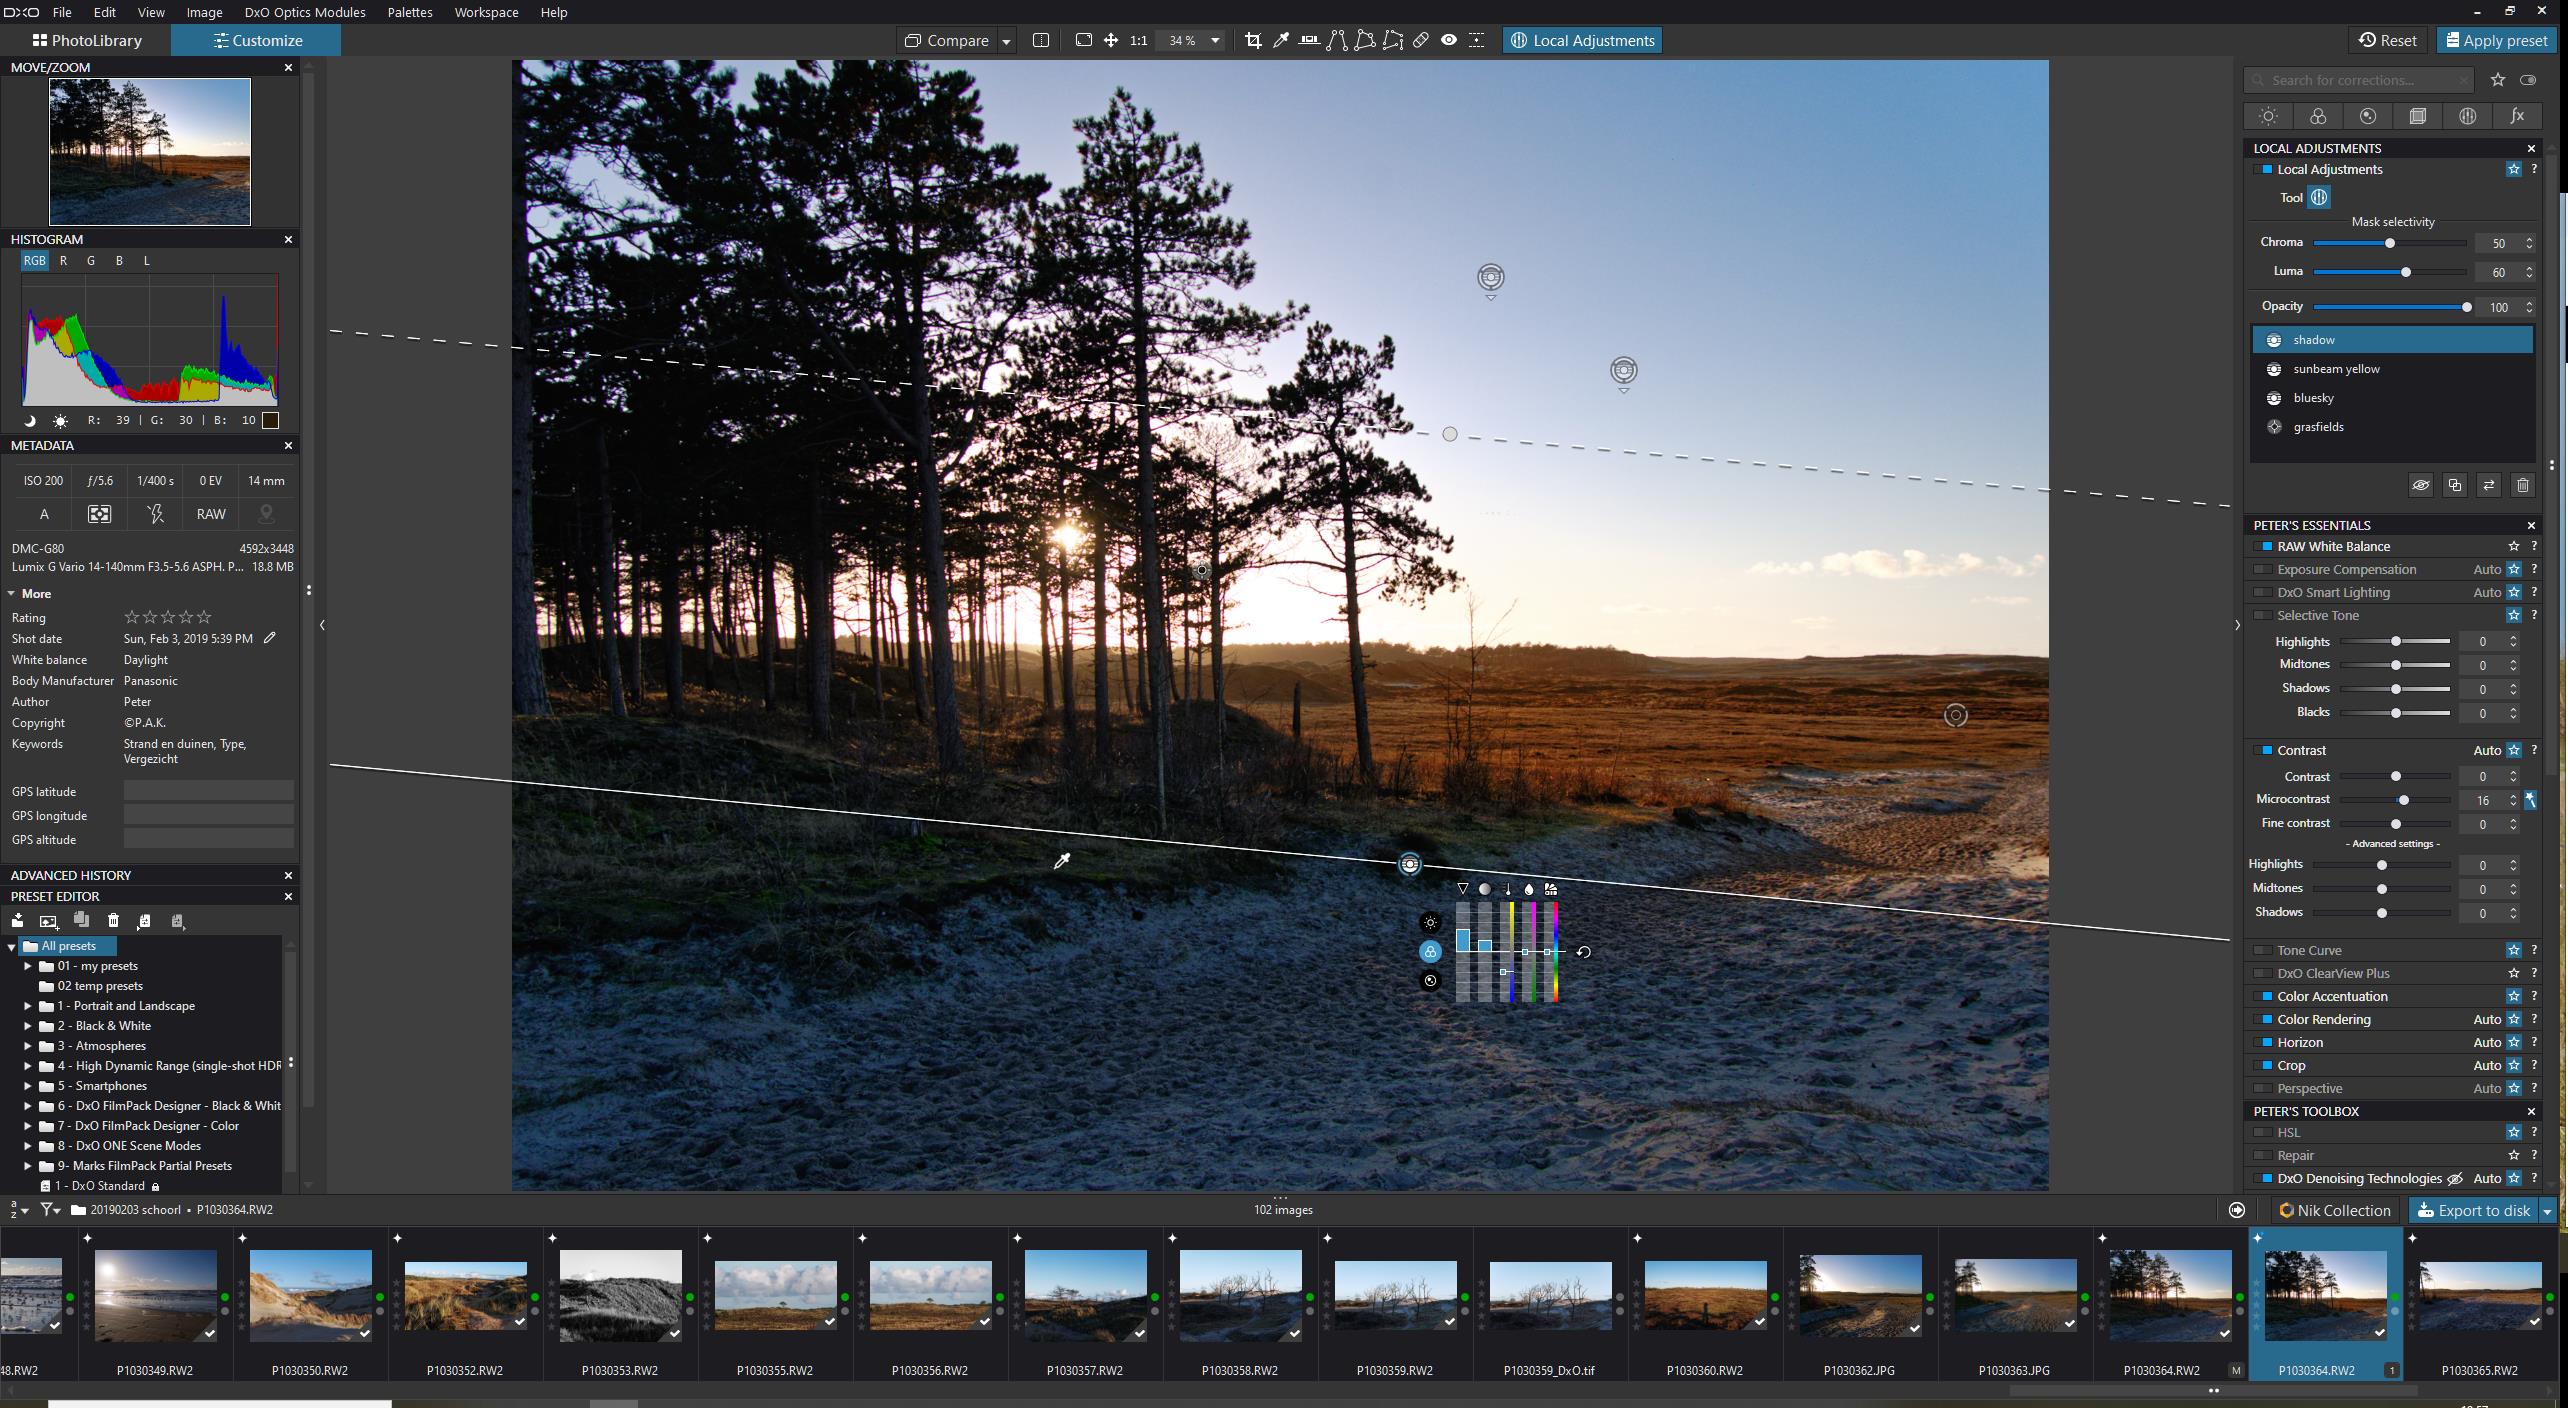
Next photo down reminds me of something where I splattered control points all over, and I think you are trying to show me that a simple correction with control lines can do the work of a bazillion control points. The ground up front looks ugly, and the trees are still crooked.

Third photo, which I guess is the result of the above works, looks “wrong”. Trees are still crooked, the foreground looks horrible with the blue “mold” or whatever it was or is, but the sun now stands out more - nicer than the earlier shots.

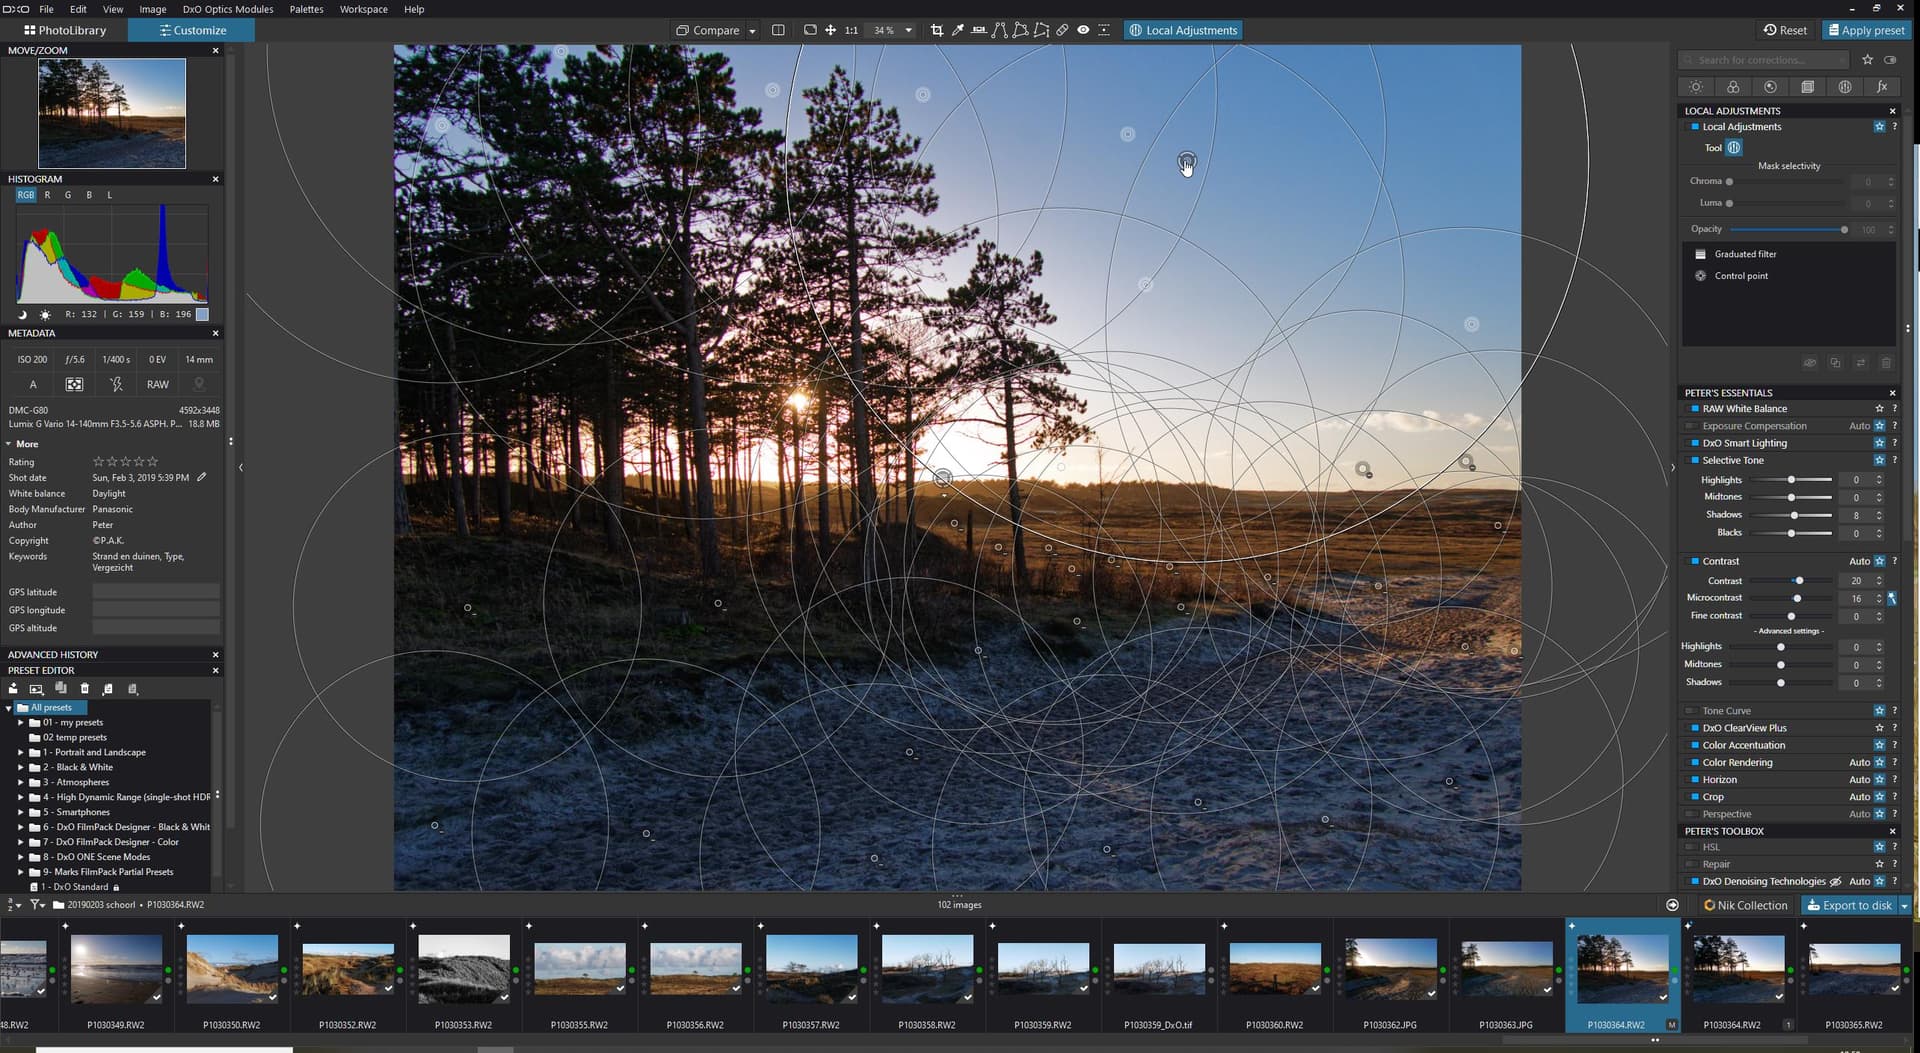
The last photo looks “stable” finally, with the trees nice and vertical. The “horizon” looks plausible, but it bothers me. The ground looks less annoying - the ground still has an unnatural blue tint, but it’s warmer, and I can now see the detail in the ground. The sky looks manipulated, and not like "glare from the sun which might explain it. The sky in the first photo appears to be genuine, but in the last photo it no longer looks “real”. To me, the photo also looks “unbalanced”, like the left side of the image has all the weight, and there’s nothing off to the right to balance it out. Between the horizon being tilted, the ground being a strange blue color, and the sky looking fake, I don’t know how this image could be made more pleasing.

(I doubt it would work, but I would be tempted to use the 8-point correction Joanna beat into my head relentlessly, to keep the trees vertical so they look good, and straighten the horizon so it didn’t look tilted, and remove the blue cast from the bottom right part of the image.)

I think what you want me to learn from this, and if so, you have succeeded, is that one control line can accomplish the same effect as doing a huge number of control points.

(I have tried twice to edit this reply, but the forum doesn’t accept my changes.)

Yes, Fuij has a BSI sensor which seems to be much better in low light. Vs a panasonic sensor.

I have tried three times to change the text of what I just wrote, but the forum doesn’t accept any changes. I tried to quote Peter at first, but that also got “lost” in my post…

Most of you color comments are correct.
I over did it to show color manupalation. And horizon and tillted trees those treesand the horizon have a viewing issue. Tree’s arn’t straight originally, horizon is dunes and has a prespective problem.
The goal of this file was, can i shoot straight in the sun catch the sunbeam glare?
The blueisch glare is trees and shadow make it blue. (warming up to sand color was not reality.)

Indeed i wanted to show you the difference between plain v4 controlpoints and chroma, luminance v5 masking of controlpoints qnd lines.
I did quick and dirty processing.
Maybe i start over with the hole set, a v5 version just to see if i can improve the hole set’s feel and look.

By the way the hole image is not “great”
Quickshot, f5.6 would be enough. But focus was not aimed good enough.
No “ettr” to protect shadows, aldo the rawfile shows reasonable exposurelevels.

You may use the rawfile to try your self.:slightly_smiling_face:

No problem, i understand what you try to say. :grin:

Yes i tried to show the huge improvement chroma, luminance and controlines are compared to the v4 version. Selective wise i can only say much much better.

Peter

I’ve been deeply frustrated with how PL handles metadata, but I love everything else about it and so I just paid the money for the upgrade once I knew it would now write to xmp files (which it does well). The irony is I don’t really need it now as I’ve had to build a workflow with other programmes to have a workable cataloguing system. I guess I see it as a stepping stone to further improvements and a personal commitment to the programme, though quite expensive for the improvements it’s brought (and a few bugs, for me at least).

Mike, there’s nothing mysterious going on in the images I posted further up in this topic. Just three parallel, horizontal control lines whose individual ‘color pickers’ are set to the sky, the tree foliage and a head-stone respectively. I tuned the control line adjustments in three different ways: (1) reduce the exposure & raise the temperature of the sky (2) lift the shadows in the foliage of the trees, and (3) lift the midtones & contrast of the headstones.

Joanna said she didn’t like the adjustments much. I have to admit they’re a bit crude: a quick-and-dirty ‘proof of concept’ use of multiple control lines whose overlap is controlled by the ‘color’ pickers and the chroma/luma sensitivity settings. I meant only to verify the ‘consensus’ that the control-lines & improved spot-controls are significant changes in PL5 vs PL4.

Peter

Yes, great :+1:t4:

If several images are posted in the same message (not quoted !) the forum allow us to have a slideshow view.
This view is really great to see the before/after or step by step guides.
I guess more people need to be aware of this option :smiley:

Else we can always download all the pics… but « on the go » it is less convenient.

I trialed the upgrade for about an hour before I paid for the upgrade. Control line and Chroma and Luma adjustments are a game changer.

1 Like

Count me in as one of those people - I know nothing about “slideshow view”, let alone how to use it. Can you please point me towards a link that describes this?

All you need to do is click on the first photo in a post and it comes up full page with arrows each side if there is more than one image, then you click on the arrows to see the photos in sequence

So simple! I think I’ve seen those arrows, but never yet clicked on one of them. Very helpful!!

I guess I do most of my work with “blinders” on, only seeing what I’m looking for.

I was away from my keyboard but I see you got an answer already :white_check_mark:

Funny ! At the same time it’s great for concentration :+1:t4:
In my case I learn a lot but it’s hard to focus. We need a good balance :smiley:

For me the best thing about PL5 is the addition of the chroma and luma sliders in Local Adjustments. I had never used Local Adjustments very much before but when I watched a couple of videos on how to use Control Lines and saw what was possible I began experimenting and could not believe the control they gave me in editing my images. I can see myself using Local Adjustments much more in the future and it is the thing that would get me to upgrade.

I use Photoshop so I also have Lightroom, although I have never much used it, preferring Optics Pro before and PhotoLab now. I tried using the adjustments in LR to do what I could now do in PL5 and found that I could not. But then I have always thought that OP/PL gave me better final results than LR.

On the other side of the coin I have to mention the thing that disappointed me the most about PL5, and that is the fact that it no longer recognizes images created in the working folder during processing. If I send an image to Photoshop for further editing I can not see the tiff in the filmstrip, and can not see the return image either. If I use the Nik HDR functionality I don’t see the intermediate tiffs created for the HDR and I don’t see the final HDR image, so I can not further process it. To do any of that I have to switch to another folder and then switch back. I work on a Mac and I don’t have a way to force PL5 to reread a folder other than switching folders, and that is a major problem for me since I do a fair number of HDR images. Every single one requires that I stop processing, switch folders, then switch back, and only then can I further process my image.

This was not a problem in PL4. I first saw it back in OP5 or OP6 and it has recurred from time to time in upgrades. Eventually the developers fixed it and I trust they will do so again with PL5 but since it is so important to me I may hold back on upgrading until it has been addressed or I am told it will be addressed.

Still, I really like the new Local Adjustment functionality and am amazed at what I can easily do now.

On the other side of the coin I have to mention the thing that disappointed me the most about PL5, and that is the fact that it no longer recognizes images created in the working folder during processing. If I send an image to Photoshop for further editing I can not see the tiff in the filmstrip, and can not see the return image either. If I use the Nik HDR functionality I don’t see the intermediate tiffs created for the HDR and I don’t see the final HDR image, so I can not further process it. To do any of that I have to switch to another folder and then switch back. I work on a Mac and I don’t have a way to force PL5 to reread a folder other than switching folders, and that is a major problem for me since I do a fair number of HDR images. Every single one requires that I stop processing, switch folders, then switch back, and only then can I further process my image.

This was not a problem in PL4.

@sgospodarenko we should probably verify if this is something isolated or a bug…

I just round tripped from DXO V5 to Affinity Photo, used SilverEfex Pro V2, saved, then closed AP. Modified file was sitting alongside the original file in DXO’s viewer.
Win 10 Pro

Hi @MikeFromMesa
I’ve just tested this scenario: I choose a raw (nef) file, choose the Nik HDR tool in Nik output menu, DPL v5 create the tiff file which I can see in filmstrip, I work on it with Nik v4 HDR tool, save the result and I can see the tiff created in the same folder than original in DPL filmstrip.

This on Mac mini Big Sur 11.6, DPL v5.0.1 build 41 and Nik v4.

So this doers not solve your issue, just show it’s working on my workflow on Mac.

BTW, I guess you don’t have a filter in filmstrip to not show tiff images?

2 Likes