When I send a file from On1, basic edits don’t go with it (eg the on1 sidecar file). I tried denoising an image that is underexposed and when I increase exposure back in On1 after processing the result looks horrible when compared what I had achieved in Topaz Denoise AI. I had to bring contact down to the minimum and it still look contrasty
Is there a workaround for On1 users?
Have you tried processing your raw files in PureRAW first and then opening the output .DNG file in ON1 for editing?
Mark
2 Likes
I don’t use PureRAW because I use PhotoLab 4. However, from the promotional videos on DxO’s site regarding PureRAW, it appears the idea is to prep all the photos in PureRAW and then open them in your editing app.
I got the same result by dropping the original DNG. That’s presumably fine if the image is correctly exposed but if It is underexposed, the result is dreadful.
I was just watching a demo video, and when LR files are sent to Pure Raw the metadata (ie basic edits) go with it. In On1 the metadata is contained in a separate propriety sidecar file. I think thats the root of the problem.
As far as I am aware, the edits never go across unless they are baked into a tiff. Lr edits can also be kept in a sidecar file so what happens to those. Sidecar files are the recommended option and many use it. Maybe I am misunderstanding what you mean by basic edits - highlights/shadows that sort of thing?
I also tried to export from DxO PL4 with optical corrections & denoise only (same as Dxo PureRaw)
as DNG and then afterwards open / edit in ON1 2020.6.
The procedure didn’t show any problem, but then the original was somewhat correctly exposed.
Could you adjust your exposure in ON1 without going to PureRAW first? – Maybe enclose your file for a trial.
have fun, Wolfgang
Colin.
I might have misunderstood the videos, but I got the impression that with LR some sort of metadata is sent over to Pure Raw, which means that, yes, you can do things like increase exposure etc. in advance of the Pure Raw processing.
That’s certainly NOT the case with On1, so if I have an underexposed image, like the one I posted above, I have to adjust exposure back in On1 after Pure Raw has worked its magic. The results are horrible, even with a lot of tweaking, such as reducing the contrast.
Wolfgang,
My understanding, from watching several YouTube videos, is that if you have DxO PL4, you can tweak exposure etc BEFORE denoising.
If I adjust exposure in On1, that change does not carry over. The only solution would be to convert the file to a TIF and then back to DNG (since Pure Raw doesn’t work with TIFs)
All this is a pity, since Pure Raw does a much better job with colour noise, providing exposure is correct, than Topaz DeNoise AI.
I will upload it here, if you want to play around with it yourself in LR.
fine, I’ll give it a try 
I cannot see how that can work as Pure Raw will apply its own optical corrections and that will conflict with Lr edits. It certainly is at variance with the threads I have read on the subject.
I watched a tutorial that said you should disable the optical corrections in LR before sending files to Pure Raw.
The file I uploaded is way underexposed. That’s why Pure Raw makes a mess of it, because I cannot correct the exposure BEFORE I send it over. My understanding is that when sending from LR the exposure CAN be corrected first. Maybe someone who is reading this could try it!
Having used ON1 since 2018, I upgraded twice – and stopped as I was still missing support for a couple of lenses. When I tried PhotoLab, it recognized them all (except the TC) and even some from my ‘entry’ to the digital world.
Now, I had several trials with your file …
-
I exported your raw-file from DxO PL4 as DNG with denoise & optical corrections only (same as PureRAW = no exposure manipulation) and opened it in ON1 2020.6
– short version: it doesn’t work!
The contrast seems to be to high to be reduced sufficiently, and bringing the shadows up
only ends with tonal breakdown.
( BTW, tried to use the settings from raw-file in ON1 – took note and had to choose them by hand, while AI Auto couldn’t be applied at all – also no success. ) -
Instead I opened your raw-file in ON1 and applied the ‘Camera Standard’ profil + AI Auto, which seemed to give the best exposure in ON1.
I also experimented with the tone curve (in Effects) and with Local Adjustments (painting masks, brightening …), but stopped after a while. I’m no expert with all the details and you will know better anyway. -
I exported your raw-file from DxO PL4 as DNG with denoise & optical corrections only and opened it in LR 5.7 64Bit. As lowering contrast & increasing shadows wasn’t sufficient, I changed the gradation curve plus added local adjustments to fix some highlights – well, it works.
-
I exported your raw-file from DxO PL4 as DNG with denoise & optical corrections only and opened it in PL4 – very easy to correct globally and locally, and also to ‘restore’ some atmosphere of this heavily underexposed pic … well then, I’m familiar with PL.
-
At last, I opened your raw-file in PL4 … just the same as before.

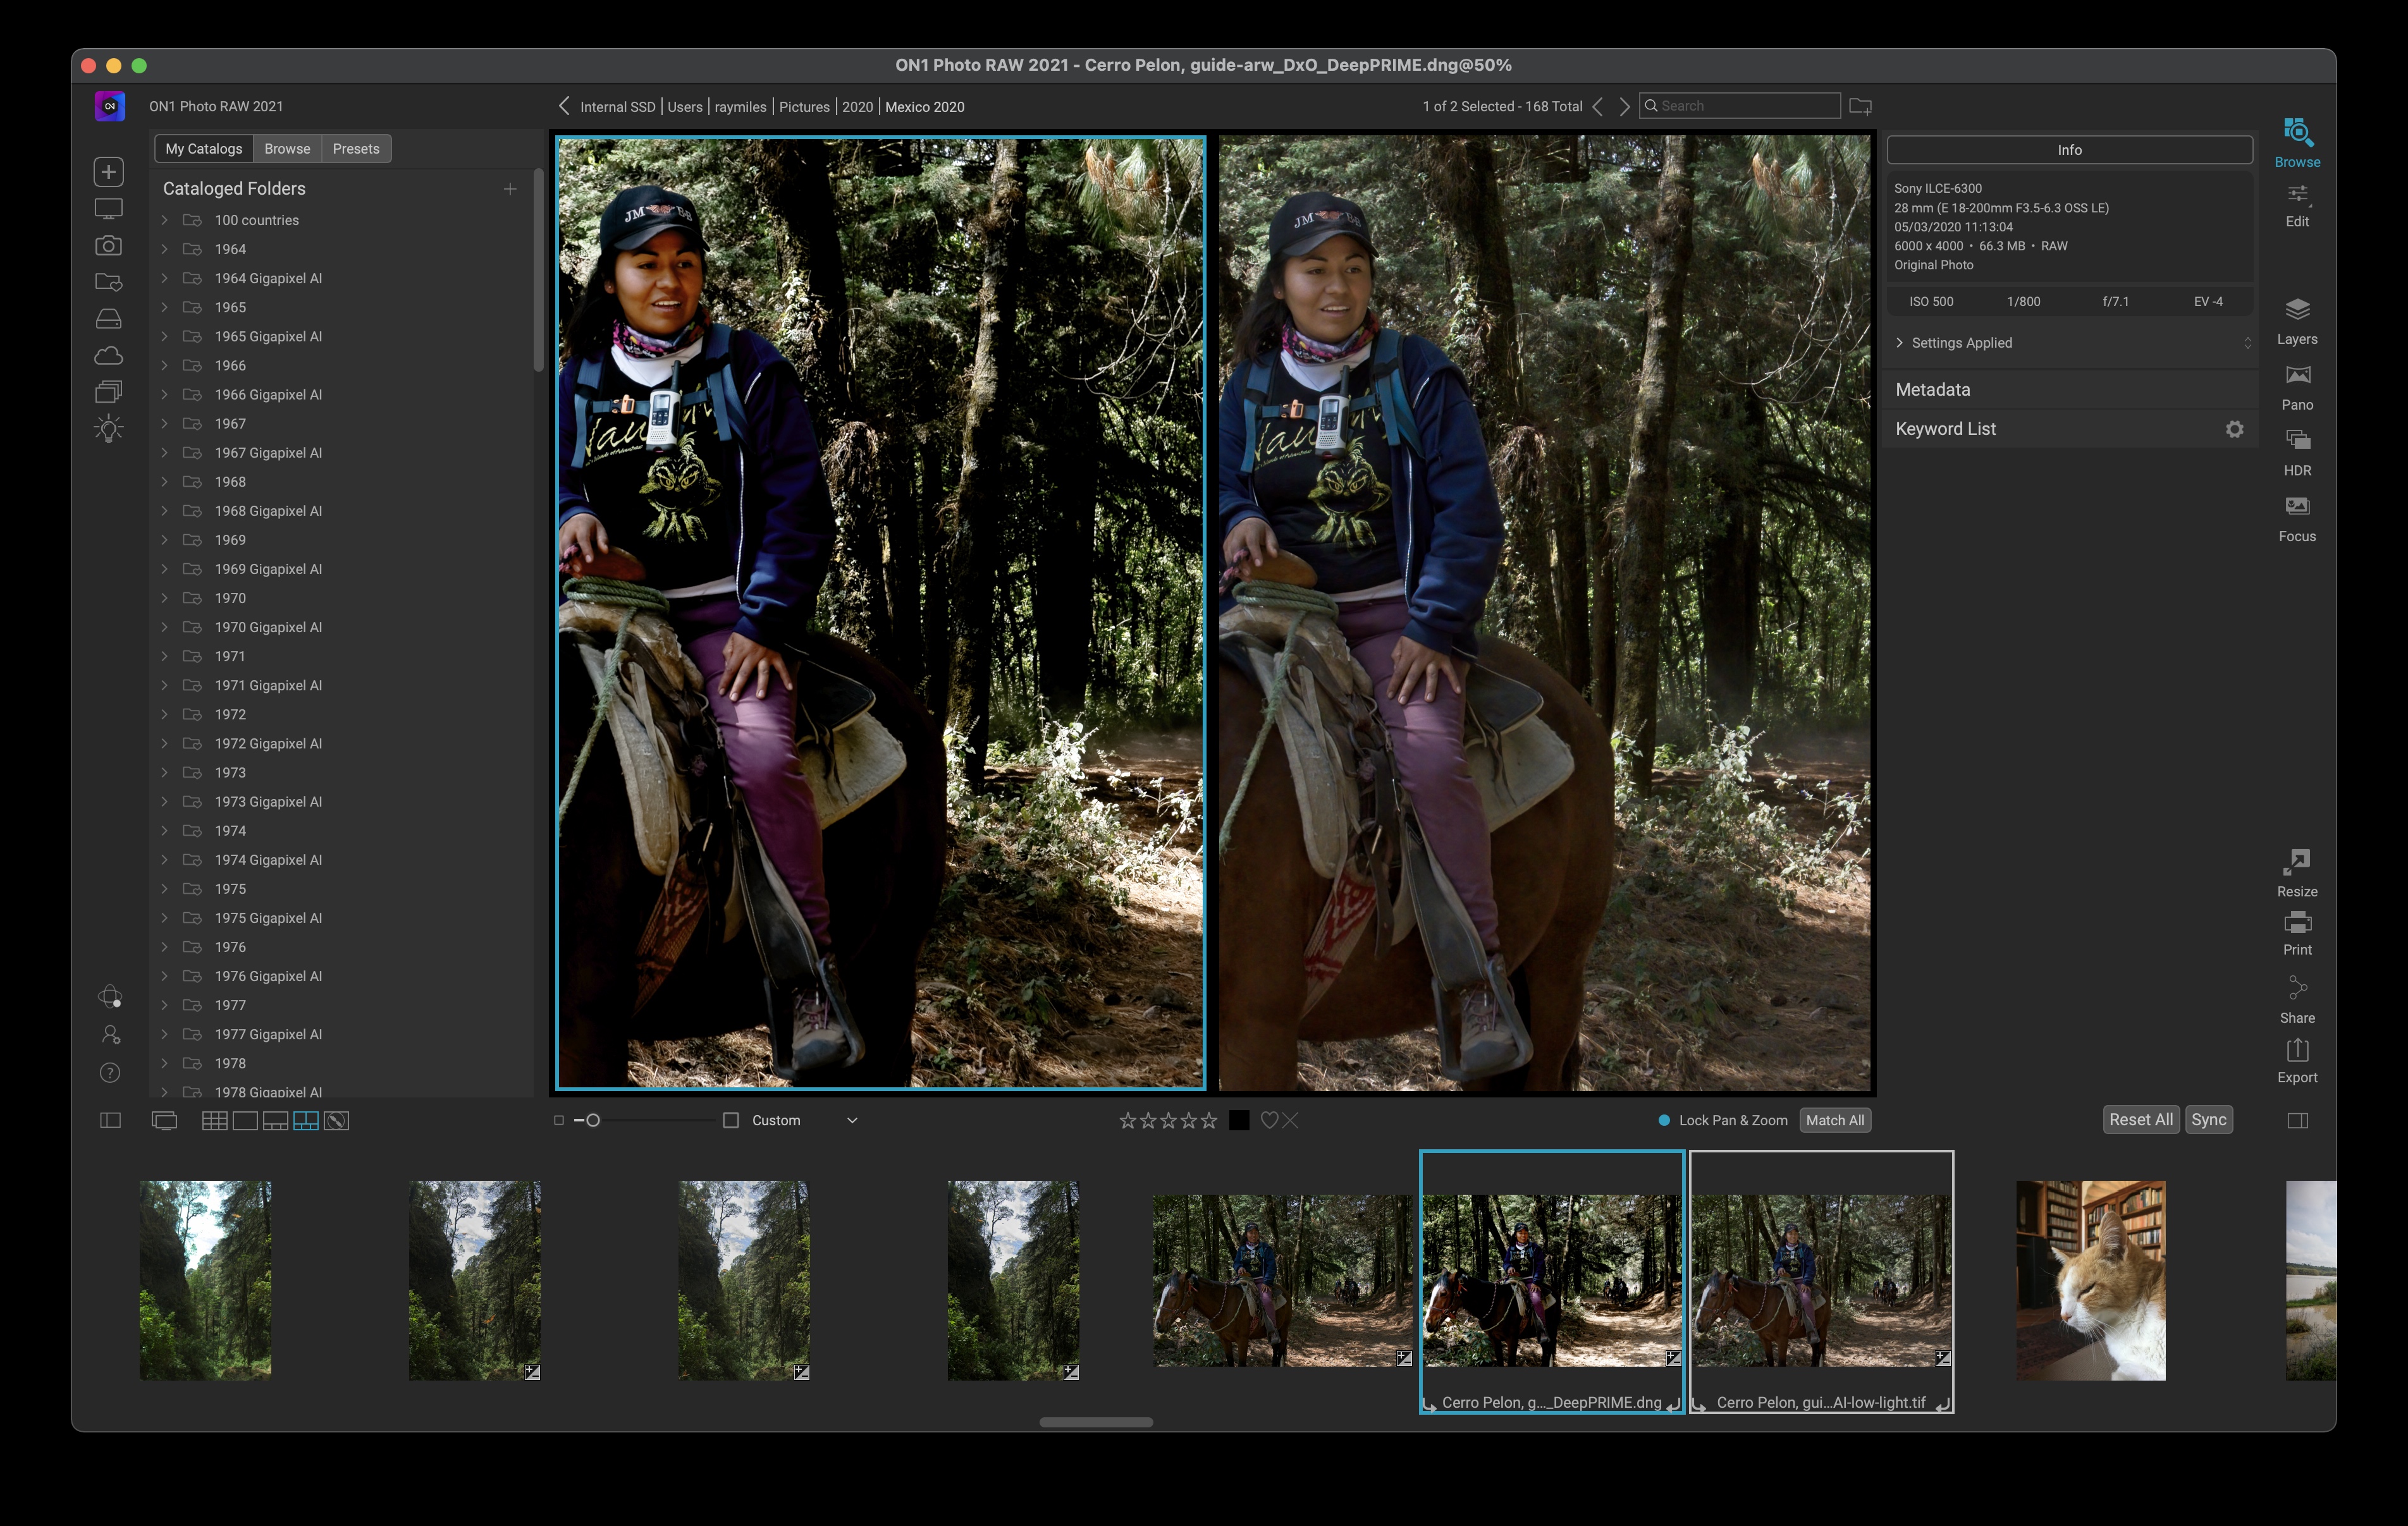
I’ll enclose 3 JPEGs to give you an idea of the results
- #2: raw-file to ON1
- #3: DNG to LR
- #5: raw-file to PL4 (= published // with the same correction settings as #4, so they look alike)
Cerro Pelon, guide_CameraStandard_sRGB_ON1.zip (5,9 MB)
Before I forget, I also tried to open your raw-file in LR 5 … nope, to old to recognize your camera.
have fun, Wolfgang
(ed)
Thanks for all that.It was very informative.
I think the secret is to use DxO PL 4, so I downloaded the trial version. This means I can correct the exposure there before applying the denoise. Once that’s done I can open the DNG in On1 and apply any further embellishments there. Later this month, On1 will be releasing its own high-end denoiser, so none of this is likely to be necessary. Let battle commence! By the way, I switched from LR to On1 over a year ago, after researching all the alternatives. DxO PL looked as though it might have too steep a learning curve, but I must admit this v4 is pretty easy to use.
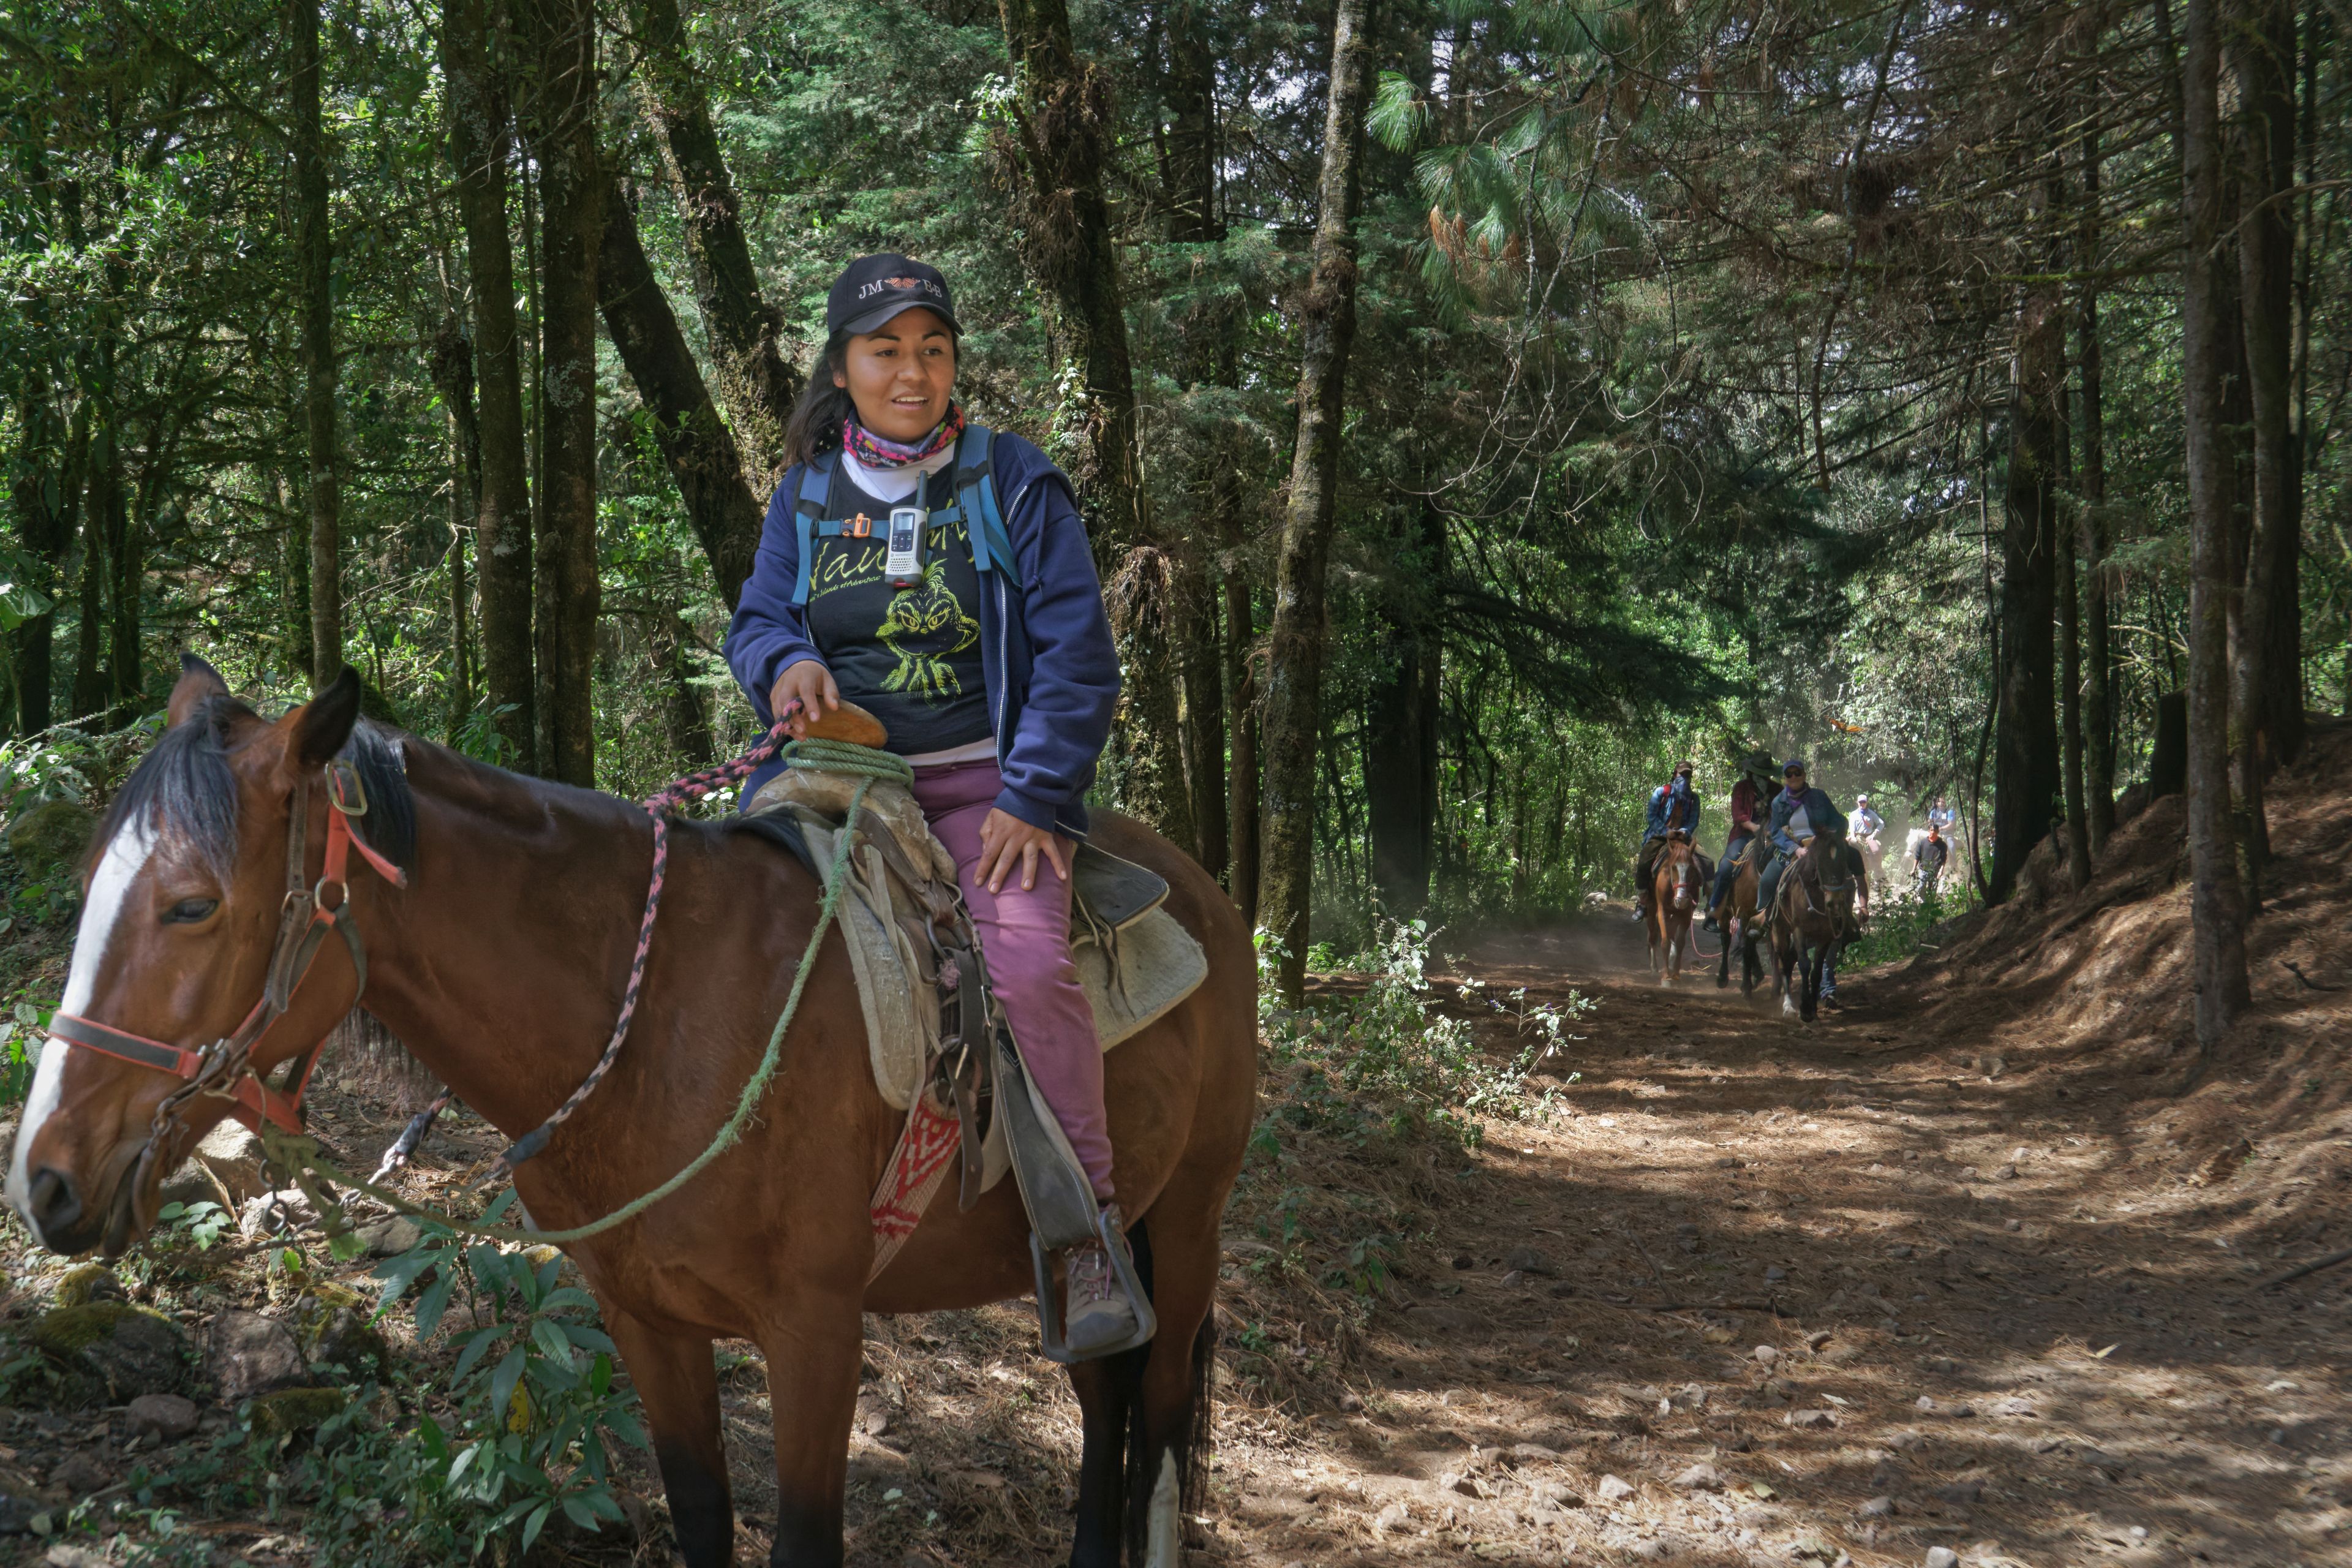
Here’s my result. I couldn’t resist adding some sun rays. Since the sun is behind her I kept the foreground darker than you did. Your’s look a bit like a flash was used.
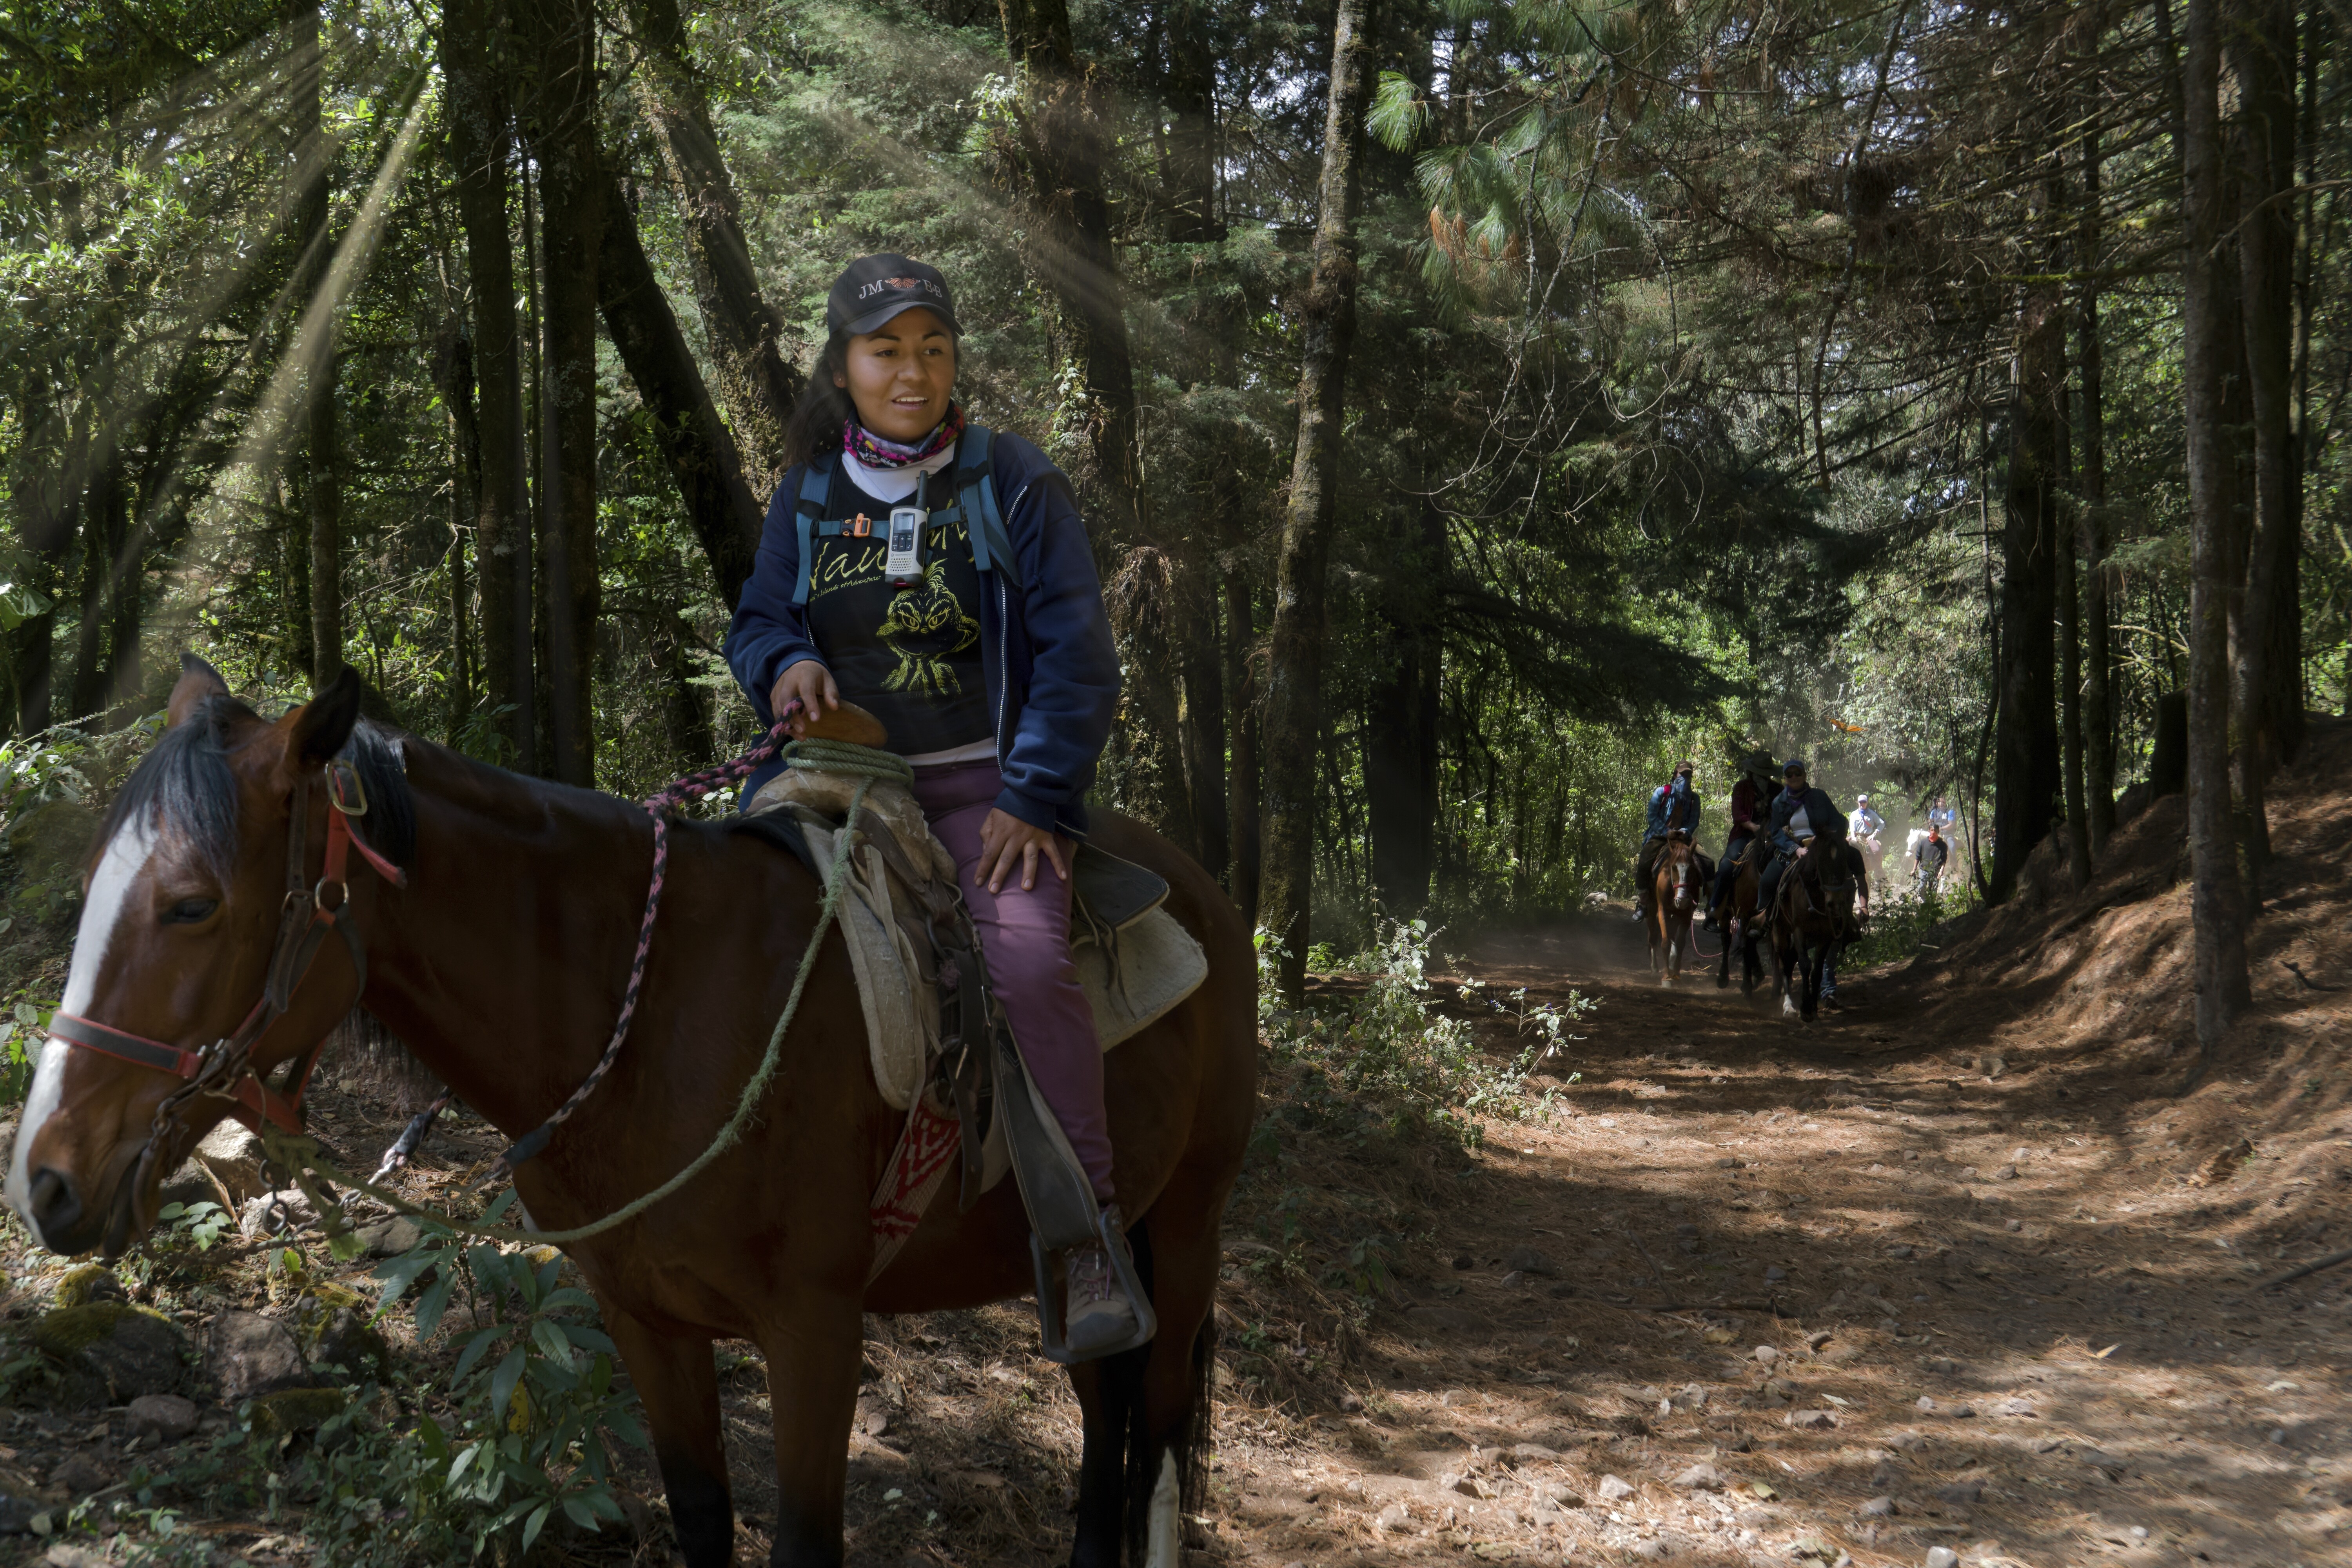
@Londinense – oh, how could I miss the sunrays
Well, the question is what and how to present. – As the eye usually follows light and contrast, the partly lit forest makes it difficult to discern the subject. So I tried to shed some light on the guide in the foreground. But what I don’t like (and could have done better), the right of the pic looks convincing to me, while the left side is somewhat HDR-ish … Thinking about this, I went back and re-created this new version.
Copy your raw-file and the dop-sidecar-file Cerro Pelon, guide.arw.dop (286,2 KB) into a new folder. PL4 will then show you the raw-file and 2 virtual copies.
To compare the two versions, check here …
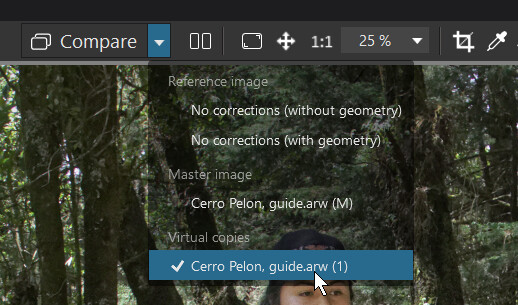
I chose virtual copy (2) to compare it with virtual copy (1)
At the top right of the screen you find the switch ‘Active correctons’,
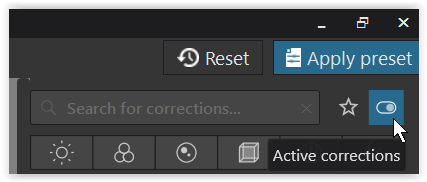
which then only shows the active (used) settings.
Now you get a quick and complete overview of the settings. But as they ‘disappear’ from this view, when you deactivate them, switch off ‘Active corrections’ and look for the setting you are interested in
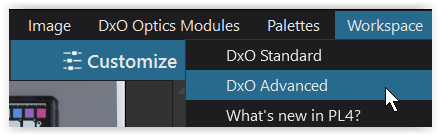
‘Workspace’ > ‘Standard / Advanced mode’ to compare the different states.
A powerful tool is ‘DxO Smart Lighting’.
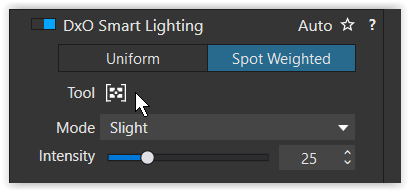
I used it here in the mode ‘Spot Weighted’.
I’m on PhotoLab4 / Filmpack5 Elite versions and you might miss some extra global settings, while the Local adjustments should all be present.
IF you decide for DxO, I recommend the Premium bundle (discount till end of the month).
have fun, Wolfgang
(ed)
Many thanks. I did my additional processing back in On1 and then added the sun rays in Luminar.
Two questions relevant to DxO PL:
- When using Deep Prim denoising, can the loupe be magnified? I didn’t see anything in the manual to that effect, but my poor old eyes find it difficult to see what’s going on!
- Every time I open the app, or a new image, the denser defaults to HQ. Is there a way to get it to default to Deep Prime instead? Nothing in the Prefs I can see.
The loupe just shows a small area of the image with 100% zoom. The zoom level is not adjustable.
The reason images at startup, or new images, change denoise back to HQ is a result of the preset in Preferences which applies a lot of default settings. It is probably set to DXO Standard. The Elite Version of Photolab has a preset editor which will allow you to modify individual settings of a preset to whatever you prefer.
There are also two types of presets, full and partial. Full presets will overlay all settings with defaults for that preset, partial presets will only overlay specific settings and leave the rest alone. If I recall correctly, the majority of the other presets which come with PhotoLab are full presets. .
Full presets can be converted to partial ones and vice versa. It all depends on your requirements. For a new user the preset editor may be confusing to use. We can help with that.
Mark
Thanks for the explanation. I only intend to use DxO during the trial period, and am waiting to see what the new On1 DeNoise module will be like, since that’s my main app.
@Londinense, well – You must to be happy!
To my surprise, I found it quite difficult this time to get better results in ON1, similar to what I’m used to in PL4 … stopped as explained.
have fun, Wolfgang
Yes, there is sometimes a limit to one’s patience or what one can do. This was a not a really important photo, just a test case. I am now running lots of other shots that need the noise removed through DxO PL and comparing them with what Topaz DeNoise had done with them. In most cases I think DxO does better, although it does seem to bleach out skies. Maybe I am doing something wrong there?
I’m now using ON1 Photo RAW regularly with DxO PureRAW. Open the raw file first in PureRAW, then finish the resulting DNG file in ON1 Photo RAW. For me, it works great!