Maybe I’m missing something, but I have been working on some new 4800ppi 48-bit colour scans of some old negatives and most are in desperate need of sharpening.
But no matter where I put the sliders they seem to achieve nothing. I can put them all full-right and switching the adjustment off and on reveals no difference at 100% zoom.
I just ran a quick check/test for you - and USM is definitely impacting my sample TIFF file (tho, I’m on Win10 version - not Mac).
Perhaps it’s specific to the image(s) you’re using - Suggest you try with another sample.
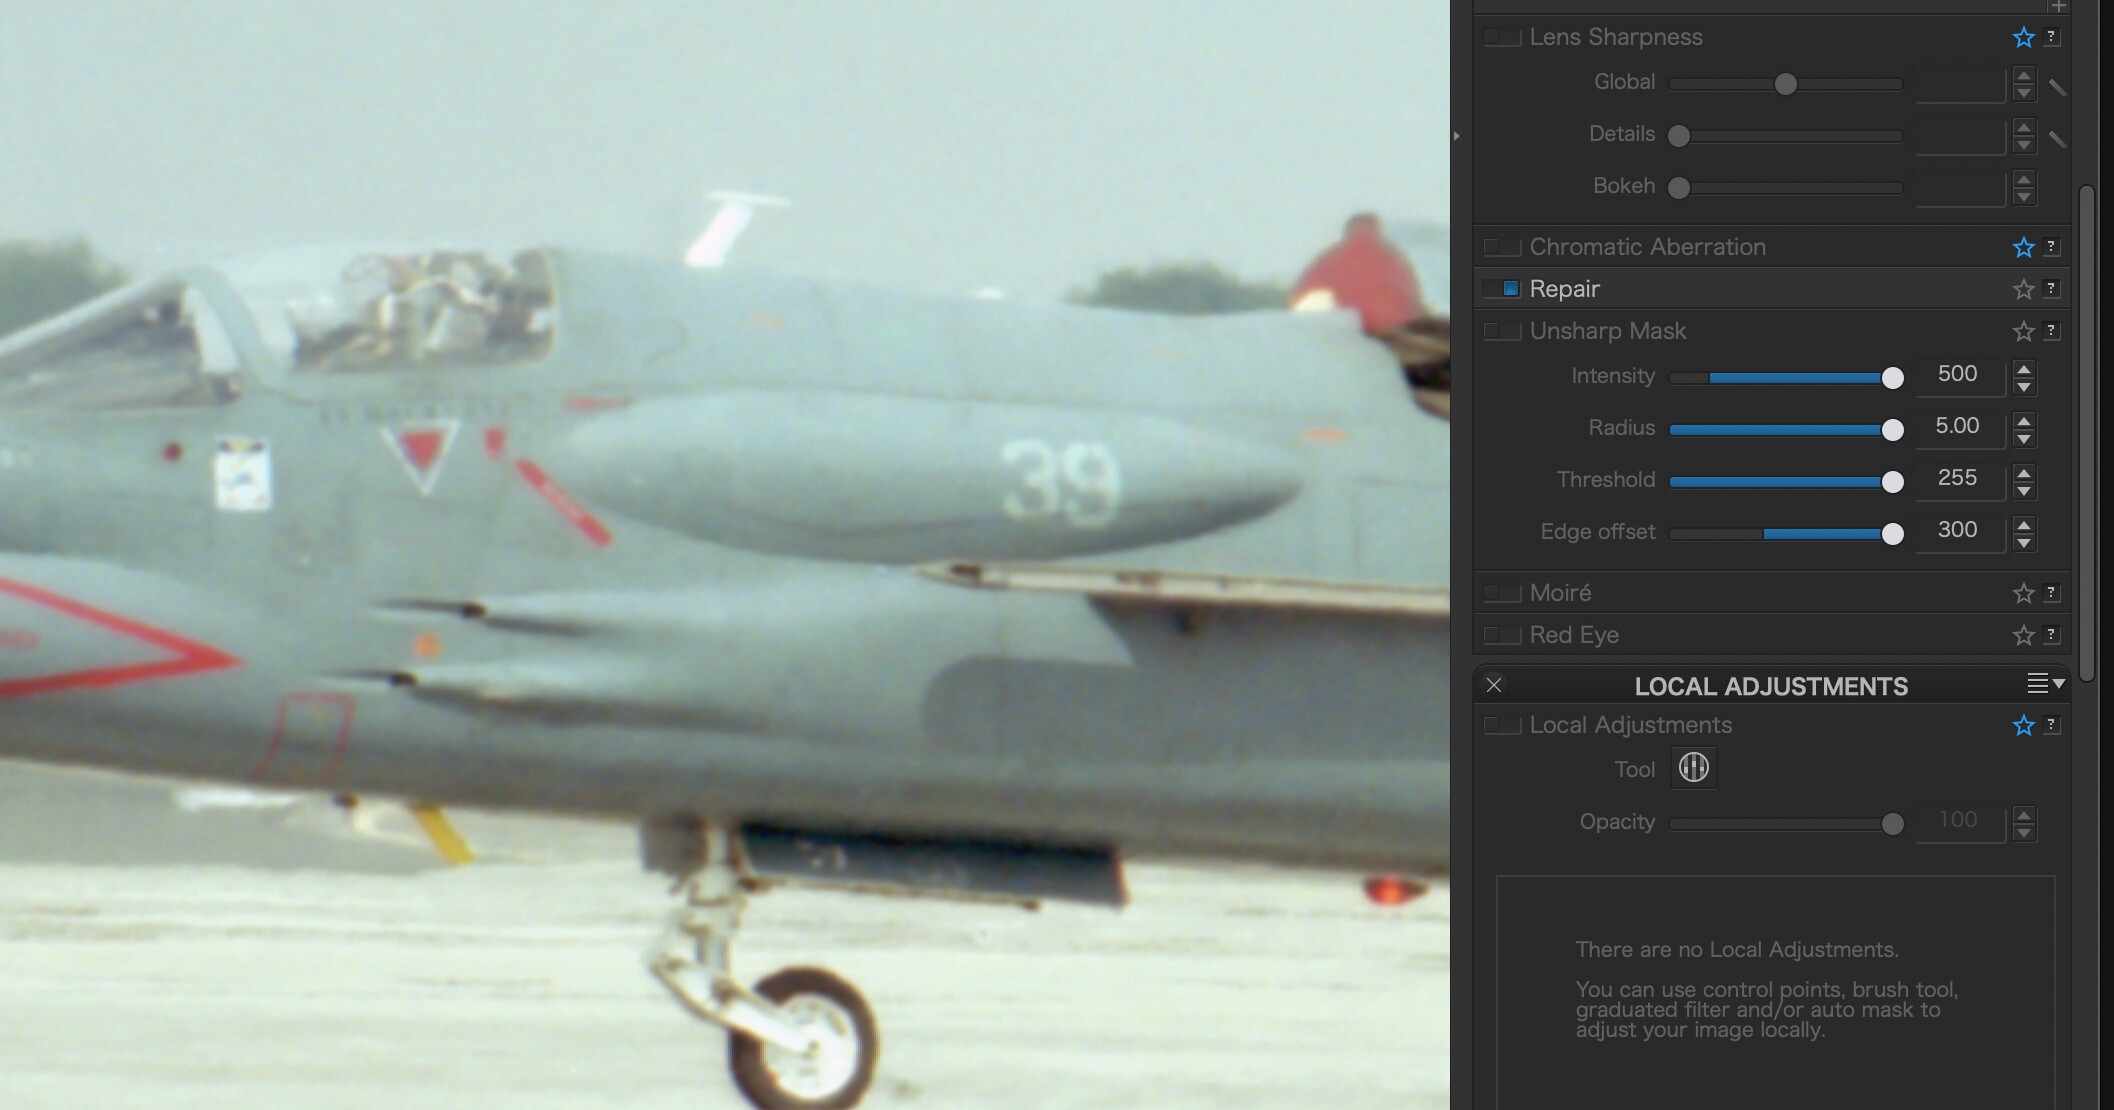
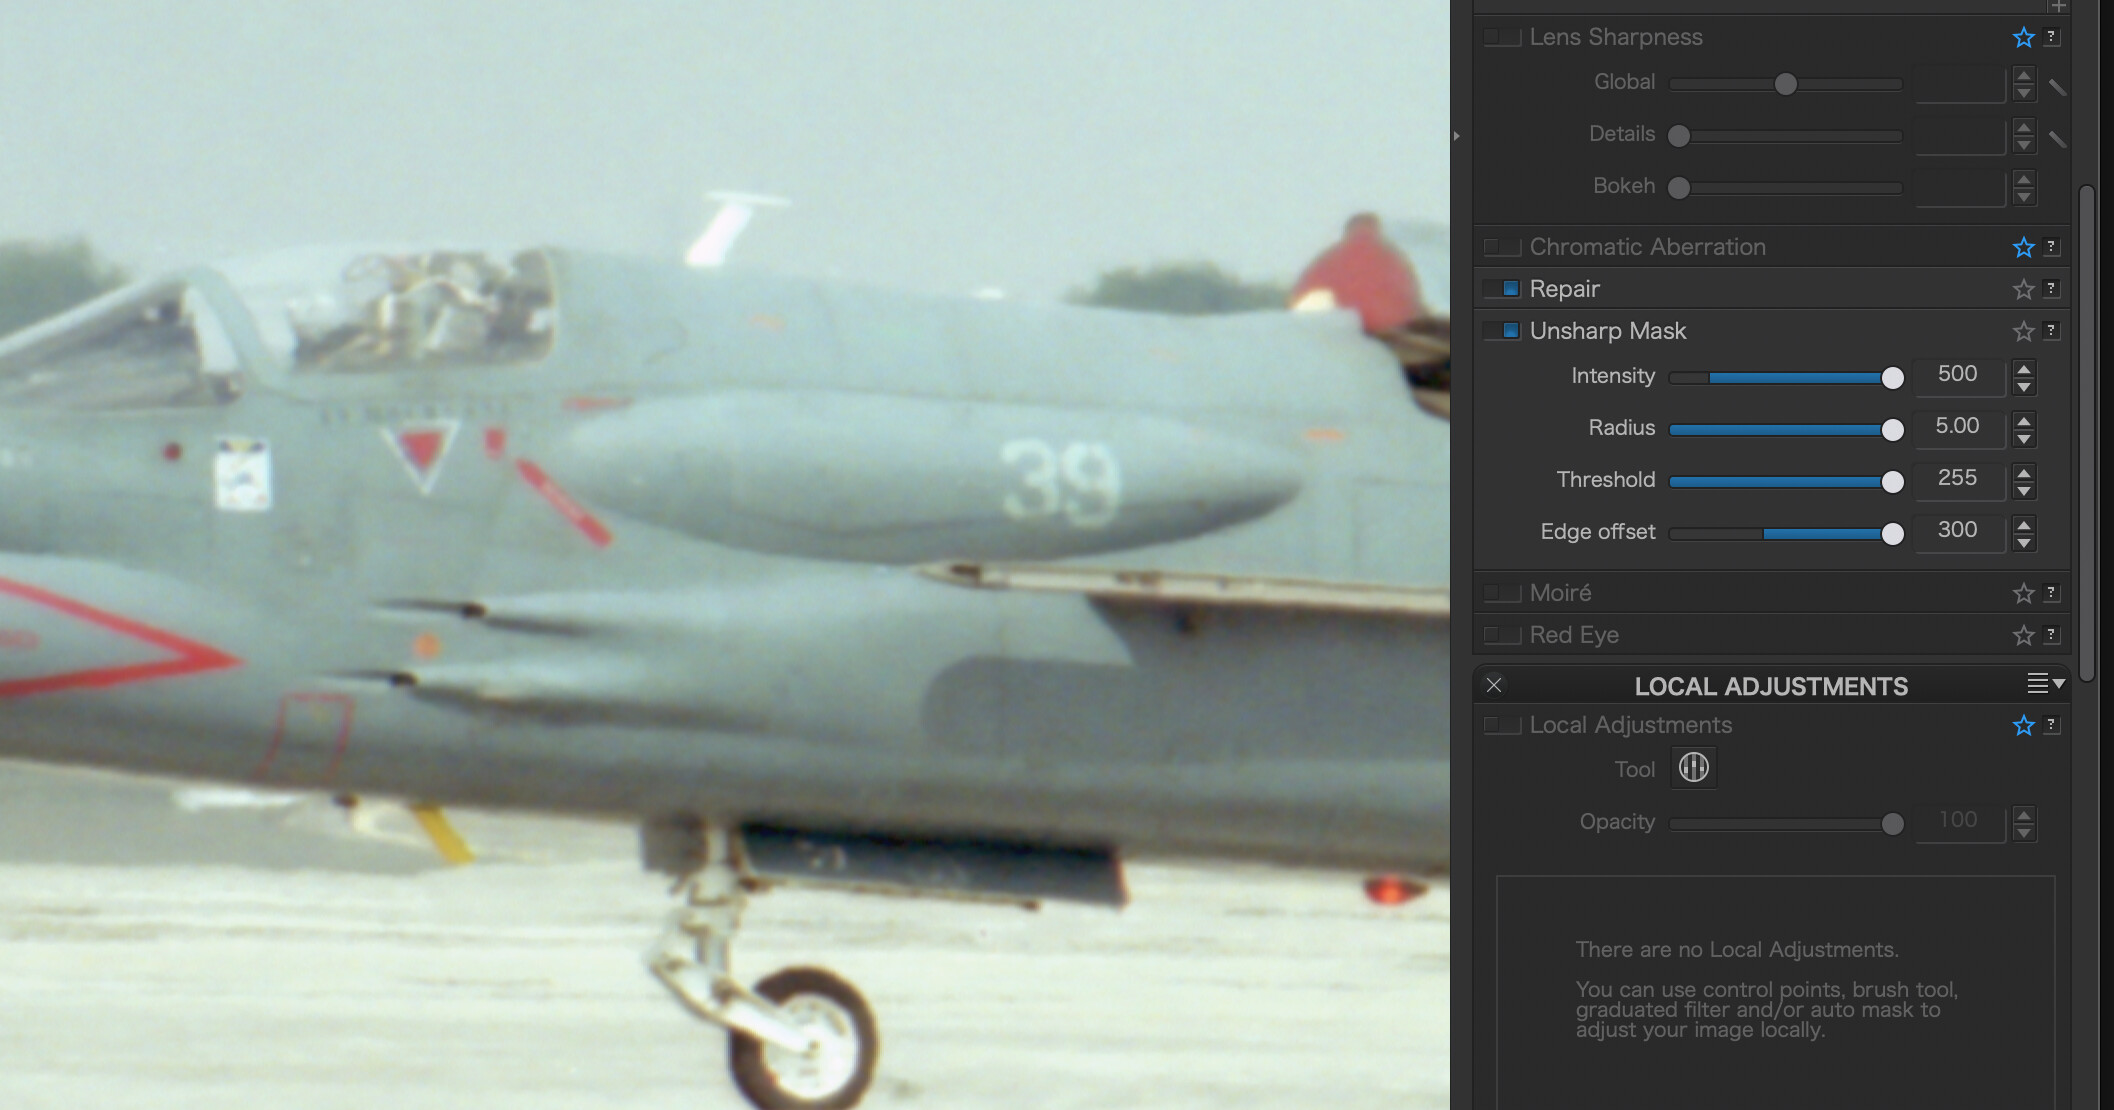
Thanks @John-M, it may be specific to Mac then. Below are two screen captures with it turned off and on and I’m sure with those settings it should look markedly different. I had applied (less of) the USM while zoomed out to 47% and just assumed it would do something meaningful, but was disappointed it wasn’t “strong enough”. When I couldn’t get it any stronger I put the same image in Pixelmator Pro and turned its sharpening up (not sure what technique it uses, but I assume USM) and it was immediately obvious and effective.
All other adjustments seem to be fine, including HQ noise reduction, although it oddly greys out the HQ button even though it is selectable/selected.
Hmmm, the file in question is a 48-bit colour TIFF, and another one I tried it on is the same and also doesn’t work. However, it does work with a 16-bit monochrome TIFF.
Hi - two points. Firstly a “48-bit” scanned image is actually 16 bit, this is old terminology as each channel, R -G - and B have 16 bit encoding. My scanned slides at “48 bit” are 16 bit images. No software I know of handles 48-bit images.
Second, you say you are viewing at 47%. The effect of Sharpening is not shown by DXO PL in the main window until you reach 70% zoom. This is a well known “catch for the unwary” with this software - you have to be at 70% zoom or greater as sharpening is a very processor-intensive process, and a higher zoom level limits the number of pixels being processed. Zoom into 100% and you should definitely see it. Also you CAN see the effect in the detail panel’s small preview window (where you see the effect of noise reduction and lens sharpening also) so look at the preview window while moving the USM slider, you should see it.
Finally, very soft images don’t really respond to USM, especially large ones, as there are no hard edges on which to apply the USM. I find some scanned images work best at a lower scanned resolution, or downsized to say half the resolution, before sharpening. After all, a 35mm slide or negative usually has considerably less native resolution than a modern digital sensor.
Hope this helps. Try the zoom ratio and preview window, you might be surprised.
Aha!! That’s what my problem was, thanks! I read the description of its function but I had it backwards in my head.
I did figure that the large size of the image (though barely bigger than my current DSLR images) combined with the softness would be challenging, but by putting that slider too high at the start I was effectively disabling the rest of the sliders. Some experimentation shows that once it hits 50, everything is protected. I note its default value is 4.
The most important slider in this case (and it makes sense now) is the radius slider. The intensity slider does nothing until I raise the radius to over 3. I’ve found a nice sweet spot that at least gets rid of the “bleariness”.
One weird problem — I created a preset with these settings and when I apply it the USM block has the correct values but is turned off. I’ve created it twice to be sure I wasn’t inadvertently turning it off myself.
It’s 16-bit samples, 3 samples per pixel = 48 bits of colour information. So it’s both a “16-bit image” and a “48-bit image”. This is like the “RGB” versus “RAW” discussion elsewhere — it’s all correct in different contexts. PhotoLab clearly knows what it has.
Yes, 4 helps to lessen sharpening of noise. As you’ve noted it is quite a steep slope. 50 protects almost everything. If you are working on scanned film negatives you might try 5 or 6 to help not sharpening film grain. It all depends on how high you set the other adjustments though. Sometimes lowering the edge offset can also help. Sorry but I have no idea why your preset isn’t working correctly.
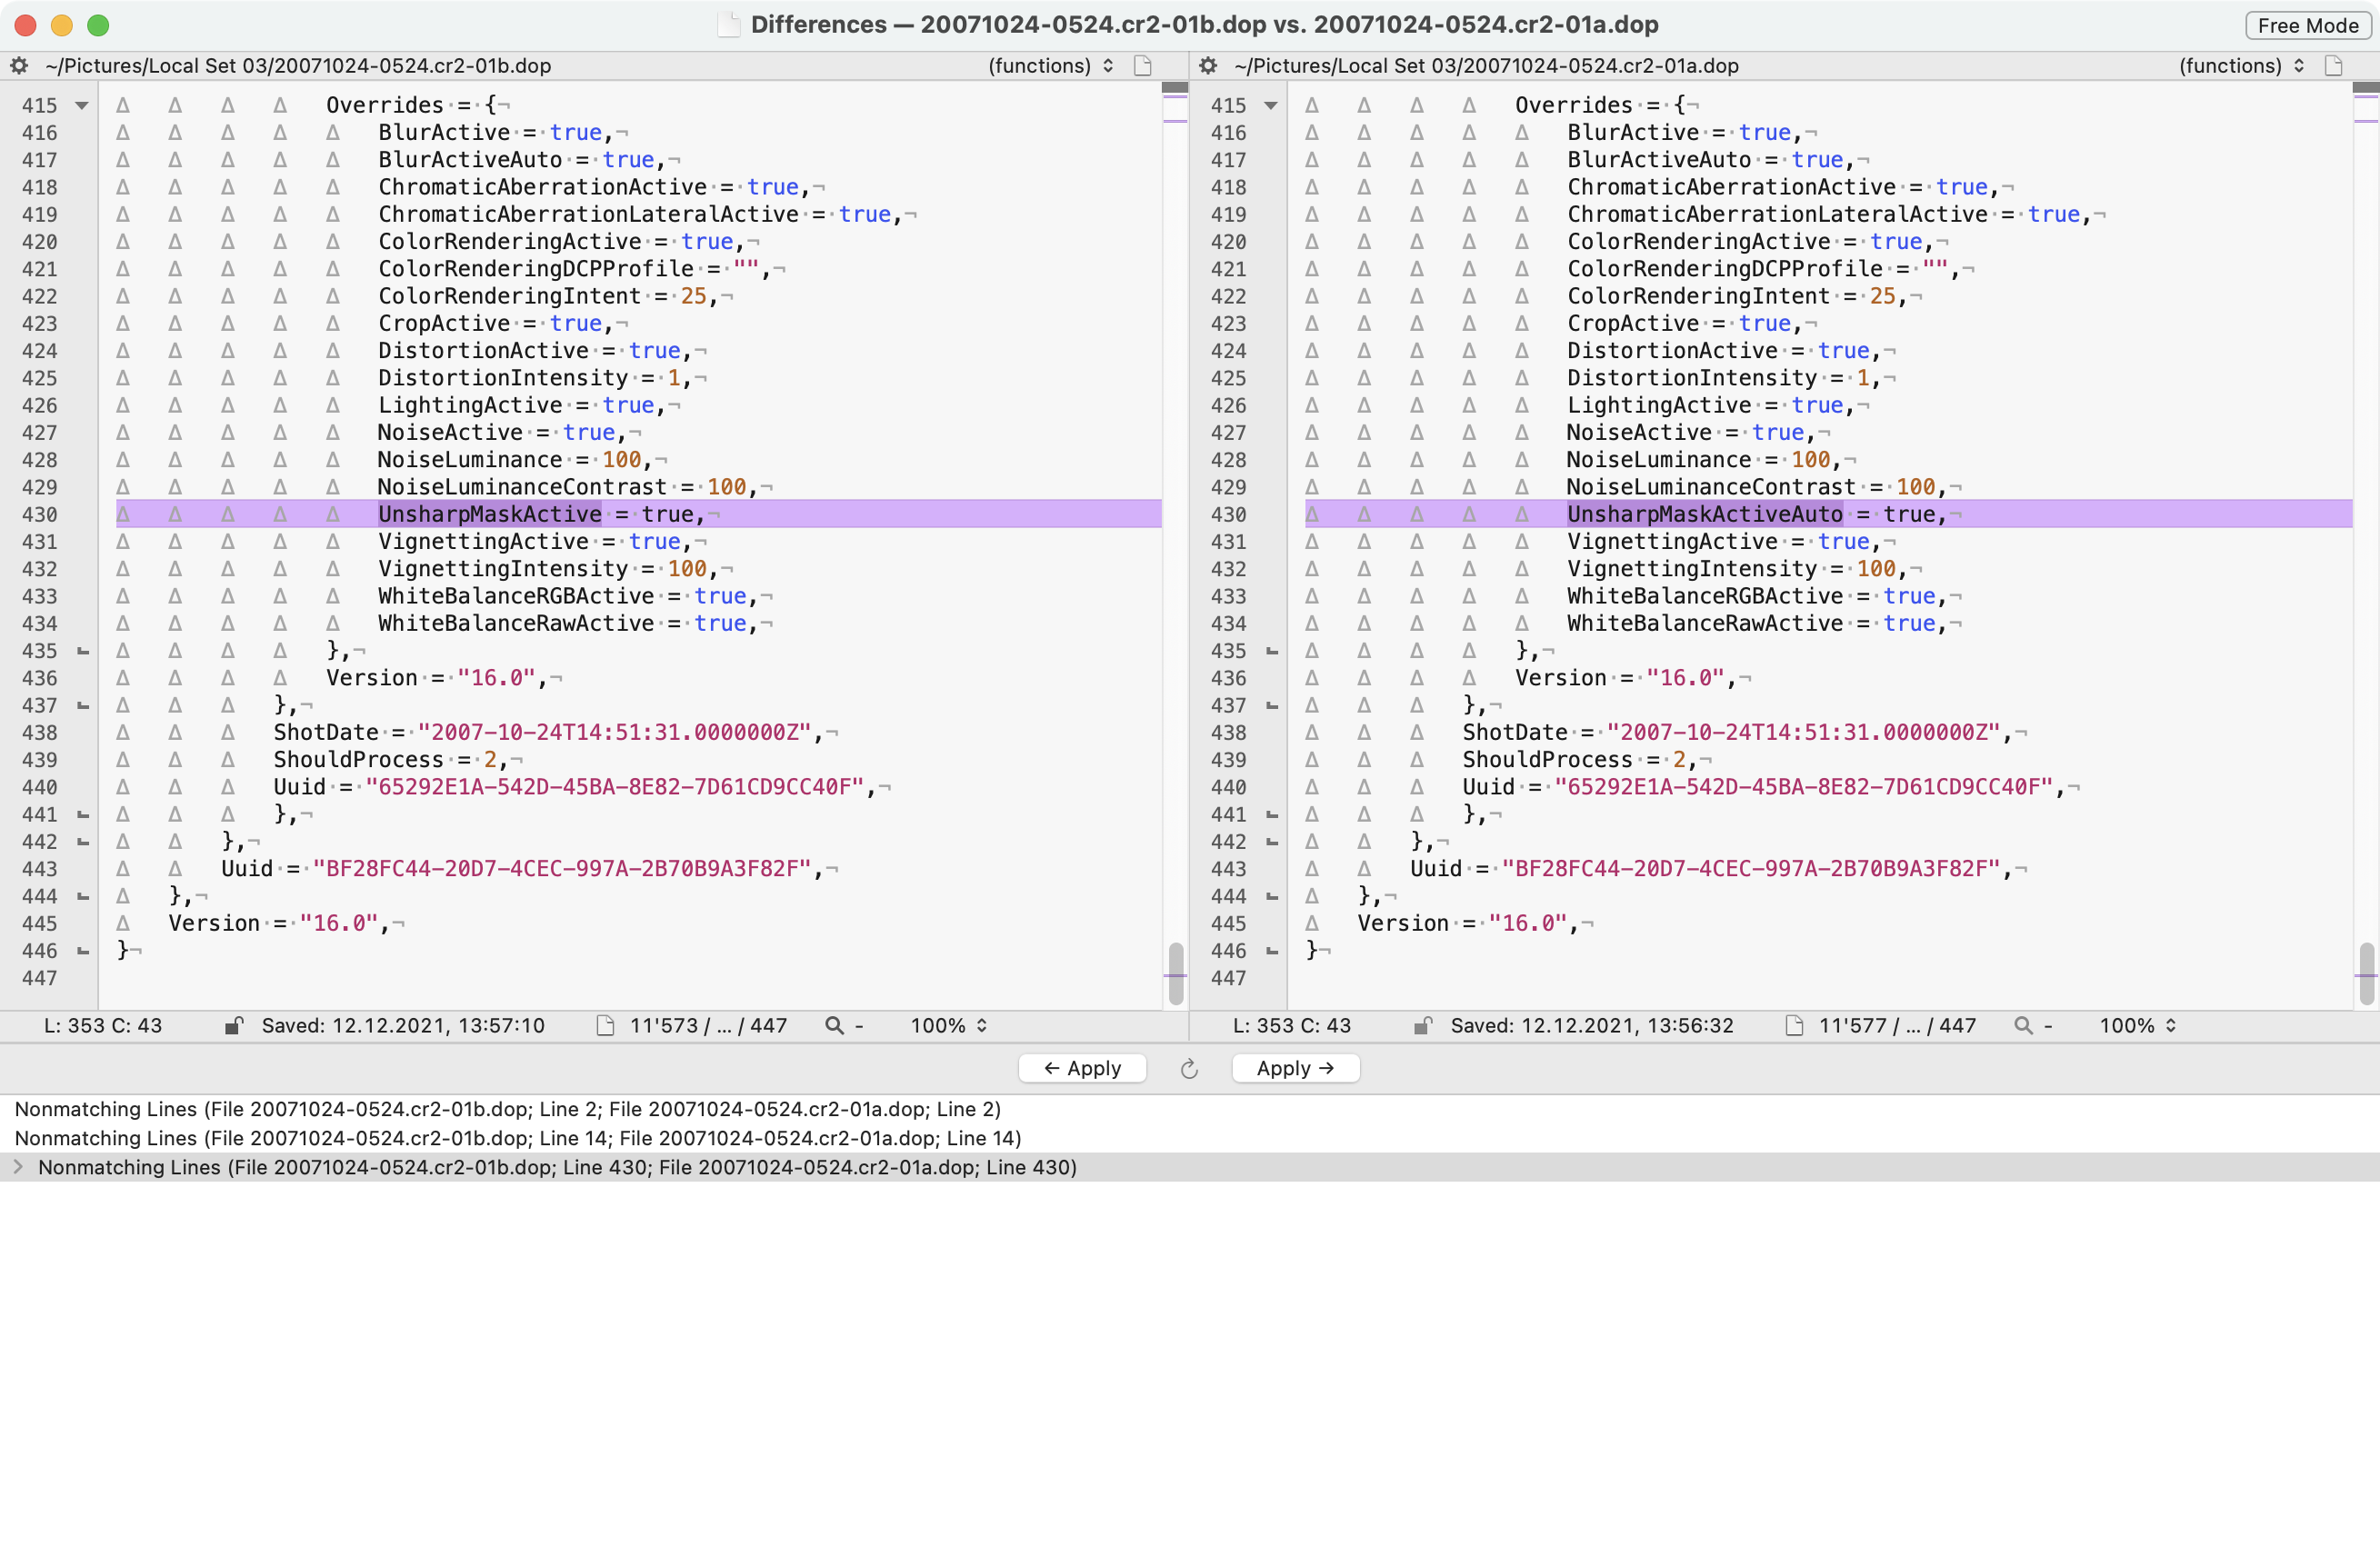
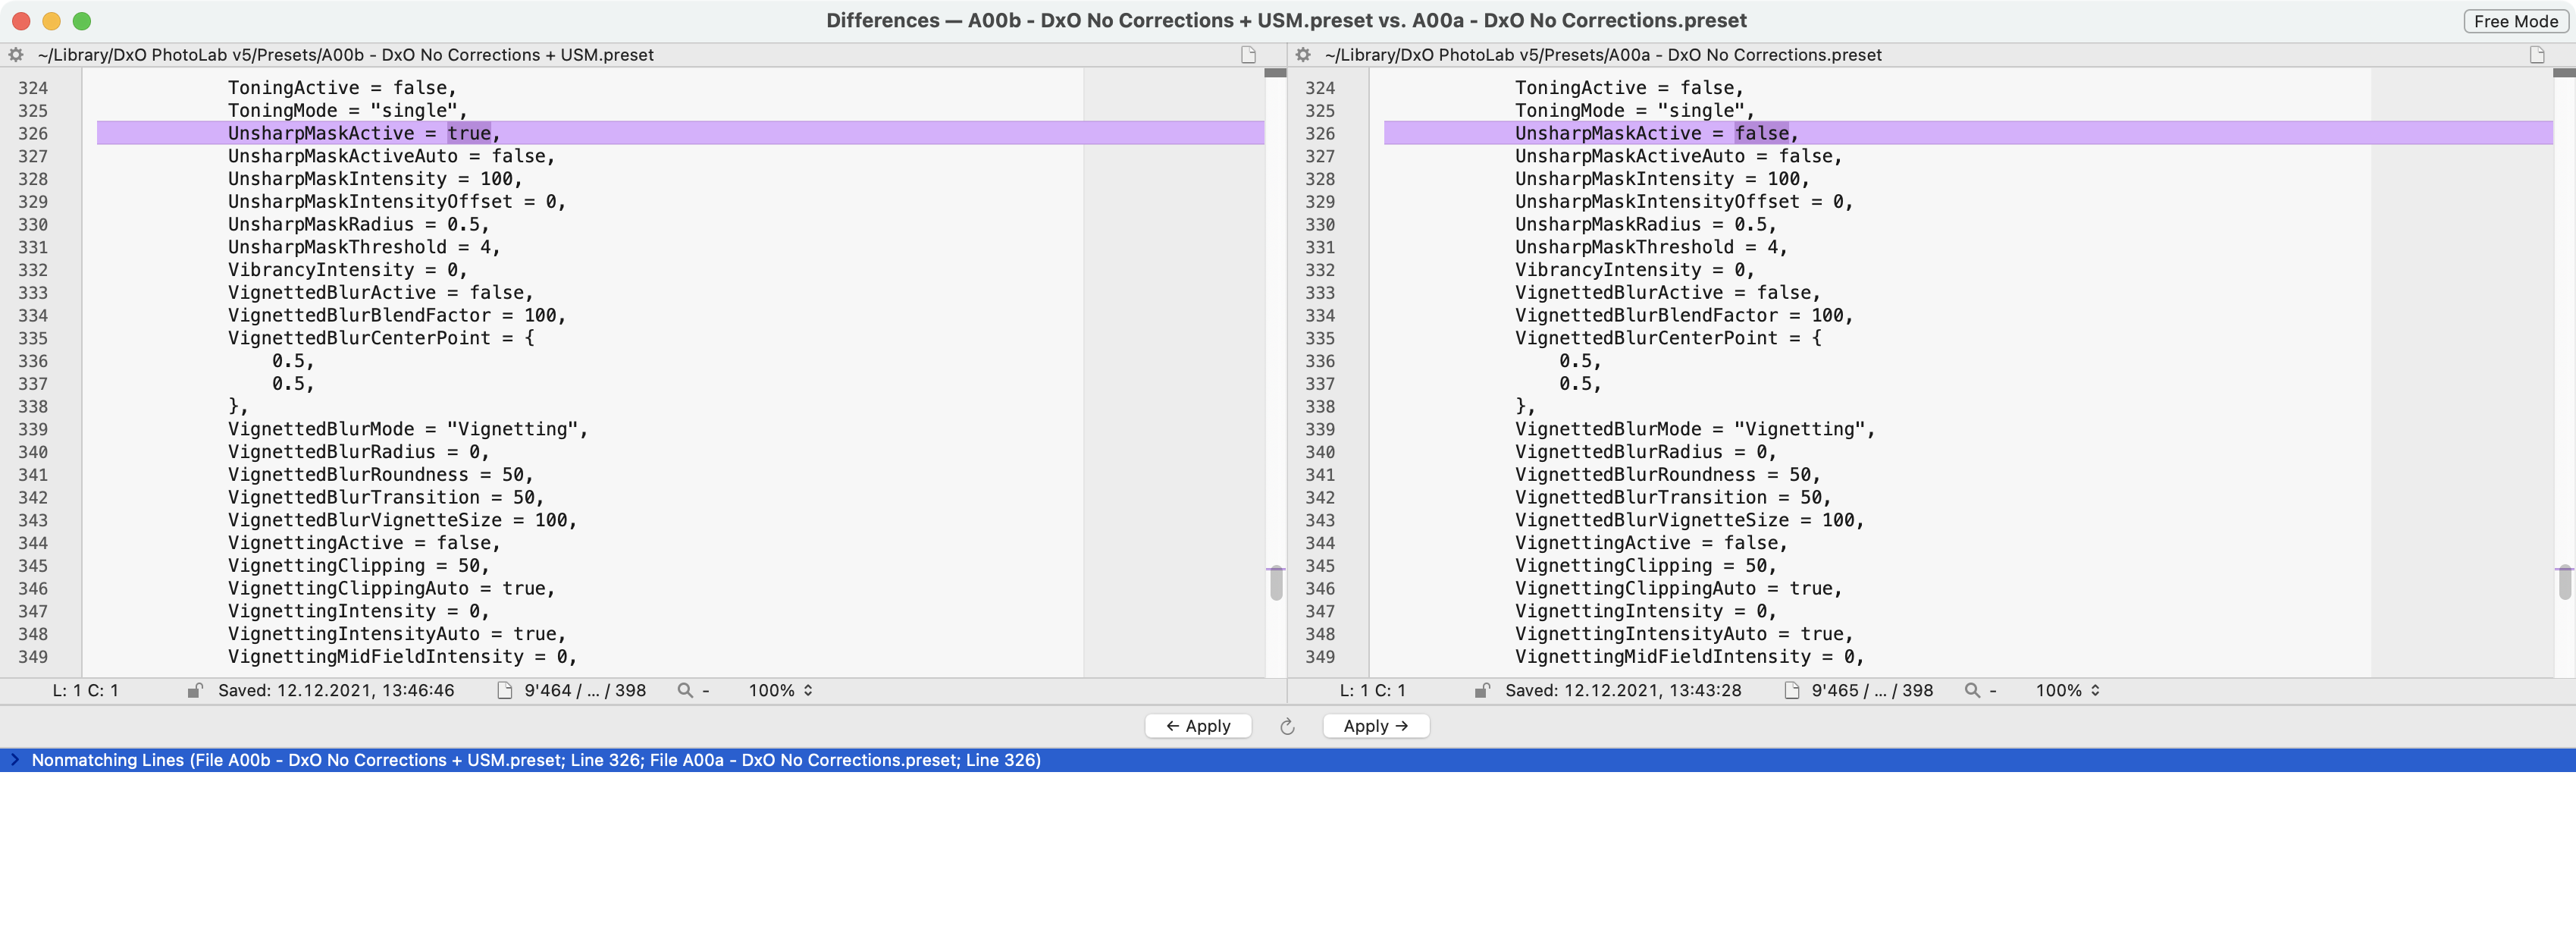
I’m checking how DPL uses presets and how the settings are saved to .dop sidecars. It looks complicated at the moment, but I see a thing that I cannot tell whether it’s a bug or simply unclear…as shown in a comparison of the .dop files (note: other differences are just timestamps)
Left: DxO Standard with USM switched on. Right: DxO Standard.
DxO Standard is a full preset, the section above “Overrides” contain all settings (also of inactive tools), changed settings appear under “Overrides”.
The presets only have one entry that is different.
Testing the above, I found that USM can hardly be noticed at its default settings. If lens sharpness is off, the effect is even more difficult to spot. If lens sharpness is on, USM accentuates haloes - if observed with high zoom levels (e.g. 900)
My conclusion: The effect of USM is slight, unless Radius is high and Threshold is low. Increasing Edge Offset makes edges look sharper.
All of the above tested with a RAW file.
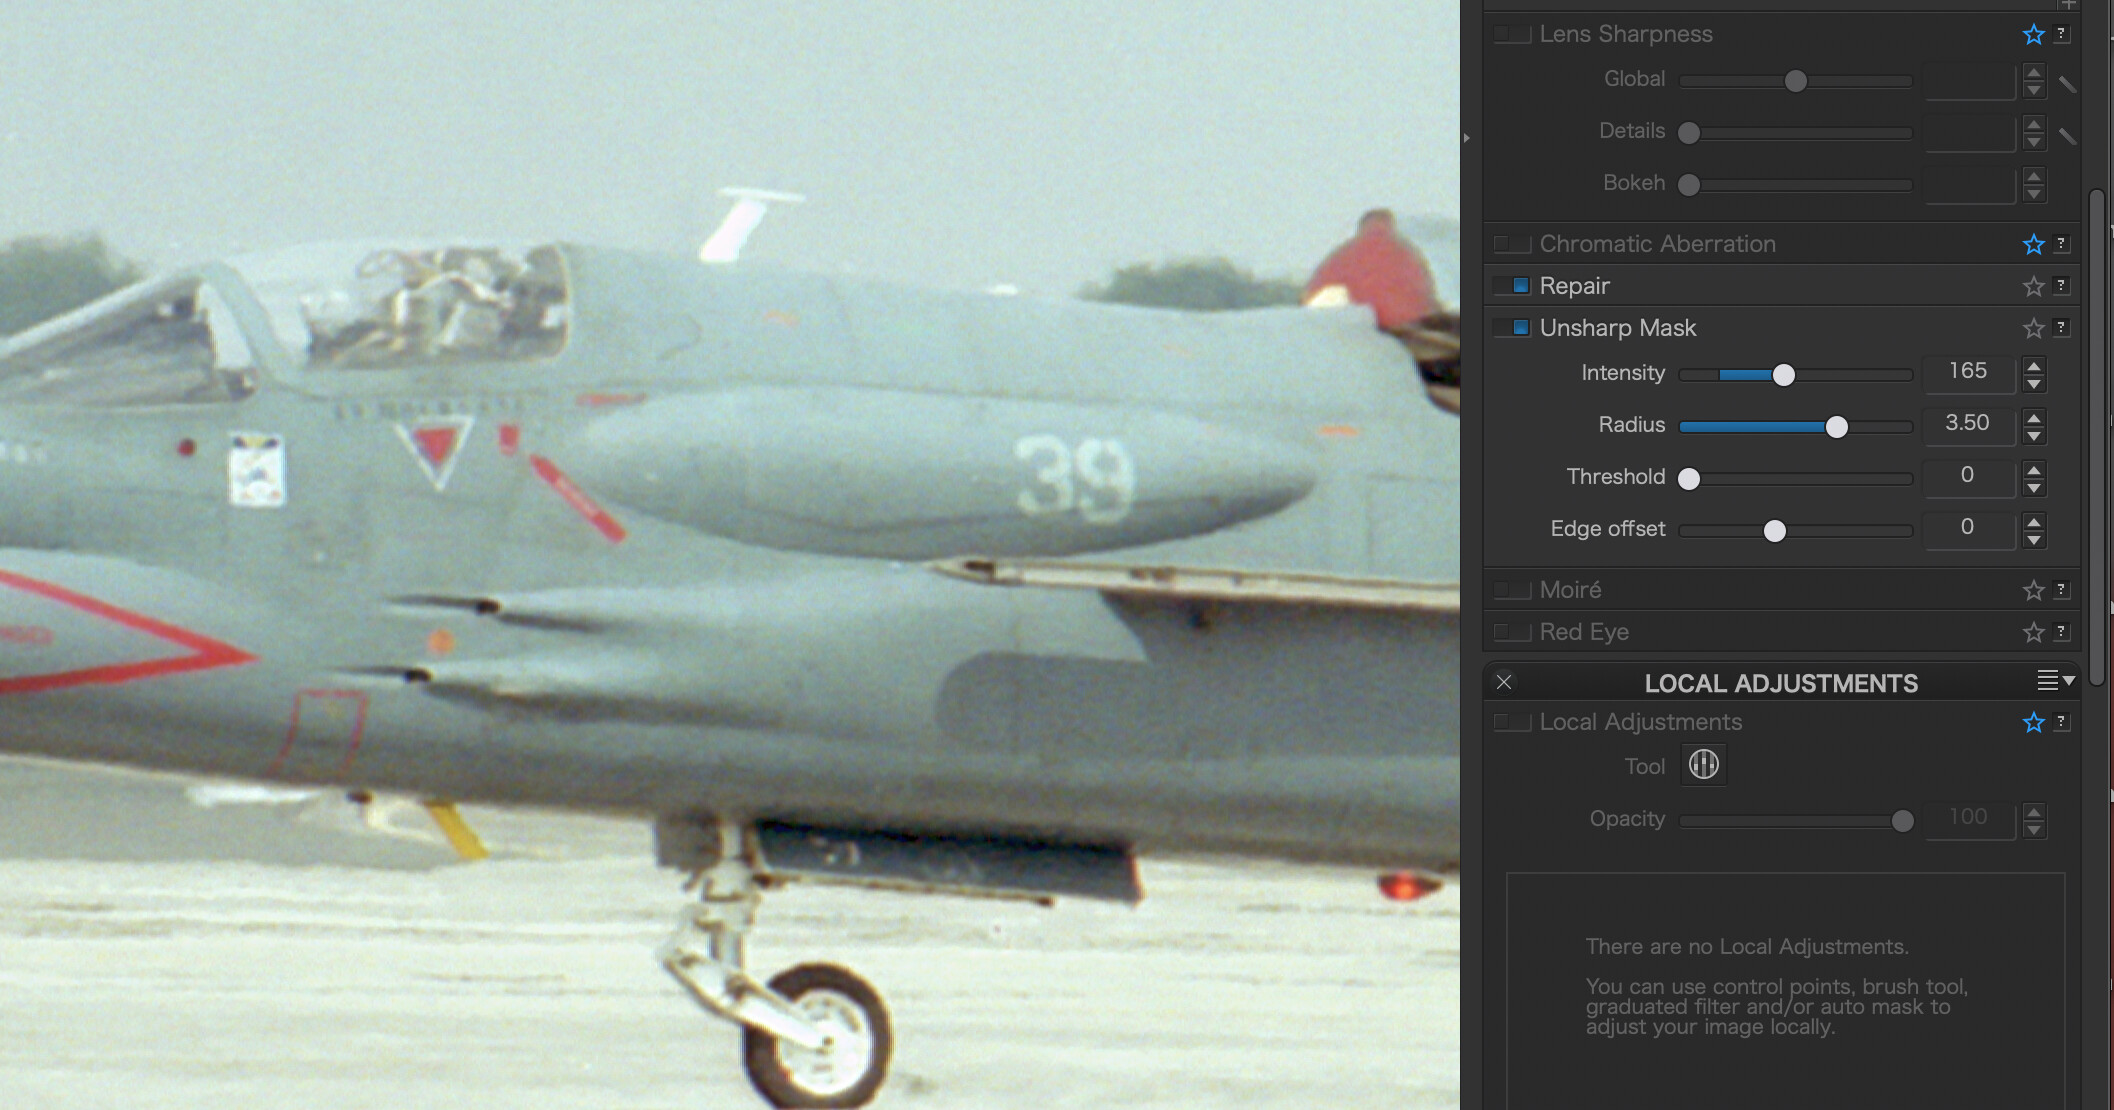
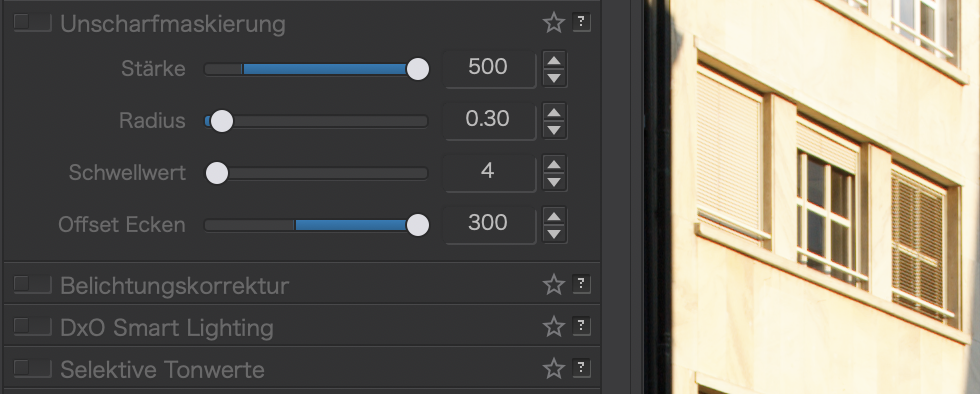
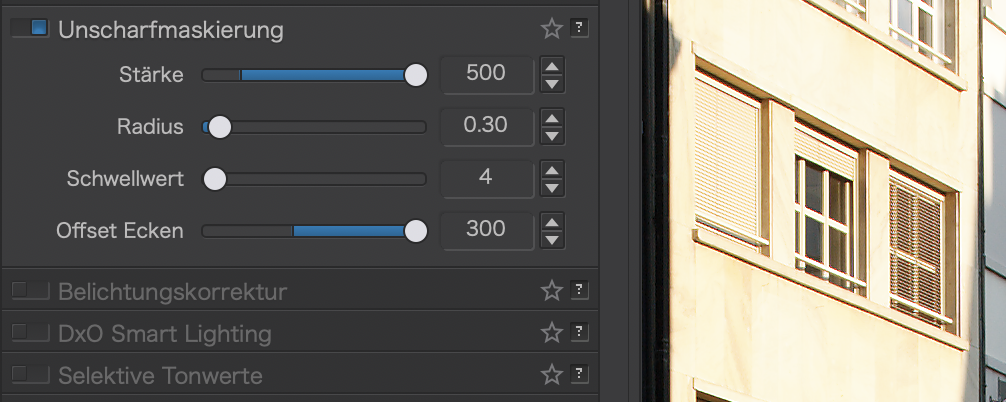
Effect with TIFF is even slighter, but can noticeably improve fine structures, if USM is set to (500/0.3/4/300) as seen with these 100% center crops of a 12 Mpixel image: