Unexpected system crash, and image from Nikon Df

I suppose I could keep notes on every photo I take, and when I get around to editing it, I’ll have a head-start on what to do. I’m not that organized. I walked around with the M10 today, and probably captured 10 images that I may want to edit (some of which I tried different settings and angles). The WB was set to 5600. Exposure was set first by Sunny-16, more or less, or viewing the red dots in the viewfinder indicating when the exposure was close, and then re-adjusted when necessary based on the microscopically small histogram from the M10. I’ll work on them later today.

For the whole day, today, WB stayed at 5600. I don’t think looking at the relatively small viewing screen on the back of the M10, while standing in sunlight, is going to give me useful information about white balance.

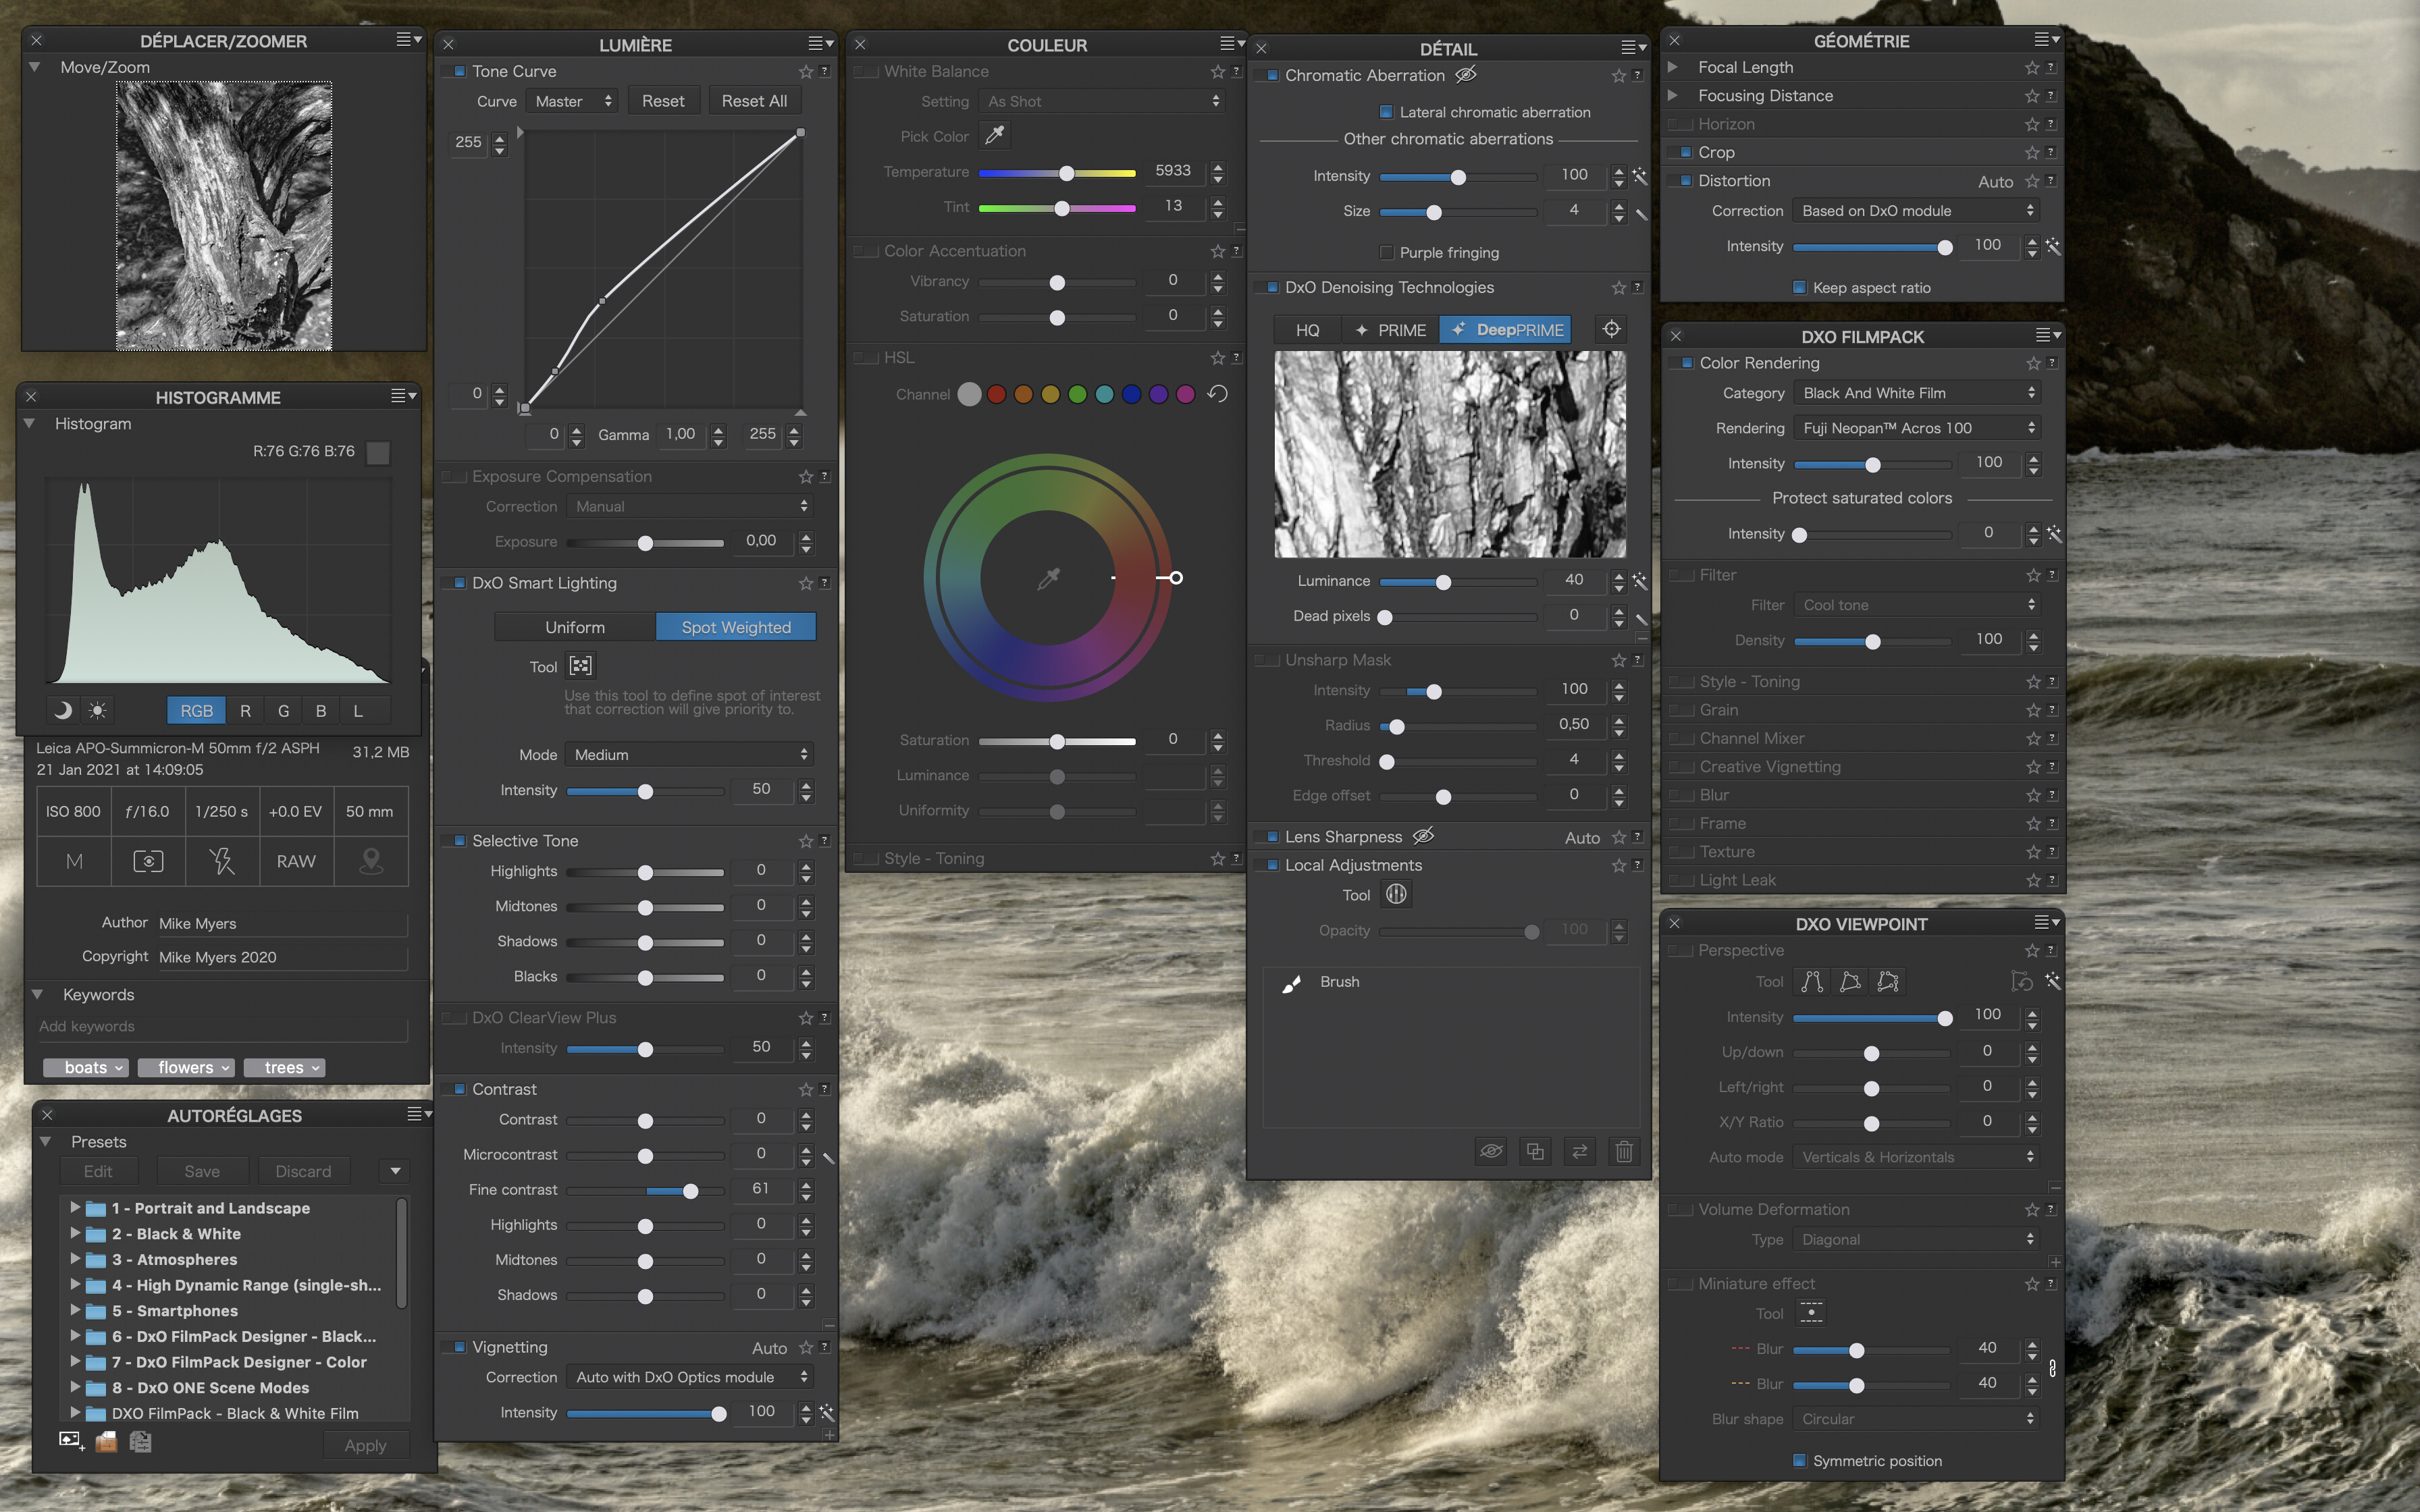
My experience is that 99% of the people I interact with tell me not to use auto-white-balance. From my discussions with Joanna earlier, I can see why standardizing at 5600 and adjusting in PL4 sounds reasonable.

I probably should have brought the Sekonic with me. I’ll give that a try tomorrow.

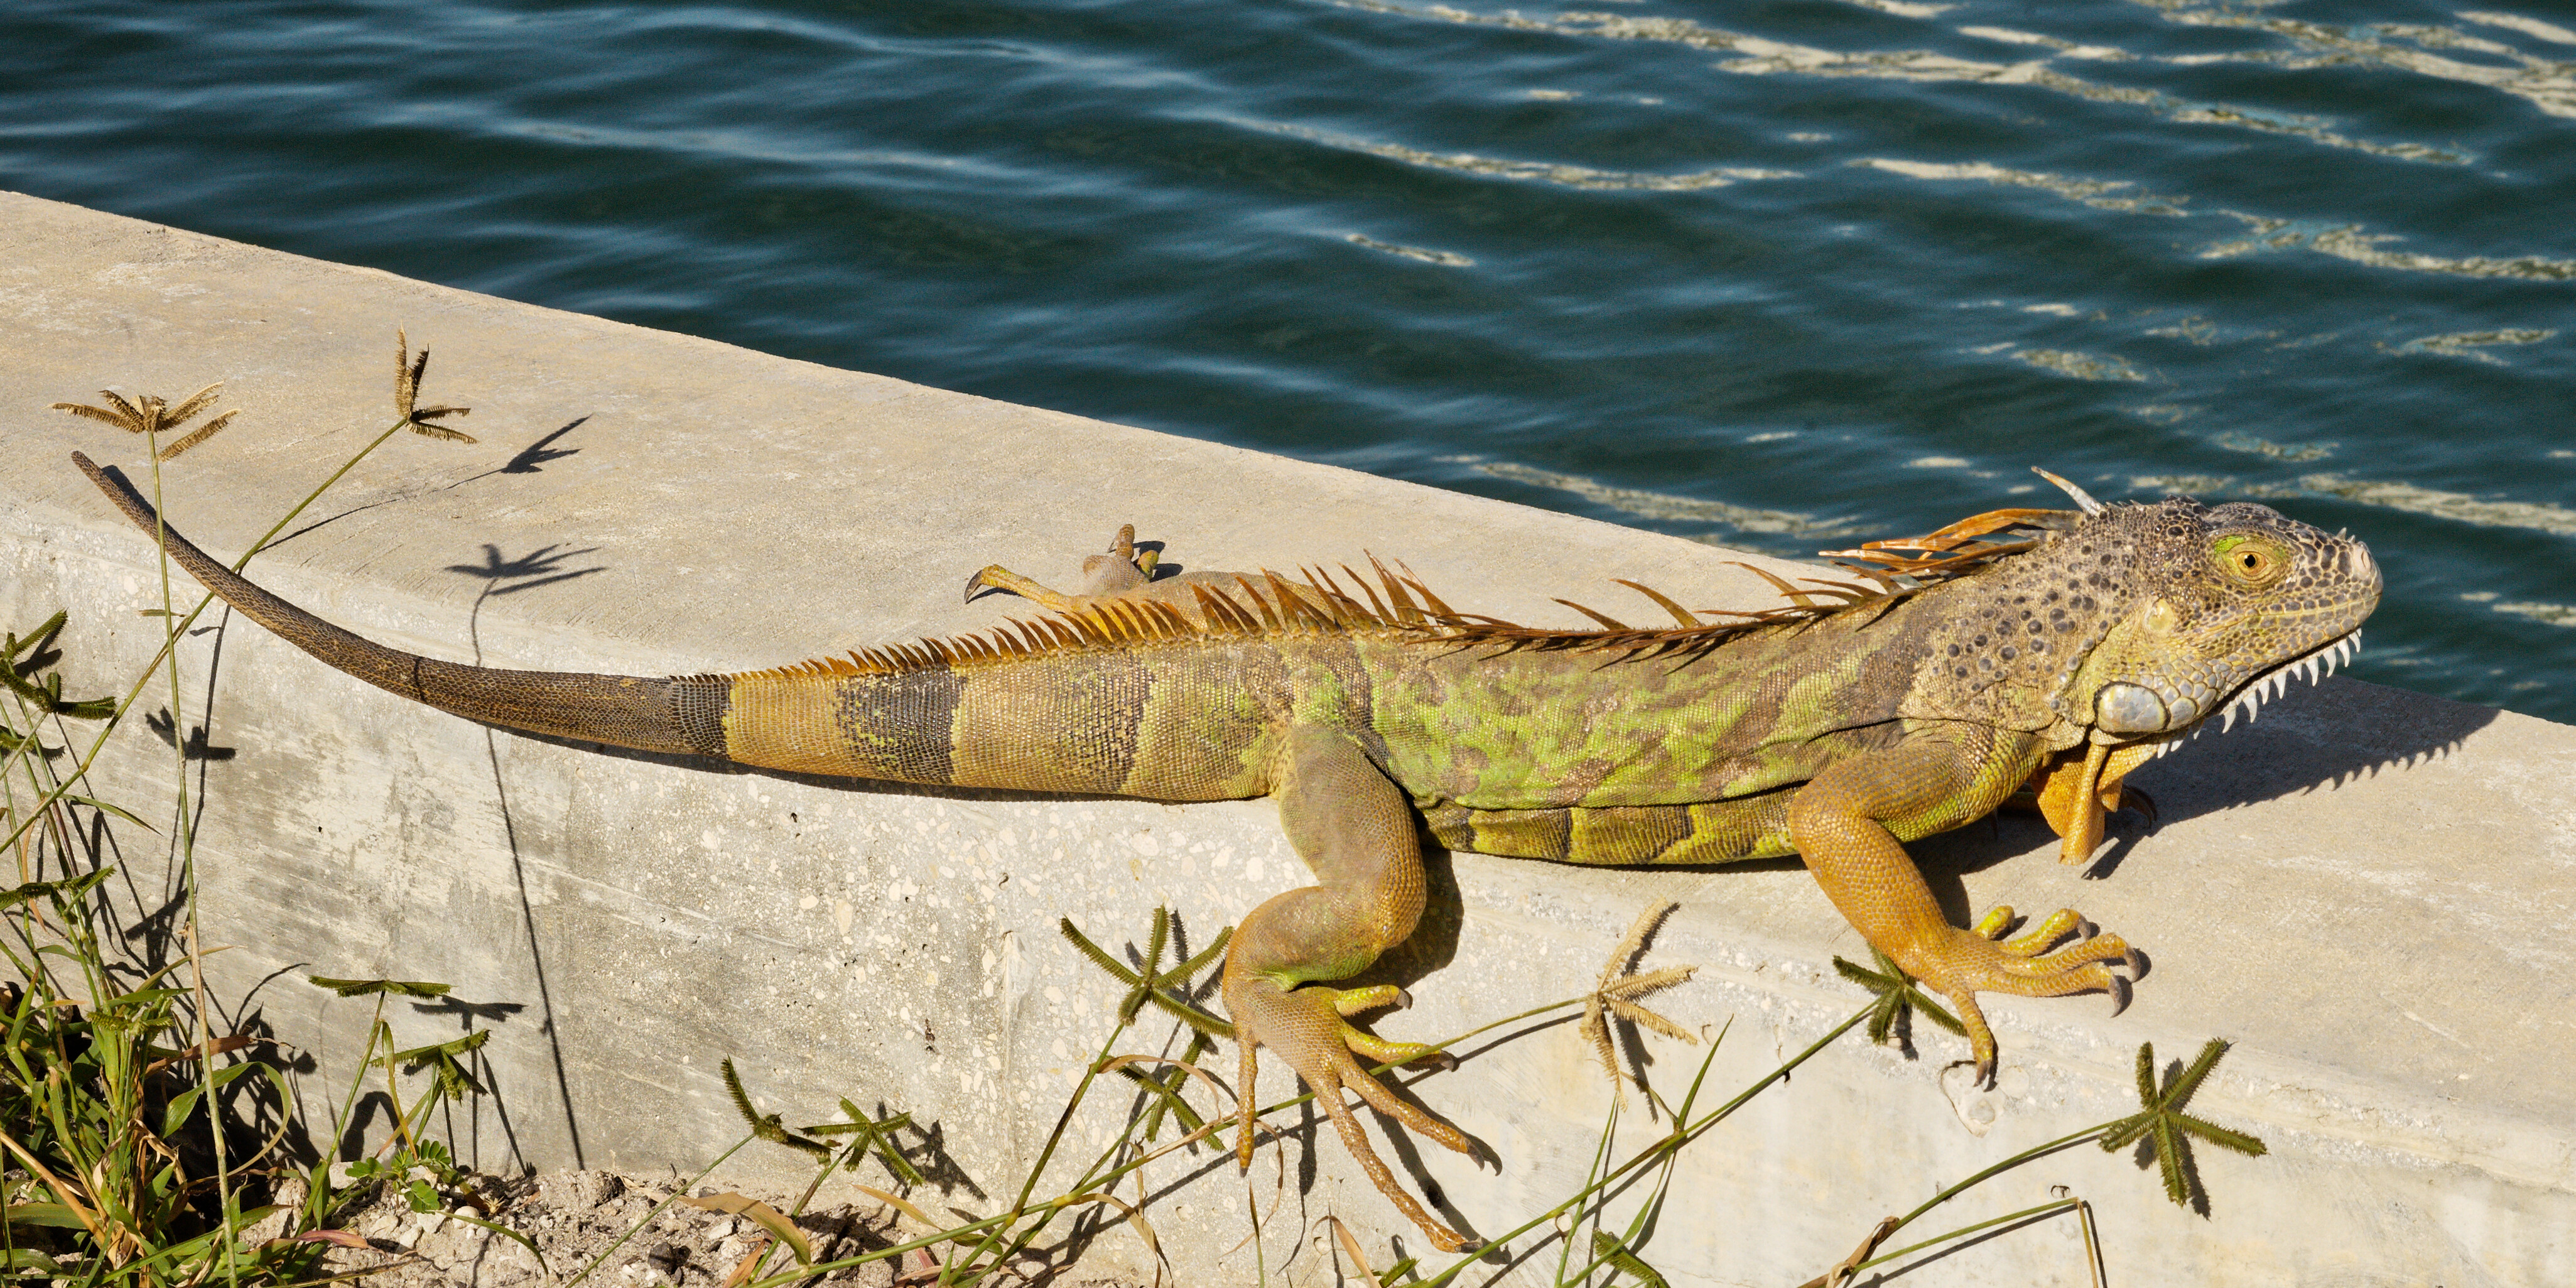
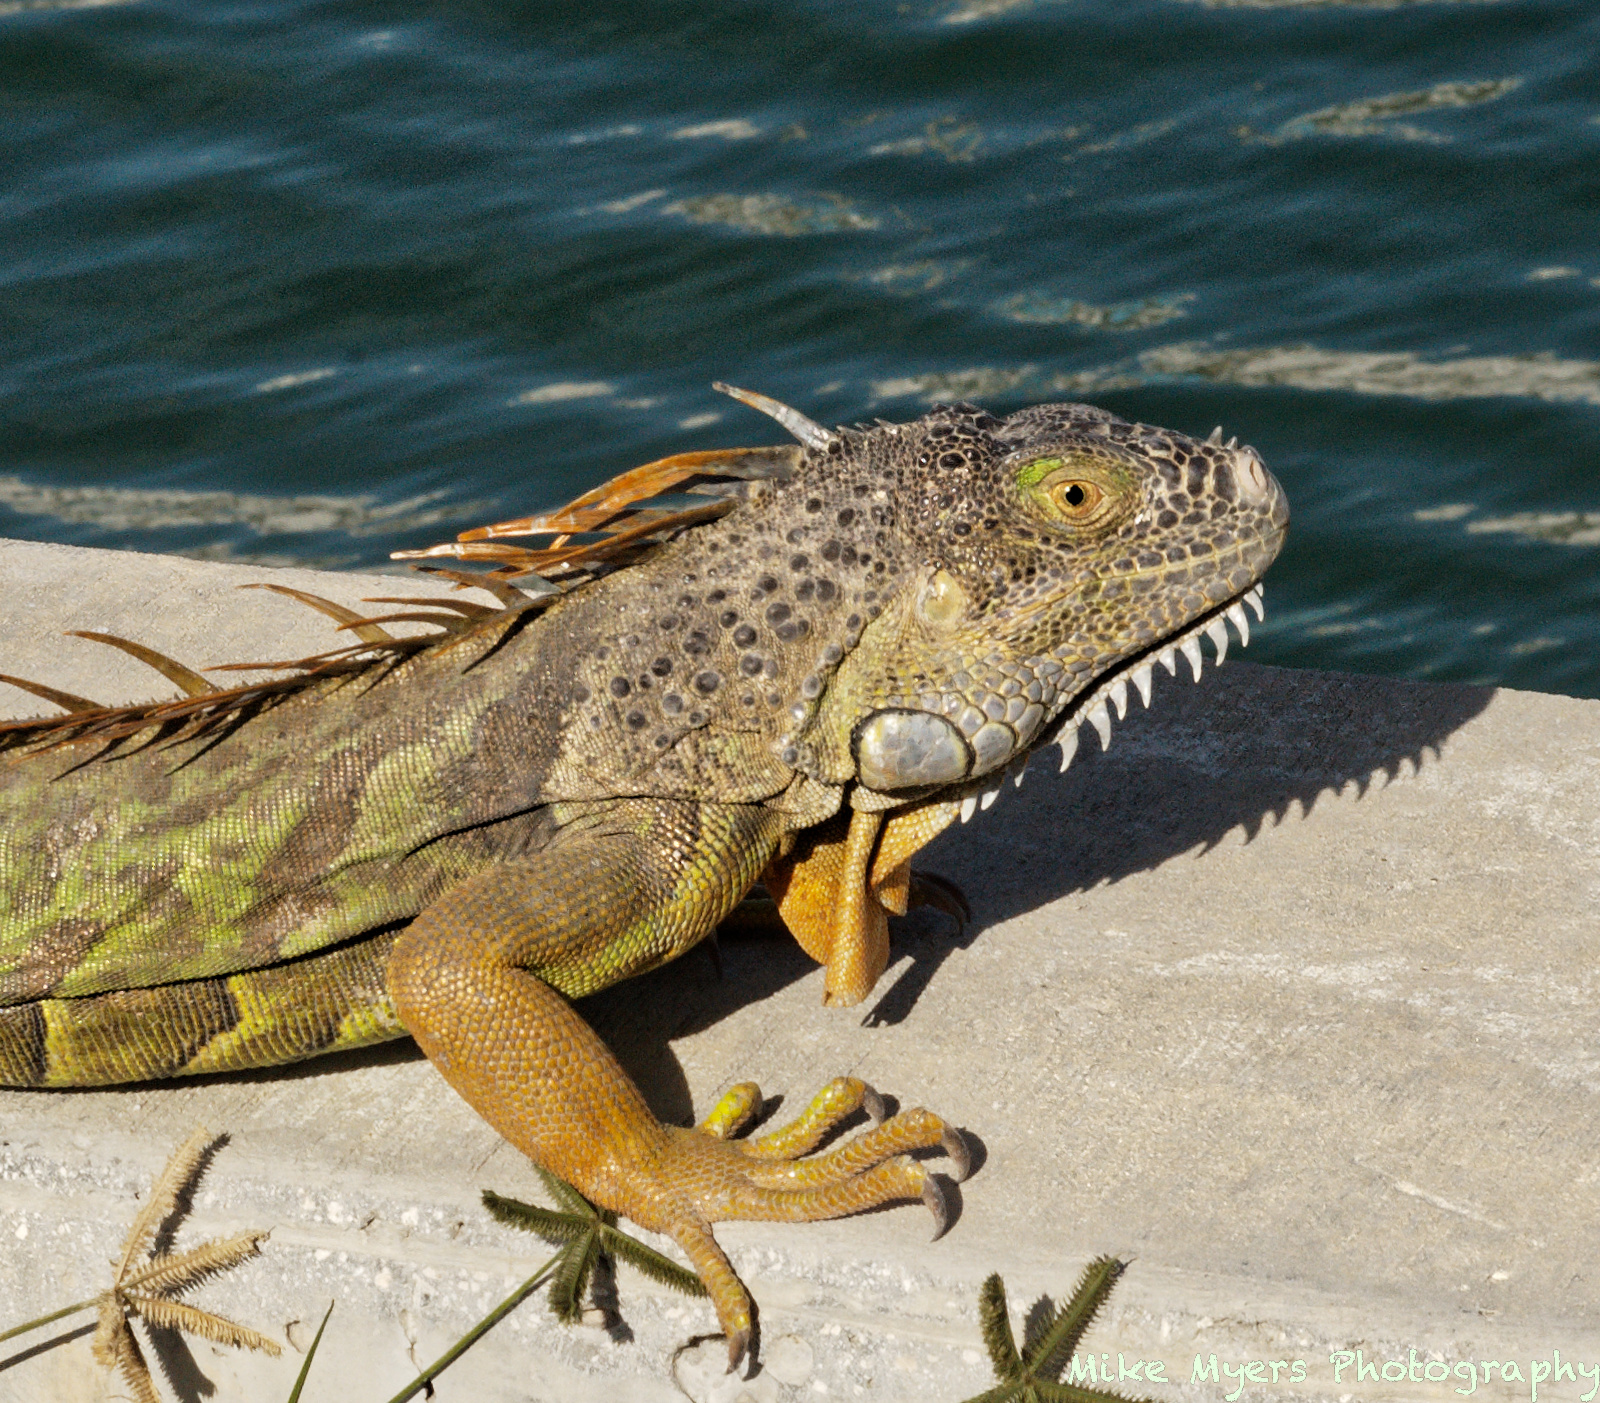
For most of my shots today, I sort of treated the M10 as if it was a LF camera. No tripod, but each shot was captured carefully, after checking the borders. When I came upon a huge iguana sunning itself, all that careful shooting went out the window. I took a shot, as best I could, moved my feet a little forward, and repeated. I got as far as I dared, before I was starting to feel uncomfortable - and about then, the iguana went dashing off. During all that time, the only adjustment I was making, was using the M10 rangefinder to focus on the iguana’s eye. I don’t think Joanna would do this - LF film costs too much. For me, “film” is free, and I kept improving my view, taking a shot, then getting closer. I got my best shots when the camera was held very low, but I didn’t feel comfortable squatting on the ground.

Changes since yesterday were to position the camera so the distance from camera to subject stayed more constant. Even if none of the shots turn out, which I certainly do NOT expect, I had an enjoyable time taking them.

One last thing - with ALL of the M10 settings available on the top of the camera (aperture, shutter speed, ISO) it was more enjoyable using the M10 than the Df. As to focusing, the M10 was more satisfying, as it was left for me to do. The Df does it for me. The Df feels like a machine. The M10 feels like an extension of ME.

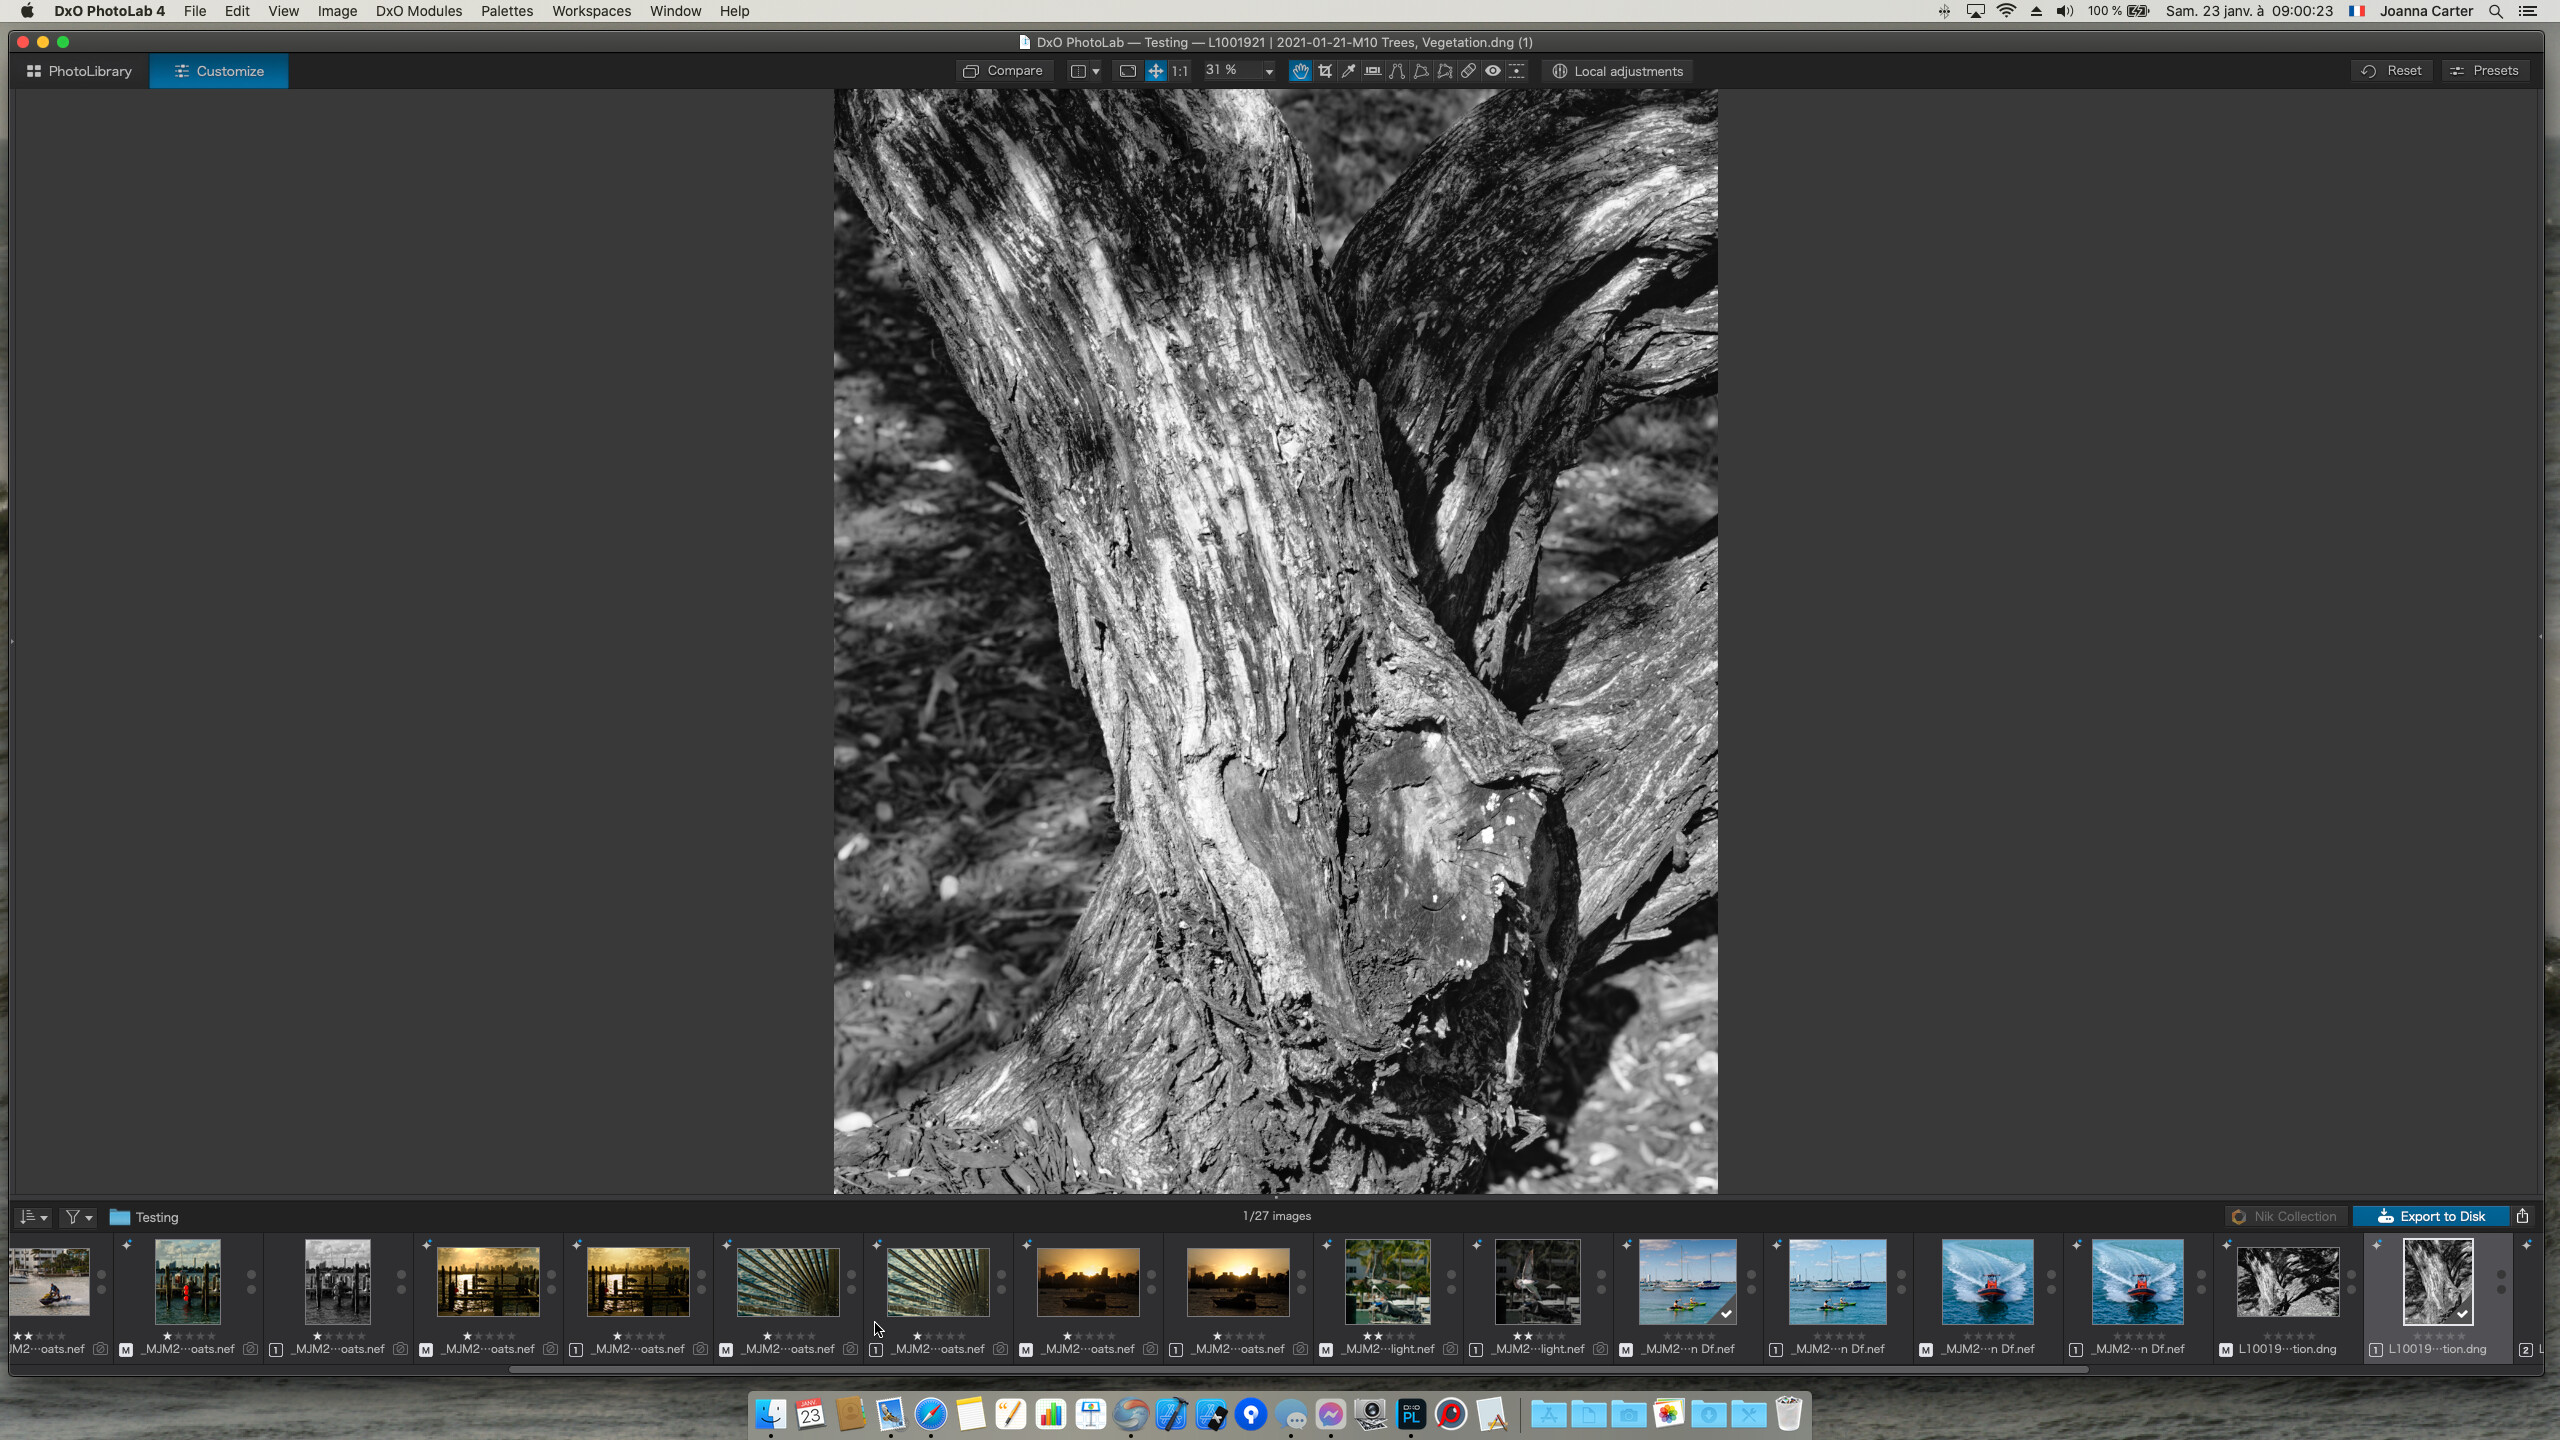
…and one last last thing - I’m starting to consider what I will do in PL4 as I’m taking the image. I never felt that way before, until the thumbnails showed up on my display at home. Because of the huge, bright, multi-function display on the Df, it would seem that the opposite should be true, but the lack of all that extra information has me just seeing the image (and the tiny histogram in the upper left).

For “serious” work, where you need to control the entire image, I agree with you. For me, most of the time, the parts of an image I’m most interested in, are sort of towards the center. I used to use “averaging”, and then I thought I might benefit from “spot”, but with the Leica it’s more difficult to know where the exact center is. No such issue on the Nikon DSLR.

If I was setting the camera up on a tripod, and wanted to make the first shot as close to perfect as I could, I guess knowing a lot more might be a good idea. Looking at your images, I can understand that. Looking at most of my images, it would be difficult to accomplish, for the types of photos I usually make.

But yes, if I was making a photo to get printed, I would need to be MUCH more careful, and probably working more like the way you do. I guess this is where the “Zone System” is so useful.

Results of two images from today.

The tree trunk was done with DxO Filmpack. Using Silver Efex Pro gave me more default choices, but I guess I can customize the way the image looks in B&W until I’m satisfied. The lower photo of the plant is perhaps more interesting to me, as it’s obvious how the plant is reproducing near the lower part of the image. I was tempted to put my Iguana photo here, but I want to think about it some more. If I show the whole iguana, it’s small and boring. If I crop in to show the head, it gets much more exciting.

I used a much smaller aperture for the trunk photo, to try to keep more of the tree trunk in focus. But, that makes the wood chips and the grass look too distracting. I like the composition, but there is no “action”, no “movement”. Hopefully the rough bark on the tree trunk makes up for that.

I’ve obviously got a LOT more to learn about Film Pack.

L1001921 | 2021-01-21-M10 Trees, Vegetation.dng (29.7 MB)

L1001921 | 2021-01-21-M10 Trees, Vegetation.dng.dop (12.8 KB)

L1001947 | 2021-01-21-M10 Trees, Vegetation.dng (31.3 MB)

L1001947 | 2021-01-21-M10 Trees, Vegetation.dng.dop (11.7 KB)

I don’t think I’m going to get my iguana photo much better than what you see here, and I don’t know if I’ll ever get an opportunity to take a better photo. The photo was taken at a construction site, so the iguana must be used to heavy machinery and people moving all over making lots of noise. Not sure if I was supposed to even walk in to the area, but there was a huge gate area wide open, and the iguana was apparently taking in the warm sunlight maybe 20 feet away. As I approached it, I would take a photo, get a little closer, take another, then get closer, and so on. When I got to about 3 feet or so, I stopped, took a couple of photos, lowered the camera and my head a little, and so on. I would have liked to get down on the ground, but that didn’t seem safe. I stayed there for a while, and the iguana eventually turned around and scampered off.

If I showed the whole iguana, there would be no sense of scale, and the photo might look boring. So, I cropped until I got what you see here.

As to the camera, focusing with the rangefinder was super-easy - I just focused on the eye. To be honest, I had a feeling that all this would be simpler to do with the DSLR, but it didn’t work out that way. The Leica has all the controls easily accessible, and when it shoots it barely makes any sound. My DSLR would have probably scared the iguana to leave much sooner. For WB, the camera was set to 5600K, and since the photo is obviously in bright sunlight, I figured that should be good.

L1001971 | 2021-01-21-M10 Trees, Vegetation.dng (30.6 MB)

L1001971 | 2021-01-21-M10 Trees, Vegetation.dng.dop (11.5 KB)

IMHO, this is one of those photos that seemed like a good idea at the time but, in reality, is never going to be that great. I should know, I’ve taken quite a few like that myself :wink:

Nonetheless, here’s my attempt…

Instead of using Style - Toning to convert to B&W, I used the Fuji Neopan™Acros 100 film rendering, then fiddled around with a few things and, in the end, applied a local adjustment to slightly blur the background. It’s not great but it helped to separate out the tree a bit more.

The other thing I tried was to apply a split toning…

Here’s the dop with your version and my two added…

L1001921 | 2021-01-21-M10 Trees, Vegetation.dng.dop (646,8 Ko)

Please don’t take this the wrong way but, with the Palm, I wouldn’t have bothered, for much the same reasons that you identified with the first one.

You are suffering from the lack of a zoom lens and thinking you can crop it later :crazy_face: The only problem with doing that is when you find you have taken a stinking good shot that you want to enlarge for the wall, only to find that all you get is a large pixelated image of the crop.

Yes, prime lenses will give you better sharpness but, if you have to crop, you are going to lose lost of that advantage. I had to swallow my pursuit of the ultimate sharpness in order to be able to take photos that would enlarge to the kind of size I like.

Well, I thought that the comparison of the Iguana with the grasses maintained a sense of scale, so I did a slightly wider crop…

… with its dop…

L1001971 | 2021-01-21-M10 Trees, Vegetation.dng.dop (27,3 Ko)

Like I said, most of the time, it’s near enough for most of the time and, anyway, applying a bit of selective saturation with the colour wheel has changed the tonality (for better or for worse)

Please don’t take my edits as definitive, they are just ideas that may or may not affect how you do your edits.

I never take critical comments “the wrong way”. I’ll never improve if 20 people say how great something I did was, but I am very likely to improve of those same 20 people write what they didn’t like - and why. When Gregor wrote to me, he was always negative - but I gave him a “star” because I know he likes them. (Me? I don’t use “stars” or “likes” or other social media stuff like that.) Mixed in with his words, there was usually something I found helpful.

I’m not even using this editing software properly - I think I should be using it to create art, but the reality is I’m mostly using it to learn how to use it. I think the best way to learn something, is by doing it. Just reading about it isn’t enough.

Of course, if I’m mostly using it to learn how to use it, I’m also editing images that I’ll likely place on my SmugMug gallery. It’s all enjoyable, and often, like just now, it leaves me with questions as to HOW other people achieved the effects they create - like n making the background less detailed, showing off the tree better. I need to re-read that, and try it myself so I can do it from now on.

I’m not sure yet how to do any of that. I will try to read up and experiment with each of them later today. Where would I look to find choices such as “Fuji Neopan”? I went into Film Pack, but maybe I didn’t dig around as deeply as I should have.

I’ll go back to the “vertical view” as you did - it simplifies the photo, instead of my eye not knowing where to go.

Yep, true. Maybe I’ll need to go back to my Nikon for “walkabout” shooting. For starters, there are no zoom lenses for the Leica, and Leica lenses are priced as if they were made from gold. I do have a Leica 90mm, which would have helped, but all I had on me was the camera and the standard 50. I guess I should dust off my gadget bag, and start taking it with me.

I first cropped the iguana photo pretty much like you did, and I liked what I saw, but on SmugMug or an email, people will just see an iguana and move on. Then I zoomed in - a lot - even though it meant cropping. I think that view will stop people in their tracks, and they’ll stare at it for a while.

Having said all that, a longer focal length lens would have gotten me the same end result, without so much cropping, and I could then print it and get something nice, rather than a pixel map. …meaning that my 90mm lens would have been more useful to me in a gadget bag, than sitting at home.

Good thing you mentioned all this - maybe I’ll buy another (smaller) gadget bag, big enough for a long lens, some filters, and my meter. The bag I have now is quite big.

I have never used, or even considered “split toning”. Going back and forth between your two images, the split toning does something amazing - it’s still sort of a black&white print, but I see color!

Now I need to go through all your settings, to find out how you selected “Acros”, how you used and configured the split toning, and how you blurred the wood chips. Fascinating!

You don’t need to go into FilmPack standalone version it should be integrated into PhotoLab.

Three things you can do to check it is activated and available:

Check if it is activated…

Capture d’écran 2021-01-22 à 17.03.45

Check the palette is available…

Capture d’écran 2021-01-22 à 17.04.04

Add the palette to the righthand side (or left if you prefer) and, once you have organised the palettes and tools how you want, save the workspace under a name of your choosing…

Capture d’écran 2021-01-22 à 17.08.38


There are two ways to select a film:

  1. Use the Color Rendering tool

Select the film type…

Capture d’écran 2021-01-22 à 17.09.59

Then select the film itself…

  1. Use @mwsilvers’ presets

They are available from here…

Once they are installed, you can simply go to the Presets button and see previews of what each film will look like when applied, much like in the standalone version…

Don’t forget that every time you change lens, you stand the risk of getting dust on the sensor. My “walkabout” lens is the Nikon 28-300mm (see Ken Rockwell’s site for a review). It can be a bit soft around the edges but it certainly saves lugging a load of kit around :wink:

All I can say is - use it with caution; it can make a real mess if done wrong. Here’s a screenshot of what I did with your shot…

Capture d’écran 2021-01-22 à 17.25.55

… but you really need to play with the settings to see how, or even if, it works best for a particular image.

Here’s a shot of some weird tree roots that I tried to rescue using it. In my own opinion, I was “throwing good money after bad” :crazy_face:

It was a hand-drawn brush mask in local adjustments…


What I have done is far from perfect - I needed to spend more time refining the edge of the mask by zooming in a lot more and carefully choosing the amount of feathering on the brush. What you won’t see is how, sometimes, I brushed over the boundary to the tree trunk and had to use the eraser to remove it from the other side.

Once again, lots of playing is required to get the hang of this particular tool :nerd_face:

FilmPack added itself to the right side “palette”. That happened when I activated Film Pack.

But, my “WorkSpaces” only show “DxO Standard”, and “DxO Advanced”. I see you have three additional workspaces, “Detached Browser”, “Dual Screen”, and “Joanna”. Why would I want to create additional workspaces? It seems to me that anything additional I configured, just became part of the “Advanced” workspace ???

I wanted my palettes and tools laid out with only those items that I wanted to see, hiding those that I rarely, if ever use. So I created my own workspace “Joanna” and then I can also work with all the palettes on a second screen, leaving the main one just for the image editing, hence “Dual Screen”

You don’t have to do this but I found it useful because, if I move any tools, or even expand or contract some items temporarily, for a particular work session, I can go straight back to my layout in one click.

If I understand you correctly, had I clicked on “DxO Advanced” yesterday, anything and everything I did to add to it would be lost, and it would go back to just the way it came from DxO ?

…and since I just saved my workspace with a title “Mike Myers Jan 22 2021”, any time in the future that I click on this workspace name, it will go back to what I just saved with this new name?

There are still lots of things I don’t know or understand, and at one point I was going to ask how to remove them, but then I keep learning things from you. Maybe what I ought to do is move some of the things I do frequently (such as watermark) up near the top of the page. Can I just drag those sections upward, and they will be inserted in a new location? Doing all the above will make it easier for me to use PL4, minimizing the time it takes to search for things.

Let me ask a general question, and I’ll use an image I took yesterday as an example. There was a row of plants I’ve been photographing for several weeks now, trying to gt a good image of their flowers. Yesterday I saw a nice example, with lots of “green” behind it for a backdrop, and took several exposures trying different things. The one I’ll post here is my favorite, but that’s not what my question is about.

Way off in the background are trees and buildings, all lit up with bright sunlight, and all blown out. The way I discovered this is with the PL4 tools for blown-out highlights and shadows. I could fix the shadows, but there was no way to that I could find to help the highlights - and the more I tried, the worse they looked. So, I went back to my first interpretation of the image, with nothing done for the blown-out highlights.

It’s currently my understanding that there is nothing in PL4 that can be done about this now. If I would have had a graduated filter, that should have done it, but after the image was captured, it’s all over.

Or, I could have underexposed the entire image, and maybe fixed it later by opening up the lower part of the image. Or, I could have held the camera higher, so it was shooting “down” more.

I can try this again, and see if that works, but it doesn’t sound right to me to deliberately underexpose the part of the image I’m most interested in.

My question - if someone took an image like this, and wanted it printed, would it be best to ignore the blown out areas as I’ve done here, or are there any tricks I’m not yet aware of to do it better?

(However bad the image looks to me now, it looks far worse when I click on the COMPARE tool. Ideally, I will get to where I’m correcting potential problems better before I ever press the shutter button, rather than using digital band-aids later!!)

L1001932 | 2021-01-21-M10 Trees, Vegetation.dng.dop (12.9 KB)

L1001932 | 2021-01-21-M10 Trees, Vegetation.dng (26.8 MB)

Doing some of this now. How do I get things to appear on a second screen? I have my PL4 window open on my ASUS display - I think you’re suggesting I can have a separate window on my other display (iMac) and use it to help me edit in my main window on the ASUS ?

That is what she means but I can’t help you with setting that up on a Mac.

Mark

Indeed.

Yes, but I wouldn’t bother with dating it since you are unlikely to want more than one version of the same name. Just use something that is descriptive like your I used my name or Dual Screen or something else. The idea is to provide quick access to workspaces arranged as you want them, with as many or as few palettes/tools as you need, where you want them.

That’s exactly what you can do. I have grouped and ordered my tools under functional areas like Light, Colour, etc, but I did that before we got the new filters at the top of the right side. The problem with the filters is that the tools are arranged in an order decided by DxO, which cannot be changed, which is why I have kept to my own workspace.

You can’t have a separate window for palettes on the second screen - all you do is drag palettes by their title bars to the other screen and arrange them there.

Then you can close any empty sidebars…

Here are my two screens, as saved into the Dual Screen workspace…

After all that hard work, don’t forget to save the workspace!!! :stuck_out_tongue_winking_eye:

Essentially, yes. In fact, with this kind of shot, even a physical grad filter would not have helped because it would have changed the tonality of the parts of the flower that are in front of the blown area.

As we have previously discussed, known as ETTR, spot-metering on the brightest part and over-exposing by two stops, would certainly have made the image more manageable. Unfortunately, it still leaves an image that has those highlights, however well exposed, to distract the eye from the main subject.

Not knowing the location, as you suggest, I would have tried to take from a higher point of view, to avoid having the bright areas in shot at all.

Added to which, you have cropped one of the petals :wink:

Regardless of the technical perfection or not, I have to ask the question, apart from being a record shot, is it ever going to make an image you would hang on your wall? My personal answer is - no.

I did a Google image search and got Spider Lily pictures, most of which were taken from either higher up, or from low down with a bluish sky behind.

This kind of subject is notoriously difficult to get right with so many surrounding distractions. Never mind, it’s all part of the learning process we call photography :blush:

Wow… All the first things you wrote sound like reasonable explanations/suggestions that I can follow, and should I change things I will use a descriptive name, not a date. I just used the date as a place-holder - that’s the first time I’ve done anything like that.

The things I quoted above are nothing short of amazing, >if< I understand you correctly. You seem to be saying that I can drag all my tools to my other (iMac) display, group them however I want, and leave the ASUS display for my “working space” - and that if I save this workspace under a name, maybe “dual display”, I can shut down PL4, or use any workspace or whatever, and most importantly if I re-open the workspace “dual display” all those tools will move to my iMac screen, leaving me the whole ASUS to use for editing my image??? I don’t often exaggerate but to me that’s nothing short of incredible.

Until now, I never got around to thinking about how or why I would change to a different workspace. This is awesome.

Late last night, I went to Dave Kelly’s YouTube channel, and played this video:

Towards the end, he brought up many things I never realized before, as in how to find my tools, how to find my “active” tools, and why this is useful. As a “Beginner’s Guide” it is a goldmine of useful information, especially for relative newcomers, like me. As I usually do, I need to watch it again on my left screen, while trying all the things he describes in my PL4 window on my other screen.