Unexpected system crash, and image from Nikon Df

Gosh, the more stuff I post here, the more stuff I learn that I knew nothing about. So the color picker can give me a temperature reading? I’ll try that shortly. What does that number actually “mean”? You wrote “and used the gray picker on the left boat. Gave me a color temperature of 7388”. What might I do with that information, once I checked it as you describe? Is it just a reference number, to see if different parts of the image are the identical color?

Which brings me back to the white balance. Based on what I learned here, I set it manually, rather than leaving it up to the camera. I set it to “direct sunlight”. Maybe that was a mistake - I think I should have set it to 5500 instead. But you and Joanna are coming up with 5200, and before that 5400. Is this all because I just set it to “words”, rather than an actual number? If it’s bright sunlight from now on, I’ll set it deliberately to 5500.

More later - I’ve downloaded Joanna’s “.dop” file, and I will try that. (Hopefully when I open the image again, with her “.dop” file in place, I can see exactly what settings she selected, and see things “through her eyes”.)

I had no idea. None. Now it’s obvious.

I copied your “.dop” file into my folder, replacing the version that I had. In the thumbnails, I see that my original image is labeled M for master, and I have a virtual copy with your changes. I clicked on Local adjustments, and saw what you did - but half an hour ago, I had NO IDEA how to do that. Amazing. And obviously very useful. Thank You!!! Maybe this was supposed to be “obvious”, and maybe “PhotoJoseph” already showed it in his webinars, but if so, I never caught on - until now.

Two questions - first, I am trying to find out how you changed the appearance of the water - it looks like “clearview”, but I know you don’t use that. If I select or deselect CONTRAST that seems to be what you did. Looking further, I found it “fine contrast”. You set it to 75. To me, 15 seems to leave the water looking more natural.

Also, something puzzling. On my 27" monitor, everything looks slightly out of focus, but when I view at 100% size, I see everything is razor sharp. I’m wondering if that’s because of the resolution of my display?

Here are two screen captures:

Screen Shot 2021-01-20 at 16.49.42

Screen Shot 2021-01-20 at 16.50.06

So much detail is lost when I change the 100% or reduced image size at the top of the page. Am I doing something wrong? It’s a 2560x1440 resolution display. The “blurry” view on my ASUS becomes crystal clear when I slide the PL4 window over to the iMac. I don’t remember it being like this before…

That has to be down to a matter of personal taste :blush:

I get similar changes in quality at less than 100%. This is fairly normal as the screen has to interpolate pixels in order to do things like squeezing e.g. 1½ pixels into 1 pixel at certain scaling.

Capture d’écran 2021-01-21 à 00.05.27

Capture d’écran 2021-01-21 à 00.05.33

@mikemyers

I guess, this scenery


captured your interest.

You may check this lens https://imaging.nikon.com/lineup/lens/f-mount/zoom/telephotozoom/af-p_70-300mmf_45-56e_ed_vr/spec.htm . I used to carry its predecessor everywhere (easy to handle and to handhold). It should work with your D750 (for DF you have to ask) and the new one is contrasty now at the tele end.

_MJM2553 | 2021-01-19-LF photography with Nikon Df.nef (19,3 MB)
_MJM2553 2021-01-19_NikonDf_1.nef.dop (33,8 KB)


checked now: your DF is supported with this lens

It certainly did - looking out at Biscayne Bay, all I saw was static photos I had already taken, but then I saw these to heading my way. I probably took about 8 photo just to check. I wanted to catch them with the paddle at the same angle and close together. The perfect scene happened, and I added that last bit of pressure to the shutter release. I took another one after, but this was the only “keeper”.

I don’t lack for lenses - I have far too many fully manual lenses from my Nikon F2, maybe three or four more from my Nikon F4, then some more automated lenses from my Nikon D series cameras. The Df will accept just about any lens made by Nikon since 1959. Maybe I need to wise up, and carry a gadget bag with me.

Thanks!

In a way the walkabout wasn’t all that great. My memory card ended up with a very nice Miami-at-sunset photo, with a great sky, some interesting flower images, a boat coming right at me, an iguana, and a fascinating tree trunk that had me remembering Joanna’s posts about very wide brightness ranges. Maybe I’ll work on that image - try to make it look like I used a LF camera. :slight_smile:

Trying to emulate Joanna’s style. Started as color, cropped the blurry parts, went to Nik Collection Silver Efex Pro, then had to make some more adjustments…

The image that attracted my eye had three trunks, twisting around each other. But I thought that was too many. I tried to use only the PL4 tools that Joanna seems to prefer. If I squint my eyes, and just look at shapes, it finally got to look “balanced”. The most difficult part was getting rid of nasty looking background stuff.

_MJM2607 | 2021-01-19-LF photography with Nikon Df_Nik.tif (40.0 MB)

_MJM2607 | 2021-01-19-LF photography with Nikon Df.nef.dop (12.5 KB)

_MJM2607 | 2021-01-19-LF photography with Nikon Df.nef (21.1 MB)

Taken with my Nikon Df 4x5 not-quite-LF camera with 50mm lens.

An interesting thing about PL4, is that instead of taking my photos, returning home, and editing, I can simply cull through the images and leave the better ones in a folder created by PhotoMechanic. Then I get to look through them, and either smile or groan. Regardless, I can the leave and do other stuff. Later in the evening, I can just pick one image I think might have hope, and start playing around with it. Quite often that’s sort of disappointing, as I’m not getting all that excited - until I click on the “compare” button. Then it’s like yikes, I see something awful, only smiling again when I return to the edited version.

Instead of exporting an image right after editing, I’ve learned in this forum to come back a while later, and get a fresh look at things. I think it was Joanna who gave me that idea. When I see the picture the second (or third) time, I’ve changed my mind about cropping and other things. PL4 is like the awesomest toy for photographers - Adobe stuff does editing, as do lots of others, but PL4 feels like using modeling clay.

The photo below looked awesome when it happened before my eyes, then less exciting when I saw the original, and by the time I got finished with it, I liked it again. I can’t wait to see what some of you guys do with/to it. I love how other people “see” the same image, especially when you take something created, and give it a whole new look.

_MJM2564 | 2021-01-19-LF photography with Nikon Df.nef.dop (12.4 KB)

_MJM2564 | 2021-01-19-LF photography with Nikon Df.nef (20.8 MB)

Something I’ve discovered, now that I know how to use PL4 a little better. The reason I like it so much may not be due to how good it is, but maybe it’s more so due to how enjoyable it is to use.

(…and I’d still be back in kindergarten level, but for this forum and all of you!)

In pl it’s called color picker in the wb section. Other converters use the name gray picker. If you’ve a surface that’s supposed to be gray but isn’t, then you can use that tool to correct the channels. Gray is anything with equal values for the different channels. So pure white, pure black and everything between that.

It’s not mine advice. I think the camera will do a better job then you or me.
The 5400 is one of the strangeness of pl that they don’t want to change. It seems to be something as an initial value the program is using, or maybe the target value. Problem is it’s shown even if there’s no relation to the image you see.

George

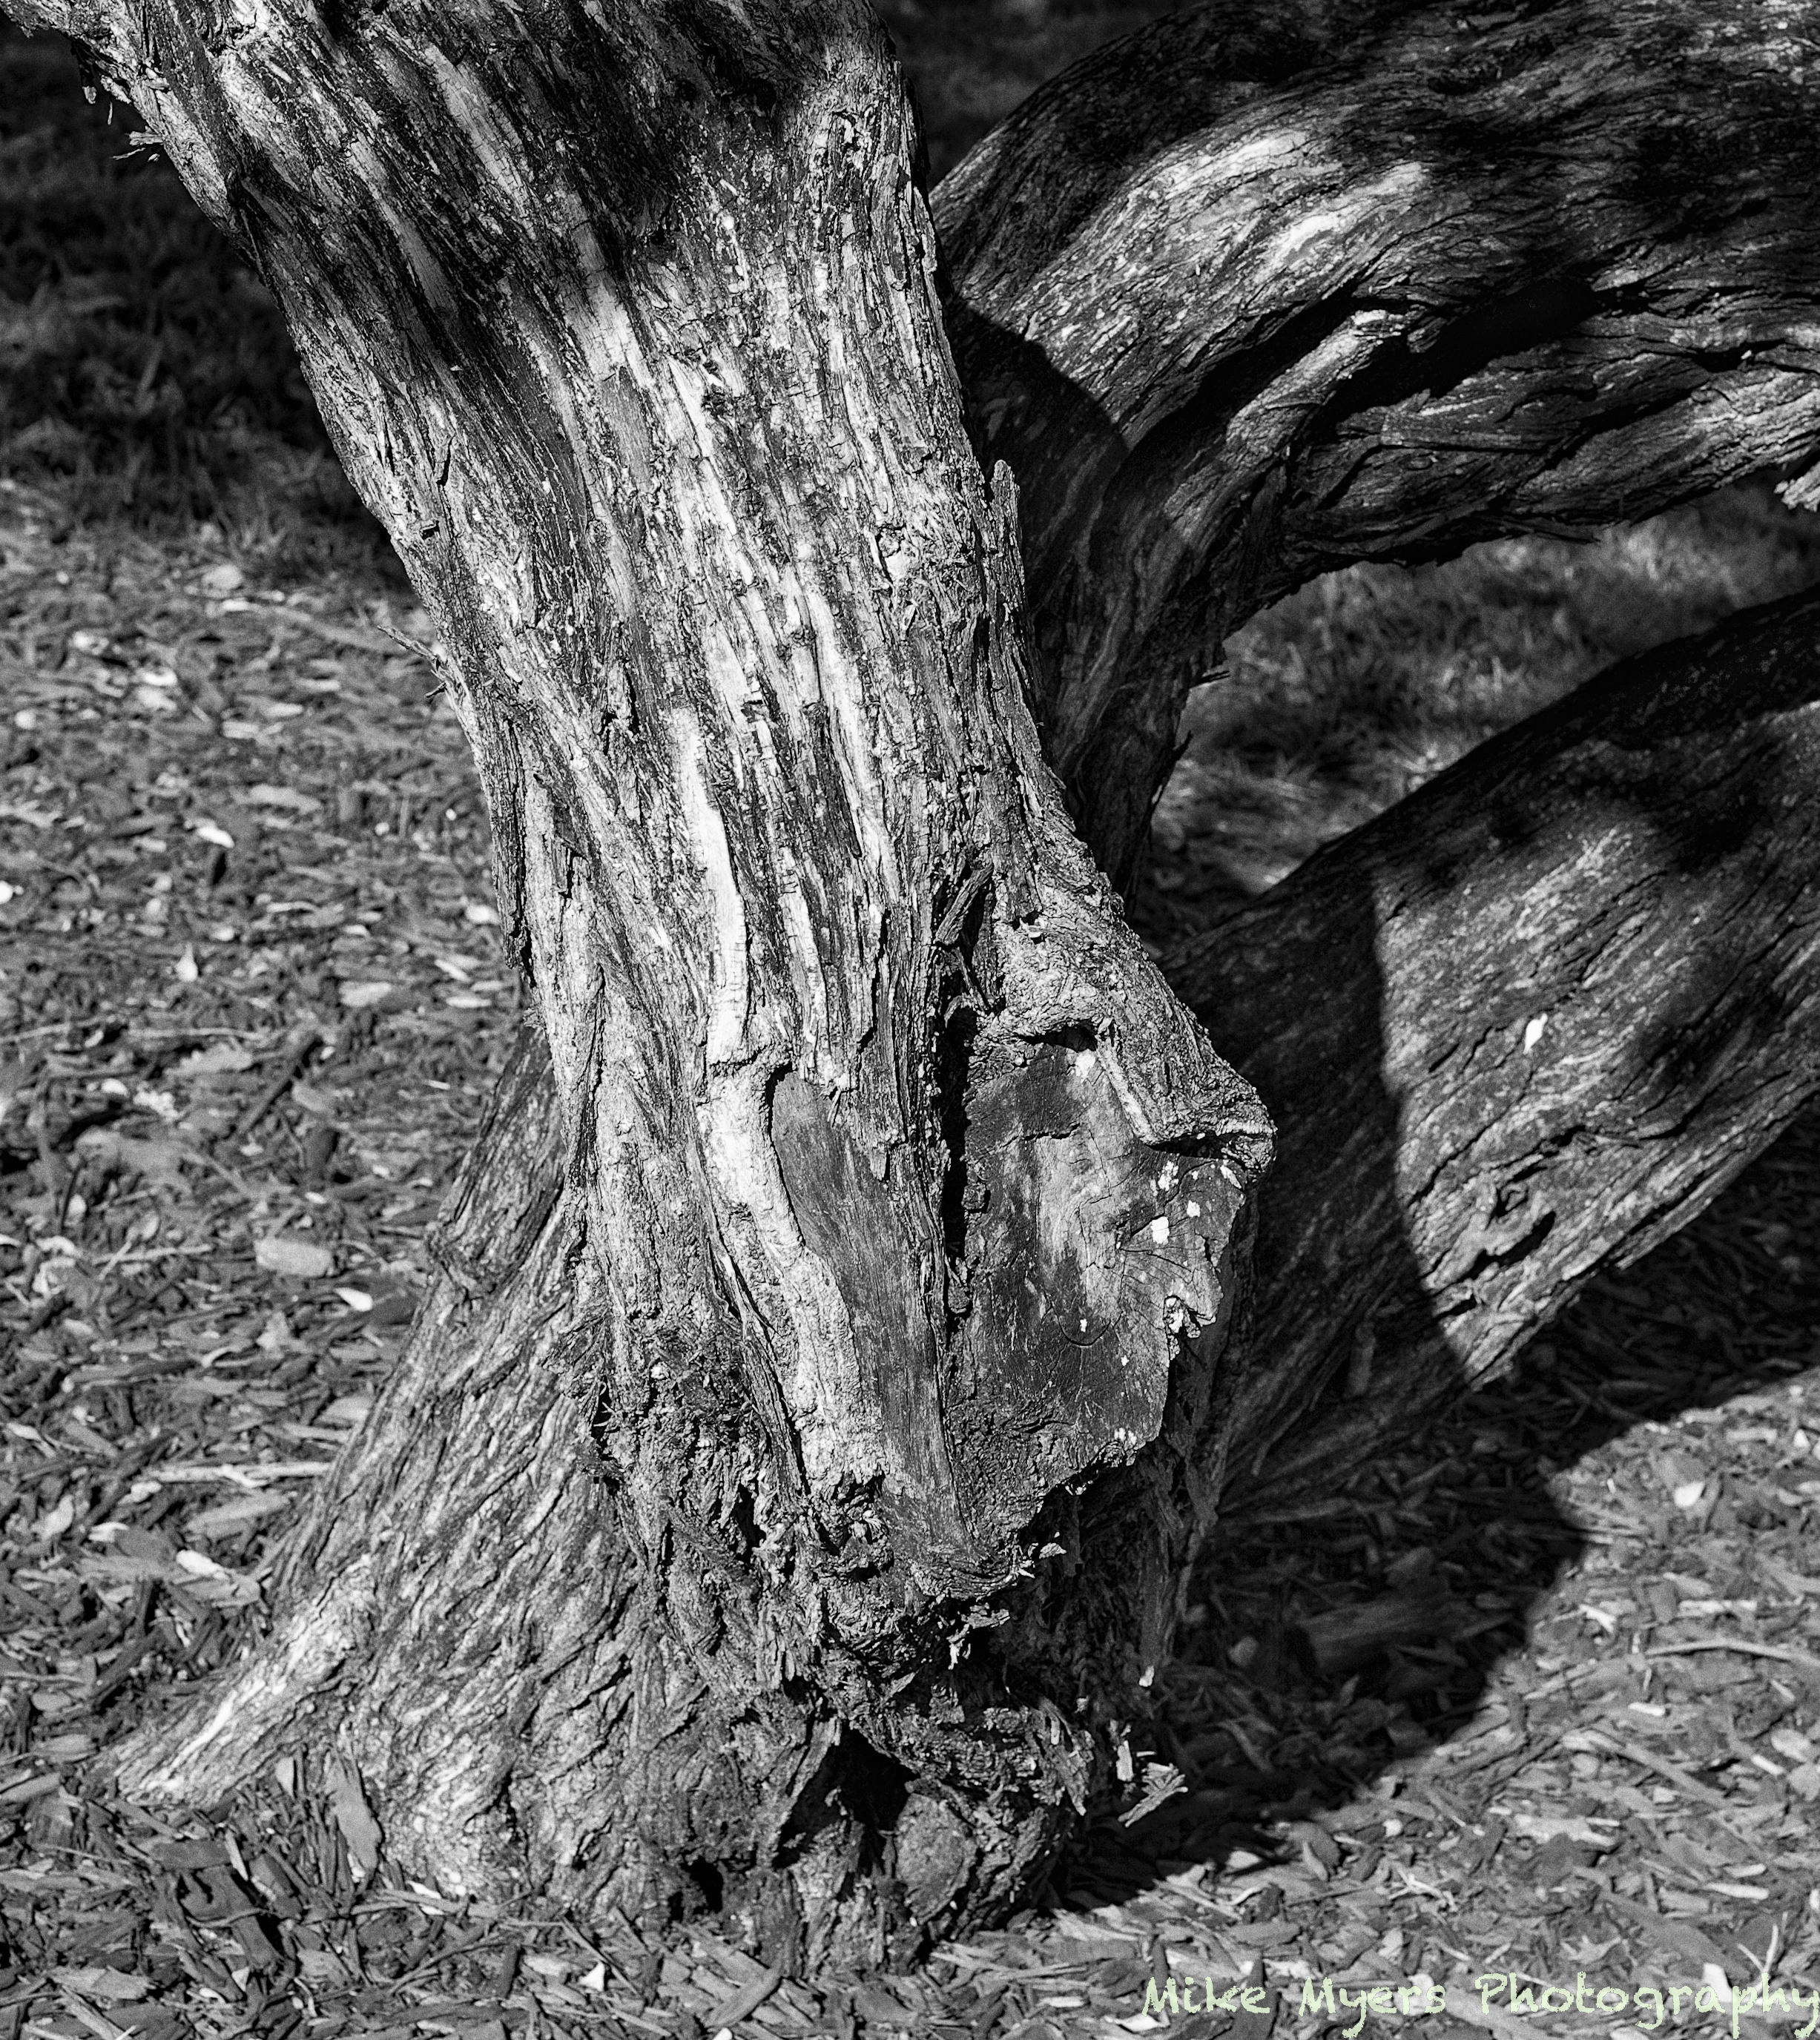
Can I just ask why you didn’t stay in PL and use one of the excellent FIlmPack B&W renderings from there?

As it is, we can’t see how you edited it because the .dop file for this .tif doesn’t contain the edits you made to the original raw file.

Yeah, only missing around 1 GigaPixels :laughing: :wink:

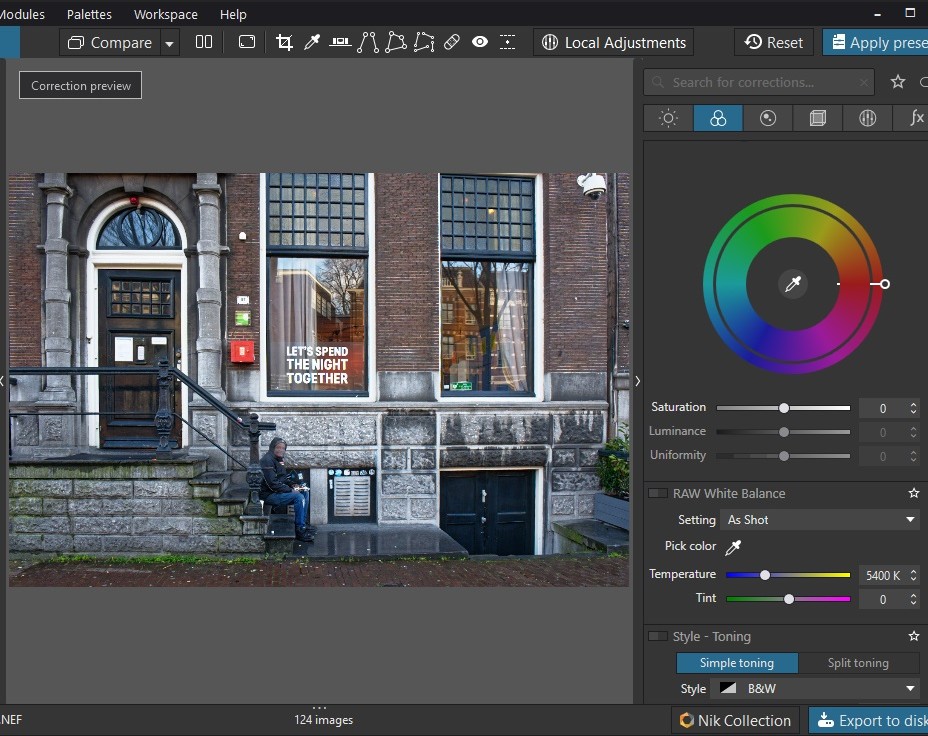
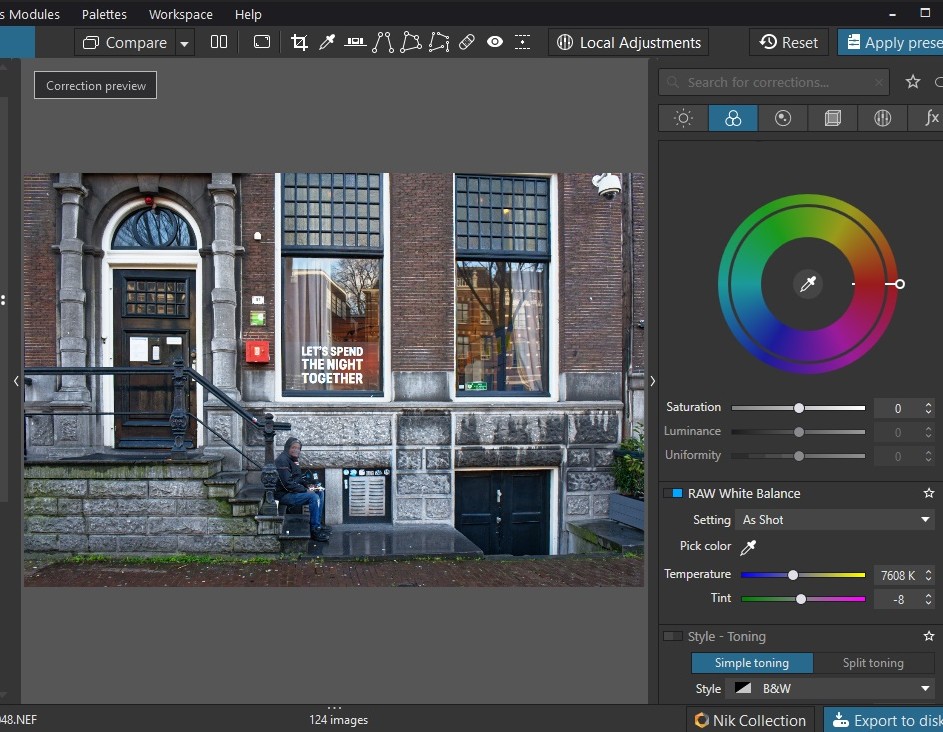
I don’t get this. PL shows whatever temperature the shot was taken at, it doesn’t impose anything on it.

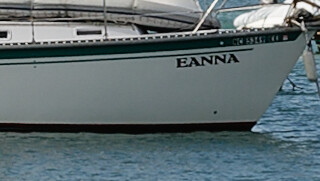
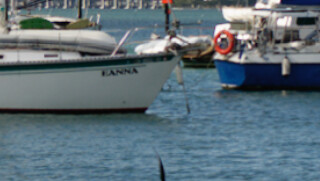
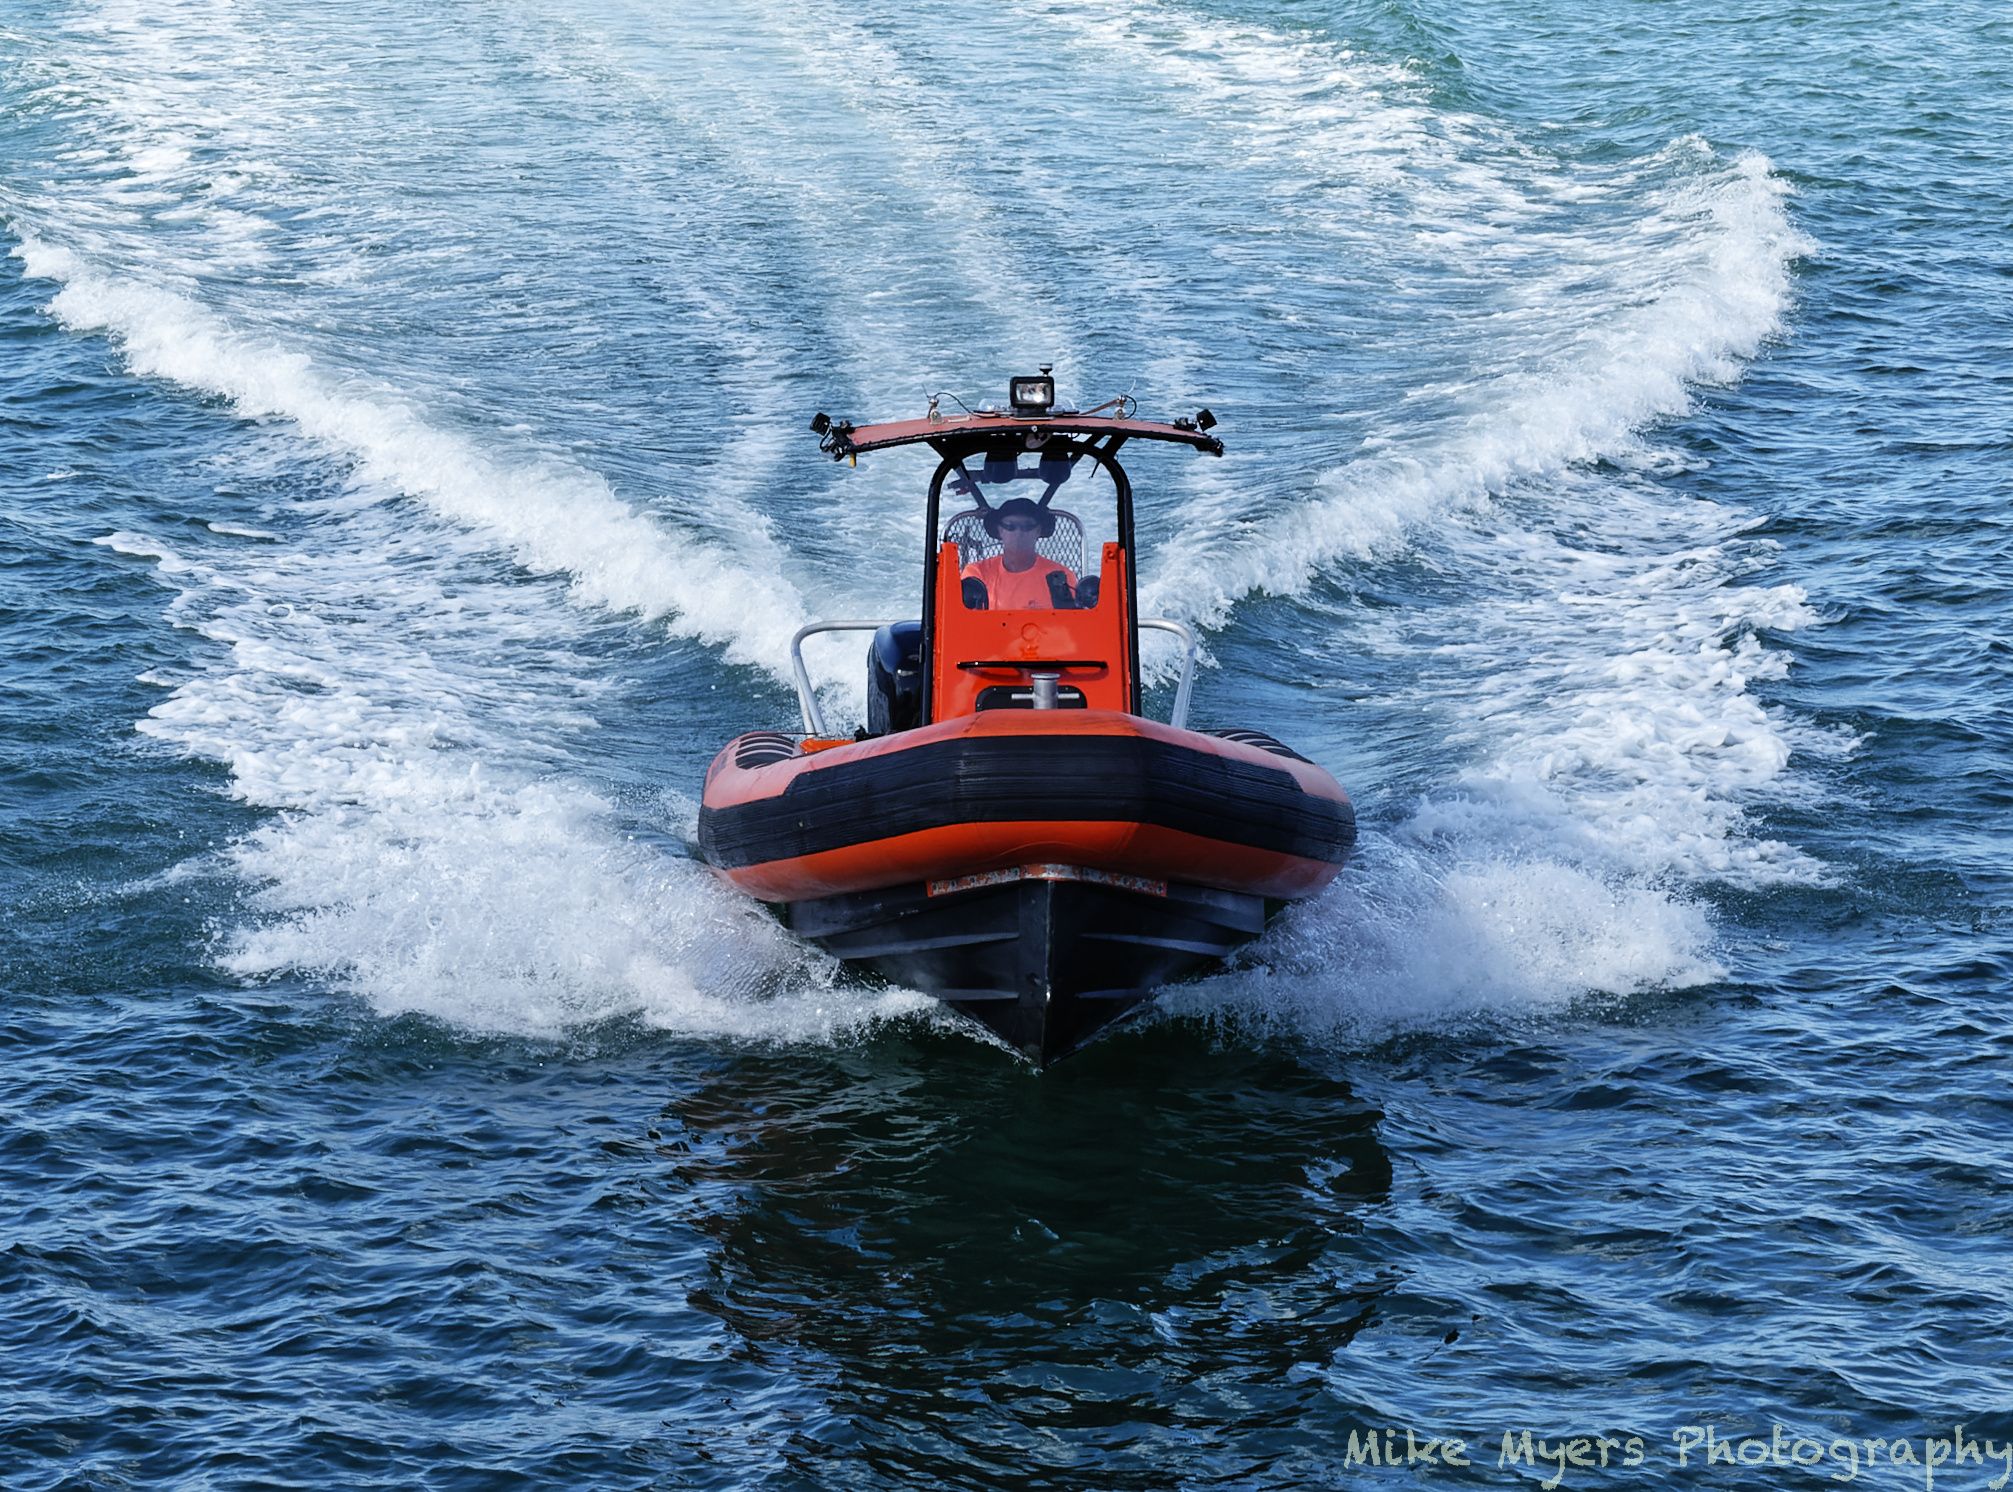
I’m not surprised, that boat is hardly neutral grey…

Capture d’écran 2021-01-21 à 08.17.28

You can’t always rely on the colour picker to give you the temperature of the light when an image was shot. In this shot the light colour will be affected by reflection from the water, which has its own coloration.

In my LF photography I use a precision colour meter to tell me which compensation filters to use to correct the light temperature to the film temperature. It is from my experience with daylight transparency film always being 5600°K that I always recommend setting a digital camera to this value for normal daylight shooting, regardless of what the light actually is or where the sun is in relation to the camera.

Just because we are using digital cameras doesn’t mean we couldn’t use a colour meter and compensation filters in front of the lens - this would be the “professional” way of doing things. But, since we don’t want to spend a small fortune on such gear, and given that we can correct the WB in post-processing, most of us tend to take the easy way out, shoot at 5600°K and change the WB to what we feel suits our memory of what we saw.

Even using physical correction filters with film allows us to change the colour rendering to suit what we have visualised.

Just pretend your digital camera is a film camera and set the WB to 5600°K. The only difference to film is that you can change the temperature in post processing, without any detriment to image quality, in post processing.

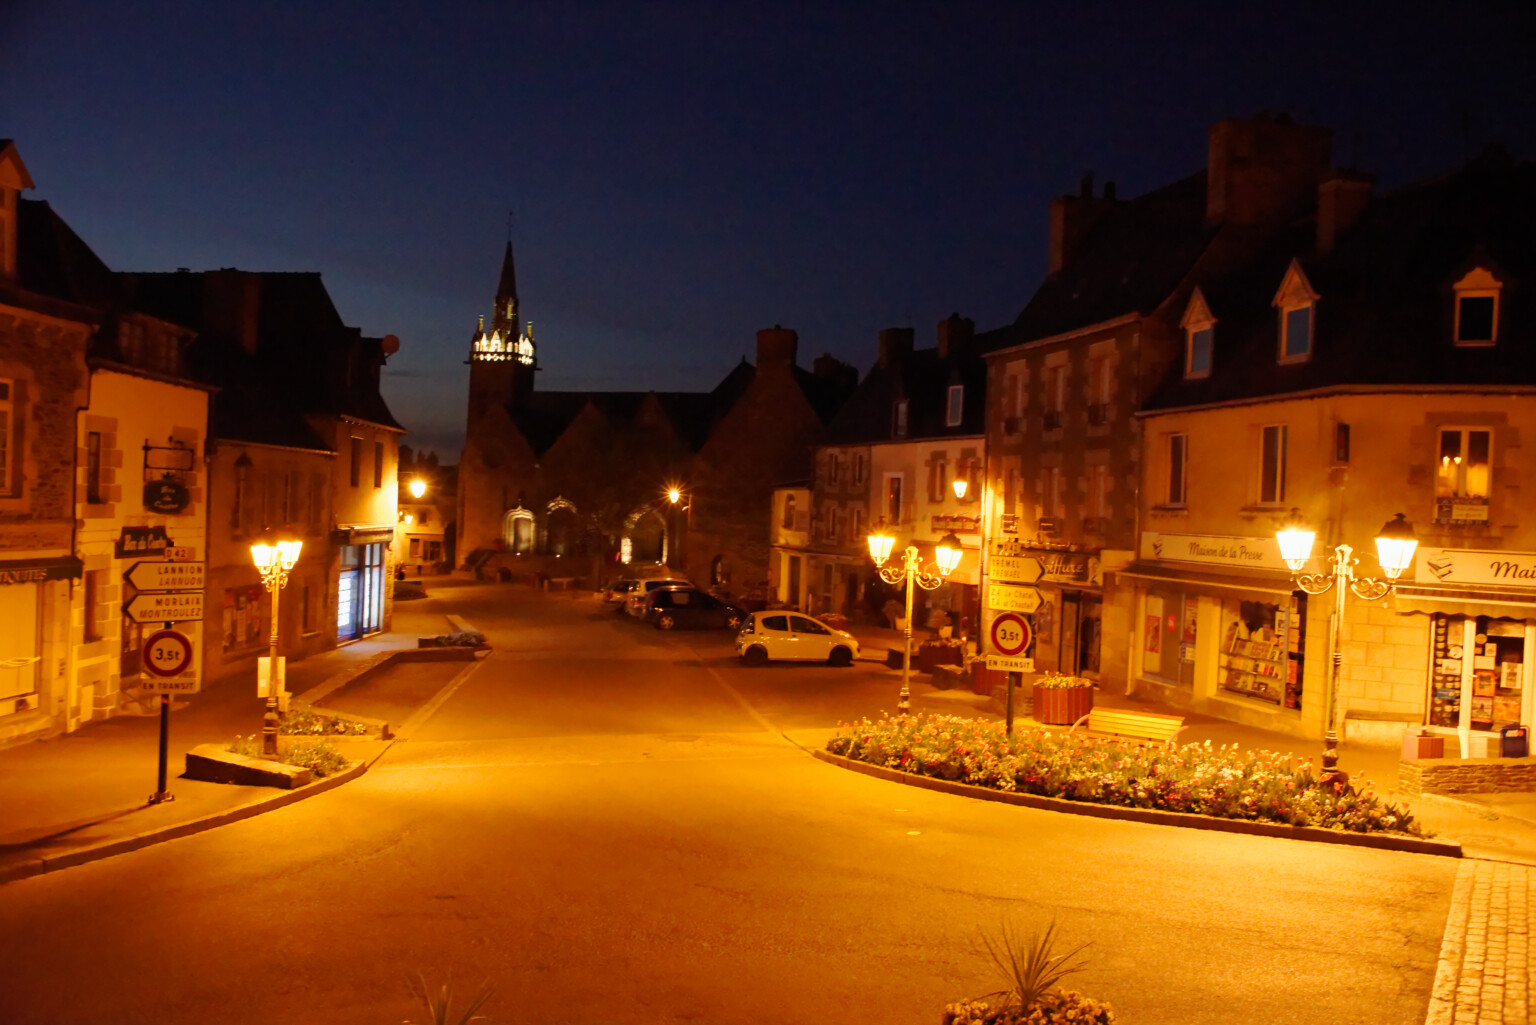
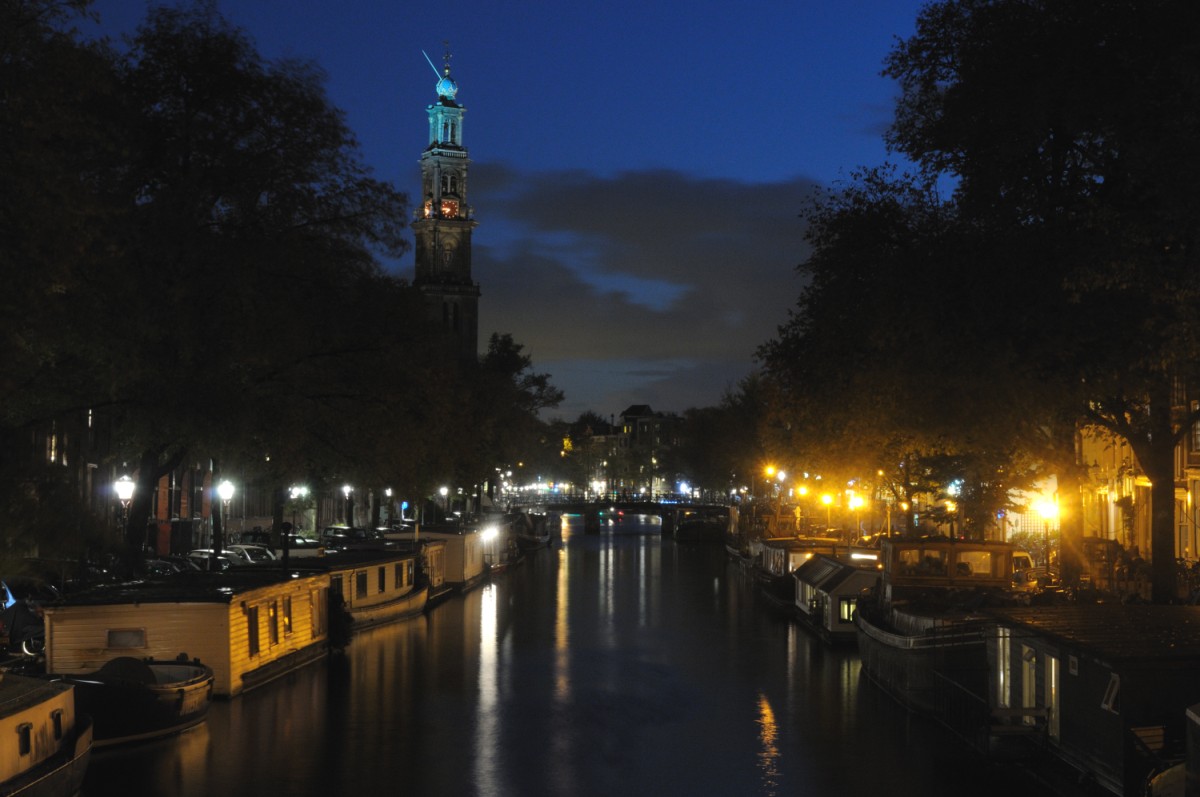
Here’s a night shot at 5600°K…

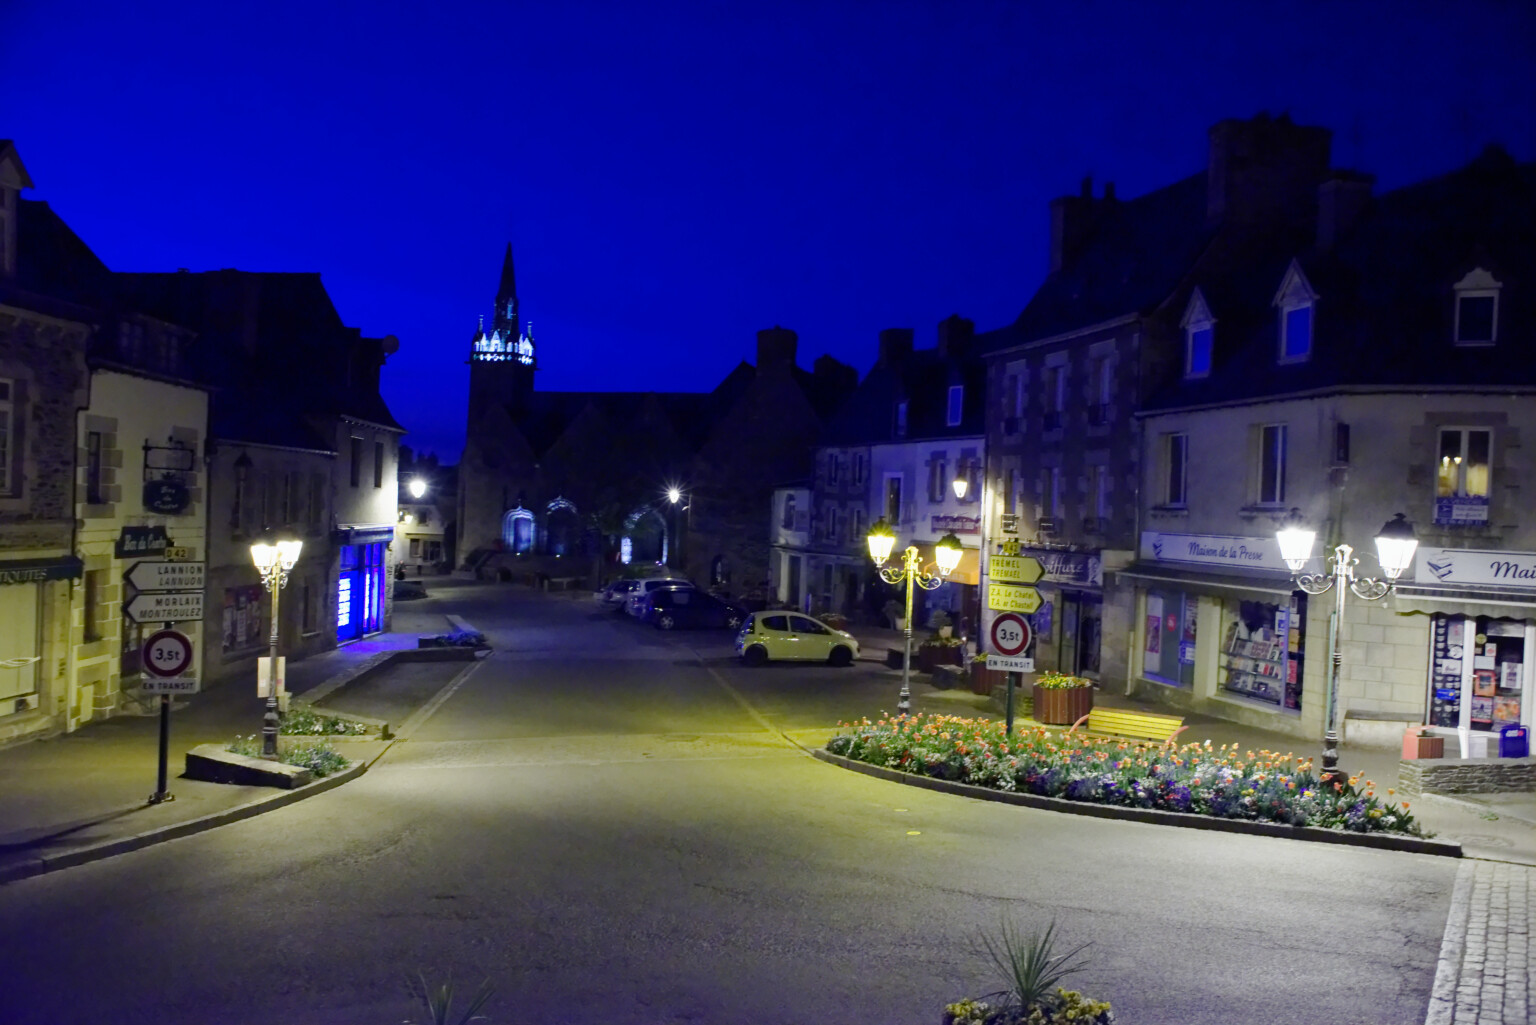
And here’s how I chose to render it (at around 2200°K)…

Just to demonstrate why I wouldn’t rely on auto-WB, here is a series of shots taken at both a temperature measured with my colour meter, depending on the direction of light, and taken with auto-WB on the camera.

Let’s start with auto-WB with the sun behind me…

Now with a measured 5150°K…

Now, auto-WB against the sun…

… and finally, with a measured 8580°K against the sun…

Although the two measured shots do not appear to have the same temperature, that is an optical illusion and, if we zoom in to both, side by side, we can see that the colour temperature and thus rendering is virtually identical…

With CropContra Crop

I think the color are better in auto wb. Just look at the grass.
How do you measure the color temp. I thought it was done to the resource or by a callibrated gray card, also measuring the resource.

About the 5400 value.
Open a raw with raw white balance deactivated: 5400K.

Now activate the raw white balance: 7608K.

The image hasn’t changed. Pl starts to fill that cell with an initial value and shows that but uses the as shot value. Once the tool is activated the used value is shown. Deactivating will still show the used value.

George

I’ve the two night images of the night shot in one image.
Street lights are mostly natrium lights, I think in yours too. In Amsterdam they are changed for led lights. Giving next result. On the left the led, on the right the natrium. It seems you prefer the led. :grinning:

George

Oops… I didn’t even think of FilmPack. Now that you’ve reminded me, I will re-do the image staying within PL4 - so anything I do in the Film Pack add-on will be included in the “.dop” file, but nothing from Nik Collection? I never really considered that.

I’ll try again today, starting with the original image - I guess I need to make a “virtual copy” and go from there.

All my fault, for manually selecting “words”, rather than specifying the exact temperature in Kelvin. Df is now set to 5500K as a starting point. At least I hadn’t left it on “auto”…

If I put the camera away for a day/week/month, it seems to me that I would be better off leaving it on “auto” though, and changing it only when I pick up the camera to use it. If I grab my camera day or night to get a quick shot, I might not even think of the white balance setting. 5500 is fine I guess if the sun is shining, but if the sun moves behind a crowd, or it’s a cloudy day, leaving it on “auto” might be better than having left it on “5500” which is where it’s set now.

Aha! So maybe I should leave my camera at 5600 for the default when I put it away, and correct from there as needed?

I looked at all the color related photos from both of you. I can see where all of this is necessary when shooting slide film.

For me, shooting only digital, and not having a color meter, it sounds like I could just set my Df and my Leica to 5600 K, and correct as needed in PL4. The camera would have a known starting point. Any reasons for me to not do this?

@mikemyers
I think you got the message now – present pics with some interest, also when trying something in PL.

That’s all well and good but no good if I need accurate representation of the covers on the chair.

I use a Minolta Color Meter III F

What I see on your screenshots looks wrong. The pipette tool is enabled without having selected one of the coloured dots, which I also can’t see.

That all depends on how I want the shot to feel.

The key is to remember that the RAW image data doesn’t have any idea of what temperature you shot it at - that is only a number that is recorded in the metadata and applied when it is “decoded”

As I said, 5600°K is what applies to most transparency film. Since it really doesn’t matter what temperature I shoot at on digital, that’s what I leave it at because it gives me a consistent reference point to start from. then I can apply the look and feel I want from that reference point.

My Nikon D810 also allows me what it calls Preset Manual…


… where you can take a reference WB shot and save the value as a preset. I have used this to save me having to take my colour meter with me to complex lighting venues like concerts. and mixed street lighting.

Absolutely none at all. It’s what I have been doing for years and it saves a lot of messing around :sunglasses:

What bothers me (a lot) are things that sound obvious after someone here, in this case, you, points them out. I could make excuses, but that doesn’t “fix” anything. Had you asked me what effect the White Balance setting had on the data from a raw image, after thinking about it, I would have said NONE. According to my way of seeing the world, a raw image is just a copy of the data from the sensor at the time the image was captured.

BUT… that would be misleading to me, as if I looked at the image review screen, it might make a huge difference - because then the camera configures the image to show me based on the selected white balance, set by me, or set by the camera. I guess that’s irrelevant. If (and only if) I am shooting in RAW, on the Leica or Nikon, I can permanently leave the WB setting to 5600 (or anything), and the captured image will be recorded and the WB info as set on the camera will also be captured.

Please correct me if I’m wrong, but if what I am saying is correct so far, when I open the image in PL4, the image I will see on my display IS modified based on whatever WB I selected, which will be 5600 from now on if I follow this rule. That means one of the first steps in editing in PL4 will be adjusting the WB either to what I knew it was when I captured the photo, or by guessing, or by using the “white picker tool”.

Again, if I’m still right at this point (I think I am), since I’m already going to the white picker tool so often anyway, this makes no difference, and again, I might as well just leave it at 5600 and adjust later.

…and I will also need to remember something else you pointed out (yeah, it’s obvious NOW, but it was’t obvious to me an hour ago!!!) that the WB setting depends on the light, meaning ALL of the light, which may be sunlight, or whatever, and ALSO reflected light, perhaps from the water and the sky, and who knows what else.

Mistake #1 for me, is I incorrectly assumed the WB setting had a direct effect on a raw image - that was “obvious” to me, as I could see the effect on my image review screen. BBUUTT the image review screen is NOT coming from the raw image - it’s from the small jpg image captured inside of the raw image. I could leave the WB setting on the camera at 0000 or 9999 and it would have NO effect on the image data captured by the pixels on the sensor.

But… if everything I have written above is really correct, as I assume it is, what is the reason for not just leaving the WB setting on “auto” since I’m going to have to adjust it in PL4 anyway? The benefit of doing so is the ‘jpg preview’ image I see in my review screen is likely to be closer to what I saw with my eyes?

This is to allow you to use your camera as a color exposure meter??

What you aimed at, in the light existing at that moment, will be measured and displayed?

I don’t think I understand the reason for doing this…??

From Joanna:
As I said, 5600°K is what applies to most transparency film. Since it really doesn’t matter what temperature I shoot at on digital, that’s what I leave it at because it gives me a consistent reference point to start from. then I can apply the look and feel I want from that reference point.

It’s part of her workflow. But you don’t gain anything from it.

George

1 Like