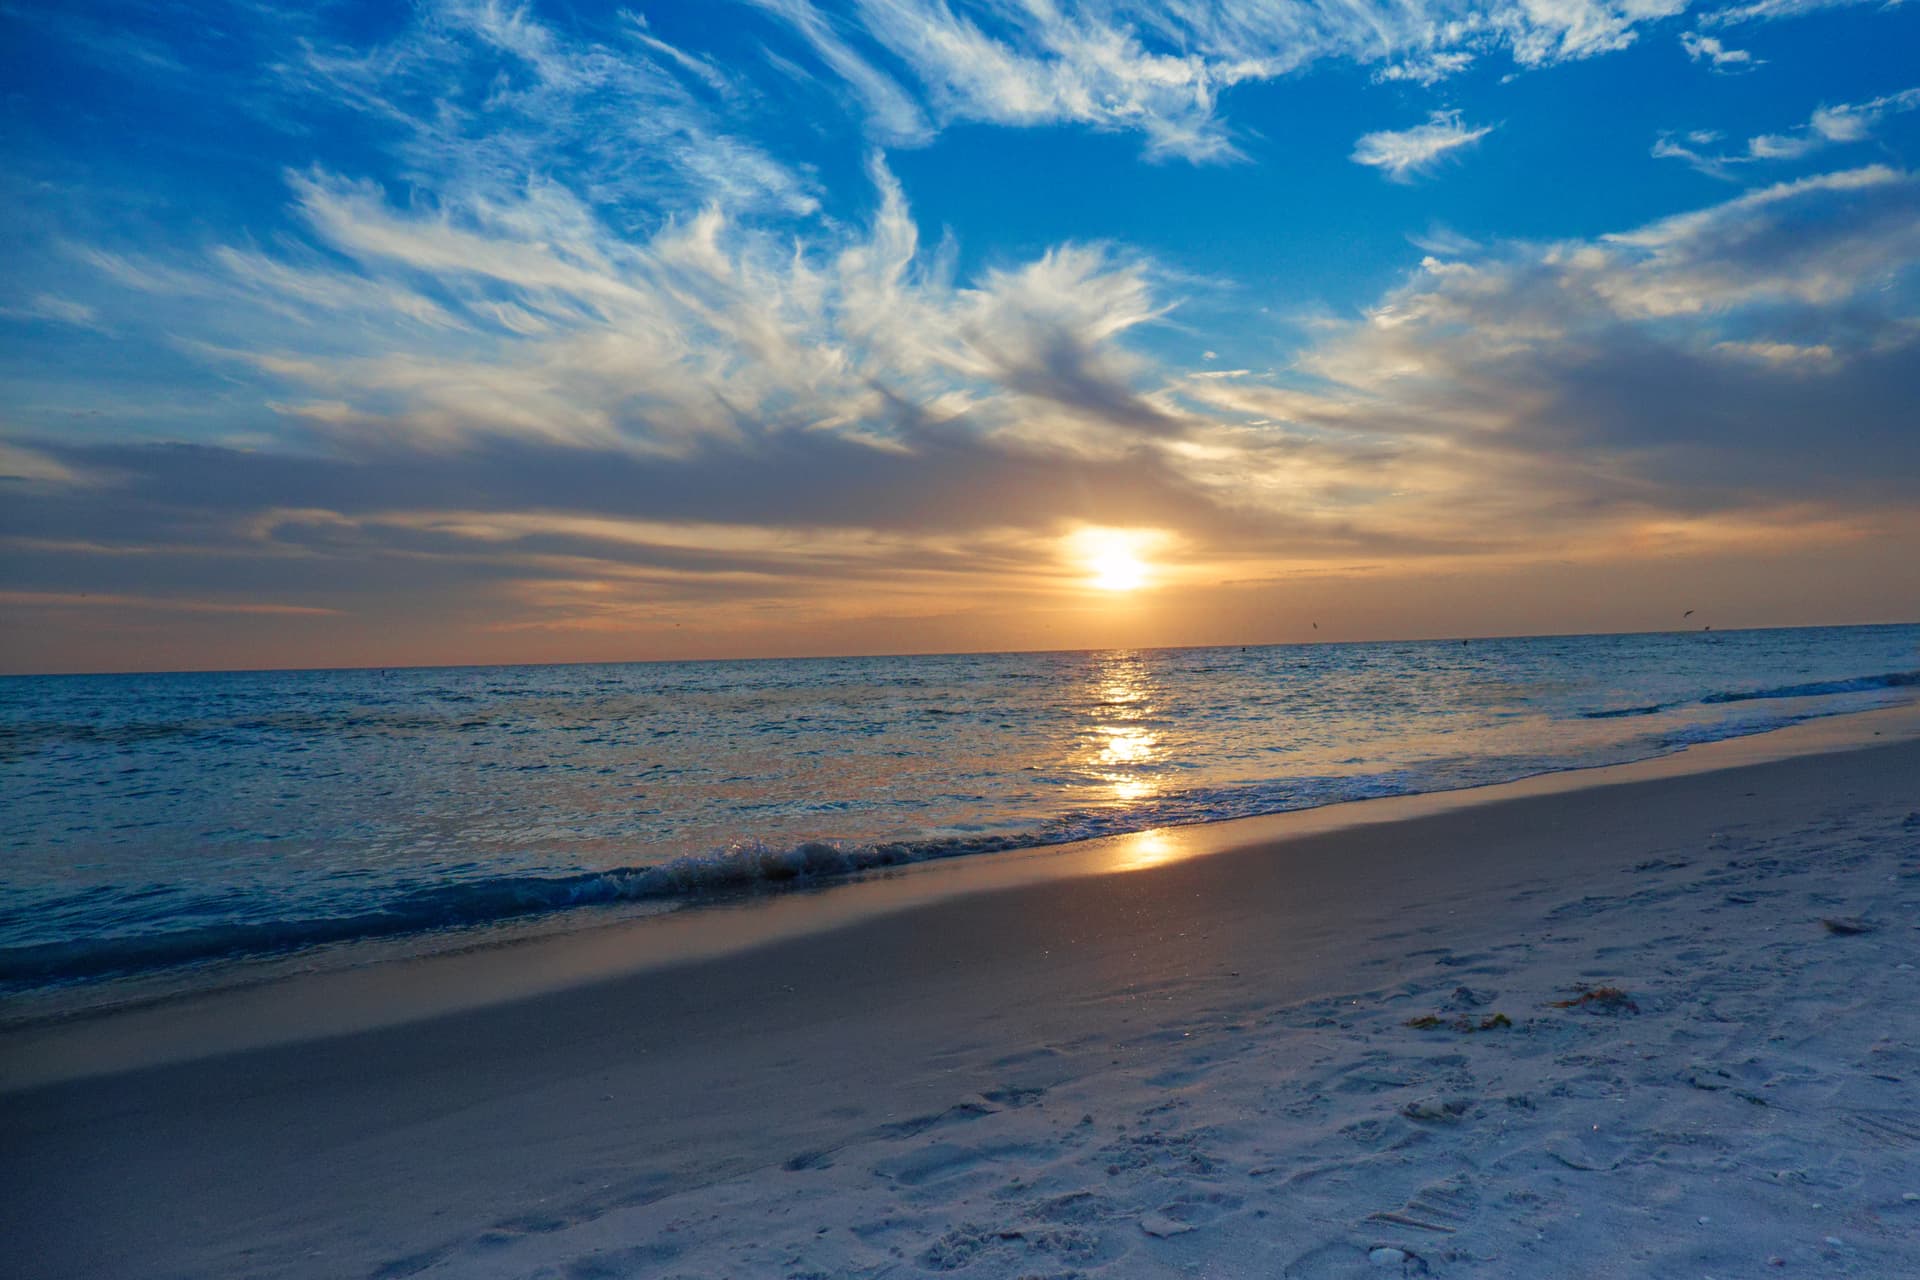
I’m trying to figure out the best tool to work specifically with the middle area of a picture. Just as an example, what if I wanted to only work with the water section in this picture? I can’t figure out how to use the control line or graduated filter to work with only the middle part. Thanks for any help!
Interesting challenge. Ultimately, I think it depends on what you want to do. A brush mask most completely isolates the water section, but doesn’t give more fine control over the mask like a control point/line.
I could easily mask out one side of the water section (the sky) with a control line. But I couldn’t use a negative control line to completely mask out the other side (the sand). Using two negative control lines with a minimal gradient was more effective, but still didn’t completely mask out the sand. (Reversing this and trying the negative control lines in the sky is far worse.)
And performance of PL5 degraded considerably the more I played with this.
I’m not sure this is working correctly.
1 Like
In fact, this needed more than one negative Control Line…
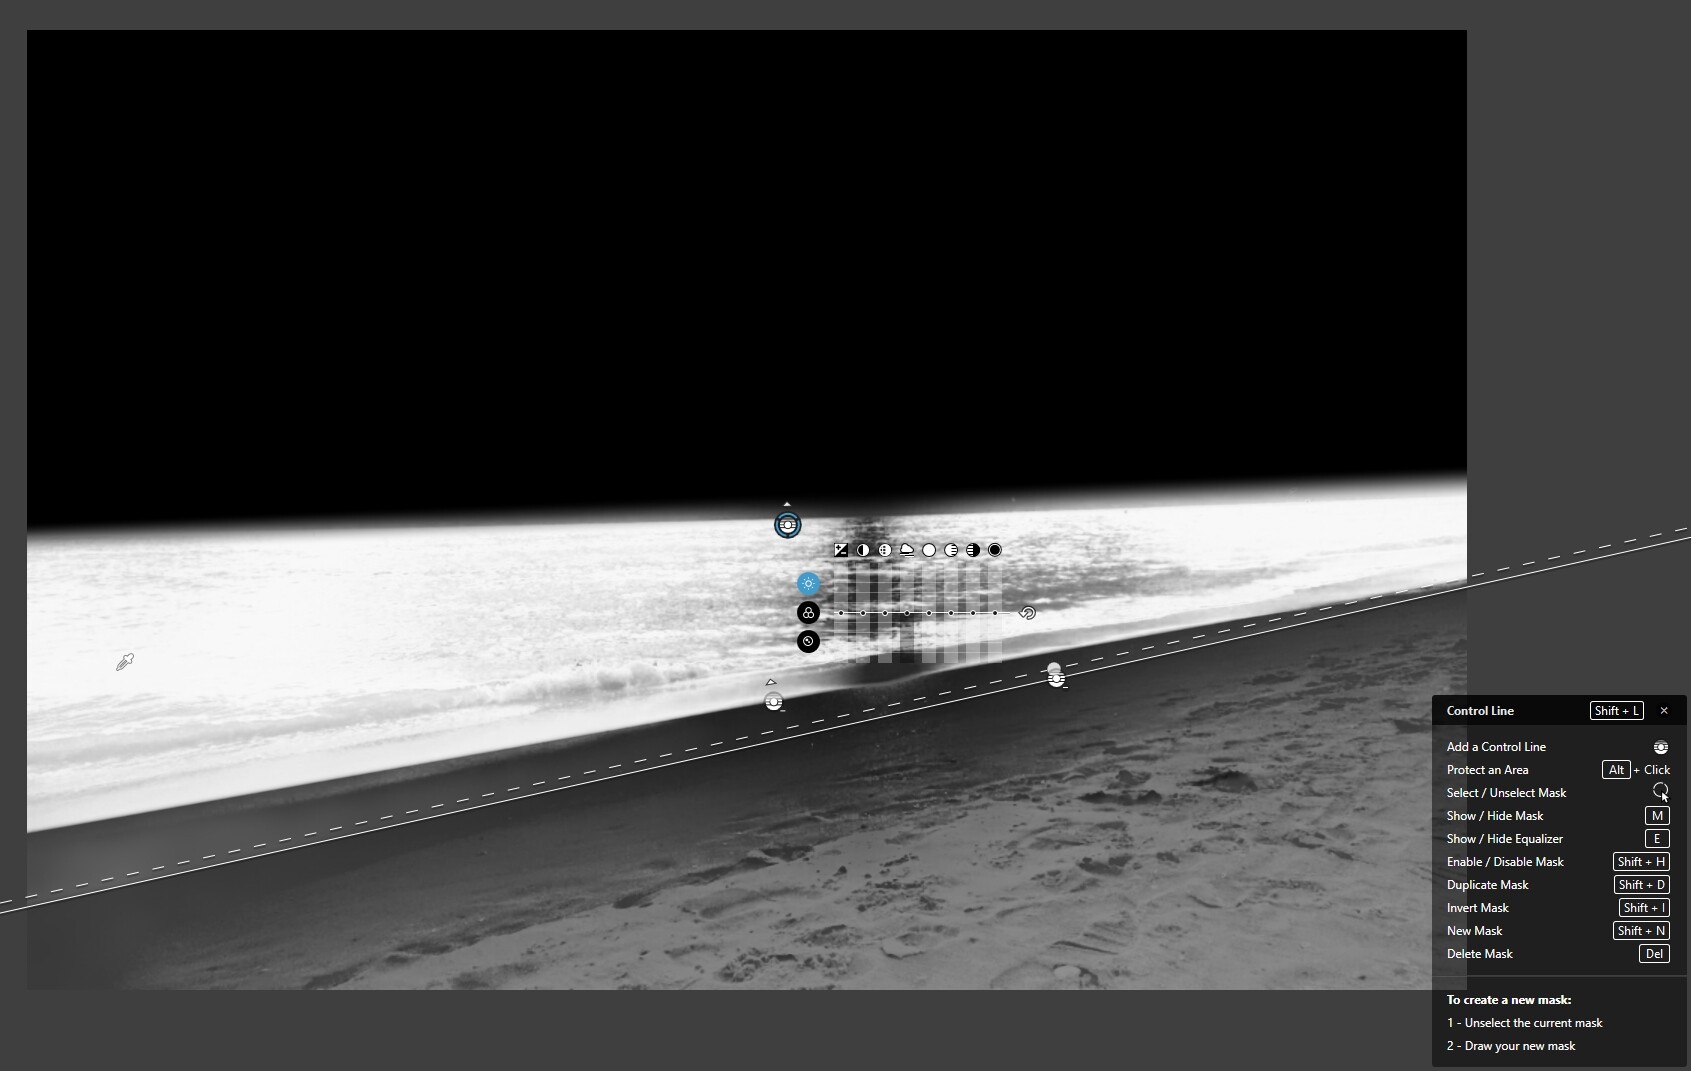
Here’s the principal mask to remove the sky…

Then I needed three negative masks, with their pipettes on different parts of the beach…


Does that help?
1 Like
This is excellent. I don’t know anything about negative control lines. That will make this so much easier. Time to search for some info on them.
Just use them like regular control lines but place the pipettes on an area that needs deselecting instead of on an area that needs selecting.
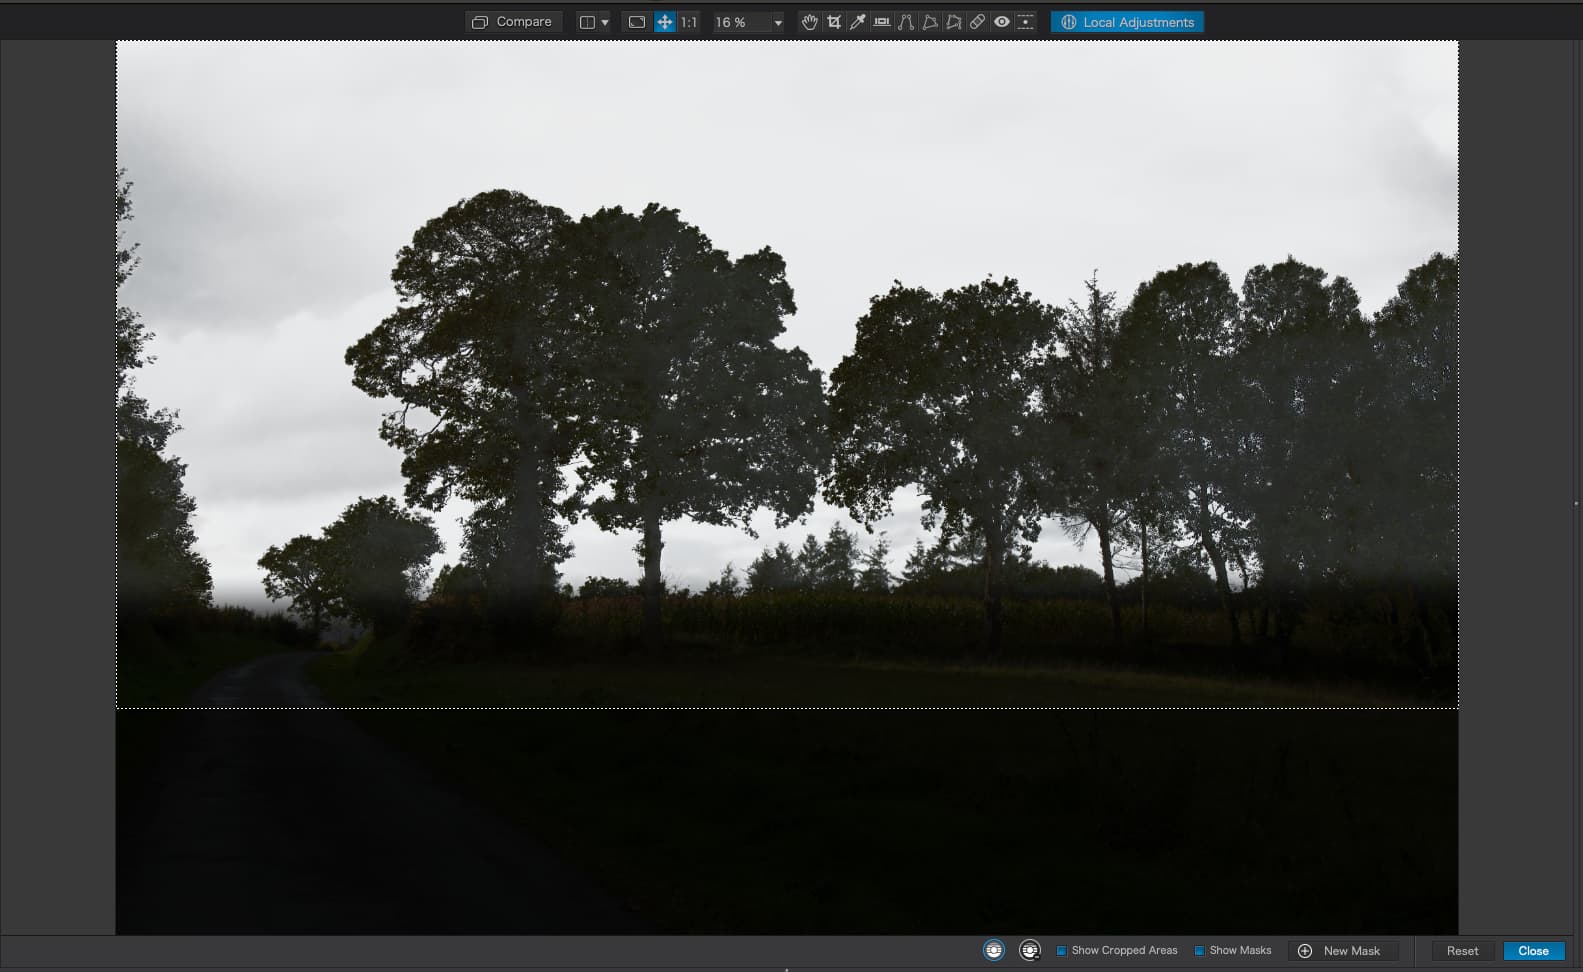
The overall selectivity is determined on the main positive control line. You are using selectivity, aren’t you?
What do you mean, “selectivity”?
Have a look at this video PhotoLab 5 and FilmPack 6! Big upgrades from @DxO - YouTube (starting at 1:44)
Steven.
2 Likes
He must be using an Apple because I don’t have the negative control lines on my screen. For some reason, the Apple version is different than Win…
Ok. I see that I can make a negative control point by clicking “Alt-Click”. However, I just can’t get it to work right. I need to find a step by step.
1 Like
I have to get some new tyres for the car but I’ll put something together when I get back.
3 Likes
Right. Mini-tutorial on Control Point selectivity.
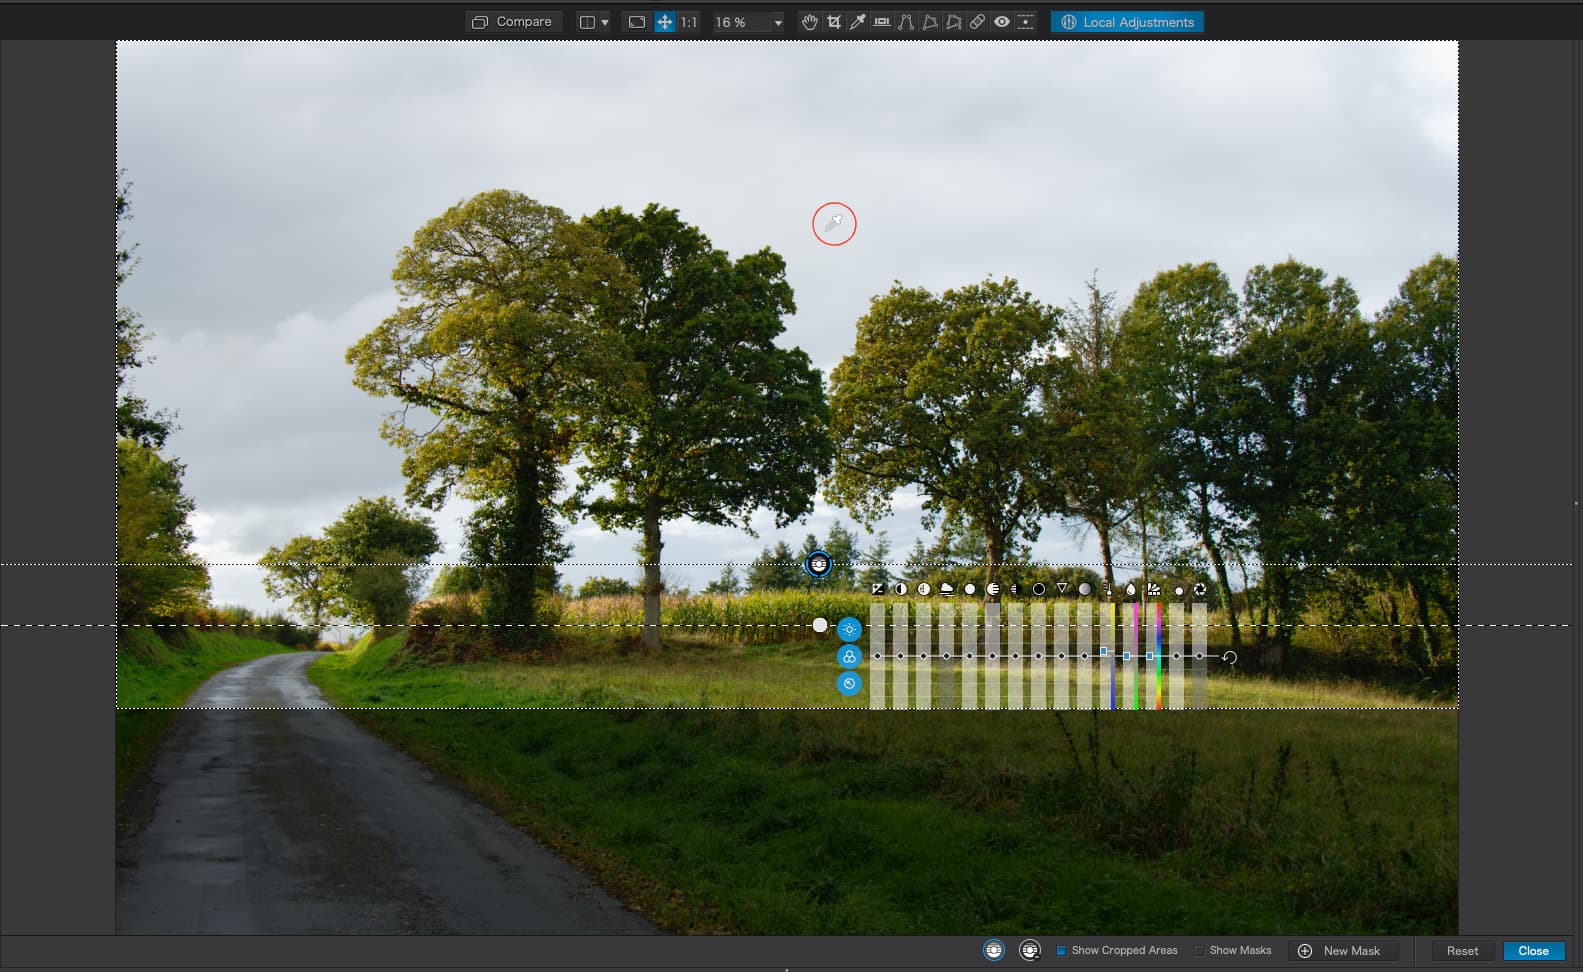
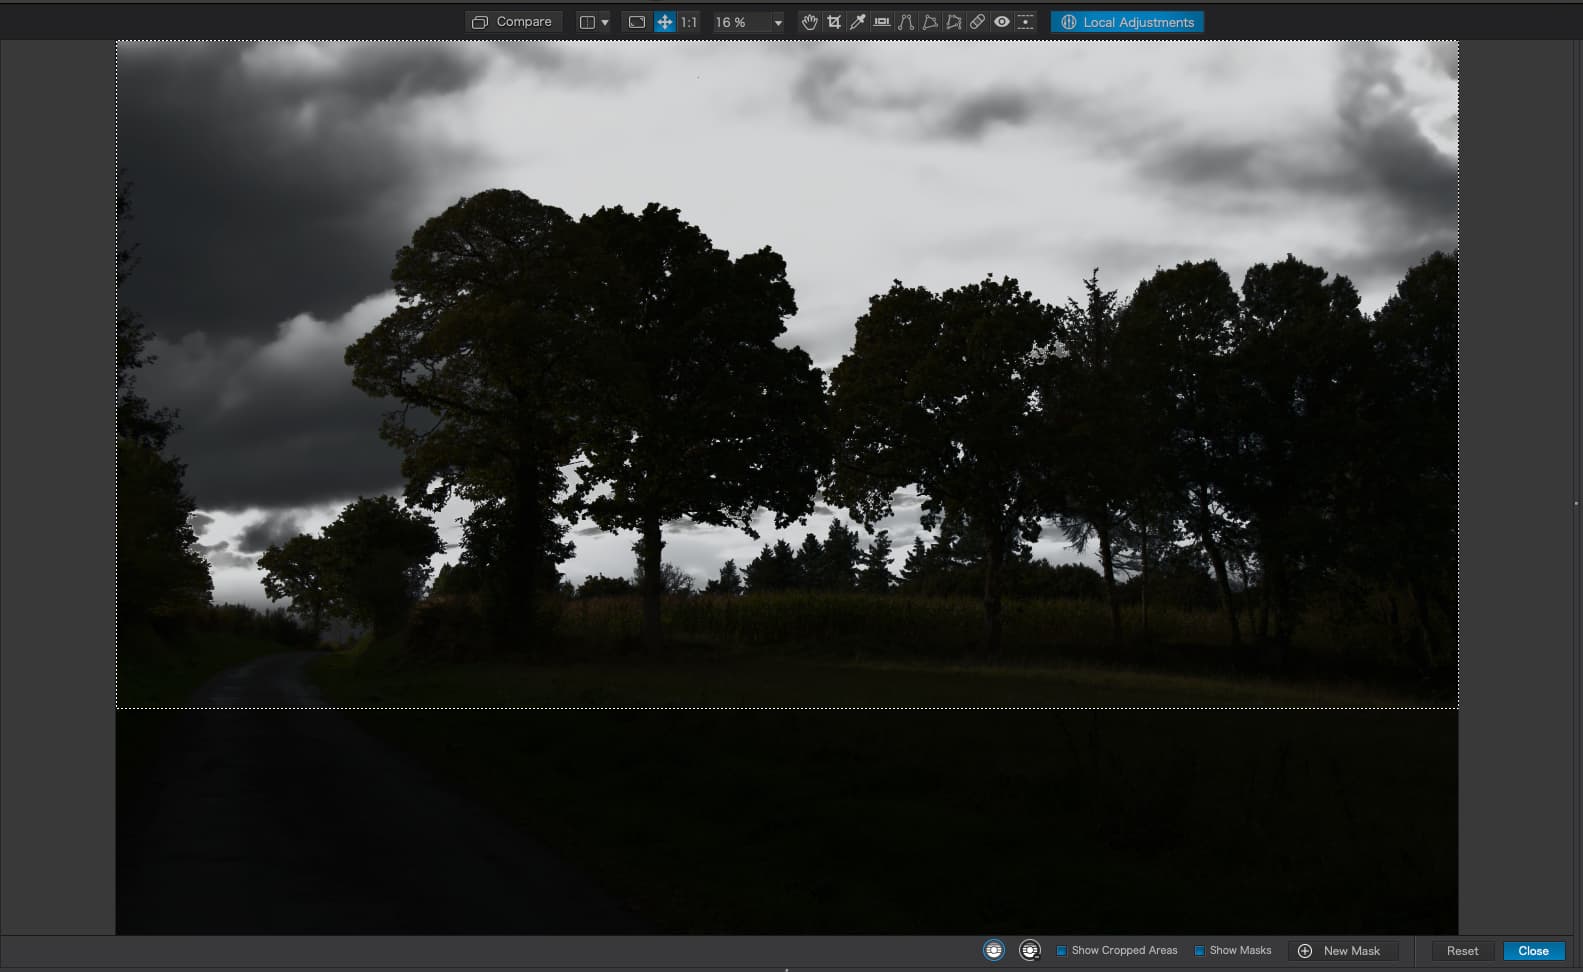
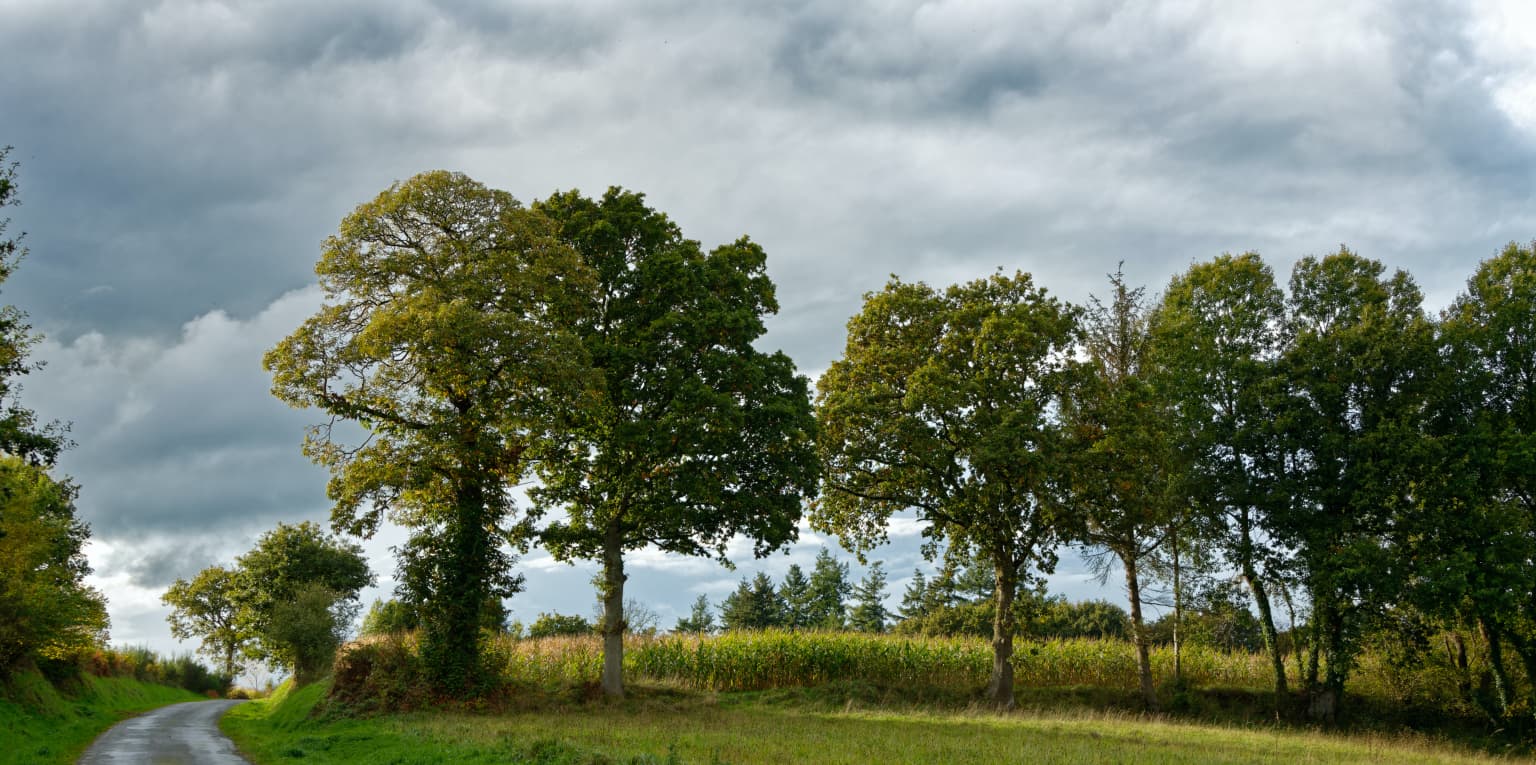
I have an image for which I want to bring out more detail in a fairly blank looking sky…
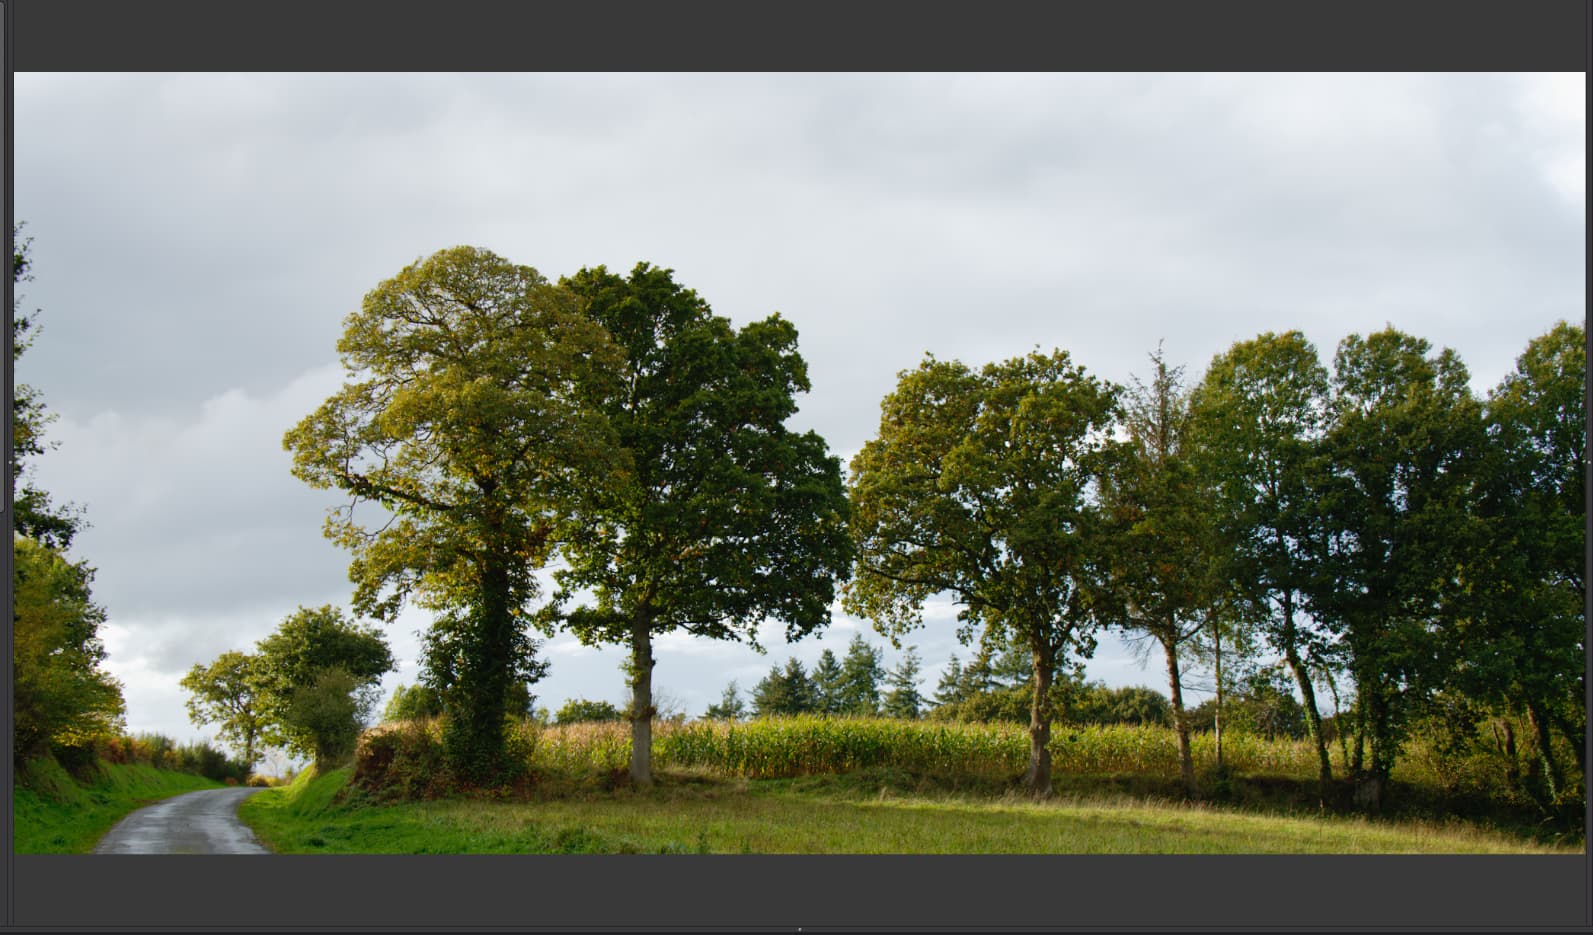
The first thing I do is to place a Control Line below the level at which the sky becomes visible between the trees and place the pipette somewhere in the sky…
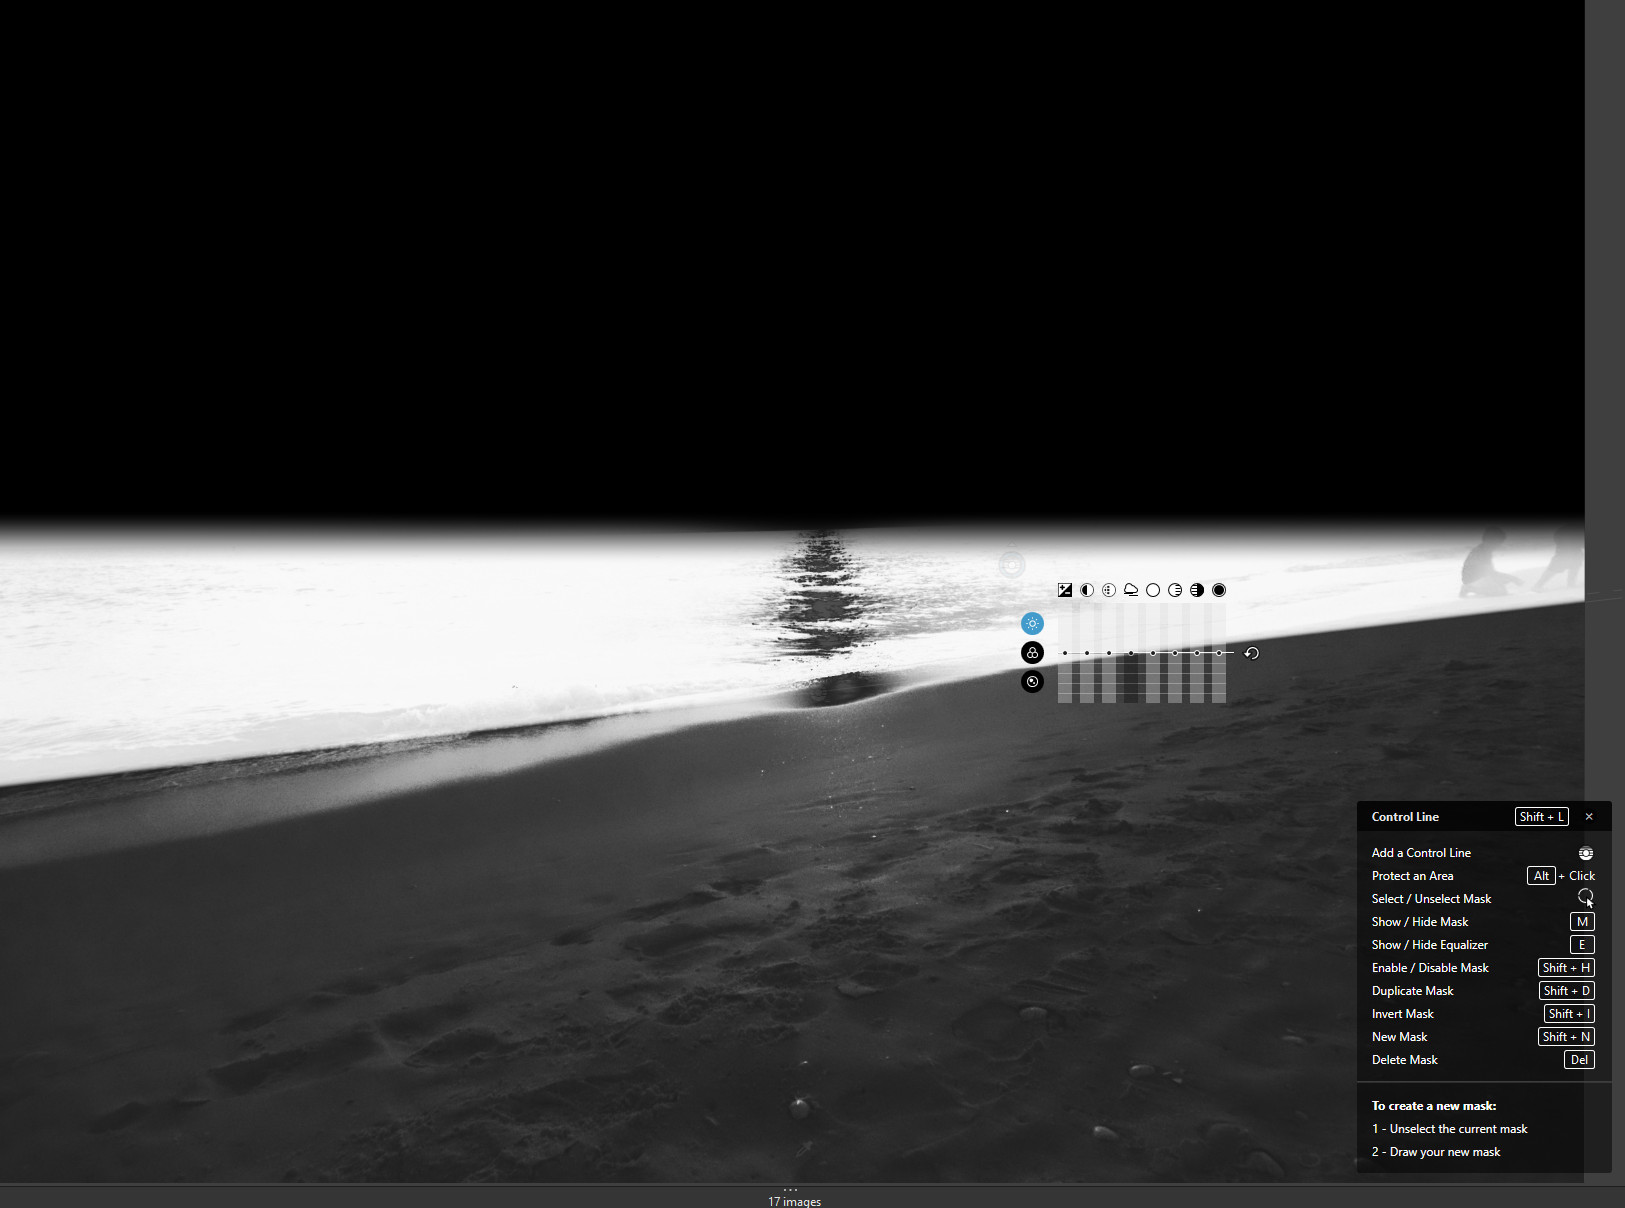
… then turn on Show Masks…
Note that I have allowed for a slight gradient on the bottom of the mask, to gently fade the increased detail in the sky as it gets nearer the horizon, but this is not always necessary for all images.
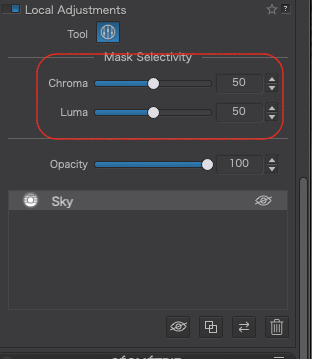
As it happens, this image is fairly well defined in terms of what has been selected and what hasn’t, with the selectivity sliders set to their default level of 50…
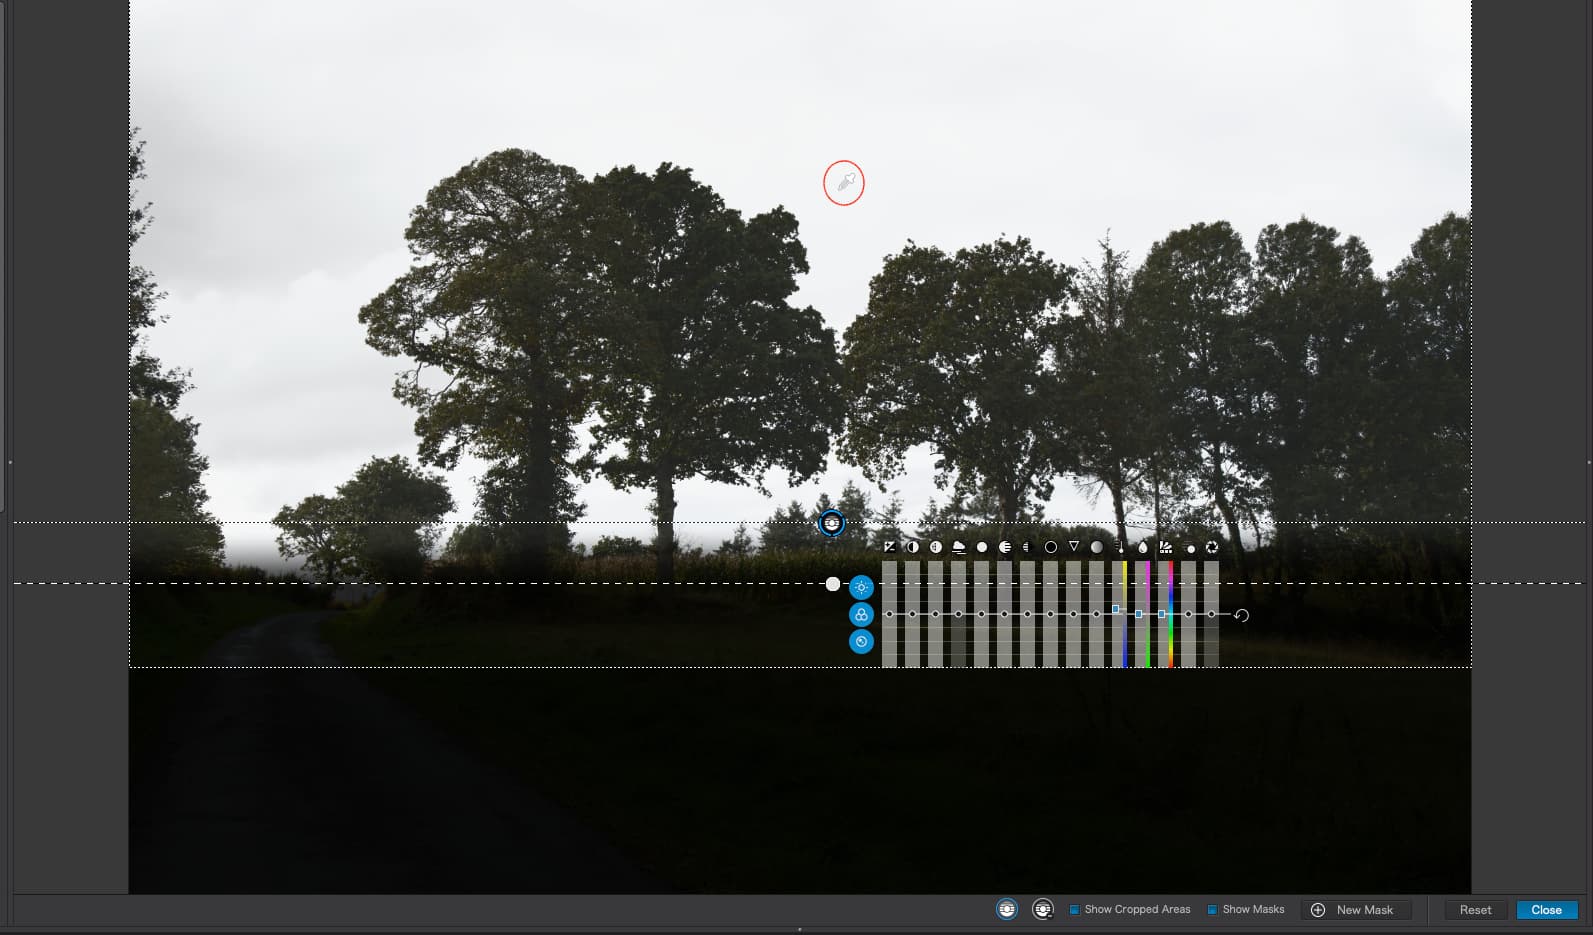
In order to demonstrate what happens if the selectivity sliders are set to lower values, here is what happens if I set them both to 0…
Notice how virtually everything above the Control Line is now selected (as shown by the light coloured mask), even the trees.
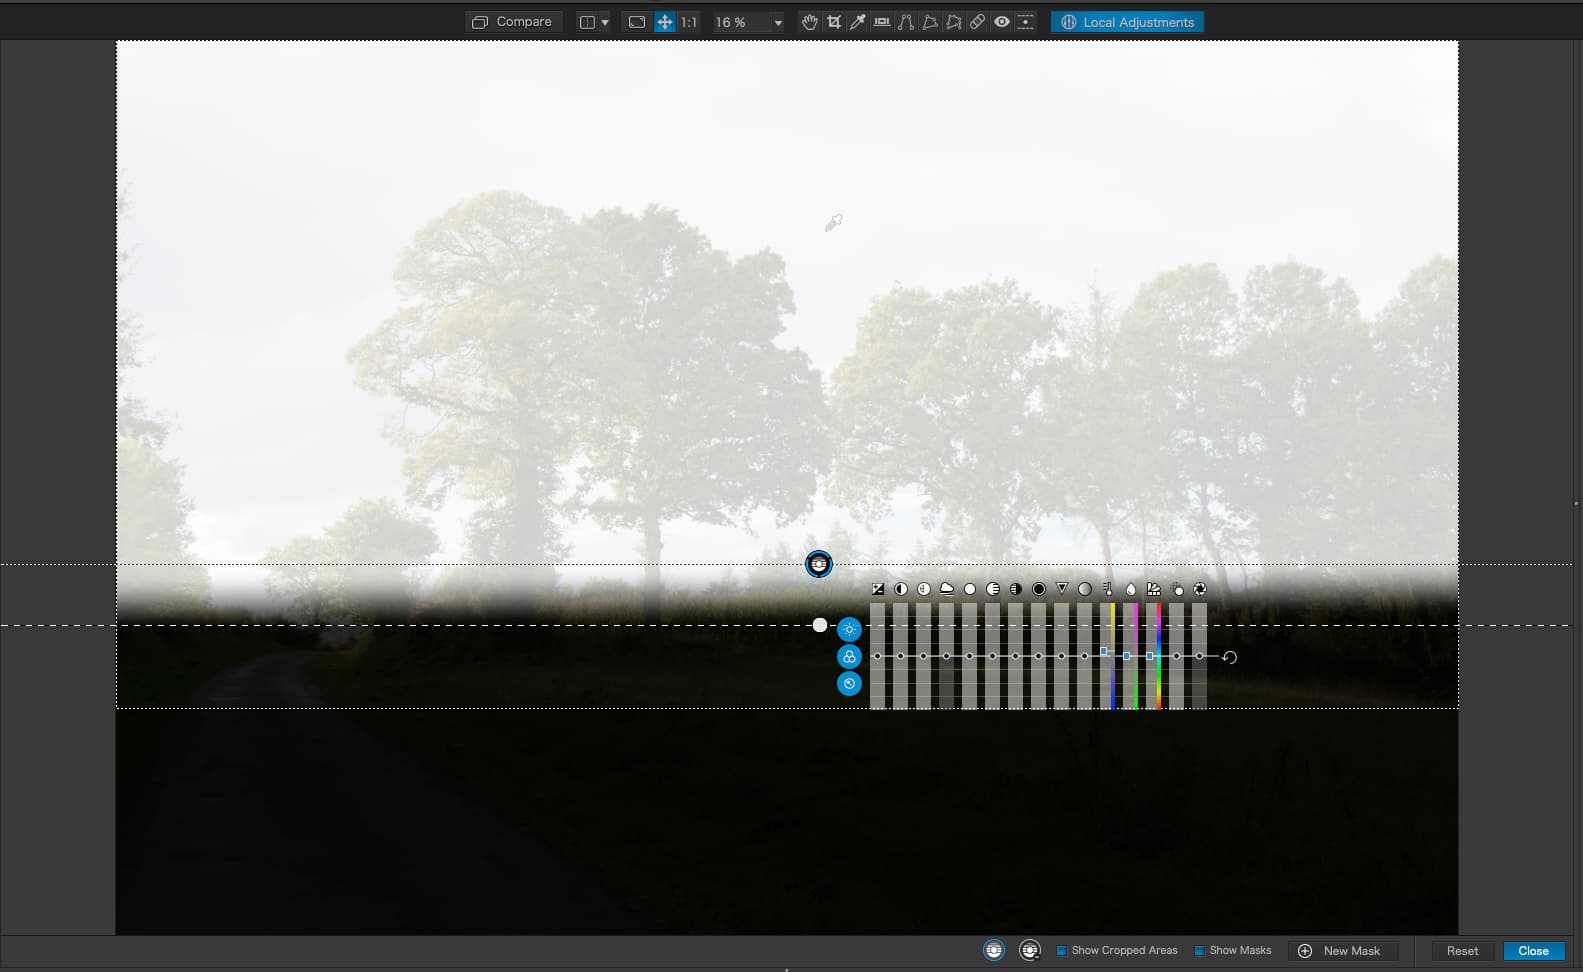
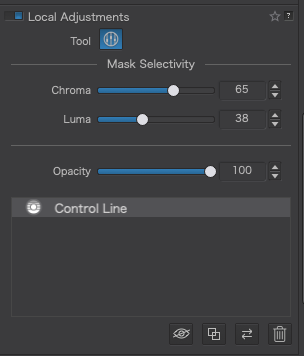
If I now set the selectivity to 100 (the most selective) the different tones in the sky become apparent and the mask starts to get too restrictive…
… which means that any adjustments I make will only apply to those parts of the sky where the mask appears lightest.
So, I adjusted the selectivity back to obtain the best possible contrast between what I want affected and what I don’t, but making sure that there is enough range to accommodate the differences in cloud tones in the sky…
Now, when I switch off the masks, I can make adjustments as I want and they will only affect the sky and nothing else but, in addition, they will not only affect the sky above the trees but between them as well…
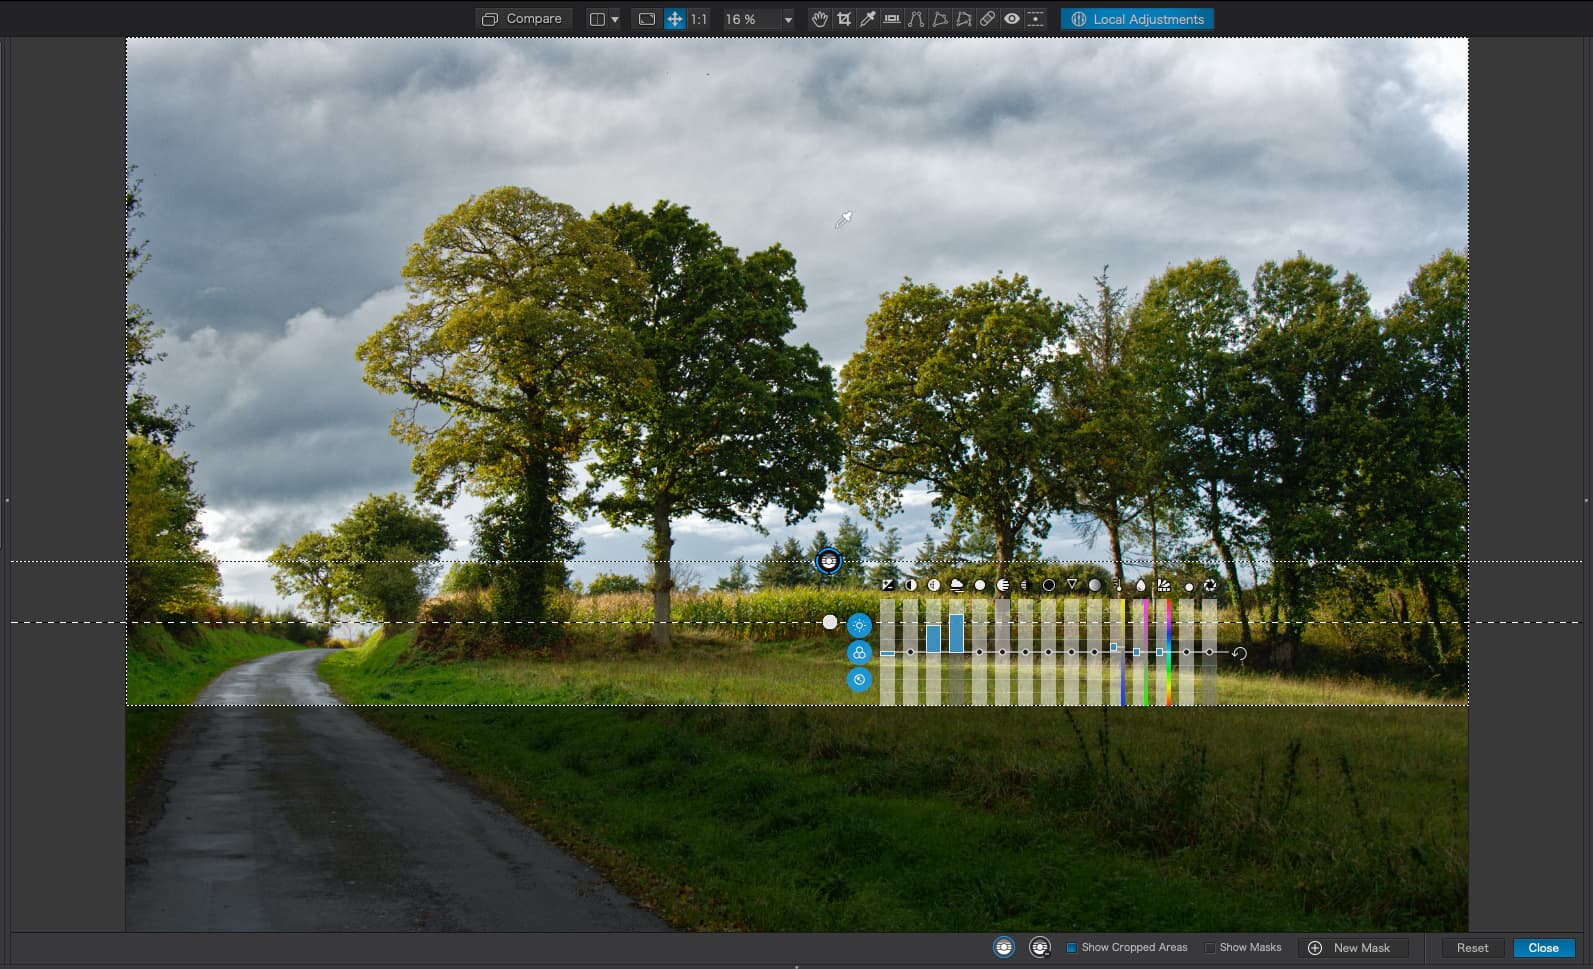
And the finished result…
So that is the basic principle of selectivity for one simple Control Line. Things can get more complicated should you need to apply multiple and/or negative masks as well but, for now, does that explain the basics?
4 Likes
That is awesome and very helpful. I get it. The negative masks is what I’m having trouble with probably because I’m just not doing it in the right order or selecting the appropriate tools.
I’ll redo your image of the sea as a tutorial tomorrow, complete with how to do the negative Control Lines
1 Like
Negative masks
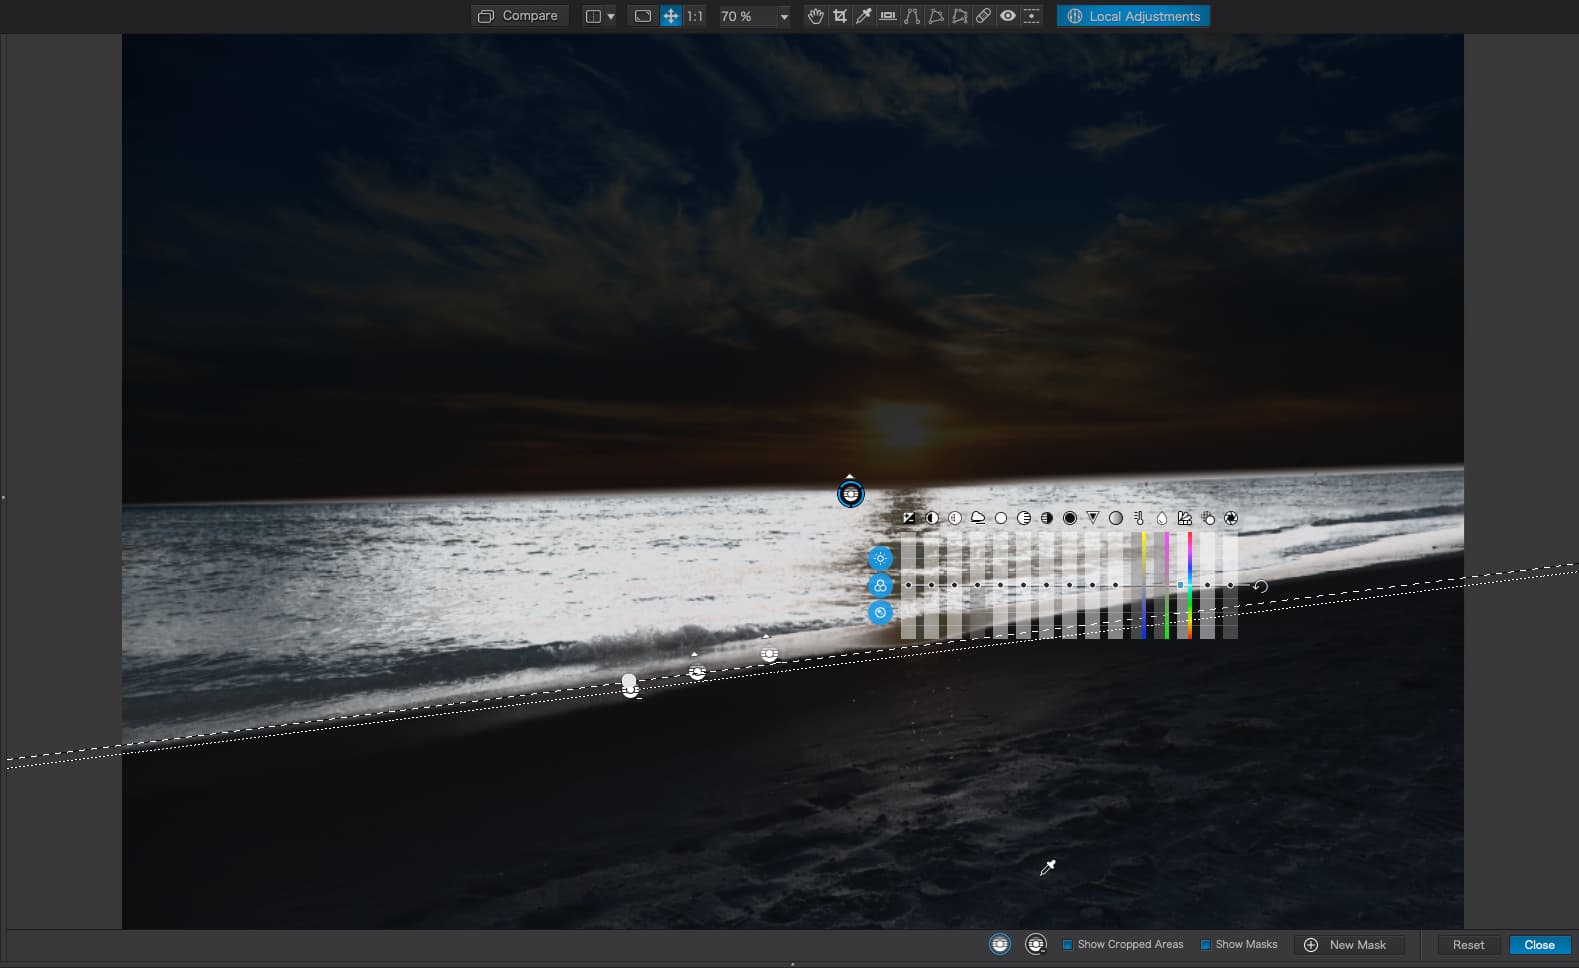
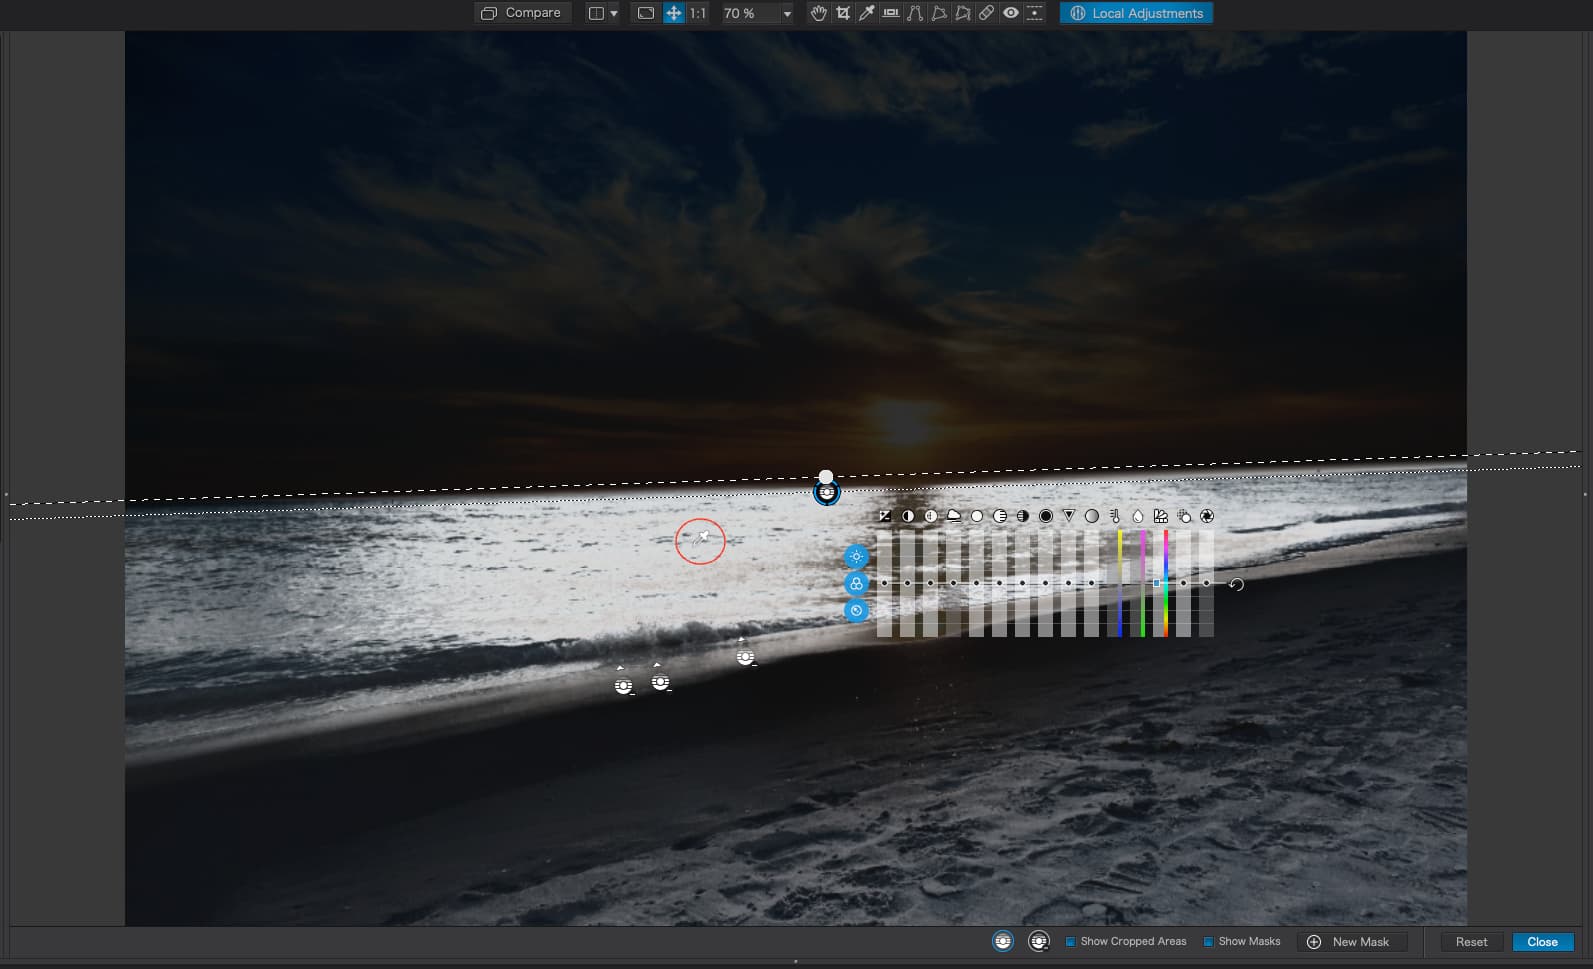
Start with your image as before, with the positive Control Line added to exclude the sky…
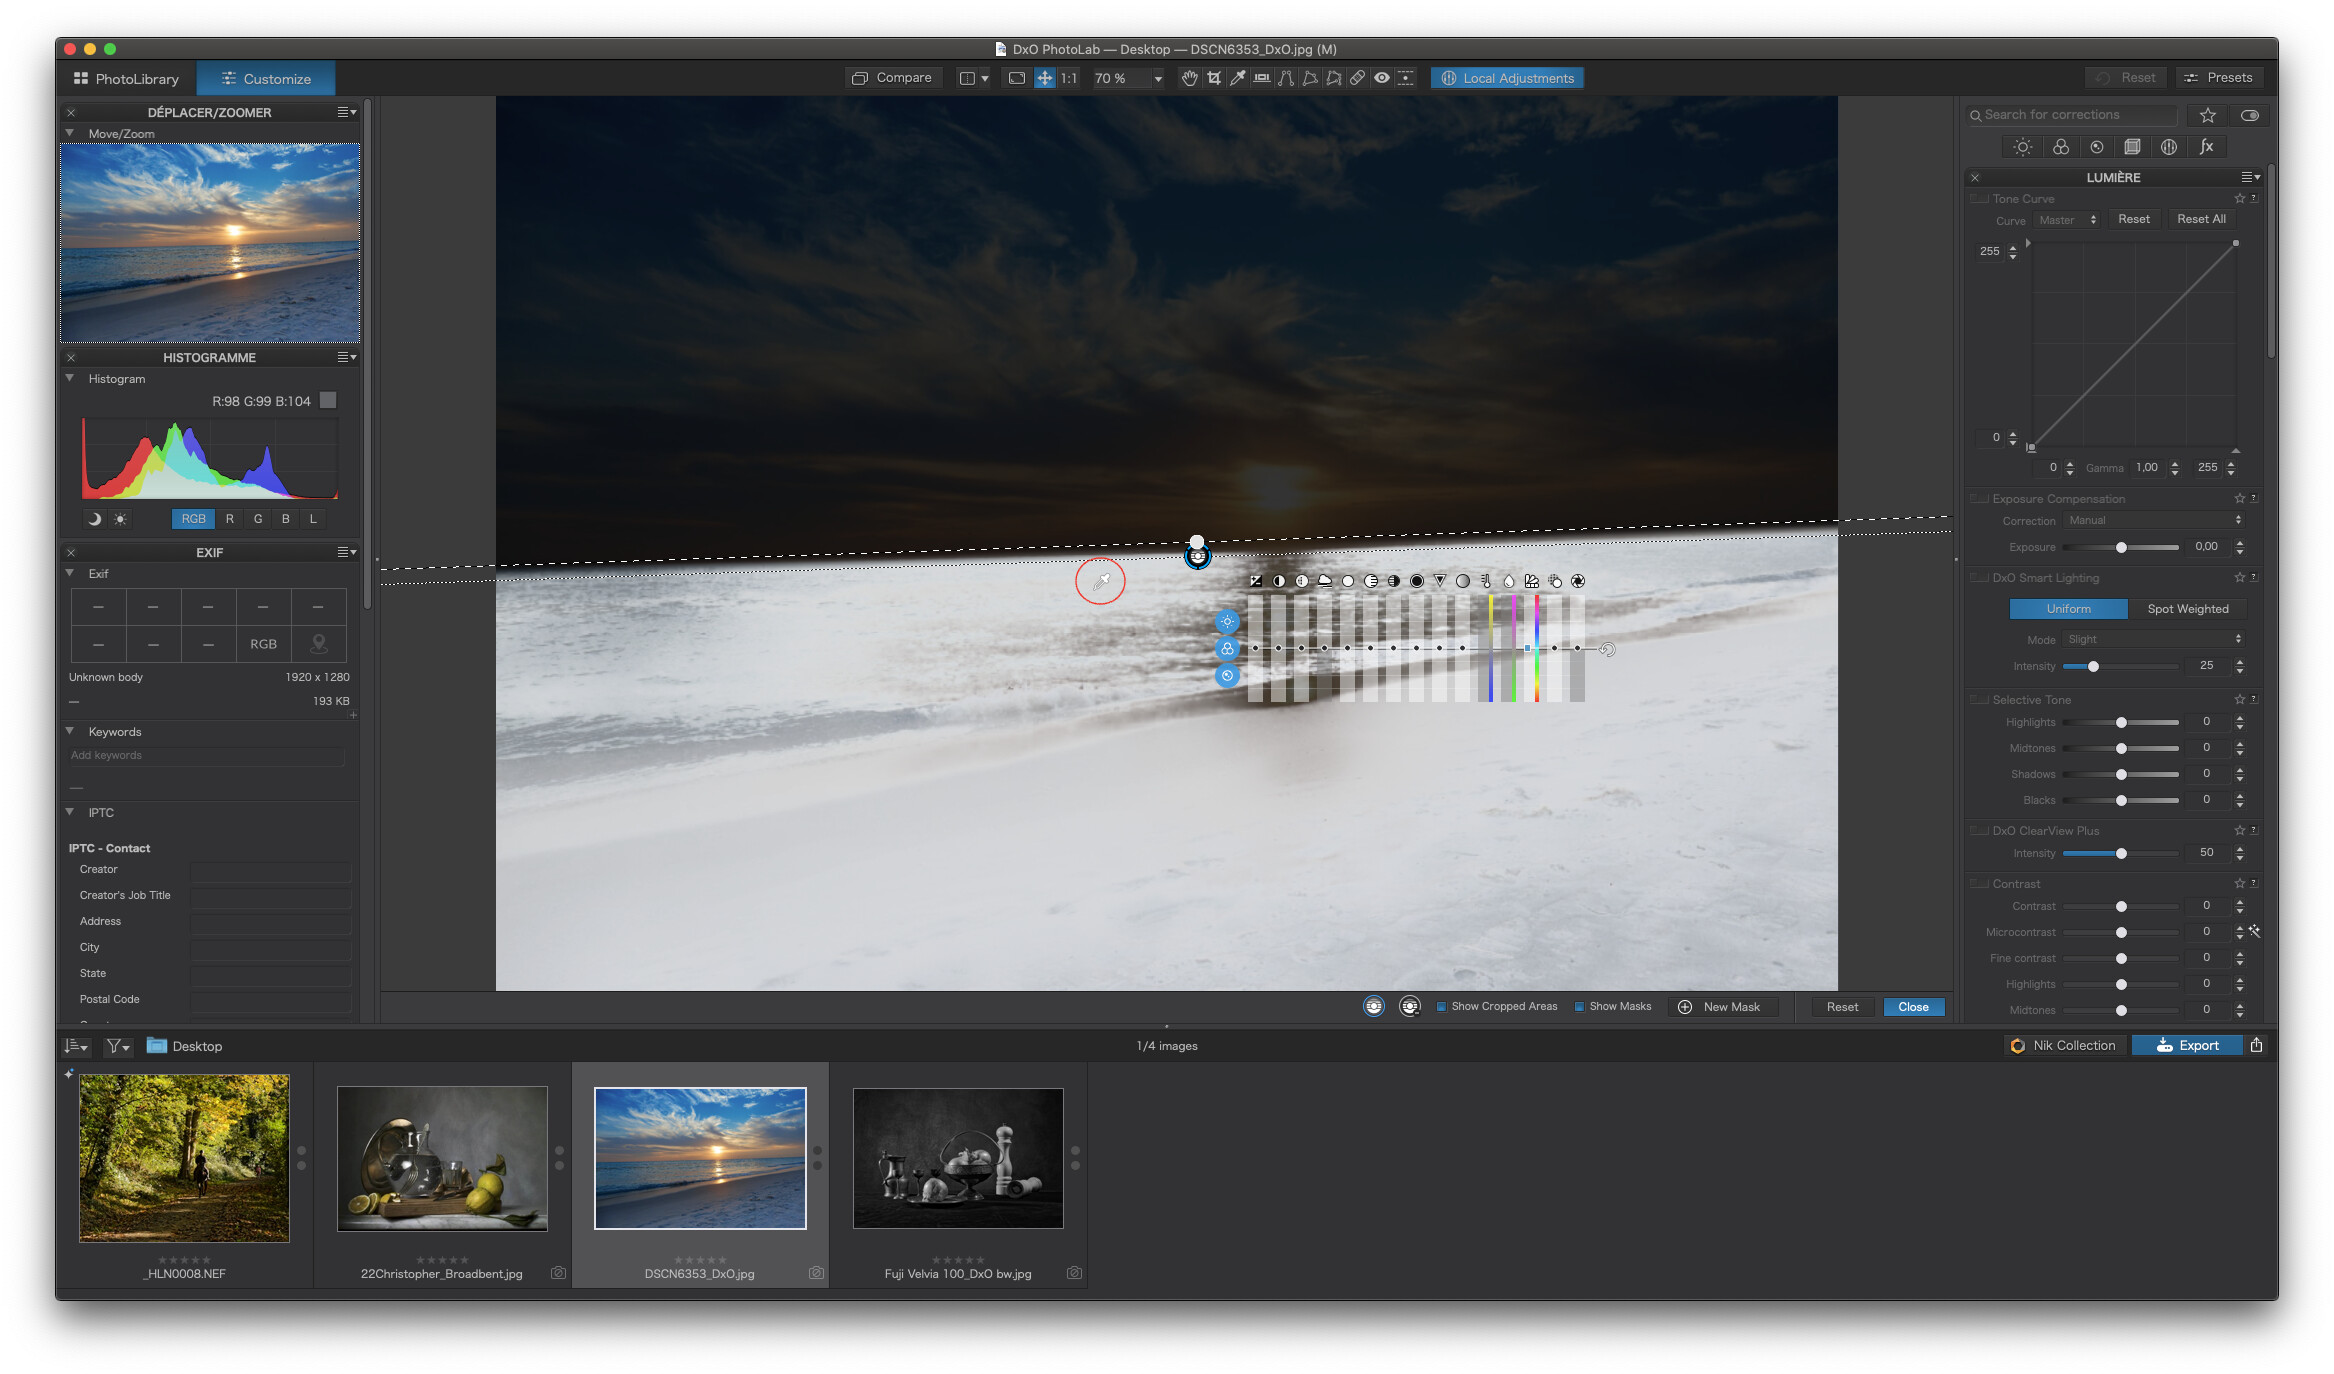
Notice the pipette is placed on the sea, in a position that made the mask over as much of the sea as bright as possible.
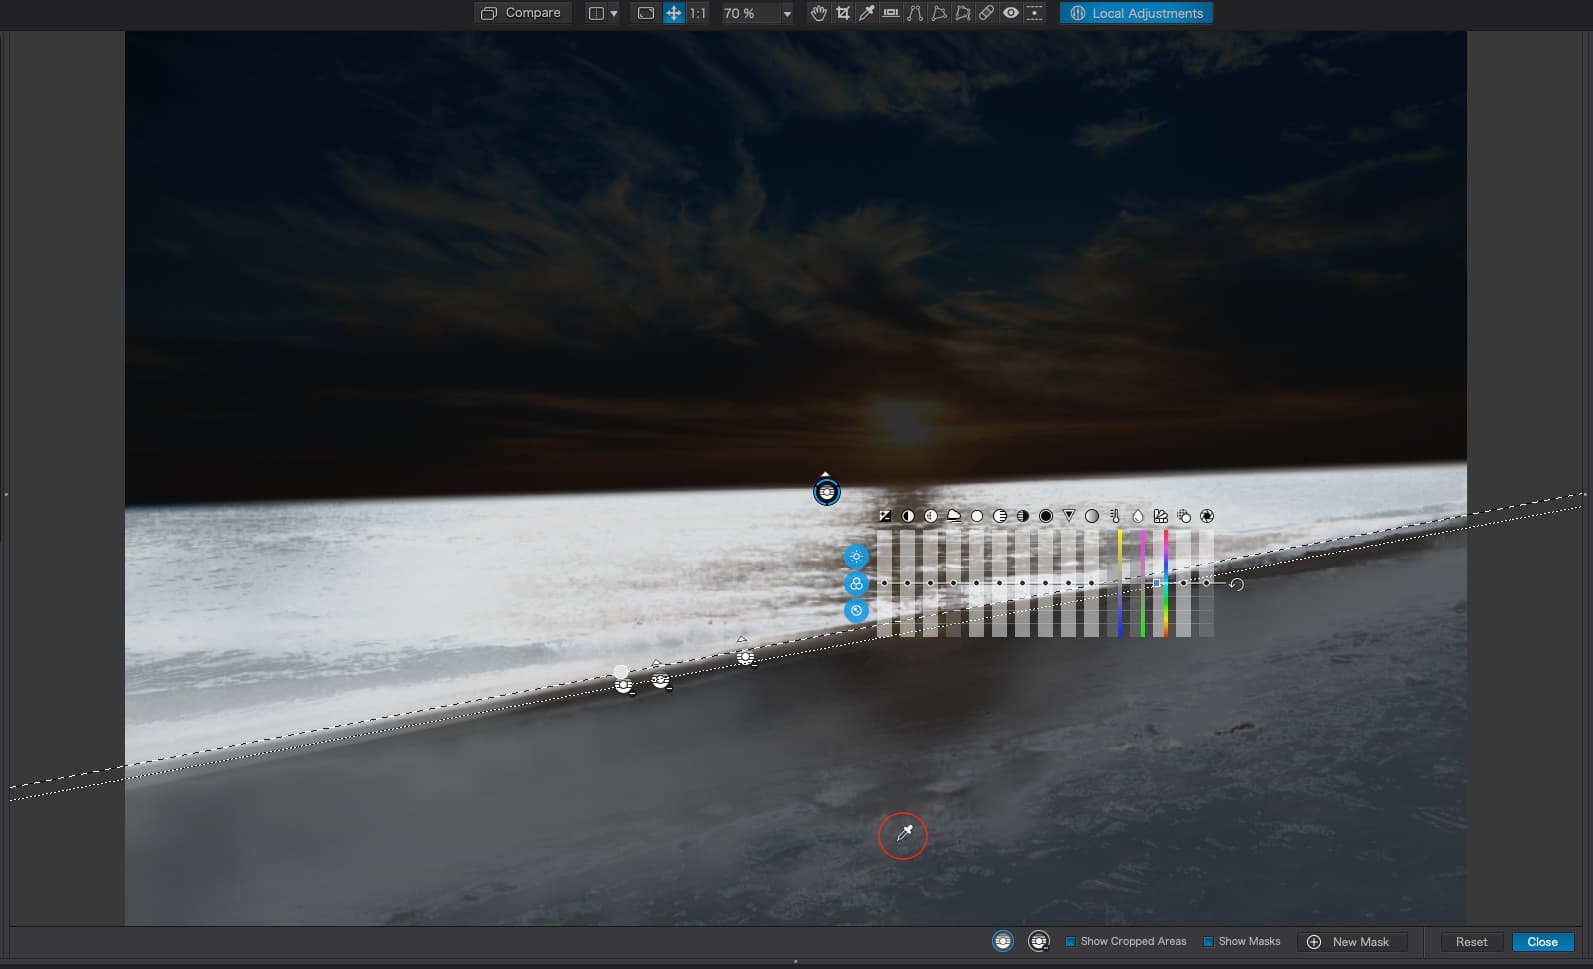
Now add a negative Control Line that excludes the beach…
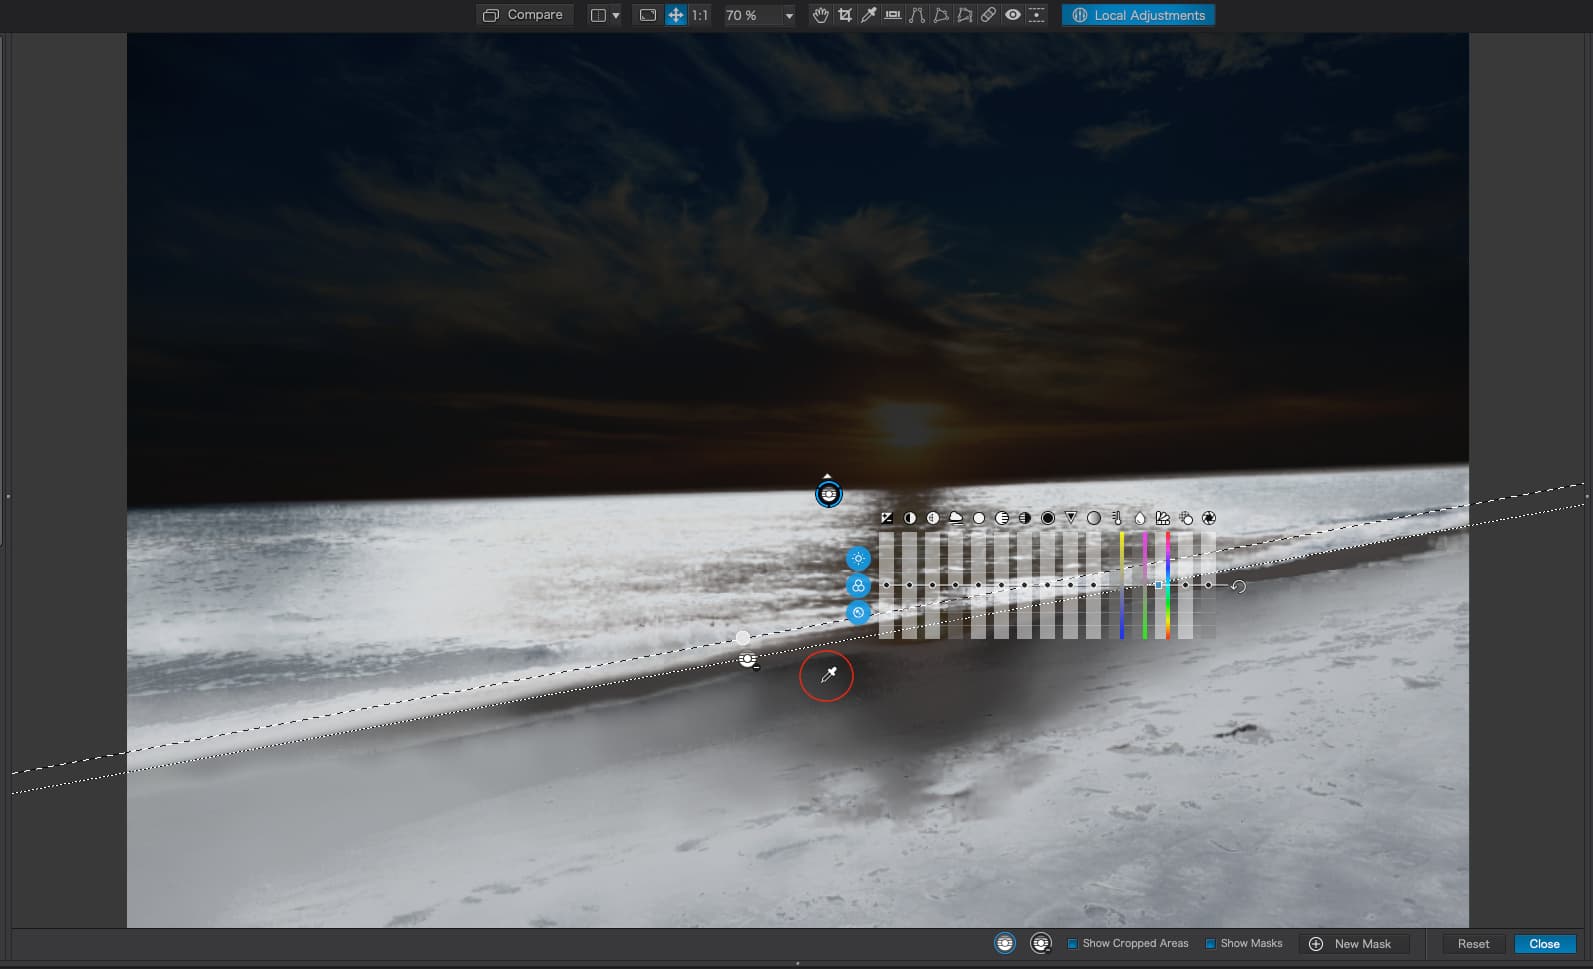
Note that this doesn’t darken the mask over the beach all that much. This is due to the various different tonalities in the beach and I placed the pipette where it would cover the most to start with.
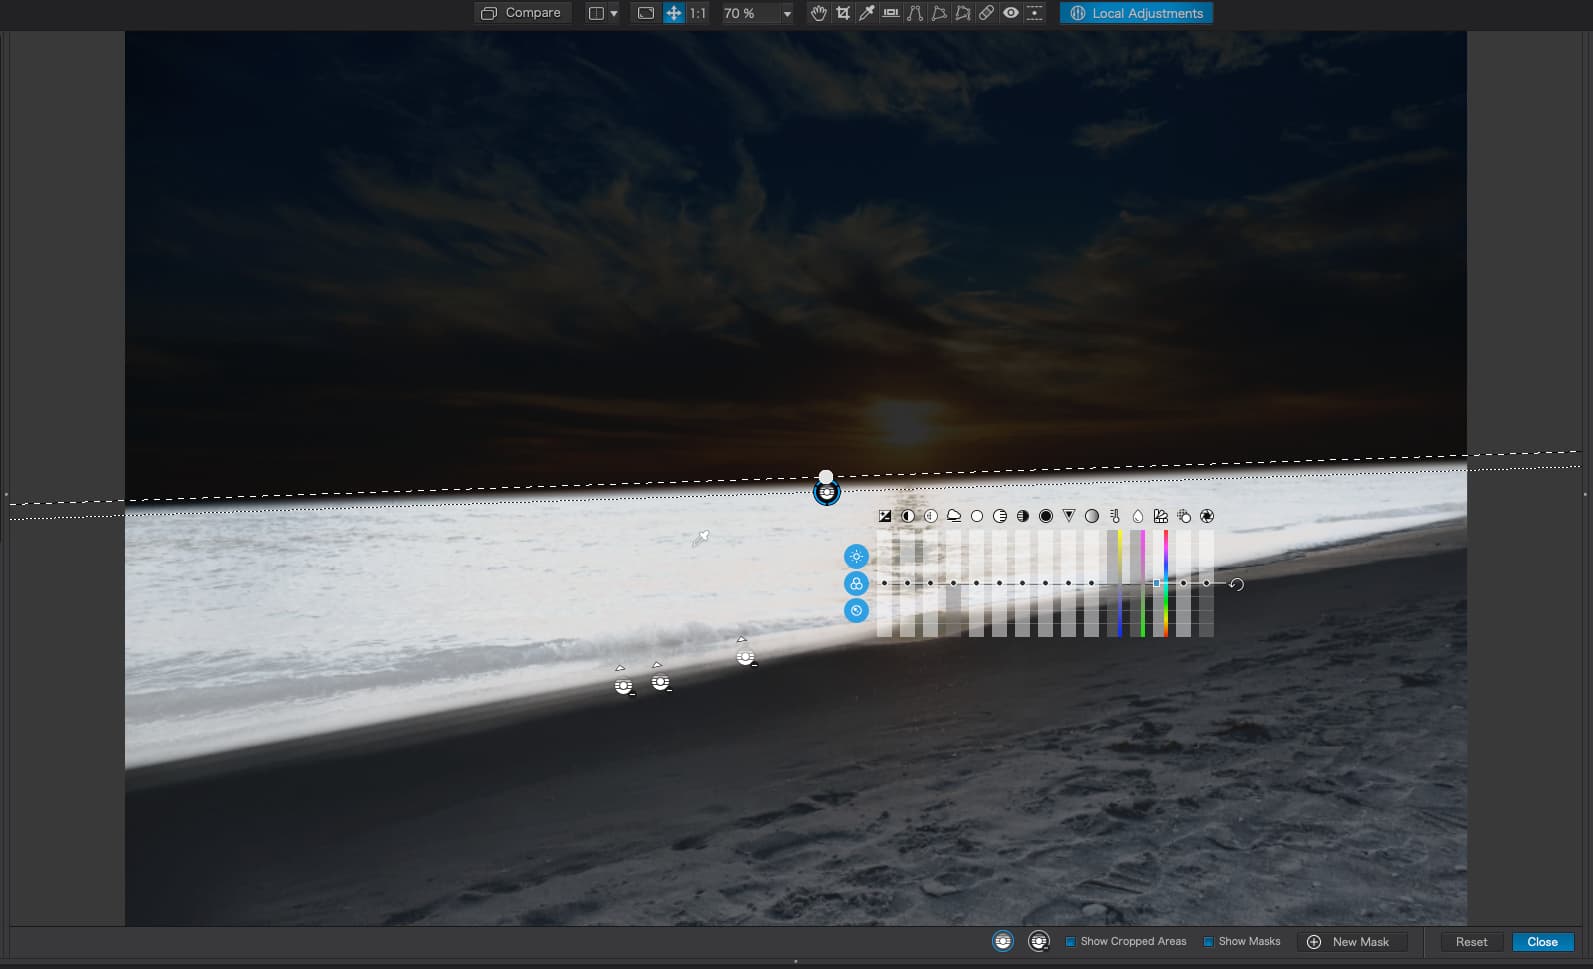
So, I now add a second negative Control Line…
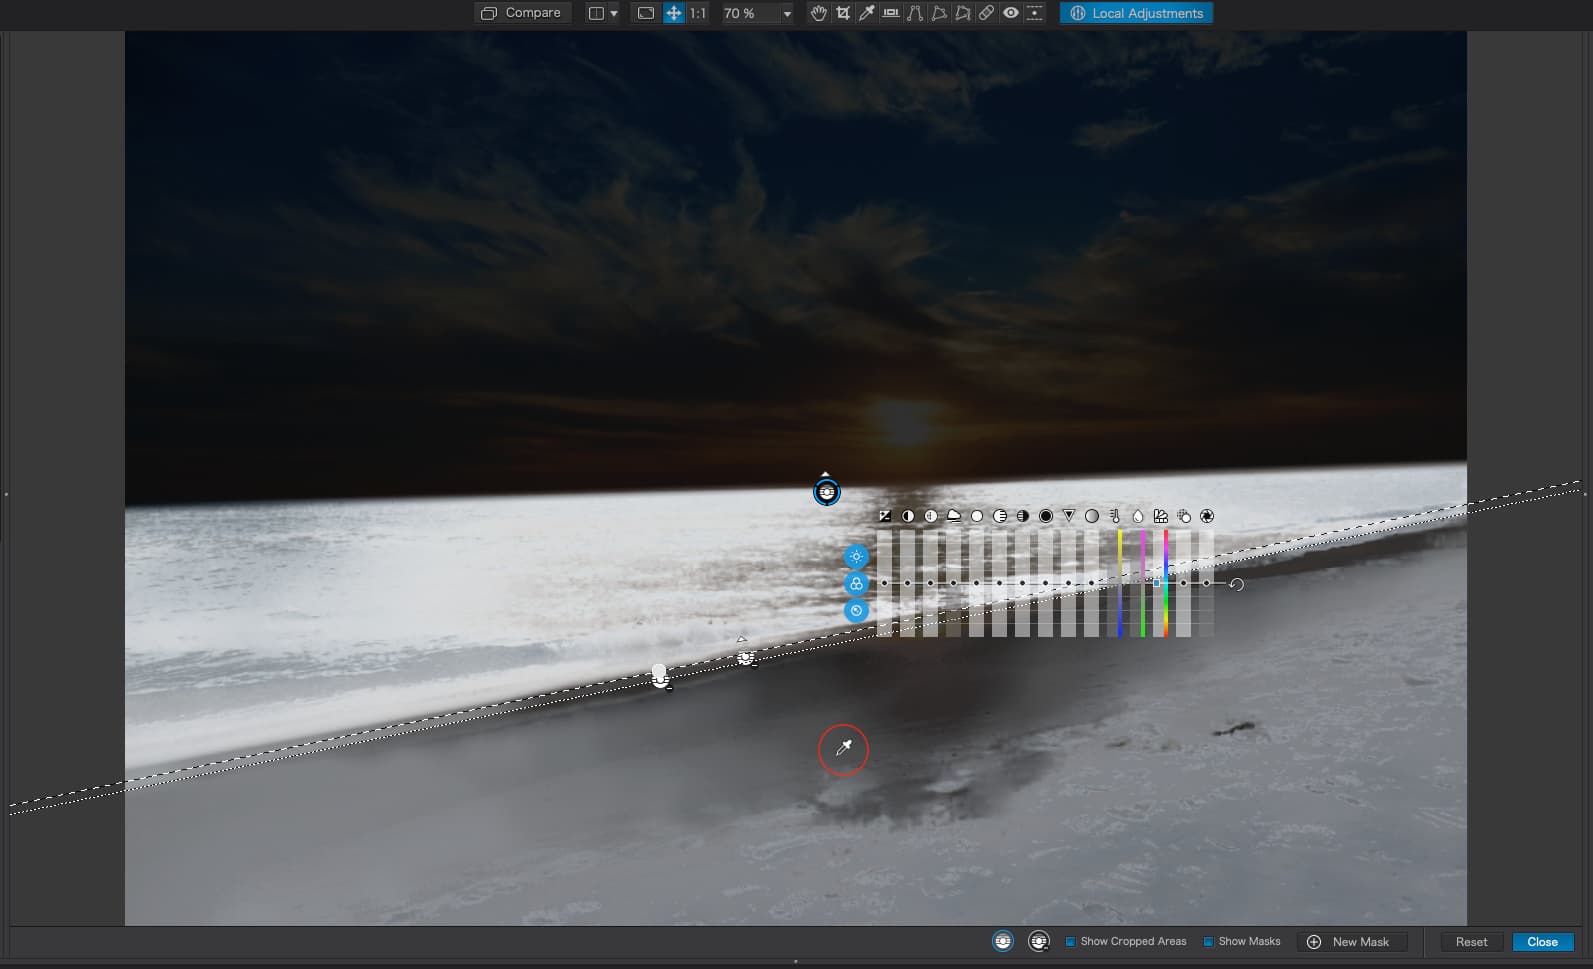
This time I placed the pipette on a different tonality to increase the amount of beach covered. Each time I place the pipette for a negative Control Line, it needs to be on the lighter areas, because these are the areas that still need negating.
Finally, another negative Control Line…
Now we are starting to cover most of the beach, even though the mask is still a bit thin.
At this point, I tried moving the pipette on the primary Control Point to another part of the sea and this seemed to improve the darkness of the mask over the beach…
But it also started to darken the mask over the sea, so I reduced the Chroma selectivity to around 15 and this then selected more of the sea…
It might help, in this instance, to add a second positive mask with the pipette on a different tonality on the sea, but I’ll leave that up to you to try that out.
I have found you really need to experiment with pipette positioning, both on the positive and negative Control Lines, in order to maximise the tonalities selected by the respective masks - place them on the brightest parts for both the positive and negative masks. On the positive, they will add in to the selected area, own the negative they will subtract from it.
As you can see from the screenshots in this post, compared with the previous ones, the mask is different, which will be down to slightly different placement of the pipettes. You really need to play with this to see just what you get with pipette positioning, selectivity and number of additional masks.
Have fun and ask if you run into any brick walls.
5 Likes
This is excellent. I really like how you explained the multiple masks over the beach. I was wondering how you covered something with various colors within the area.
I don’t have the neg control point button like you do (I have Windows) but I think I got it working!
Yes, for Windows, you need to hold down the Alt key when dragging a negative Control Line or clicking for a negative Control Point.
1 Like
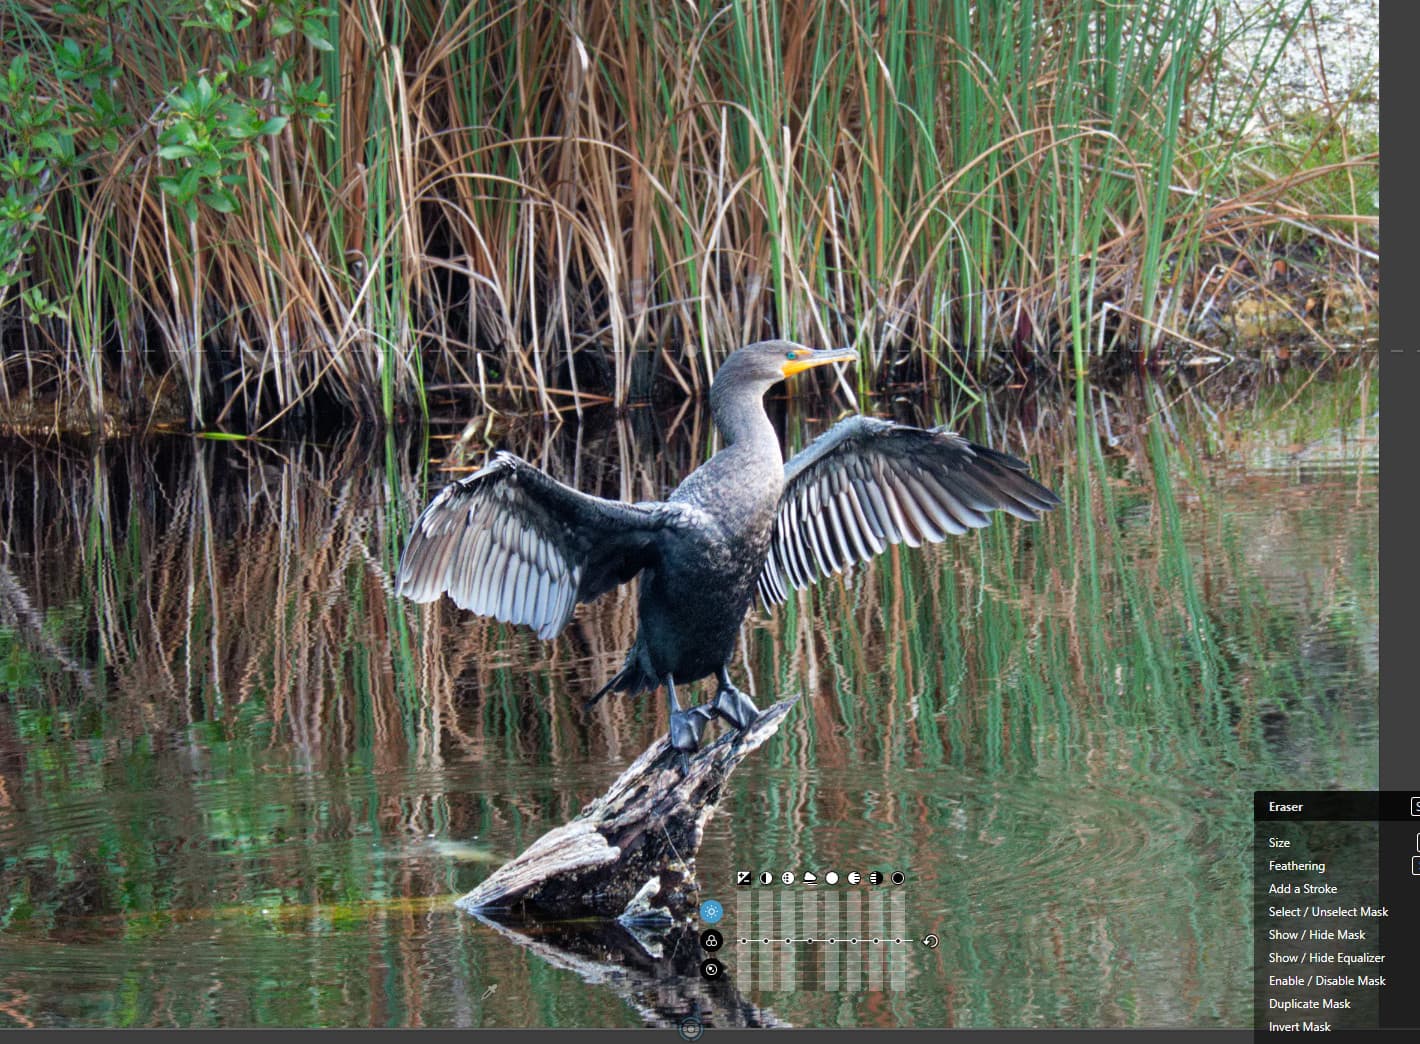
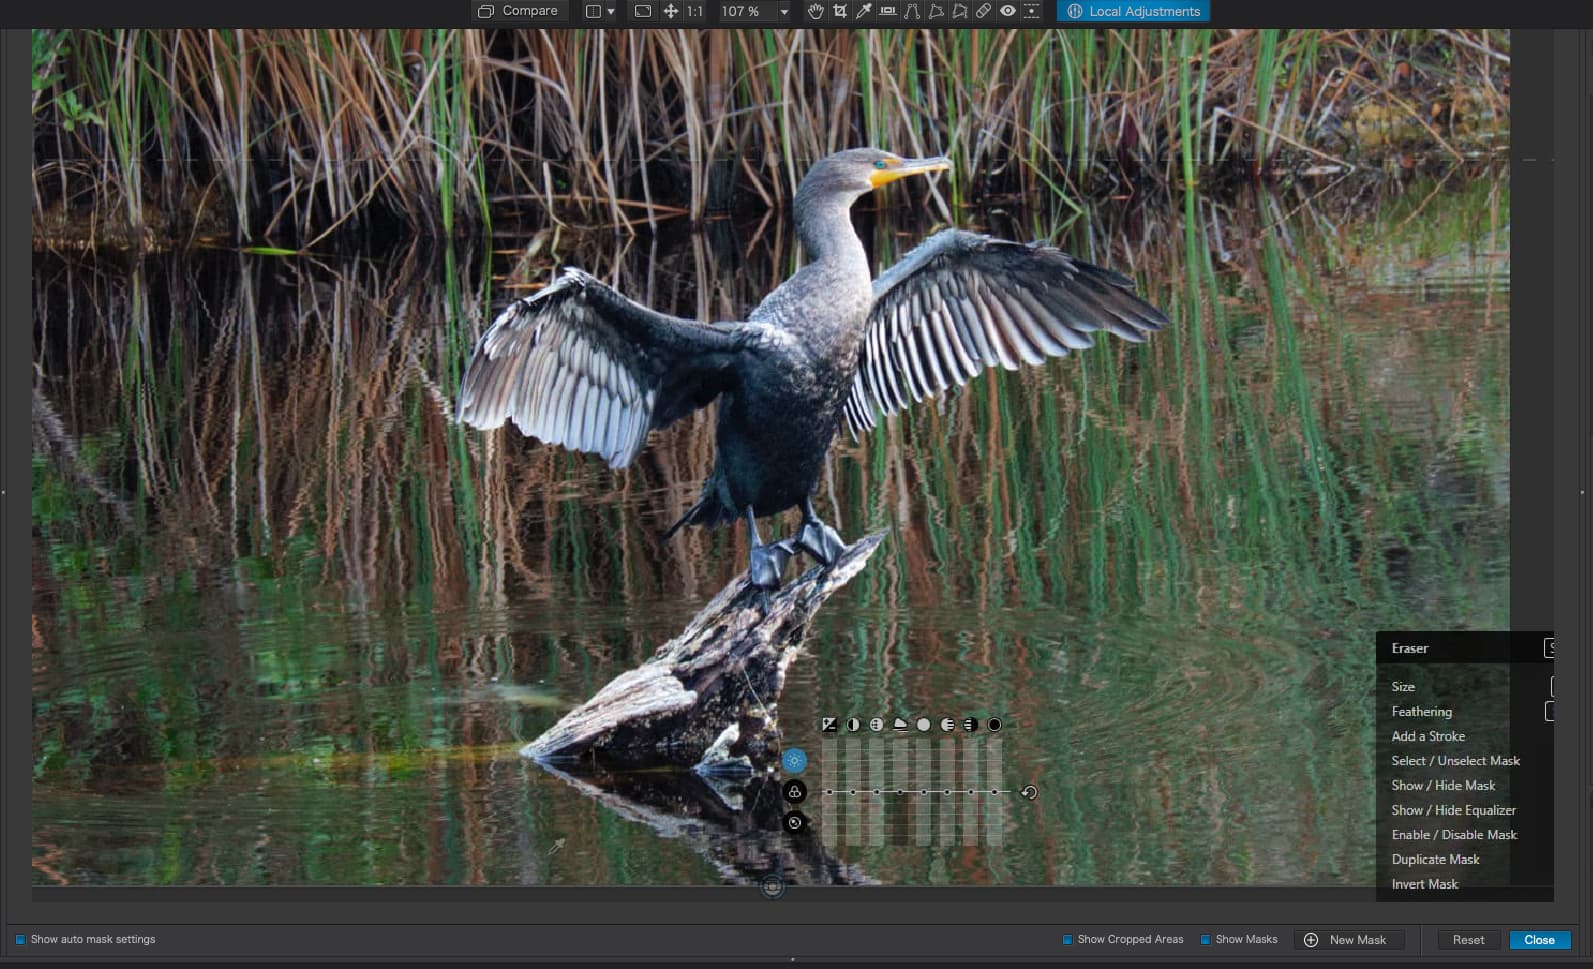
Ok. I think I’ve got that down. What about for this photo, if I want to use a control line to work on the water but not include the bird? I tried to erase the bird out but it won’t let me.
In my opinion, this will not work since the water is nowhere near a single tonality, either luminosity or colour. It is far too complicated.
What exactly do you want to do with the water?
I wanted to darken everything around it. The pic is just so busy! I sort of got it to work. I did a control line and then put negative control points all over the bird. I could not figure out how to erase out the control line over the bird (not sure if that’s possible). I darkened everything but I’m still not real happy with it…
Actually, what you did was spread a gradient filter over the image with only the very bottom couple of millimetres being fully affected. In any case, a Control Line is totally inappropriate for this kind of subject.
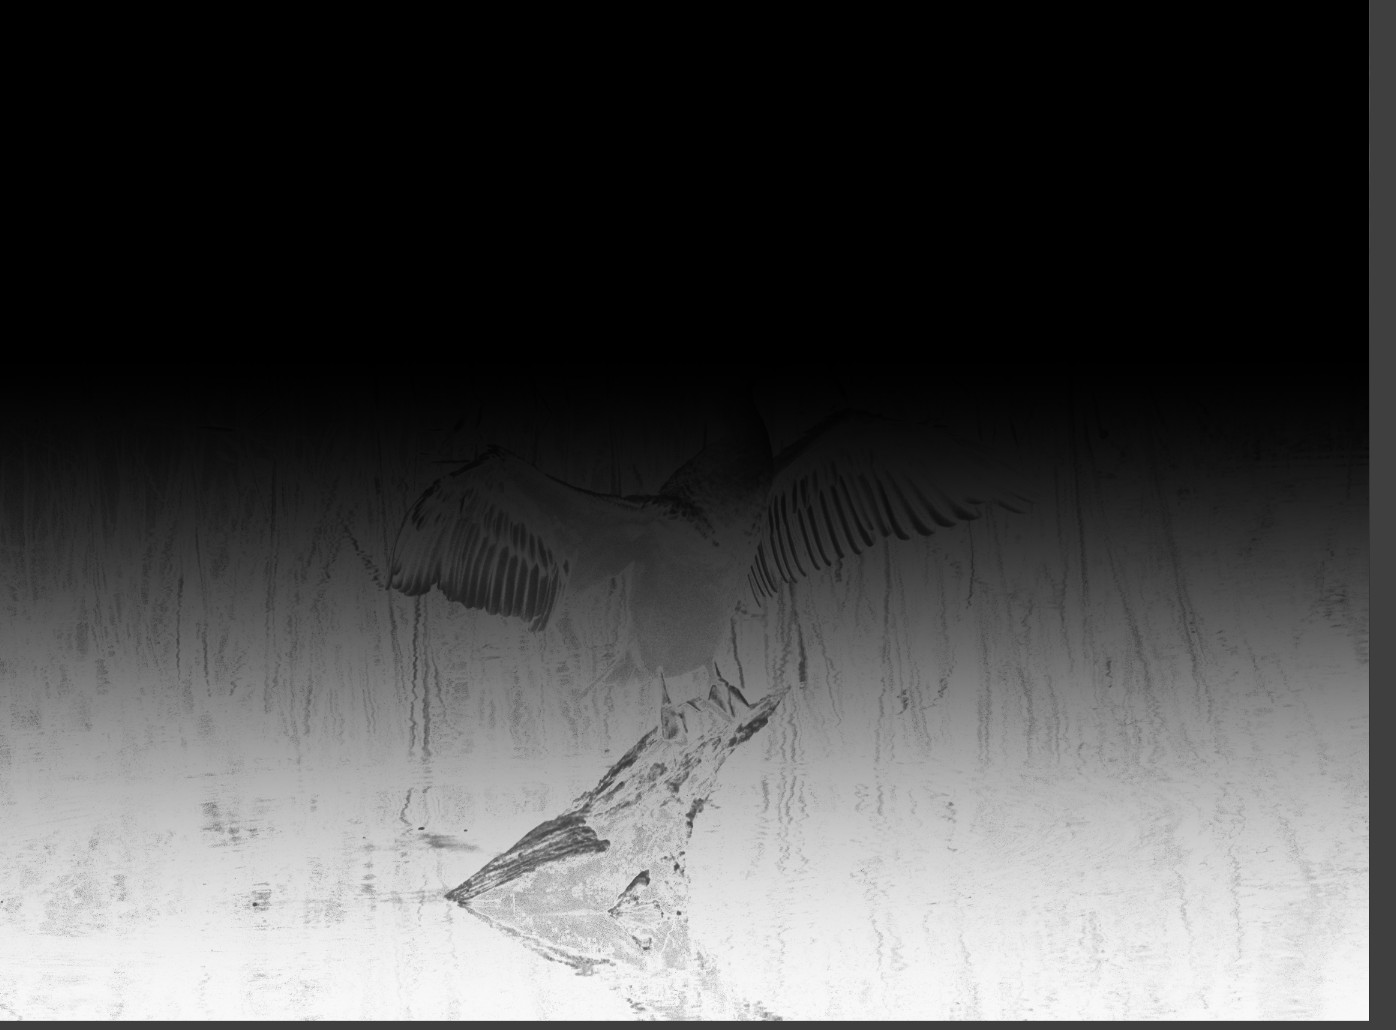
Here, I used an Auto Mask to cover the bird and then inverted it so that it covered everything except the bird, then reduced the exposure…
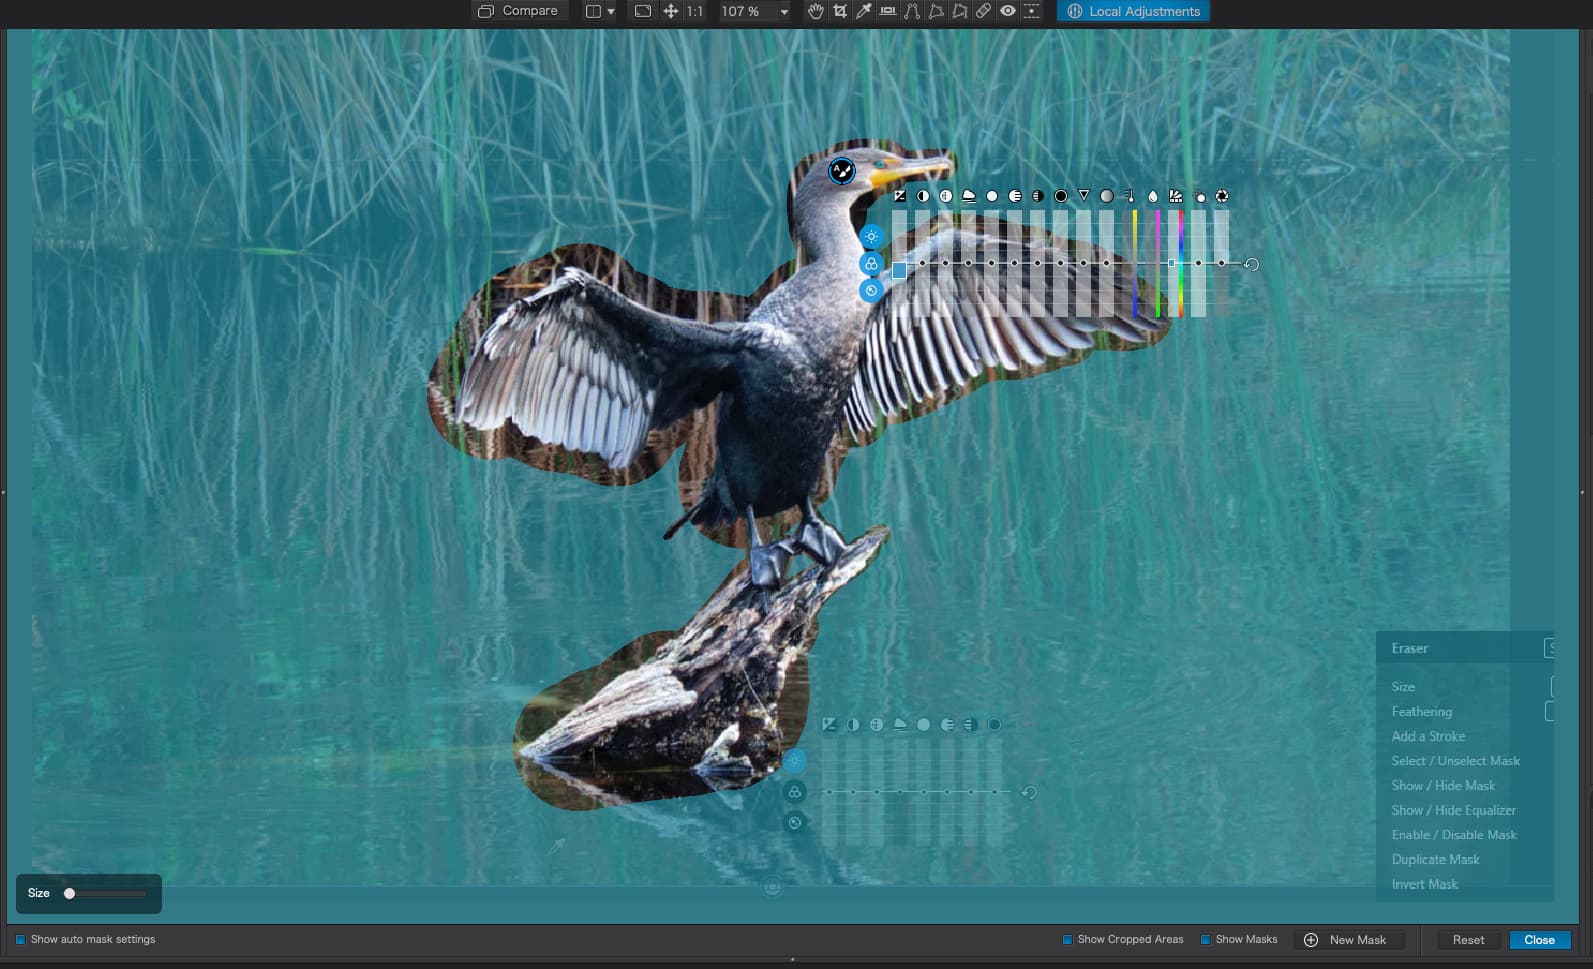
1 Like