Someone else had a question about printing and it reminded me of some of the reasons I don’t use PL3 for printing.
After doing a lot of printing, I learned one really useful trick: I label my photos so that I know the image name, date/time I printed it, the “version” as well as the paper and the ink I used. These are all important to track.
I print on 13"x19" paper with 1/2" borders for a 12"x18" print. However, the label is placed in the border.
The way I do this in Affinity is to create a 13"x19" image filled with white and then center my 12"x18" photo on it. I add the label, using the full text capabilities of Affinity (including the ability to do bold and italic). The label is placed in the border area, but above the margin that the printer would enforce (e.g. if the printer requires a .2" border, the label lies in the .3" area above that.
Then I tell Affinity to print the image at 100% size. Done.
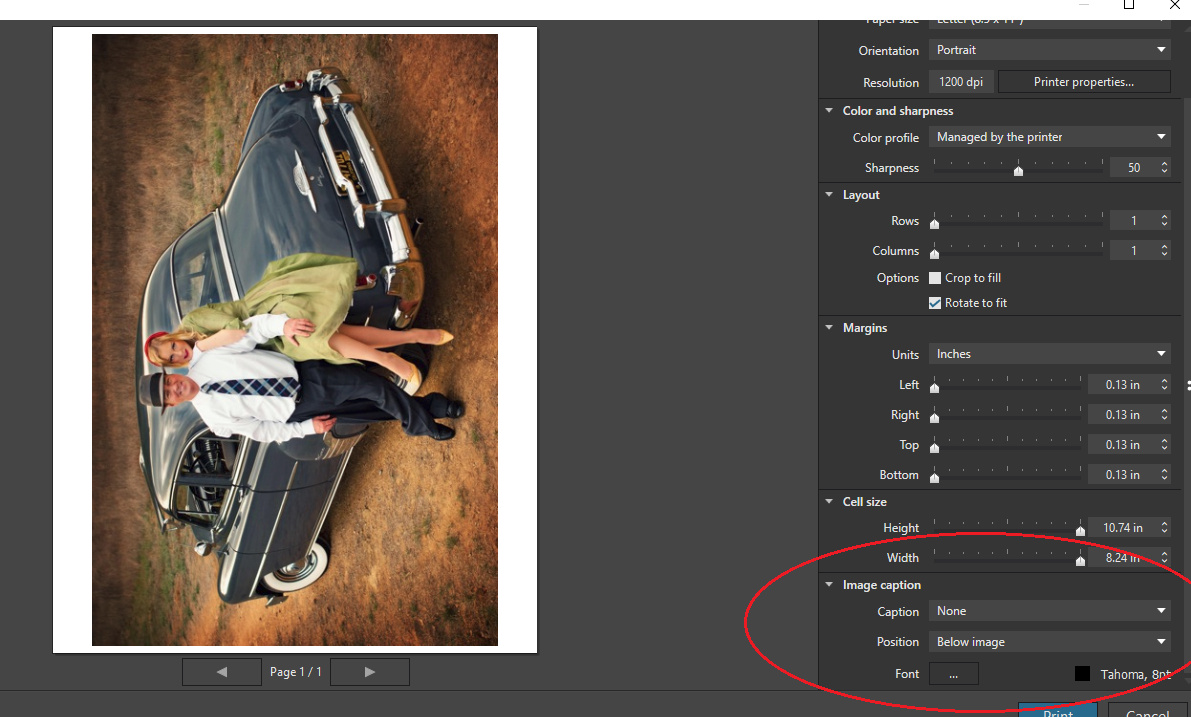
What PL3 lacks is the ability to:
Create a custom label
Place the label in the border area
There is no work-around for the first problem. I can’t use any of the pre-defined labels and that ends the usability of PL3’s printing. They might as well not include it.
It might be possible to do the second by reducing the bottom border size by the amount the label would use. Unfortunately, this depends on the font used and its point size. One could opt for a font and size, do a test print and measure the amount of space consumed by the label. It would be more convenient if PL3 would report the size.
There are a few other problems I’ve noted:
When working in inches, I don’t get reasonable sizes (with half-inch margins, I can’t get an 12"x18" image—I get 18"x11.95").
If I set the borders such that the image doesn’t fill the available space (say, .15" borders for 13"x19" paper and a 12"x18" image), I can’t control where the image lies within the available space. It isn’t centered—it’s aligned to the top/left borders.
There’s a nice sharpness slider, but there is no way to evaluate the effect of the slider on the print other than printing. I suppose one could set this to 0, and use the other sharpening features of PL3, but haven’t tested this.
If I have some standard setups for printing, I don’t see any way of saving these as templates.
I mention all this in case the staff takes a look (and they supposedly read postings). None of this is a big problem for me because I don’t print in PL3.
If anyone feels like appending any other missing features, feel free to use this thread.
I have zero issues printing, setting margins or remembering what I printed. You actually have a lot of options. Labels as I mentioned above. You can add a keyword “Printed” or a rating. You can move them into a directory named “printed”. You can use a txt file, etc.
Your ability to select margins in increments is likely tied to your printer or its driver. Sharpness slider? Look at your workflow. Final print is probably not the time to be making these adjustments, as I believe you run the risk of over processing your image. Again, the sharpness slider (in the print dialog) is a carry over from your printer driver.
You can also submit feature requests if the above doesn’t meet your needs.
Rick, thanks for taking the time to respond and I apologize if I was unclear. I am aware of all the printing options and ran through them all when writing up my post. The caption feature has three options, none of which work for me. That ends the usefulness of PL3’s printing for me. I need to be able to put in custom text.
Yes. For what it’s worth Photoshop, Affinity, Adobe PDF and other programs allow me to send the image at 100%, ignoring any printer margin settings. This is for people who “know what they’re doing” and is useful when you need precisely sized printing. PL3 has a minimum size for the margins–it’s a less flexible model.
This by itself, though, is not an issue. If I knew precisely how tall the caption the caption text was, I could adjust the margins to compensate so as to place the caption within what would look like a 1/2" margin.
Sharpening is tied to print size. In most systems (e.g. Photoshop and Affinity), one resizes and then does the final sharpening. PL3 has no resizing option. Therefore, they have to provide sharpening in the print dialog. The problem is that there is no way to inspect the results of sharpening other than by printing. Also, most sharpening controls (even the ones in PL3), have more than one slider.
This is incorrect. I just double-checked: my printer driver has no sharpening option, nor do I get a sharpening option anywhere except in PL3.
I am aware of this, My workaround is satisfactory. I am unlikely to ever bother printing from PL3. I know the staff reads these posts and I thought they might get some value from my comments–it’s fine with me if they choose to improve printing or to invest their time on other features.
Based on this discussion, It just occurred to me that a “resize” feature might be worth adding to PL3. Reize would be a transformation applied to the RAW (just like any other adjustment). I could create different virtual copies in different sizes, for example. This would give me the full power of all of PL3’s sharpening tools as well as the ability to inspect the results. This would not only benefit printing, it would benefit image exports.
Thank you for the detailed feedback. The Print module is going to be improved but not in the near future as a more important features are implemented now.