Let’s start with a definition of what dynamic range is in terms that are of interest to the average photographer…
Dynamic range is the number of stops between the exposure required to see detail in the deepest shadow and the exposure require to hold detail in the brightest highlights.
To start with, you need to decide on what ISO you want to use - one that is not too slow if you are going to handhold or not too fast that it gives you lots of digital noise.
If the world were a perfect place and everything stood completely still while we took a picture, 100 ISO is absolutely ideal, especially for the kind of landscape shots you seem to favour. But, if necessary, you can increase that speed quite considerably, knowing that PL4’s noise reduction can get rid of that excess noise, even at relatively high ISOs. Unless I am using a tripod, for “wandering around” daytime photography I tend to use 400 ISO.
Apart from generating more noise with higher ISOs, another thing they do is to limit the dynamic range (difference between darkest and lightest parts) that you can record without losing detail.
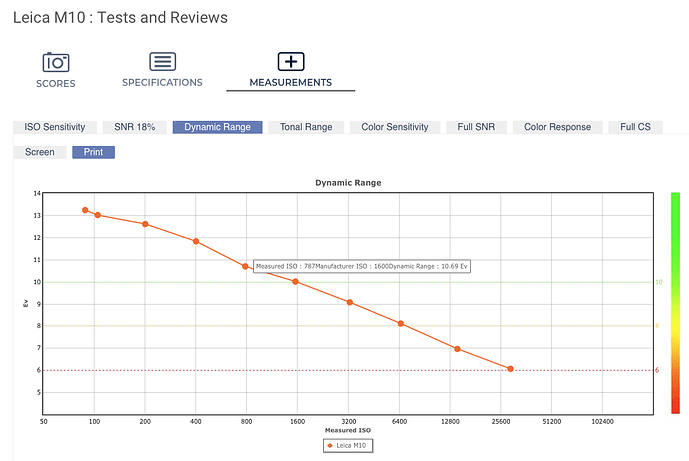
This chart shows you that, with your camera, you have got as much as 13 stops of range at 100 ISO but, if you were to use 25600 ISO, you would only have 6 stops of range.
Why does this mean?
Well, if you are shooting against the light, you are going to need as much range as you can get, in order to neither block the shadow detail or blow the highlight detail; so you are going to have to keep the ISO as low as possible, given the light available.
However, if you are shooting with the light behind you, or in diffuse light, you could possibly get everything into 6 stops (Fuji Velvia 100 transparency film is only capable of 5 stops and is a firm favourite of large format landscape photographers) so, if necessary, you can raise the ISO and still get everything in.
So, let’s take the kind of shots you have been showing us. The earlier ones were taken against the light but, if you were using a tripod, you could safely use 100 ISO, unless you wanted to avoid subject movement blur. This then allowed you to profit from the maximum dynamic range of your camera and take “HDR” shots in one frame rather than having to bracket and blend two or three pictures afterwards.
Now to discuss what happens when you meter a scene.
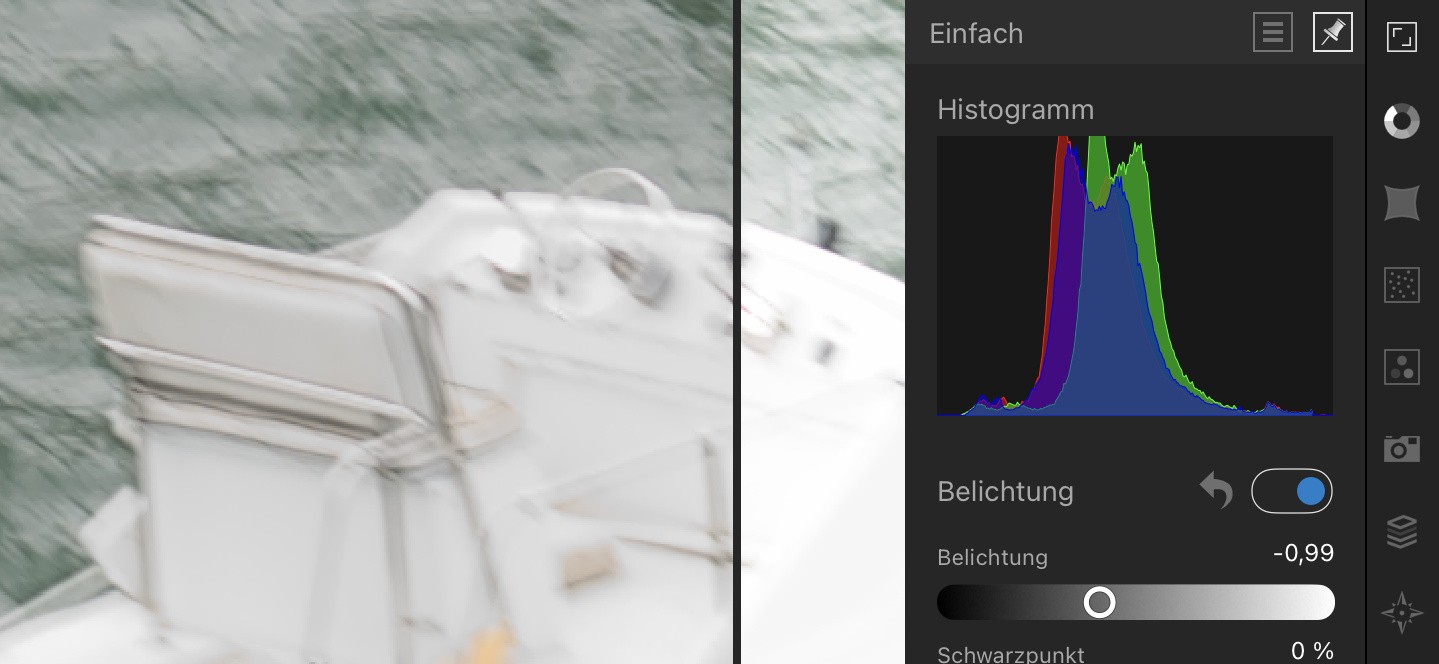
All light meters, including those in cameras, try to make the exposure an average 18% grey; not black, not white, not even mid-grey.
When we spot meter this white van
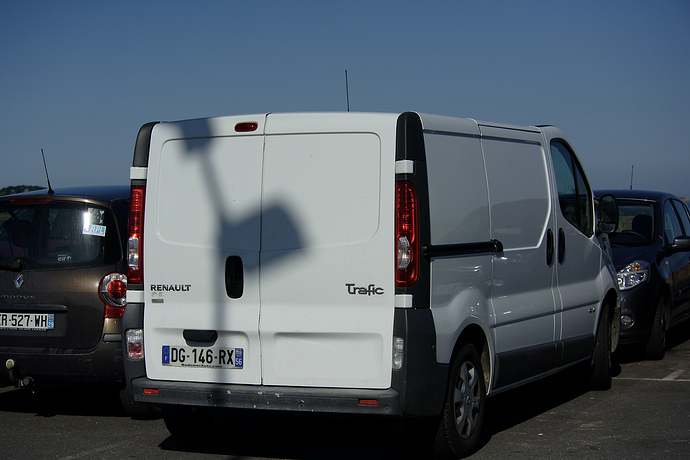
… it comes out a mucky grey.
Now, because we found out that your camera can over-expose by up to 2 stops without losing detail in the highlights, we can tell the camera to deliberately over-expose by those 2 stops
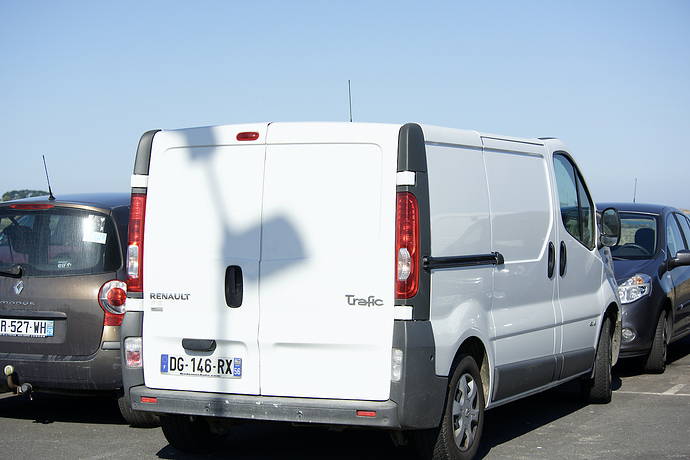
… which then gives us a properly white van with the detail of the panels still visible in the doors.
Which is why we advise you, in the case of high contrast scenes, to spot meter the brightest part and add two stops. On my camera, if I set the exposure compensation dial to +2, the metering will then tell me the right exposure without having to add the 2 stops on afterwards.
Am I going too fast? Let’s take a break there and you can come back with questions if you need to.