I assume you use these values in the M-mode.
George
I assume you use these values in the M-mode.
George
Indeed. I only use aperture priority when I’m trying to shoot stuff that is not important.
The amount of “stuff” I want to remember is becoming overwhelming. What you wrote makes sense, but I didn’t think to do it until now. Thank you again! Perhaps when someone buys something like Film Pack, it would be nice if these options were automatically added to the PL5 options, or at least have a question so someone could select it. Who knows what other benefits I’ve gotten with Film Pack 6 that I’m oblivious to, since I simply open PL5 for editing. At a minimum, that small “+” sign could be programmed to blink, to attract attention.
I will have to think about this, but it’s an easy choice for me to change from average metering to center-weighted (like I automatically used to use long ago), and now that I’m no longer afraid of high ISO speeds, I will turn on auto-ISO as well.
I will need to think about this. In the past, I was burned several times by accidentally leaving my camera on spot-metering. I think that for my limited memory when busy, it will be safer for me to leave the camera in center-weighted. If I was as careful as you, this would not be an issue, but I try to leave my camera with settings such that I can quickly pick up the camera and grab a shot without thinking too much, and expect it to be at least “reasonable”. Nowadays I ALWAYS have to remember to push the back button for focus, but all my Nikons are set that way, so it’s getting to be natural.
That makes a lot of sense to me. If I’m carefully taking a specific photo, it sounds “obvious” in a way, but if I’m photographing scenes that are rapidly changing, such as sports, or animals, it’s one more thing to have to remember.
I will post one more photo here, in a separate response. It’s as close as I could get to a carefully set-up, composed, and exposed image.
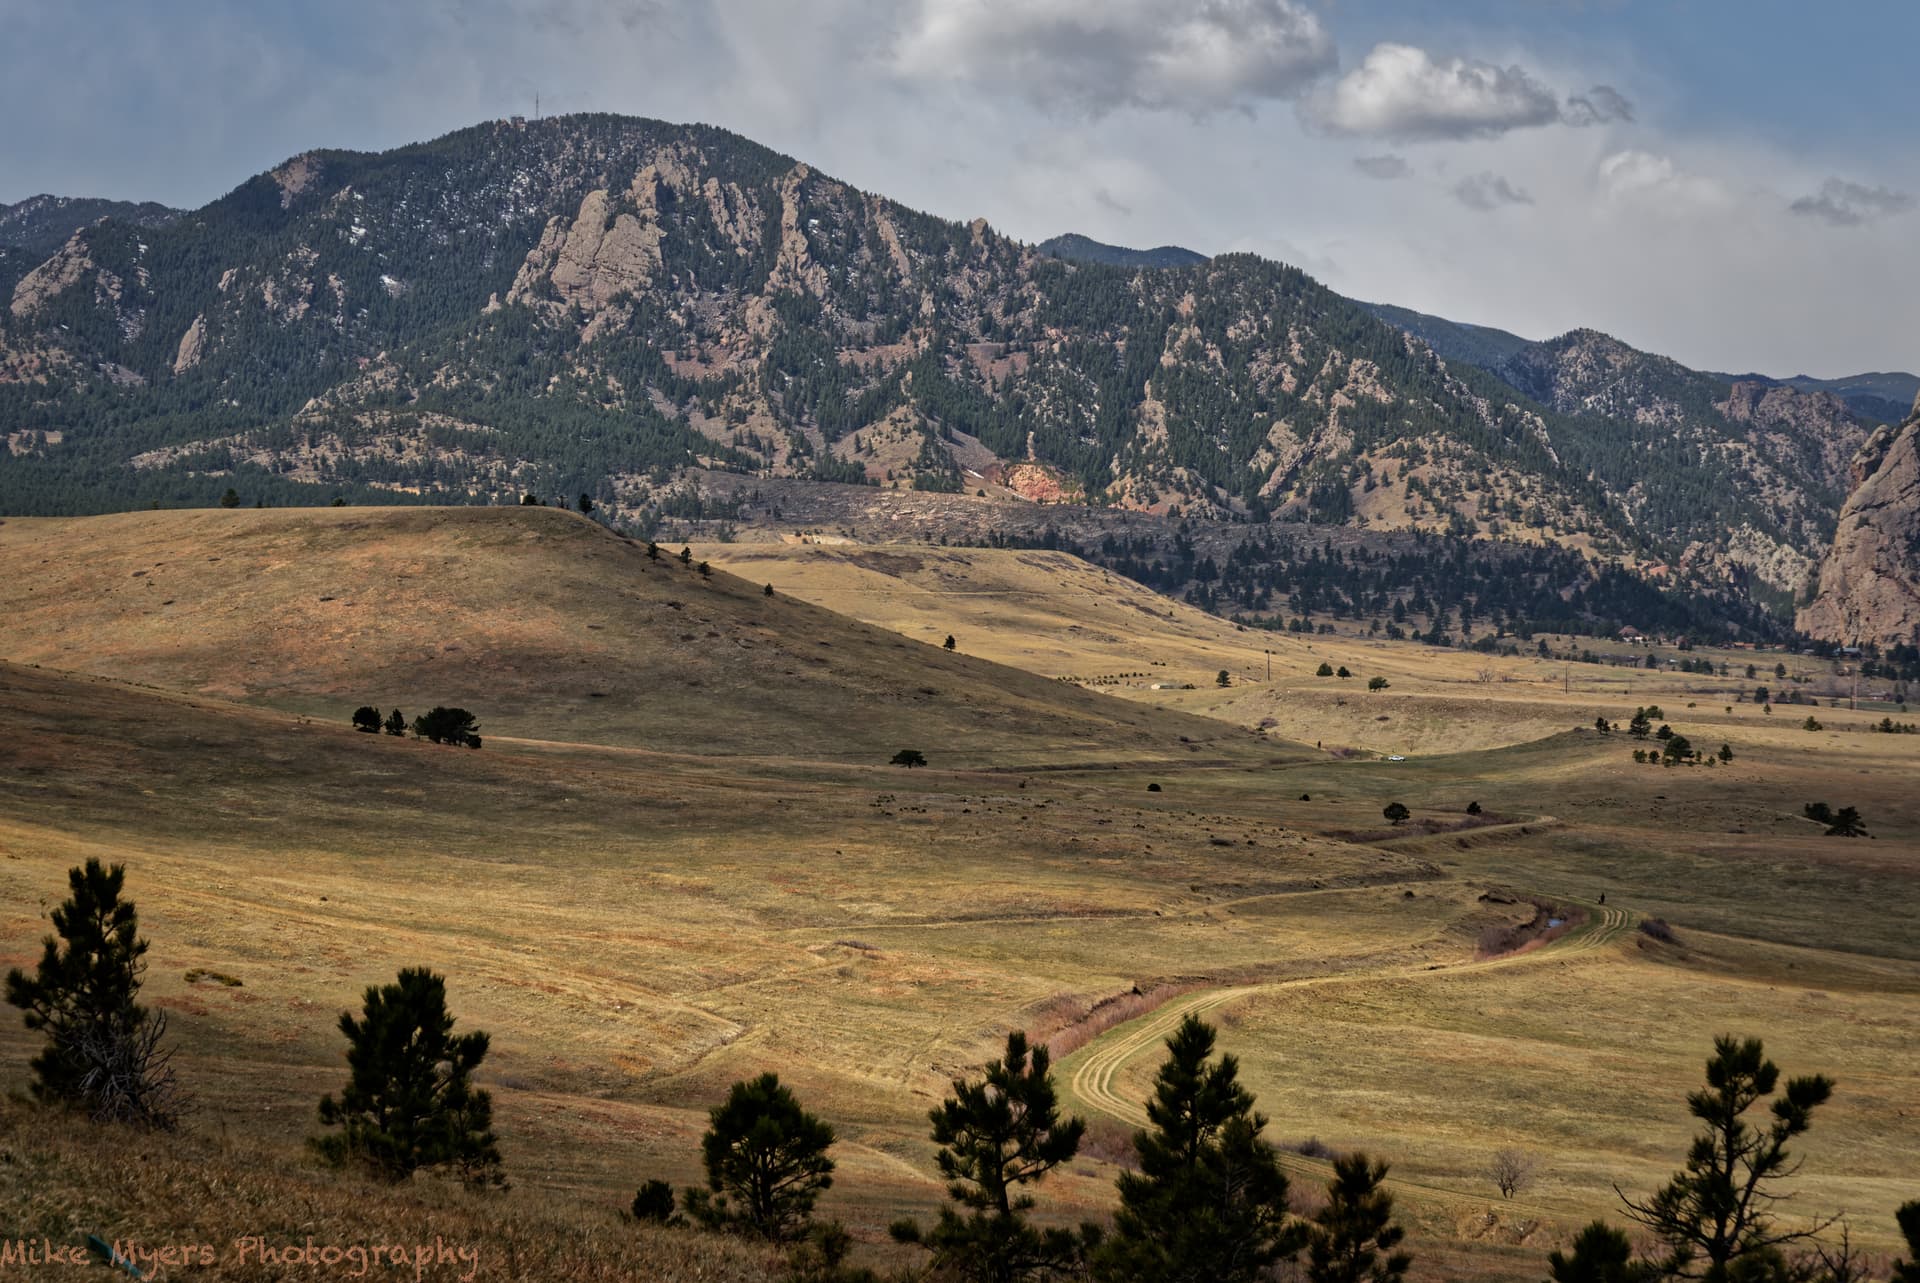
Maybe my last image I will post here from my trip to Colorado. I wanted to get a photo of the beautiful mountains off in the distance, with the snow covered peaks, but nothing even approached the beauty that Ansel Adams found so often. I mentioned this to Susie and her husband John as we were driving somewhere, and I got off the main road, and we found something close to what I described I wanted to capture. The only lens I had was my 18-24, and of the perhaps 40 different scenes I tried, most were dead in the water before the shutter even clicked. As the last image took, I found a view that I liked. A lot of what I wanted was included, but as the saying goes, “you can’t make a silk purse out of a sow’s ear”. I probably spent an hour or so, in two sessions last night adjusting and re-adjusting and re-re-re-re adjusting until I reached a stopping point.
I liked the shapes, and the colors, and the clear (very clear) detail on the mountain, which gets lost on my computer screen unless I zoom in. The sky was acceptable, but I would have preferred more clouds. It lacks a “focus point” to be the one thing that stands out most in the photo, but the original goal was “the mountains”. I never did find a scene like this with the taller mountains all white with snow on the top - the photos I took of those just didn’t look so pleasing.
I do like this photo as a relaxing and enjoyable view of what I remember. I think it would make a nice print to hang on my wall, that I wouldn’t get tired of, and it would be great for a postcard. On the other hand, it is very “static” and “boring”. I do have other photos I like, but my “goal” was to show the mountains. I will look around for the other photos I took, where my eye went right to the snow-topped mountains…
Any thoughts?
MM2_0295 | 2022-04-15.nef (28.4 MB)
MM2_0295 | 2022-04-15.nef.dop (13.4 KB)
I guess I have different goals than you. I want to be able to pick up my camera to capture something that will be gone in seconds, and to have the camera get a decent exposure even if/when I have no time to think.
For me, the main choice isn’t whether the photo is important, but how much time do I have to configure the camera.
(I’ve also been finding out that the D750 makes my photography much “easier” than my Leica M cameras. With the Leica, for me, everything takes longer, and I “trust” the D750 more than I “trust” the M10. Not that one is better than the other, but shooting with the 750 is certainly easier and faster, for me.)
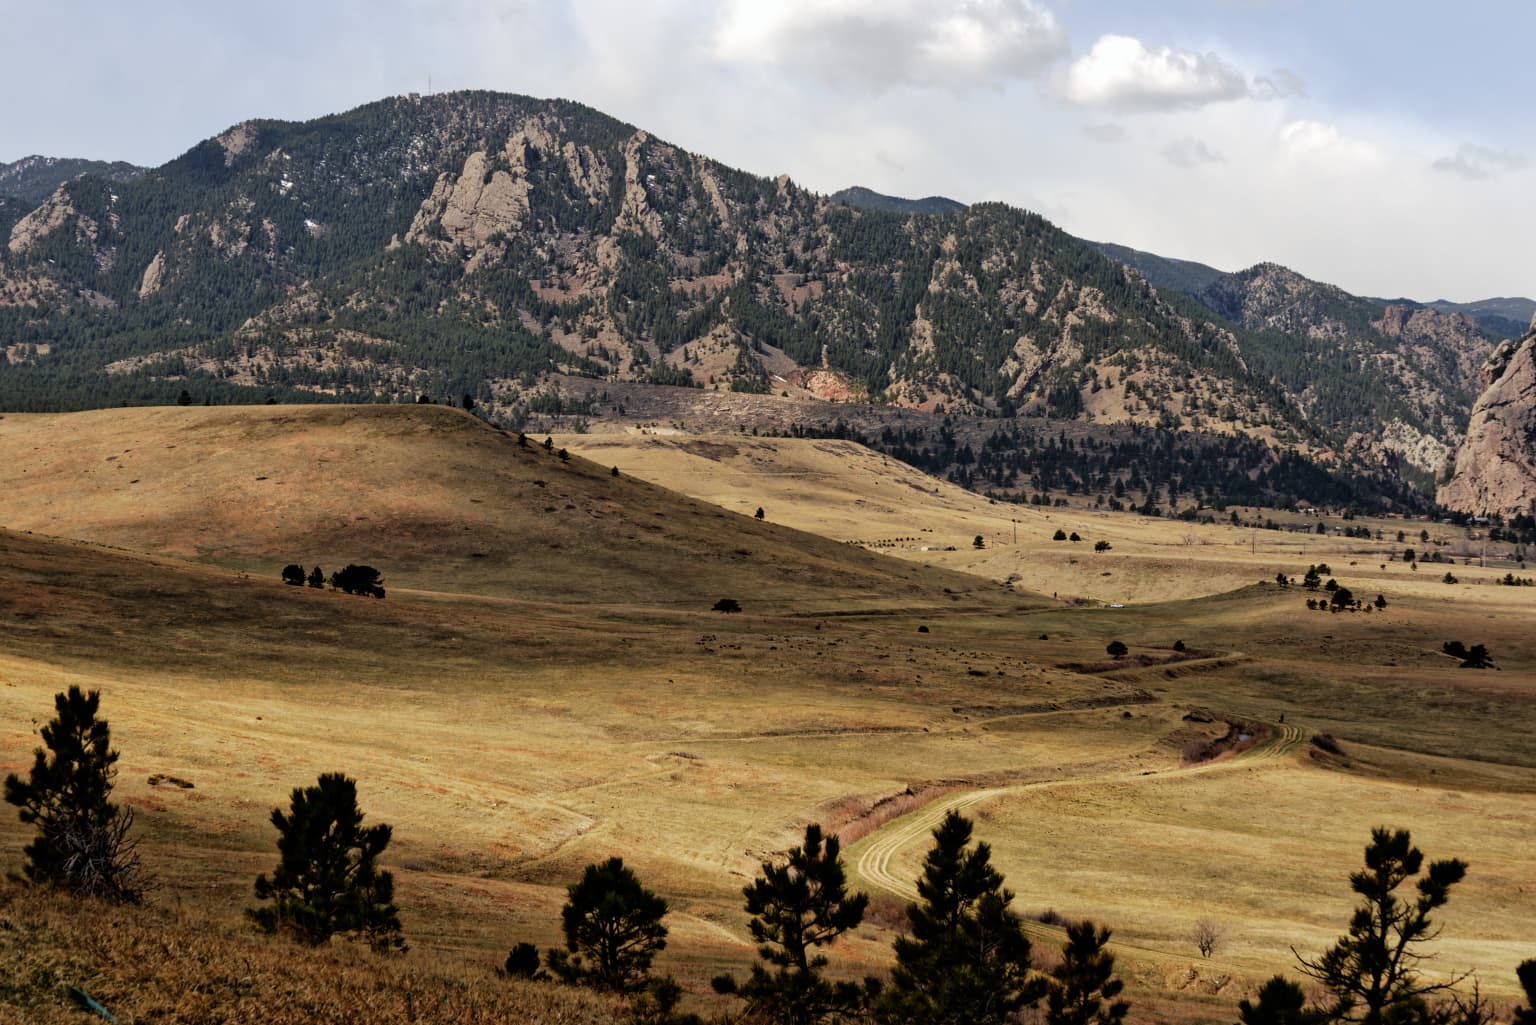
The key to this one is enhancing the contrast without resorting to ClearView Plus.
See what I did using the Tone Curve, Smart Lighting and a bit of Fine Contrast. Plus, I added a Control Lin over the sky to deepen the blue a little without accentuating the clouds too much.
MM2_0295 | 2022-04-15.nef.dop (8,8 Ko)
BTW, I cannot read your DOP for some reason
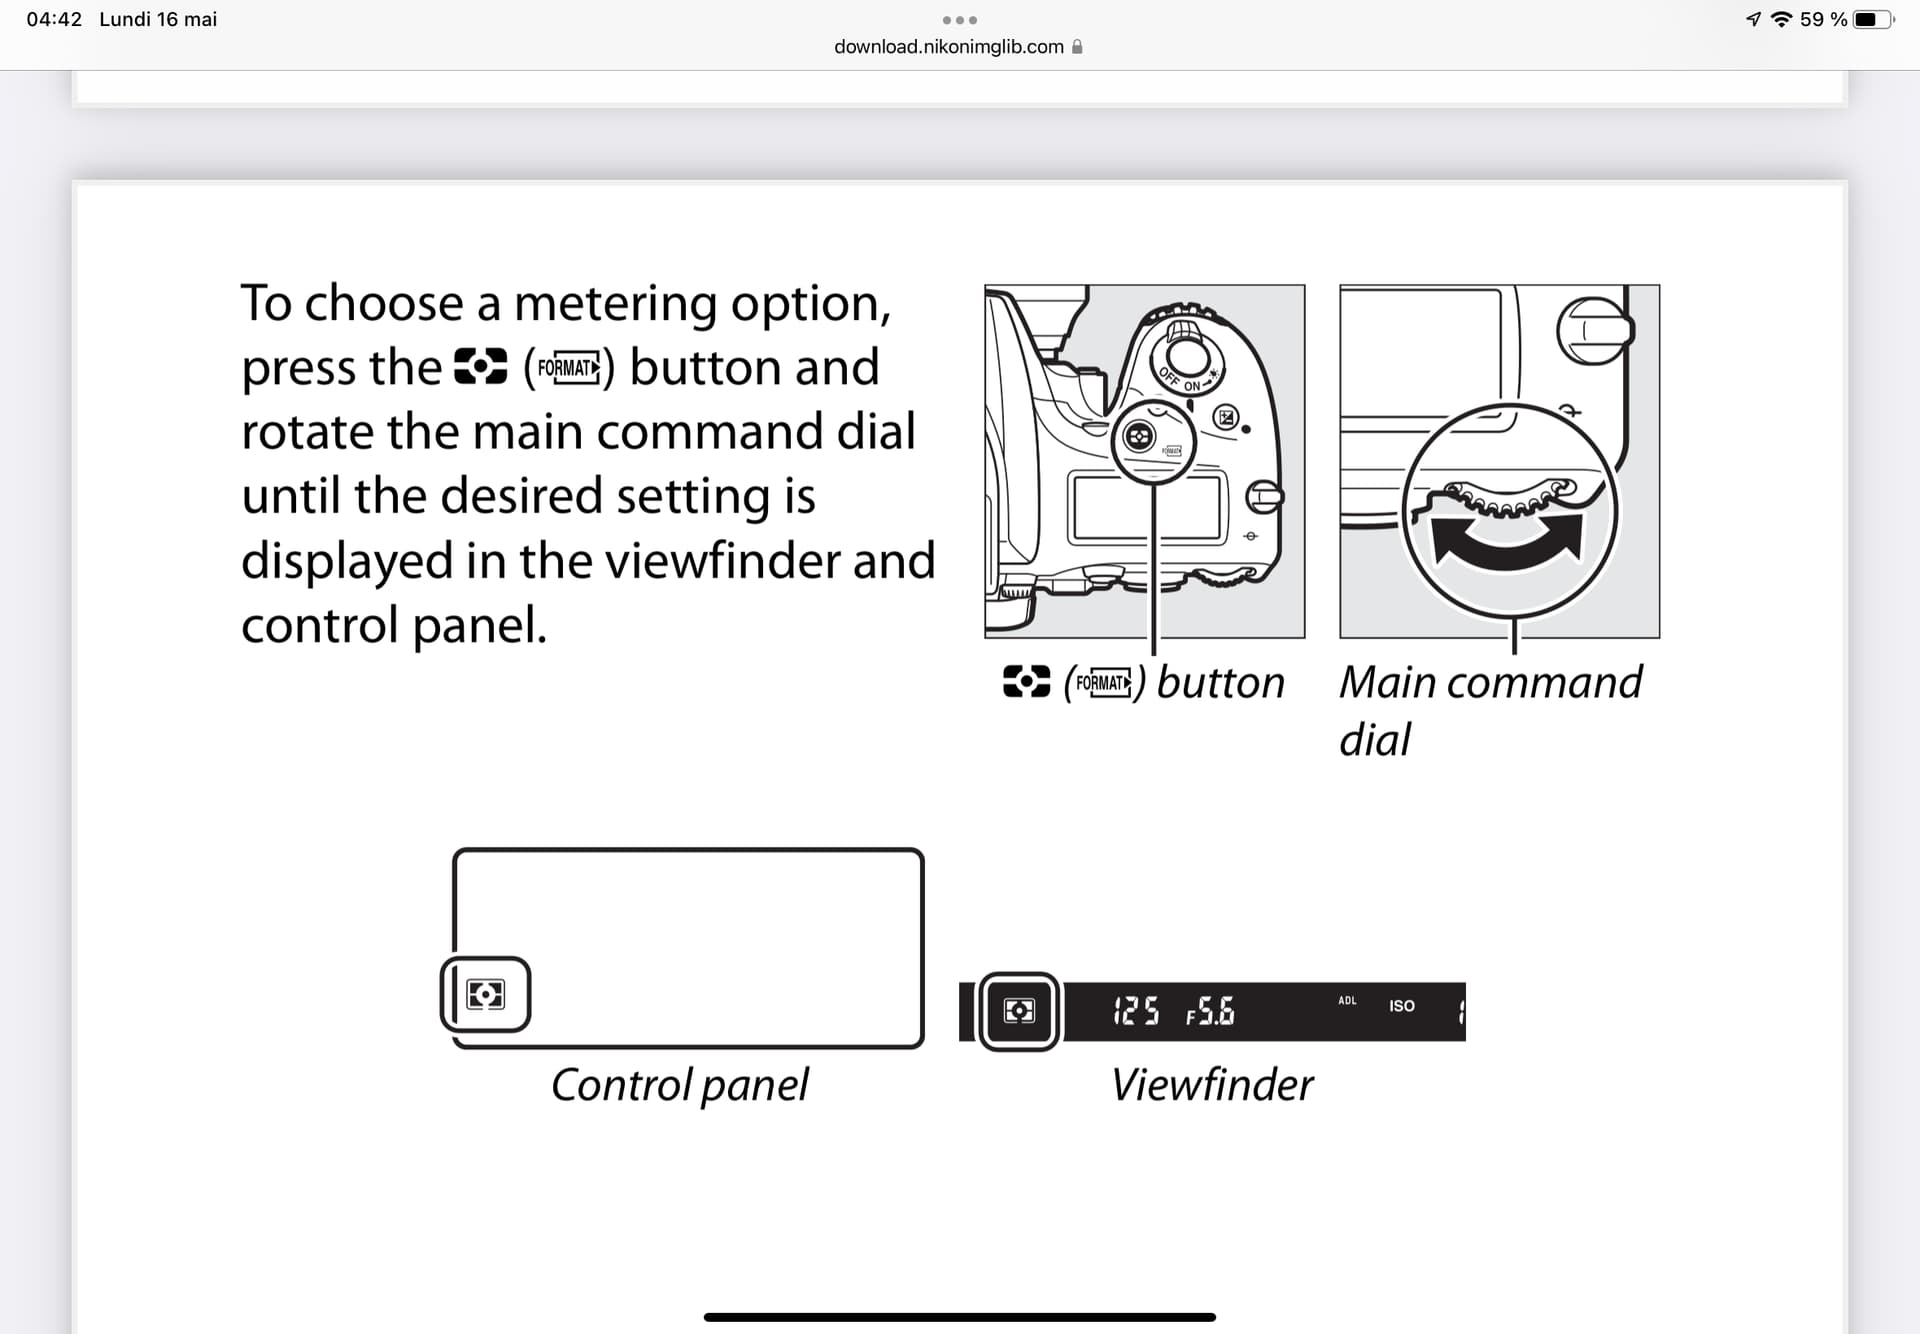
I don’t know whether the D750 allows you to program any other buttons. If so, why not programme. Another button to toggle between centre-weighted and spot reading. Once you have set that then you can press your focus button. That is what I do with my AEL button except I leave my AEL button in spot and toggle to centre weighted when needed. Your case toggle to spot when needed.
Nor me yours or indeed Mikes? Weird.
Was going to very quickly edit your version with a quick crop and possibly a grad filter on bottom (slightly lead you to the light so to speak!) as should be doing something else really!
For me. The foreground trees add nothing and are a distraction. Feel a 16:9 would suit the scene but without some cloning the tips of the trees remain unless you lose some of the mountain range.
Just an opinion anyway as to me the picture is clearly about the mounrtains but there’s too much fore and middle adding nothing. Again imo.
Gosh, I have two buttons on the D750 that I don’t use, and both are programmable. Doing as you suggested ought to be easy, but I’m not sure I can “toggle” between two settings. If I use one button to set center-weighted, and the other to set spot, it should be simple.
Strange, I downloaded your .dop file and replaced my file with yours. If you made a VC, I don’t seem to be able to select it, and I don’t see any modifications to the tone curve?? I also don’t see your control line. I’m feeling lost again.
Gee, I closed Filmpack and PL5, restarted PL5, and my additional contrast settings were missing. I then restarted Filmpack and got the + sign to add them to PL5. Does Filmpack need to be running, in order to have access to those settings.
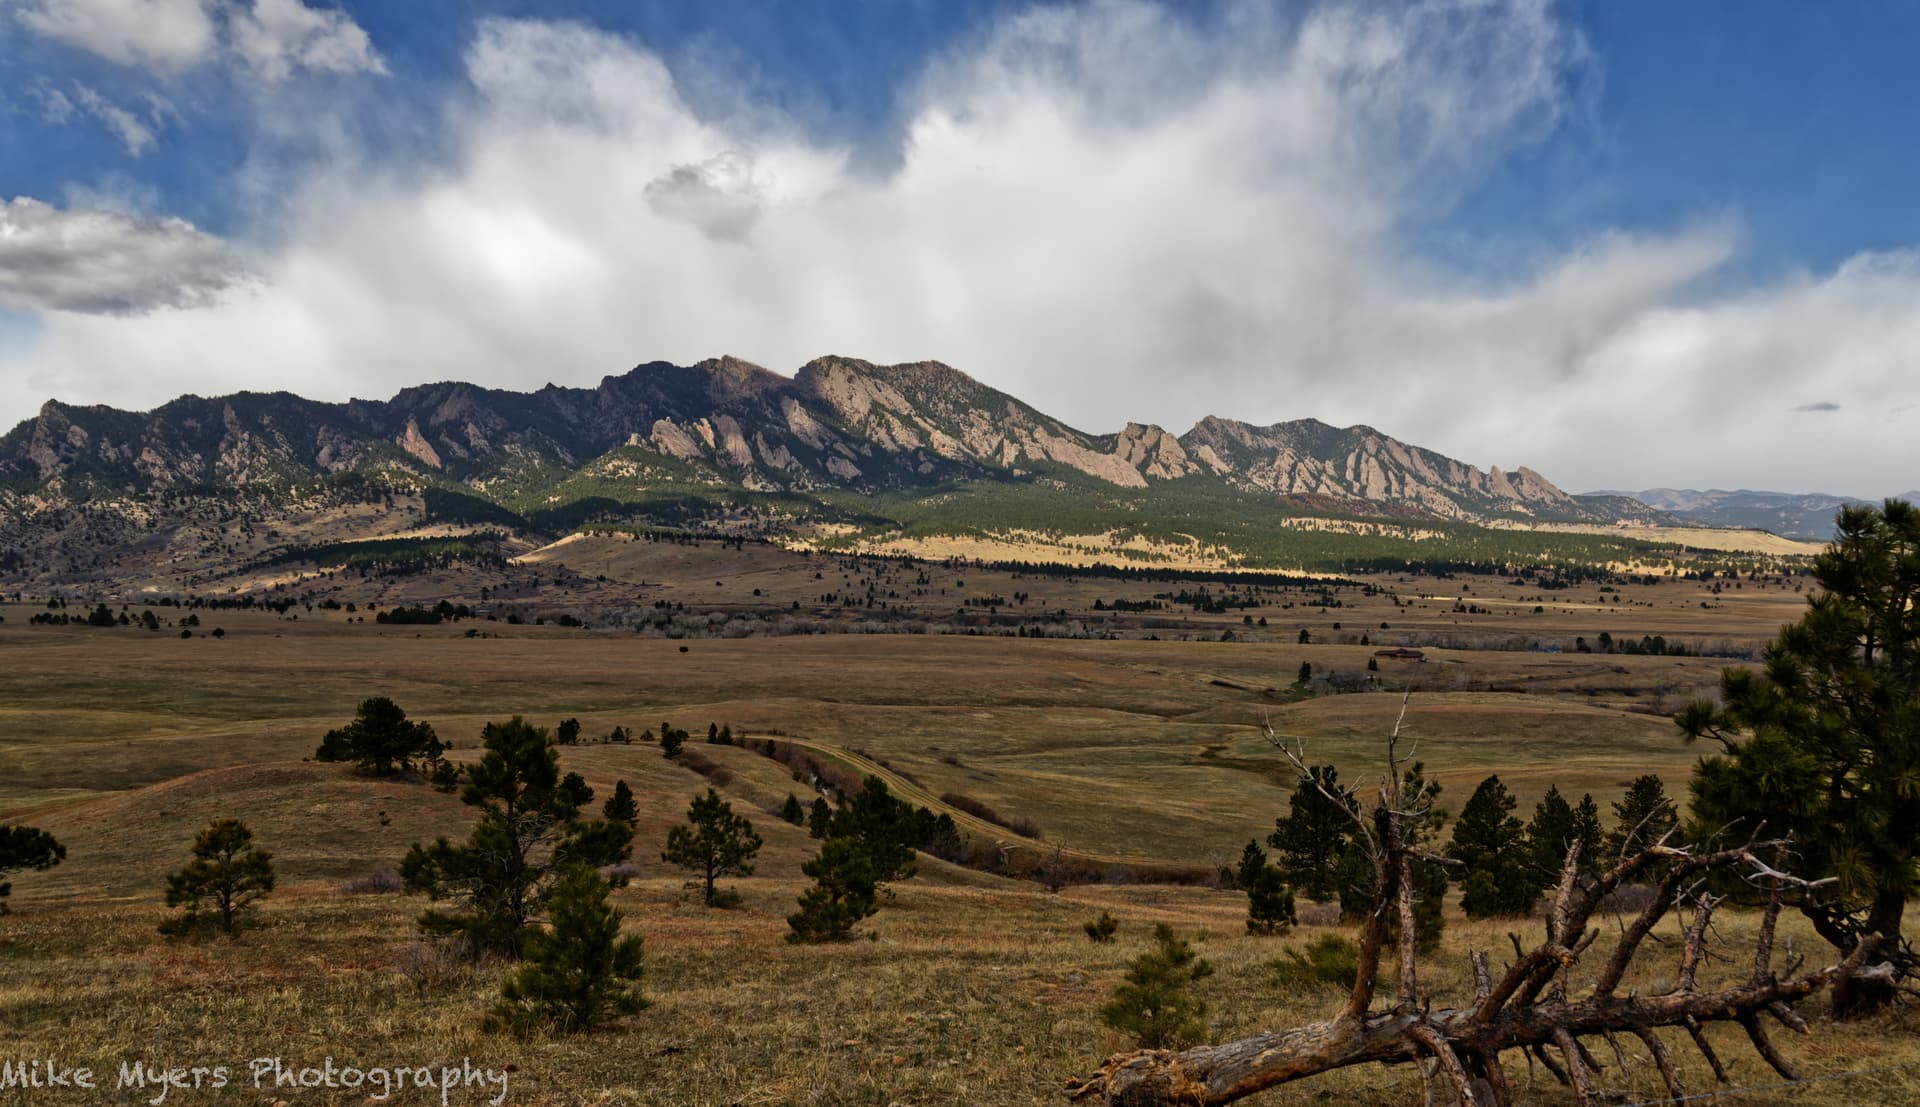
I went through my images of the mountains, and found another one that I liked, but felt the one I selected was “better”. I just edited my second choice image, and will post it here. I want the “dead branch” at the lower right to add something to balance the photo. Maybe you will prefer this image? I did bring out details that I did not see with my eyes, but the camera saw them. Perhaps I went too far though…
MM2_0291 | 2022-04-15.nef.dop (14.6 KB)
MM2_0291 | 2022-04-15.nef (28.5 MB)
I have a feeling something is broken with the .dop for your image regardless of who ‘made’ it.
I can’t open either yours or @Joanna versions.
No ideas why tbh.
I’ll create a brand new DOP later this evening and put that up. That will let us know if it was Mike’s DOP or a general fault
Hopefully you can set the button to toggle. Otherwise it will be very hard to hold in 2 buttons when needed.
I will call Nikon tomorrow and ask. I doubt this can be done, but hopefully their tech support people will know for sure, and if so, how to configure it.
My guess is I need to program the two buttons, one for action spot metering, and the other for center weighted metering.
No, starting FilmPack only starts the standalone version for those who are not using PhotoLab.
As long as you have activated FilmPack in PhotoLab it will work fine. You obviously have because you can see the + on the Contrast palette.
Being out over the weekend I’m trying to ‘catch up’ now …
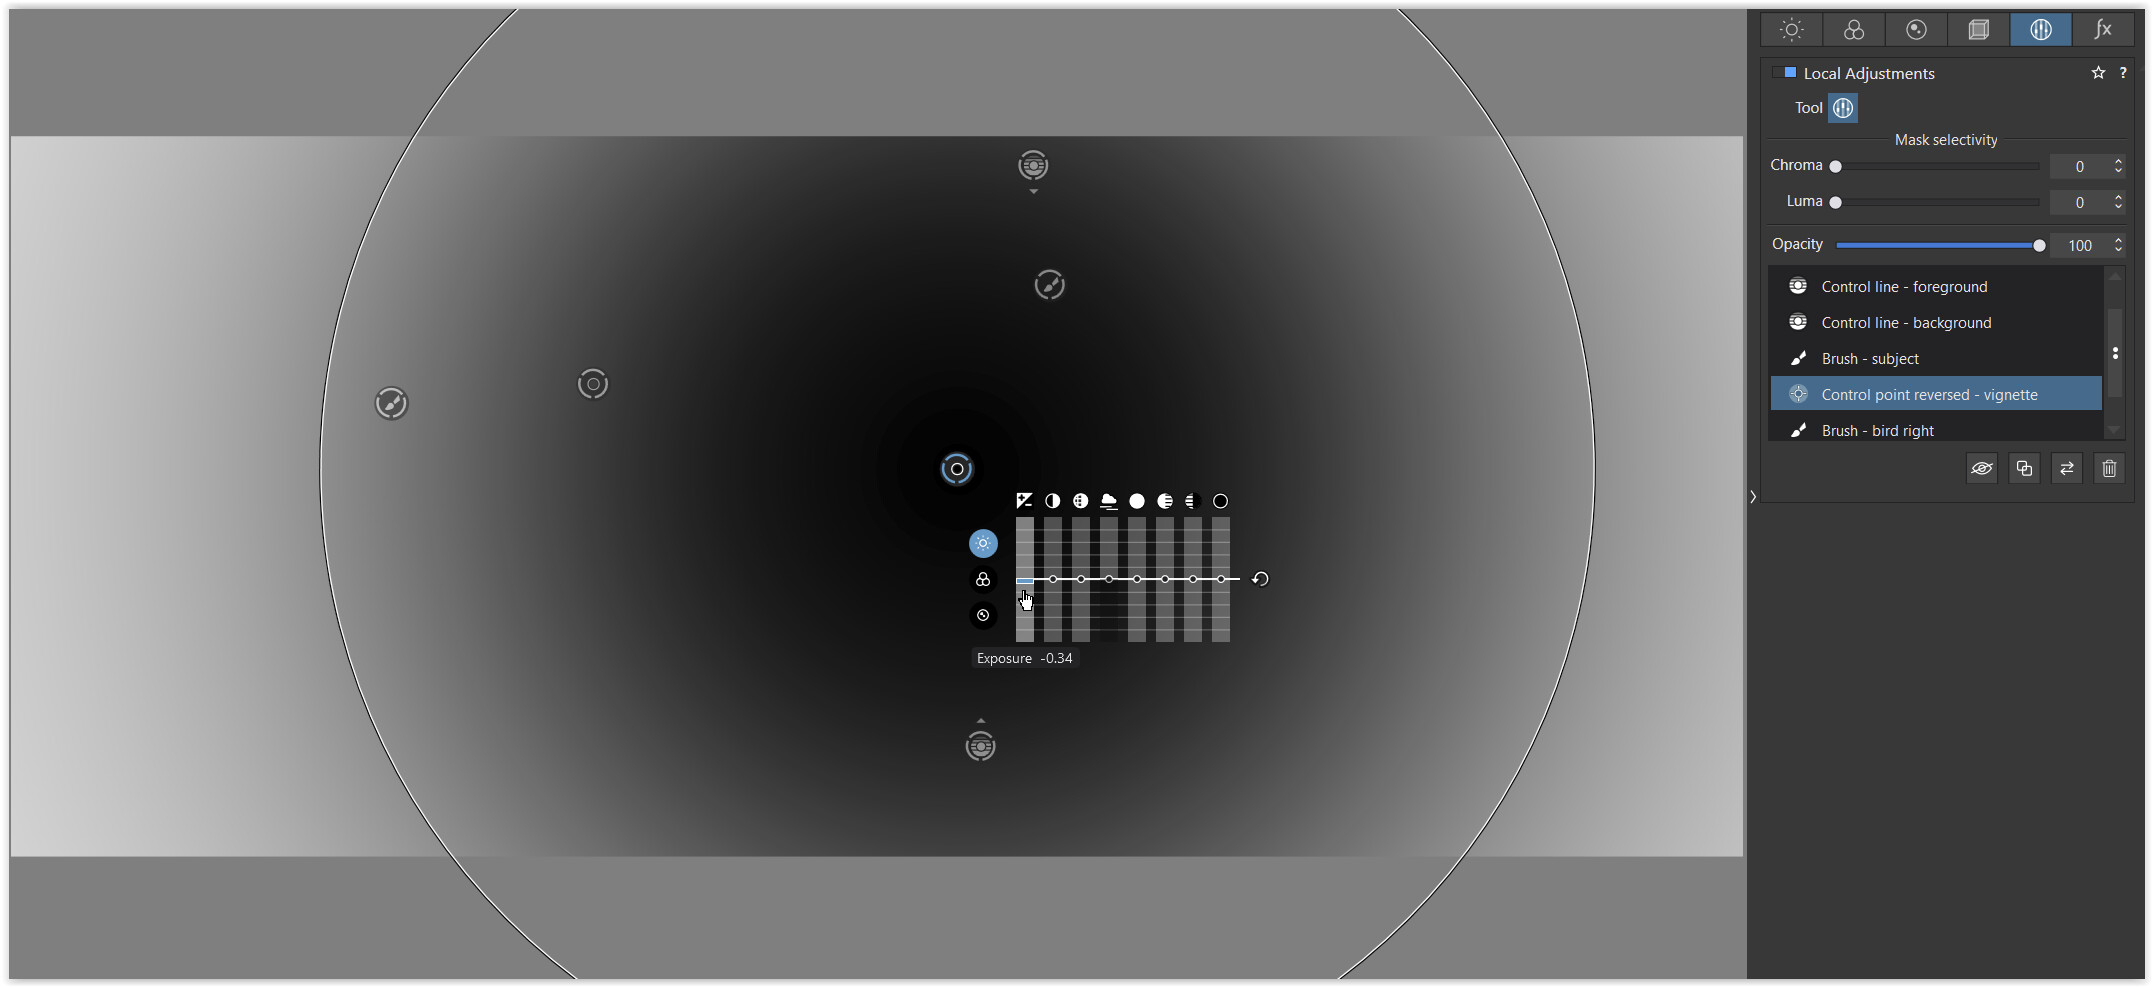
Activate the Local Adjustments to see the list of corrections – in this case starting with Control points.
The next 2 screenshots show a Control line with settings for the background.
Different to other tools, Control points and Control lines allow to choose how much Chrominance (colour range) and Luminance (lightness range) to include in the selection (mask) → Mask selectivity.
The next screenshot shows a reversed Control point to (better) control the light fall off.
I suggest to make a Virtual Copy of the version you want to check, activate the Local Adjustments globally, deactivate all of them in the list and re-activate them one by one to see the effect / to play with the settings.
have fun, Wolfgang
about help & tutorials …
Thanks, Joanna - actually, this is the way I’ve been doing it for ages - it is the only way I know how to do it. Using a function-button sounded like an even easier way to switch back and forth between the two metering modes, but the standard way is adequate.
For me, it means lowering the camera, finding the button on top, and selecting what I want. I guess that’s just a habit I’ve developed. Knowing where this button is, is just about as useful as using a programmed function button.
If I remember correctly, I set the function button to an “artificial horizon” years ago, then forgot about it. This video explains how I learned most of my settings that I configured on my D750, including the function buttons:
Useful settings for D750
Thanks for the reminder.
I closed PhotoLab.
With Finder, I went to the folder for this image, and deleted my .dop file.
I downloaded your new .dop file to my downloads folder.
I moved it into the image folder.
For reasons I don’t understand, it got renamed to "MM2_0295 | 2022-04-15.nef-2.dop
So, I deleted the file from the folder (moved to trash), then emptied my trash.
As expected, it downloaded with the correct name, no “-2”.
I copied the file, and pasted it into the image folder, and it did not get renamed with the “-2”.
As a test, I deleted the .nef file from my image folder, emptied my trash, then dragged the file from my downloads folder to my image folder. Again, it was moved properly, without being renamed.
I am lost as to why this happened, as it seems like having the old file in the trash somehow might have caused the replacement file to be renamed with a “-2” the first time I tried this today. I don’t know why this happened, but from now on, I’ll be careful to verify that the file name doesn’t get changed when I move your file into my image folder.
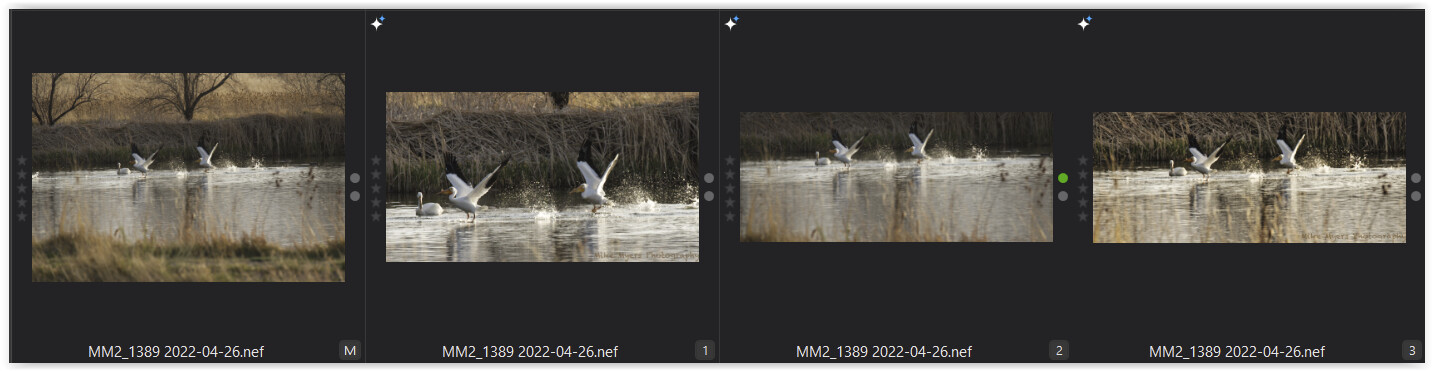
I re-opened PL5, went to this image, and only saw what looks like my original edited image, completely with my watermark. When I click on the comparison window, it says “no virtual copy” and it shows the two versions I had saved.
So, I closed PL5 and deleted my two images from the PL5 Exports file. All I have left are my original image and your new .dop file.
Restart PL5, and I see my edited image with my watermark, which can’t be from your .dop file as the watermark should be gone.
So, I close PL5, and delete the .dop file, and empty the trash, which I’m sure I don’t need to do. I then re-open PL5, and as far as I know, there is no more .dop file for this image in the folder, so I should see an un-edited version of my image.
Nope, it shows my edited version. At the top of the PL5 page it shows:
It has a (M) at the end, meaning this should be a Master image, meaning there might be a virtual image somewhere?
OK, I moved the .dop file to the trash, closed PL5, and re-opened PL5. Of course, it still shows my original edited image with the (M) and my watermark.
How can I “reset” this image in PL5, so all it shows is the original image, with no editing? Until I can do that, I’m just spinning my wheels. Is there a button I can select to force PL5 to go back and show the original?
As a test, I copied the image to a different folder, and renamed it with an “x” at the end of the file name, then moved this renamed file back into the original image folder. PL5 should see it as a brand new image it doesn’t know about. That worked. Presumably, I can rename Joanna’s .dop file using the same “x”, and PL5 would open my new image using Joanna’s settings, but right now I’m more interested in fixing what’s broken in PL5 - why does my original image show up with my old corrections, when there is no .dop file ??