Is there a way to determine visually the black point and white point like its possible in lightroom (option click while dragging the sliders) ? trying to normalize the histogram .
the only way i know is to use the icons to highlight the bright and dark areas ( sun and moon icons below the histogram) - what luminosity values do these icons depict/ highlight in the image? absolute black or white or extremes of exposure zones ?
thanks!
…if you look closely around the edges of overexposed areas, you can see that the markings change colour. This indicates, which colour component is saturated. When all highlights markings turn black, all colour components are saturated.
Once clipped areas are identified using the moon and sun icons on the histogram, I don’t use the blacks and highlight sliders to resolve them. Those tools cover too broad an adjustment range in my opinion.
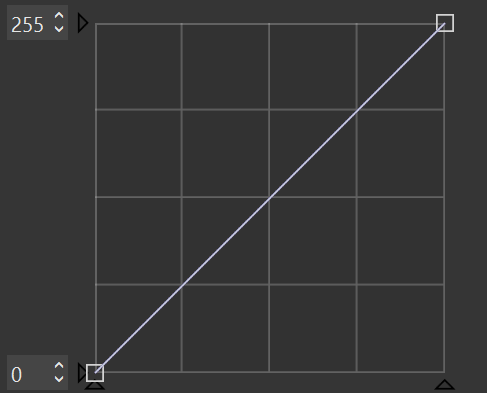
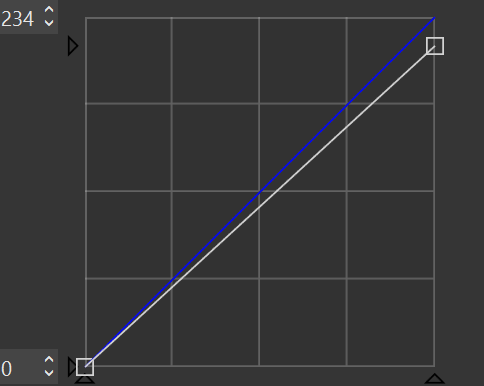
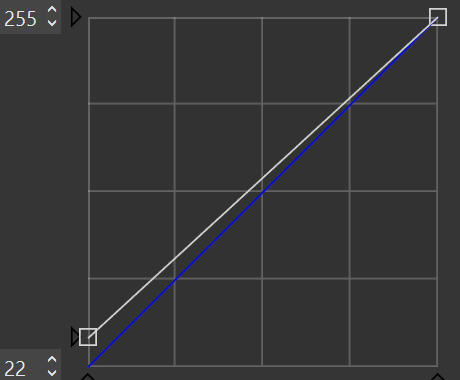
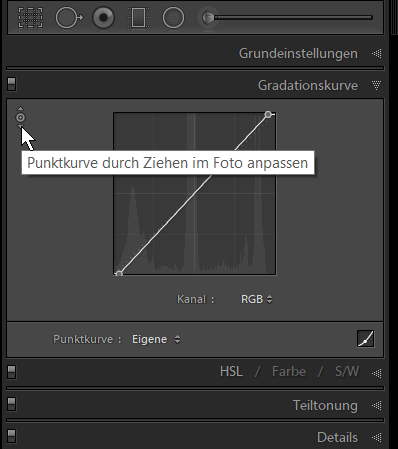
Instead I use the up/down arrows keys on the left side of the tone curve . The arrow keys on the top left will adjust highlight clipping and the keys on the bottom left will adjust shadow clipping, I adjust the keys one step at a time until the majority of the clipping indicators turn off.
The example settings below are extreme so you can easily see the effect on the curve. Usually lowering the highlights and raising the shadows by 3 or 4 is sufficient to remove most of the clipping
.
As I indicated in my post the curve I was showing was an extreme example. I usually only need to lower the clipped highlights by two or three. And of course if there’s nothing there nothing can be restored.
It seems that PL uses a threshold of 2 on both sides. Higlights are 254 and above, lowlights are 1 and below.
It’s annoying that one can’t read the values of the pixels when clipping is on. It shows the values of the warning
My usual experience with the majority of images where there is clipping is that adjusting the tone curve keys by 1 or 2 usually removes most or all of the highlight and shadow clipping warnings, That seems to coincide with your findings. However, on a number of images I have had to increase that number to as much as 4 for either highlights or shadows, but that is not the norm…
It stands to reason that adjusting the tone curve like that will eliminate highlight and shadow clipping warnings, since those warnings appear when there are luminosity values near 0 or 255 in the output from processing. However, it’s my experience that even an all-black warning (RGB all at 0 or 255) doesn’t mean that there is clipping - only that there might be clipping, as the min or max values have been attained. If you change the black point or white point on the tone curve, you’re changing the min and max values - the tonal range that is output. It’s my experience, as @platypus noted, that lost detail isn’t recovered in this process. Instead, the clipping simply occurs at values other than 0 and 255. To reduce clipping, one has to instead adjust the tonal compression at the black point and white point using other adjustments. I’d like to be wrong about this, but my experience has convinced me that this is how it works in PhotoLab.
The problem I have using other tools for this, like the highlights and black slider is that the curve of those sliders is too extreme for the purpose of eliminating clipping. If the clipping indicators are not always valid and can’t be relied upon to be accurate then this whole discussion is kind of moot. What is your approach to identifying clipping and compensating for it?
I use the clipping indicators - just not the tone curve to recover highlights and shadows, because I find it won’t do that. It’s true that PhotoLab doesn’t offer a precise way to compress the dynamic range of an image only at the extreme ends of the range. If you adjust Selective Tone highlights, the midtones are adjusted as well. Same if you adjust the shadows slider. The blacks slider is more precisely tuned for recovering shadow detail without compressing or elevating midtones, but still isn’t as precisely focused on blacks as some people want. So I employ a combination of adjustments to recover details and still have good contrast throughout the image. Smart Lighting often helps establish a good starting point. ClearView Plus can help, too, though it tends to lower midtones and add too much contrast there. One can compensate for that a bit with microcontrast and fine contrast (FilmPack) adjustments, though.
It is what it is. There are feature requests open to more precisely control white and black points without so much work. I voted for this and hope that a future update to PhotoLab will at least add new adjustments that make getting the desired tonality a lot easier - if not radically change the whole kit-and-caboodle for the better.
As with zebra indicators in one of my cameras, I will adjust the image until clipping indicators change color from black - and if I want maximum contrast, step back so that they turn black again and stop there.
Try exposure compensation to begin with. That’s what you would have done on the camera too. Or just except some clipping.
I don’t know why you get other values when clipping. When you lower your value to 254 you shouldn’t get any highlight clipping.
I just found a trick to see the underlaying values. Set highlight clipping on. Double click on the image to get 100%. Put the cursor on a clipping part. You will see when you’re right on the color next to the pixel values in the histogram. CTRL-W toggles between clipping on and off. Now you can see the real values of that same pixel.
Hmmm, if highlights are blown in a shot, nothing will bring back the lost information.
Bringing down the tone curve’s upper RH corner does not change that.
If highlights are not blown, lowering exposure is the tool of choice.
You can then bulge the tone curve up to restore overall impression of brightness.
There are many degrees of freedom = many ways to change the looks of an image.
Nevertheless, info that has not been recorded, can not be restored. It can be faked though.
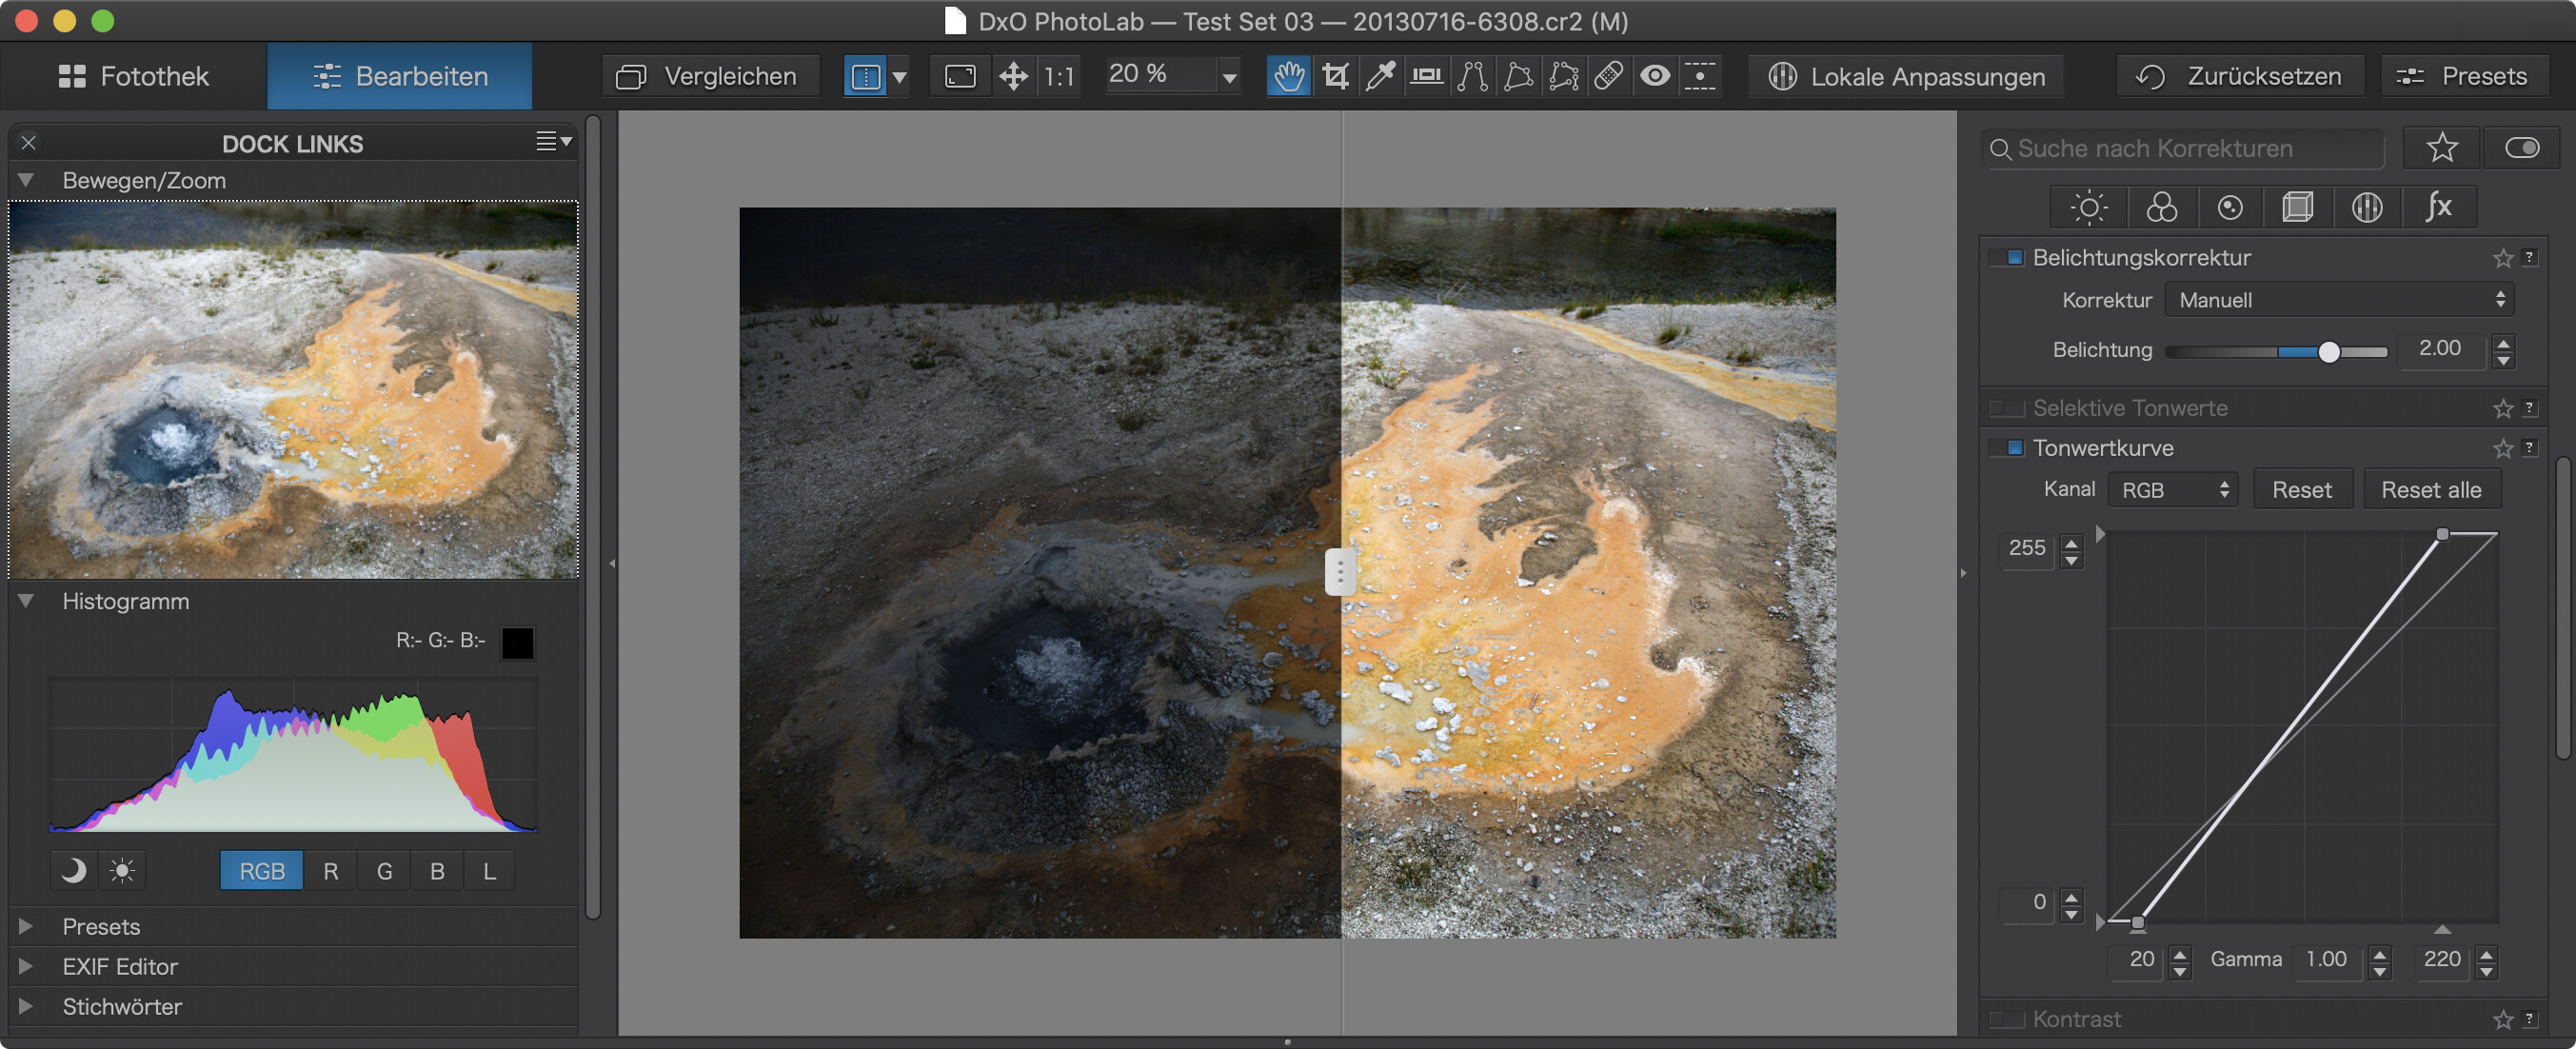
Here’s an example of an image that needed massive exposure correction. The shot was underexposed due to the polarising filter I had used. The way I choose to adjust the image can be seen in the screenshot: Exposure was lifted by 2 stops and the black and white points were moved inwards to achieve darker shadows and brighter lights as well as adding some evenly increased contrast.
Clipping can be the result of some processing too.
But in general it is an overexposed part of the image.
I know some people when printing do use a marge of about 5 on the highlights to force the printer to use inkt all over the page.
You might get a clipping warning up to 255, which is different from actual clipping.
The key difference is when the highlights got blown. What we see in PhotoLab is the output rendering and not the RAW or source dynamic range. That includes the histogram. So it’s often possible to recover some clipped highlights and shadows. Correct?
What I did mean is that the clipping border is a hard code value, not dependent on the image. I learned that that value is 254 and 1. That should be the same for everyone.
Hmm again and maybe, but let’s look at it more closely.
Case ONE: If sensor wells are flooded in an area, the raw image will have R=G=B=16383 (assuming a 14 bit ADC) There is no way that the sensor, ADC or raw developer can have a clue what the original color was. The flooded area can not be recovered. End of story.
CASE TWO: If sensor wells are NOT QUITE flooded in an area, a raw developer (A) and its algorithms can still create an image that looks like containing blown highlights. If we chose a different raw developer (B) or algorithm, the resulting image might have perfect highlight detail.
If (A) claims to be able to recover highlights in case ONE, (A) lies
If (A) shows blown highlights in case TWO and we can “recover” these highlights if we turn down exposure, (A) does something that makes us believe that it can recover “blown” highlights that are not truly blown (or else we’d have case ONE). (A) destroys highlights in order to prove it can recover them? Not what I’d call a sincere business practice, but sales will loves it.
All I’m talking about is what you see on the screen when starting in PhotoLab vs. what’s possible to enhance through adjustments. All of that is output from post-processing, not what’s been baked into the RAW file or whatever source file is being processed in PhotoLab. I think some users don’t realize that the histogram in PhotoLab isn’t a RAW histogram and that RAW files especially tend to offer latitude in adjustments such that highlight and shadow detail can be recovered. I hope that helps.
 )
)


 I think some users don’t realize that the histogram in PhotoLab isn’t a RAW histogram and that RAW files especially tend to offer latitude in adjustments such that highlight and shadow detail can be recovered. I hope that helps.