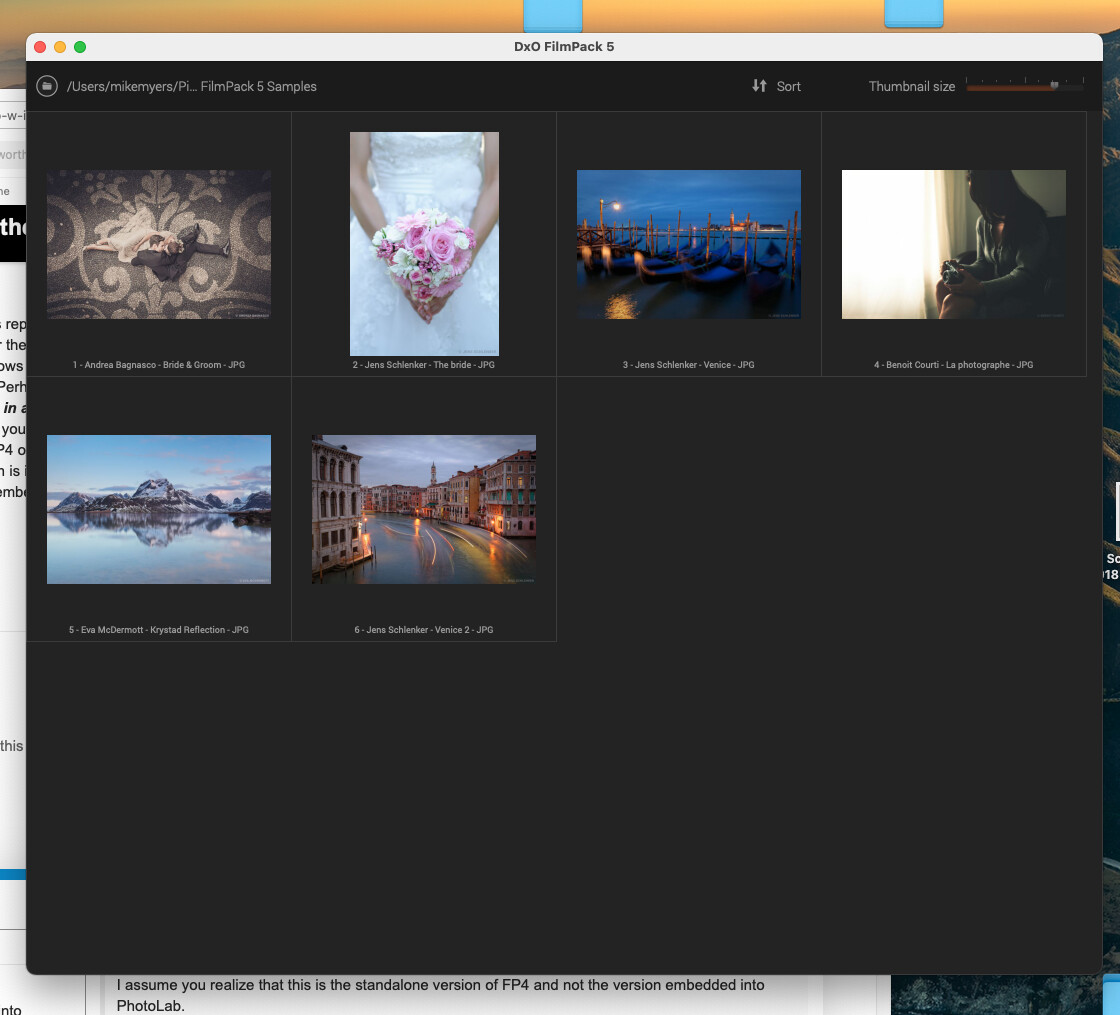
Thank you Mark - I didn’t know those things. I know nothing of previous versions of FilmPack, and yesterday I think was the first time I opened the standalone version. But when I do so, I get the following screen.
All I see is samples - isn’t there more that should show up on the opening screen, more or less like the PL4 user interface? I’m probably missing something right in front of me, but I have no idea how to start using the program once I am at this screen. (I don’t expect to ever use it as a standalone program, but I’m still curious as to what I did wrong, as in how to start using the program, and not review the examples.)
(At the top of my Mac screen, I clicked on the magnifying glass that finds programs, and it found “DxO FilmPack 5.app” . I assumed this was a link to the standalone program? I quit looking after a few minutes, but I assume there is a way to start the standalone version of FilmPack 5.)
The first thing you need to do is to go to the circle top-left and choose the folder you want to browse. Only when you double-click on a thumbnail, does the “toolbox” appear on the right.
But be aware this is an application for processing non-RAW files. As your workflow is 100% PL, just close it and forget it. It is only there because it was installed along with the plugin for PL.
The standalone app should be in your Applications folder.
Ouch. OK, I will close the app and forget it. I didn’t know any of what you wrote, as I never used the app until yesterday. I never even considered that the tools wouldn’t show up until I selected an image.
You get a few dozen “bonus points”, and the guys who wrote these “how-to” articles get demoted for leaving out all the information you just posted.
I think I will use FilmPack 5 from within PL4, which keeps everything nice and tidy in my mind. Whenever possible, I am shooting ‘raw’, and with my Leica M8.2 I shoot in raw, then convert to TIFF which PL4 will accept (it doesn’t accept my Leica M8 raw files).
I can see a lot more experimenting with FilmPack in my future, but I’m ad a disadvantage as I don’t know anything about most of the films it can emulate. My film experience was 99% Kodak Pan-X, Plus-X, Tri-X, Kodachrome, and Ektachrome.
If that is your experience and you like the look and feel of those films, then why not use them as a starting point, then start making virtual copies, use a different film on that copy and compare it.
My experience in B&W was mainly with Ilford films, starting with FP4 and HP5; neither of which I have ever used again since Delta 100 came out.
When I started LF work, Fuji were doing Acros 100 in Quickload envelopes, which saved having to load double darkslides. I tried it and was blown away by the cleanness and tonality of it - and the fact that ,it has virtually no reciprocity failure worth worrying about. It is still my go to film either real or virtual.
But, in all this, don’t just choose a film and use it as is. You can vary the intensity of the effect and also play with filters, just like you would have done on a film camera. You can also do interesting things like choosing one film for its tonal rendering, but applying the grain from another. I do this with the Kodak IR film, which gives great IR rendering but the grain is too prominent; so I apply Fuji Acros 100 grain to it at the LF size.
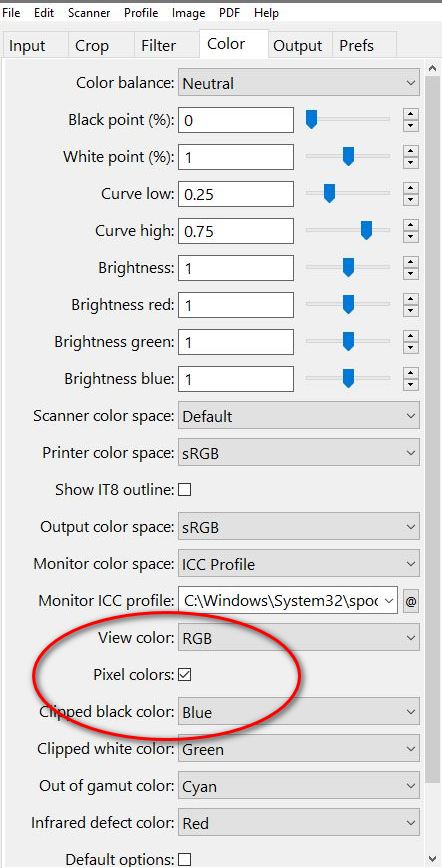
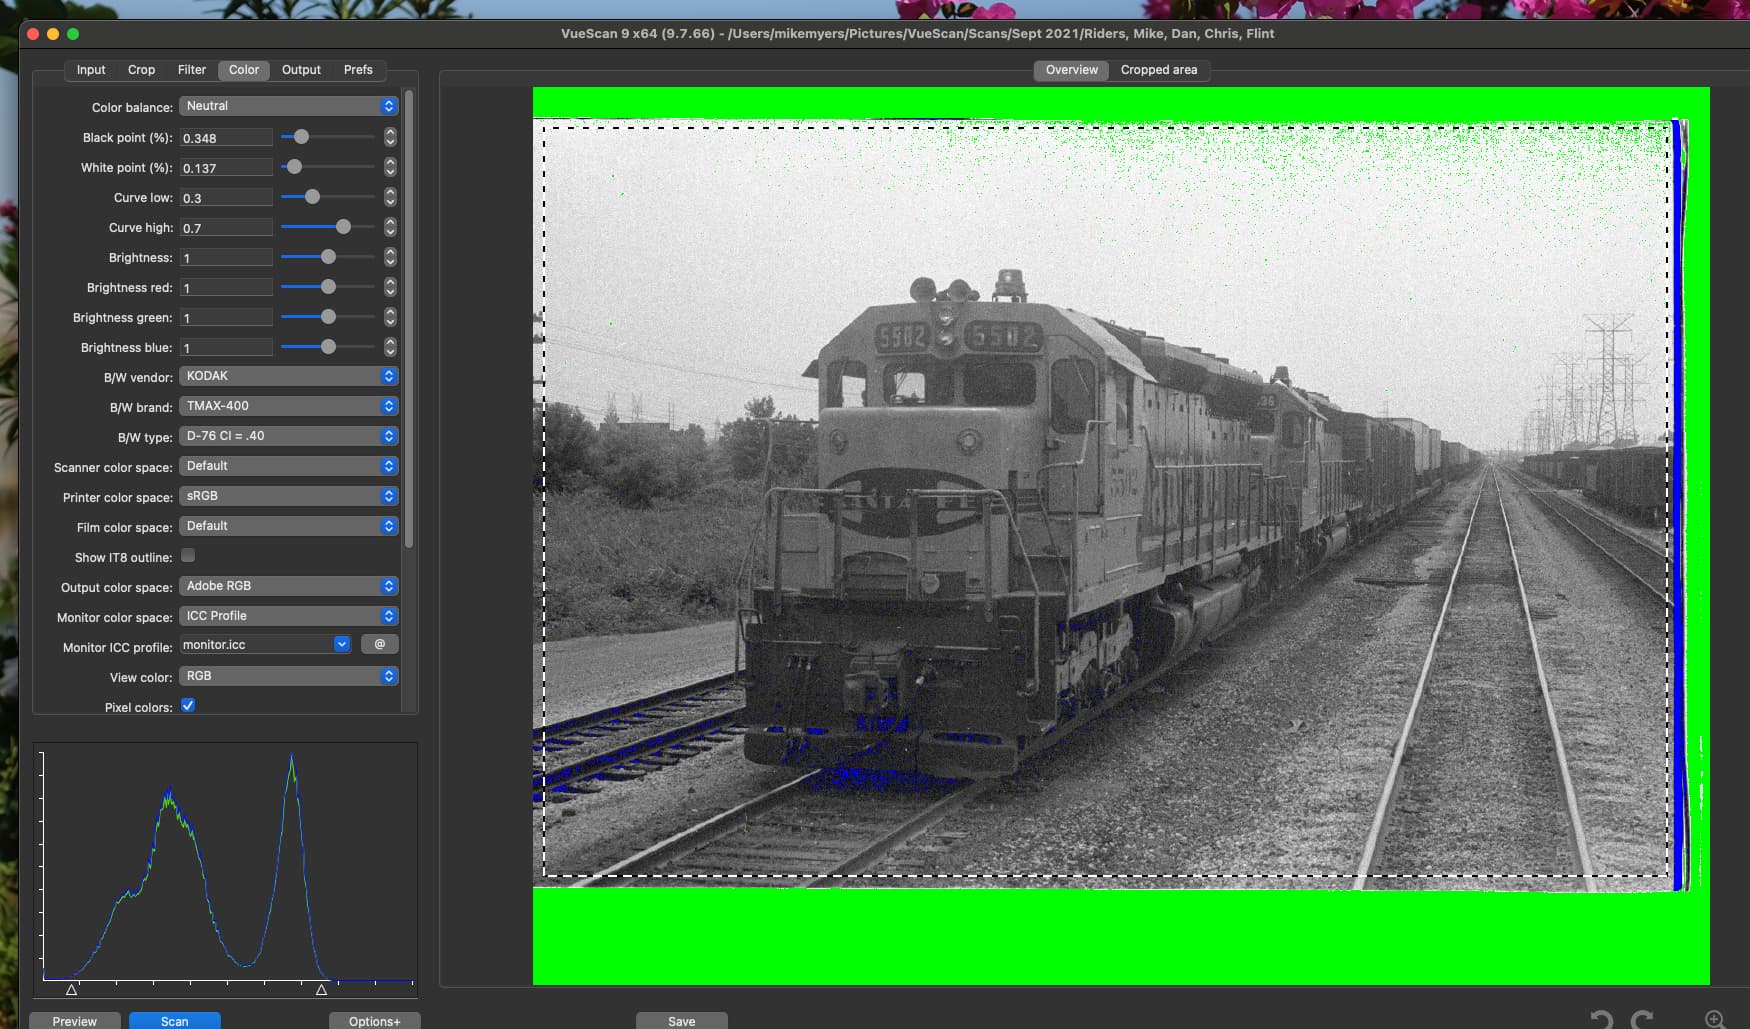
Just a heads up in case anyone isn’t aware but in Vuescan you can tick the “Pixel Colors” check box and Vuescan will show the clipped black and white pixels of the scan in Blue and Green (windows) just like DXO. This helps you adjust the histogram triangles.
Also make sure the Black % and White% controls are set to 0%.I think this should be the default to avoid clipping.
Hmm, I can’t say I liked or disliked them - it was all I had, and when I bought a 100 foot roll of Plus-X, that was all I was going to load for a long time to come. I was just a teenager back then.
I now have five rolls of this film, and my very first experiment will be to shoot the film in one camera, and take similar photos in a digital camera, and compare them.
Only when I know and understand something, is it time to try changing. I mostly follow your advice that way, and if you suggest +20 for a setting, I will start with the same.
In time! It’s like with any of my cameras - I always start learning how to do better, but my first task is to learn (and remember) the camera the way it comes. My Nikon, Fuji, and Leica cameras have a never-ending menu of things I can change - but I don’t believe in doing any of that until after I learn the “stock” setting. I’m not sure if I’m right or not, but I feel a need to “understand” everything.
(My brother wants the opposite - he wants me to tell him where to click, he gets an image, and he is done. He tells me he hates digital because he doesn’t understand. I try to suggest he use it and learn how things work, but he gets frustrated, and that’s the end of it. My biggest frustrations are when things don’t work the way I expect them to, and I find out it’s not my “fault”.)
I will get around to doing all the things you suggest, as I’m now somewhat getting used to film again. It’s fun, and it’s educational, and if I mess up, so what - I can start all over.
Aha! I missed that box hiding down at the very bottom.
So, anything pure white turns green, and anything put black turns blue.
Very handy - thank you!!!
I wonder how many people besides you are aware of this?
I will leave it on from now on.
And I can see now that I need to be more careful positioning the triangles.
I don’t understand? As I adjust the cropped area to what I want, the histogram changes accordingly, and the triangles move to new locations based only on the cropped area. I rarely have to adjust anything here, most of the time it just “works”.
I recently updated VueScan - they might have modified how this works.
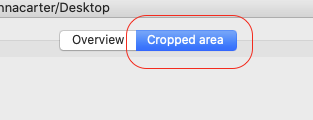
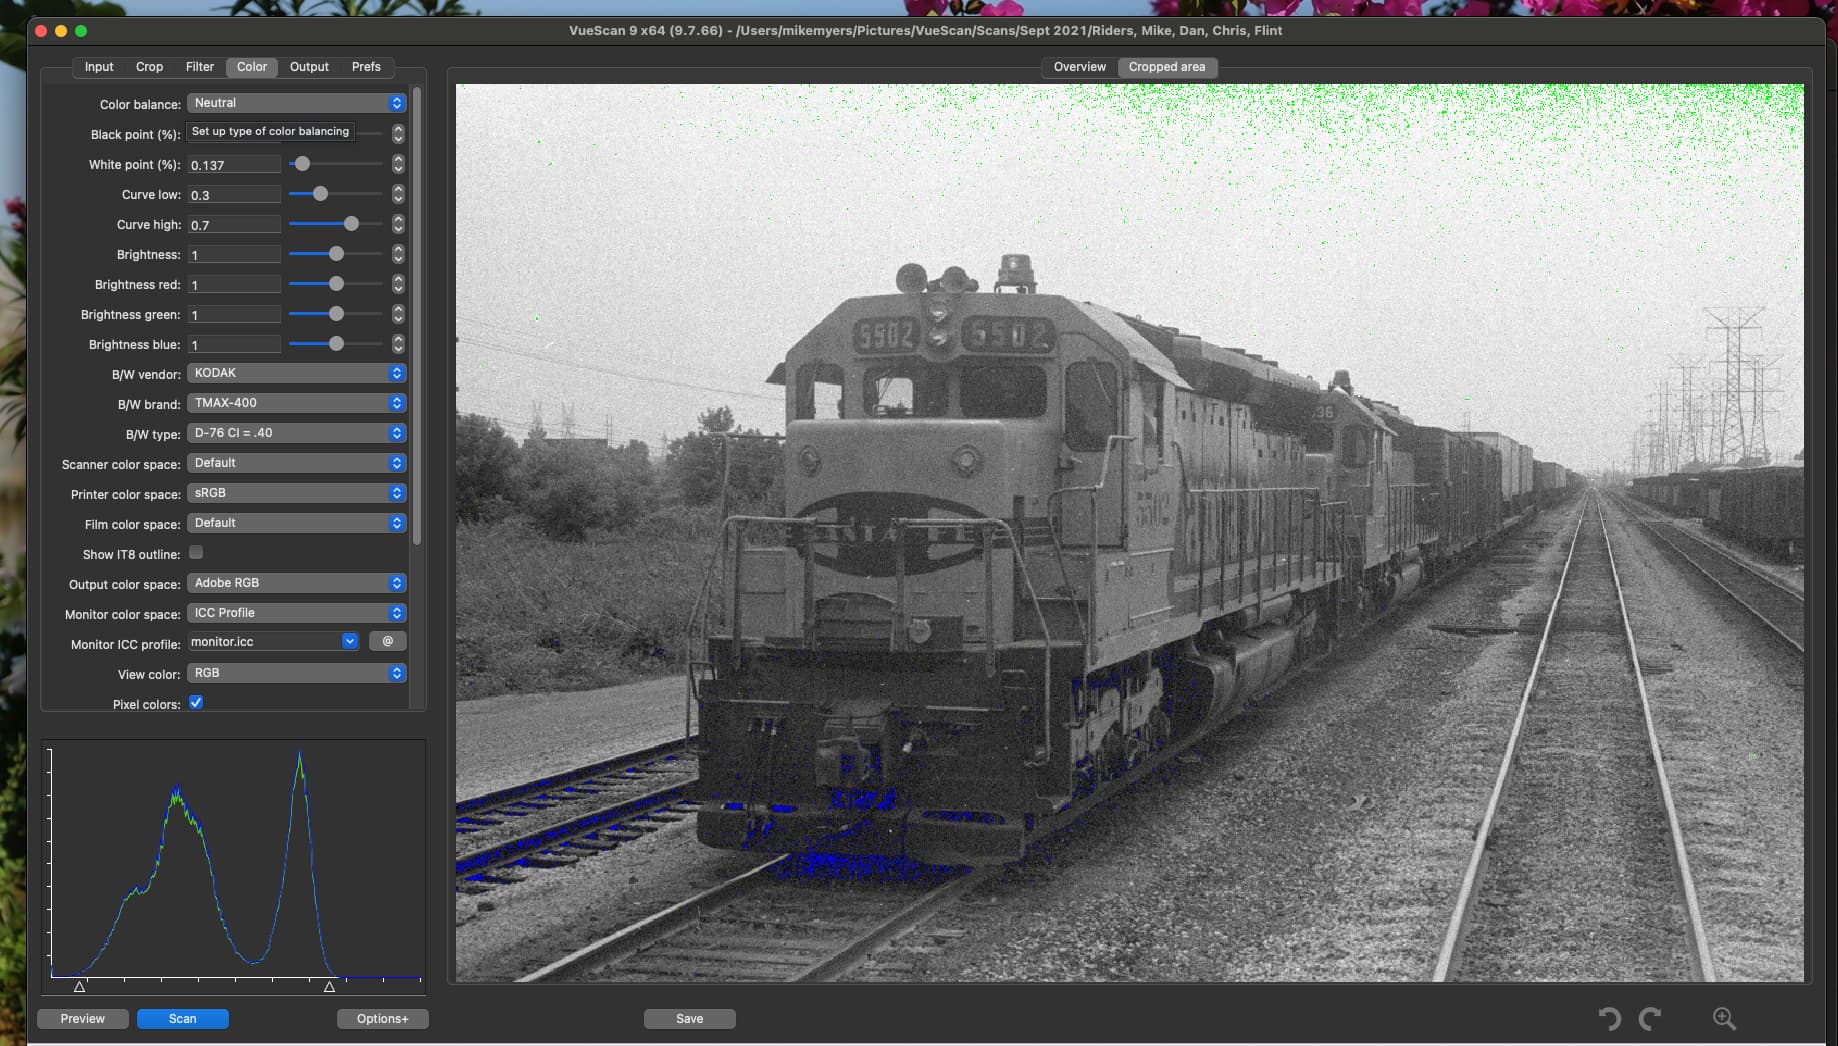
I meant that the screenshot that you shared shows that you are looking at the Overview tab, which shows the area surrounding the cropped area. This affects the histogram but, if you switch to the Cropped area tab…
… the histogram is based solely on the area that you want to scan and will react differently.
As a test, I brought up my VuePoint screen for an image I recently scanned, and for me, all the “Cropped Area” changes is the size of the cropped area on my screen. The Histogram doesn’t change.
Maybe I have some other setting different from what you’re using?
Yes, confused - I always adjust the crop (the “ant’s lines”), so my histogram should be correct. I usually leave the setting at “overview”, not “crop”, as I’m constantly re-considering my crop.
I think we’re saying the same thing - whether or not I select “overview” or “crop”, having adjusted the crop lines, nothing seems to change in the image or the histogram for me. Using “crop” looks prettier, so maybe I’ll try using that, but if I decide to make a small change in the crop I would just have to go back to “overview” anyway.
I know it looks quite different, but isn’t the end result the same?