Any HDR like this?

In addition to @Joanna’s example, I also use Local Adjustments extensively to lift shadow details or to bring out sky and other details without changing the overall global exposure. In addition, I generally use the global shadows control sparingly because higher values impact too much of the mid-tones. I did not modify global shadows at all for this image. I then export using DeepPRIME which results in a huge amount of clean shadow detail that may have been barely visible in the original image.

I see no significant advantage to using a different application to create the sense of a greater dynamic range, or any need to use bracketed shots in a full featured HDR program.

Here is an image taken in Hartford, Connecticut, USA shortly before sunset

With geometry adjustments only

.

With global and local adjustments in addition to geometry

3 Likes

Ah, OK, that explains it.

Thanks

My image just above also uses shadow contrast. Some people seem to believe that FilmPack 5 Elite is primarily about film emulations. It is much more than that.

Mark

1 Like

I have not experimented with the current HDR Efex Pro within PL4 Elite current. Does this plugin work as (most of) the plugins for the Adobe product, not requiring the manual creation (export) of an intermediate file (e.g., a TIFF) for the plugin to use, but rather “automatically” using the internal representation of the working image file in PL4 or creating a temporary file without any intervention from the user and then removing such files when the Adobe application is closed? I much prefer the latter, only exporting to a full pixel-level information file (in most ways, equivalent to a raw file such as a NEF) when I choose to do so for other purposes.

From the PL4 manual (PDF that I have downloaded as a more useful reference than attempting to find on the web), High Dynamic Range (single-shot HDR)
This category contains four presets that simulate HDR effects - that is, images with an extended dynamic range but with a tonal range that
is redistributed to be used without having to use special software or 32-bit files. These single-shot image presets do not require combining
multiple images shot at different exposures, and can be used on both RAW and JPEG files:
HDR - Realistic: Provides a less-pronounced HDR effect. Restores highlights, lightens shadows, and has a reasonable effect on
the tone curve and vibrancy.
HDR - Artistic: Provides a marked HDR effect. Restores highlights, strongly brightens shadows, and emphasizes the tone curve
and vibrancy.
HDR - Backlight correction: strongly lightens shadows under backlighting conditions, while still preserving a natural look.

Are any of these similar enough to what you used? If so, can I use one of these with my additional “favourite” settings, that is, as a “partial preset” upon which to build a new local-to-my-PL preset? I have played a bit with these as I do not need HDR very often – but I had an otherwise “keeper” image that would have benefitted from such and thus I experimented. I became more interested when a DxO-competitor email advert had a display of what appeared to be AI technology for this purpose (AI as with PL “deep Prime”) that would decrease my workflow time interval and effort to the endpoint of a preliminary image to submit to a client.

Some people seem to believe that FilmPack 5 Elite is primarily about film emulations. It is much more than that.

So I have just discovered. Probably time I took the trial for a spin…

While I can’t speak for @Joanna, I don’t use any of those HDR presets. They are primarily just adjustments lto Smart Lighting, a couple of contrast sliders and vibrance and don’t work equally well for every image. They don’t apply any Local Adjustments, of course, and Local Adjustments are a critical component for any of my attempts at HDR. Since I know what I want to achieve, I just apply global and local adjustments as needed for the specific image I’m working on. In general I tend to use global presets infrequently because I usually find I have to undo some of the preset’s settings anyway. As a result, I often find it quick and easier to just adjust things on my own from scratch to reach my goals.

Mark

2 Likes

Certainly I don’t normally use those presets, although they can be interesting. As you say, they are mainly Smart Lighting and a couple of other small tweaks, and are not necessarily what I would want as an end result.

Here is the result of the “Artistic HDR” preset

… and here are the corrections that have been applied

In my opinion, this is nowhere near where I would want to end up with an image, but it does demonstrate the kind of corrections that contribute to a certain overall look and feel.

I think it is important to say that, unless you have created your own custom presets, they should only ever be regarded a starting point, which you are free to tweak to your hearts content.

If you want to know what a certain preset actually does, all you need to do is apply it to a “virgin” image and then select the “Active corrections” switch at the top of the right palettes (in PL4 at least). Then you will only see what that preset has done in terms of corrections.

A “full preset” is only a collection of corrections, applied at one time. You are free to alter any of those corrections or add more as you wish.

You can also create “partial presets”, which only affects certain corrections and you can apply those in much the same way as doing a list of corrections after the fact without changing everything from scratch.

Of course, if your partial preset touches a correction that you have already done, then that particular correction will be overwritten.

1 Like

The Nik collection button automatically creates one or more TIF files before launching a specific module.

You are correct. However, the TIFF file that was created was not available after the HDR Nik module failed to operate. I then attempted to get to another Nik module that ultimately did launch, but required me to create another copy of the TIFF file from the NEF, and was not able to use (perhaps to locate) the TIFF file that already had been created. In the PL4 version I have, the TIFF file actually is listed as an export in the same list as the JPEG files that I export for a client, but there seems to be no mechanism to transmit this listed TIFF to the second Nik module after the first one (HDR) failed to launch. Is my statement of the order of events clear or have I been unclear?

Hi Wildlife

Have you found why the Nik module failed to operate ? If you experience bugs, the forum is not the best place to discuss them. There is a customer support ticket system.

I did not have problems using the Nik-Photolab interface.

1 Like

If you have already created a Nik_TIFF file that you wish to send to a second Nik module without creating a second TIFF copy then you must choose the Nik_TIFF that was created and then click the Nik Collection button then on Export Settings and choose “Export without processing” before clicking on the new Nik module that you wish to send it to.

I have sent a request to DxO support, although there has been no response just yet (expected given the pandemic). I provided both information on the operating environment as provided by MS Win as well as the release number of the DxO applications in use. However, by posting here, one can compare with the experience of others. Other Nik modules I have tested seem to work, although I have not done extensive testing on all of these. UPDATE: I just tried to export to a Nik module, and was presented with request to update just one day after the previous update – the files are not identical as the current update is slightly smaller. The new update also does not work in terms of linkage, and HDR does not execute from PL 4, but does execute as a standalone invocation.

The support team have been quite responsive so far.

Hi Mark,

Care sharing some details for me knowing/understanding how to accomplish this in PL4?
Would appreciate some more indepth info. Geometry and such I am familiar with, its just that I know need external HDR application (SNS-HDR) but it seems doable within PL4. Thanks in advance.

Jeroen

Take at look at this earlier post of mine

Essentially, start playing with Smart Lighting and also look at what Mark has to say.

Good HDR shots take time and effort if you don’t want them to look “artistic”. Always remember, if the sun is coming from in front of you, you should not be able to clearly too much detail in side of the rocks that is facing you.

Here’s one I did well

… and not so well

I use a number of combinations of local and global adjustments to get the results that please me. I may use a somewhat different approach depending on the original image.

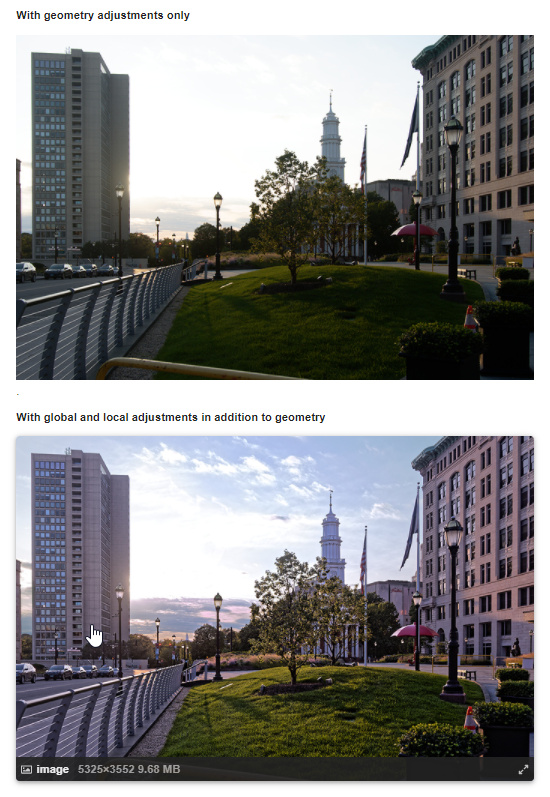
First with regard to geometry, For this image it includes the application of the camera/lens profile to repair lens distortion, and the use of the Viewpoint 3 perspective tool to fix converging verticals in conjunction with the crop tool. I also used the auto setting of Chromatic Aberration tool and the Vignetting tool.

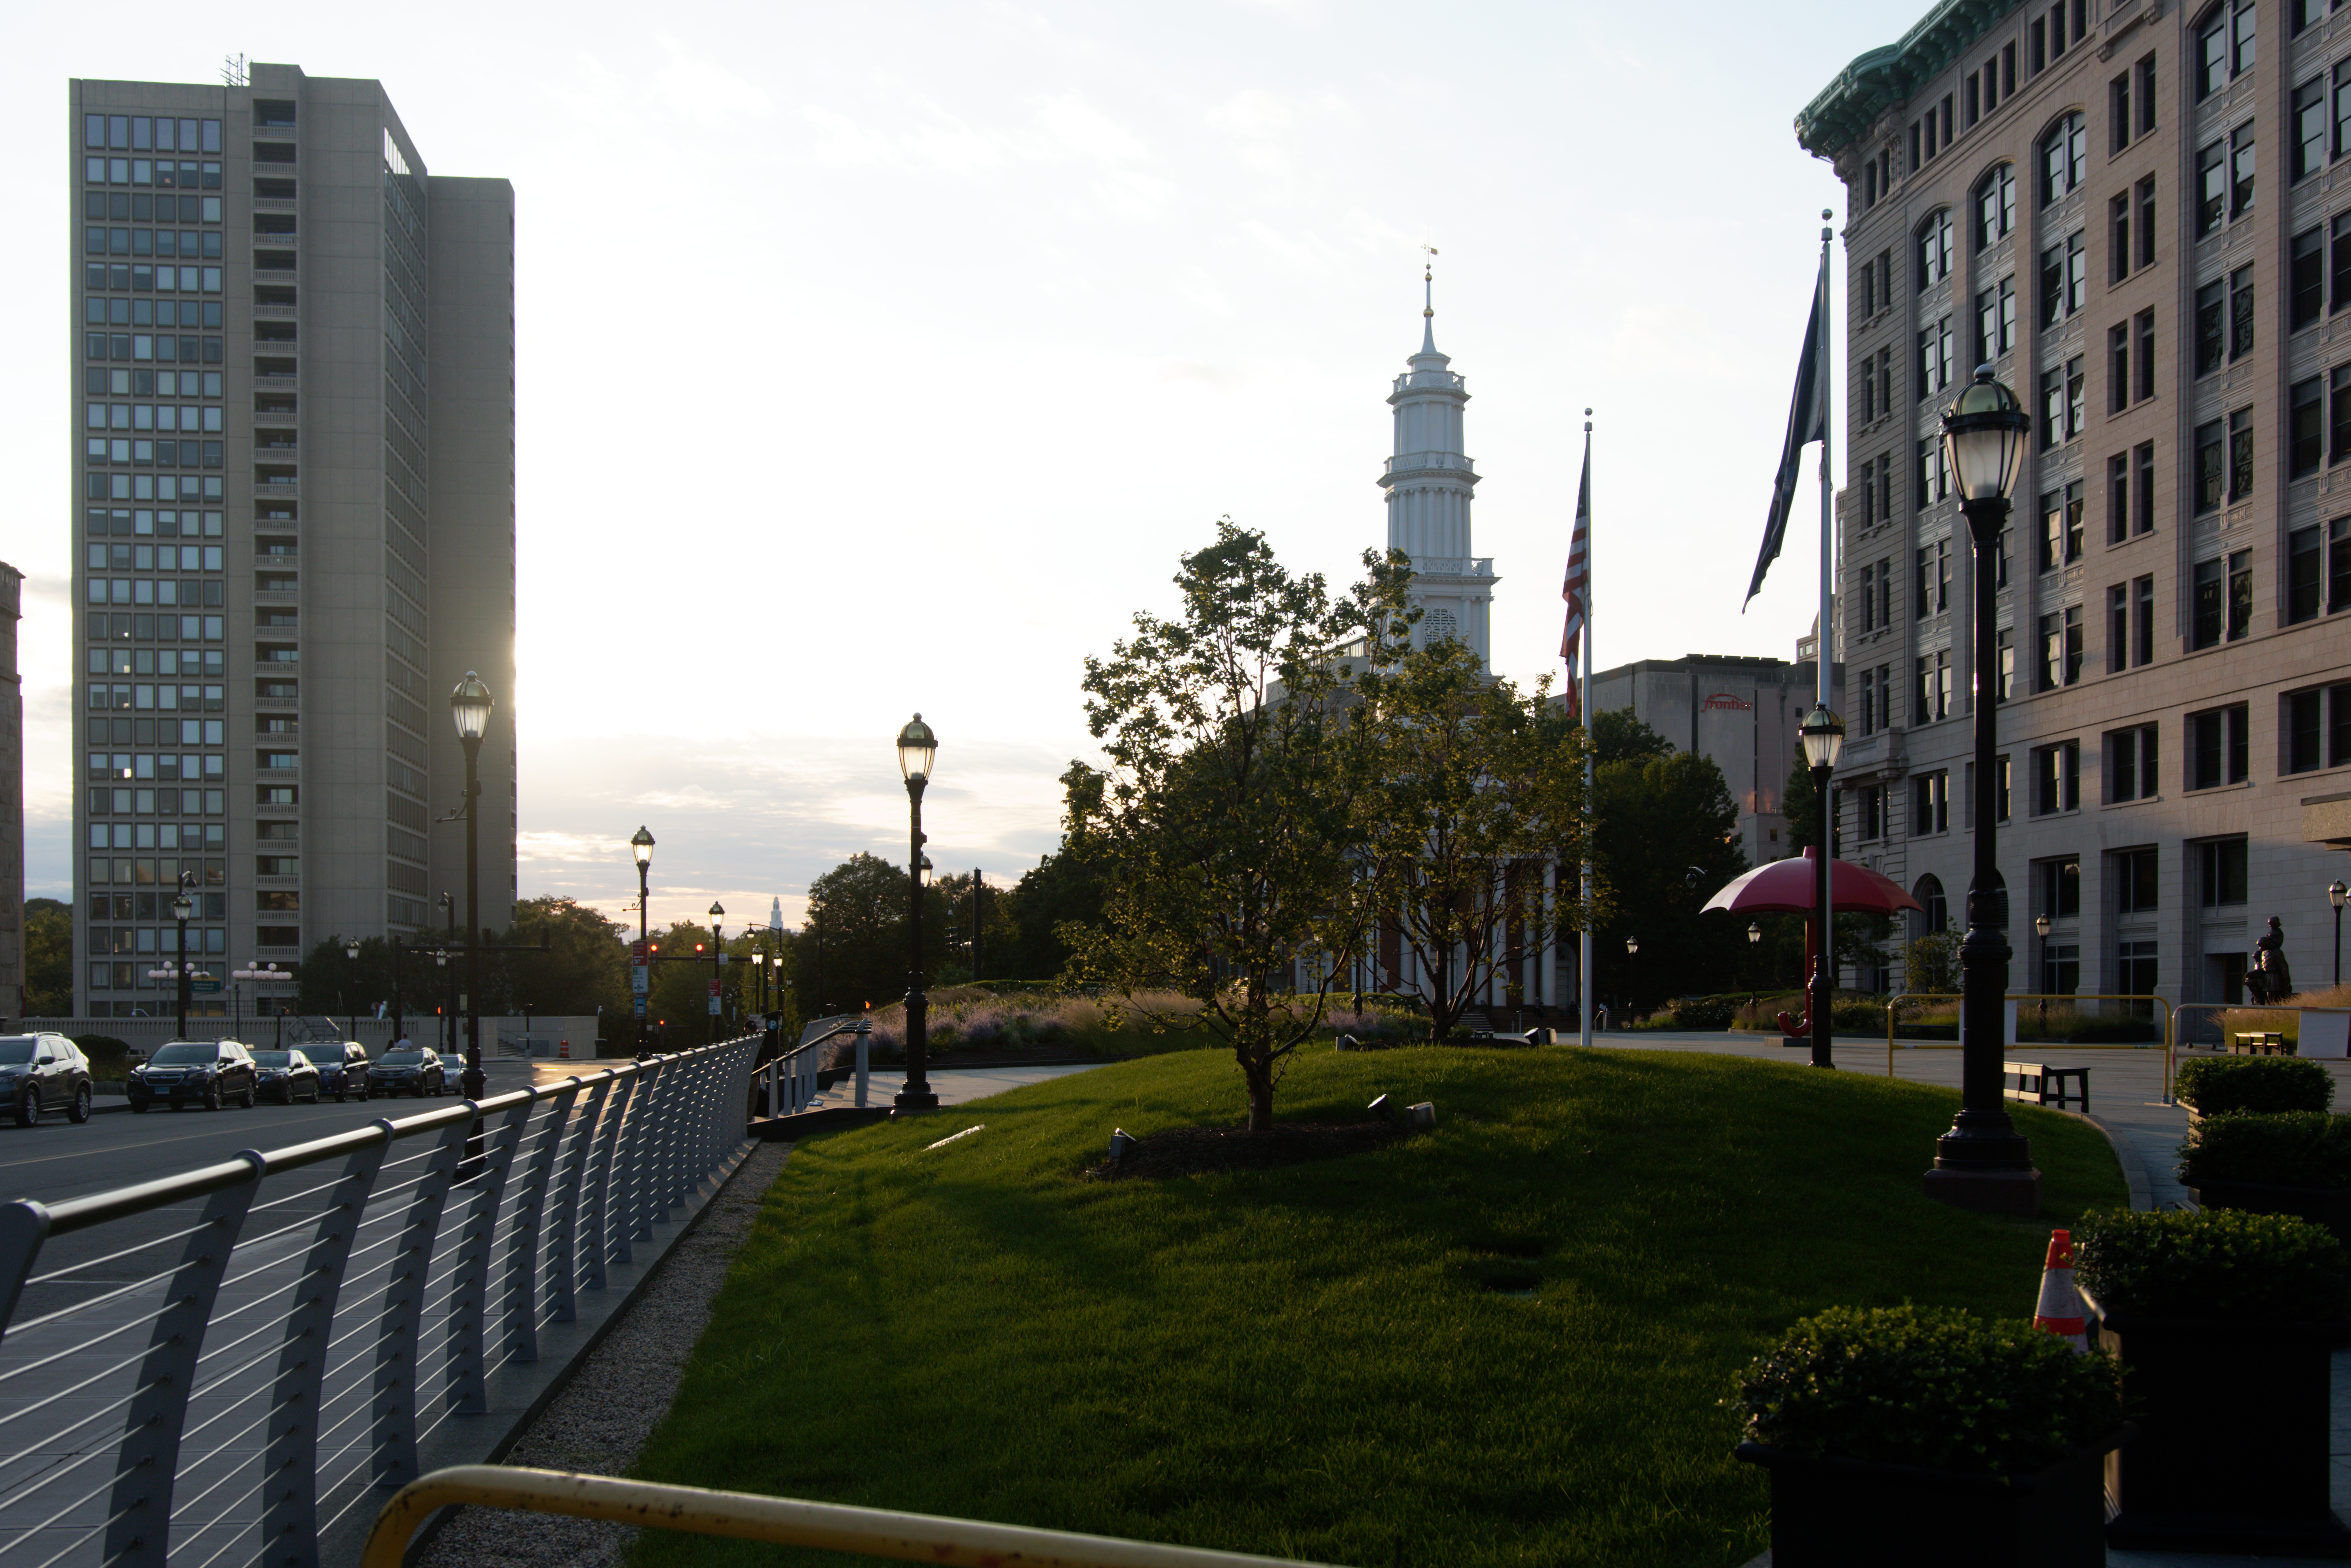
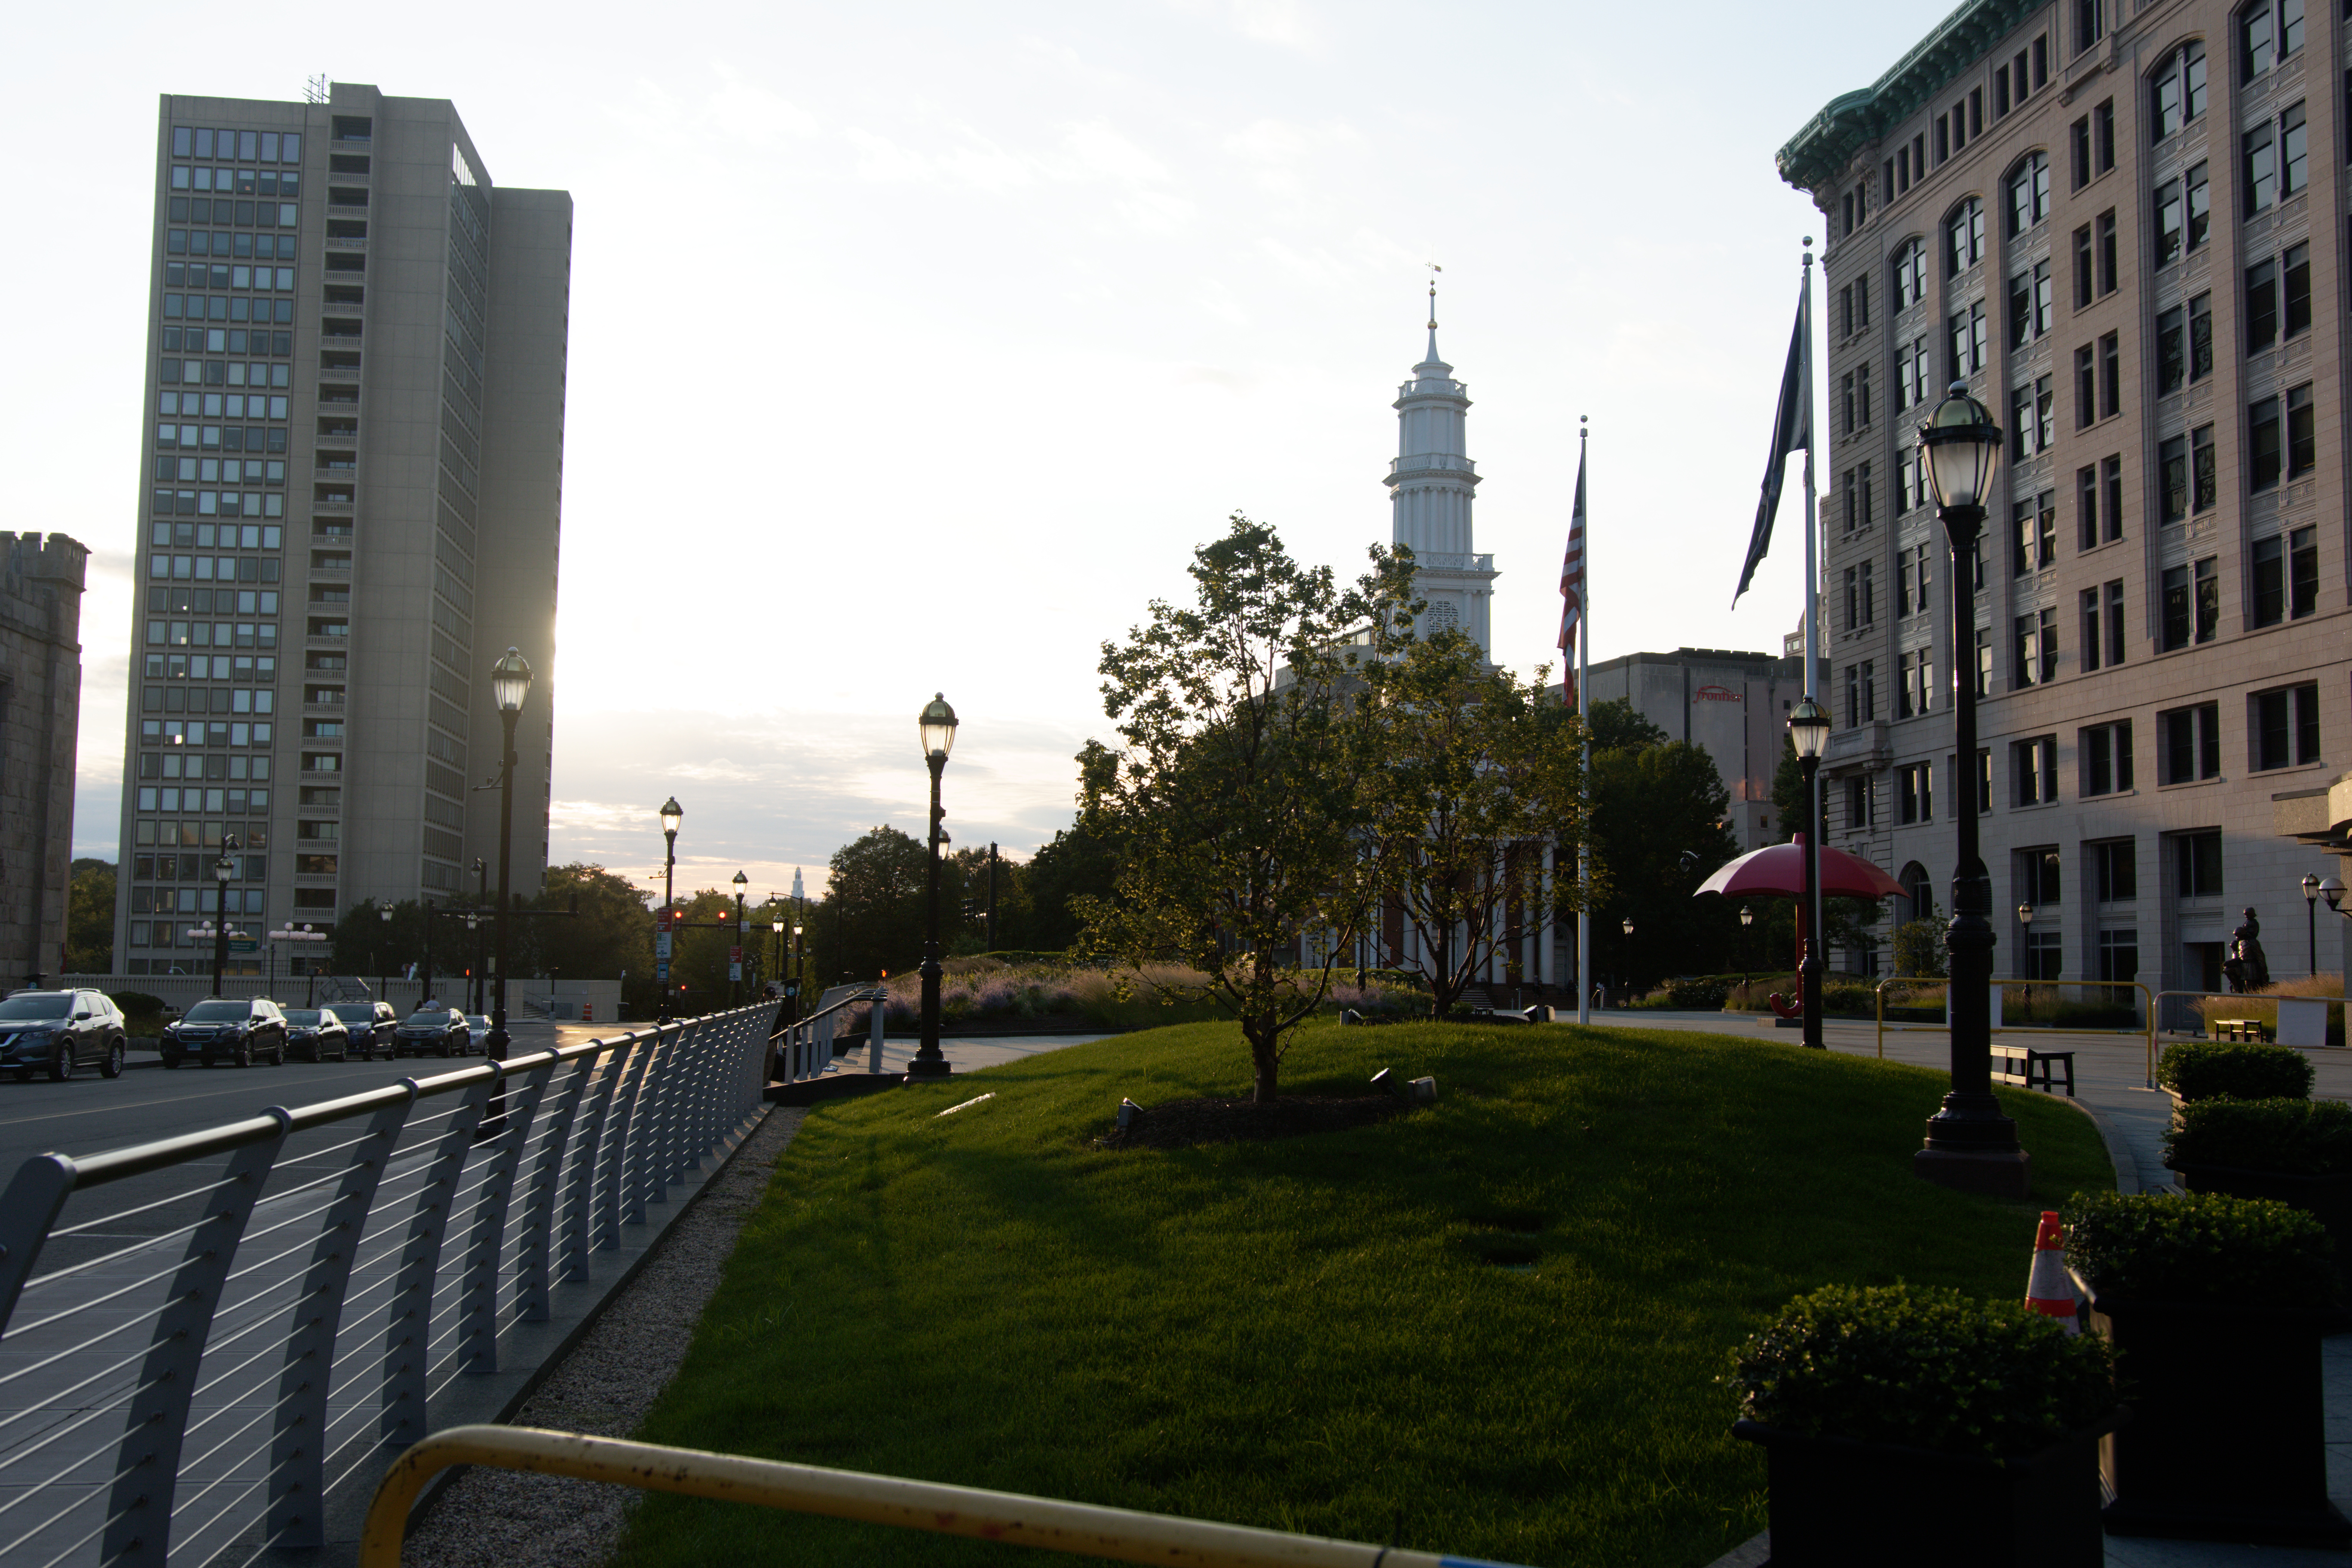
Here is the original image without Geometry.

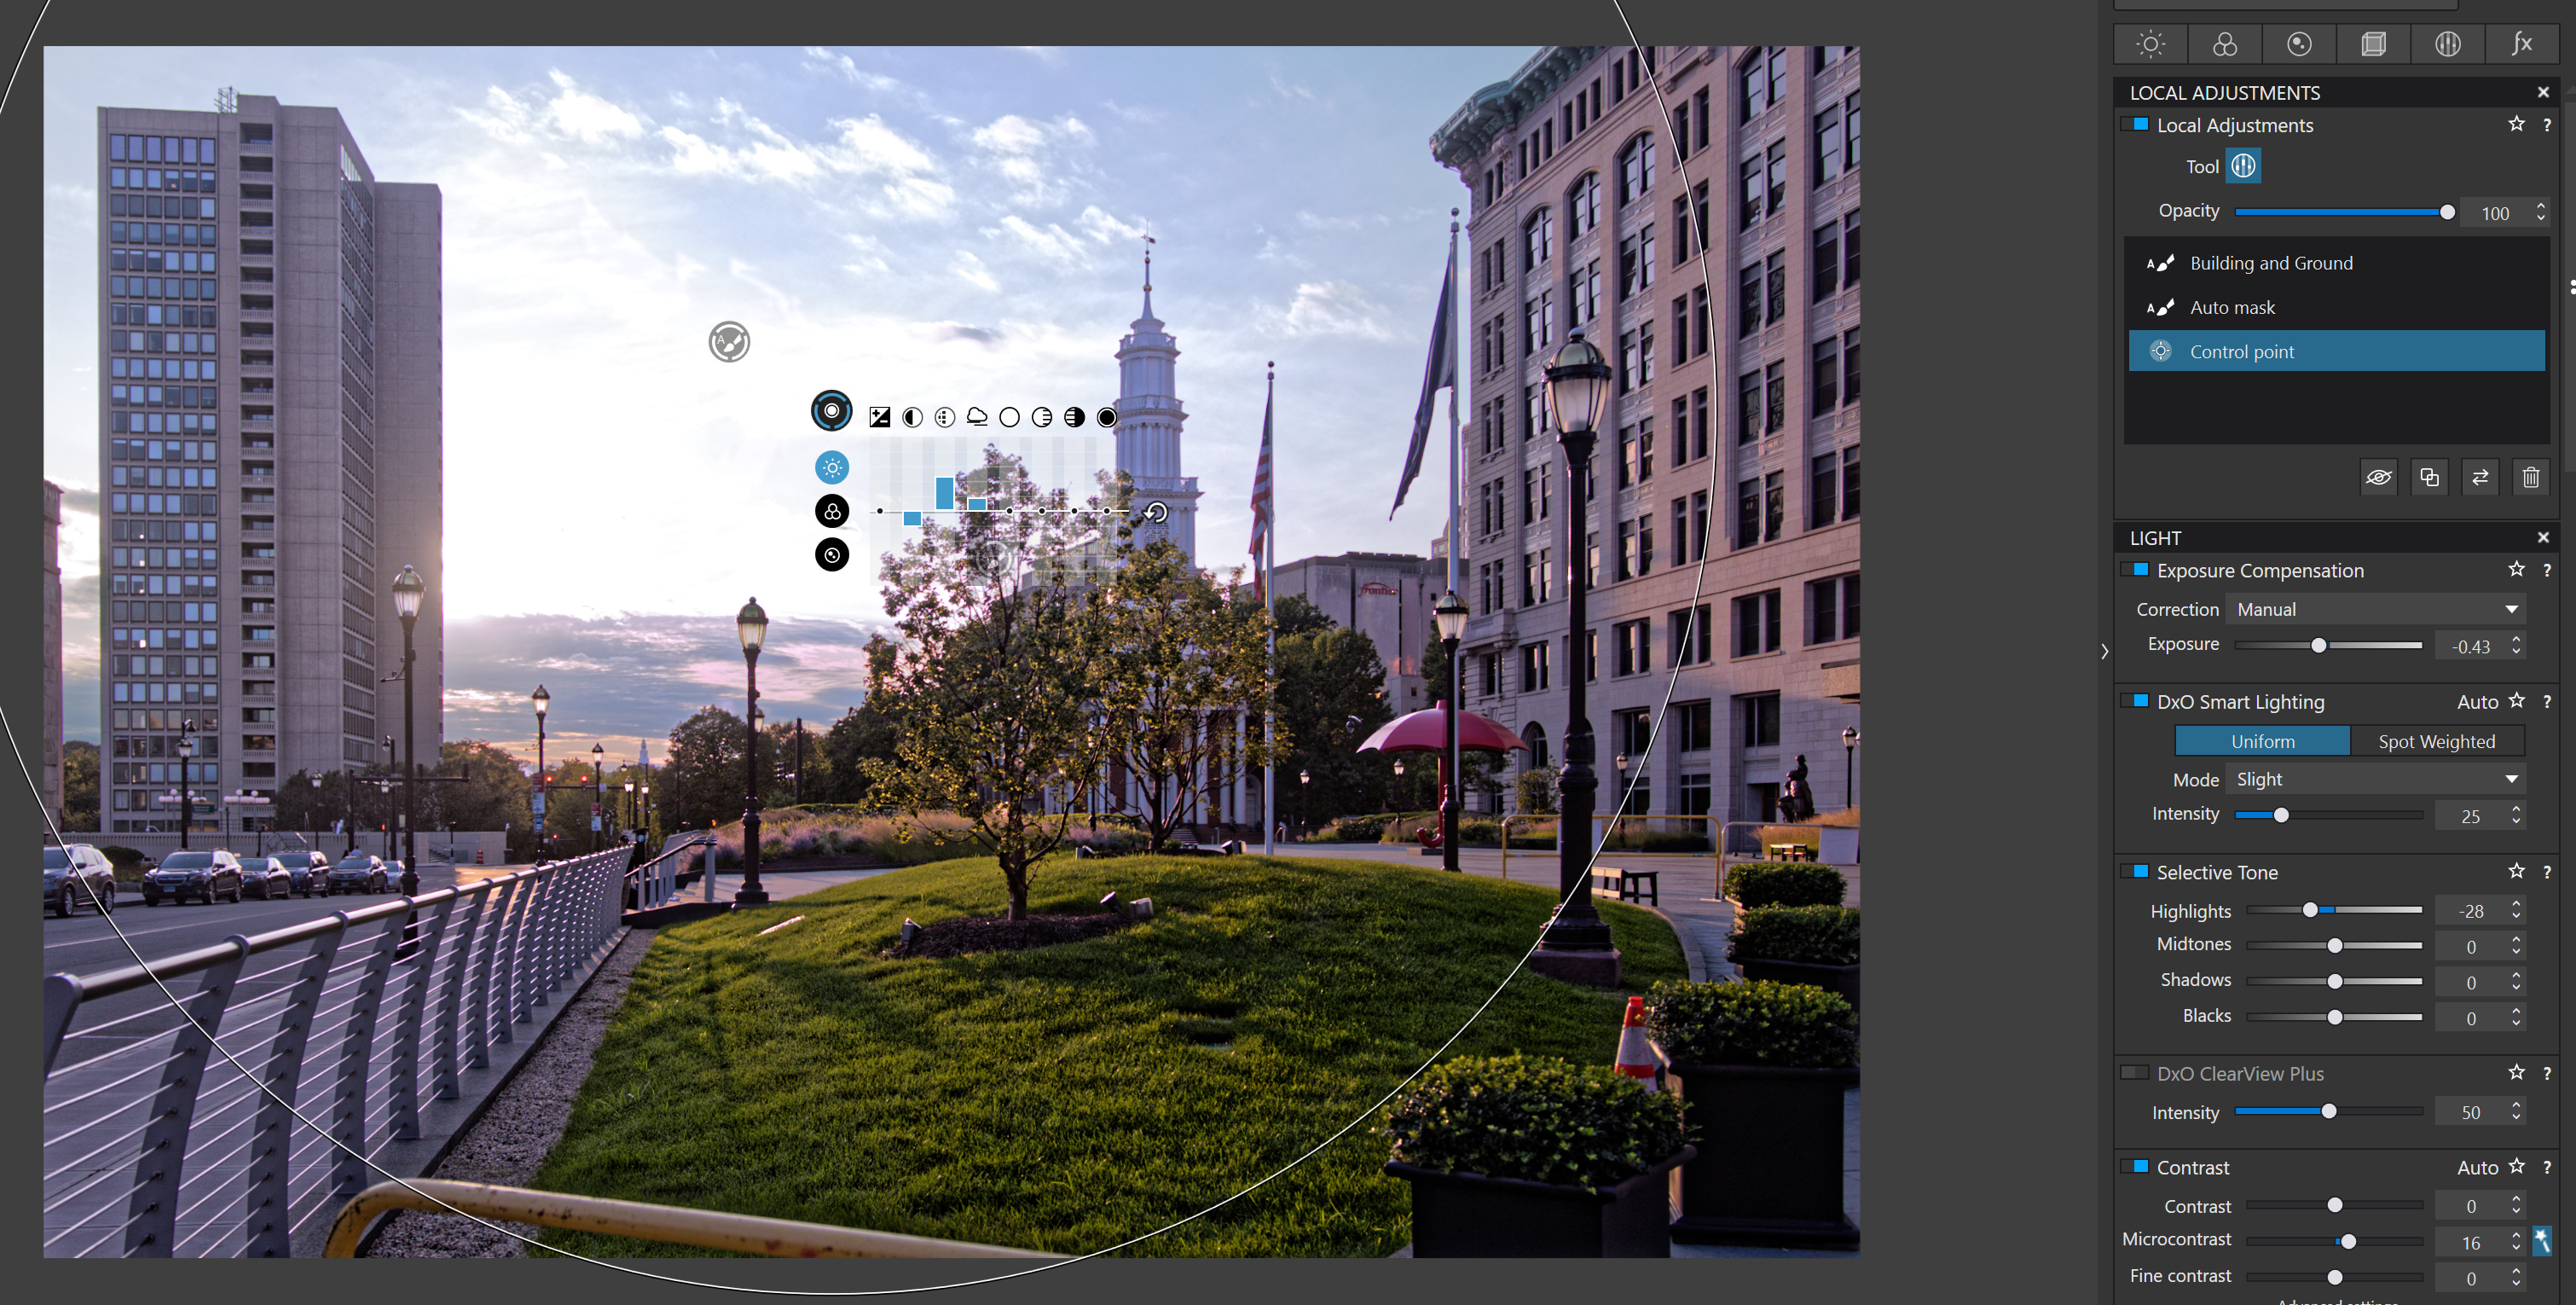
After geometry I created a large control point mask centered in the sky. I applied Local Adjustments to Vibrancy and Saturation and lowered the color temperature. I also made additional LA adjustments to slightly increase sharpness, lower contrast a bit, raise micro contrast and add a small amount of Clearview Plus. My goal was for the control point to also affect the buildings and ground for a more integrated lighting effect. Control points are somewhat similar to gradients as the slider effects diminish as you move closer to the edges of the circle. .

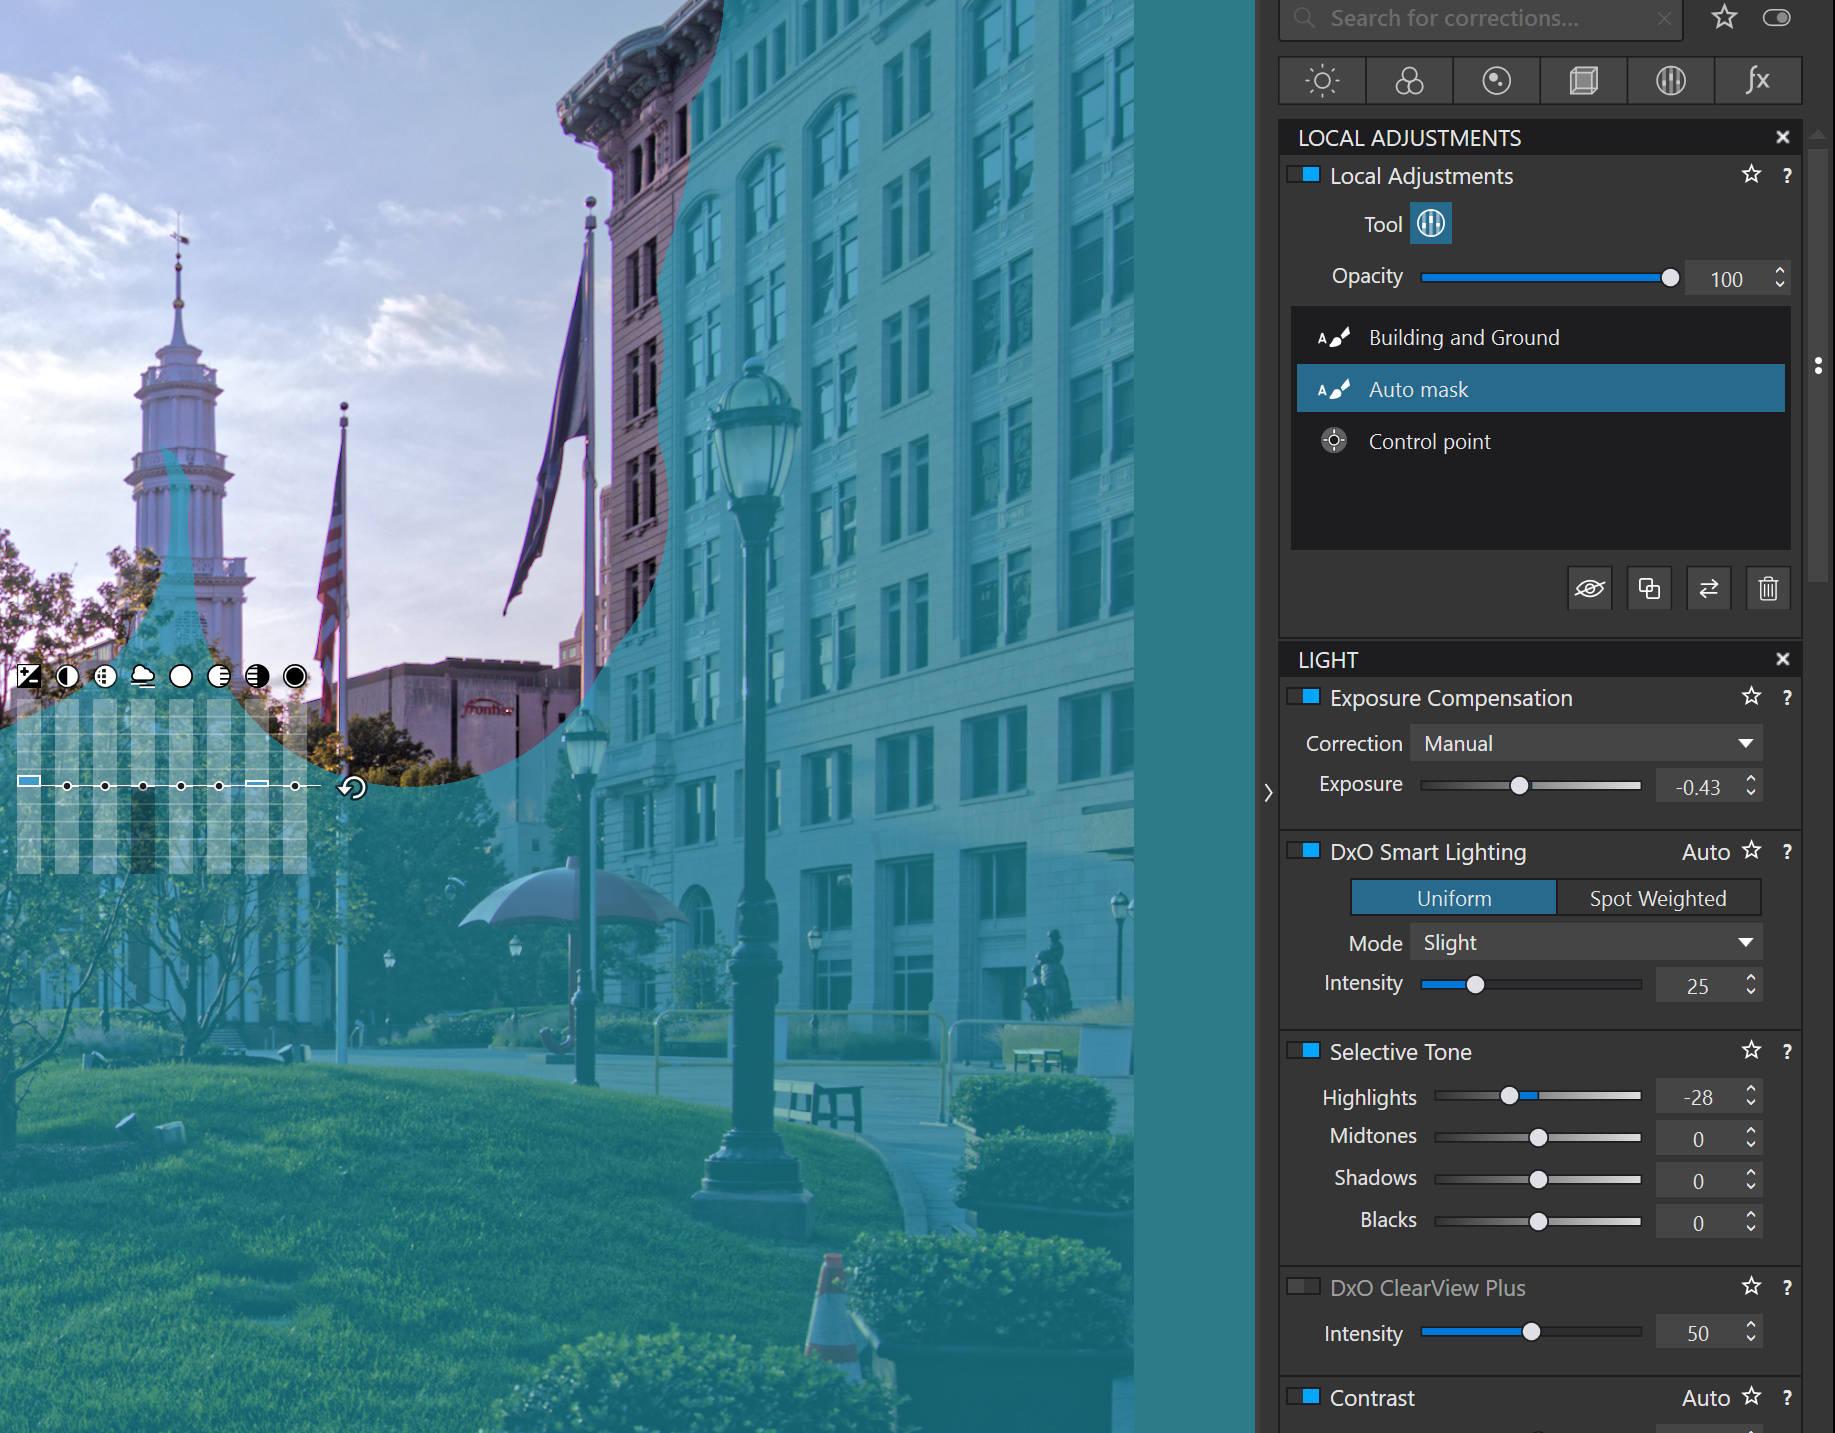
An LA auto mask was created for the buildings and ground. See part of that mask below. That mask had sharpness, vibrancy, micro contrast, and some shadow recovery applied

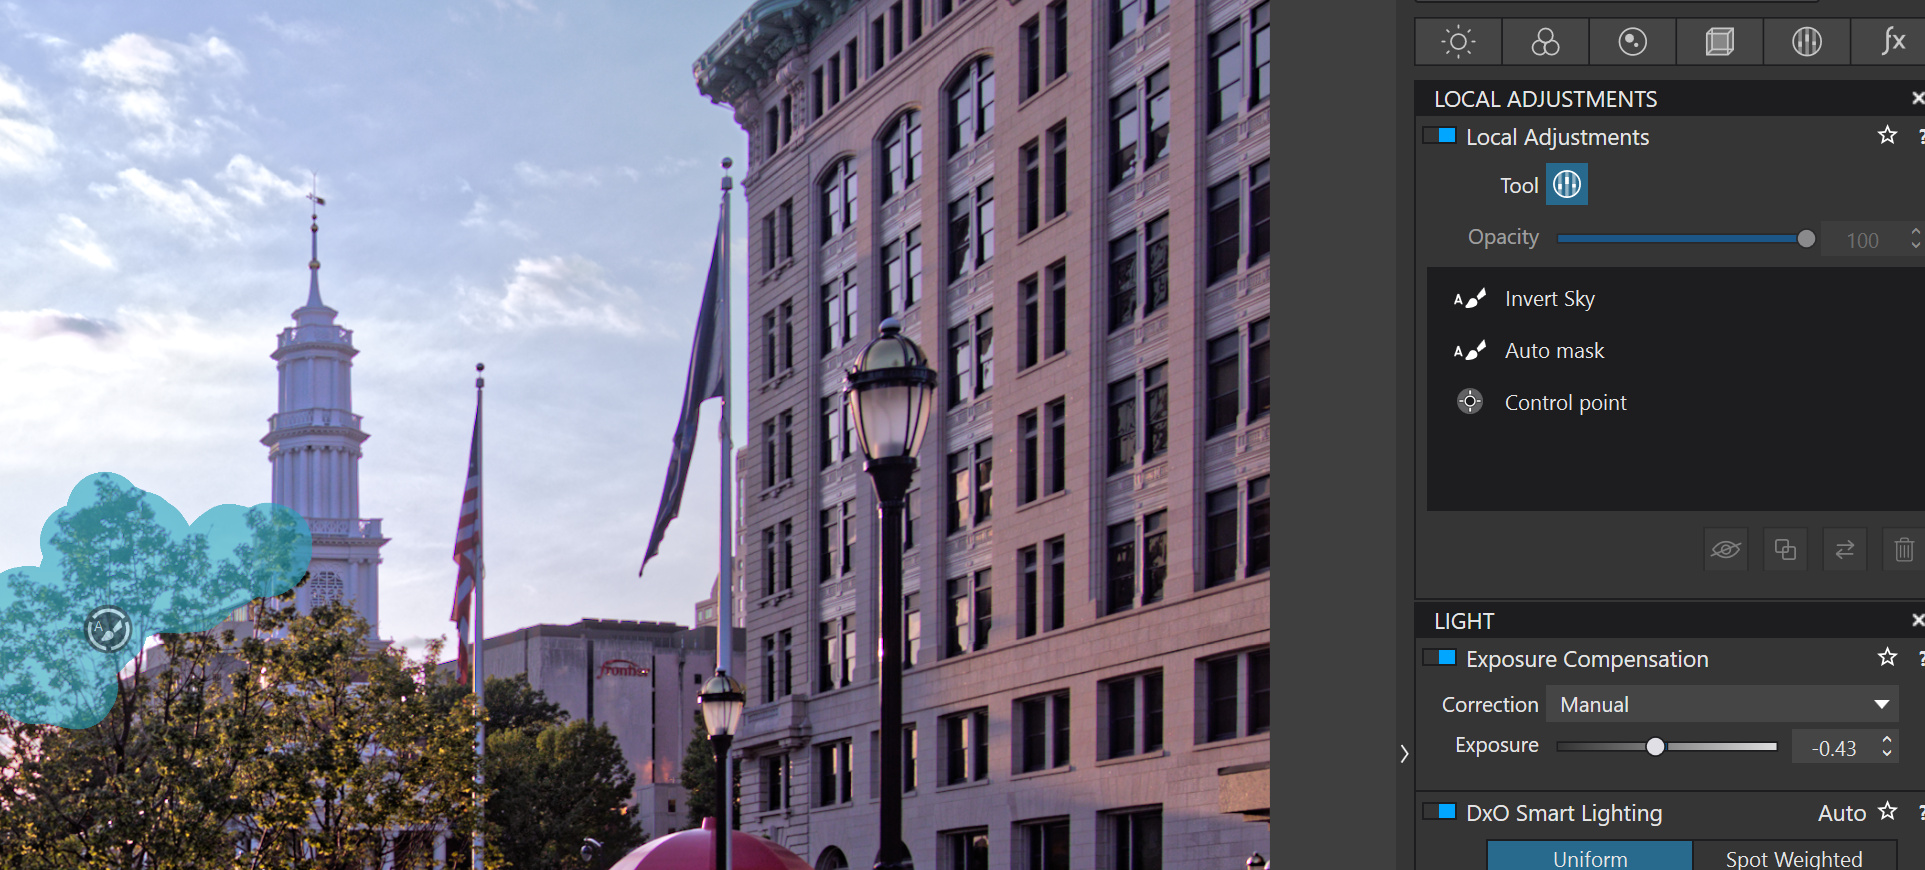
I applied a separate auto mask to the top of a tree to fix an exposure issue by increasing exposure and shadows slightly.

I tried to ensure the lighting and other Local Adjustment settings of all three masks integrated well together and I made adjustments as needed.

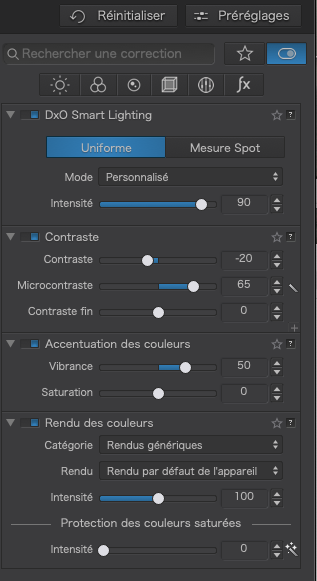
Finally, I made a number of global adjustments including lowering exposure a little to compensate for the local adjustments, setting smart lighting, lowering highlights a bit, increasing micro contrast and shadow contrast, using the default lens sharpening, and using the default auto value for DeepPRIME.

This all took far less time then you might think. The whole process, including the planning and decision making did not take much longer then 15 minutes. While there was a small amount of experimentation during the editing, my familiarity with PhotoLab’s features and tools, including their range of adjustments and how they interact with each other, made the process very straight forward. As an example the Global adjustments I made for the last step took no more than 1 or 2 minutes. Besides familiarity with the tool set, I believe the availability of a 28" 4K monitor and a reasonably fast computer helped me speed up the process. I am still learning after three years and my use of PhotoLab continues to evolve.

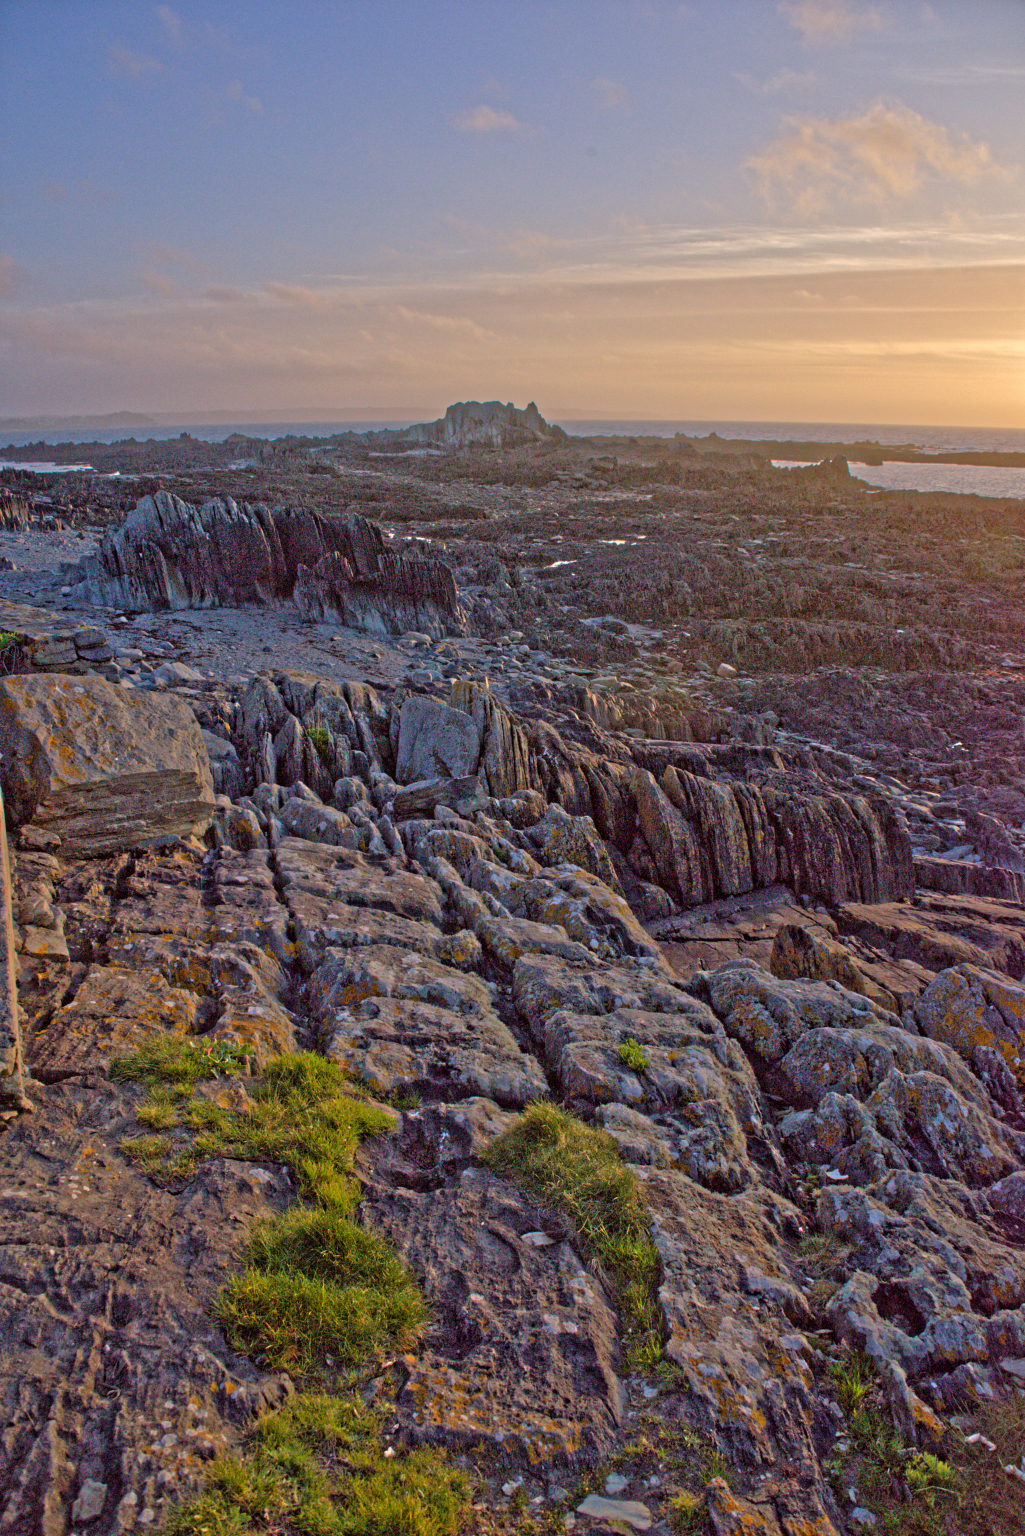
Since this was a very late afternoon scene, prior to the sun reaching the horizon, I wanted to be careful not to pull too much detail from shadow areas and to ensure the lighting and contrast on all surfaces was consistent with the time of day. Unfortunately, there is no magic bullet to accomplish this. Poor lighting and contrast adjustments as well as over sharpening and over saturation of colors are some of the reasons that many HDR images don’t have a proper balance and have that over processed HDR “look” that many people hate.

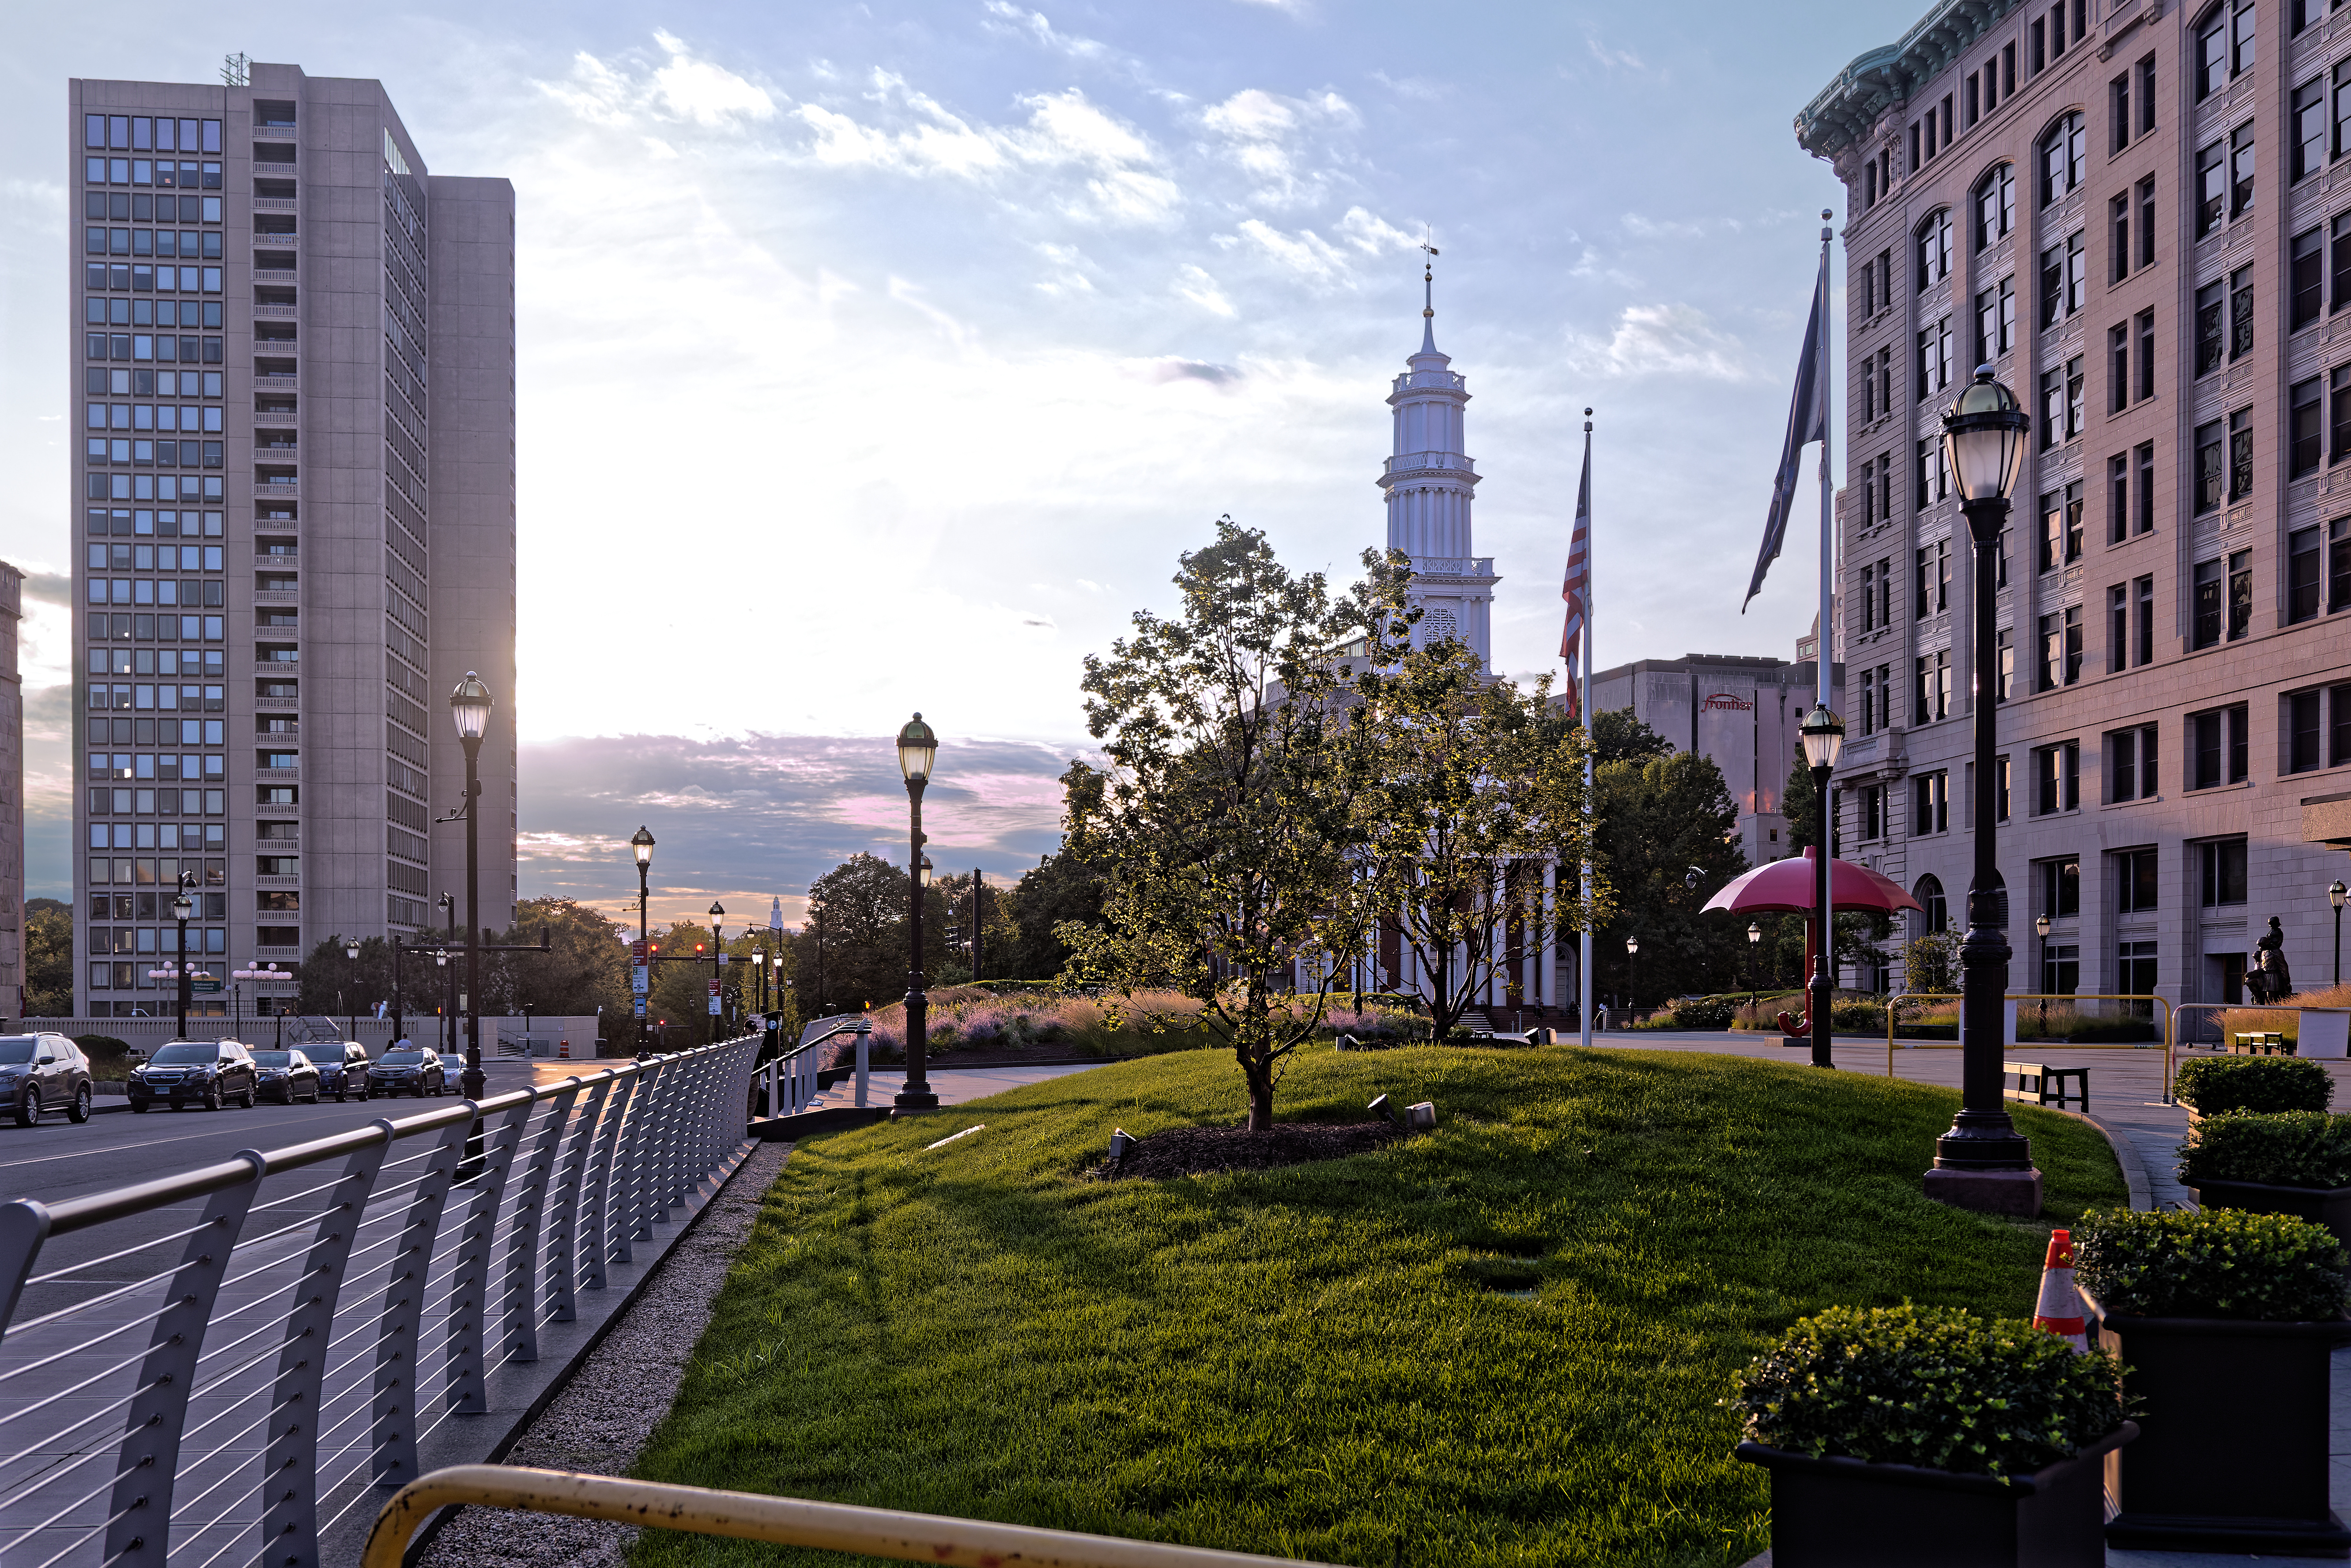
Here is the end result again. It is not perfect by any stretch of the imagination, and if I did it again from scratch I might make some different decisions. But it more or less met my goals and I’m pleased with the results. Of course, I should have cropped out or cloned out the yellow bar at the bottom of the image and will do so when I get a chance.

Some people may not care for my design decisions or how I achieved them, but in the end I only need to please myself.

Mark

3 Likes

This is a very good demonstration of proper technique for achieving a very pleasing and natural-looking single frame HDR effect. Well-done Mark!

1 Like

Thanks Mark.

Whether my results are pleasing and natural looking I will leave to others. This is just my approach. There are a number of ways of achieving one’s goals using PhotoLab.

While Photolab doesn’t support true layers and is not as full featured as a pixel editor, it is a very flexible tool which can compete well with other more “full featured” software if you understand how to get the most from it.

Mark

1 Like

Agreed! If they would add a layers/Masking module, I’d never leave DXO apps.

1 Like