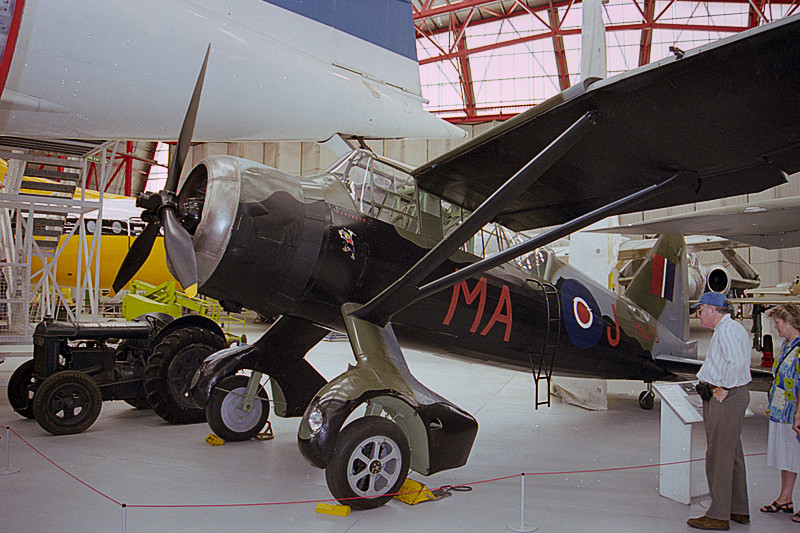
I’ve just gone through scanning 7 films from negatives, which I took with my Pentax MZ-50 during a 1999 trip to the UK. The scanning has gone pretty well with VueScan and now I am using PhotoLab 4 to whip some of them into good enough shape to share.
Where my trouble lies is with the “white balance”. I am able to use the eye dropper to pick a neutral tone and the photo ‘snaps’ to a sensible looking image, but what is actually going on when I do this?
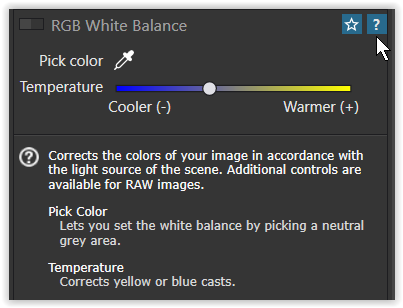
With a RAW file from my DSLR, I can use the dropper in the same way and then choose to ‘juice’ the photo a little by warming or cooling it with the white balance temperature slider. For an “RGB” image like the TIFF scanner files, the blue-yellow slider is still there, but after using the eye dropper, as soon as I touch the slider, the colour goes back to original and I’m not sure the colour I achieved with the eye dropper is reachable just using the slider. It seems to be a whole different set of colours.
Furthermore, without recourse to the white balance slider, what is a technique to “warm a photo” using other PhotoLab blocks?
I realise, having done all the scanning, I could probably profile the films to get better colours in the first place, but I would still like to understand how to do this warming or cooling.
Hi zkarj. Yes I’ve noticed this same phenomenon. For RGB white balance there is no slider for the green/magenta axis. The eyedropper tool is somehow decoupled from the rest of the WB adjustment and the blue/amber slider for RGB WB adjustment and adjusts both the B/A and G/M axes as it does in RAW WB adjustment. If you adjust the B/A slider at all, you can’t even get back to the As Shot WB without turning off the RGB WB adjustment palette entirely. This needs to be improved and a G/M slider needs to be added. I would like to see both of these sliders activated on the Local Adjustment equalizer for RGB WB adjustment also.
Tiff-files are ‘finished’ versions, not comparable to ‘not yet developed’ RAW-files.
as such one can’t correct the original colour temperature anymore (no ‘As shot’, ‘Daylight’ … ),
but change colour shift and the eye dropper quickly helps with white balance
I too scan film (35mm transparencies using a Nikon CoolScan V ED). My experience is that PL is not the best tool for retouching scans. Yes, PL can edit JPEGs and TIFFs but it is primarily a RAW converter. Affinity Photo is a proper pixel editor and as such offers so much more than PL. For example, it allows you to alter both Y/B and G/M. Then there are all the possibilities that come from working with layers.
Right now Affinity Photo is on offer at 50% off. At that price it’s rude not to buy it:
NB I have no affiliation with Affinity. I simply suggest it as a better way of getting your scans to look the way you want them to look.
Forgot to mention. The Nik collection works with Affinity, EXCEPT for Perspective Efex (even though that one does work in Photoshop) but if you’ve got ViewPoint that doesn’t matter.
“As shot” was a poor choice of words on my part. I should have said “You can’t get back to the WB that was baked into the TIFF file by the conversion from RAW without deactivating the WB palette”. Given my choice of setting WB on a RAW file or a TIFF, I’ll choose RAW every time, but when dealing with scanned film negatives this choice is not available. Changing WB on an RGB file is very much possible, I do it all the time.
I do, that’s a direction I didn’t consider, thanks.
That was the bit that was confusing me.
I understand that much. But I thought the slider provided would “warm” the colours in some fashion. Which it does, just not from the point the eye dropper sets it. I totally accept that false colour could be introduced.
I knew at the outset it wasn’t going to give the same flexibility as RAW but hoped it might be workable.
I don’t think I’d be considered rude given I already have it. I even bought someone else a license as a gift, plus I bought every other software product they produce. I’m a bit of a fan, but hadn’t considered using it for this task because I don’t use it for “photographs” unless I have a specialist need. But it seems like this task is a specialist need.
Hmm, that’s odd given the clue in the name, ‘Affinity Photo’ No, seriously I know what you mean. PL is my ‘go to’ application for processing the RAW images from my DSLR. It excels at that job, the lens corrections and noise reduction can’t be beaten. It also offers enough other editing features to do most of what I want and give me an output image I’m happy with.
Note, I didn’t say a ‘final’ image there. For example, I never print from PL, the few times I’ve tried I’ve been disappointed. For printing I use an ancient version of Photoshop because from experience I know what additional tweaks I may / may not need to make in that application to get a pleasing print.
In summary, I see PL as the way to arrive at a TIFF or a JPEG but it’s NOT where to start if you already have a TIFF or a JPEG. Others will disagree.
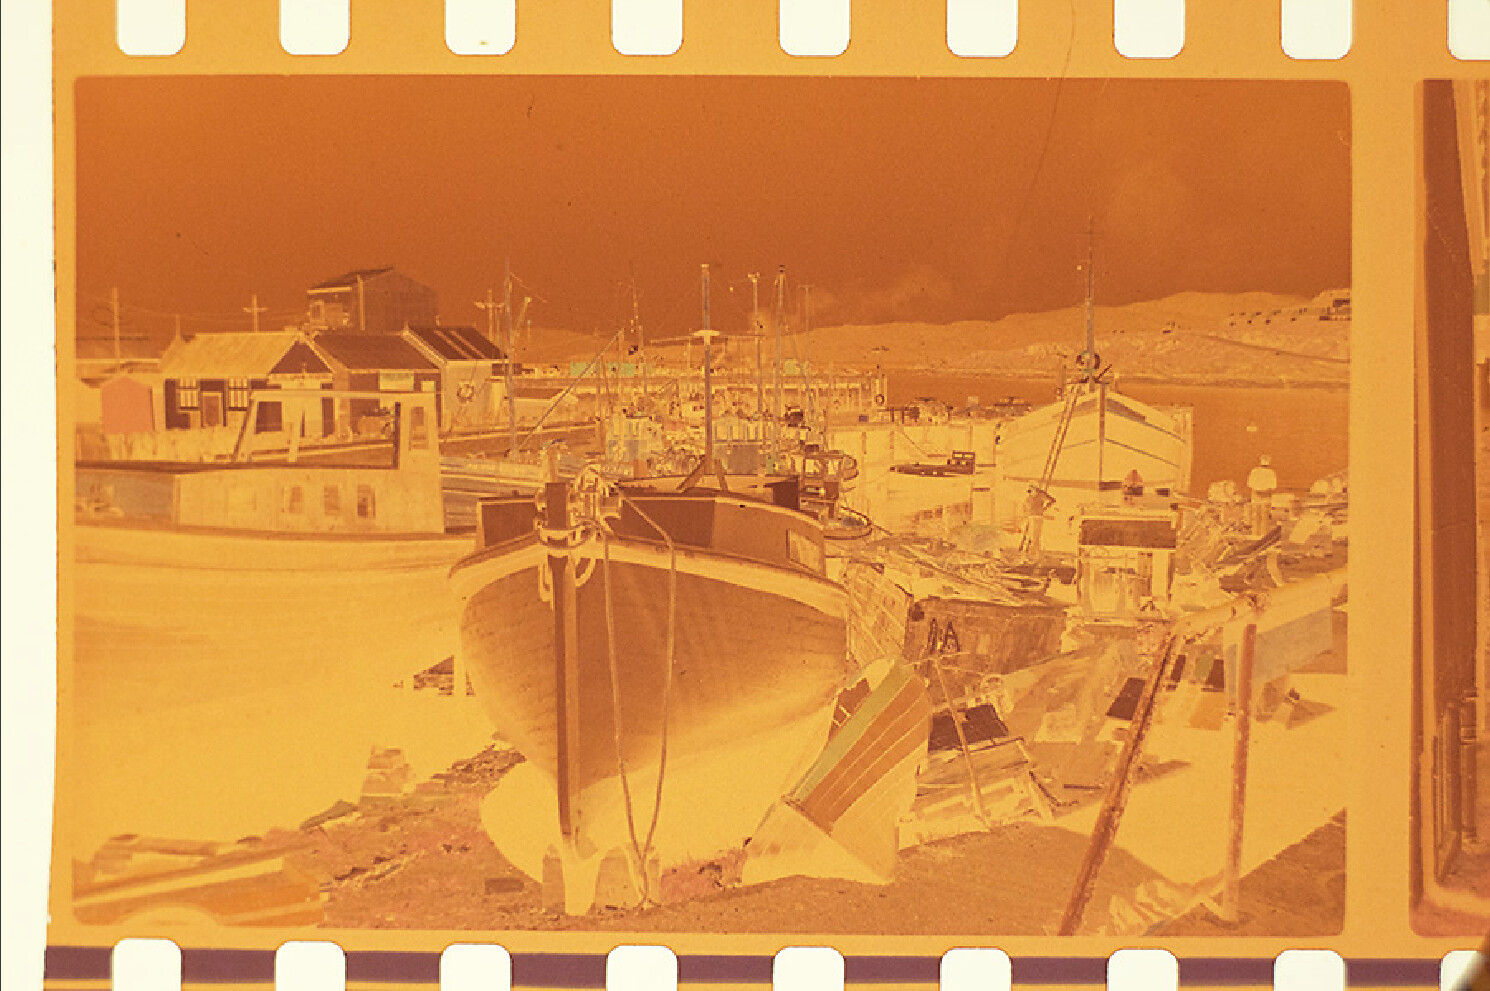
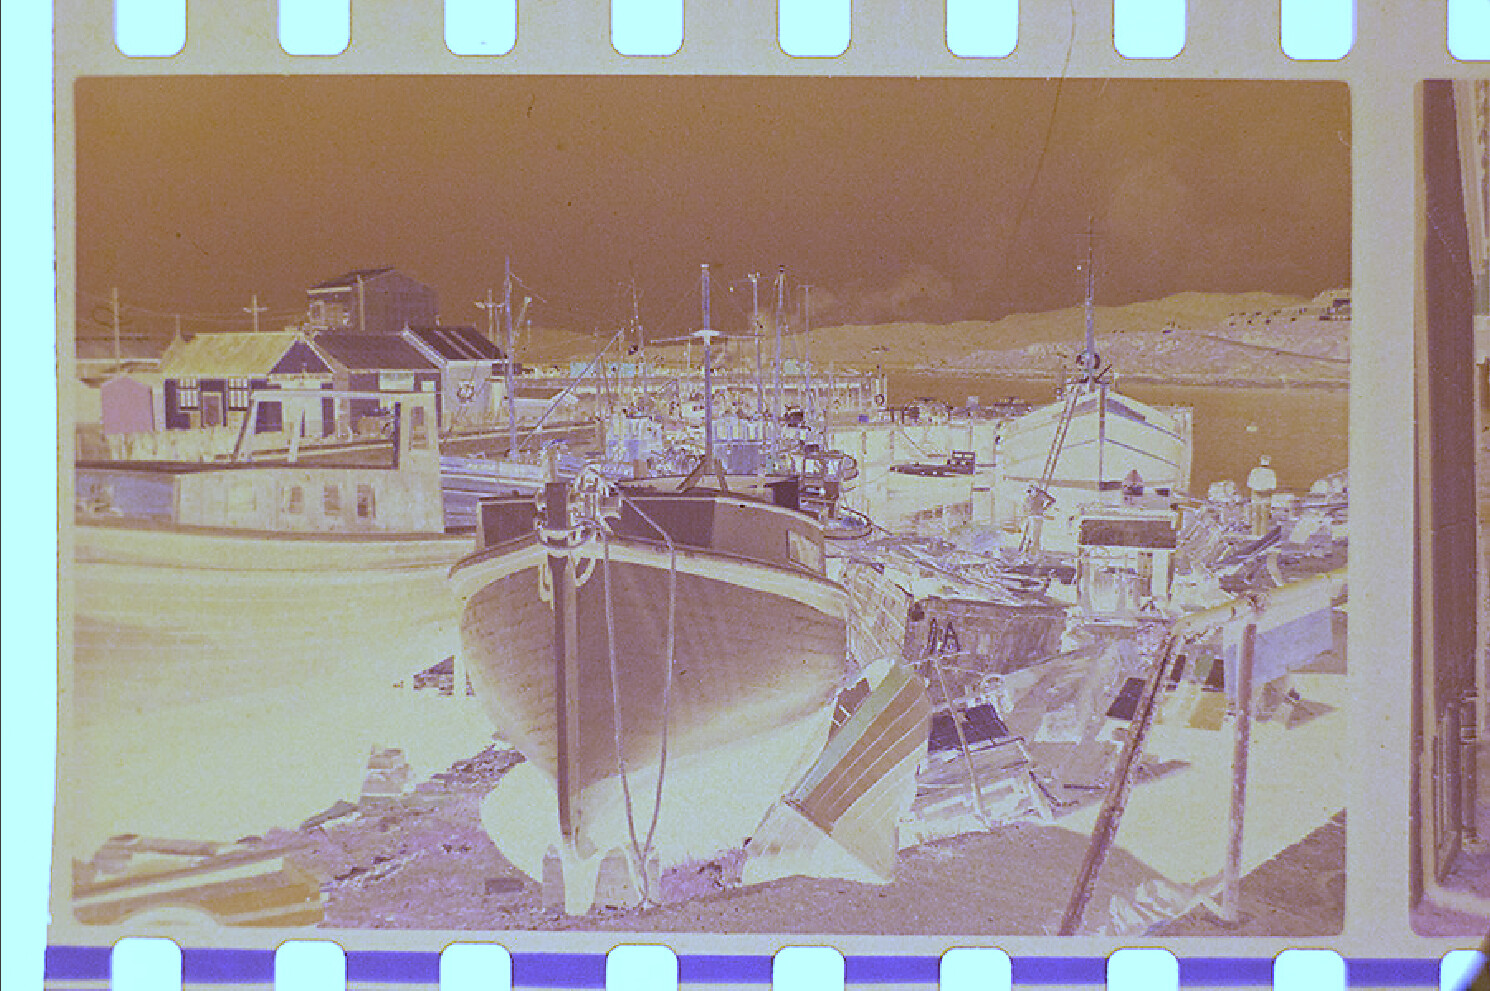
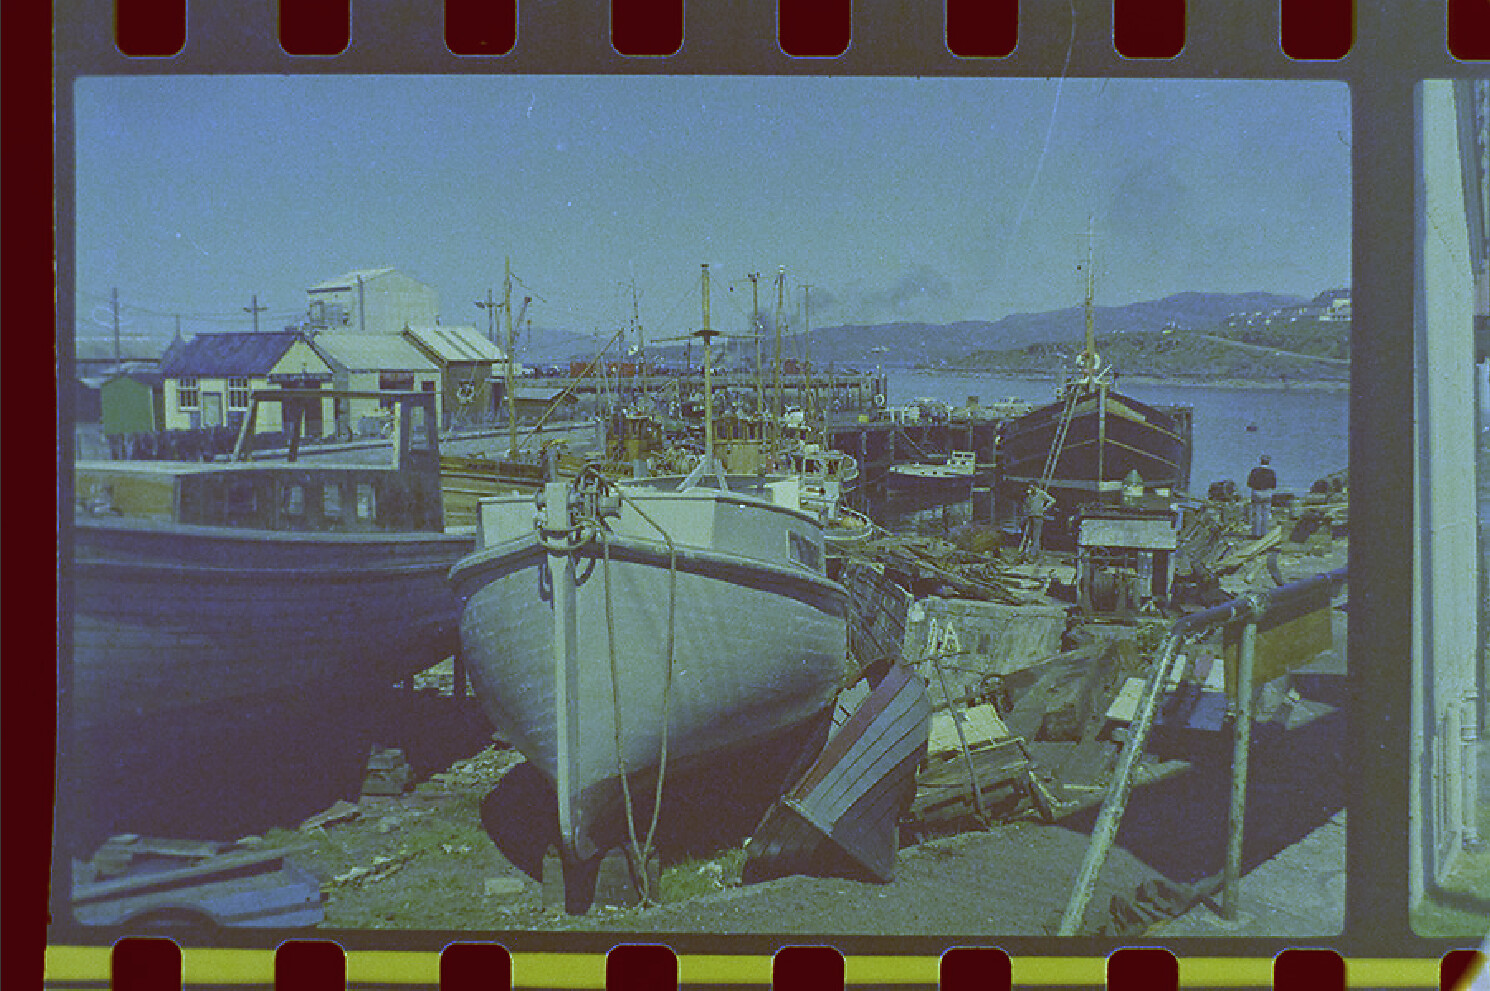
I don’t normally shoot colour negative film so I found an image somewhere on the internet to demonstrate how I would get the white balance somewhere near right.
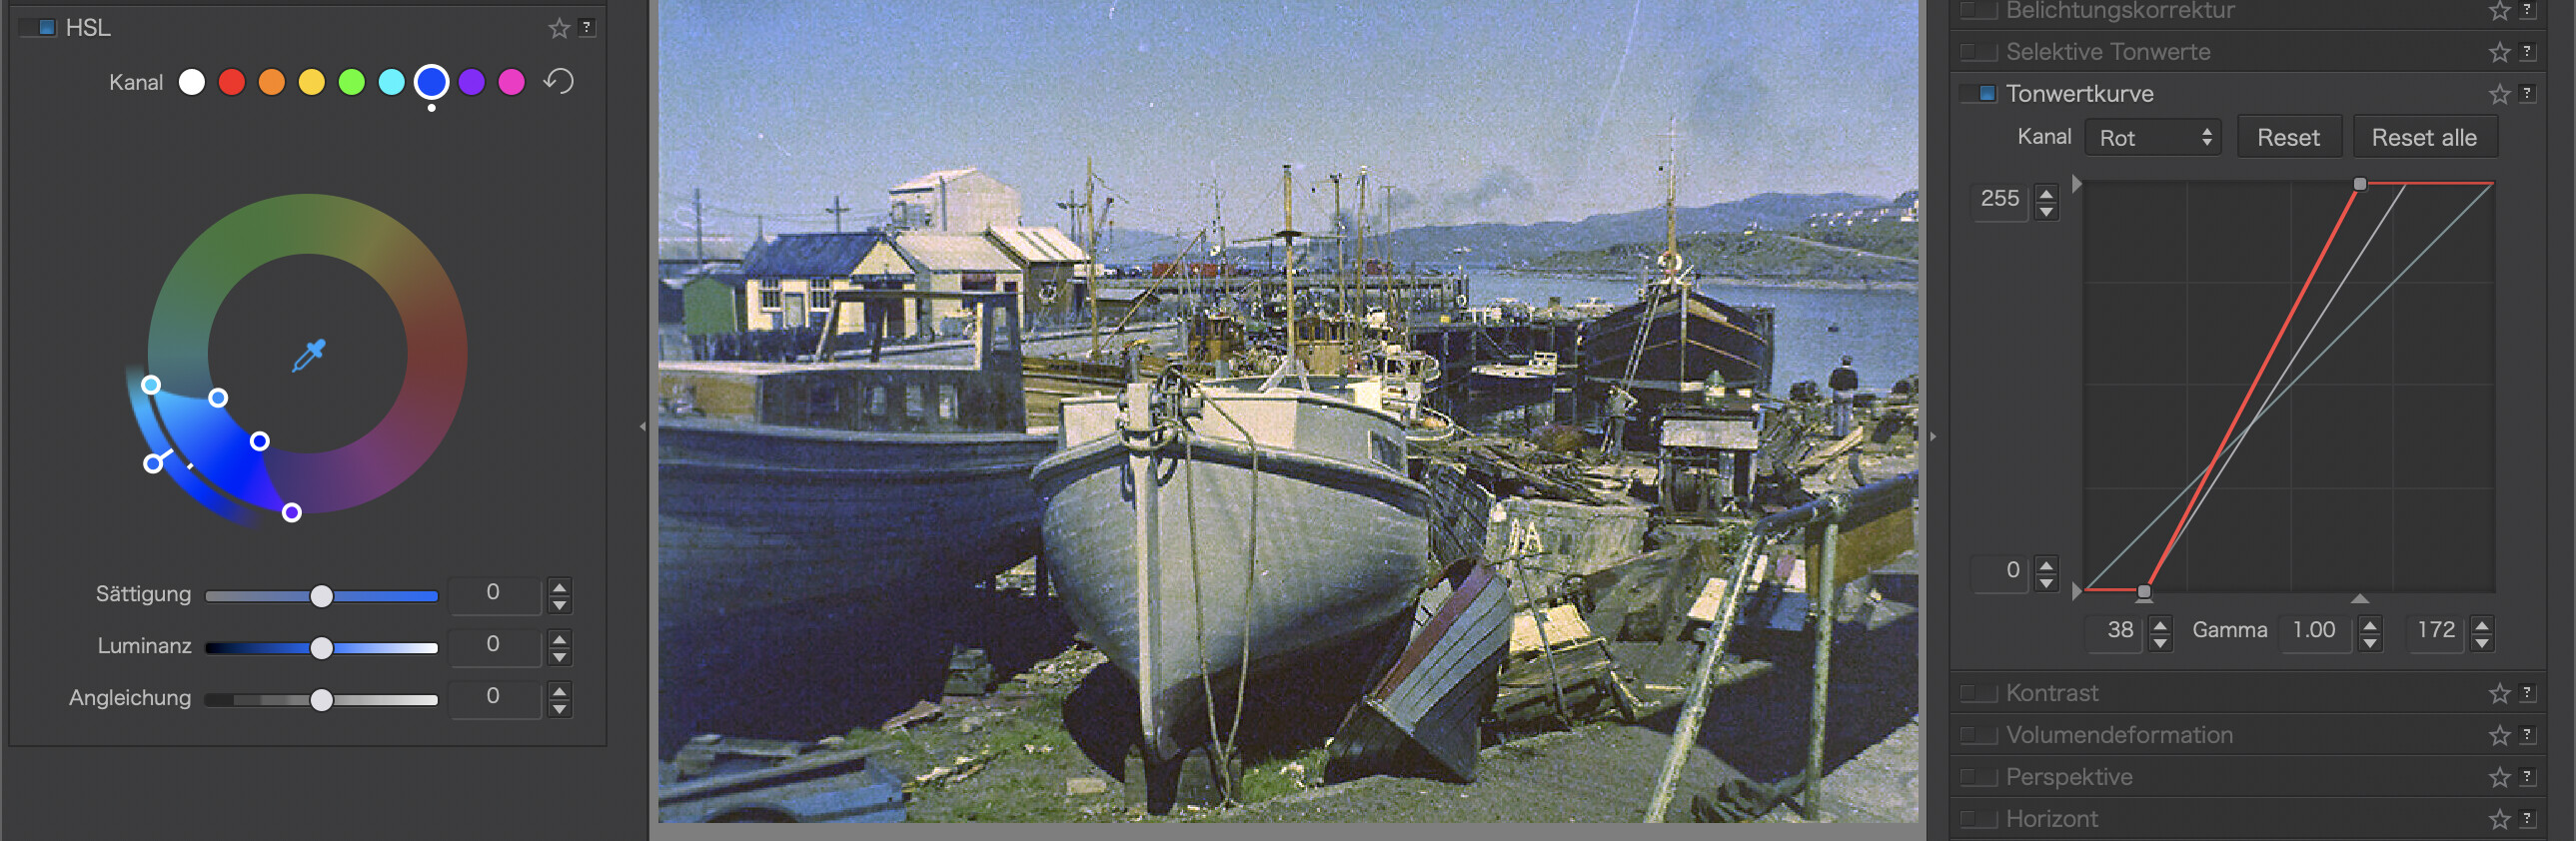
Finally, I cropped it and exported it as a TIFF, then started to work on that copy with the HSL Colour Wheel, offsetting some of the colour ranges, which seems more effective than using the WB tool…
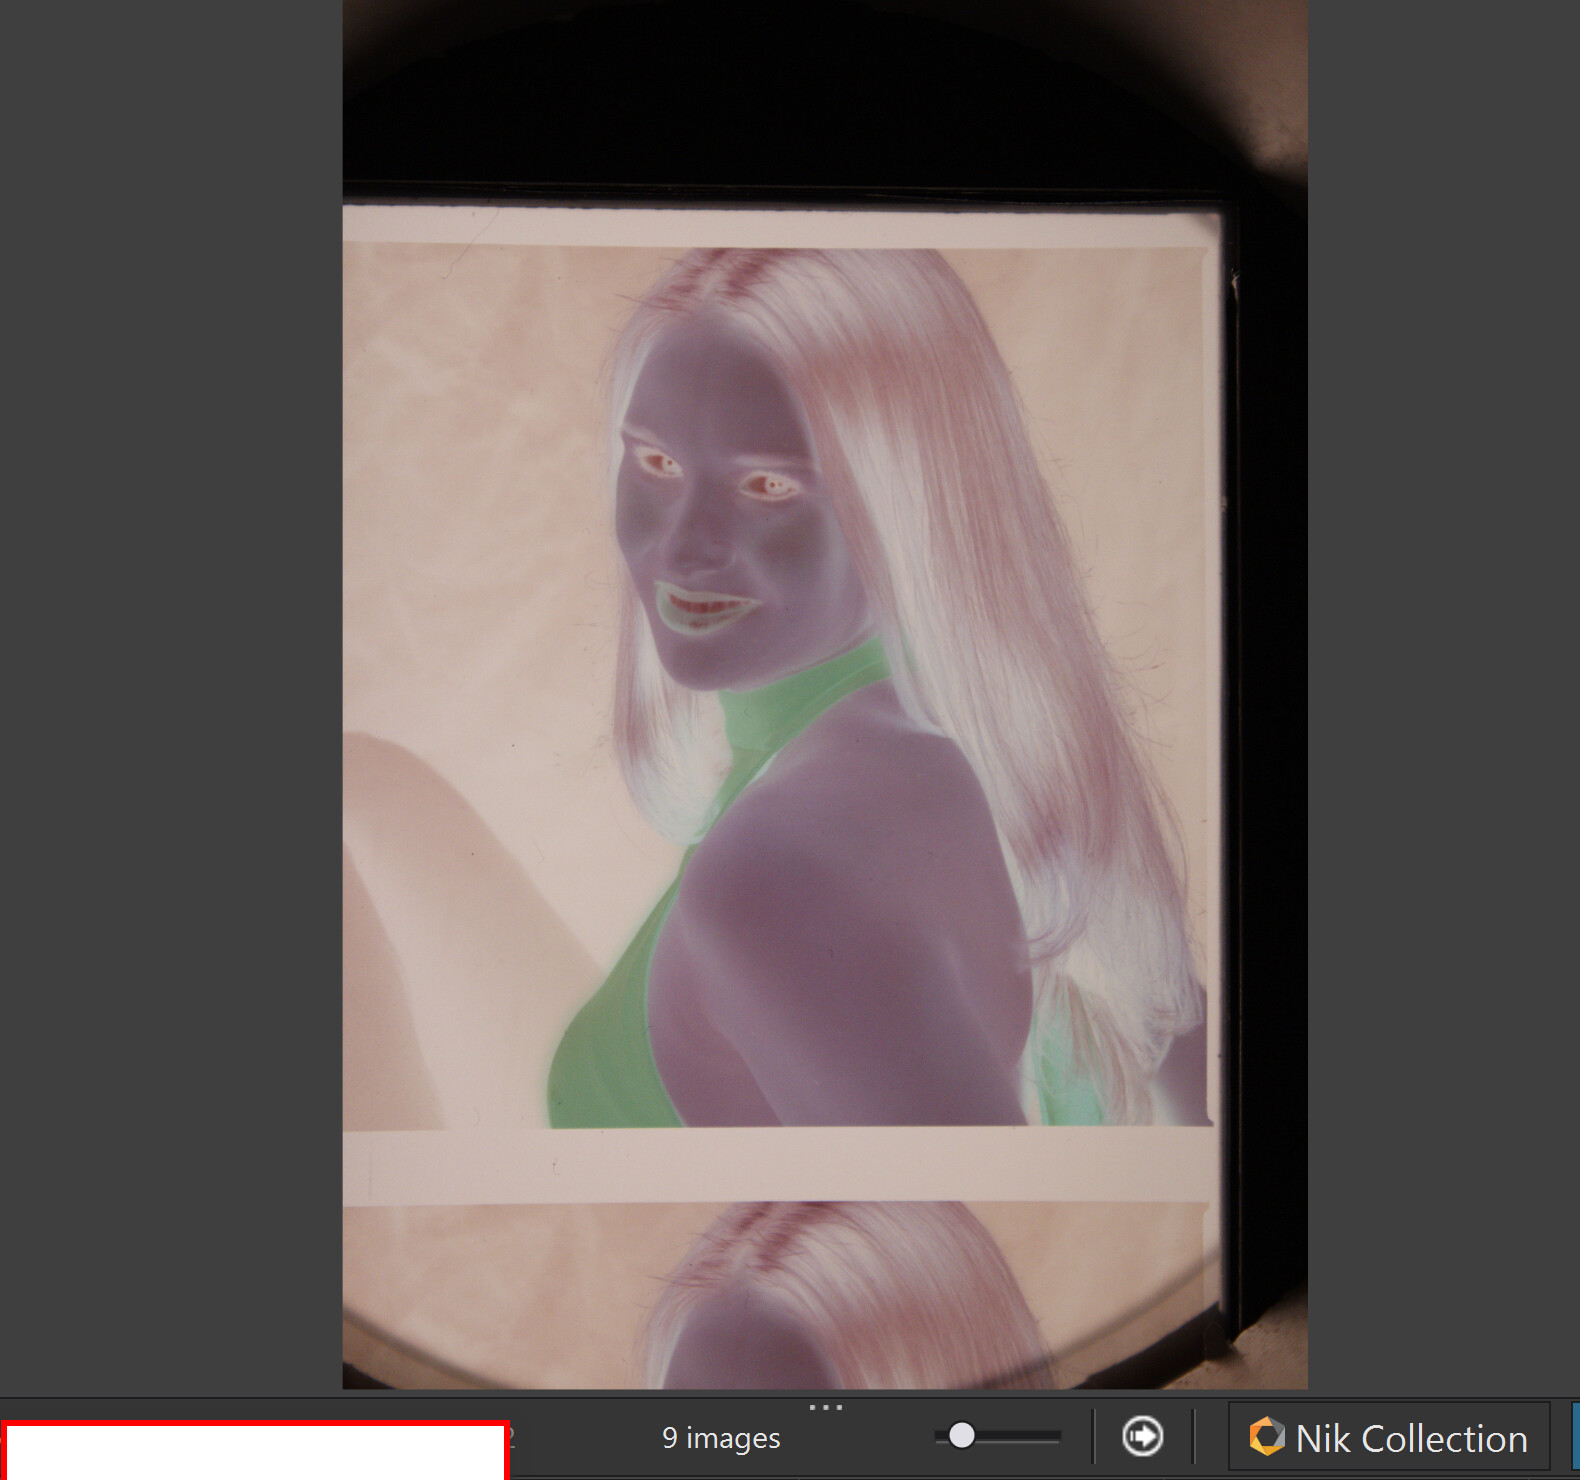
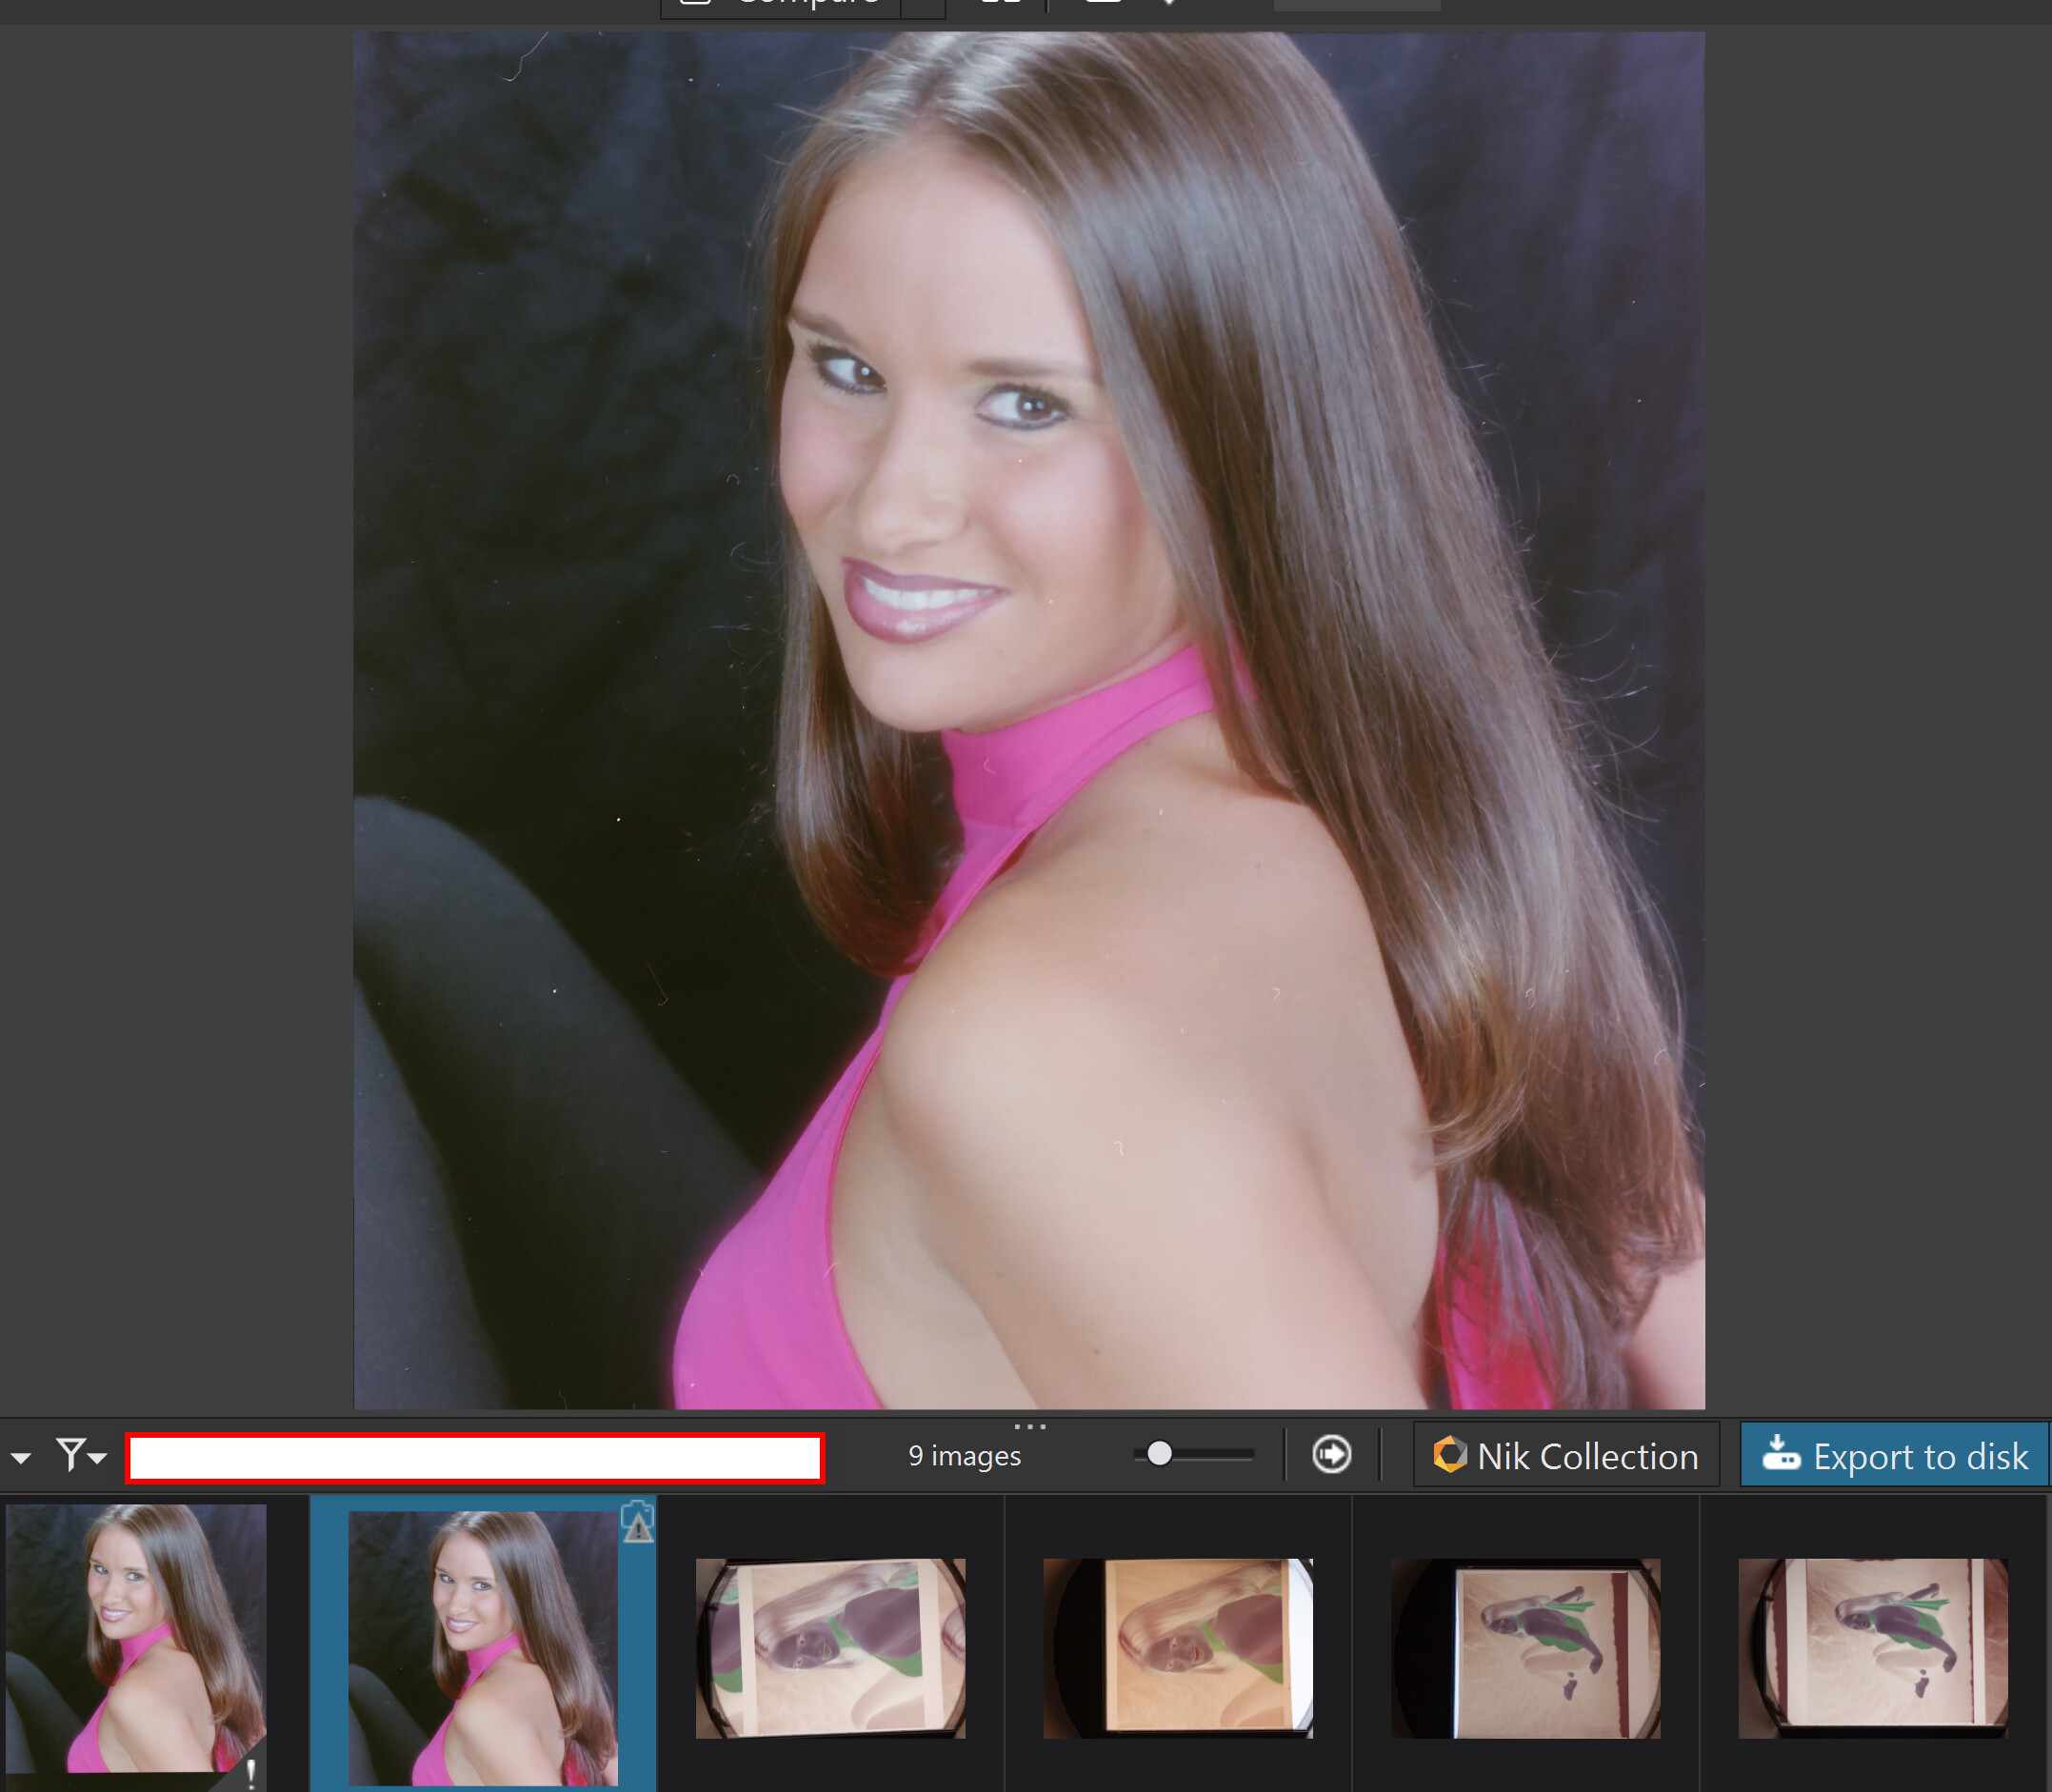
I owned a small film-based custom portrait/wedding studio from 1996-2010. I did all my own darkroom work and customized the photos to the client’s desires(I charged them an arm and a leg for this service, but they were informed up front and received a great product for their money. You get what you pay for.). I’m sure that my clients from back then are no longer interested in them but I want to preserve them for my own portfolio. I have 1000s of negatives from this era and this has been my primary focus since COVID hit. I loved the color-positive films of the era but my clients were mostly interested in prints so color-negative film was easier and more cost-effective than using Cibachrome to make prints.
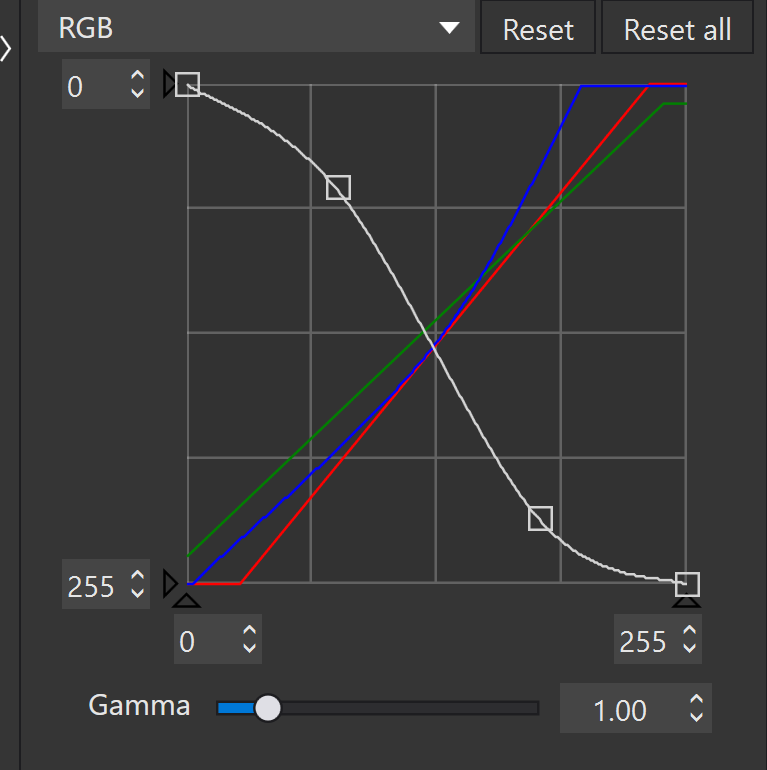
At any rate, while I still would like to see the WB palette improved, I find using the tone curve to work similarly to correcting color balance in the colorhead of the enlarger, which I an very familiar with. Here is an example:
The Glamor Glow is unfortunately on the negative and is the result of using a soft focus filter that I was enamored of at the time. I think I still like it.
Yeah, if I had a dollar for every time I heard someone (usually not a photographer) talk about Photoshop like it’s a competitor to, say Luminar or ON1. It does my head in. I mean… you can use Photoshop to rotate a 320px jpeg, too, but it’s like buying a trucking company to get your groceries home. But… see below.
Hmmm, yeah, not the way I’m going about it. Try scanning 270 negatives (with the intent to process most of them) without going batty and you’ll probably decide, like me, that your scanner software’s ability to perform the colour conversion, while also cropping out the 4-6 negatives per strip is a worthwhile. I’m still hesitating on the exposure locking procedure that @mikemyers highlighted in another thread.
I mean, I want good colour, but I’m not out to make too much work for myself to get it perfect.
In any case, @stuck’s point about using Affinity Photo has panned out very well. While I lose the convenience of the “darkroom” experience, I do have more flexibility at my disposal. So yes, for this task, a small trucking fleet is in order.
So far I’ve done three photos. One I spent a lot of time fiddling with numerous filters and adjustments and the other two I just copied those and tweaked. I’m still not 100% on whether I need them all, but I have deployed Unsharp Mask, Noise Reduction, Curves, White Balance, Colour Balance, Vibrance, and Vignette. I’m not sure about White Balance versus Colour balance as yet. I think I might be able to do with just the latter but I need to experiment more. The White Balance picker didn’t give me a decent result, so it is all dialled in by eye.
Strange tone curve, I mean for me.
You inverted the rgb channel but are using the individual r,g and b channels too. But they are not inverted.
And from what I see from the blue curve you changed the gamma correction for that channel.
Hi George. Yes you have to invert the RGB curve in order to see a positive image. You can invert the individual color channels if you wish, but I just choose to use them backwards. It is very similar to adjusting color with an enlarger colorhead, which I am very familiar with. Yes, the gamma on the blue channel is slightly higher(lower, backwards). I was adjusting by sight. Good observation!

 I even bought someone else a license as a gift, plus I bought every other software product they produce.
  I’m a bit of a fan, but hadn’t considered using it for this task because I don’t use it for “photographs” unless I have a specialist need. But it seems like this task is a specialist need.
 No, seriously I know what you mean. PL is my ‘go to’ application for processing the RAW images from my DSLR. It excels at that job, the lens corrections and noise reduction can’t be beaten. It also offers enough other editing features to do most of what I want and give me an output image I’m happy with.