This is not a poll. I’m just curious about what knowledgeable users (such as those who visit here) think is the best aspect of the upgrade from PL4 to PL5 and to what degree that justifies an upgrade price which is not inconsiderable (>$100 in $AU for PL Elite alone w/out the Film Pack).
I think that the best thing is the additional local-adjustment control (luminance + chroma). I don’t use local-adjustments much but when I do, this is a useful improvement to the utility of some adjustments. Control-lines are possibly useful but I’m not sold on them. I suspect they have been added in an attempt to address one of the deficiencies of the ‘control-point’ adjustment type (its awkward radial perimeter). But I can’t see much utility here that is not available in gradients.
I don’t bother with much additional meta-data for images. I decided years ago that keywords very rarely repaid the effort required, for me. I prefer to use projects and image-similarity search using e.g. Excire to group images when needed So the modest additions to metadata management in PL5 don’t seem to matter much. I find the speedier Deep Prime processing is good; but saving a few seconds is not very valuable (‘live’ Deep Prime would be).
I don’t shoot with Fuji so the biggest change in PL5 is not relevant to me (except that it broadens the appeal of DXO; incidentally good for me at best).
So far, I’m in no hurry to upgrade. Have I under-rated PL5? What should I be putting a higher value on?
I don’t know if I’m ‘invited to answer’, but I’d like to specify a few things about the new options which were added to the local adjustments in Photo lab 5…
chrominance/luminance give you greater control and can be used together (in LR for instance is either one or the other)
if you set both chroma/luma to zero, a Control Point becomes a standard radial gradient (something users asked us to implement a while ago)
using an inverted Control Point, with luma/chroma set to zero, can be used to add some artistic vignetting to your images (and with extra softness too)
if you put a Control Line for instance, at the bottom of your image, just outside its boundaries, set the chroma to zero, then, let’s say, with the eye dropper you pick a shadow tone, now you have a mask to edit your shadows (for instance you can now desaturate all the shadows of your image…)
you have a landscape shoot, and you need to apply some local correction to the sky only: a single Control Line will solve your problem…
you have a sky on the background and something on the foreground (building, trees…). A Control Line is your best ally for precise editing
the fact that you can use Control Points and Control Line together (as well as counter CP and counter CL) provides you with absolut masking power for almost any situation. And because of the technology used in CL/CP, this is done in a few clicks, in a matter of seconds…
This is simply astounding once you get to use it right.
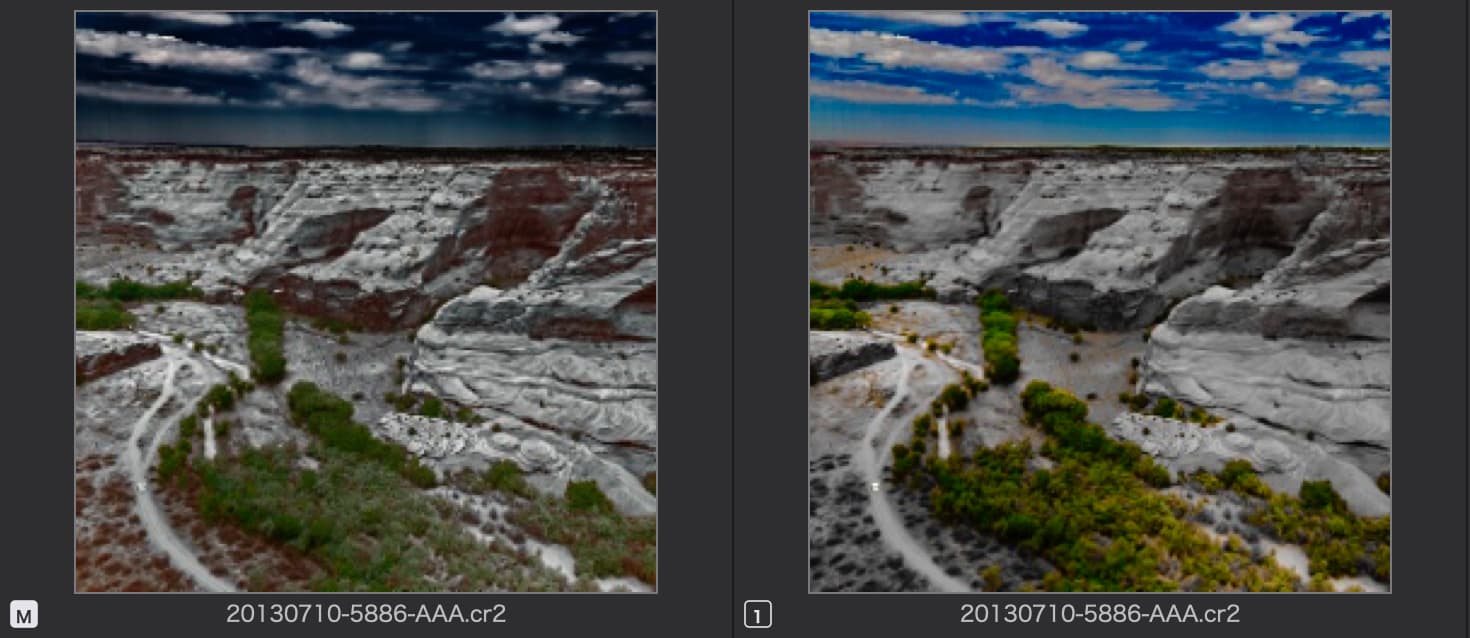
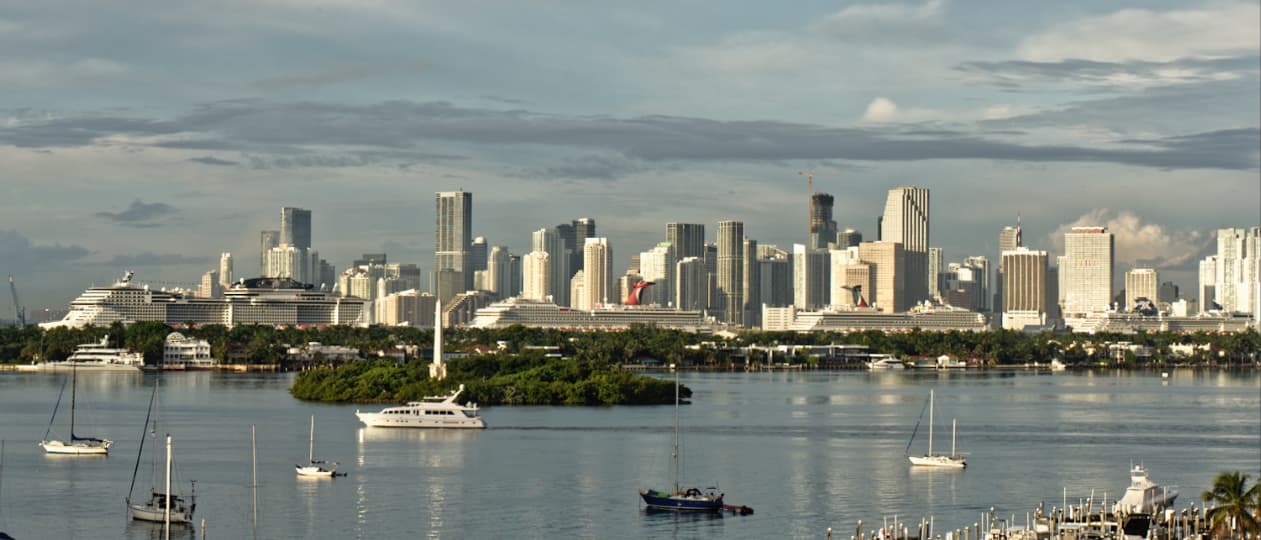
Here is one of @mikemyers shots, that we were working on. In this first image, some of the buildings are reflecting the sun and, even though the image was perfectly exposed, the unadjusted appearance made them too bright…
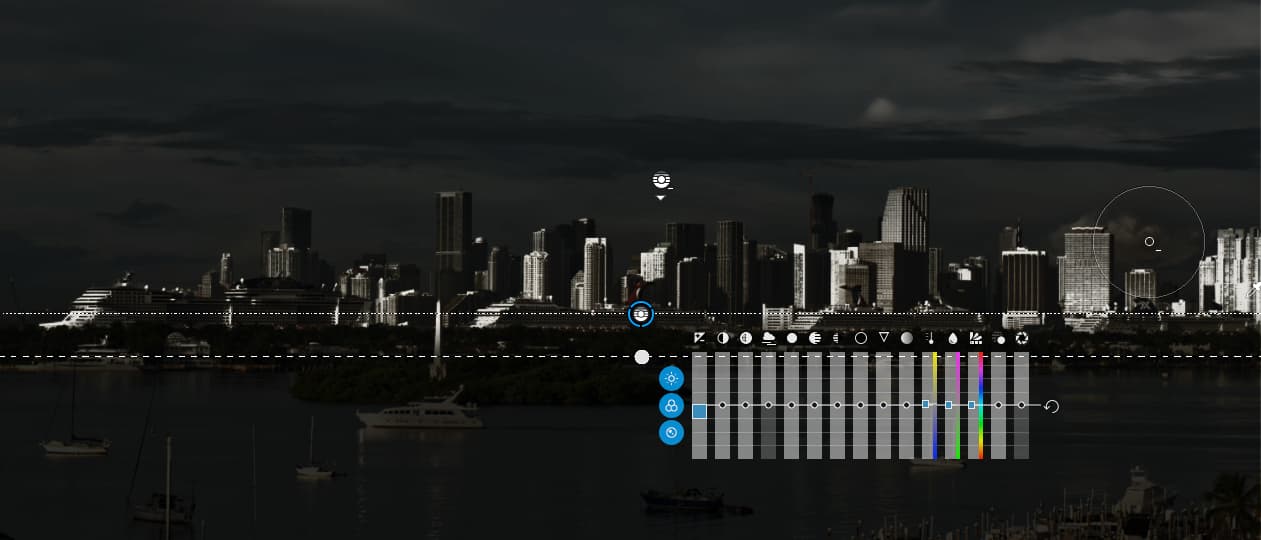
So, I added a Control Line, placed the pipette on the brightest building face on the right, turned on the mask view, adjusted the Luma to 85 to only select the brightest areas and applied a negative Control Line and Control Point to remove a slight bleed into the sky from the selection…
You’re not kidding there. This has to be the most powerful tool I have come across for selective adjustments. Now, if you could only move that darned equaliser out of the way (like to a tool palette? ) I would be an extremely happy bunny.
I’ve obviously got more to learn. I hadn’t yet found these.
I updated not for anything in version 5 being worth it just to support DxO. metadata management is totally useless to me I use a DAM and look like as feard is diverting resources into the DAM fantasy. Control lines has been pointed out was imported from parts of Nik, some work in adding it its not new just new to PL. I haven’t noticed any increased speed in deep prime getting it to work on older PC’s would be of more value to many of us rather the few who have high end ones.
I don’t consider myself as knowledgeable user and I can only answer about Photolab 5 ‘’benefits’’ from my perspective.
-DeepPrime
As far as I was doing tests I get the same results from Photolab 4 and 5. I can see no big changes here. Still; we could also say DeepPrime in Photolab 5 gives excellent results as in Photolab 4.
I have old PC with integrated graphic card so the speed stays the same for me.
-Selective Tone sliders
Sadly; they work the same as in Photolab 4. They didn’t fix them. Shadows slider still affects midtones and blacks. Blacks slider still affects shadows. Highlights slider affects midtones. So no changes here.
I still need to find out how this behaviour of the sliders is good for my RAW conversion.
-Exporting to disk (jpeg + resize)
Nope; no changes from my perspective. More or less the same. You still have Bilinear, Bicubic and Bicubic sharper option. I can’t control the sharpness of exported images like in Lightroom.
Bicubic gives me mostly not sharp enough results and Bicubic sharper gives me too much sharpness most of the time.
-Local Adjustments
As far as I can tell basic functions work more or less the same. The new thing is Mask selectivity (Luma, Croma) but I haven’t used it much so I can’t comment yet.
-Color rendering
Some new film simulations.
-Preview on the screen
I think they fixed that (at least partially). In PL4 the preview was somehow not sharp when ‘’Fit on screen’’. Now the previews look better.
-Photo library, metadata, DAM…etc
I don’t use those things.
i played with them in the EA time and immediately fell in love with the endless possibility’s more those addings locals give you. (you need to be used to use controlpoints to see the level of improvement but anyone who uses controlpoints as a layer kind of editing will be happy with this.
Controlines looks like gradient lines but it isn’t, it is a evenspread controlpoint. So long stretches of controlpoint’s with negatives around it in order to adjust sky or other colorplanes is no longer needed.
simple line, select selectivity, stretch “feathering” line, replace eydropper if needed. Done, most of the moments it’s enough, not? just add a controlpoint in the same layer or in a new to counter effect the line.
It’s by far the best tool given in PLv5
Other thing’s may be less pronounced , sticking out the woods, but those are steps forward, buildingblocks. DAM, needs some finetuning in master-slave control of reading and writing when you have an other application in use as exif/iptc/keywordmanager but in it’s own it’s improved and evolved from v4.
x-transfiles, i don’t need them but lots of people asked for it. So major step forward in reaching out to fuij users. (it’s “beta” so some hickups are hidden in the longgrass )
And also a long asking feature: faster respons!
And everyone knows you can’t leap every year on the improvementscale.
This is a jump forward, and the leap is just behind the blind corner…
I fully agree with everything that StevenL said as I think that local adjustments are so good, easy and powerful after a little practice. Being able to mix Control Lines and Control Points is so useful too. For me these features make it worth the upgrade.
Even, of course, if someone has to make his/her own decision based on his/her specific needs, I think that those “local adjustments’ improvements” are a bit overlooked by our users…
I guess we need to double down about how we communicate about them…providing better info (with real-case scenarios) as well as with tutorials to help you fully appreciate their raw (no pun intended ) power…
A bit of a pointless example but it does demonstrate that it should be possible to isolate "matching areas anywhere in an image in order to change something more useful. I thought about de-sharpening highly detailed areas possibly?
Something like this yes.
Because the gradient is ‘outside’, everything above the ‘gizmo’ is affected at the same level (because the fading occurs outside the image…).
In my exemple I was mentioning this use to target a specific luminance value for the image, allowing you to just edit for instance, the shadows, or midtones, or highlights…or anything in between.
Something similar (for those who are familiar with) to the TK8 panels in Photoshop…
Putting the gradient outside of the image makes a GA from a LA - and the benefit of the control line tool (compared to HSL) is, that it includes both chroma and luma data for masking. The example image is basically composed of orange, green and blue areas, an image with less pronounced separation would be more difficult to tweak in HSL.
The new LA tool’s c/l masking offers possibilities that are worth being advertised more pronouncedly indeed.
As I’m sure Wolfgang will agree, I am a very slow learner. I read all the above about control-lines, but I don’t yet “understand”. What Joanna has written has helped. Maybe I need someone like Wolfgang to describe it so simply that it sinks into my brain.
To me, it is all very blurry. If you asked me what control-lines were for or how to use them, I wouldn’t know where to start. All I can do, is follow Joanna’s examples, with zero understanding of what I’m doing, and more importantly, why.
A video, with audio, as PhotoJoseph uses, along with examples (do this, and here is what happens) would be great. I don’t have time right now, but I will re-read all the above on one screen, while testing on PL5 on my other screen. Eventually something usually “clicks” and I understand. Eventually.
This is exactly what I was thinking about…when I said that we need to get better at “explaining things”.
Because those improvements may “risk” to be “missed”, we have some work to do on our side…
While I don’t use Fuji equipment, I have to acknowledge the significance of the addition of X-Trans support in PL5. For some, this might be the best new feature.
For me, the new local adjustments and added metadata support are significant enough to change how I work on photos. Yes, there are still many refinements in the works and I wish they could come faster. But I’m also pleasantly surprised with the utility and elegance of what’s new.
I can feel with you. For me its the new chrome and luma sliders, I have to learn, how to benefit from those. Though I am using control points a lot. But those sliders are a game changer. So I take every breadcrumb from the postings here to complement my workflow. Also a good way is to just play around and watch the results while doing it.
 ) I would be an extremely happy bunny.
 )
)