Regarding using the camera; have your friend download a manual from here: https://www.manualslib.com
Thanks - I sent him the manual, but it got lost somehow, so he printed out another. The manual is great about a lot of things, but I’ve found two things just today that are adjustable, but not in any obvious way. I think my friend is doing pretty well so far. I’m the one who is a very slow learner, and I believe I should be able to find all these things easily in the menu. In my particular case, they ought to have had BOTH the spot metering, AND the ability to focus on the eye. They should have allowed me to switch to spot metering, and just turned off the focus on eye code when I did so - but this is all minor stuff. It’s a wonderful, lovely, powerful, light, easy-to-use camera that can be used manually or automatically. Thanks for the link. Manuals are great for reading ahead of time, but I never have one with me when I need it. 
Lots of good info there. I have several of those editors. What I would like is something similar to Adobe’s DNG Converter, where it does nothing more than take an RAF file and convert it into a TIFF file. I found several other ideas here, but I’m too tired right now to make a decision:
As to Deep Prime, what I wrote is I was able to use most of the PL4 tools I’ve been learning in these discussions, but NOT things like Deep Prime as I can’t edit the Fuji raw images. What you wrote, is what I tried to say.
People tell me I should pick one camera and stop using the rest. To me, that’s like someone looking at my toolbox and telling me I have too many tools. I know I do, but they all serve a purpose when they’re needed. The two cameras I’m concentrating on are the Leica M10, and the Nikon Df. That leaves maybe a dozen or so cameras sitting around collecting dust. Some are just collector cameras though. To me, each one is a tool, and each one is better in some ways than the others. I forgot until this afternoon how much I loved working with the Fuji. I’ve also got a Canon G7X Mk II Pro, which fits into a belt pouch. In the Leica forum I read about people with two, three, or maybe four digital Leica M cameras.
I keep telling myself that the camera doesn’t matter. The camera to a photographer is like a wrench to a mechanic. Pick the appropriate one for the job you’re working on.
If you’ve never read it before, check this out:
Basically RAF files are one huge PITA to do anything with - even converting them is not simple or, as far as I can tell, free. It seems like most, if not all, of the solutions involve spending money on an app that you really only need to cope with the RAF format, especially if all you want to do is convert it to TiFF.
I have used Affinity Photo, which is relatively cheap and I use it for stitching panoramas, stacking, etc. as well.
I tried this and ended up deleting it. I couldn’t get it to work with the RAF files I have.
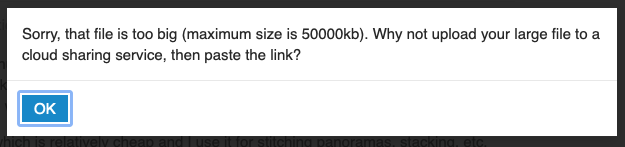
Nope. Just tried it and got this message…
… when I tried to open a RAF file
So it would seem that even Fuji don’t support their own format that well 
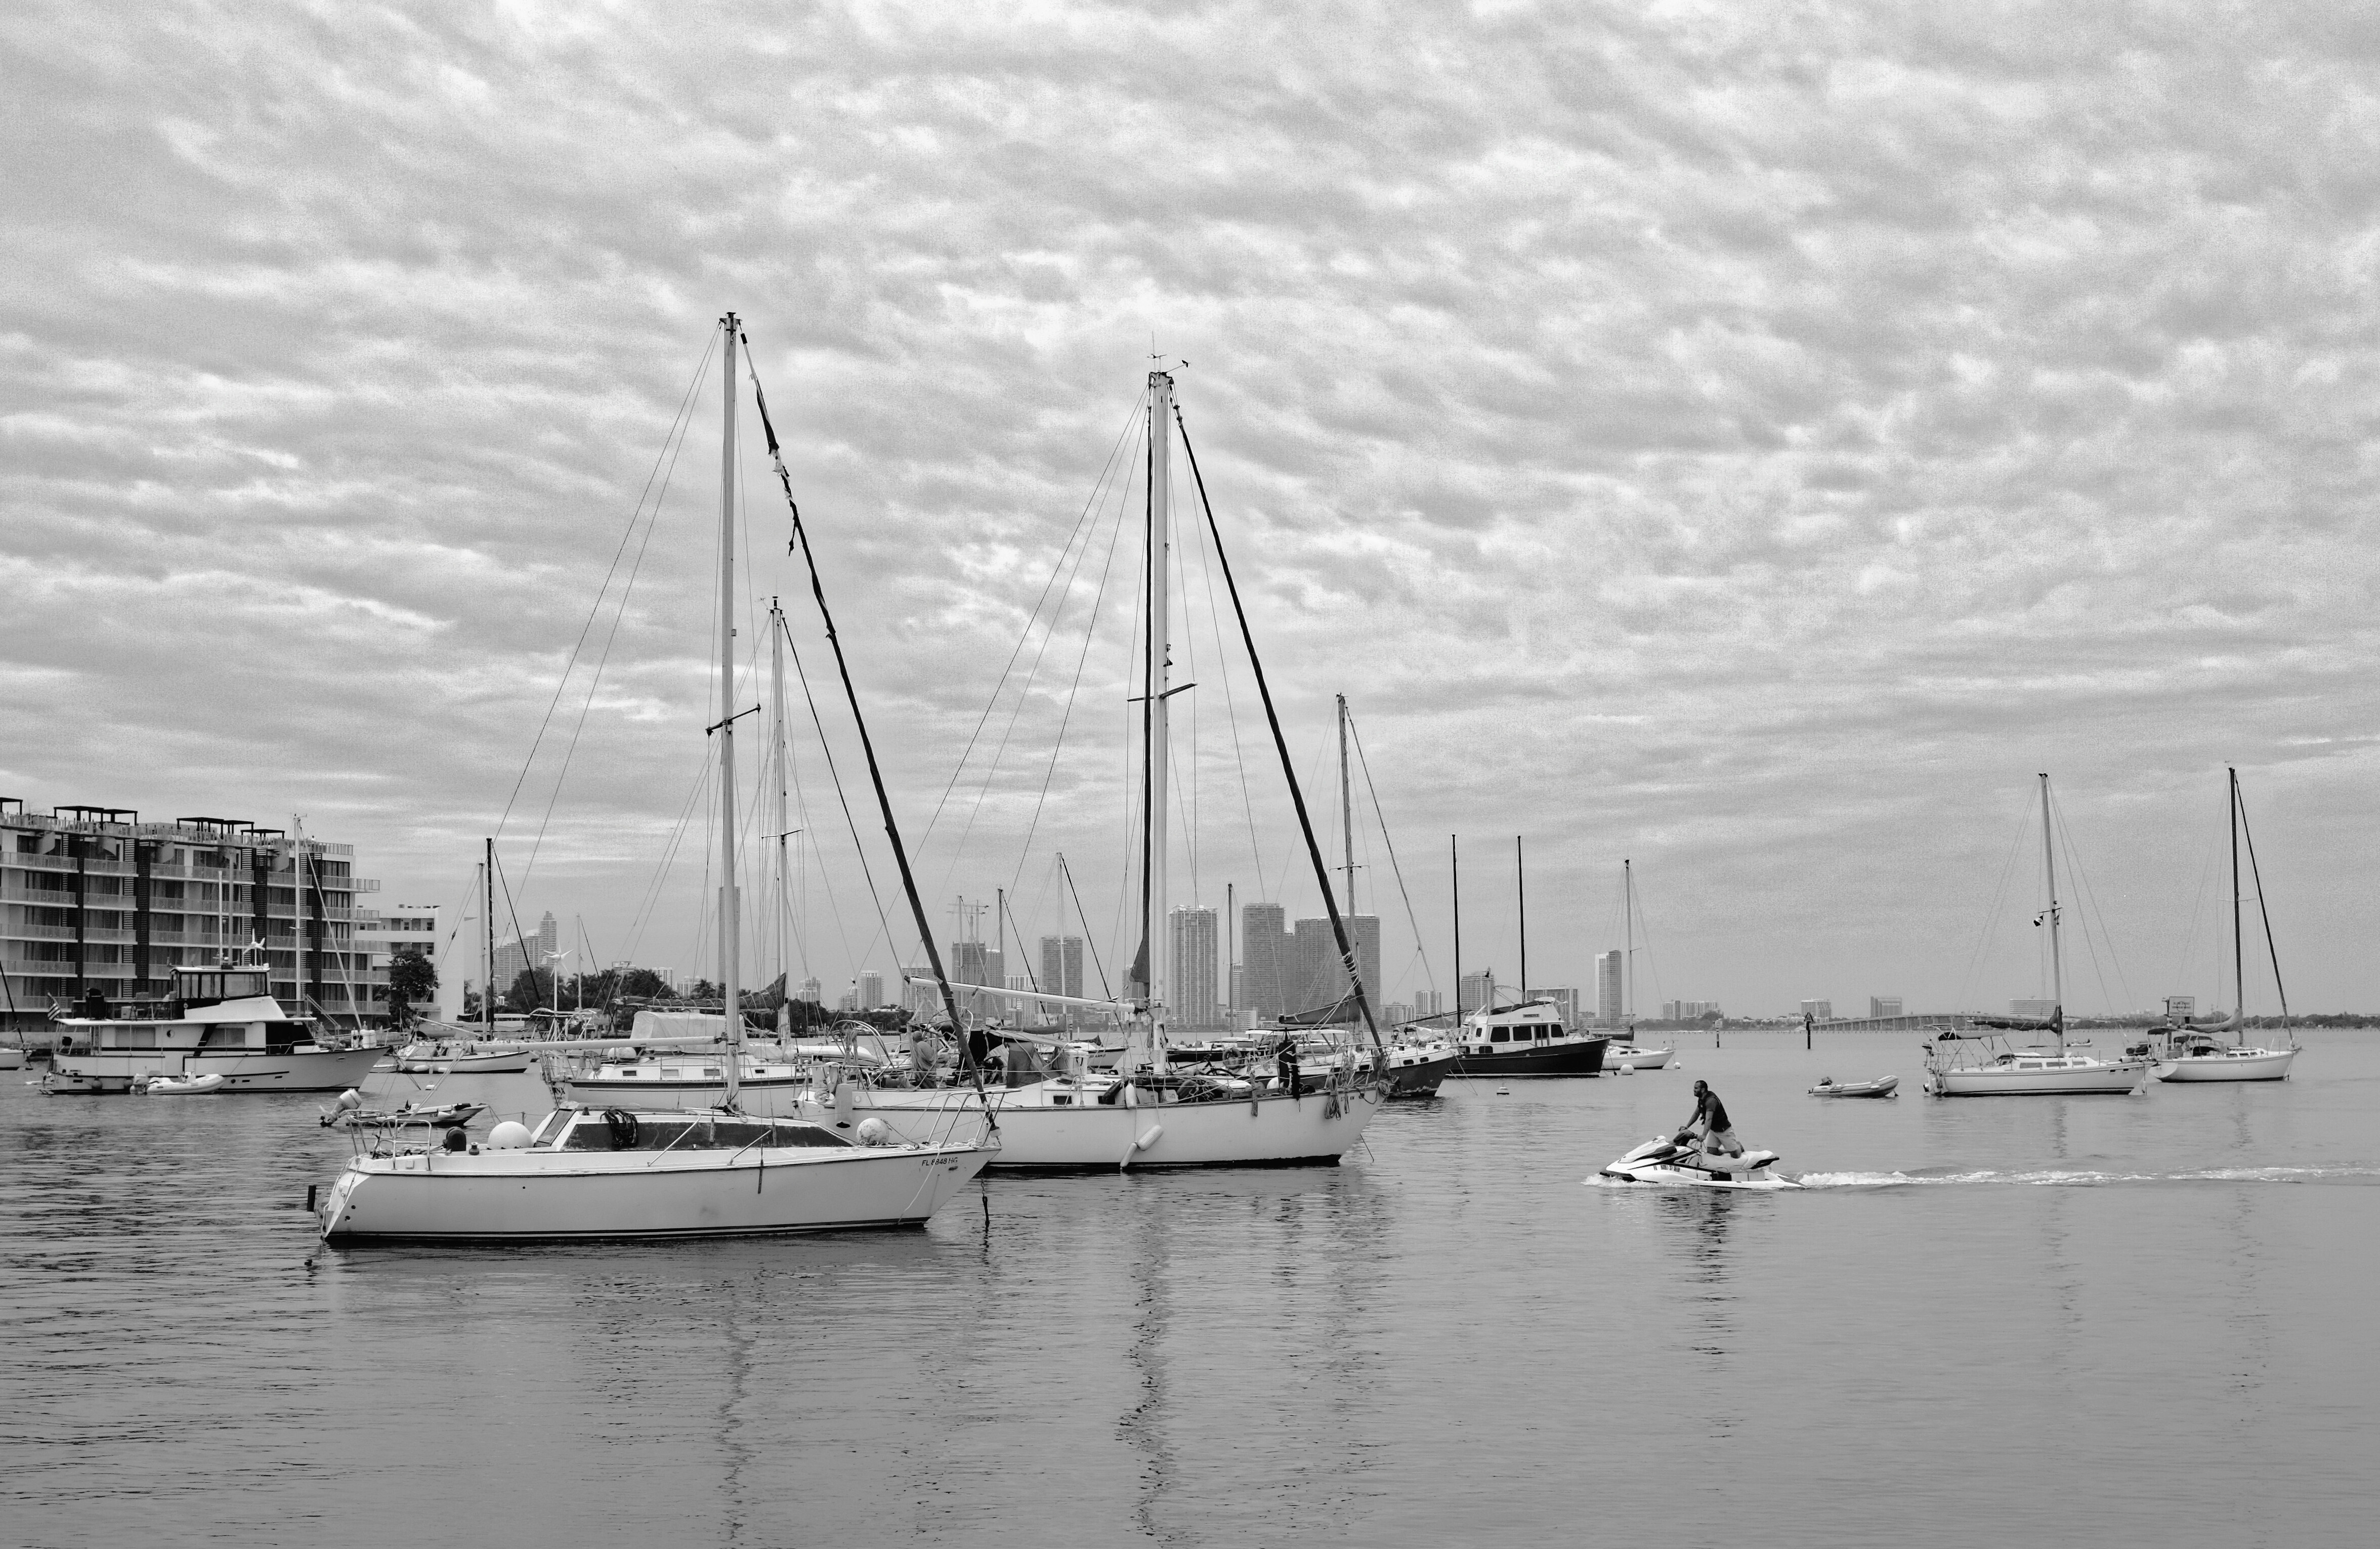
Here’s my version of this image. Just suggesting a few minor tweaks…

And here’s the .dop…
_DSF4311 | 2021-01-13-Fuji X100f testing.jpg.dop (26,5 Ko)
Main differences are:
- I took the vertical edge of one of the buildings in the centre of the image as the reference for the horizon tool
- I used the HSL saturation instead of Colour accentuation vibrancy and saturation
- I changed the length of graduation on the graduated filter local adjustment. By starting the transition, as you did, at the top of the image, the graduation starts immediately and fades out quite quickly, so most of the sky is hardly affected by it. I placed a short transition just above the horizon, to ensure that the full effect covered most of the sky…
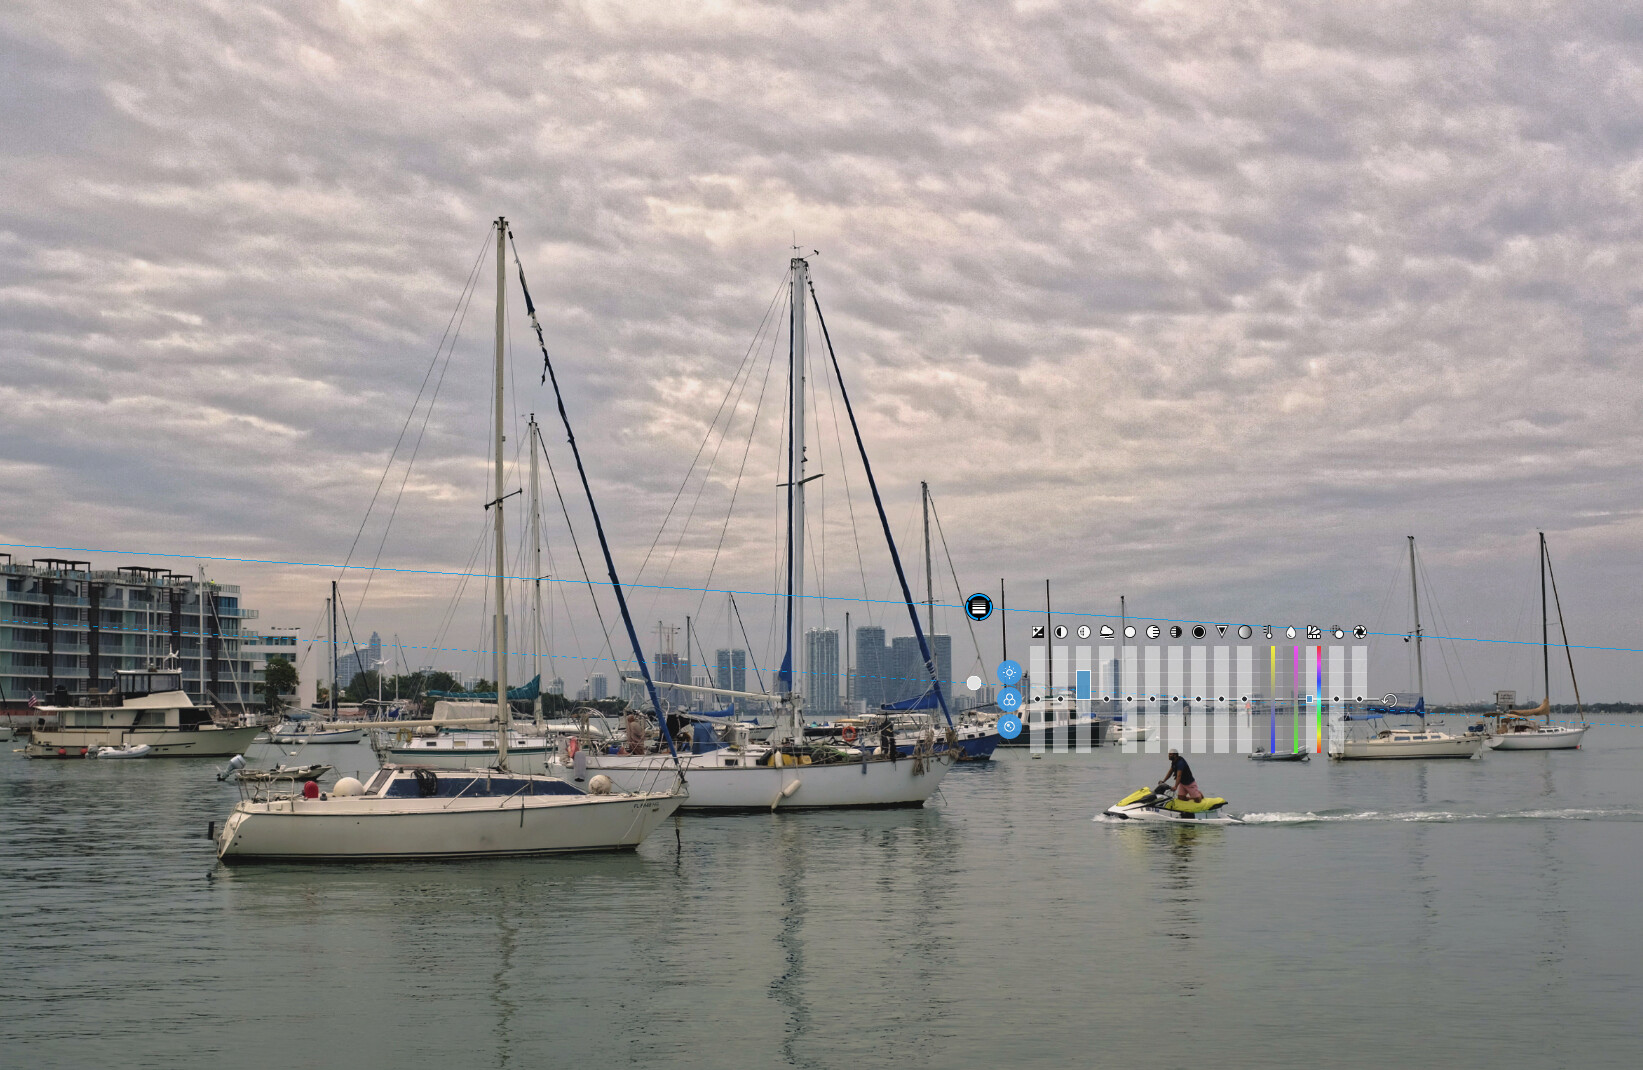
This is a matter of personal taste but it is closer to how I would use a physical graduated filter on the front of the lens.
Just thought I would check something out and found that GraphicConverter will open RAF files and convert to TIFF (amongst others)
Fascinating to see this image as you saw it.
In my adjusted view, both masts from the large sailboats go up and to the right. In your view, the mast of the sailboat at the left goes up and to the left, and the other mast goes up and to the right. The boats were moving around a little, but your view looks more “stable”, and the horizon line at the right looks more level. I thought I leveled the photo - several times - but it never looked “right”. Without realizing it, when you did the adjustments, the two masts sort of “anchored” the image as being level. From now on, I need to do what I think is right, then do something else, and come back to the window after a while. After staring at it too long, my eyes tricked me into thinking I had it right.
HSL saturation tool - is it more “sensitive” than doing what I did? Why would I use that instead of going to saturation and vibrance as I did? I’m guessing it gave you finer control of the change you were making.
Graduated filter. Yes, I just did what I always do, start at the top, and go down to where the effect would be finished, but I think you’re saying that the upper part of the sky was already good enough, and just some of the lower parts needed a little boost.
Looking through the viewfinder, I was oblivious to the sky - I was seeing the boats, and timing my shutter release until the jets got to just the right spot. It’s a subtle difference, but your rendering of the sky looks more interesting than what I did.
I noticed you used only micro contrast. Somehow I thought that I should use a little “contrast” and use more of “micro contrast”. I will try this next time.
I’ve never had nor used a physical graduated filter for my lenses, so I’ve got zero experience at doing it that way.
I’ve taken similar photos before, same place, but they usually look dull and boring. The jet ski added color, action, and a place for my eye to jump to. I intended to take a photo showing the sailboats, but ended up with a photo of the jet ski with the sailboats being “props”. That’s what I was trying to explain to Gregor, that to me, being technically good isn’t enough. Balance and timing are essential. This photo would not have “worked” if the jet ski was any place other than where I caught it.
I woke up thinking about this. I was wrong, and so was Ken Rockwell. The camera certainly DOES matter. Joanna couldn’t get the precision prints she makes without an appropriate camera. My race photos would be infinitely more difficult to capture without a camera designed for sports. Ain’t no way I would get a good photo of the moon, without an appropriate lens.
I was taught The camera to a photographer is like a wrench to a mechanic. Pick the appropriate one for the job you’re working on. Think of this from the mechanic’s point of view. He could remove a nut with a heavy pair of pliers - our a properly sized wrench. One damages the nut, and the other removes it cleanly. Both can do the job - but one is more appropriate than the other. Or, a screwdriver - the wrong screwdriver butchers the end of the screw. The proper screwdriver removes it cleanly.
Ken Rockwell is right in that you don’t need a high tech camera for most general photography, but as soon as you want to do something more specialized, it matters - a lot. …and Ken’s beautiful photos taken with a $3 camera are not representative of any of this, as he is so good at photography. If Joanna were suddenly transported to a photogenic location, for half an hour, with a box camera, she too would come home with lovely photos. I think that’s the point of what Ken was really saying - it’s the photographer, not the camera.
Have you yet found out that you can use the “horizon” tool vertically? Sometimes picking on a vertical can be easier if you can’t see anything long enough that’s horizontal.
I guess it’s all a matter of what you’re used to using. Read what the manual says about vibrancy - it’s subtly different from saturation in how it works. I’m guessing that the two different saturation sliders do about the same - it’s more than likely just more convenient to use the HSL one if you’re already working on selective colours in the wheel.
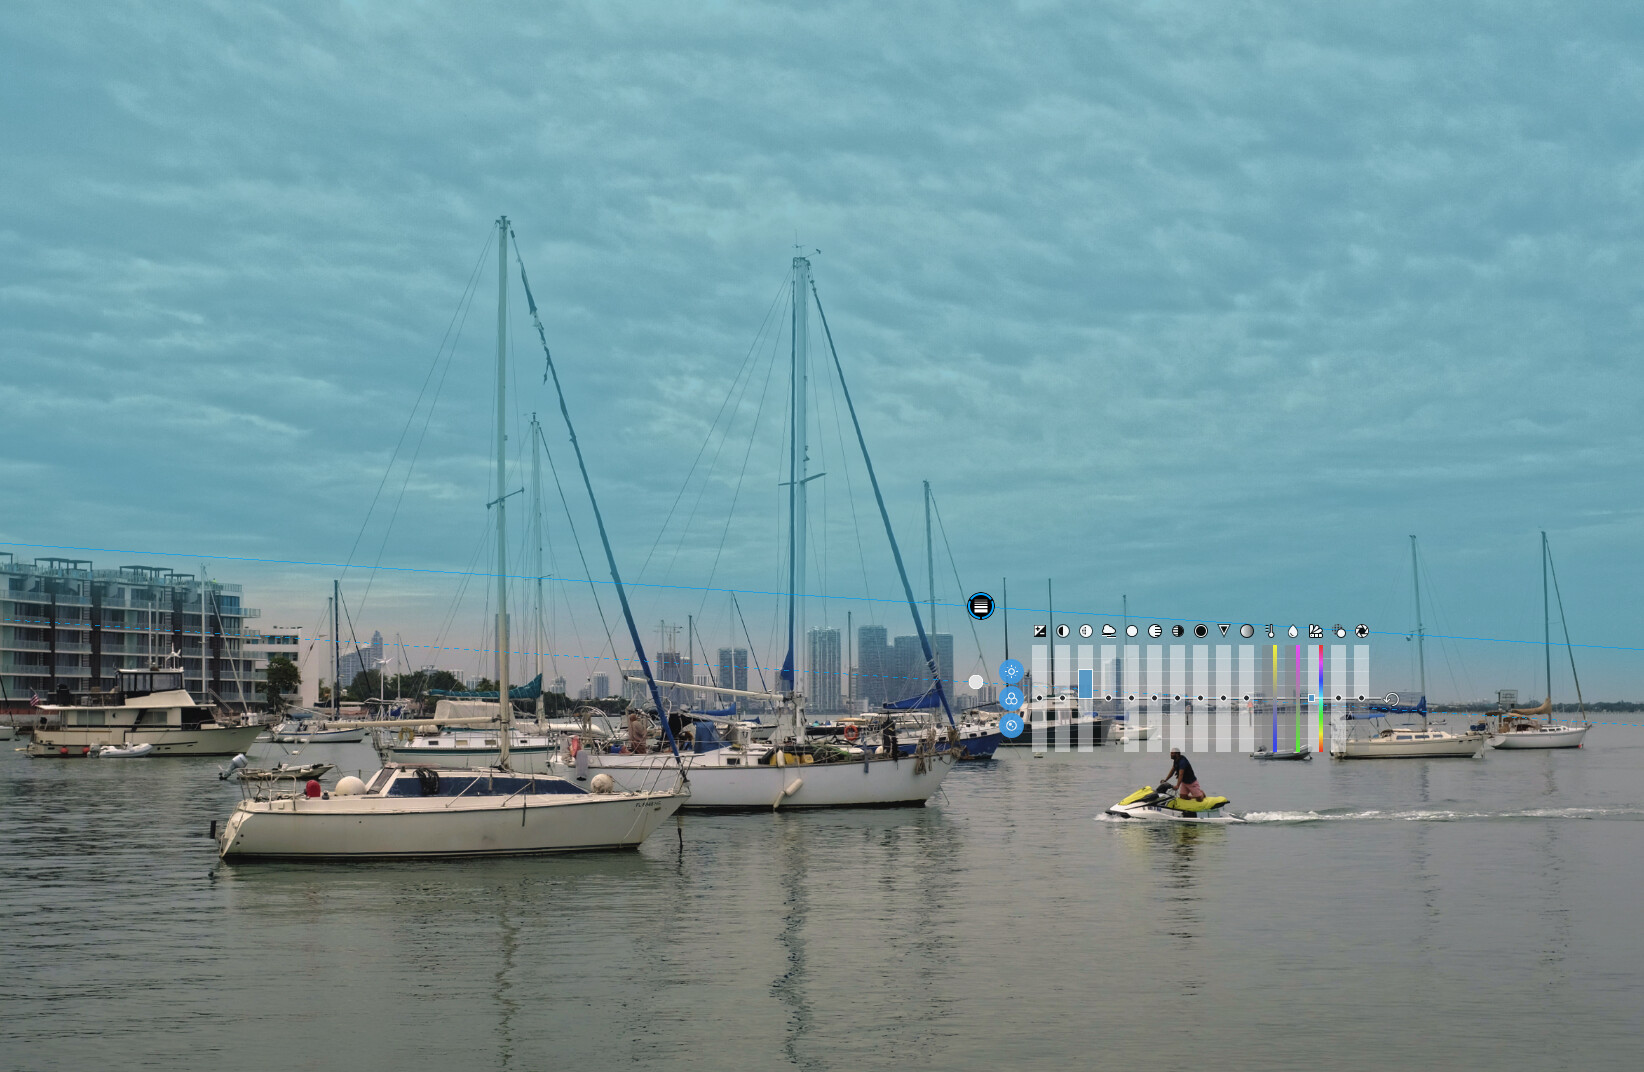
Not quite. The full effect of the filter starts at the top of the picture and then starts transitioning to zero where you see the equaliser anchor. This screenshot shows the masked area in blue, which will all be fully affected by the settings in the equaliser…
Micro contrast doesn’t mean “a little contrast”, it means that it applies contrast to transitions between tones at a detail level rather than just globally. Often you don’t need “regular” contrast as well.
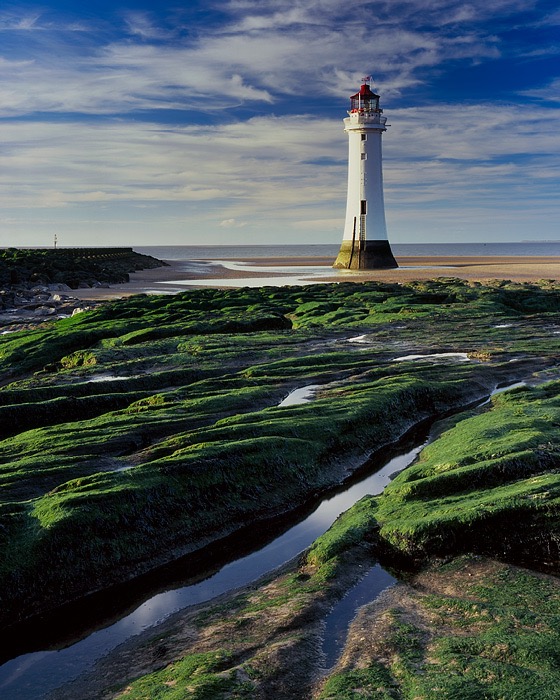
With LF work, they’re almost mandatory when the difference in brightness between clouds and ground is more than the 5 stops you get with Velvia 100 film. in this shot, there is a hard grad neutral density filter over the sky and lighthouse with the transition following the horizon line. Nothing else was done in post-processing to equalise the light levels.
With a true box camera? Maybe not - unless the dynamic range was within that of the film. With an LF camera? Definitely - after all, it’s still really only a flexible box with a sheet of film at one end and a hole at the other - no electronics - if you don’t know what you are doing with either, there is nothing to save you from yourself 

Couldn’t resist playing some more. How about if you’d taken it with Ilford Delta 100?
And, yes, I did retouch the jet skier to give him more detail 
I need to re-read that for a third time. Between what I read, and what PhotoJoseph explained, I thought I learned the “saturation” over-does what I need, and “vibrance” takes what I would call the main colors and makes them stronger. I will read this again, and experiment with it. I’ve learned to reach for vibrance, not saturation, but sometimes I feel a small amount of saturation “can’t hurt”. Maybe that’s not so valid. I will start working more with the HSL tool - no reason not to.
Yes, I learned how to use the straighten tool vertically if I can’t use it horizontally. What I haven’t learned yet, is to use the tool, look away, and come back to view it. I’m much too likely to see what I expect to see, rather than what’s actually there.
Graduated filter - yes, I understand - I thought I did yesterday too, but I didn’t “angle” it like you did. One more thing to consider when I’m using that tool.
I don’t enjoy the version for Ilford Delta 100 nearly as much as your previous version. Your first version took what I was trying to do, and made it better. The second version looks too “flat”, and “gray”… it looks like a “before editing” version.
I just got off the phone with Tech Support at Fuji. I suggested they display a message when someone clicks on the icon to get to spot metering, rather than do “nothing”. He liked it, and is passing it on for a future release. We discussed RAW FILE CONVERTER EX 3.0. I had already loaded an image, and he told me to click on DEVELOP, then FILE TYPE FOR SAVING, and select TIFF. Then I can do DEVELOP or BATCH DEVELOP. I can then open the TIFF file in PL 4. Try this - easy to do, and reasonably fast. I just converted one image. It looks like a clean image, minimal contrast or saturation, what I’ve gotten to learn is an excellent starting point for PL4.
(https://fujifilm-x.com/en-us/support/download/software/raw-file-converter-ex-powered-by-silkypix/)
After reading your responses, I wanted to edit another image, doing things more the way you and others here suggest, and ignoring my previous use of “global” tools.
Conversion from RAF file was simple and fast.
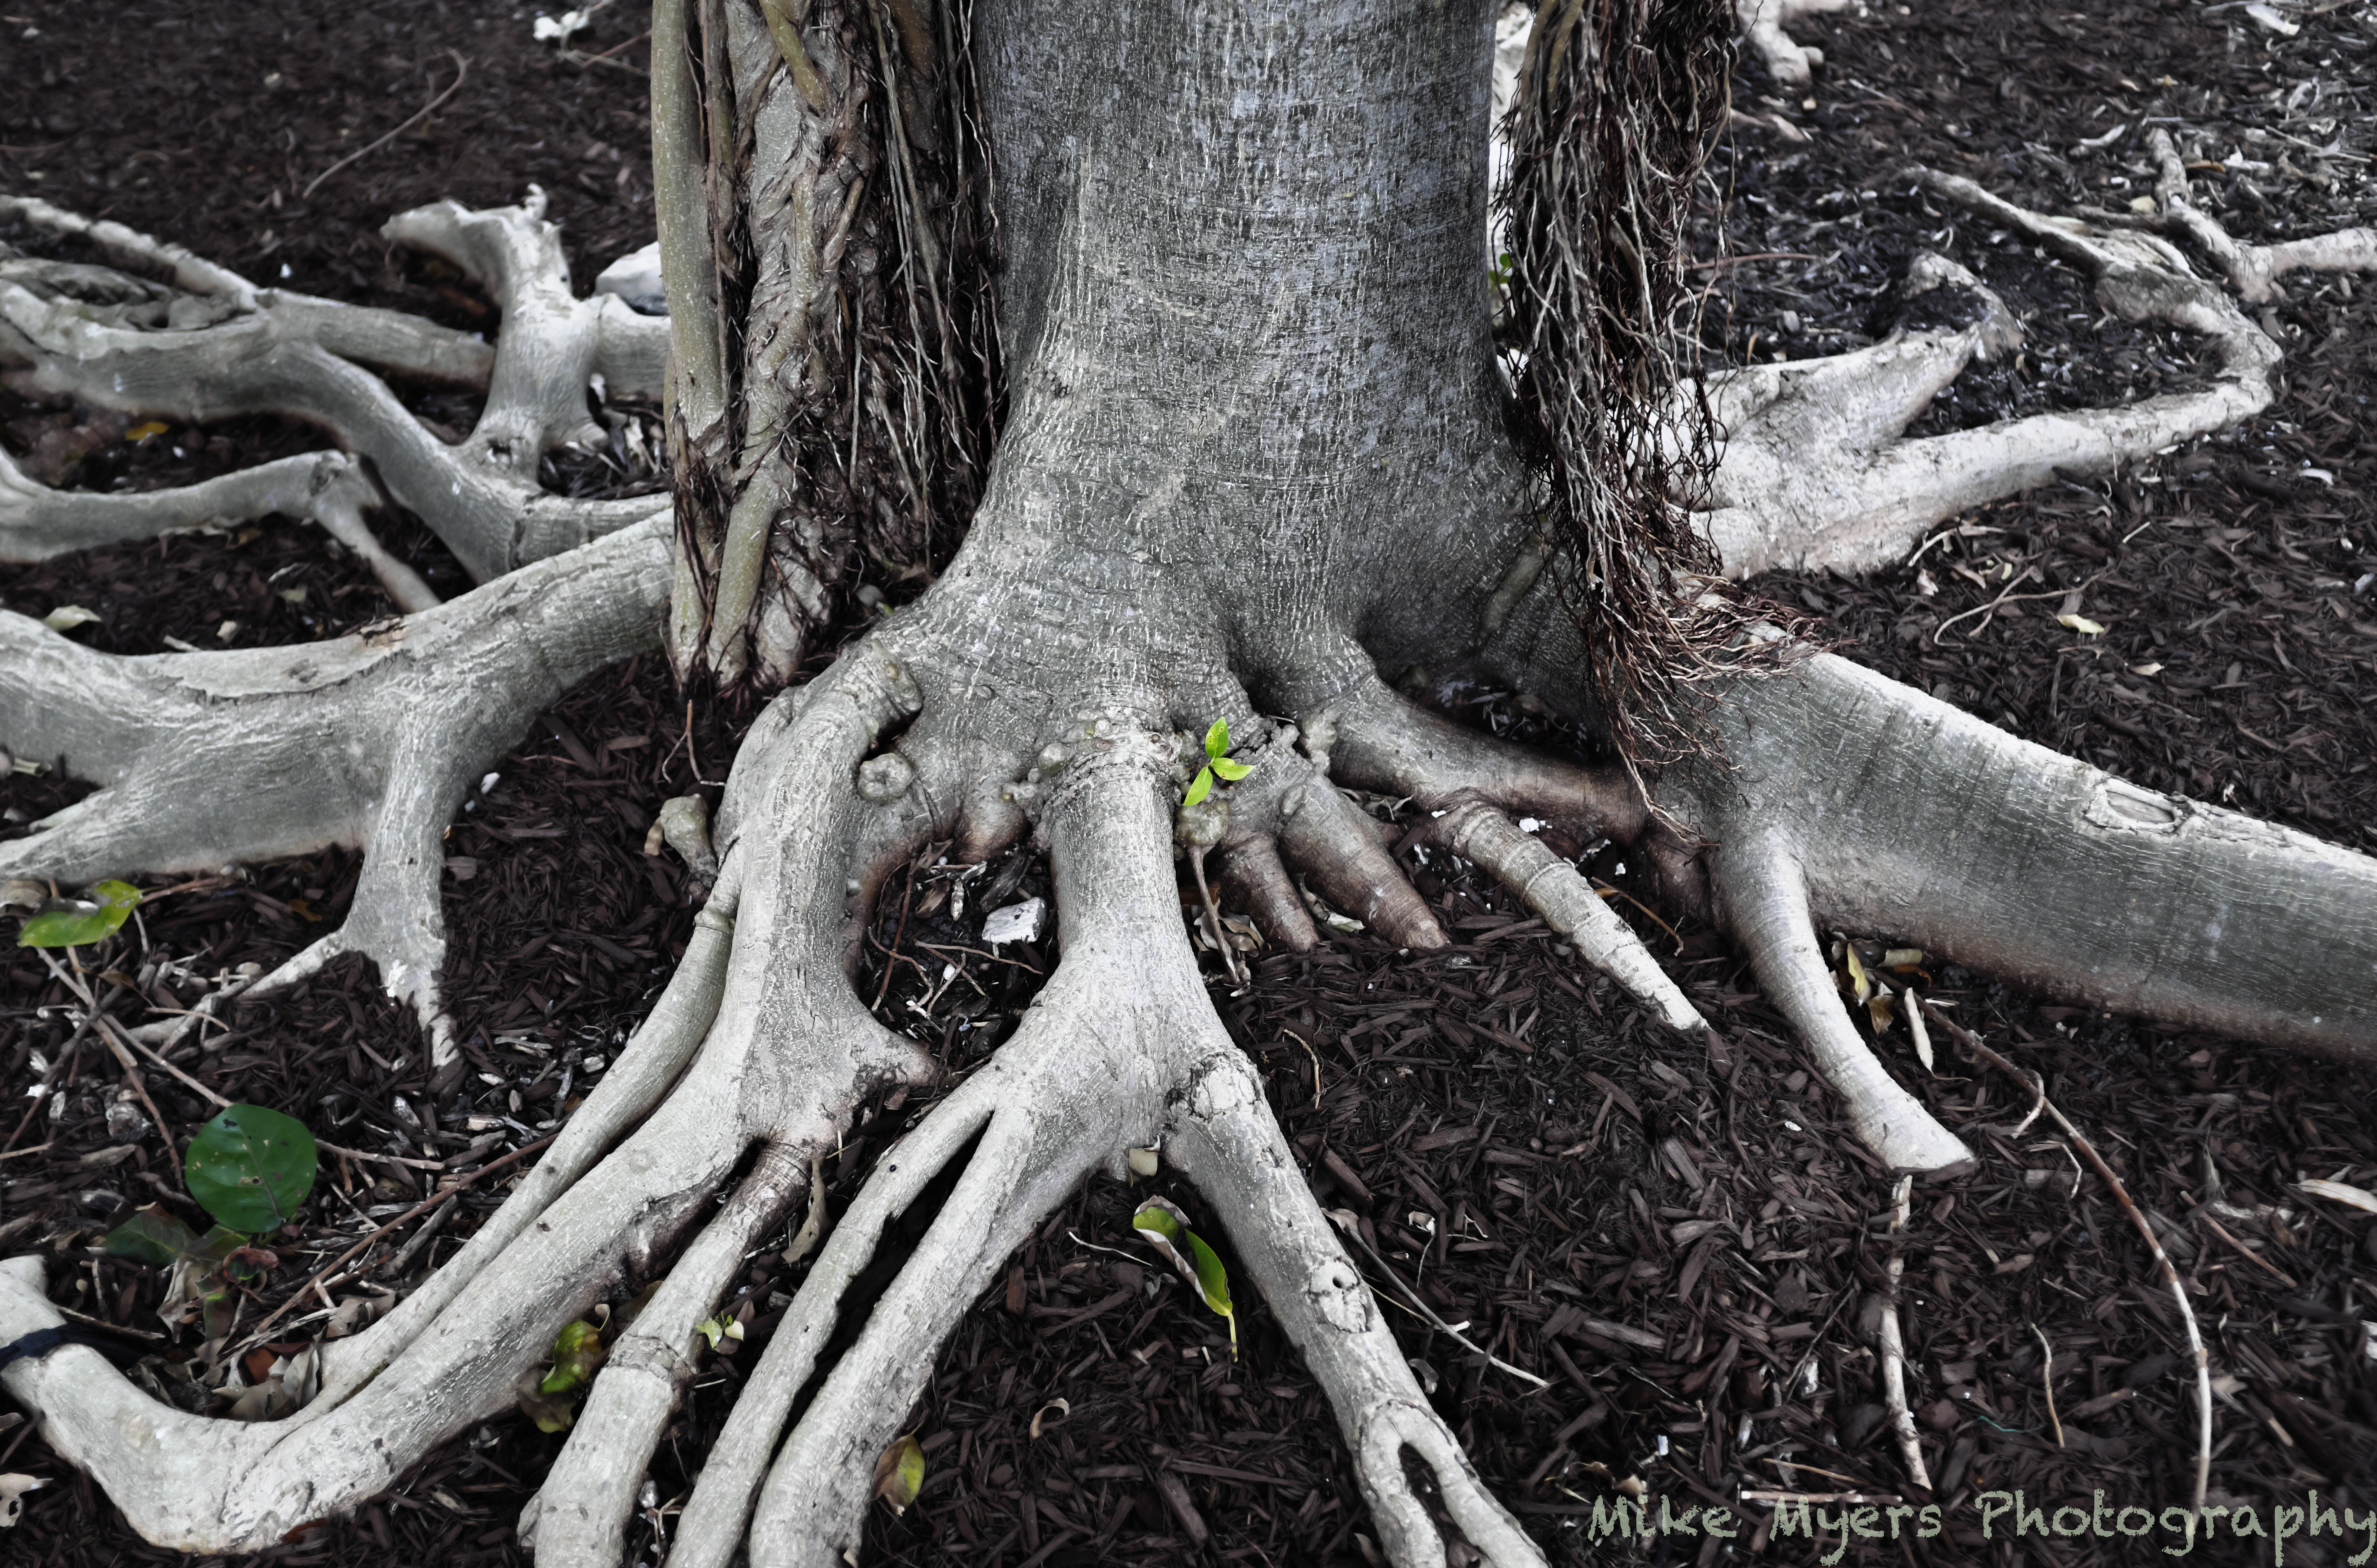
TIFF file opened in PL4 with no problems, and looked dark and colorless. Working with the histogram got things looking nicer, and then little by little, cropping and using local adjustments, trying to make the small green plant in the middle of the image stand out as much as I could.
So far, unable to upload the tif file:
Strange, as I already uploaded a 7-meg tif file. I will try again later.
…nope, no-go.
Not sure how I downloaded the previous tif file, same size.
This one appears to be 72 MB rather than 7 MB.
Oops, sorry, I meant another 72 meg tif file, which went through with no problems. This is the second 72-meg file I’m trying to send…
1 Like
My apologies, I misread your statement. What I wrote was not what you tried to say: it’s what you DID say. Sorry about that!
You could try DCRAW - if you’re not afraid of using the terminal…
Below’s a compiled version that runs on my iMac, If it will run on your machine, I can neither tell nor guarantee. I’ll give no support either.
Copy dcraw here:
![]()
The bin folder does not necessarily exist. Installing Exiftool (another CLI app) will create it.
dcraw.zip (203.9 KB)
Open Terminal.app, then enter “dcraw” and press enter. Read and learn!
I don’t find that to be so, except of course that PhotoLab doesn’t convert them. RAFs can be used in just about any other photo editing software (Lightroom, Photoshop, ON1 Raw, Luminar, Affinity Photo, Pixelmator, GraphicConverter, etc.) Silkypix (mentioned by others) and Capture One have versions that are free and do raw conversions from RAF to several other formats. Again, it’s not more of a hassle than any other raw format.
I tried this and ended up deleting it. I couldn’t get it to work with the RAF files I have.
The software is not compatible with all X cameras. A list of compatible Fujifilm cameras and computer-OS versions may be found here.
Of course, you can always use the convert-to-JPG feature of the camera itself. Fujifilm X Raw Studio is merely a more convenient interface to it. If the goal is to convert a RAF file to a JPG, Fujifilm does a better job than anyone because they are the only one who truly understand their (proprietary) film simulations.
Maybe that’s how you do things, but it’s not what I said or meant. To make it more clear for you, everything else about that image was all set up and done ahead of time, and all my concentration was on the jet ski. Maybe I should select a better word than “oblivious”, but that fit. Camera was fixed, composition was fixed, everything was steady, and the jet ski eventually moved into the viewfinder and reached the spot where I wanted the photo to show it. Multi-tasking is probably good, but that’s not how I do things. Pretty difficult to not be aware of the sky, or the water, or the boats, but no need to pay attention to them. If it was a still life, and static, things wold be different.
The only way I’ve found to capture things like this to my satisfaction is to have everything else “done”, and wait for something important (animal, radio controller, boat, motorcycle, whatever) to hopefully fit into the composition I was planning on - and when things get all screwy, to do the best I can.
…and the instant the camera goes CLICK my attitude changes, looking for something else that might be worthwhile.
The big thing of course, is to plan properly for the photo I hope to capture. Without planning, results become just luck, or the lack of.
I’m only aware of one photo of yours, and it was lovely. I enjoy scenes like that, but when possible, I want some “life” in the photo, maybe a bird, whatever. But that’s just my goal. Joanna’s photos are often static images frozen in time, and that IS the image. I love to see all the small details, and I picture Joanna with her camera set up on a tripod “visualizing” what she sees onto the film. …Like many photos from Ansel. I used to do that in India, spending hours setting up a scene, and at dusk, having two or three minutes in which to capture what I wanted. Too early, or too late, wasn’t what I wanted.
When I left to take the photos yesterday, the camera was set to RAW + JPG. I already had my jpg images, and that’s what I used last night to edit the photos. Next time I do this, I’ll just shoot in RAW (RAF) and plan on converting later.
Shooting with the Fuji “feels” like shooting with an ultra-modern version of my Leica. I wish my Leica was more like my Fuji, with a viewfinder that could switch back and forth between optical and digital.
I don’t know much about other Fuji cameras. I know people like them, a lot. Do you use one, and if so, which model?
I have an aging (but still very much loved) X100s; my main camera these days is an X-T30. I absolutely agree: Fujifilm cameras are fun to use. They are also better than anything else I’ve found for shooting in JPEG mode. The various film simulations are amazing. I downsized from a Nikon D750 in late 2019 and never looked back. I do have some information about that here.