I’m delighted with how effectively purple and green flare blotches can be removed using control points in PhotoLab. Also certain kinds of obstructions that end up blending into the image. Here are two examples I worked on recently.
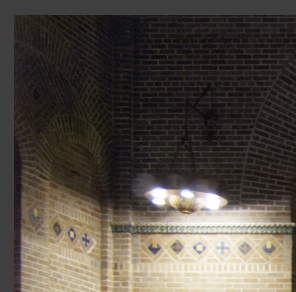
First, an easy one involving purple flare:
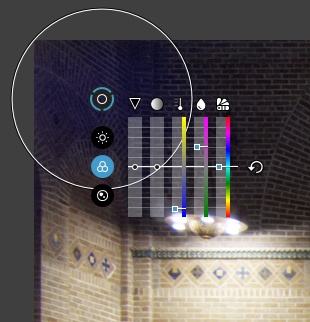
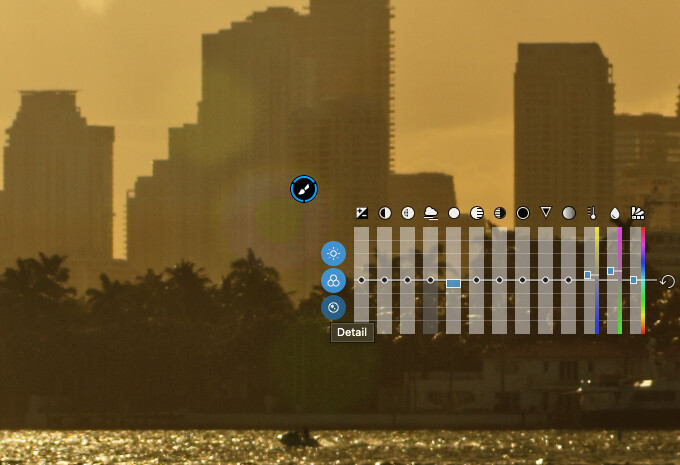
I created a control point near where the flare is strongest:
Now it’s just a matter of adjusting the local Temperature and Tint sliders for the control point. I found I could start by reducing Tint to 0 and then remove the blue by elevating Temperature toward yellow; or, I could start with the Temperature: shift it toward yellow until the blotch turns red (this is what I actually did) and then adjust Tint toward green.
As I fine-tuned the result, I found that there was a range of Temperature and Tint settings that looked acceptable. For this one, I started with Temperature = 2,592 K and Tint = 81 and ended up with Temperature = 2,804 K and Tint = -10:
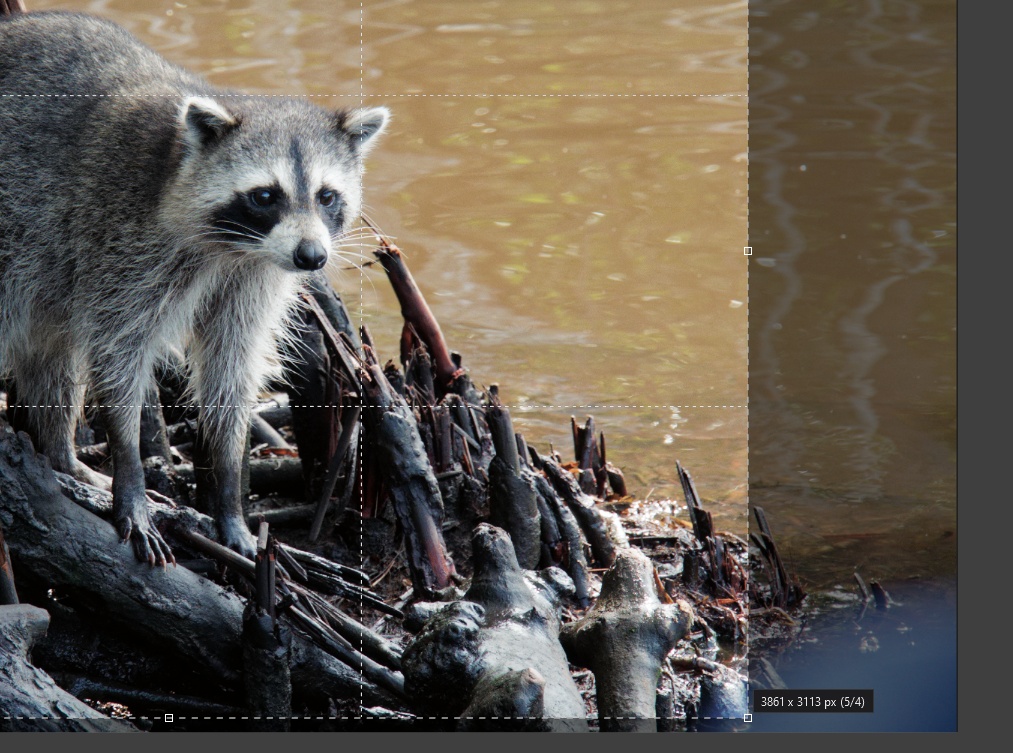
A somewhat different example with a similar approach involves an obstruction that got in the way of my shot but didn’t ruin it:
It happened that I was able to crop most of it out, but not all of it. The remainder is little more than a strong color cast. A control point took care of it:
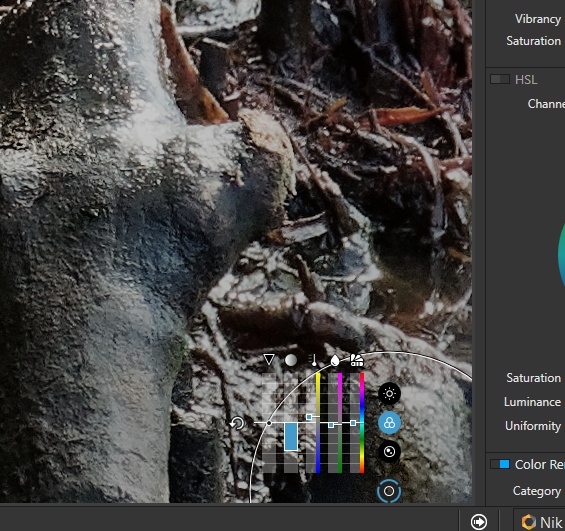
This one I was more creative with. The primary adjustments are:
temperature raised to 12,327 K: deals with the blue component. Actually an overcorrection, making parts of the area brown but in a way that matches the surrounding elements.
saturation lowered to -56: a very subtle adjustment, neutralizing a very small part of the obstruction that didn’t blend in completely after becoming brown.
ClearView Plus raised to 82: reverses a lot of the smudging of the bark that the obstruction caused.
sharpness raised to 12: adds a bit more texture to the smudged bark.
The whole image underwent significant saturation and contrast alterations, so these local adjustments were among the last that I applied. And yet, in this particular case, undoing the global adjustments doesn’t seem to impact the effectiveness of the local adjustments.
I’m sorry Greg but I don’t fully understand what you are doing here.
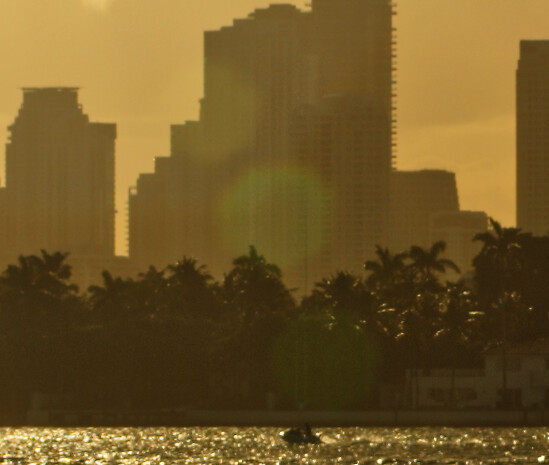
If I take this portion of one of @mikemyers images…
… how would I use this technique to remove these flare spots? I tried using the standard brush and adjusting the tint, colour temperature and highlight but with limited success
In the original image, that flare spot was ugly. Nothing I tried could get rid of it, but my bag of tools is much smaller than yours. So I just minimized it, and gave up.
Am I correct that the flare is caused by reflections within the lens? If so, maybe I just need to use a better (and newer) lens? For the future, I would like to prevent them, so less need to fix things later.
Could you please post a before and after photo, so I can understand better what you’re doing, and why? In the top image, the only thing that stands out as maybe distracting to me is the brown branch to the right of the raccoons head, which instantly grabs my attention, but that’s not the area you are working on in the lower photo. To me, if you took away the brown color in that one thing, it would then blend in better.
Yup, that’s where I usually end up, unless I am fortunate enough to have something nearby to clone over it.
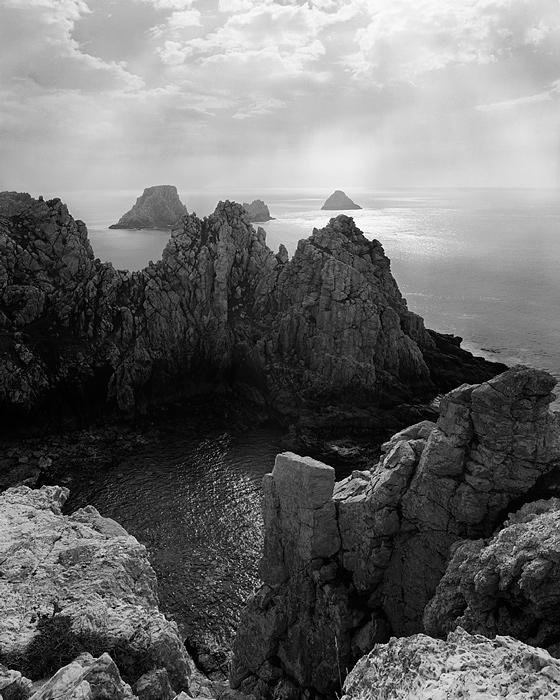
This picture, from my large format photography web site, had several flare spots in front of the vaguely triangular rocks in the middle ground. But when you’ve got a 300Mpx scan from a 5" x 4" negative to play with, it’s easier to be more precise. In this case, I used Photoshop to change the tonality of the flare spots to that of some neighbouring rocks.
Certainly modern multi-coated lenses help but, if the sun is able to penetrate into the lens, it can also reflect off the inner structure of the lens as well as refract through the glass. Which is where a good rectangular compendium hood comes into the equation, where you can place the edge very precisely on the edge of the frame, observing very carefully that none of the lens interior is in direct sunlight, whilst avoiding cutting into the frame with the hood.
Believe it or not, we used such a hood on this shot but the sun was just a tad too low in the sky (possibly it had dropped whilst we were calculating the exposure and loading the film).
In short, don’t shoot into the sun
But since contre-jour shots are so attractive, as we found with the above shot, the only way to do that is to use a decent compendium hood, or even (a lot cheaper) a French flag, and take your time to align it properly but not too long if the sun is setting as fast as it was then (sort of slow, slow, quick, quick, slow)
I do have a question for you, and maybe you’re the only person here who can get me a good answer, but I will try to copy and paste it into a new thread here - as it is very different from “flare”.
Mike, the second to last image in my first post shows the “before” situation, with a blue obstruction (someone’s clothing or part of the boat) in the lower right corner. I was cropping out most of it, but still had to deal with a little bit of it that was interfering with the branches in the foreground. Because of distance, the obstruction was translucent, not opaque. The final image is the “after” shot.
I realize after posting that the area of detail looks small and is harder to see because of the white background on the web site. (I’ve begged for a dark mode!) I didn’t want to make the post too hard to follow with larger images.
I used a control point, not a brush mask. That’s what I’m recommending to try. Those green flares you’re showing in Mike’s image are a bit complicated, but the color is concentrated enough that a control point where the green is most intense might let you blend in most of the flaring. The orange rings would have to be handled separately, I think - if they can be mitigated at all.
Feedback appreciated - I didn’t notice that and will consider brushing out the branch! I gave so much attention to the obstruction because the raccoon seemed to be looking right at it.