Updated FilmPack 5 Elite Color Negative Partial Presets

As I indicated in a separate topic this weekend, I discovered an error in my 16 FilmPack 5 Elite Color Negative presets which caused local adjustments to be overlaid. I corrected this error yesterday. Even though the 16 Color Negative presets were the only ones that required an update I included all 82 presets in four folders in the attached upload for those who don’t currently have access to them. .

These presets were originally intended for my own use but I discovered that several other PhotoLab users were also interested so I created and uploaded these partial presets last September. The attached zip file contain all four folders.

Feel free to use and share with others. As I indicated last year, If the DXO staff finds these presets useful I give them permission to use them for any purpose except for sale as a separate plug-in. Of course, using these presets will only work if the FilmPack 5 plug-in is installed. They should work the same in both the Windows and Mac version. Please let me know if there are any issues with them

Preset folders in zip file:

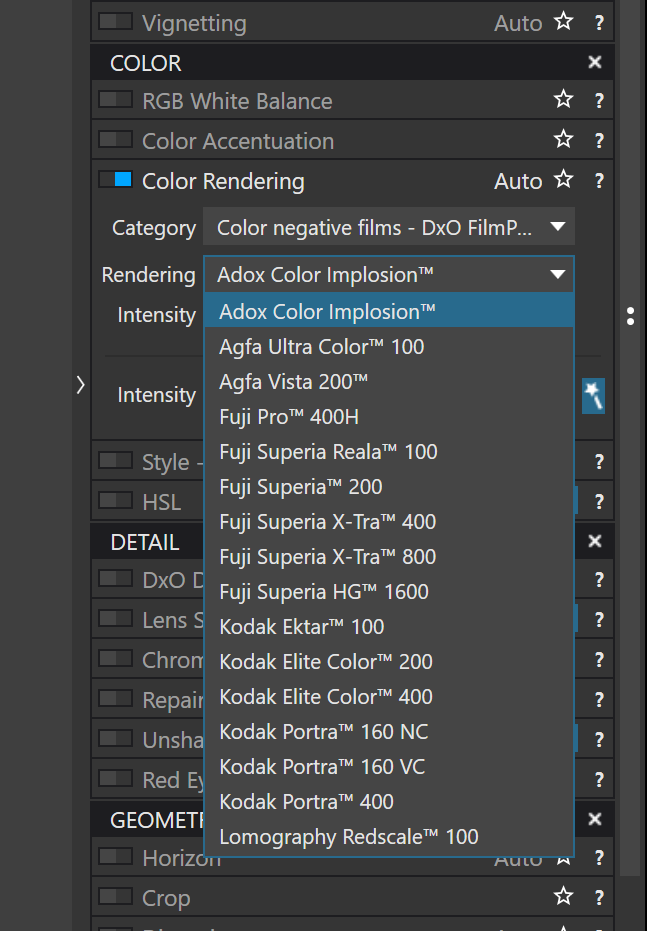
DXO FilmPack - Black & White Film
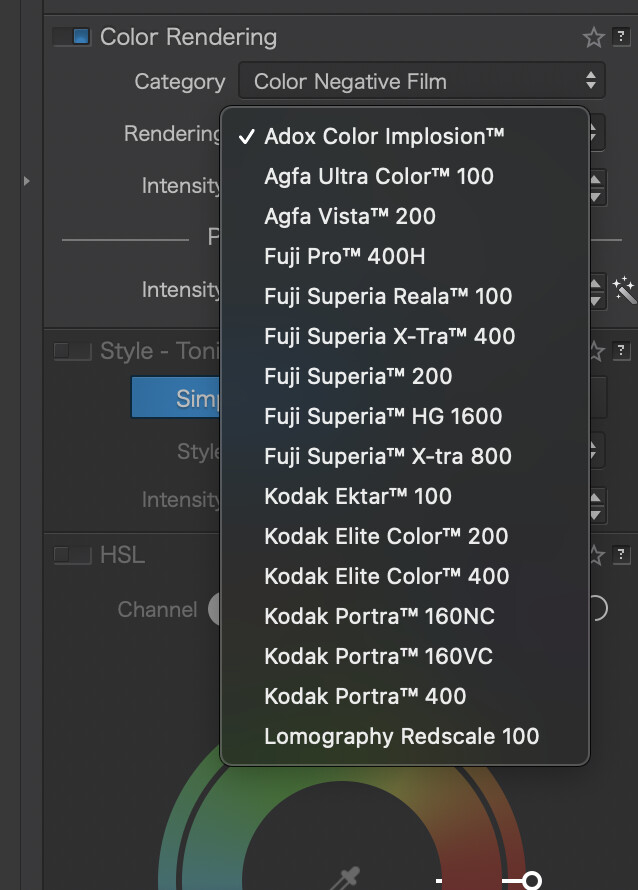
DXO FilmPack - Color Negative Film (This the updated folder)
DXO FilmPack - Color Positive Film
DXO FilmPack - Cross Processed Film. .

INSTALLATION
There are a couple of ways to install them. The easy way was suggested by @Pieloe who posted the following. For those who are comfortable with this procedure, it is the fastest way to do it.

"Unzip and just drop the content like sub-folders in the preset DPL folder.
There’s nothing more to do :wink:

Windowd Presets: %LocalAppData%\DxO\DxO PhotoLab 2\Presets
Mac OS Presets: ~/Library/DxO PhotoLab v2/Presets"

For those not comfortable with the above you can use the more cumbersome way as I indicated in the thread from last year.

"First unzip the zip file to a location on your hard drive. You will see 4 folders with each containing the presets related to the folder name.

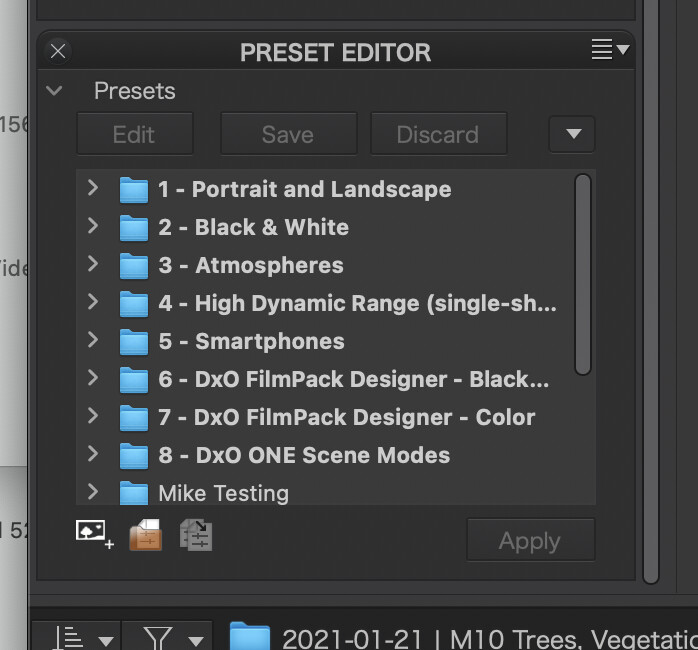
Next go into PhotoLab and expand the Preset Editor. I only have PhotoLab Elite so I hope the Preset Editor is also available in the Essential Version as well for those that use that version.

Next in the expanded Preset Editor click on the first icon, “new preset folder”. Rename it to a name similar to one of the four folders you’ve unzippped. Create 3 more preset folders and also rename them with similar names to the unzipped folders.

Next, select one of the preset folders you just created. Click on the “import” icon in the Preset Editor (2nd icon from the right) . Navigate to the unzipped folder with the similar name to the preset folder you just selected and select all the presets in that folder before clicking on the OK button. On a Windows machine you can do that by holding down the shift key as you select the presets. Click OK and all the selected presets will be copied to that folder.

Finally, follow the previous step for the other three folders. I hope the instructions are clear enough. If you know where the presets are located you can just copy and paste them there directly as @Pieloe suggested, but many people may not be comfortable working “under the covers”."

Mark

DXO PhotoLab - FilmPack Presets.zip (34.6 KB)

11 Likes

Thank you for the update!

1 Like

Thanks.
(I never used color negative up to this date so that’s why i didn’t noticed the error.)
The others arn’t changed or modified?

Peter

That is correct. The only ones changed are the color negative film types.

Mark

Thank you so much for the original work and for the update!

1 Like

Thank you. I hope you find them useful.

Mark

1 Like

I’m definitely interested, but I think I need to put this off until some time in the future when I understand PL4 better. I’m using it, but it’s still a learning curve. Thank you in advance!

These are just presets. They are not a requirement when using FilmPack 5 Elite from within PhotoLab. Some people prefer using my presets rather than the way FilmPack displays and applies them.

Assuming you have activated FilmPack 5 Elite within PhotoLab. you can see and apply FilmPack 5 film types without using my presets. Select the Color Palette and from within it select the Category dropdown under Color Rendering. From there select Color Positive Films, Color Negative films, Black and White films or Crossed Process films. Once you have selected one of those four options in Category the Rendering drop down box below it will list all the available film types for that category. and you can view and select your preference.

Mark ,

First time doing this.

…and sure enough, it worked for me:

Wow! I’m speechless. I know nothing about those films, but it sure gives me a lot of choices.

You have opened a new door for me, that I never knew existed. I think this is something Joanna suggested I do rather than clicking on “Vibrancy”, but I didn’t understand. Is there a way to show all those film types using thumbnails of my own image, since I don’t recognize the names?

I think at some point I’m going to want to use two screens for PL4.

What I like about using @mwsilvers presets is that you can see them applied to your image instantly in the presets thumbnails all at once. This makes it easier to choose the one that you like best at a glance. If you use the color rendering method, you have to click on each one, one by one, to see it’s effect on your image. Download them and try them yourself.

1 Like

Yes, use Marks presets… :wink:

1 Like

I’m not sure what editing vibrancy has to do with selecting different film types. I’m guessing she was commenting on the results you achieved with a specific image.

With regard to your question about seeing thumbnails of your own images, that is what my presets are for.

Mark

It is unfortunate that we can’t increase the size of the presets when viewing them which I believe would be very useful.

Mark

The files are now copied to a folder on my hard drive. There is no indication they are zip files, they all just look like files. I’ve never yet un-zipped anything on a Mac, only Windows.

I found where to create a new preset group, but not where to create a new preset folder. ???

There is one.zip files with 4 folders in it. Finder is probably showing you the individual folders in the .zip file. Within the folders are a total off 82 preset files. In the prest editor the first icon to the left creates preset folders, at least in the Windows version.You don’t seem that comfortable using you Mac. If you were you could just drag and drop the folders into their final destination Maybe the Mac version refers to them as Preset groups rather than folders. Perhaps some other Mac user can help with that.

Mark

Yes I agree. It would be nice to have the thumbnails about one forth of the screen so they can be seen four at a time and scrollable to see the rest.

1 Like

@mikemyers another great feature of these presets is that they are partial presets and can be applied at any time in your workflow without affecting any of your previous editing on the image. I find this extremely useful as I often like to get the image partially edited before deciding on a film emulation.

1 Like

I created them specifically for that purpose. They do only one thing, add the selected film emulation to your image.

Mark

Thanks for your help - and you are very perceptive. I learned my lesson many times over, not to do things I’m not sure about. I’m not comfortable doing new things on the Mac that might get me into trouble if I accidentally make a mistake.

You are probably right that Apple’s Finder automatically showed me the actual files, so I don’t need to un-zip them.

Maybe the Mac version of PL4 uses different wording.

It’s noting urgent - I’ll wait for confirmation from Joanna.

I’m also getting way ahead of myself. Before I think about different films, I need to understand Film Pack better. I am half way through watching this video - maybe it will help me understand Presets and Film Pack better:

1 Like

I doubt Finder unzipped them for you. Finder probably works similarly to Windows Explorer and is just showing you the contents of the .zip file as if it is a normal folder. If I’m correct you will probably have to drag and drop them somewhere else to unzip them.

Mark