Unexpected system crash, and image from Nikon Df

I wanted my palettes and tools laid out with only those items that I wanted to see, hiding those that I rarely, if ever use. So I created my own workspace “Joanna” and then I can also work with all the palettes on a second screen, leaving the main one just for the image editing, hence “Dual Screen”

You don’t have to do this but I found it useful because, if I move any tools, or even expand or contract some items temporarily, for a particular work session, I can go straight back to my layout in one click.

If I understand you correctly, had I clicked on “DxO Advanced” yesterday, anything and everything I did to add to it would be lost, and it would go back to just the way it came from DxO ?

…and since I just saved my workspace with a title “Mike Myers Jan 22 2021”, any time in the future that I click on this workspace name, it will go back to what I just saved with this new name?

There are still lots of things I don’t know or understand, and at one point I was going to ask how to remove them, but then I keep learning things from you. Maybe what I ought to do is move some of the things I do frequently (such as watermark) up near the top of the page. Can I just drag those sections upward, and they will be inserted in a new location? Doing all the above will make it easier for me to use PL4, minimizing the time it takes to search for things.

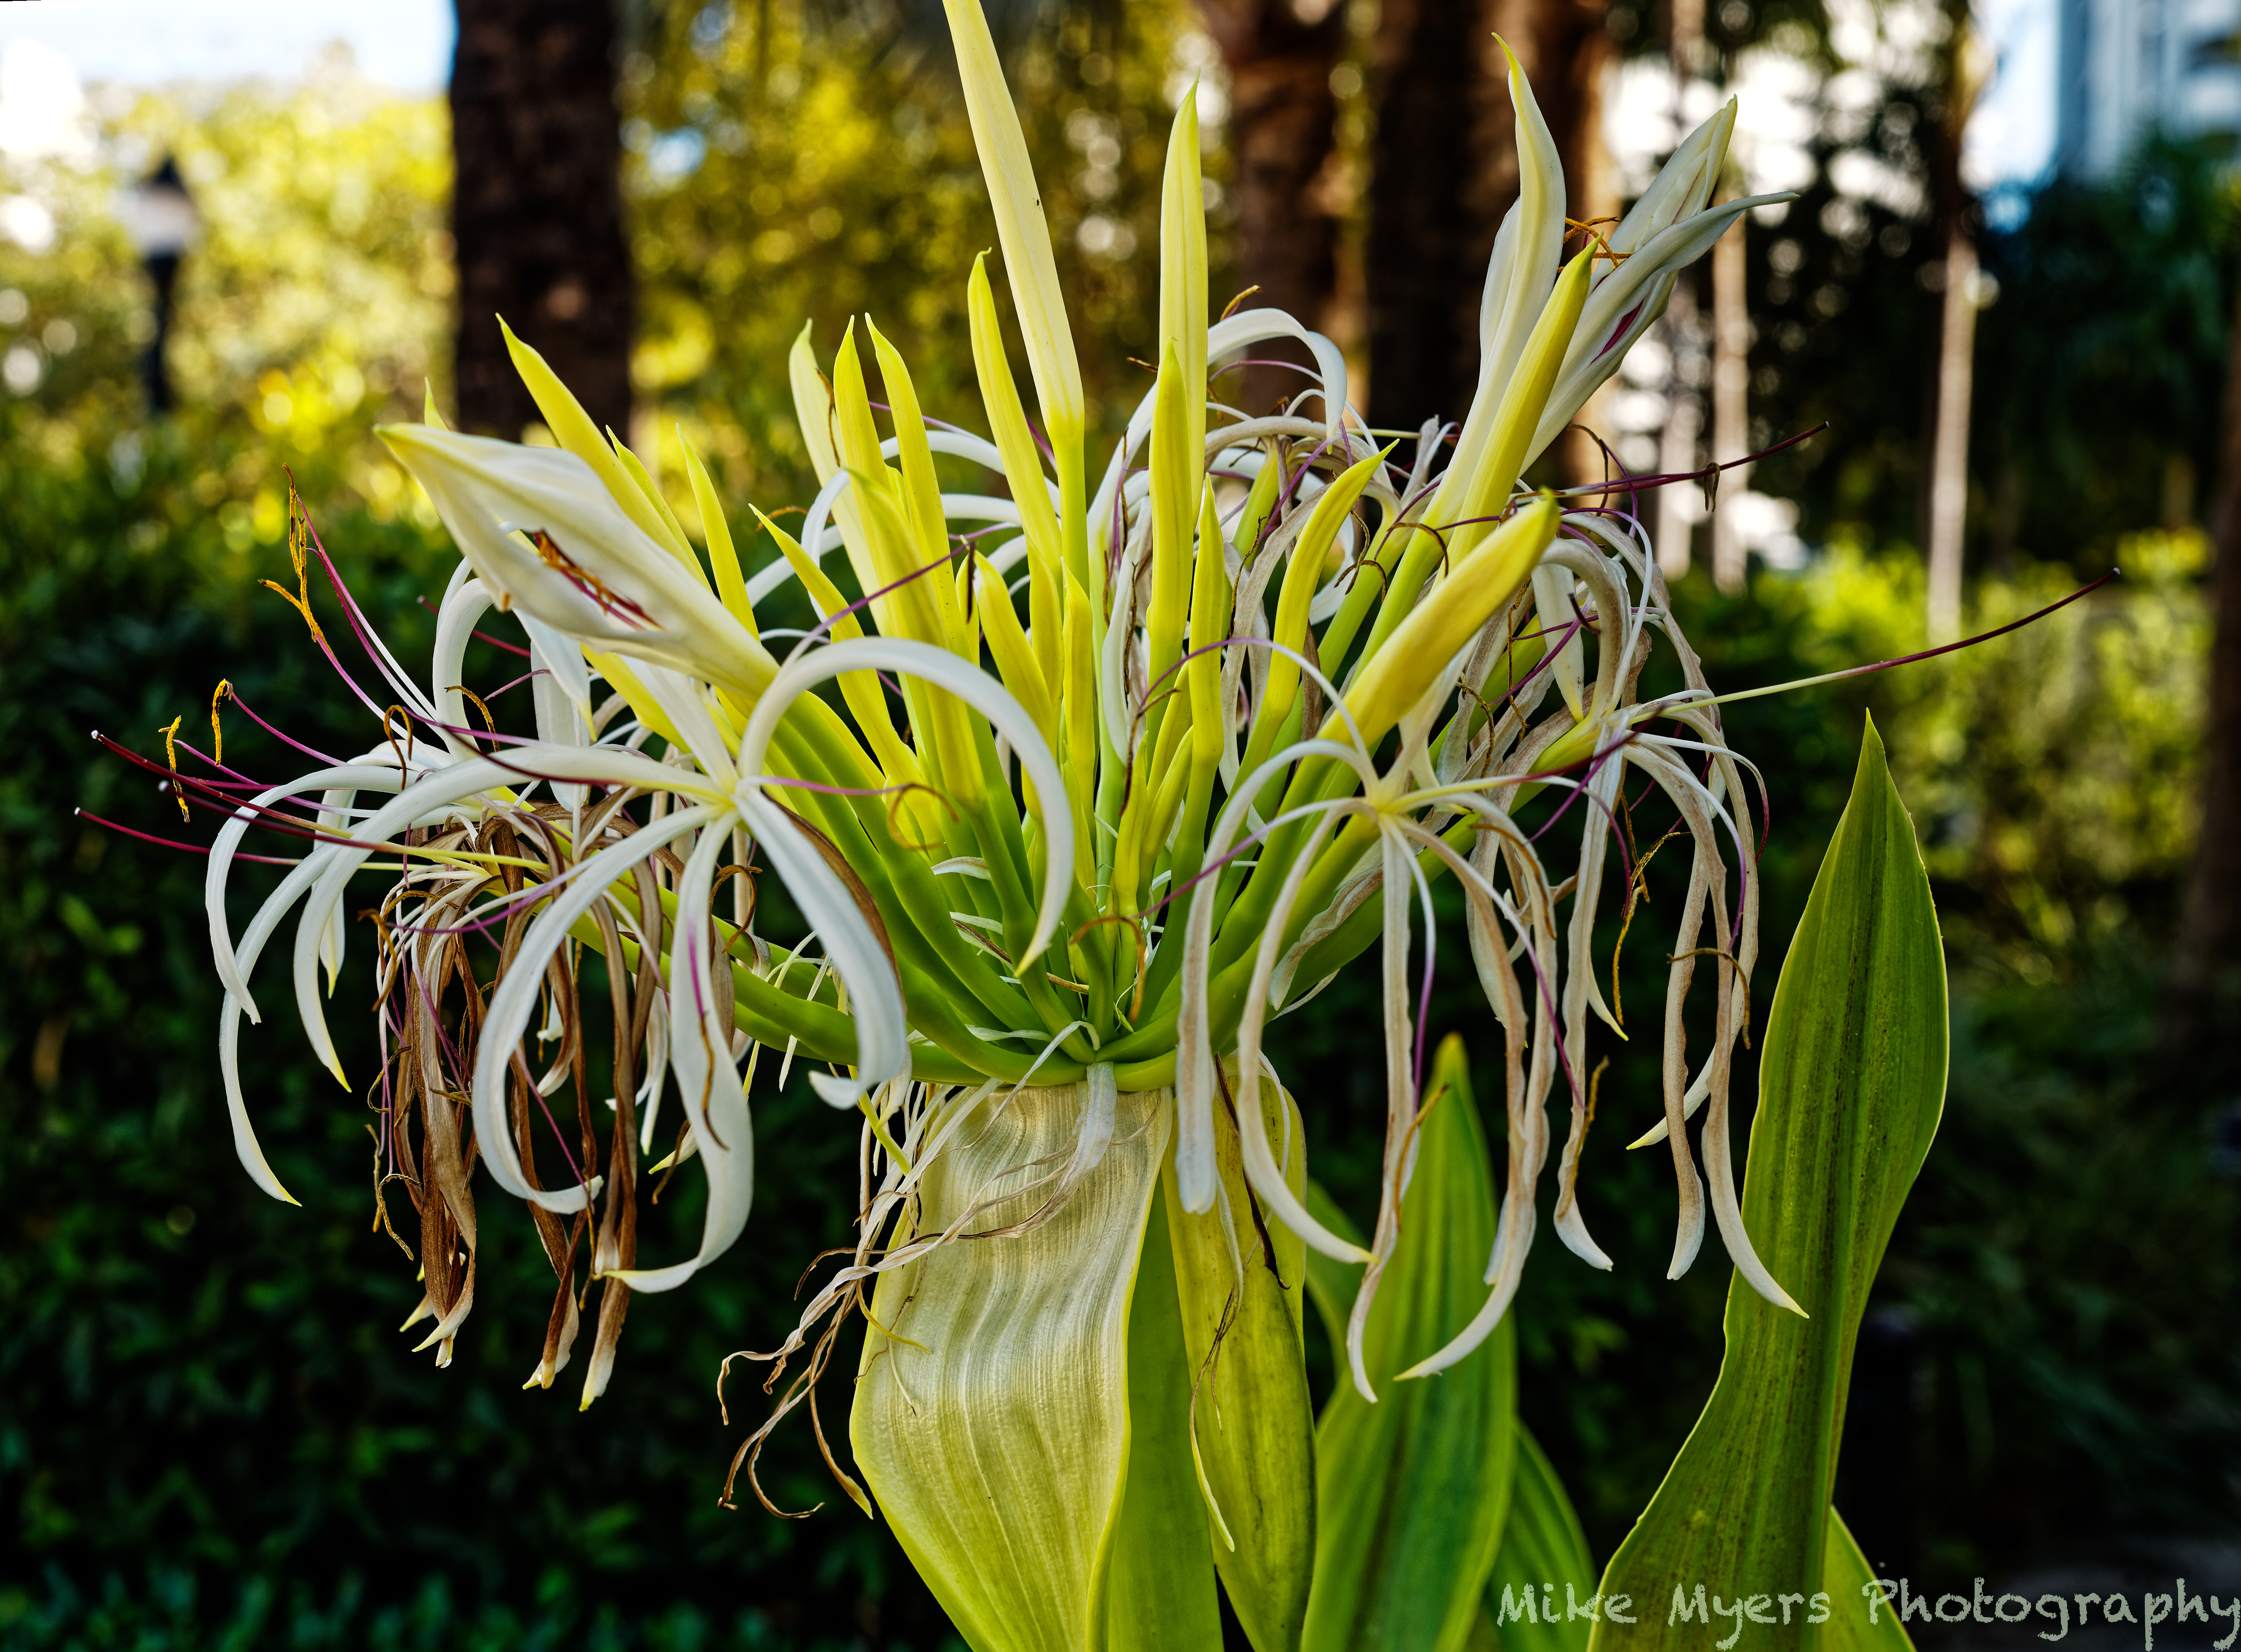
Let me ask a general question, and I’ll use an image I took yesterday as an example. There was a row of plants I’ve been photographing for several weeks now, trying to gt a good image of their flowers. Yesterday I saw a nice example, with lots of “green” behind it for a backdrop, and took several exposures trying different things. The one I’ll post here is my favorite, but that’s not what my question is about.

Way off in the background are trees and buildings, all lit up with bright sunlight, and all blown out. The way I discovered this is with the PL4 tools for blown-out highlights and shadows. I could fix the shadows, but there was no way to that I could find to help the highlights - and the more I tried, the worse they looked. So, I went back to my first interpretation of the image, with nothing done for the blown-out highlights.

It’s currently my understanding that there is nothing in PL4 that can be done about this now. If I would have had a graduated filter, that should have done it, but after the image was captured, it’s all over.

Or, I could have underexposed the entire image, and maybe fixed it later by opening up the lower part of the image. Or, I could have held the camera higher, so it was shooting “down” more.

I can try this again, and see if that works, but it doesn’t sound right to me to deliberately underexpose the part of the image I’m most interested in.

My question - if someone took an image like this, and wanted it printed, would it be best to ignore the blown out areas as I’ve done here, or are there any tricks I’m not yet aware of to do it better?

(However bad the image looks to me now, it looks far worse when I click on the COMPARE tool. Ideally, I will get to where I’m correcting potential problems better before I ever press the shutter button, rather than using digital band-aids later!!)

L1001932 | 2021-01-21-M10 Trees, Vegetation.dng.dop (12.9 KB)

L1001932 | 2021-01-21-M10 Trees, Vegetation.dng (26.8 MB)

Doing some of this now. How do I get things to appear on a second screen? I have my PL4 window open on my ASUS display - I think you’re suggesting I can have a separate window on my other display (iMac) and use it to help me edit in my main window on the ASUS ?

That is what she means but I can’t help you with setting that up on a Mac.

Mark

Indeed.

Yes, but I wouldn’t bother with dating it since you are unlikely to want more than one version of the same name. Just use something that is descriptive like your I used my name or Dual Screen or something else. The idea is to provide quick access to workspaces arranged as you want them, with as many or as few palettes/tools as you need, where you want them.

That’s exactly what you can do. I have grouped and ordered my tools under functional areas like Light, Colour, etc, but I did that before we got the new filters at the top of the right side. The problem with the filters is that the tools are arranged in an order decided by DxO, which cannot be changed, which is why I have kept to my own workspace.

You can’t have a separate window for palettes on the second screen - all you do is drag palettes by their title bars to the other screen and arrange them there.

Then you can close any empty sidebars…

Here are my two screens, as saved into the Dual Screen workspace…

After all that hard work, don’t forget to save the workspace!!! :stuck_out_tongue_winking_eye:

Essentially, yes. In fact, with this kind of shot, even a physical grad filter would not have helped because it would have changed the tonality of the parts of the flower that are in front of the blown area.

As we have previously discussed, known as ETTR, spot-metering on the brightest part and over-exposing by two stops, would certainly have made the image more manageable. Unfortunately, it still leaves an image that has those highlights, however well exposed, to distract the eye from the main subject.

Not knowing the location, as you suggest, I would have tried to take from a higher point of view, to avoid having the bright areas in shot at all.

Added to which, you have cropped one of the petals :wink:

Regardless of the technical perfection or not, I have to ask the question, apart from being a record shot, is it ever going to make an image you would hang on your wall? My personal answer is - no.

I did a Google image search and got Spider Lily pictures, most of which were taken from either higher up, or from low down with a bluish sky behind.

This kind of subject is notoriously difficult to get right with so many surrounding distractions. Never mind, it’s all part of the learning process we call photography :blush:

Wow… All the first things you wrote sound like reasonable explanations/suggestions that I can follow, and should I change things I will use a descriptive name, not a date. I just used the date as a place-holder - that’s the first time I’ve done anything like that.

The things I quoted above are nothing short of amazing, >if< I understand you correctly. You seem to be saying that I can drag all my tools to my other (iMac) display, group them however I want, and leave the ASUS display for my “working space” - and that if I save this workspace under a name, maybe “dual display”, I can shut down PL4, or use any workspace or whatever, and most importantly if I re-open the workspace “dual display” all those tools will move to my iMac screen, leaving me the whole ASUS to use for editing my image??? I don’t often exaggerate but to me that’s nothing short of incredible.

Until now, I never got around to thinking about how or why I would change to a different workspace. This is awesome.

Late last night, I went to Dave Kelly’s YouTube channel, and played this video:

Towards the end, he brought up many things I never realized before, as in how to find my tools, how to find my “active” tools, and why this is useful. As a “Beginner’s Guide” it is a goldmine of useful information, especially for relative newcomers, like me. As I usually do, I need to watch it again on my left screen, while trying all the things he describes in my PL4 window on my other screen.