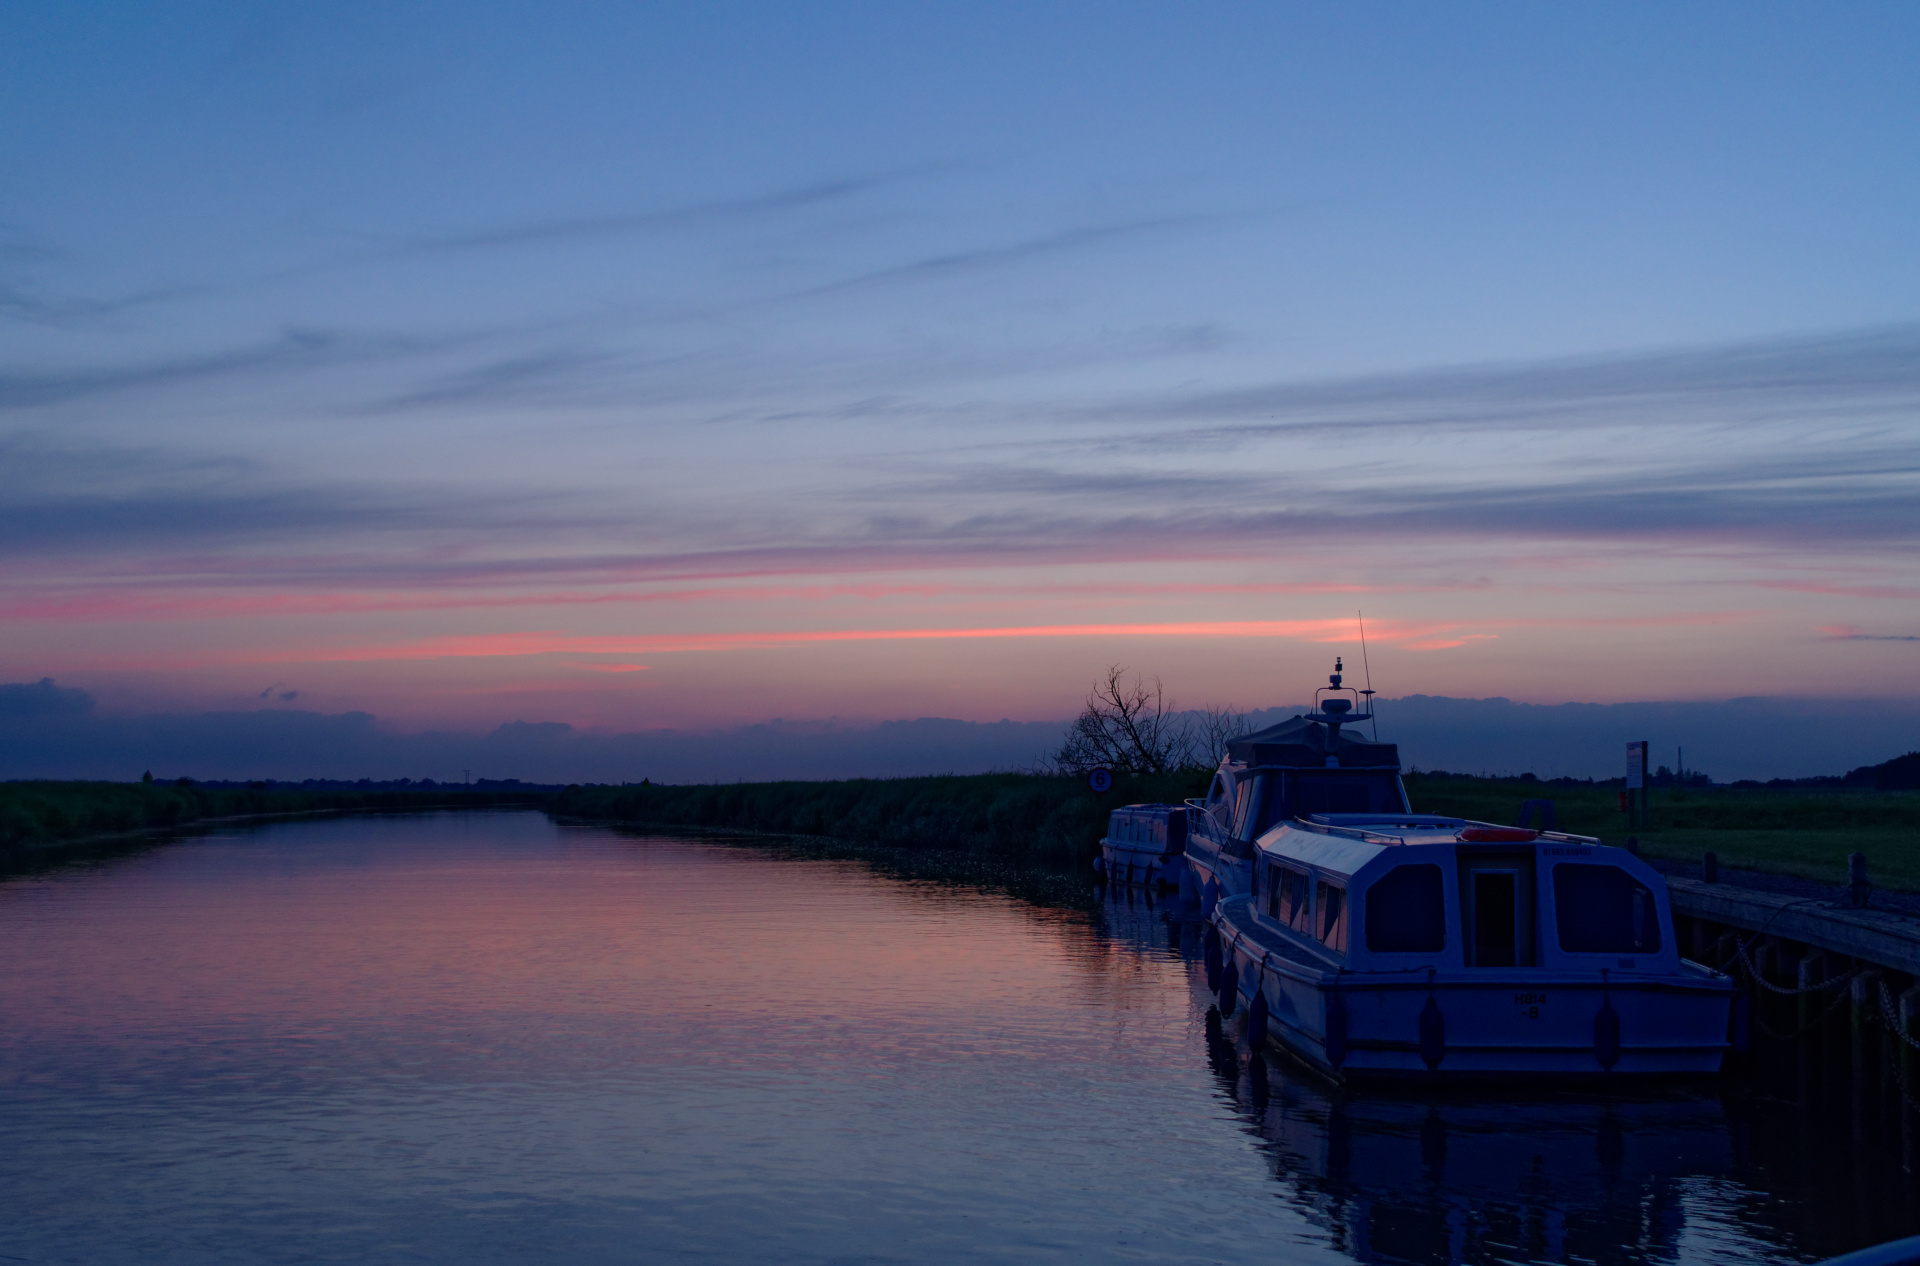
RAW file attached. That blue in the sky is quite typical of a Norfolk sky. I just find it all ao difficult in PL - I am not finding it at all intuitive. There is no real flow to it imo.DSC_0326.NEF (15.7 MB)
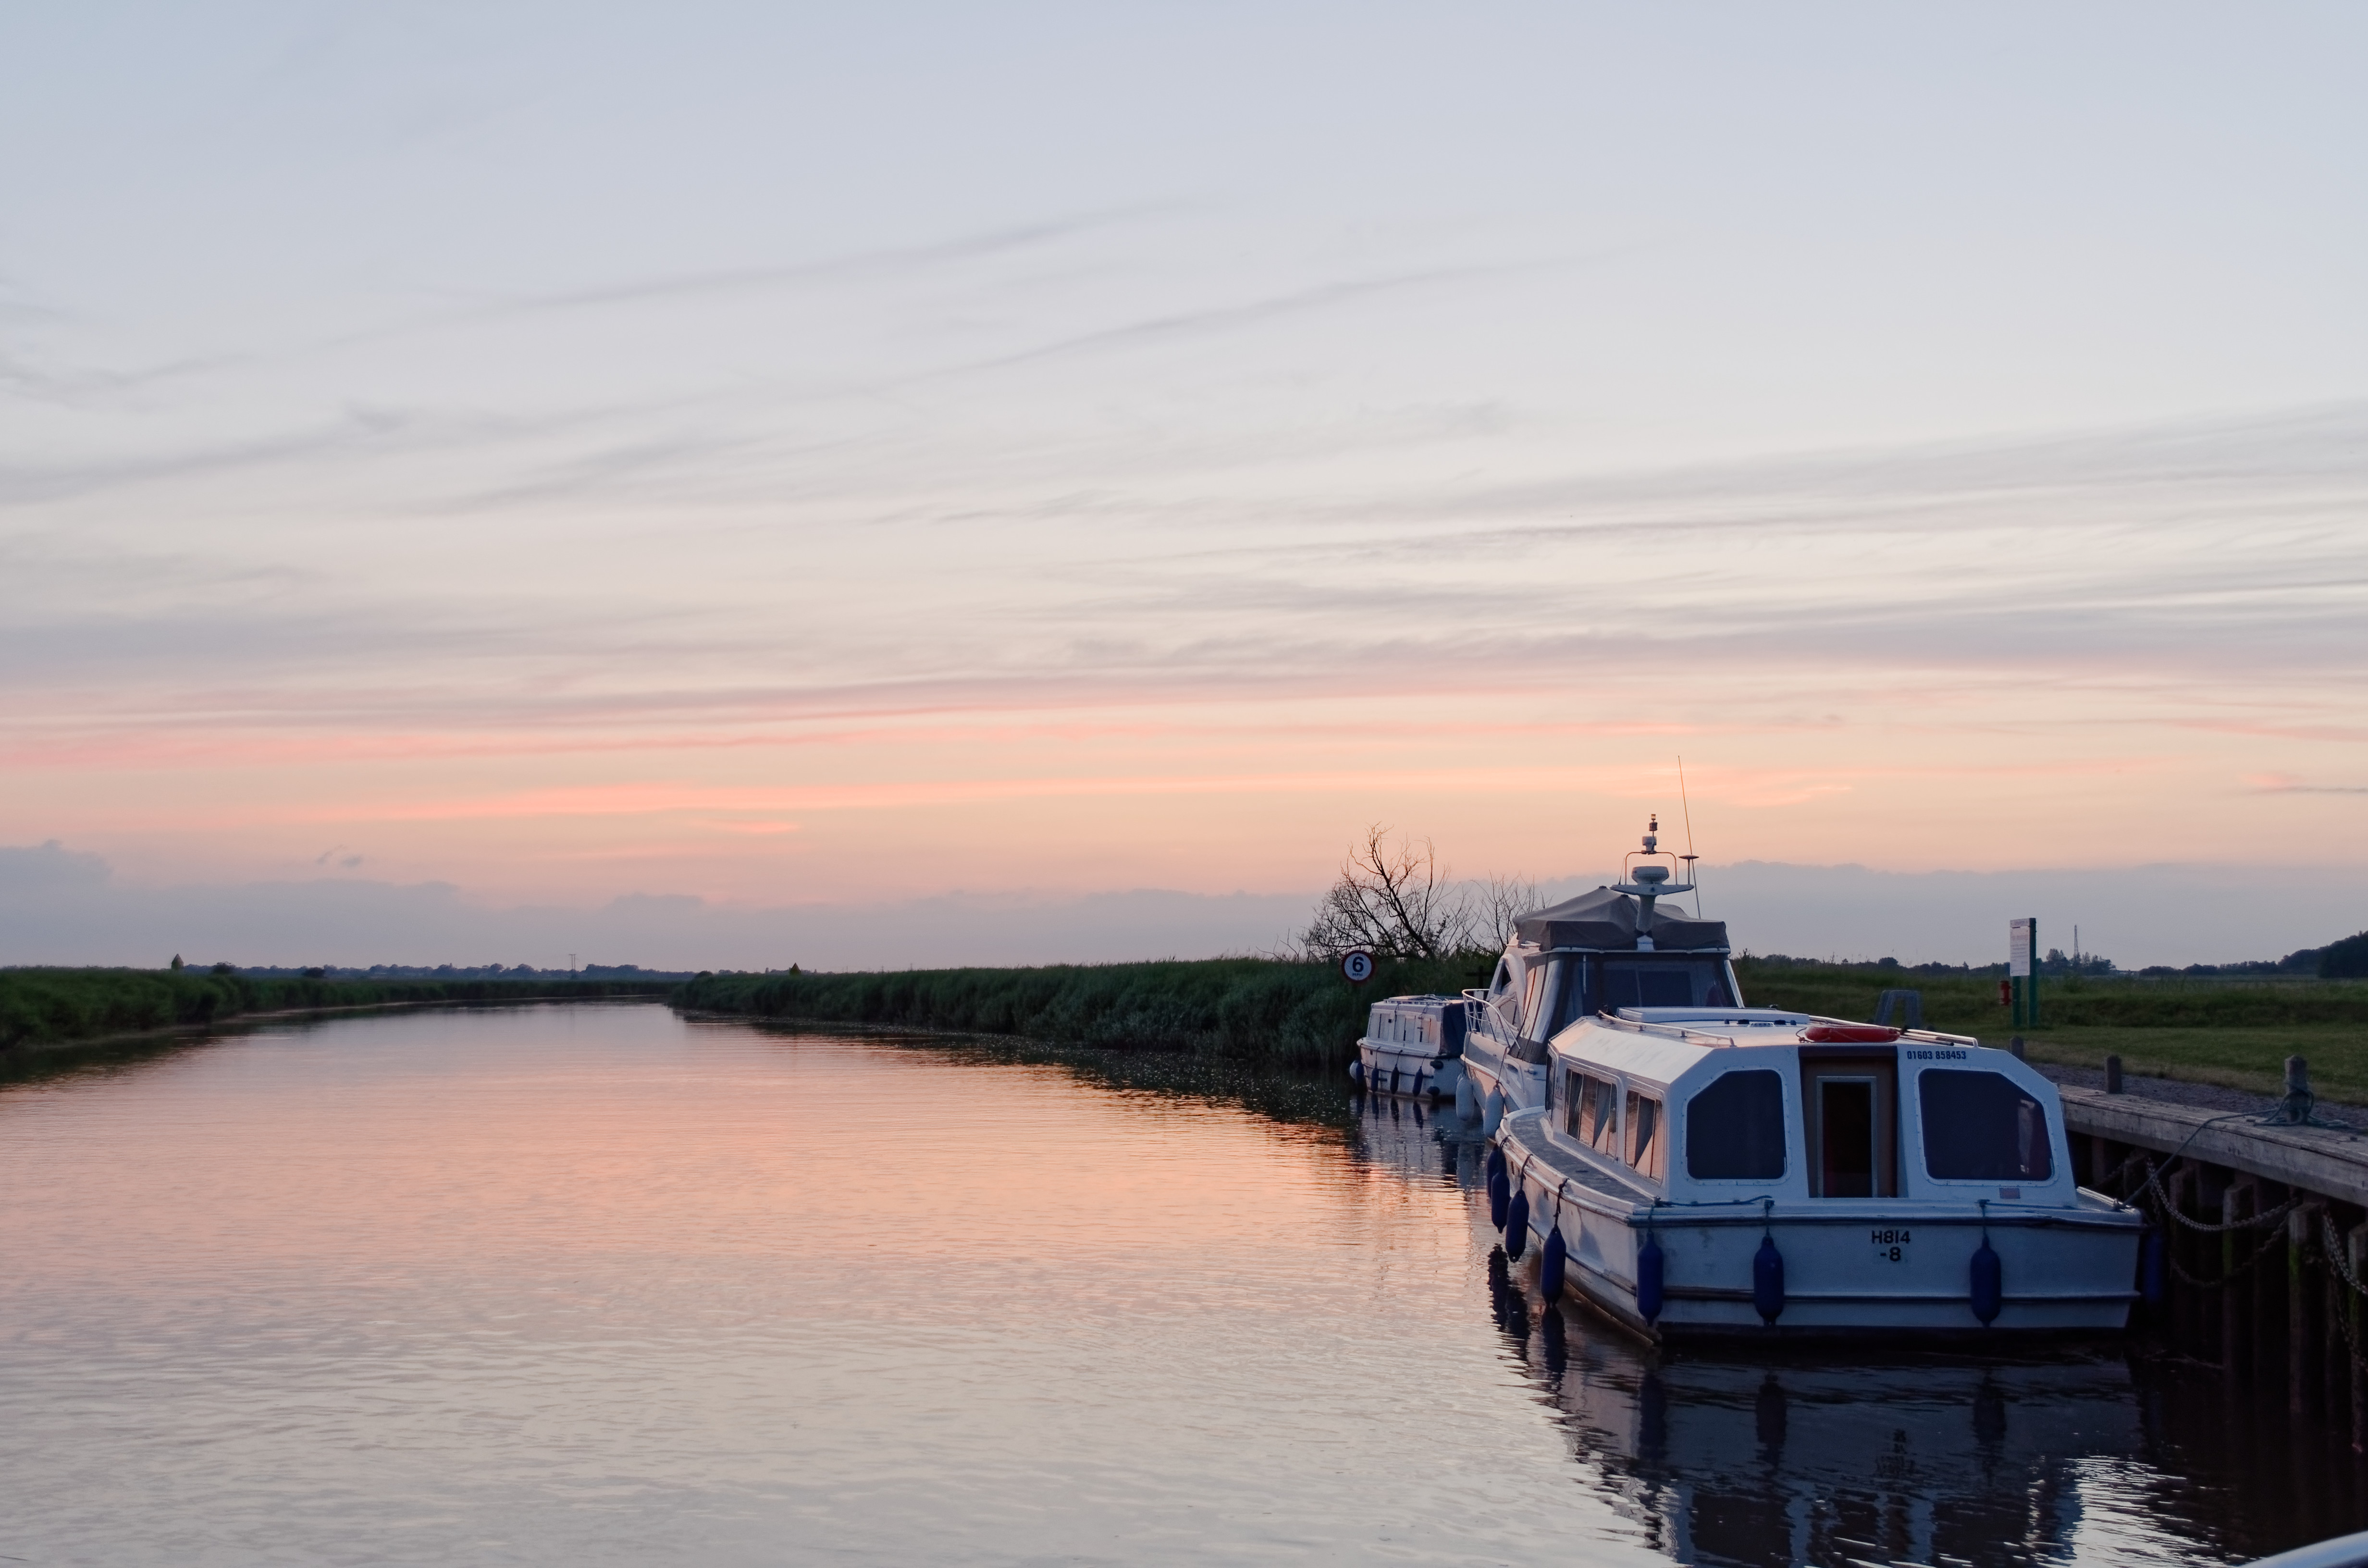
I’m still playing, Peter. Seem to have got a fair balance using the white picker on the middle boat.
Something like this !?
Not knowing what you mean, I keep the original light.
DxO Standard preset and then Neutral colors preset.
WB original
Expo compensation -0.8 for a sunset effect
Vibrance +70 for the same thing
I don’t understand the vignettage on your TIFF.
DPL found the lens profil !
Don’t even bother with too much effects 
Enjoy
Pascal
2 Likes
i though i look this up in web.
me neighter.
The point of how your mind is memorising a scene view is done by “spotbeam.” bit by bit part by part.
your eye’s adjust every time you change your lookingpoint , in “aperture” iris and memorised color. you know the boot is white so you see white. even when there is a colorcast over it.
Same why we didn’t see those dark foilage that shadowed, i think you saw more detail.
So when you want to recreate that you need some smartlighting or plane shadowlifting and highlight correction.
A camera uses WB settings to correct lightcolorcasting by time of day and luminance source, come to mind , uses a camera time to know the sunlight color? So if i set time in camera 8 hours early it has a other WB then when it’s on time? ( Sorry side trac)
Did you tried some WB presets? To see which one is close to “reality”? The colorpicker does the same, it targets neutral grey. ( don’t remeber which presentage), so you point to " this is white-ish." and the WB is adjusting towards that neutral grey . works great for colorcasting but it can ruin the sunset colors. ( because you want that type of colorcasting.)
It is rather difficult to balance color in feel (your memory) and reality and camera’s preset of wb.
I tried to edit WB but it does not bring anything … for this image. It’s not always the case !
Pascal
I took SP7pro’s absolute Auto WB, and did a 100% dodgenburn just to see if this would be near “reality”

color temp around 6319, colordeflection 3
camera setting got 4558 and 5.
big difference.
So i took over the wb numbers and did 50% sl on boot and foilage.:
One thing is for sure SL is far more effective.

I think DXO’s would be the base from where i would modify sky and sunset colors with controlpoints. fiddle a bit with exposure.
One thing: Why doesn’t DxO has this kind of “auto colorcast removal WB”
I find this Auto Absolute and Auto Natural WB modes very handy to overcome simple colorcast trouble’s and bring me to a neutralbase.
coming back to Time and Date WB calculation: bringing in the suncalender with time of sundown and horizon would give the camera a sense of colorcasting by atmosfeer due highed of sun against the horizon. (probably too much other influences to use.)
Peter
That is how I see it. The vignette is due to me having run the image through an effect in Nik. What I keep overlooking is the fact that in PL I can add a preset over the top of the initial preset. For some reason I have it fixed in my mind that adding the preset would replace the first one!
Thanks for the help. It is appreciated and useful.
Peter, great stuff. What is SB7 Pro?
The problem with this image is that it was quite late in the evening when taken so the shadows were heavy and the sky dark. Trying to stick with that means the blue cast remains. I guess the alternative is to lighten it and make it appear earlier in the evening … but that is interpretive. Nothing wrong with that of course but this image is a record of an actual event, we were there on our boat, so I lean towards a factual image (as far as possible).
Silkypix 7pro.
The two absolute auto Wb’s are great for neutralize colorcast. I really miss those settings in DPL
No i use them to get the numbers for manual adjustment in DPL.
Yes i understand your goal. I would go with those WB numbers and lower the SL presentage to get more darker image. And then enhance the sunglow ,orange, and balance the blue in the sky without getting blue cast over the white boot.
I shouldn’t even admit this but I’d totally missed the point with u-points
Now I’m up to speed thats really ramped things up a gear for me
Maybe I should read up more when the updates arrive!
Thanks Pascal
2 Likes
Yes but are they really any different to colour range masking in Adobe and which is best (still like u-point though). My big moment was being educated re smart lighting and the spot weighting tool 
True - but, only if the overlay is a partial preset … otherwise, the subsequent preset will totally replace the previous one(s).
John M
Yes, lots of power with u-points … but the way they work is not obvious (it wasn’t to me, at first).
This post may help others noting Bob’s comment: Example of how u-points are applied
I found this tutorial to be helpful too; it’s referring to Control Points in Color Efex Pro … but the selection/application logic is equivalent to that used by PL’s u-points: Using Control Points in CEP.
Regards, John M
2 Likes
Thanks John, could you explain the difference between partial and not? For instance are all those under Image > Apply Presets partials?
Colin
I reply for John because he helped me for theses tutorials
“These are the two complete presets delivered by the software. They activate / inhibit the “technological” features of DPL. To call them back is cancel all actions made to the photo. All others self-adjustments are partial, they intervene only on certain functions.
Other complementary settings can be applied immediately …”
http://dxo.tuto.free.fr/Efficacite/Efficiency.html#B2_Lautoreglage_de_depart
Pascal
2 Likes
first link is restricted but the second is very interesting.
reading material for this weekend.
Did a quick look on the link. got some questions popped up but i shal first read closely and do some tests.
Because i don’t understand ,yet, the frase partial preset in a matter of starting from the initial preset set in preferences. made by your self or not.
And a after that selected selected preset for let’s say blue sky enhancement without totally overwriting the initial settings which don’t involve enhancementsettings.
Thank you, Pascal - - I’ll add to your response:
Essentially, a Partial Preset is one that contains settings that pertain only to a subset of all possible settings.
For example, I created a Partial Preset that I named “ColorAccent(Vib=20 & Sat=5)” which contains ONLY settings for Vibrancy & Saturation - and, therefore, it leaves all other settings untouched.
You can create Partial Presets for yourself via the Preset Editor (available in the Elite version of PL).
Here’s Partial Preset that I mentioned above … DxO_ColorAccent(Vib=20 & Sat=5).preset (180 Bytes)
Regards, John M
1 Like
Why a great thread. Lots of really useful and interesting information. Thanks a million to you all.
This forum is turning into one of DxO’s great strengths 
2 Likes
Ok got behind my dpl and did a preset over preset. And the outcome is new to me.
So only the checkboxed in the blue editor line- tools in a preset in the toolset row are overwrite the one’s in image setting when applied.
Something to remember!
I checked my default genral preset and i did unatended it correct : checkbox all tools even the turned off ones. So this one is overwrite everything when applied.
Thanks for the heads up!
Now i can make little presets for sunset, blue sky ,flowercolor enhancement, and such and store them in a folder “partial presets.”
2 Likes