Hello,
I wrote three tutorials dedicated to the use of DxO PhotoLab.
As a DxO user, I give you my tips and tricks which might make you more efficient.
1- Discovering DxO PhotoLab
A quick overview for users used others development software
2- Local Adjustments with DxO PhotoLab
A user guide to Enhance the visibility of your photos
3- Efficiency with DxO PhotoLab - The means to get quickly to better results
Intended for experienced users, it explains the functioning and gives some recipes for more efficiency.
There are still a few illustrations in french soon be updated.
I hope you will enjoy these tutorials.
[Edit] Site updated for DPL2 release. See the page “Efficiency with DxO PhotoLab”.
Very nice, It was a very generous use of your time. I am also impressed that you provided both a French and English version. Hopefully users who speak other languages will have a working knowledge of one or the other, or there is always Google Translate.
Pascal,
I have been following your tutorials for several weeks now and I have to commend you for a job well done.
Thank you for taking your time to share your experience with us.
I have been struggling with PhotoLab for a while, it is so different from LR. Your tutorials have really helped me to move forward. Big thank you for that.
great effort and interesting reading material. thanks
got me thinking , maybe we can start up a “how i do it” thread for difficult tasks.
Things you needed more then one attempt to get satisfied.
Like the difference between smartlighting and gradientfilter and upoint approach.
clearview and manual contrast control. (microcontrast and fine contrast.) effect on different images.
Tonecurve control vs sliders in the tools.
-Global and local sharpening control (Upoint can be used for sharpening)
What i mean is i approach a image mostly the same way out of convience or just plain this is what i know to use. I start to wonder around in other toolsset when i can’t get my wanted image and be hours lost in learning if a tool can help to get what i need.
filmpack, NIKcollection , color rendering, local adjustments a lot is overlapping in its adjustment possibilities. The DxO PL suite plus Nik can be overwelming in its possible approaches.
many see more then one.
sometimes the best way is just around the corner but it has to be shown by someone before you see it.
Lots of ways to get the same result sort of. (some times a gradient filter is a better start to get rid of highlight trouble then fiddling with smartlighting and the highlight sliders not to mention the brush mask, upoint.)
Good idea. ON1 do, or did, have a great training aid where people put what they saw as their more difficult images forward for editing tips. Might be difficult to manage on an informal basis but it really did help those trying to get to grips with the software.
Yes that’s one of the challenges.
That’s why i would like good DxO tutorial’s which goes deep in the tools it self. With a set of images which can be download to try it yourself along the line. (artistic copyright danger)
That’s the best way to learn using a tool. watch the master and repeat. try to replicate.
if you can replicate you can learn to variate and start for your self to make something.
In the meantime we can setup this same kind of system: if you have a “problem image” post it (watch for privicy things, ones on the net always on the net.)
write the what do you want to change, include a attempt, tel what went wrong in your eyes.
And then other people can give it a go.
I think this can work.
Extremely well done, Pascal. I certainly found quite a number of features as a refreshing reminder. I imagine that a good number of members in the DxO Testing forum are keen amateur photographers and as such don’t process images everyday, and also use other software from time-to-time too. The consequences being our memories forget the how’s and the where’s of some the tool sets used infrequently.
This piece of work as a result will be useful for new DxO users as well as the more seasoned veterans.
Fantastique!
Pat
Hi Pascal,
Your tutorial is also 2.0. Much more logic and good visualised. Great job. I will dig through it again to refresh my memory. (you know i need this one’s in a wile. )
I am training myself at this moment in lightning/contrast/tonecorrection using the 3 major tools in this order:
Smartlighting, box selective
selective tone and contrast
local corrections masking and controlpoints
I am starting to get the hang of it using mask or gradientfilter or controlpoint.
it is a 3 step correction. global by dodging and burning kind of way (SL) some manual override in selective tone and contrast. finaly the worst spots with masking or controlpoints.
Cleaning up and restoring “punch/ color feel” use global vibrance and or controlpoints color control.
It starts to grow on me, those local things, lot of manual fiddleing still, no filters or presets yet.
One final step has to be intgrated in this matter, exporting to NIKcollections tools using there automated presets to enhance one step further.
If i may suggest your next chapter can be step by step working from default to export jpeg wile dealing with difficulties with example images.
Let the tools working together to maximise the image. Aproache examples.
Is it just me or is v1.2 to v2.0 not a big change?
I am not experienced with DCP profiles (don’t know exactly what it does.) but would you benefit from those camera color profiles? Maybe you get the punch you need from that. And don’t have to fiddle to much any more. This thread seems to have fans.
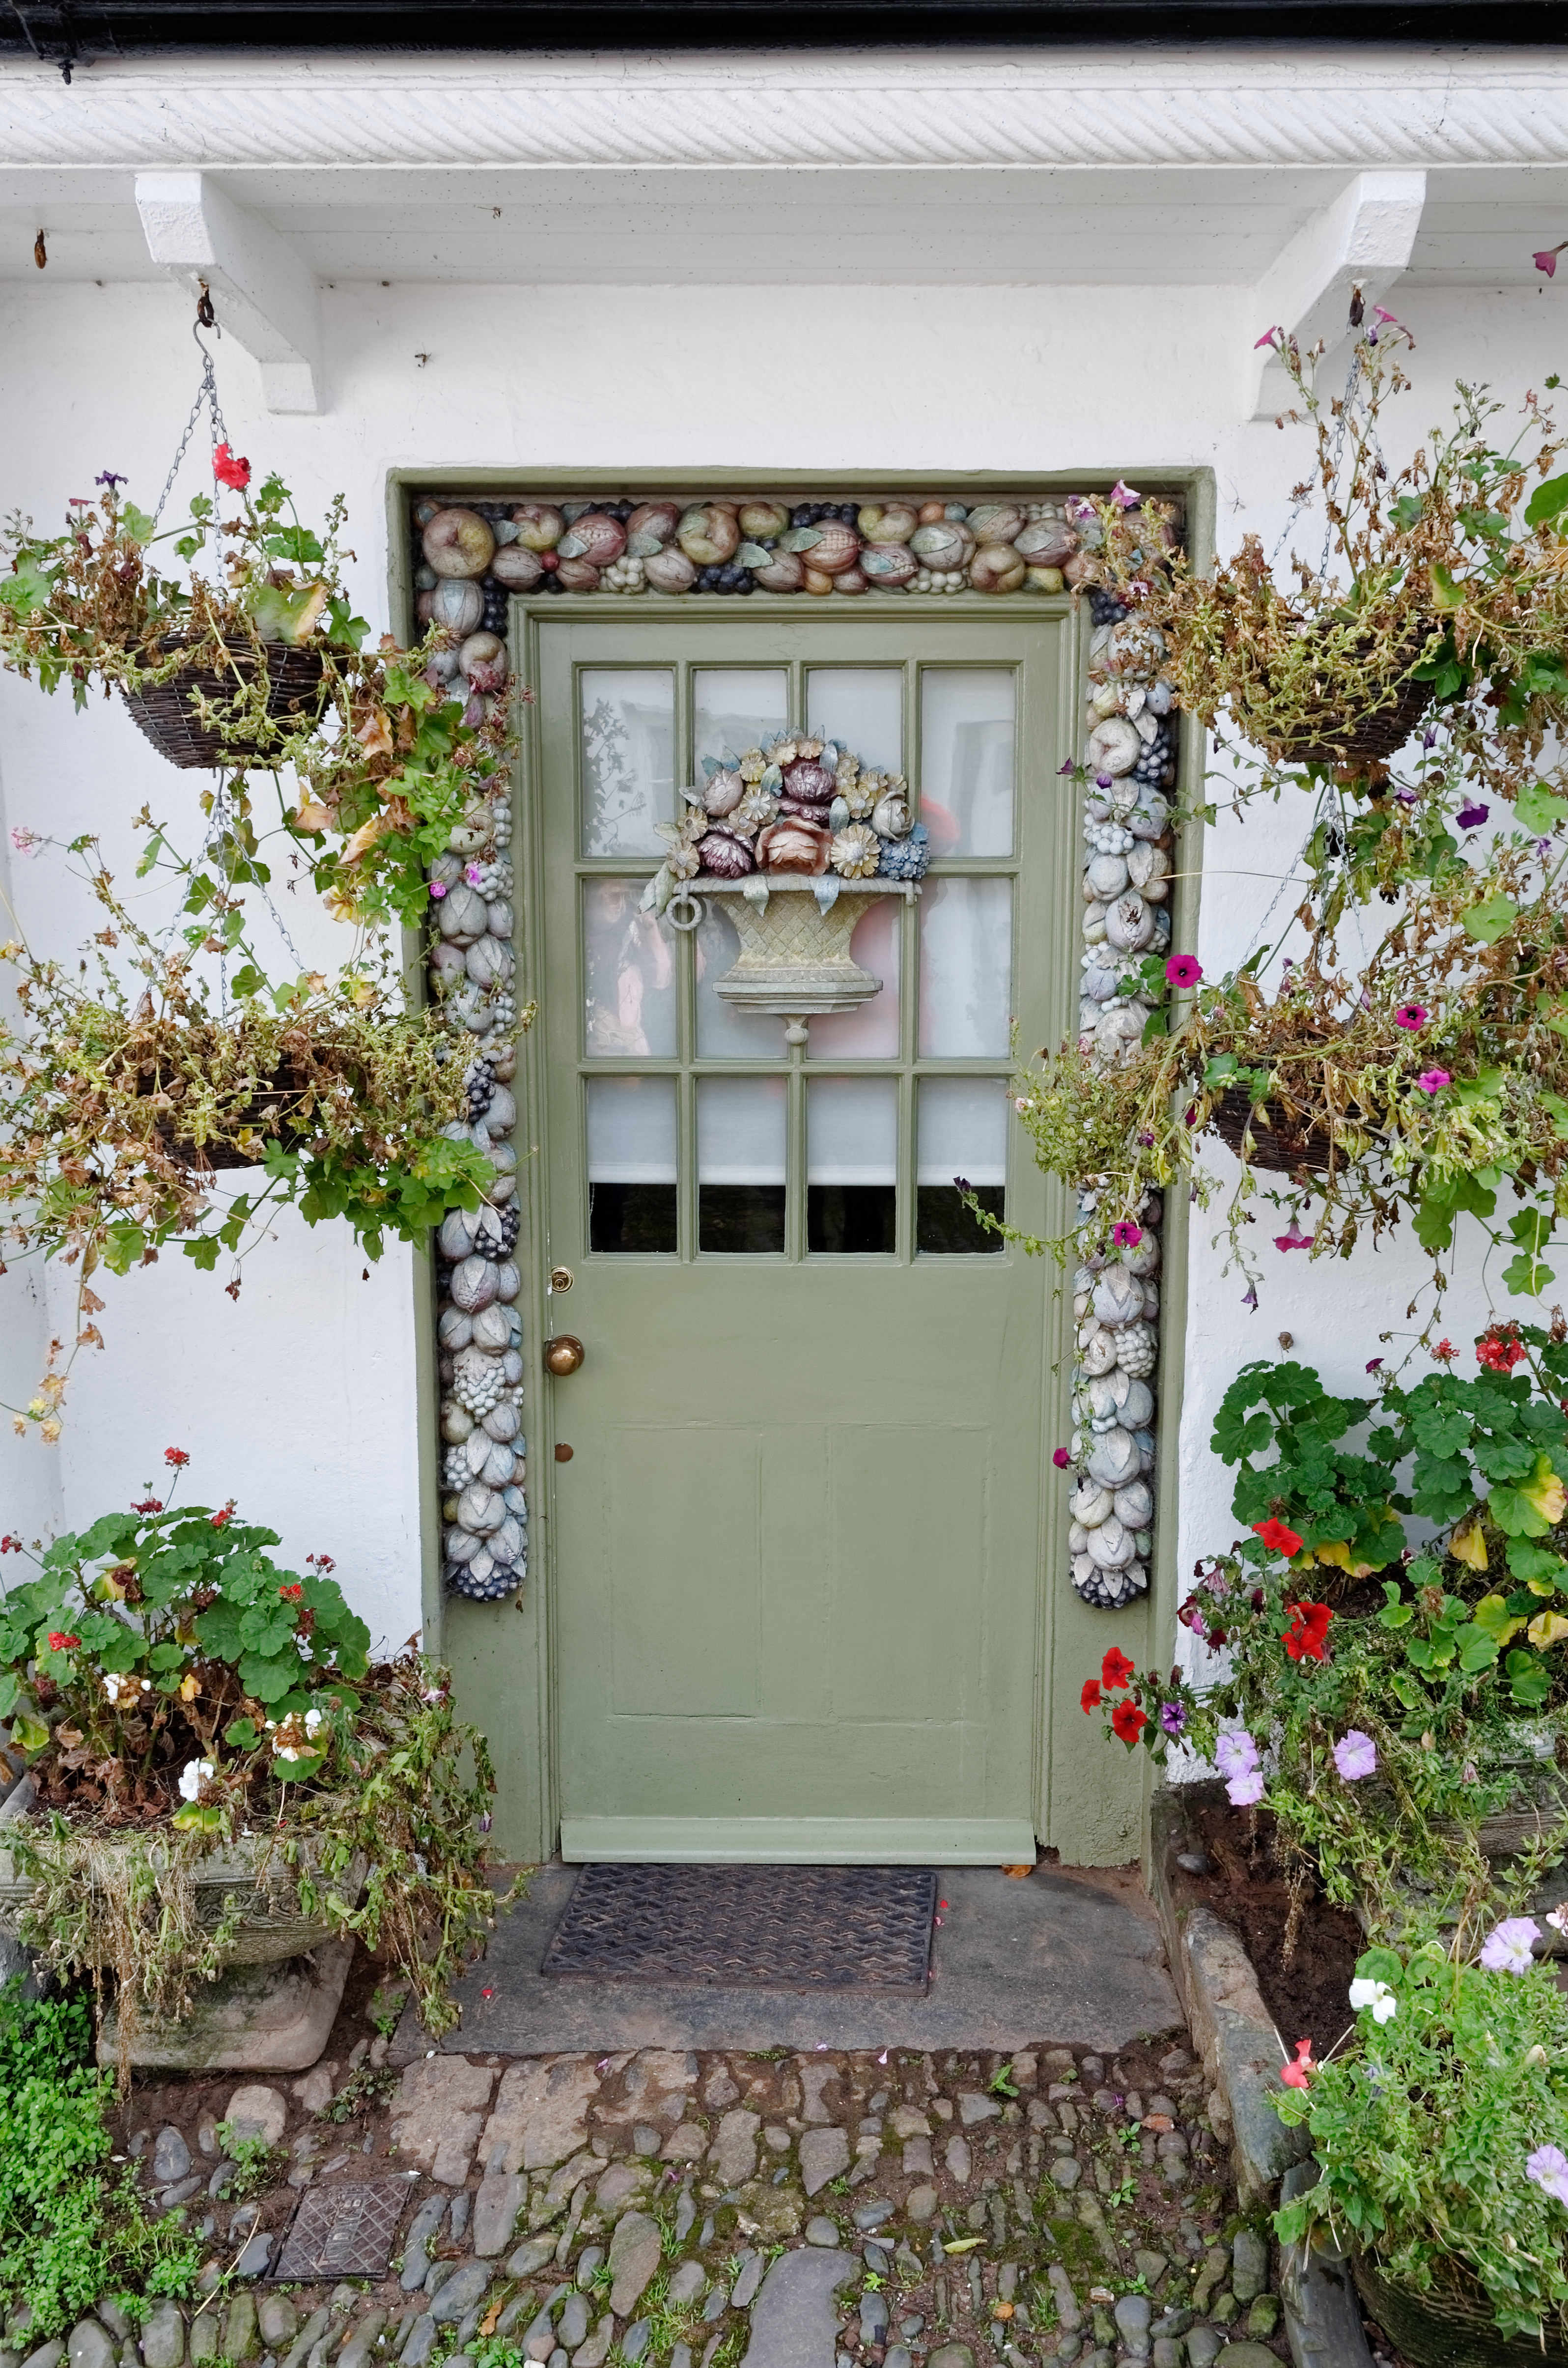
About the image: how does it look default?
judging this one as first look:
The colors of the frame and artifacs (things on the frame) and the door itself are quite pastel looking. Looking at the copper handle and lockframe and magenta flowers you did some vibrance and saturation. i think it look natural to me, aldoh the magenta flower and red ones looked a bit unnatural, overcolored.
Only thing i could think of is mask black-isch doormat and surrounding pebbles to enhance contrast a bit, clearview? just make the doormat more black. to stick out.
Wall, controlpoint, brighten a bit., the pastel colors are more showing then. contrast enhancement by tonal range.
At last, greenisch door: rest of the green flower leafs is far more saturated and i like the effect of 3D it gives. You could try to use again a controlpoint and sharpen it a bit.for micro details like cracks in the paint and relief.
If it works i don’t know maybe artifacts are start to show or brighting wall gets wrong colorasation.
Nothing special for this good shot:
DxO standard preset
ViewPoint perspective AUTO
Saturation +20 or more
MicroContraste +30 If you have FilmPack the result is better with Midtones
The lens focal length and focusing distance of a photo are recorded in the EXIF data of your images. However, this information is not always accurate. For example, different but close positions of the focal length ring (say, 17 and 18 mm) could result in the same value (say 18 mm) being recorded in the EXIF data. In this case, the distortion correction may be less than optimal. In the same manner, the focusing distance might be recorded in the EXIF data with insufficient precision, and similarly lead to an imprecise correction. In both cases, to improve the effectiveness of the optical corrections, you can provide more accurate values in one (or both) of the rollups that appear in the Geometry palette:
Focal length : Use the slider to specify the lens focal length.
Focusing distance : Select a range for the focusing distance in the drop-down menu, then fine-tune with the slider.
The Focal Distance and Distance focusing sliders are permanently displayed in the OS X version, and appear automatically in the Microsoft Windows version.
We discussed it here
even with compact as fz200 is, it worked. indeed Focal Length is appearing at 4.5mm 24mm efl max setting WA. (4.5-4.6) is to change) Stil in the fogg about how to determen that measurement to correct. But the other one, Focusing Distance, is very usefull. (Distortion: auto with dxo opticmodule, intensity 100% magic want active) plastered walls with line are difficult, always some barreling left. Use this tool: go tab along the selectionrow and poef it straitens the barrelshape. (not perspective but that’s an other thing.)
in dxo-jpeg it exif does give 4.5mm is 25mm FF instead of 24 assumes there is some tolerance.
So considering 4.5mm as compact is like 12mm m43 is 24mm FF is not UAW it still works like a charm on close WA shots. Edit: to show a Working of Focusing Distance this is 13mm 72mm EFL so not a UWA but more a close by shot.
One thing is strange: it playes hide and seak with perspective and auto horizon.
see This clip
Horizon is total out of level. Auto perspective is hunting behind the change.(i think perspective is needing recalculation because of the adjustment, because when its off, auto Horizon does stil work.) But still it is a good tool for straighten lines.
Ok last clip because i am really happy with this toy eh tool, it shows it is not about “focus distance” alone, Its a WA distortion-correction correction.
I think because lenses arn’t optical the same, DxO build in this calibration tool. (Kudo ). So if needed i can help DxO optic module to get it right.
Now i really want to know what and how the Focal lenght tool works!
(seen dxo-youtube lately? now i know they said there wil be new uploads of toolsshow/ tutorials: its the same with a new layer: Photolab 2! clip youtube new version graduated filters They teased us with maybe new info! eh not yet )
Ok im done now.
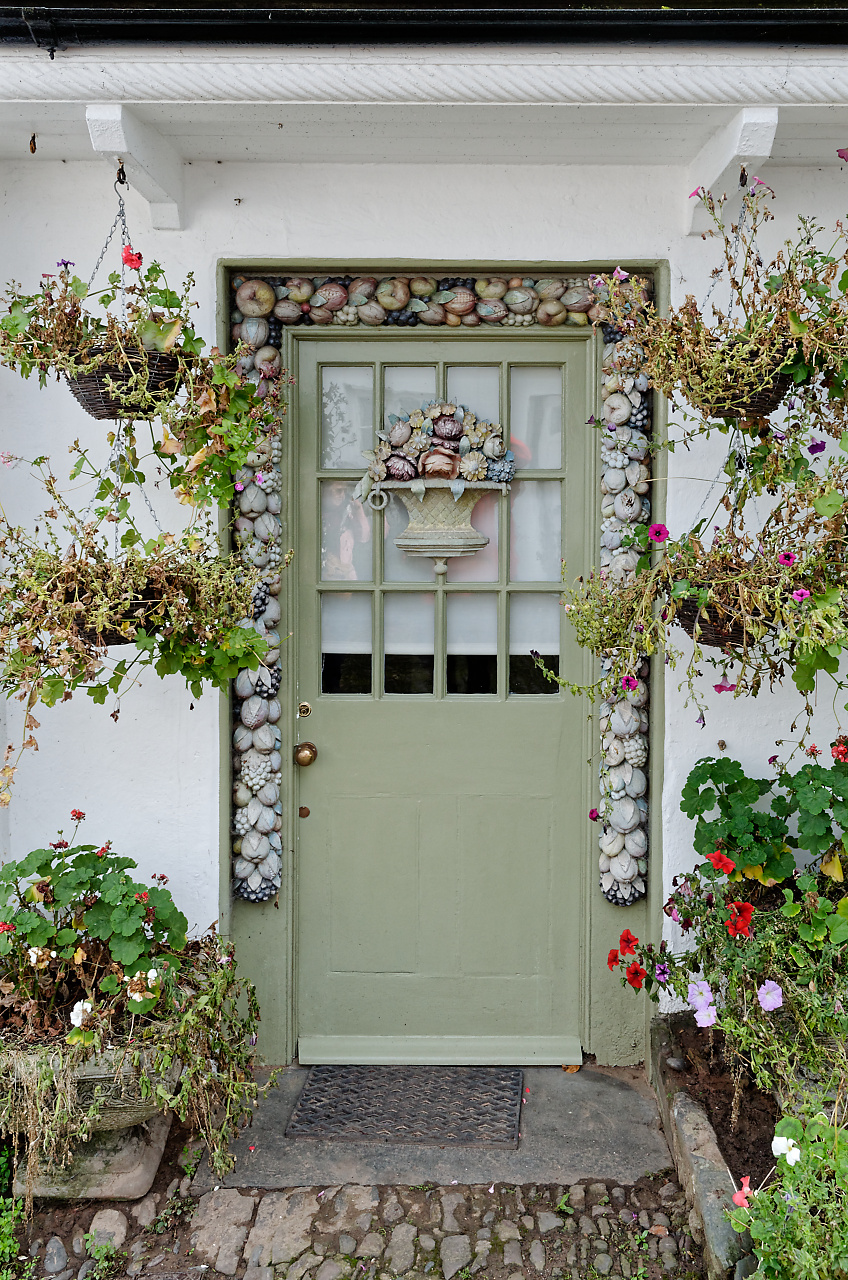
ok did:(quick and dirty)
my own personal preset ,in color: 18 points vibrance.
auto horizon.
three controlpoints:
white wall: lift exposure 0.72.
green door: clearview 24 sharpness 28
doormat: contrast 48, vibrance 40 saturation 36.
Even the addition of nothing more than some micro contrast will make it less flat and pop more. I set the micro contrast slider to 35, a little higher than necessary, to exaggerate my point a bit. Probably around 20 or 25 would be more natural . No other changes were made to your image. Compare it at full resolution to your original.


 )
)

 ). So if needed i can help DxO optic module to get it right.
 )
)