ON1 do, or did, have a great training aid where people put what they saw as their more difficult images forward for editing tips. Might be difficult to manage on an informal basis but it really does help those trying to get to grips with the software. I for one often have problems making PL behave as well as LR in the areas of shadows, highlights, whites and blacks. I always seem to lose contrast. Obviously it is me missing the point somewhere and is probably combined with poor quality initial images.
Posting images here to a dedicated branch of the forum could be a way to submit problem images but the problem is we cannot upload raw files. Any suggestions? Do others think this might be a good idea?
I guess this is also a question for forum admin. Would they be prepared to host such a service and could they provide us with the ability to upload raw files?
@ColinG => This is a nice suggestion. I definitely like this idea as part of the resources we intend to provide like webinars and tutorials.
The forum could be (or not?) the adequate platform to start this… We have to think a bit about it.
[EDIT] I’ve moved this topic to the place where it belongs => suggestions part!
The forum is the best place i think.
maybe you need a new category underneed “DxO Photolab” called “users training aid” or something.
If someone ask something which is covered by the tutorials or webinairs just hop in and place the link. But in case of difficult images its getting a store place to upload the rawfile and anyone staffmembers and EA’s and general users can have a go with it to get the result which the asker is searching. add the route you took local mask, upoint, filters, sliders in tools/curvetonetool. Just explain the stepps and such. The asker can replicate at his/her own taste. learning new paths.
Ok i have a G-drive folder setup on a test email-adres where we can upload rawfiles for now.
when some one wants to upload i can provide the link( share if you got a gmail)
this works until it can be DxOfeedback-site bound.
i was editing photo’s with smartlighting, exposure correction by boxes. then the tonecontrols
sliders to get more out of it. old way to handle shadow and highlight.
And using controlpooints to acomplisch the same effect.
just to see which approach will have easier result.
I f you have contrast highlight slider its more suitable to use the sliders of tone and contrast ( image global ) after placing boxes of smartlighting.
Just after that the control points can help to do the last bit.
few things are strange:
1 if i activate highlightblinking i and then choose a controlpoint i can’t turn it of wile controlpoint/local corrections is active. virse versa turn it on wile i am in controlpoint modes doesn’t work either. Its seem that blinkies are not fully connected with upoint tech.
This makes the highlight control less workable. I think i use it as third stage tool.
2 If i zoom in at 300% place a controlpoint and adjust the outer selectioncircle. do my thing and shut down local corrections go to the next image and want to make a new controle point at normal, full image, the outer circle isn’t visible at all.
restart PL doesn’t help.
i found out that when zooming in at 300% again the circle is there. : so is this a bug? its remains its chosen diameter and its not initialized after closing local corrections to a default diameter. So somehow you have to remember which circle size you choose at which image % to keep track on your mask selector (Circle).
Yes, that’s true. You can get rid of the highlight clipping only by switching the LC off and on again as the preview is reprocessed on closing the LC.
This is exactly the behavior required by the users - to keep the current size of the Control point between images and sessions and it was implemented according to this request.
ok thanks for the information.
it’s not my lack of understanding its just the way it works.
one other thing,
when am zoomed in at xxx% i can’t move the image around wile the controlpoint is active,.
tried holding left or right mouse, in combination of shift or ctrl also didn’t give a “handsymbol” for dragging the image.
only zoom in and out is working.
So if something is just out screen only zoom out will help to show that spot.
Is there a way to drag the image around wile the mask or controlpoint is active?
sorry bad memory. lol.
same as i know there is a control key list. couldn’t find that in PL’s tabs either…
edit: found it in manual: keyboard shortcuts list, i will make a paper version of it.
spacebar is a odd controlkey choise imo., never thought that up by my self.
in games its “jump” (edit: have to take that back, space bar works fine.)
Something i like to communicate/discus/spar about in here is: how many of you are using all possible tools regularly?
1 DxO PhotoLab divided in “customise main menu” and the “Local Adjustments goodies”
2 Filmpack (specially the filters, because the extra sliders inside PL for manual correction are more “PL’s workflow”
3 Viewpoint (well if you have it you use it )
4 NIKcollection toolset
This are the four main toolboxes you can collect of DxO
(ps second look “help” => “shortcuts” => there is The List… Geesh need glasses.)
To kick off:
main workflow for general shot images: first step: open PL customize: made a general preset which is applied by first contact with my files: EC off, SL spotweighted mode slight, CV off default 15 (clarity and vibrance and bluesky will 15 be just enough and don’t overdo microsharpnening to avoid moiré.) Contrast bluewant on (microcontrast), Vignetting on: blue want twice, color on: as shot, color acc. vibrancy 18. (to match ooc jpeg’s camera settings more) color rendering on; PSR intensity blue want.; Prime noise on in full automode ; Lenssharpness, CA, Moiré, Red eye distortion=> all on mostly automode.
From this stage i start image by image to improve/correct.
Crop, horizon and perspective off ;i turn them only on if needed.
owh and the “tonecurvetool” well it does a great job i think but in my hands a bit unpredicted in outcome. so off.
All this is global correction and i mostly stay away of color filters of filmpack which can give a certain fibe or feel by stepping away from the “natural look”.
second step: local corrections toolbox. Great stuff but still need handyguide to use it properly in its full potential. dust and spots removal, gradient/controlpoints in exposure and color tone. (sharpening i stil not tried on local object in image) I getting more and more knowledge how to use it but it consumes a lot of time getting it right. Last step is fairly unexplored yet: the export to NIKcollection. (tiff to something to do something) (there are overlapping controls and tools so when do you go over and go to tiff based editing.
So i would like to learn from others, i hope viseversa, how they utilize the toolboxset described above. when do you use NIK tools (based on 16bit tiff) rather then the PL’s including plugins (based on raw).
How many steps/tools you use to level out DR (exposure/contrast) and color rendering as saturation/vibrance/ temp/ filters(non natural colorasation), removing unwanted distortions and image objects.
finally to speed up process: do you make temp presets? and virtual copy’s?
remember it’s not about who knows the best way but more every one has its own way of work which can improve someone’s own workflow just by showing.
edit: found out a need trick:macs splitscreen on windows for compare
I was searching for a good way to see my changes step by step without using undo/redo and this comes close. I started with bringing more punch on the candelier and then i wanted the color of the stuc more natural to pop even more. (i like the slider more then the side by side. ) ( to compare activate local adjustments => side by side changes in slider mode.
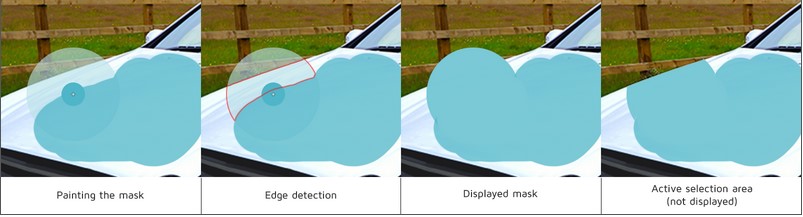
Ok see if i understand “auto mask” working ability:
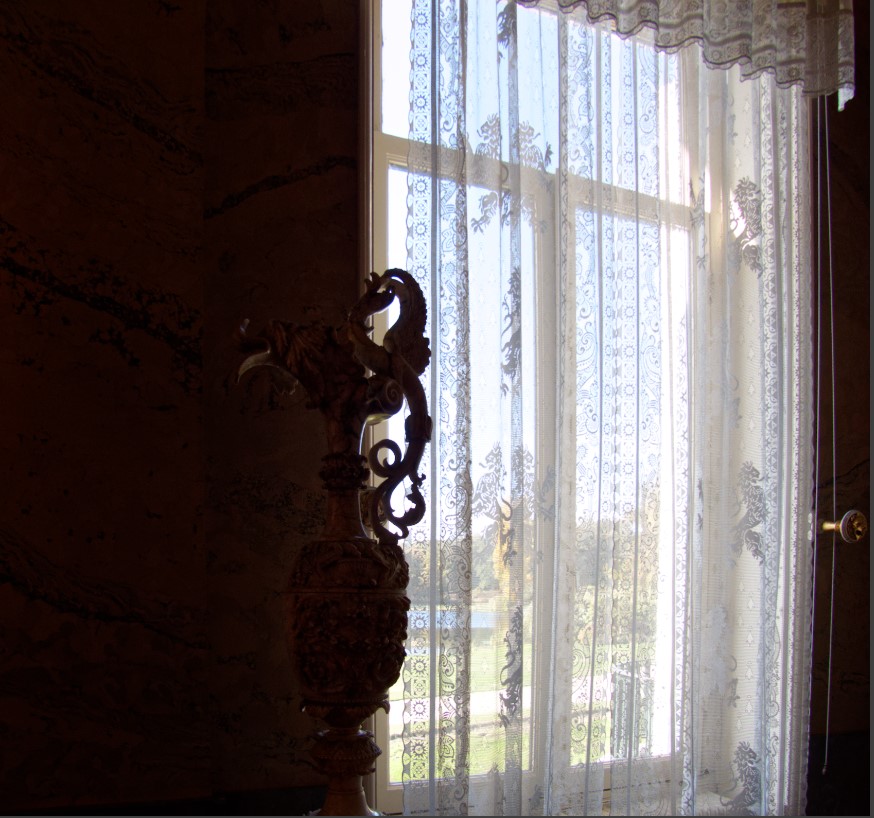
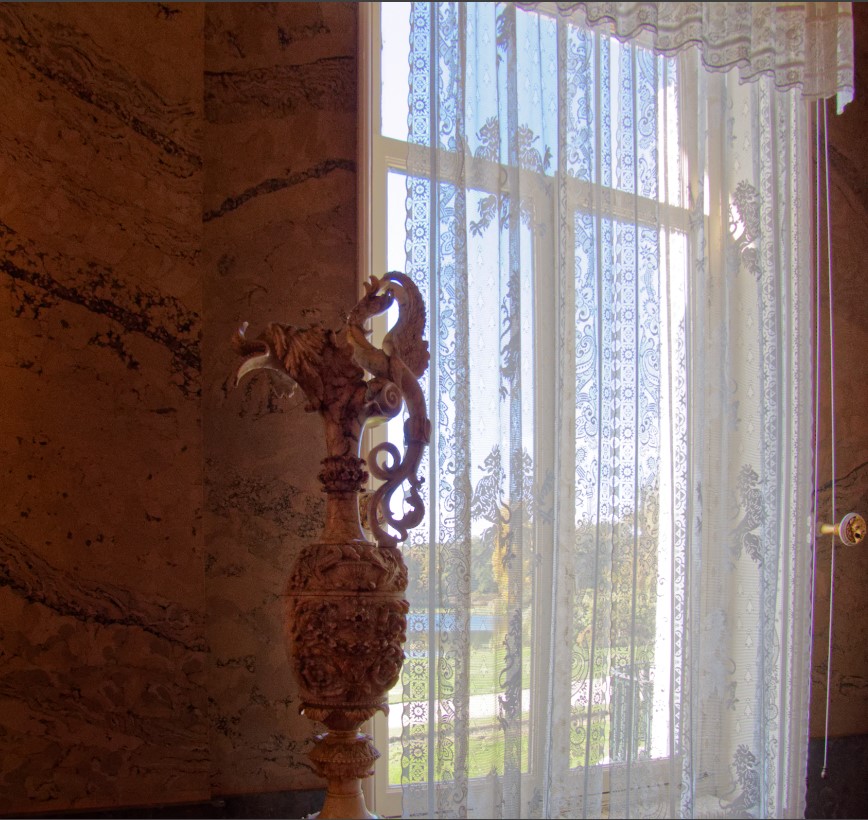
picture from my daughter very difficult because of bright window (she isn’t experienced in this so don’t comment on that. my job is to maximise her images
what camera made of: glare around the vase and foggy window.
rw2 default:(i can’t go back and forward without holding mousebutton so this is SM tool off:)
Camera exposed on window and wall heavily underexposed.
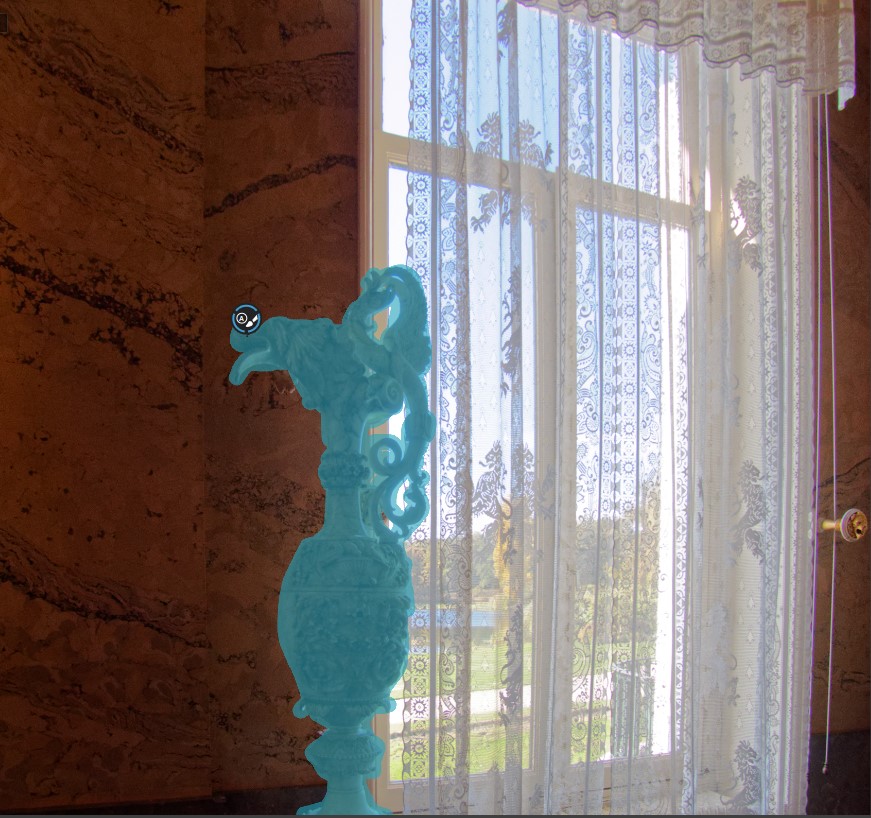
Sm box on vase and window 73% (cheesh i would have a history list now to tell the story
geometry done and crop:
note the glare left of the vase because of light reflecting from the vase, blue drapes are just blue sky.
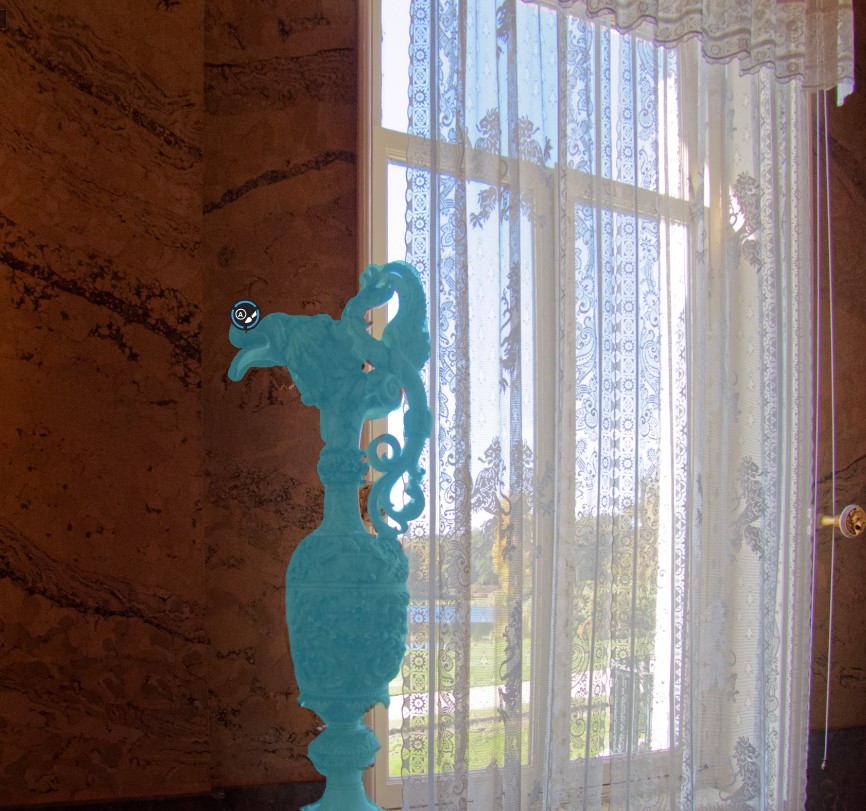
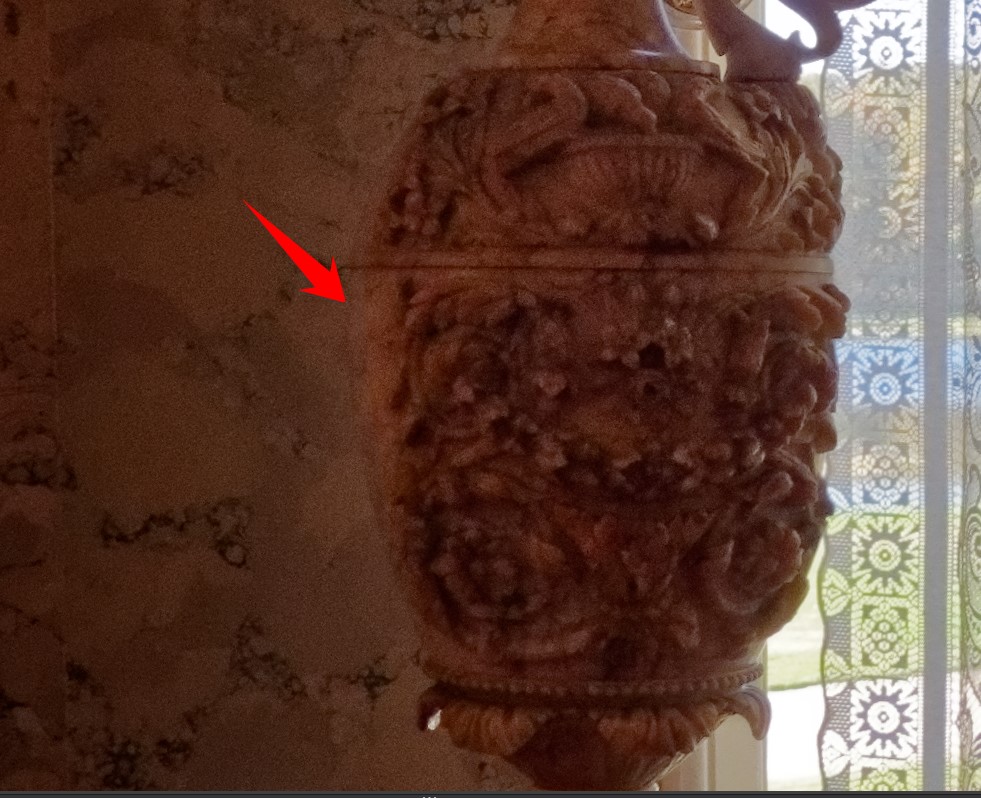
i thought: controlpoint? too much same color kind creates wrong masking. (i want just the vase be more visible) So auto masking:
It just followed my masking line never saw that hazy difference between vase and wall. On the other side of the vase it seems worked rather well having a hars edge.
So is it working? yes it looks like it. do i miss something? YES a preview of active mask. So i can erase the not wanted or add some more the missed out.
What this illustrates OXiDant is that the masking in DxO PL is sadly lacking in functionality, unlike its competitors ON1 and LR etc. To be honest I cannot understand why the focus for version 2 was on a DAM (with limited capability) rather than bringing core functionality up to speed.
Actually I believe it work’s similarly in ON1. When you apply local adjustments in ON1 if you hold down the spacebar the mouse pointer becomes a hand and you can move the image around.
Yes it could be better: like the lasso function of Adobe. that you can correct and invert. out or inside masking.
A key for showing what inside the mask-edges would be a major upgrade/update.
I am quite surprised that one of these made it into version 2. The DAM, to me at least, was the least necessary enhancement, although it does make browsing easier.


 (edit: have to take that back, space bar works fine.)
 )
)