Hello,
It has always bothered me how the tone curve is behaving in Photolab, I find it quite difficult to use and I think it behaves different than most other software on the market. I think it is the kind of interpolation when I am setting some points on the tone curve. The behavoir of the curve is extremely “sharp” and not smooth at all. For myself I find it extremely difficult to get the results that I want.
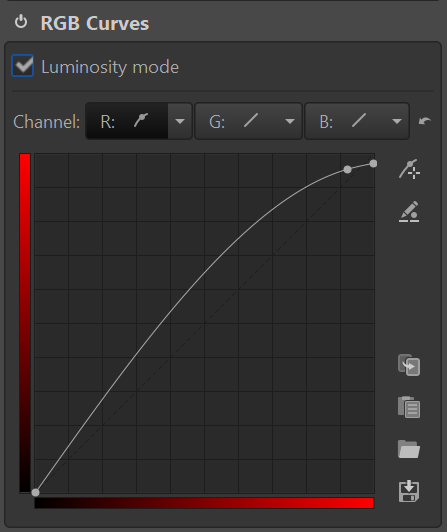
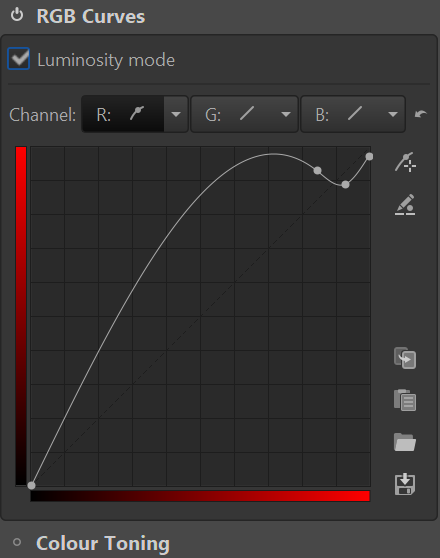
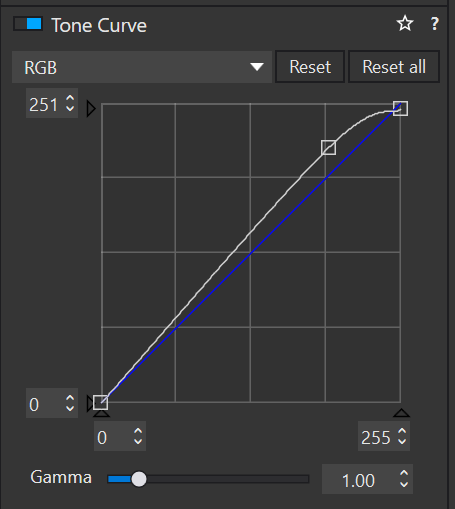
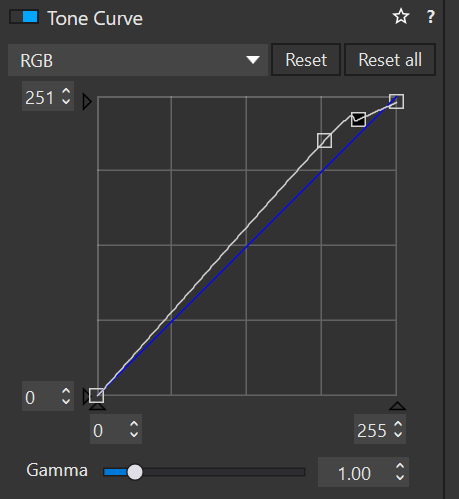
For example, if I want a smoother highlight roll-off, how can you do that? I attached two pictures, one how it looks like in Photolab, and another one, how it looks for like for example in RawTherapee, but also in most other Image Processing Softwares:
I don’t think the Selective Tone and the Tone Curve are equivalent adjustments in PL.
The Tone Curve, as expected, affects both brightness and contrast by changing the input<>output relations of adjacent tonal values along a curve. But Selective Tone controls seem to work uniformly on a certain range of values in a way that minimizes changes in contrast.
I think you can get approximately the same result from either:
1: Selective Tone + Contrast (Highlights, Midtones,Shadow) adjustments
2. A curve adjustment.
I agree with @maderafunk, however, that the PL Tone Curve dialog is too small, lacking in visual information commonly available in other implementations, and too hard to adjust smoothly except by e.g. a single point deformation. I regret these shortcomings because I have always much preferred careful (and, in programs with layers, multiple) curve adjustments to other contrast/tone enhancement tools.
@maderafunk Tone curve points behave differently from app to app. For you to get the same result as for RawTherapee simply move the points to different places until the curves look the same. As long as the curves match the result should match.
I was about to answer something about “workaround as usual”, but I checked first and compared to Capture One I do miss a Luma curve and the possibility to undock the curve from it’s pallet (or I did it the wrong way, it disappeared in a cloud) and resize the curve panel to something much bigger. But then…
No problem to give the curve the same shape as you have in Raw Therapy, it just needs another “steering point”. No problem to move points (on a 27" monitor, haven’t checked on a smaller one). Plus, using the arrow keys for fine adjustment in CO comes with the downside to deactivate the “hot” points first until the next picture shows up - this is immo better in PL: you always can delete the last active point but using an arrow key will switch to the next or previous picture. And the shape of your points indicate you’re on PC? I only can say, on Mac OS Ventura i would not consider the reaction of the points “not smooth”.
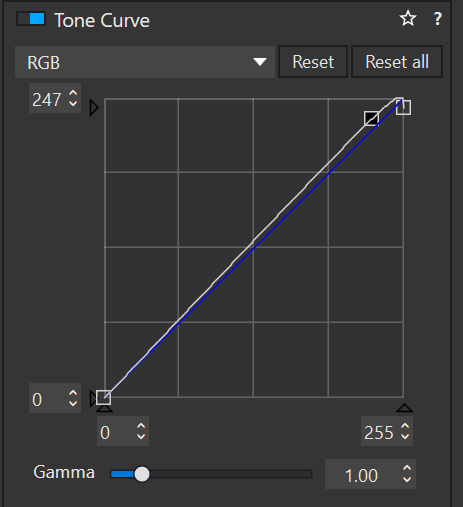
I’d like to use the tone curves to be able to make finer adjustments, with the highlight slider I am bound to a predefined adjustment.
Maybe this is a difference between Windows and Mac? I can say that I am not able to achieve all curves how I want them, even if I try to have different points than in RawTherapee.
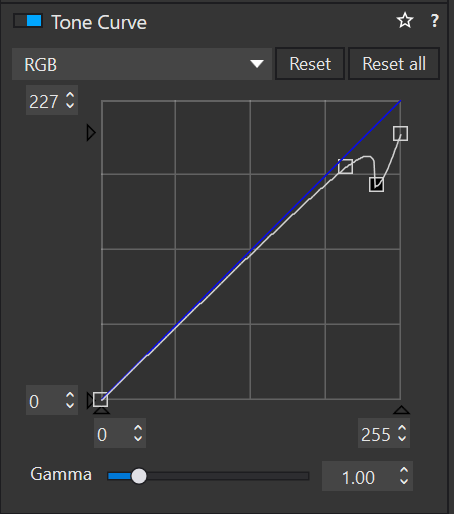
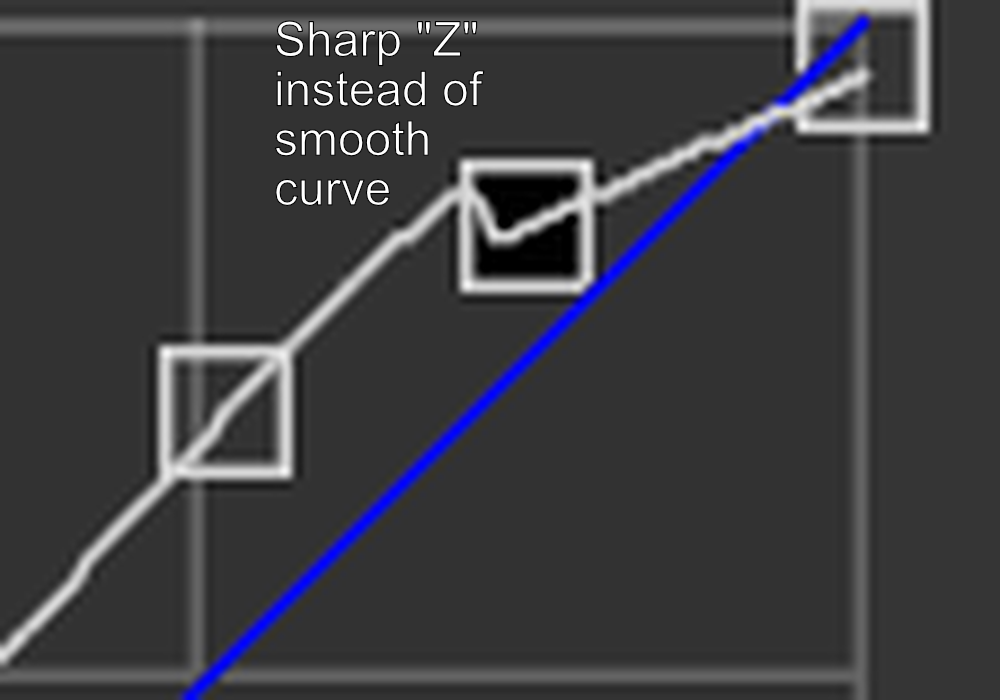
Now I would like to be the part in between of those two points to be a bit flatter. So I set a third point:
I would expect, that when I set that third point in between the two others, it would lower the curve and that the curve in between those two points is smoothly. However, it is actually more like a sharp “Z”, it goes up, then down. I find this hardly acceptable, how can I work around this?