In the PL5 documentation, and in all the videos I’ve found, it seems there are missing options/features in the Repair/Clone tool in the Windows version. The Mac version refers to hide/show masks, being able to select the area you want to use for the source of your patches. Does this not exist in the Windows version at all? Because I can’t find it, and sometimes repairs are hit or miss if I’m trying to remove something like a twig right next to my portrait subject. It almost seems like if it doesn’t work (the source is obviously not what I want), the best way to fix it is to stop, go to another image, then come back.
What am I missing? And if I’m not missing anything (except being able to access extremely important tools), why doesn’t this work like the Mac version? Thanks in advance.
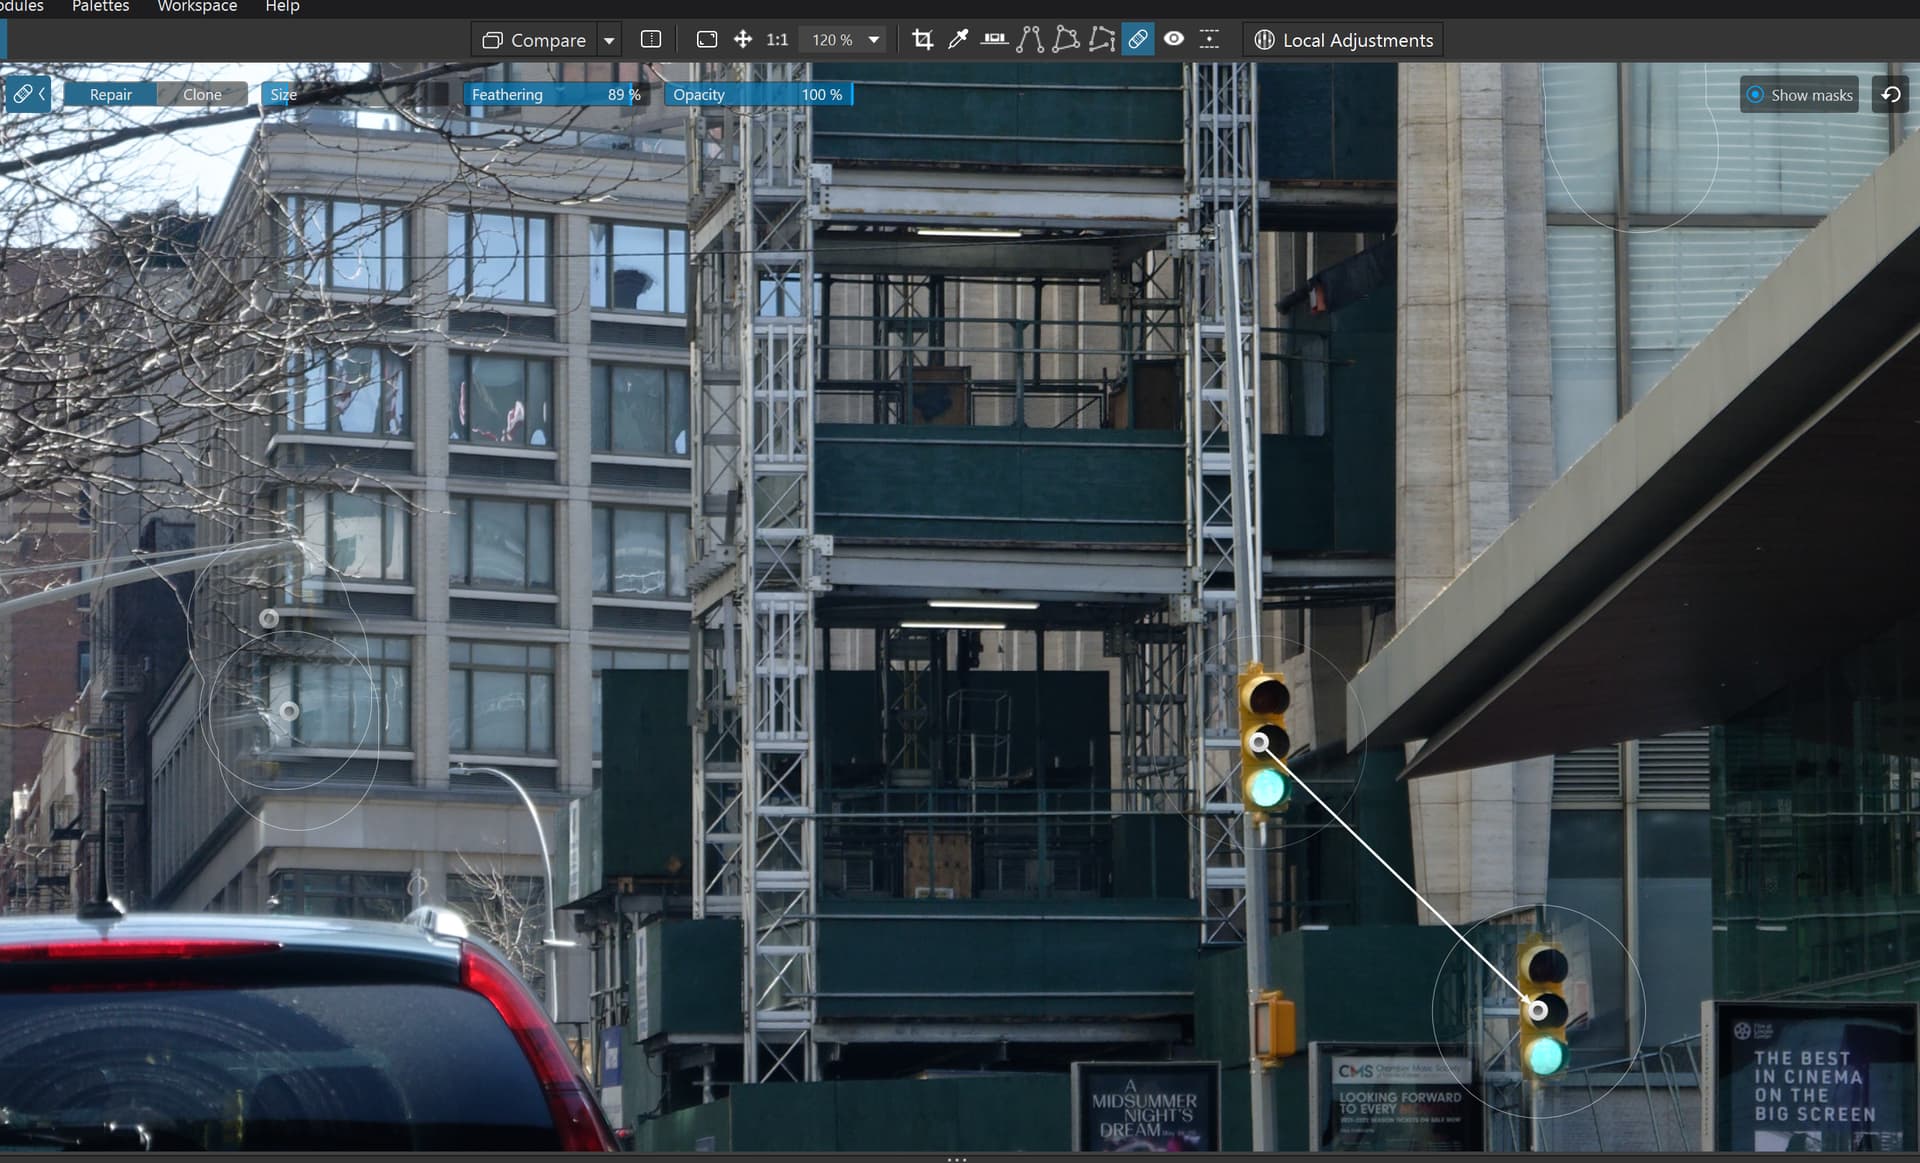
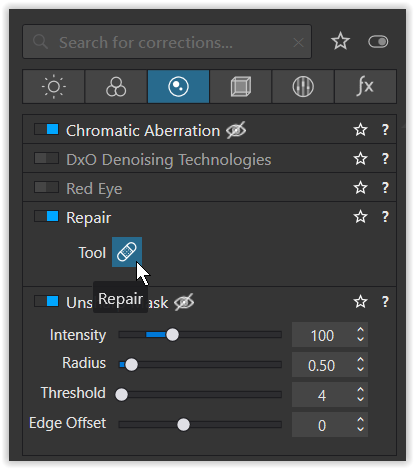
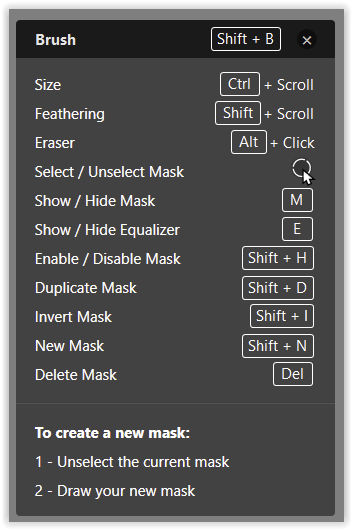
Hi @Evildad Use the “Local Adjustments” palate rather than the top tool bar. All the things you are looking for can be found there. This is another one of the infamous Mac/Windows differences.
Thanks for the help. That’s seriously stupid. How hard would it be to simply say in the help “Don’t use this tool, use the one at the top of the screen.”?
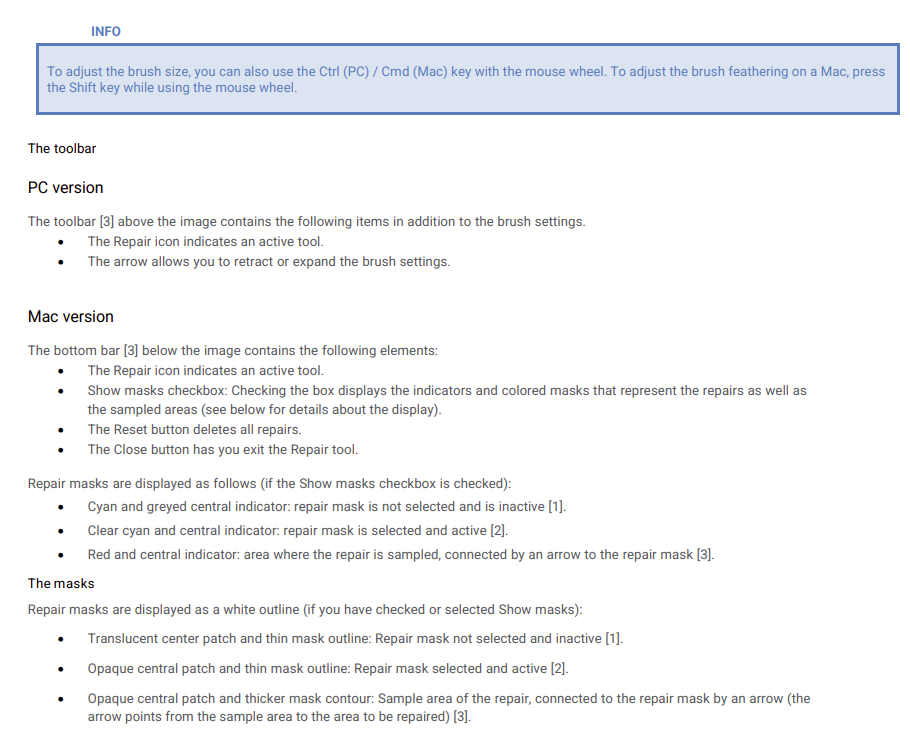
You’re not showing the palettes down the right side, where all the tools are. If you access the repair tool from there, you don’t see those masking options, or at least, they’re not intuitive. But that arrow and two circles don’t show if you use the tool from the right side palette. Or as the other Mark pointed out, you have to trigger that from Local Adjustments. I consider the repair tool to be something other than “an adjustment” - sorry, too many decades of Photoshop? - but an entirely different tool. In any case, page 119 of the PDF manual never explains how to find those options on Windows.