How do I rename JUST the virtual copy and NOT the original file?
Thanks!
Hi Drew and welcome.
Are you using Windows or MacOS?
Hi & welcome to the forum!
Unfortunately you can’t. When you rename the VC, the masterfile gets renamed too.
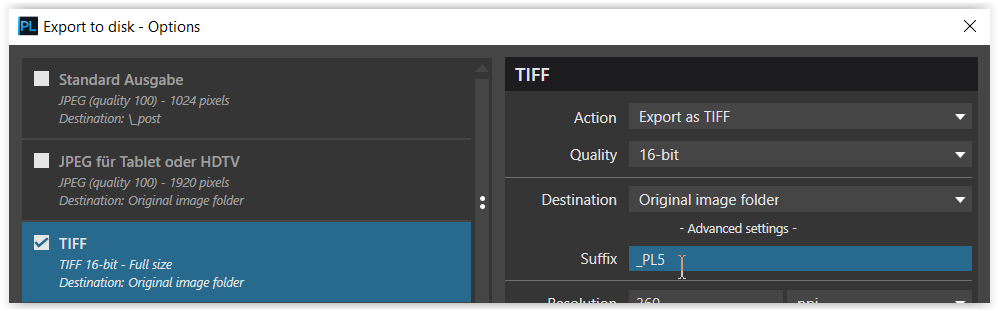
But you can export your file (M / VC) as tif or jpeg – and if you rename that export file within PL,
it will be recognized for comparison reasons (at least in the Windows version).
1 Like
Actually, @Joanna had indicated this undocumented feature was added to PhotoLab 5 for the Mac when it was implemented. I have mentioned this several times in various threads, but to the best of my knowledge no one from DxO has commented on it…
Mark
I’m using Windows.
I often want to create two versions of the same image. I then combine them in Photoshop. I wanted to name the “sky” version something special other than “-1.” So, in the future, I would know the difference between the two versions.
What is “M / VC?”
I’ve never tried to rename an output file from PL. I always rename it from Adobe Bridge.
Thanks!
M = Master file
VC = Virtual Copy
To continue in PS most probably you will export your version as a tif-file.
-
you can add a Suffix
-
or rename the exported file
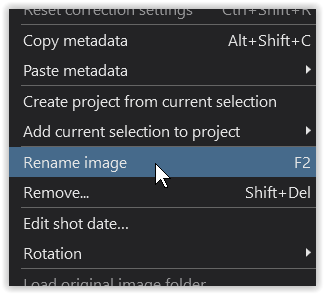
But to add a suffix / rename only the VC is not possible.
A workaround ist to make a copy of the original fire in windows. Then you¨ll get two versions of the same raw-file and no virtual copy.
This is a longwinded feature request.
Be able to induviually rename master and virtual copy’s.
And a note field connected to it in the DB would be nice too. (So you can write some key info down to remember why you made a VC and what the diverence is of the master.)
@OXiDant the database holds the names of the Virtual Copy entries but with a pointer back to the original, how it then finds and puts the entries back together will govern how easy it is to implement this feature.
In the meantime the IPTC data could be used to hold details if not required for any other use
This fields goes into the database, into the DOP and into any exported image.
1 Like
I think that is a winning idea, Joachim. I can make a real copy of the desired file outside of PL. The copy shows up immediately in PL. I can rename the copy where I make the copy or from inside of PL.
The only issue is that I now have another 24Mb file that I need to keep archive. So, the solution works, but the side effects gnaw at me.
Sorry, I don’t think increasing the amount of RAW files by copying them will avoid a big mess in the future. As you say, the side effects are worth to be considered. They can also be “moving the copy or the original to another folder will make the editing of metadata a lot worse, as you need to do it twice”. Currently I don’t see a better solution than what Joachim suggested, but that’s the main reason I work with PL less and less. It’s image organisation is a pure nightmare to me.
In the file export dialog, there is an option to add a suffix to the filename. I do this via several saved export presets.
You can also create custom pre-sets that you would apply to each of your virtual copies as needed. Or any combination thereof that resonates with your personal workflow.
I believe that M / VC above refers to master and virtual copy.
1 Like
@compupix I am glad that you have a solution that suits your workflow, my post was simply to indicate that a fix to the Virtual Copy renaming issue was unlikely to materialise any time soon but there might be a workaround available immediately, please remember that I don’t work for DxO and I am simply guessing.
One thing that we didn’t ask, I believe, is what format you export in for re-import to Lightroom!?
The photos in the snapshots below are from a test scenario with P1093735.RW2 (complete with some sky) which I then used to apply the work-around that I proposed as follows:-
Effectively every PL5 Virtual Copy (VC) has its own copy of the editing data and the Metadata all of which is stored in the database and the DOP at a cost of a minimum of about 10K (or just under) per Virtual Copy. However, with the strategy of duplicating a file multiple times there will be a similar overhead for each DOP for each copied image plus an additional 24MB (in both your case and mine) for every duplicate image file that you make.
Whichever image you highlight the [M]aster (for the first VC it will always be [M]aster, i.e. the only image) or one of the VCs when you select to ‘Create Virtual Copy’ the image (copy) will be “cloned” to make a new VC (including the current editing and the current metadata settings).
If you want to clear any editing from the new VC then use the ‘Reset Correction Settings’ command. The ‘Metadata’/‘Read from Image’ command is not available for VCs only for the [M]aster so any unwanted metadata changes must be made manually!
My suggestion was to “live” with the lack of VC renaming but use some unused (by you) elements of IPTC data to effectively “tag” the Virtual copies. The data will be available to any exports you may make (except with regard to naming the export files) but all the exports can then be in one place for easily flicking from one to another to another etc. (or not as you choose when exporting).
You could even create export options with appropriate suffixes, e.g. “_Sky” etc. (@Sparky2006 beat me to publishing that one! )but the exports of Virtual copies will still have the “_1”, “_2” etc. appended by PL5 automatically after the suffix, which may or may not need to be removed before importing into LR
The IPTC data could contain information about the specific differences/look etc, you were after to help keep track of the variations while being able to maintain that in the VC copy metadata but not in the actual file name (except by choosing an output suffix as mentioned above and by @Sparky2006 ) and/or using specific Virtual Copies for specific types of adjustments may also simplify the process (or not)
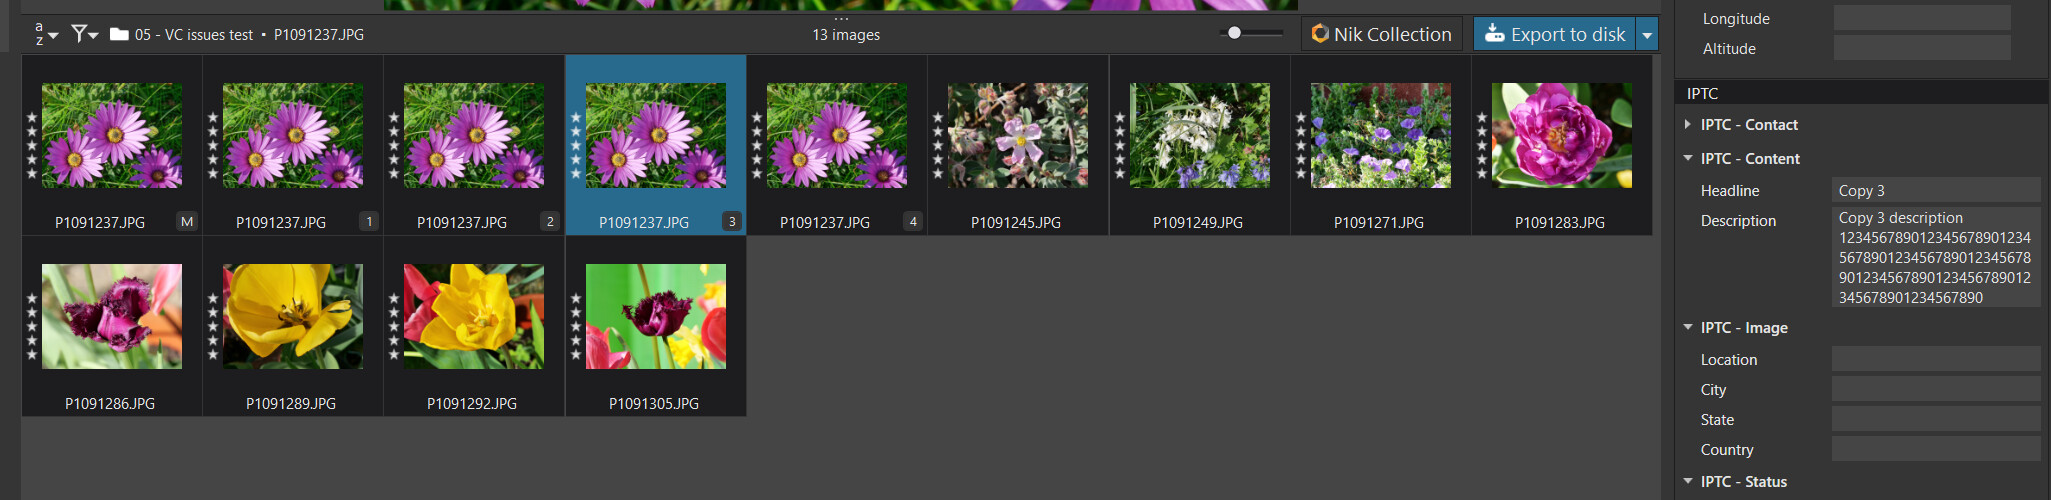
1 PHOTO with 3 Virtual Copies, all exported (with the same suffix) and one ("_1") then renamed inside PL5.
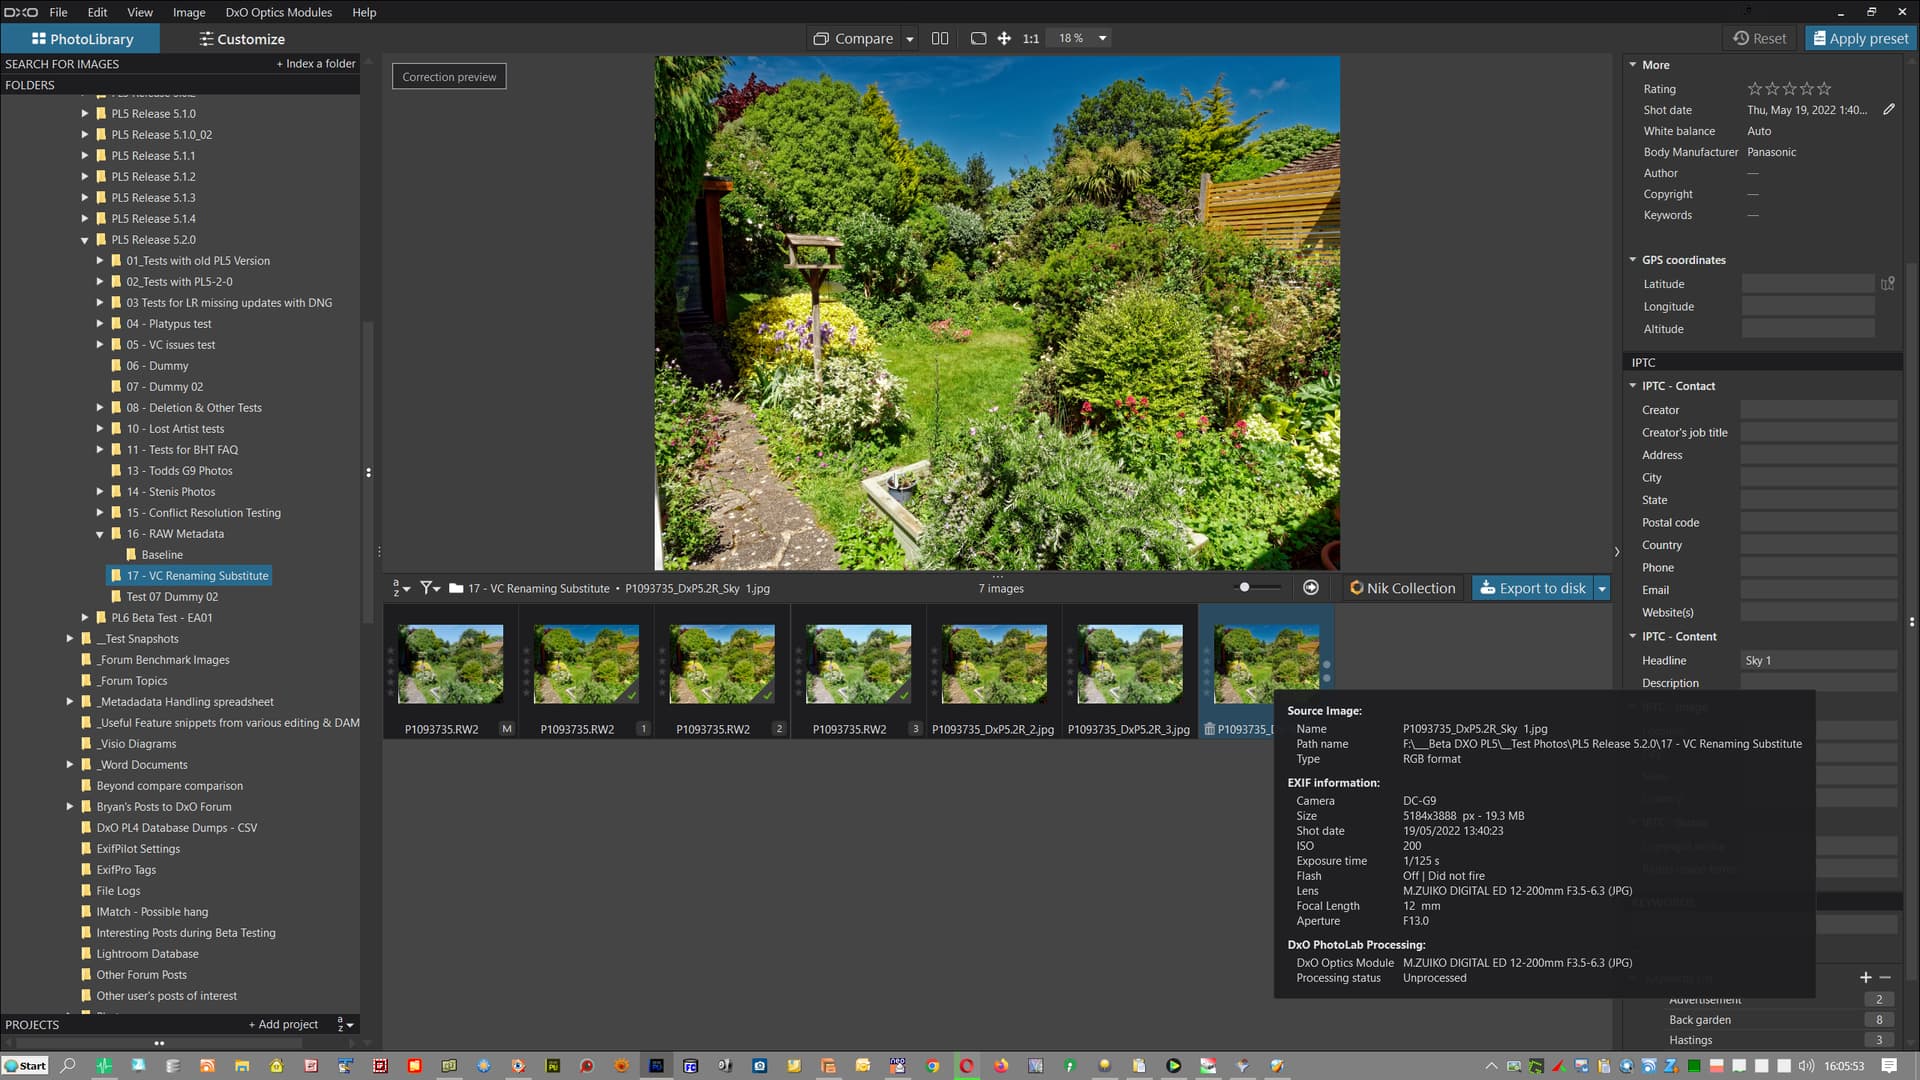
‘F11’ can then be used to compare images full screen! In my example VC[1] (_1) has been renamed to _‘Sky 1’ by copying ‘Sky 1’ from the the ‘IPTC’ field and then using the ‘F2’ to rename the exported file by pasting the field (Sky 1) all within PL5. Actually not as easy as it sounds because of the way that PL5 wants to allow editing in situ (instead of using a separate dialogue) which can be a nightmare with long preset names when working to adjust the last part of a name, but is still possible! @sgospodarenko .
However, the snapshot of the ‘F11’ screen (taken at the time) with the comparison selection pop-out showed only VC[2], VC[3]. and the renamed output from VC[1].

When I restarted the program today I was offered VC[1], VC[2] and VC[3] for comparison, i.e. the history from yesterdays export is not retained (I didn’t expect it to be). But I am puzzled @sgospodarenko about yesterday’s items offered for comparison? Why did it not contain all VC[copies] plus all exported copies (arguably duplication there) and while tracking the name change is “clever” why was that export “singled out” for attention. I was impressed by what was on offer but also confused!?
However, hopefully what is on offer with the ‘F11’ display may also help with your development of changes to be made to an image and also lead to a collection of possible presets (also highlighted by @Sparky2006). Keeping presets provides a long term library for reference but I often start by altering a particular image, ‘Copy Correction settings’ and then applying to a selection of thumbnails in the thumbnail “list” using ‘Paste Correction Settings’. The copy and paste can be from any copy of any image and to any copy of any image, i.e. [M]aster and VCs. Any really “good” adjustments will then be added to my personal presets.
The minus is that the IPTC fields I used are not available directly from PL5 ‘Customize’ screen so the alternatives are
- Use the fields available in the ‘Customize’ window, e.g. ‘keywords’
or
- Flip-flop between ‘Customize’ and ‘PhotoLibrary’ to gain access to a larger number of IPTC field
1 Like