Removing overhead wires

It’s a perennial problem, although perhaps a minor one: how to get rid of overhead wires that distract from the subject.

The usual tool of choice is a ‘repair’ brush local adjustment. But, brushes in PL5 (& most other raw processors) are unconstrained so it’s difficult accurately to paint-over an extended smooth curve with a narrow brush. (In Photoshop it’s possible to trace a path along the wire with a constrained pen and then “paint” the path with a repair brush. But that trick is limited to pixel editors.)

Then — especially if the wires traverse more complex backgrounds — it’s difficult to find any repair that does not scramble the background around the wire leaving ugly blotches that trace the path of the repair brush.

The problem is so widespread that Luminar has promised to include an “AI” solution in the next version of their software, Luminar Neo. We shall see…

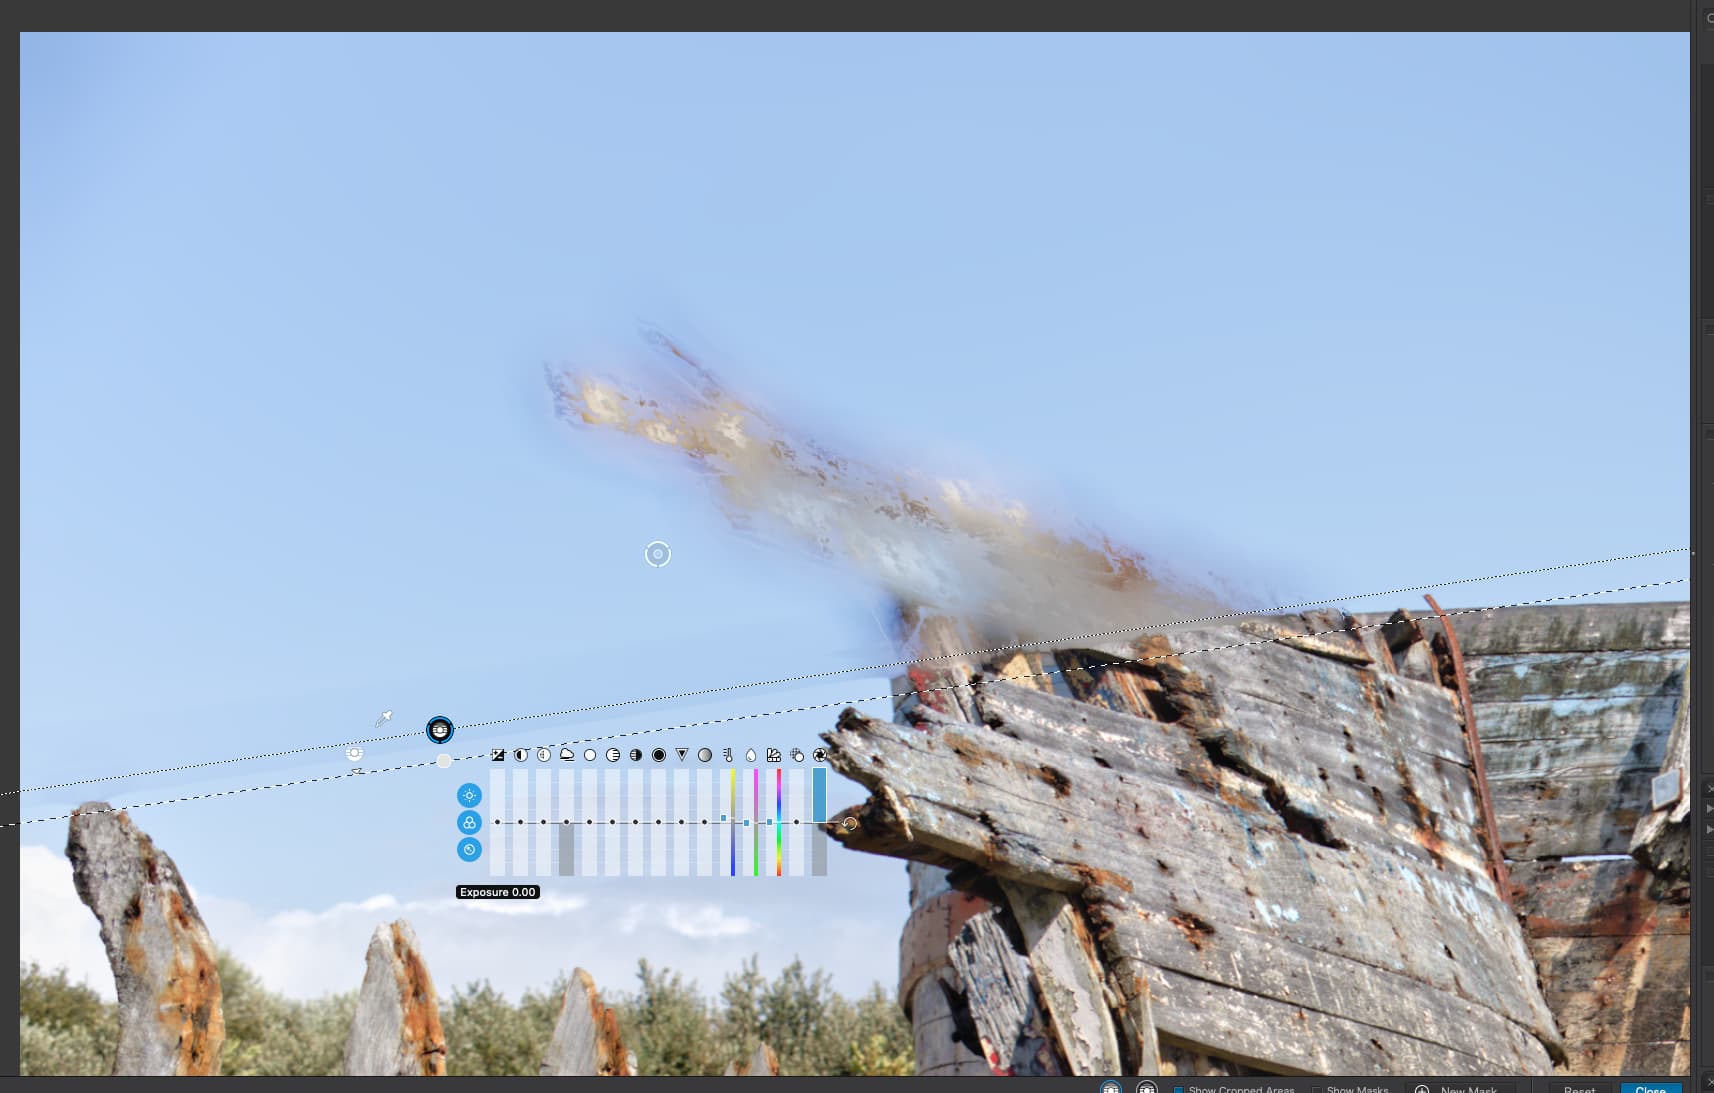
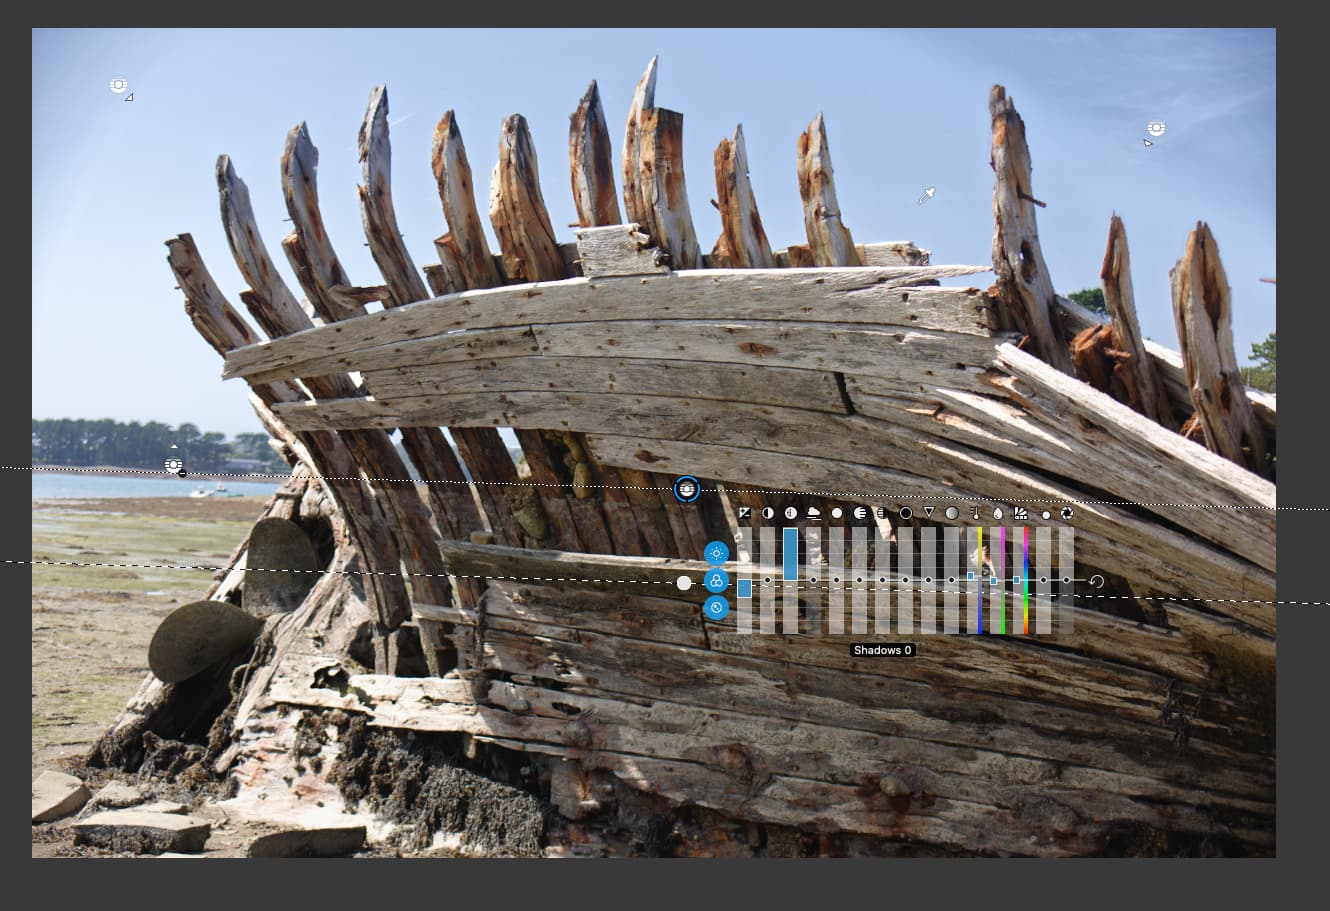
I’ve recently discovered that, in some circumstances anyway, a ‘control line’ local adjustment in PL5 can come to the rescue. This tool does not require accurate painting but only accurate placement of the pixel “picker” for the adjustment and, with a bit of fiddling (and luck) can be used to compose an adjustment that ignores the complex backgrounds traversed by the wires.

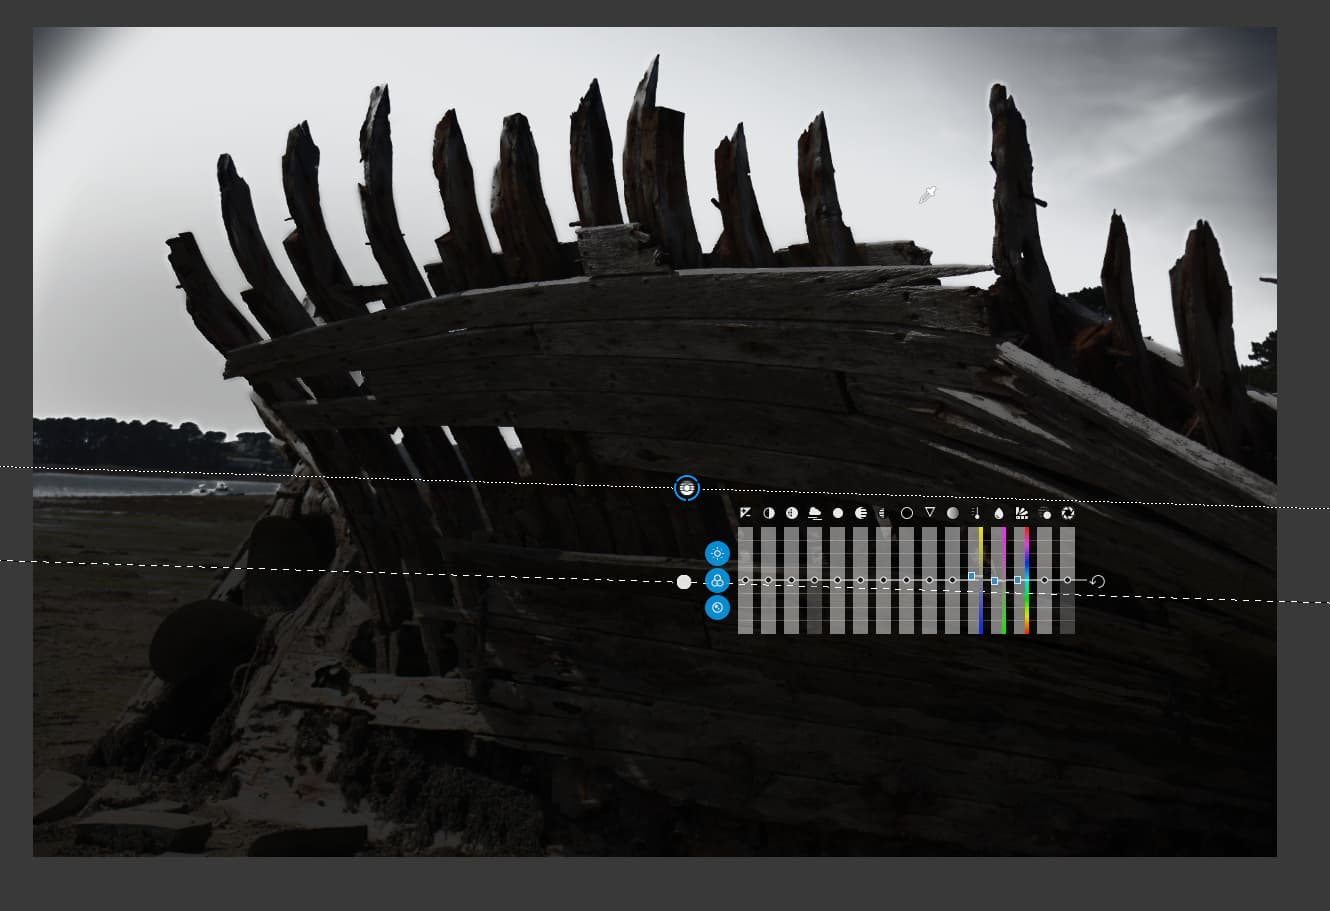
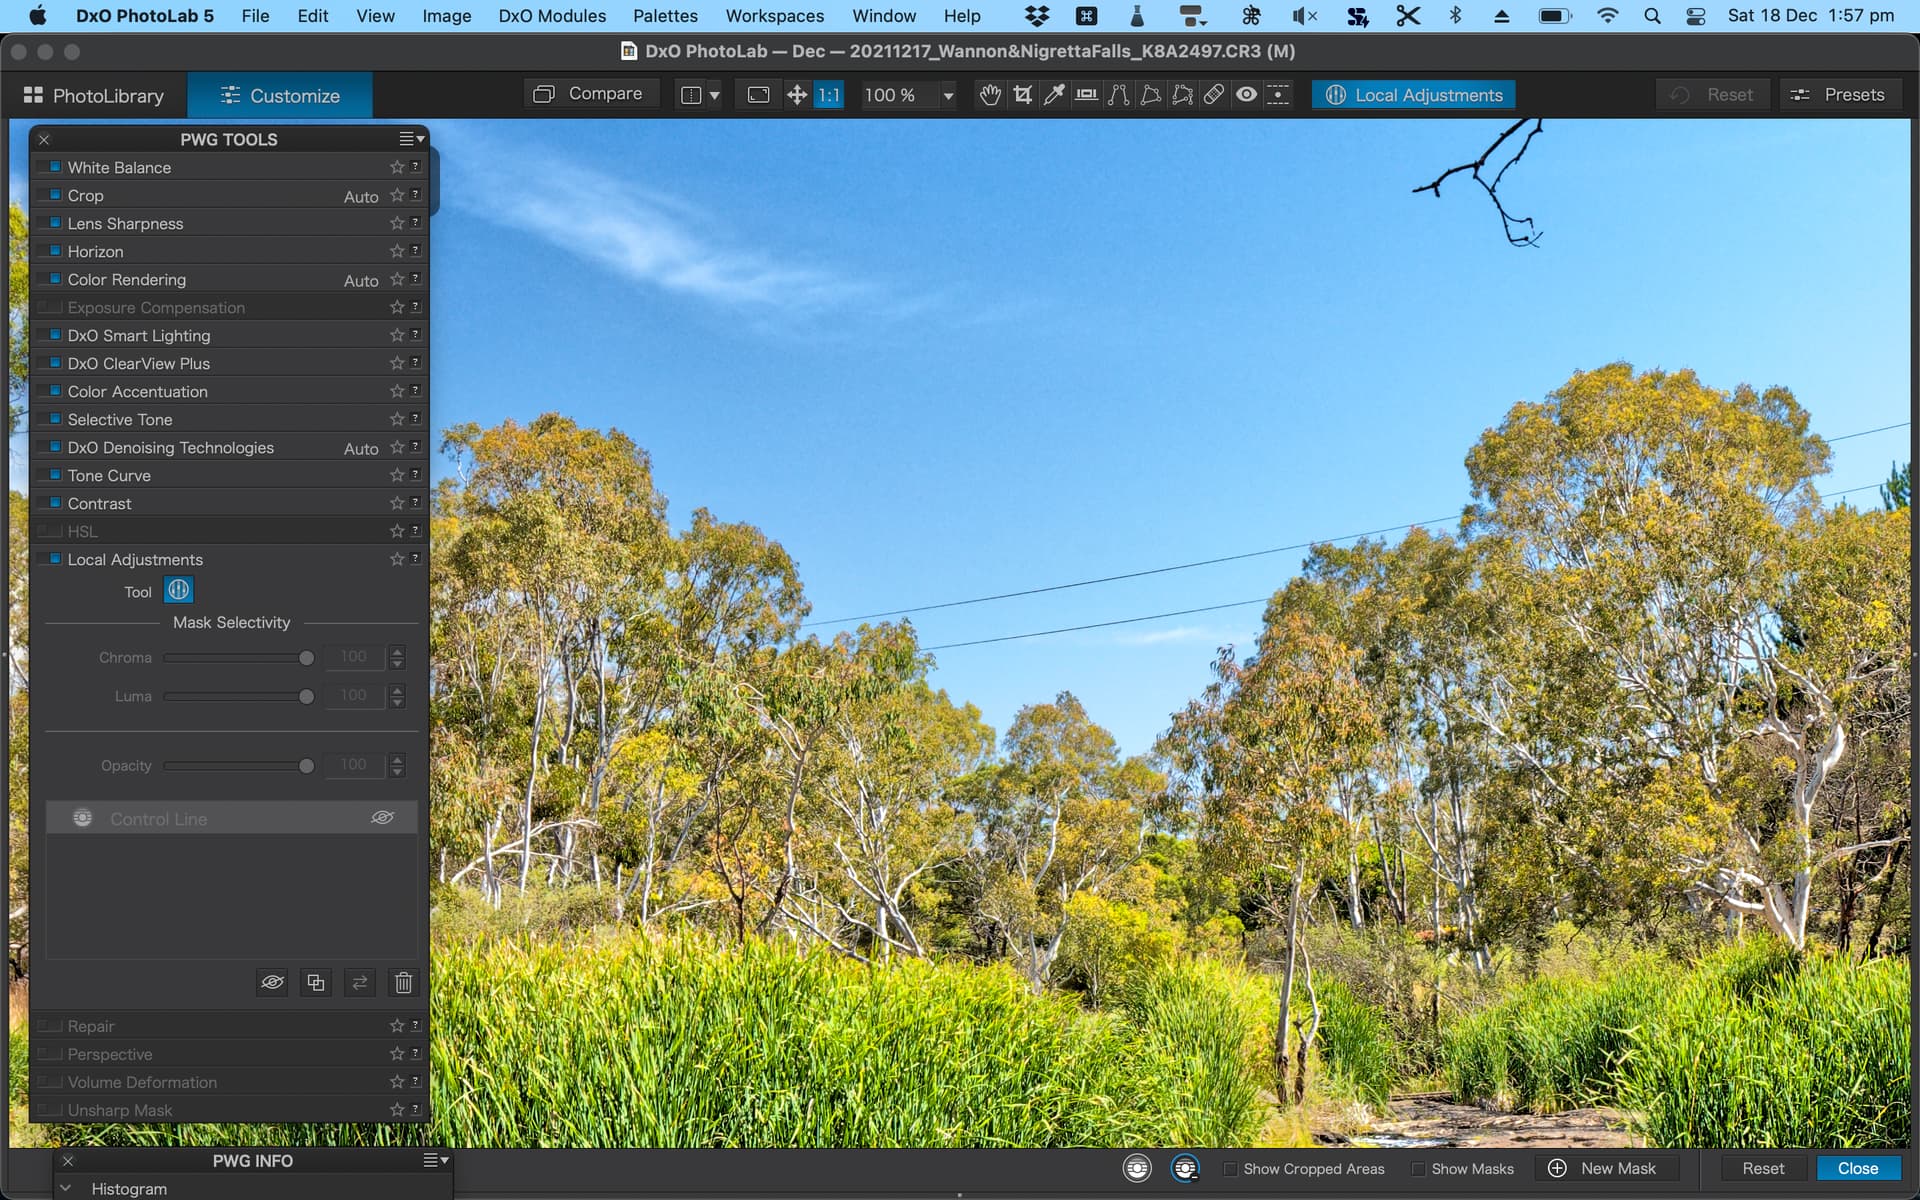
In the attached image of a creek in rural Victoria (just above some falls) there are wires that span the creek to supply power to an isolated building some way beyond the creek. To me, they distract from the natural environment.

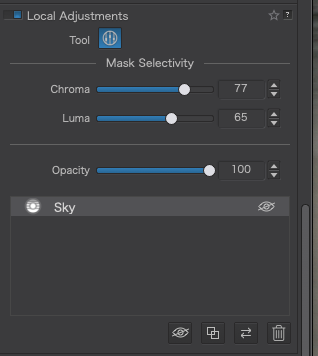
I drew a control line whose picker is placed on the wire (expand the image to 200% to be sure of accurate placement) and set the adjustments only to ‘blur’ the wire so that it is no longer — or minimally — visible at 100%. I set the chroma and luma to 100% to ensure maximum ‘selectivity’ in the adjustment to avoid (visible) changes to the foliage in the trees behind the wire.

The effect of this at 100%…

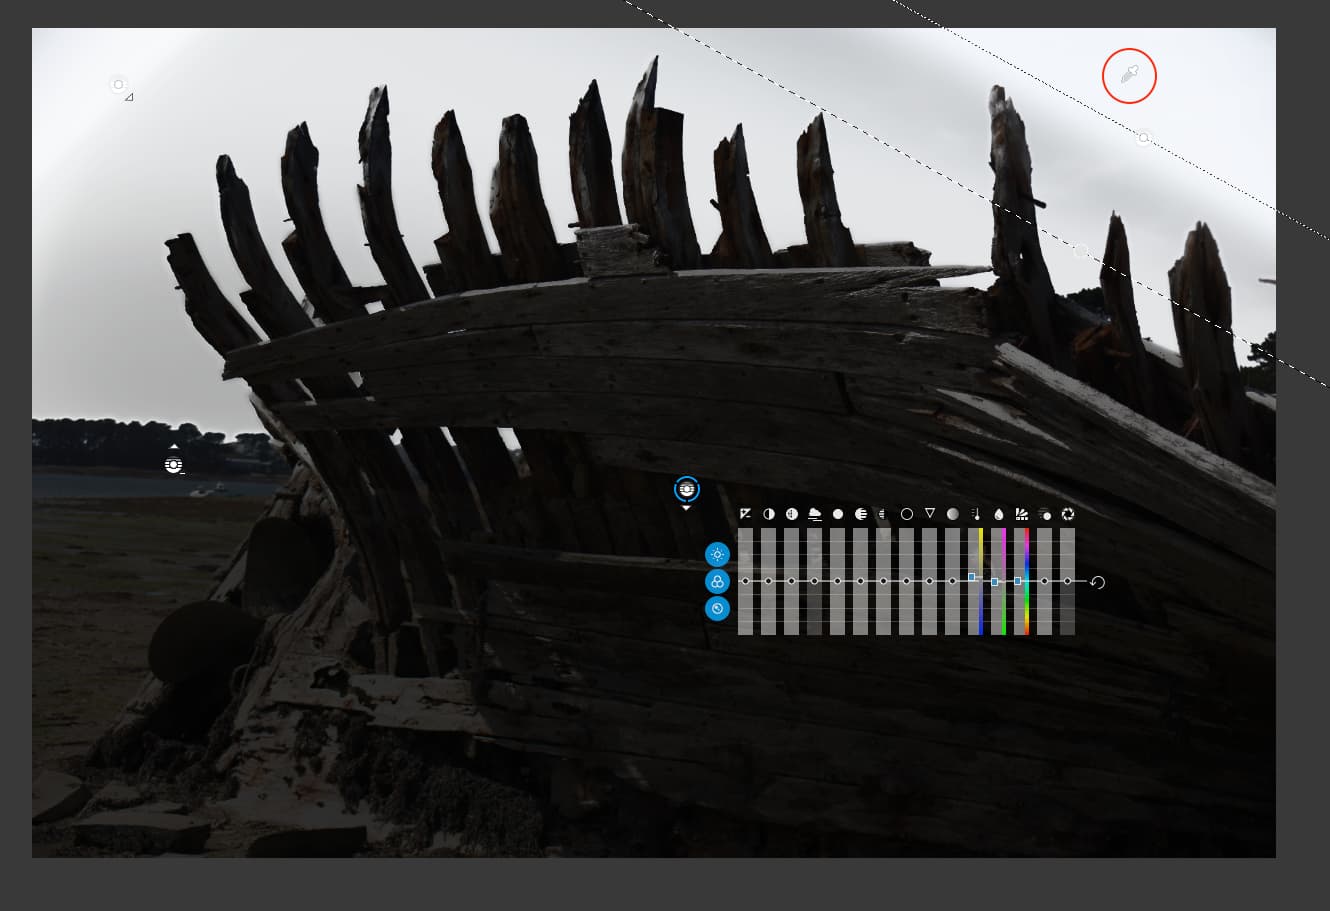
… and the full resulting image:

I’m not sure to what extent the characteristics of this image are responsible for the success of the correction in this case. But I can tell you that my attempts to use the ‘repair’ brush to remove the wires was more time-consuming and much less successful.

I’m more confident that others on this forum have discovered the ‘trick’ for themselves. If so, I’d be interested to hear about your experience and the limits of the technique.

Peter

6 Likes

This sounds like a fascinating idea. Now I’m going to have to give it a go.

Seems to work nicely in your image. I tried the method on an image in which the contrast between the to-be-removed object and the background was less obvious. The result was not as good as yours.

To remove wires, I mostly use the copy tool with several short corrections.

1 Like

Yes, well…

Given this image…

Setting the pipette on this cable shows that the cable is twisted and has multiple “levels” of luma and chroma and that only part of it gets selected…

I tried several combinations of changing the selectivity and/or secondary Control Lines but always ended up with a mask that selected far too much…

… which gives a rather undesirable effect when the blur is applied…

So, for this particular kind of image, it’s definitely a no-go :pensive:

Even if you would take the trouble to use a negative mask on the other side - the details of the old wood would get lost. “Blurring” is not “repairing” in my book. Also, there’s no single overhead power chord going straight, all of them are curved. As long as the angle adjustment of the control line is done the “least precise way”, it’s an annoying fiddling.

Why were these control lines made the way they are and not (linke perspective control lines) done with two “manipulator points” points to get the angle right? On a laptop with a touchpad (and no mouse) this must be a nightmare to use.

Is there a shortcut to move the “direction point” of the control lines along the right angle vector to the origin point? I tried, but whenever I catch the direction point to narrow down the zone, the whole angle is getting lost.

Please keep the two lines as far apart as possible before changing the angle.

Pascal

Just because Control Lines are drawn with a straight (albeit graduated) edge, doesn’t mean that the affected area is necessarily straight. The idea of the pipette and selectivity sliders is that you cover an area (or even the whole image) and then select the part(s) of the image you want to be affected.

See this image…

I want to adjust the sky to darken it and also bring out the light clouds that are there but lost in the present brightness.

So, I start by placing a Control Line that will completely cover the sky and I check the Show Masks box…

I place the pipette on the sky and you can see that everything that is light is selected and will be affected. But, at the moment, that also includes the water on the left and quite a bit of the wreck.

To reduce that, we adjust the Luma and Chroma sliders until, inasmuch as is possible, only the sky appears light…

Capture d’écran 2021-12-18 à 11.55.15

You can see that the water to the left is still partially selected and the sky appears vignetted.

To remove the water to the left, I apply a negative Control Line from the tree line downwards, so that it covers the water, with the pipette on the water…

Next, I want to include the corners of the sky that were obviously too different in tonality to be included in the chosen selectivity for the main mask, so I add a couple of secondary Control Lines, using the gradient to blend them into the main mask…

… and…

Now that the mask, more or less, selects only the sky, I can now turn off the masks and adjust the sliders to slightly darken the sky and to introduce a bit of micro contrast to bring out the high cloud detail…

3 Likes

I have now tried this (the technique I suggested at the top of the thread) on several more images. Clearly, it’s not a general solution.

It works, when it does, under specific conditions that are perhaps not surprising given the nature of the ‘control line’:

  1. When the line to be removed is almost dimension-less. If it is more than a few pixels wide it will likely include multiple chroma/luma points that can be captured bythe mask only with a less restrictive chroma/luma setting in the control panel. This, of course, means that the mask will also be more prone to affect other objects in the image.

  2. When the other regions under the control line are either broad patches of mostly undifferentiated color (e.g. blue sky or a wall) or are regions of high-frequency chroma/luma contrasts like the canopy of trees in the background. These regions seem to be insensitive to a very selective blur that captures a wire.

Unfortunately, these conditions don’t seem to hold generally in recent images of mine. So this technique is possibly one for the “toolkit” but not likely as broadly useful as I hoped.

Its main advantage – when the special conditions hold – is the avoidance of many (often a dozen or more) small brush strokes using the ‘repair’ tool that require individual adjustment as to coverage and reference region and that slow-down the correction preview as their number multiplies.

Thank you for your advice.

Peter

1 Like

I wonder, should DxO provide such an “AI” toolbox for some “special“ but recurrent situations like the one of this discussion ?
Or should we use an other software to “finish” the work with more ease -if other softwares are faster to the goal- ?

I use Affinity for serious cloning and repairs. One off payment for a lifetime of use and can be had for as little as £30 if you get the right sale

I would rather DxO spent time and money on the core stuff (and we all know there is a long wish list!) and leave things like removing wires, fences etc to other programs

4 Likes

I did use Affinity Photo last time I needed to remove such wires. I felt more happy with the process & result than with PhotoLab 4 at that time. :+1:t4:

4 Likes

I agree, subscribing to the philosophy of ‘using the best tool in the toolbox for a job’. Even back in the day when I used Adobe products, LR repair tools were not sufficient so I did the more granular/detailed work in PS. I too would prefer PL continues to strengthen itself in its core stuff.

Now I do all my raw processing in PL, using its tools for the advantage of the image. When greater work in needed in a pixel editor, Affinity is quite capable to do non-destructive quality edits. I have achieved greater results there than I did in PS. As an added bonus, I can do soft proofing there as I send a job to the printer via Qimage.

2 Likes

How do you manage that when AP requires a bitmap image or converts a RAW file to one?

in general this removing and cloning and replacing and copy from one image to an other is a pixel editor functionality not a rawdeveloper functionality.
in dxo’s case even more because optical module reacts on every change in order to demosiac as good as possible.

the present clone repair tool isn’t perfect but good enough in raw modes.

a pixel editor could be much smarter in masking a "windmil"shape and auto find all other same shaped and colored (pixel rgb code) like objects and auto replace them for pixels who are seated next to it.
large amount of computing power needed.
or a stacking modes like removing objects which move around in the set of images. (this could be a rawdevelopers functionality.)

replacing faces and people by using multiple images? also a pixel editor functionality.

personally i think that’s part of a two step editing.
batch edit a group of images export as 16bit tiff and start fase two somewhere else. (photoshop like)

3 Likes

Sorry, I could/should have been clearer, but @OXiDant helped clarify somewhat.

I highly value raw editing for non-destructive work, and PL for it’s quality, but sometimes a pixel editor is necessary (at least for me). Of course I’m starting with a high quality tiff from PL, and in a non-destructive pixel editor workflow Affinity’s layers and live filters allow my work to remain in layers and leave a way back to the original pixel layer if necessary. Same workflow I had in PS back in that day with smart objects.

To be clear, I would much prefer to remain in PL (and do for the majority of my work) but sometimes I have to pick up the pixel editor tool.

1 Like

Seeing what Affinity can do with RAW I was surprised how much more capable version 1.10.4 already is. Of course, all changes in the RAW lead to a “.afphoto” file and the RAW edits are in a way non destructive (as the RAW is not altered) but cannot be changed once I leave the develop persona.

But then, a 40 $ app… with masks in it’s RAW-developer module needs to render the changes after leaving the RAW converter module.

And when you take a look for the Live Filters, for example for scratch and dust removal, it is very impressive.
But I use it always after RAW editing in DXO, before printing or creating a booklet with a exported JPEG or TIFF from AFphoto

Hi Guenter,
Which software are you talking about ?

Good morning @m-photo Marc,

I’m talking about what we are talking about…Affinity Photo :rofl:

There are some tutorials like this one Live Filter Layers (Affinity Photo) - YouTube
that one is another way Remove Dust & Specks - Affinity Photo Tutorial - YouTube

have fun

Guenter

2 Likes

I’d like to recommend the very helpful tutorials on Vimeo by Serif, too.

4 Likes