@mikemyers and @Joanna outside off PL5 I use Franzis Sharpen and have done for some years but typically reserved for my (pseudo) macro images these days. However, I installed a trial copy of PL5 and Filmpack 6 when they were released and became reacquainted with ‘Fine contrast’ and realised it only came with Filmpack and I believe only with Filmpack Elite. This made me “very cross” even though Filmpack was on offer.
However, having purchased PL5 before the beta rewards were announced I was then able to secure a copy. Having to buy the complete Filmpack Elite for just one feature is …
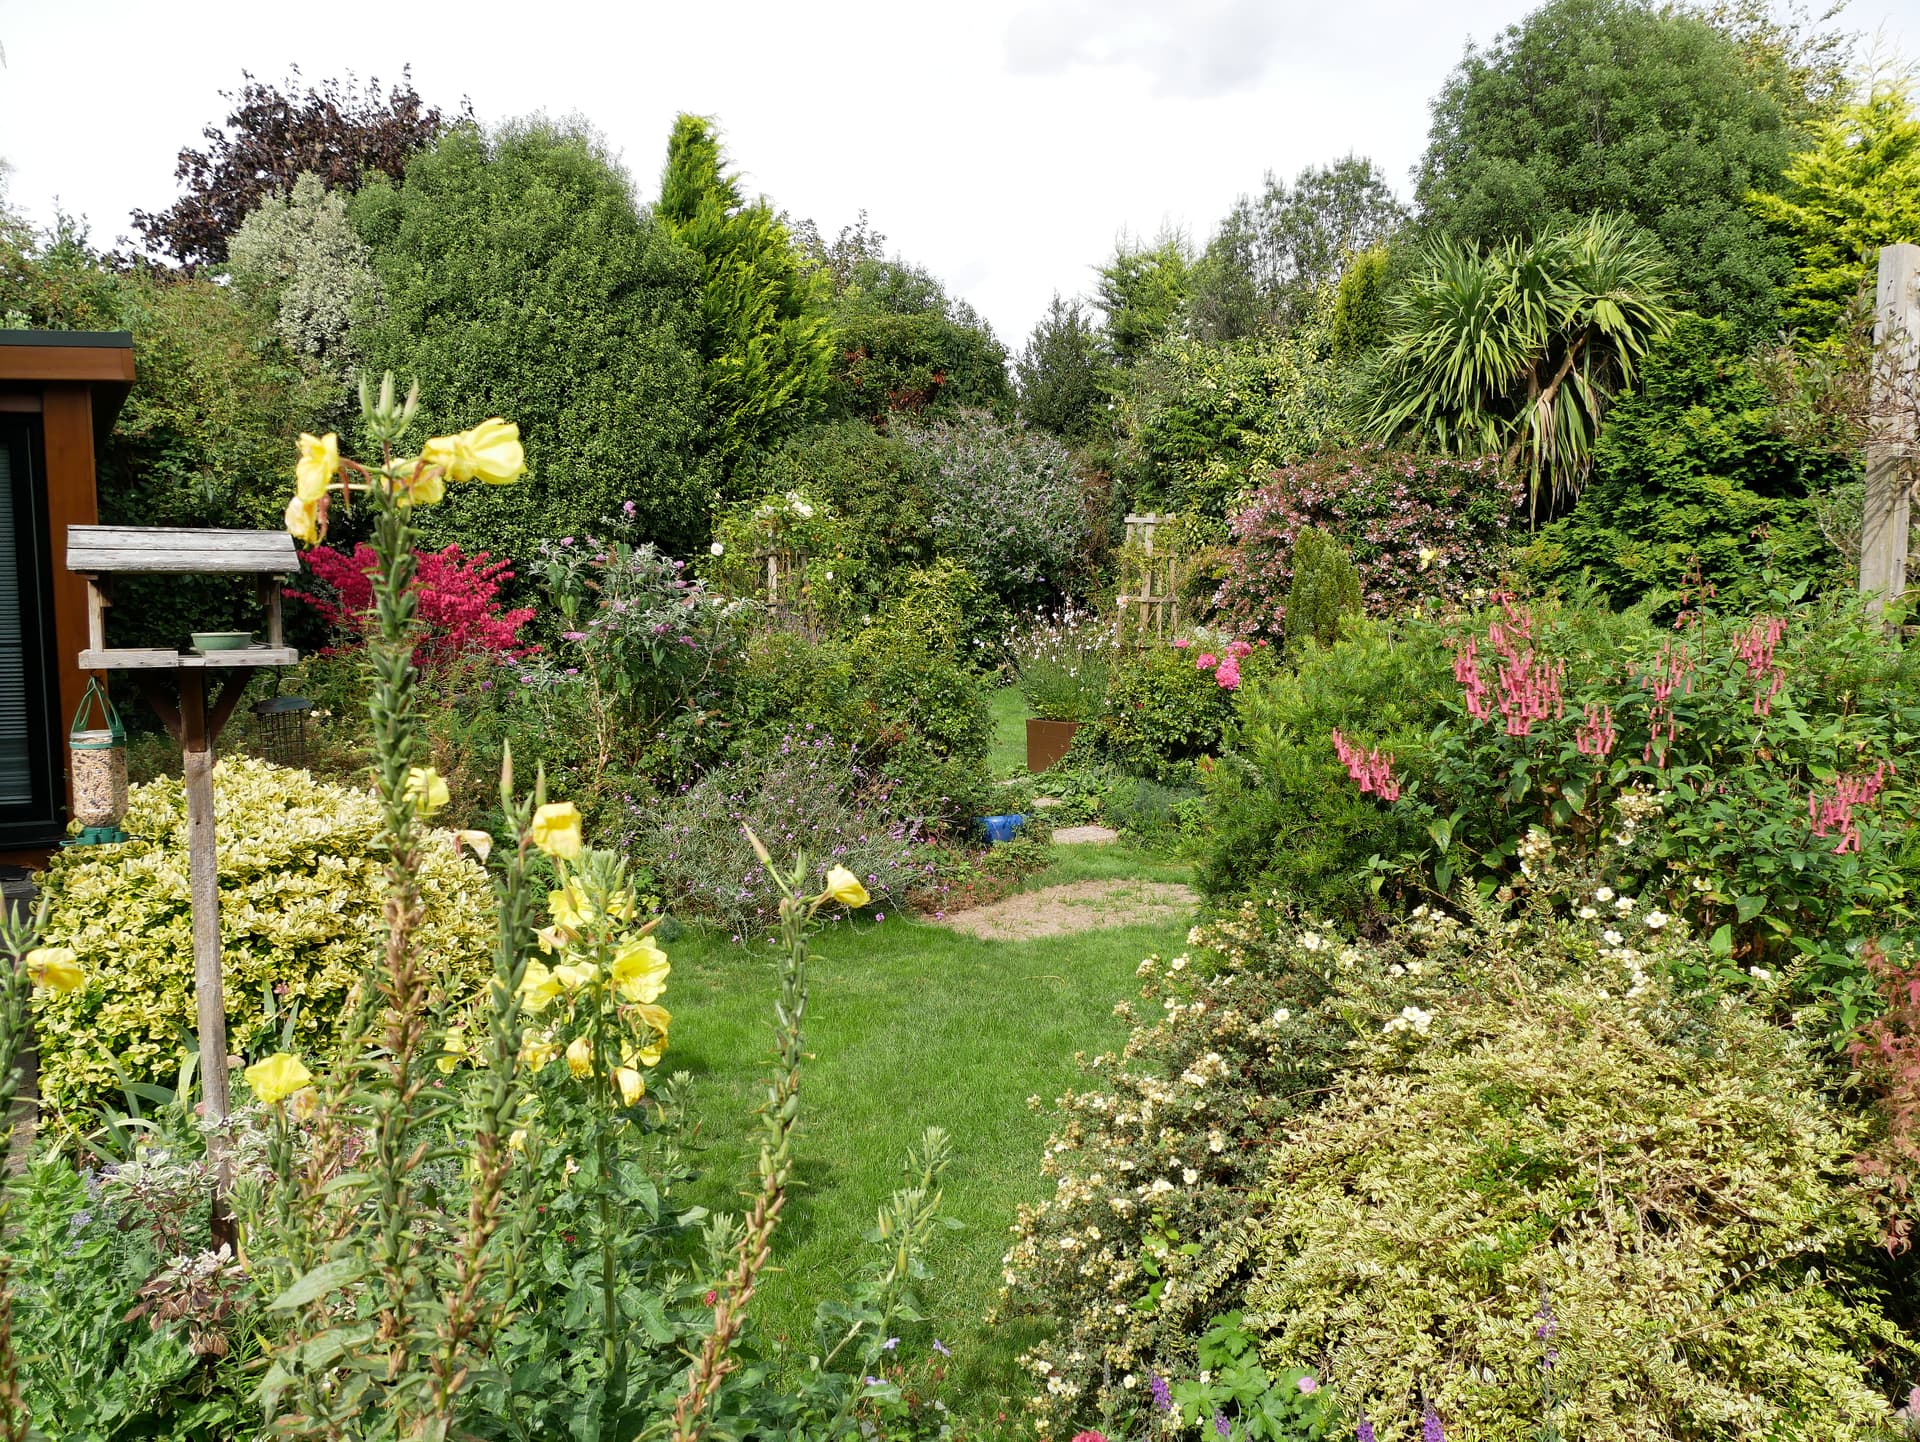
It looks like the colour options added might also allow me to tame the excessive colouration I manage to get into the grass but beyond that the other features are not something I would typically use!
I don’t think that’s right.
In my calculator focusing on something at a distance of 4000m with a 50mm lens gives me
f/5.6 a dof of 14.68m till inifinity and a hyperfocal distance of 14.78m
f/8 a dof from 10.39m till infinity and a hyperfocal distance of 10.47m
More than enough for his shots.
By using a higher f-stop sec you don’t make use of the good characteristics of the lens.
@george it does indeed and I use it all the time but usually on the auto setting (5 for JPGs and 16 for RAWs if my memory serves me well) but fine contrast is a different experience but an expensive one in PL5 if you have to buy Filmpack 6 Elite. Sorry I am overselling it but I was concerned that giving up FilmPack would me the loss of a useful adjunct to the product!
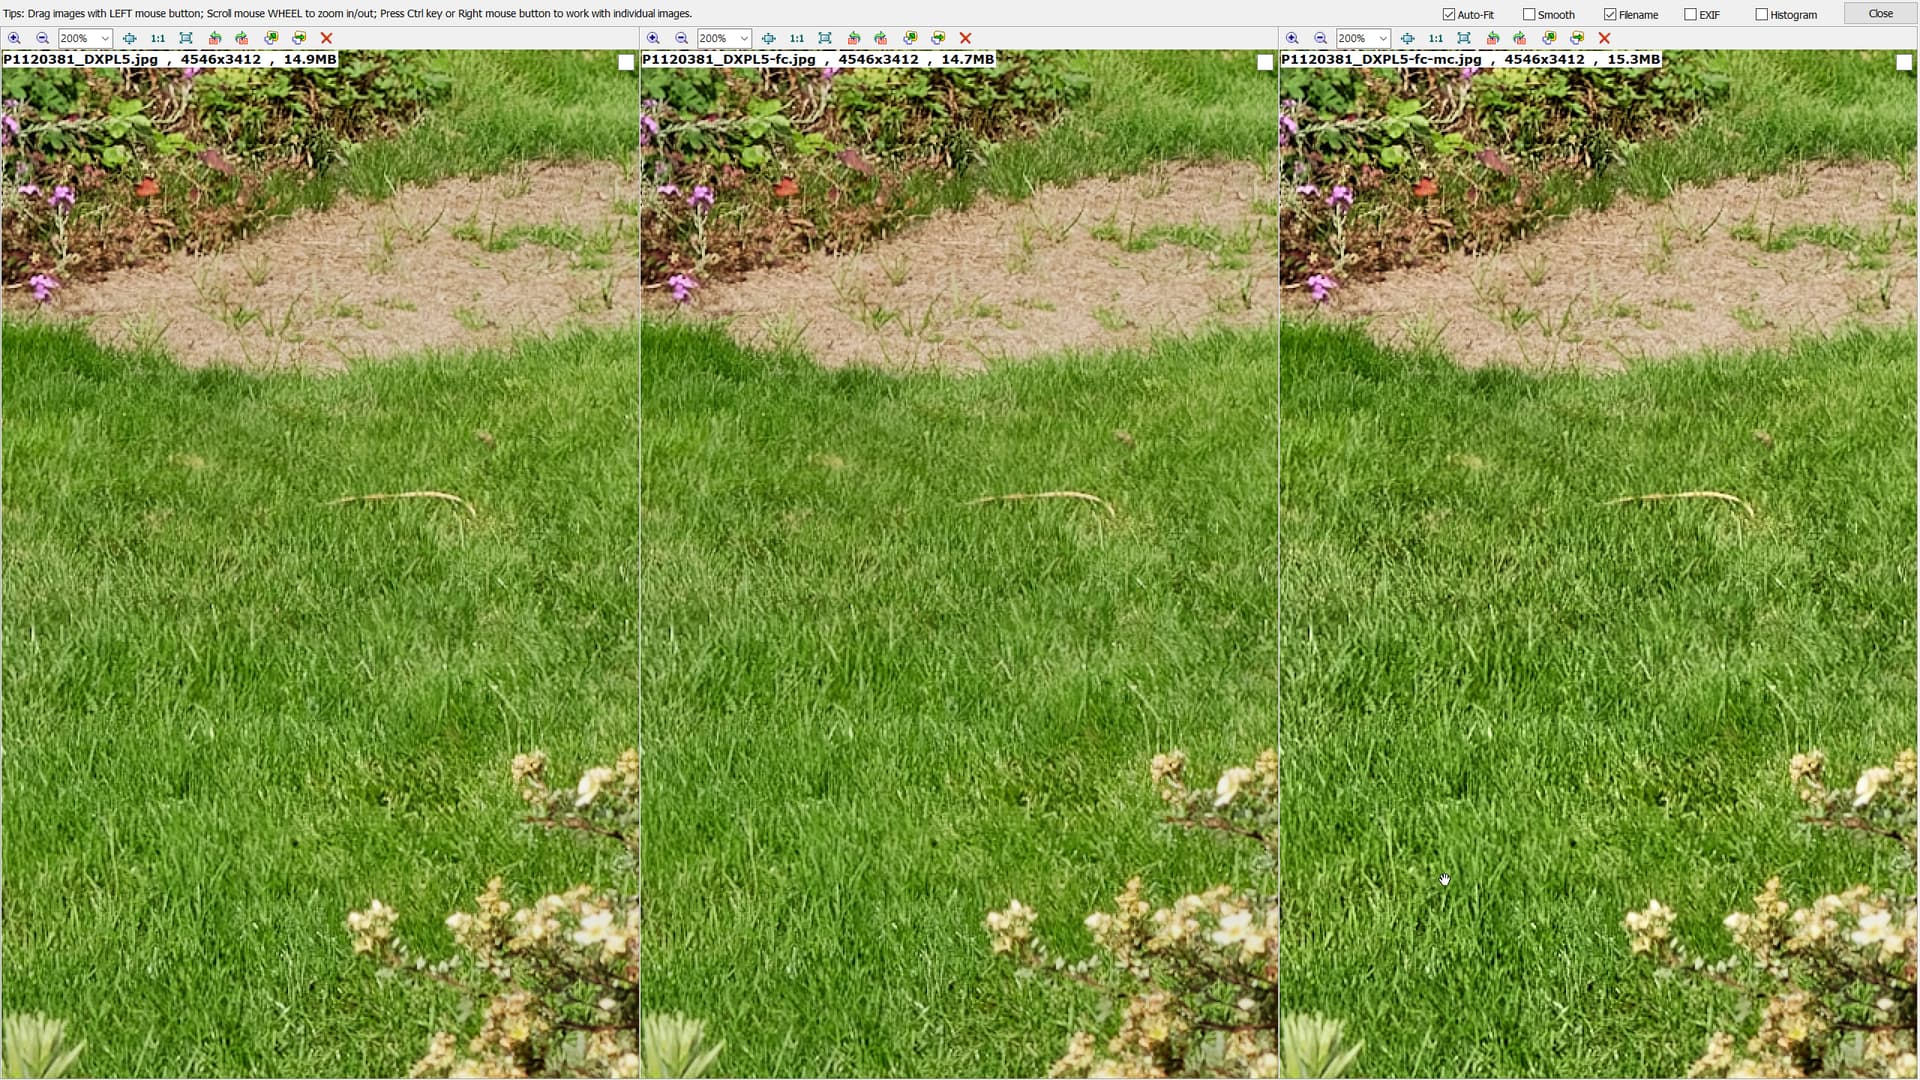
I just did a test on a very busy JPG (lots of leaves) and then tried to compare the two images side by side at 100% but could not notice a difference! But when viewing the two images one after the other the fine contrast image had more “presence”.
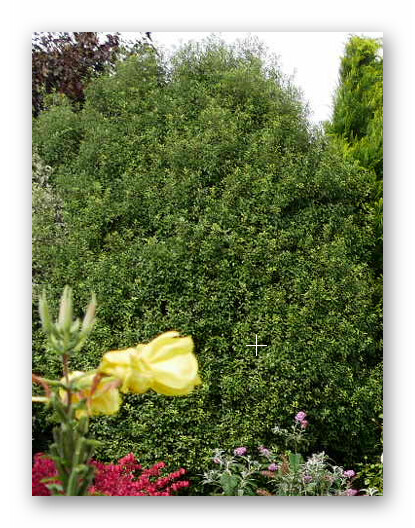
I switched photo (a jpg) so see if you can see any difference between them FC=20. Taken with a G80, 12-120 lens and I was experimenting with a circular polariser (as you do!?)
The grey sky in your image seems to have a lot of detail that could be recovered with the use of a control line. The detail is evident even looking at your image on my Samsung Galaxy S21. I suspect that if I was using my 28 inch 4k monitor there would be even more detail visible that could be enhanced.
I don’t know what you used for fine tuning but if it was the FP tool I don’t see any difference between that and micro contrast. I added micro contrast on dxpl5.
I bought PL, FP and VP as a bundle and have never regretted it. FP doesn’t get updated every year and, as such, isn’t really all that expensive. The film I use most of all is Fuji Acros 100, because it is my favourite B&W film for LF work and occasionally, I will use Fuji Velvia 100 for some autumnal feel shots. Apart from that, I don’t really use most of the films and bought it more for the colour filters, grain, channel mixer (for B&W), creative vignetting and blur/soft focus - which I would have bought it for without the film emulations.
My apologies for not making myself clear. The main techniques I was talking about were this of choosing the right aperture and point of focus to maximise DoF and sharpness, and only then using appropriate tools in PL, not to enhance, but to optimise what the camera caught.
OK. So I would then ask you how many images do you take where only the centre of the image is critical? Even for portraits, for me, the most important part is the eyes, which are rarely in the centre; and for landscapes, often the most interesting parts are things like leading lines and the foreground when taking hyperfocal distance shots where I want everything sharp.
I just went on to Google Earth and measured the distance from your block to the building on the right and found it to be about 230m to the shorter building and 290m to the taller building - which would explain why, especially the shorter building could be soft at f/5.6 with the 135mm lens if you focused on infinity.
However, with the 50mm lens, this should be within DoF and diffraction limits but f/5.6 might not necessarily be the best aperture for something at the edge of the frame with this lens - hence the advice to use f/10.
If you want to avoid diffraction softening something you think should be within DoF, try setting the blur spot size to 20µ in TrueDoF-Pro instead of using the “standard” 30µ. It can make a difference to sharpness if you are inspecting at high magnification.
If you only want a relatively small print size, you can use a 30µ blur spot, and diffraction will start to soften edges at f/14. If you want more sharpness, say for a larger print, using a blur spot of 20µ will avoid diffraction up to f/10, but it will also give a slight increase in detail on a smaller print - but at the expense of a smaller depth of field.
Unfortunately, gut feeling and ultimate sharpness rarely go together
Actually, it’s relatively simple - just stick to f/10 unless you want reduced depth of field.
Now you have TrueDoF-Pro, you no longer need the educated guess
Tell me about it A simple rule of thumb for minimum shutter speed is the reciprocal of the focal length if everything is static, twice the reciprocal of the subject is moving and three times the reciprocal if you are moving as well. Since the latter tends to be frequently true for us oldies, even when we are stood still, I will often go as far as four times the reciprocal. So, for a 200mm lens, I will not shoot at less 1/800 or 1/1600 second. And, if you need more exposure, crank up the ISO instead of opening the aperture and reducing the DoF - you’ve got DeepPRIME which is good at even 10,000 ISO.
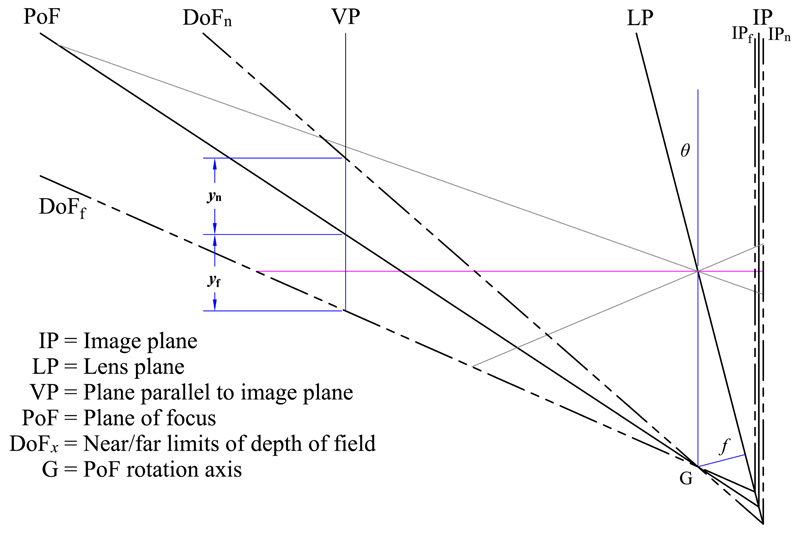
Nope, I mean sharp. It’s not the best of diagrams but this shows the plane of sharp focus (PoF) going away from the camera…
Everything on that plane will be critically sharp and, depending on the amount of tilt applied to the front standard of the camera, that PoF can be horizontal. Thus, DoF is measured above and below that plane and increases with distance from the camera.
This is known as the Scheimpflug principle and if it has blown your mind, don’t be surprised, it comes to us all when we first encounter it
It tends to be more aggressive as it adds black to edges rather than the grey that fine contrast uses.
Ok, but he used a 50mm lens.
The Scheimplug priciple is describing the characteristics for a lens where the image plane and the lens plane are not parallel, like in tilt lenses. Maybe you’re referring to the mentioned fault in his lens.
Eh olympus 12-100mm, 12-200mm, or pl12-60mm or 14-140mm.
G80 i have it too is a m43.
The optical module activates auto microcontrast levels.
To sharpen more i choose often local adjustment and clearviewplus. Like highlighting objects.(clearview is a tad smarter in applying sharpening on the right spots then general microcontrast)
Fine contrast is great for global touch.
Dehazing.
Microcontrast looks more like clarity behaves. Saturation and edge enhancement.
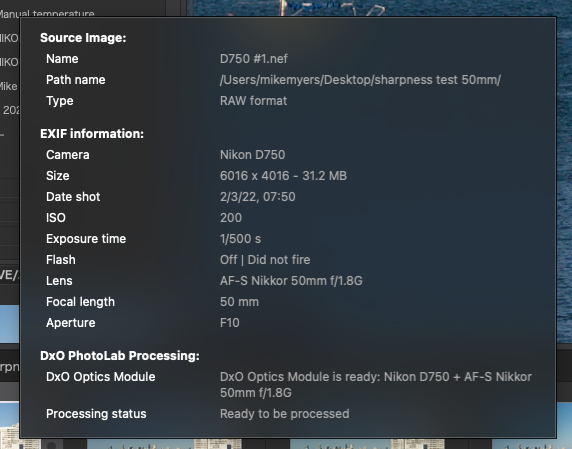
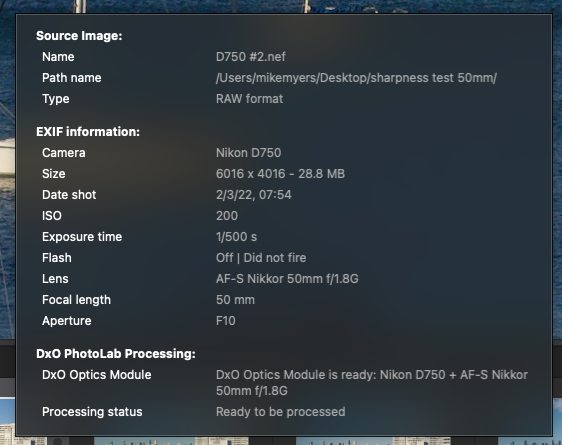
Here are the four photos I expected to take, my Nikon 50mm f/1.8 lens on my first D750, then on my repaired D750, then on my Df, and finally my Voigtlander lens on my M10. After looking at these, I went back and took one last photo, with the M10 using my ancient 50mm f/2 Summicron, one of the oldest lenses I own. I was curious how it would compare.
I came up with my own observations, but I’m just going to post the photos here. For reasons I don’t understand, my repaired D750 seems to be under-exposing by one f/stop, which I corrected in PL5, but I’m only posting the original image here. I expect to take that camera back to the shop and let them adjust it, but I’ll test it once again before doing so.
I think the my first D750 is slightly over-exposing.
I think my repaired D750 is underexposing.
I think my Df exposed the image perfectly.
I think the M10 with Voigtlander did great!
I think my D750 with Nikon kit lens did great.
I think the M10 with my old Summicron looks like an old lens.
I see no need to replace my Nikon 50mm lens. For what I know how to do, and am able to do, I like what I see.
@oxidant sorry I confused myself! At the time that the photo was taken I had 14-140 (from G7), and lumix (not leica) 12-60 (from G80) (all x2) but now I also have 12-200 (from EM1 Mkii) and 12-50 (second hand purchase) (both Olympus) plus a tiny 12-32 (from GX80) in addition, hence my mistake was starting with the 12 and multiplying it by 10 to create a non-existent MFT lens oops! The 14-140 is the only zoom I have that doesn’t start at 12(24).
I use ClearView most of the time but with the exception of linear gradient I tend to avoid Local Adjustments (except when I was trying to adjust the photos that started this topic!)
Yes, hence my comment about “presence”.
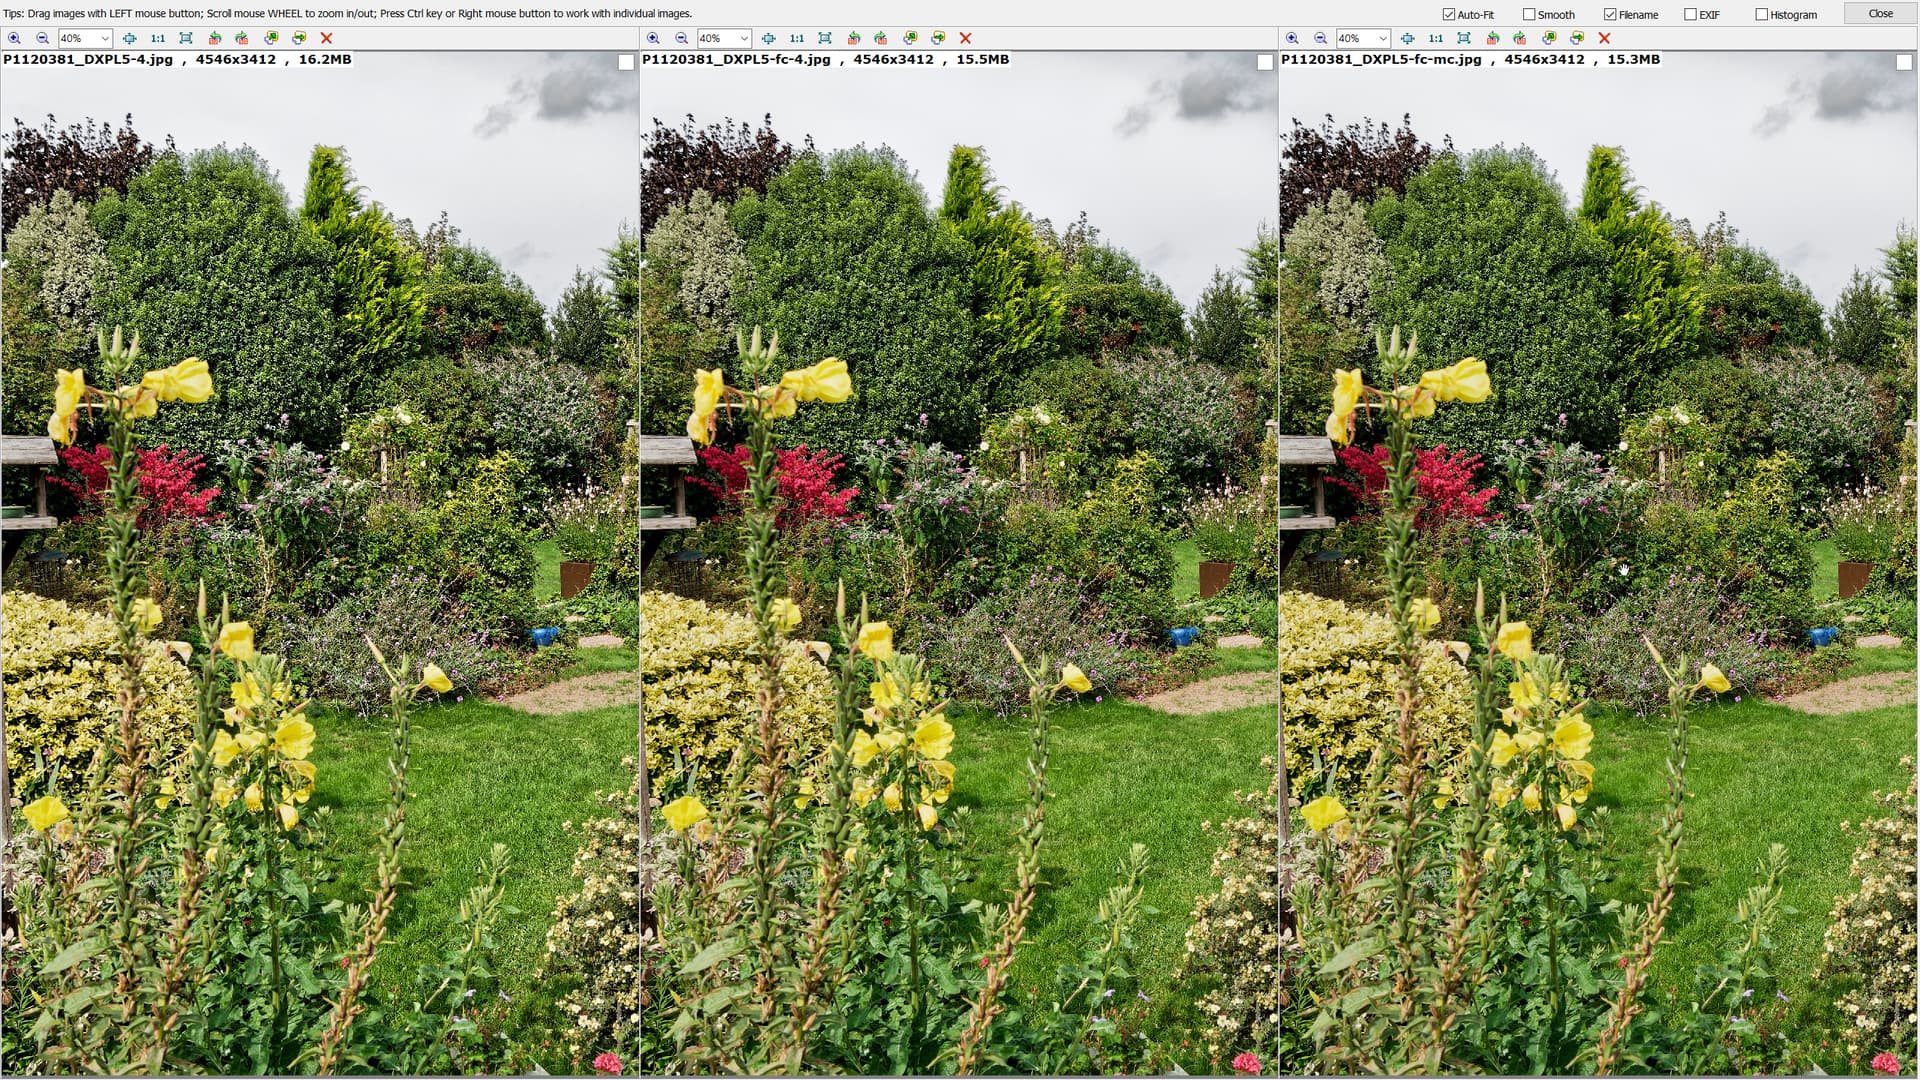
I just ran some tests, the images with no additional suffix are ‘mc only’ from =20 to =60(the -4 image) and with the -fc suffix are ‘fc only’ from =20 to =60 (the -4 image) and the final image is mc=default=16 and fc=20.
I then compared mc=60 with fc=60 with mc=16+fc=20 and the major comment I have is that the mc only image get to be “overpowering” quickly. The other included comparison is MC=20 versus FC=20 versus MC=16+FC=20 and according to my 2560x1440 25" screen the last one looks better but it is a matter of vision and what the viewer wants the picture to look like. These photos were developed from the original RAW image.
PS Our garden is full of leaves of one size or another and they can play “havoc” with cameras, way more than they do with eyes! I used to consider that a camera that could not render the pittisporum tenuifolium well was not worth having.
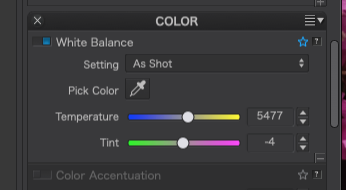
Checking them again I found that #2 doesn’t have the possibility in PL to check the color temperature. Like it is a non RAW image.
And why is there such a difference in size?
Yes, i started to use clearview at 15 for all image because it looked sharper.
But it also caused moiré on small bricks or detailed grass got noisy.
Clearview plus does a better job but stil for more then 15 it’s overpowering fast.
So i used Silkypix as counterbalance. The blacklevel, the contrastbalance, the clarity en the dehaze slider. Tonecurve of both.
And used images which needed dehazing or sharpening or both or much more dehaze but not so much sharpening.
i found out that fine contrast makes dxopl just a tad better in the dehaze clarity control IF you understand how it builds the image.
Fun part of local adjustment is you can mask a part of the image which has too much clearview by local and a negative clearview action.
So you can “paint” with a sharpening tool.
Front grass softer? Select the chroma and luma of the grass and undo the global sharpening. Use fine contrast to dehaze and some local vibrance to blend it in.
I have a topic here where i posted some fish in water examples there i exagerated the effects to show the differences.
I need to go.
If you have questions i will answer in the weekend.
Regards
I noticed the difference in size - not sure what setting might have created that. Both are “new” (raw).
I’m trying to think of what settings might cause this? Maybe there is something being recorded in the first image that is not yet turned on in my second D750?
I’ll need to check if the copyright information, and other things are turned on in the second 750. As to PL5 not being able to change the color temperature, I see this for all my Nikons:
I don’t understand - how do I open up the full window for “White Balance”, to see what the temperature setting was used for each image? In not sure what to click on. Is something broken in my PL5 ? If this is what you’re seeing, it can’t be my computer - or is there something else that’s set incorrectly?
Mike. Just a little something. There are a couple of minor differences in how the auto-focus is setup on the two Nikon cameras…
#1
[MakerNotes]    AF Area Mode                    : Single Area
[MakerNotes]    Phase Detect AF                 : On (51-point)
[MakerNotes]    Primary AF Point                : C6 (Center)
[MakerNotes]    AF Points Used                  : C6
[MakerNotes]    Contrast Detect AF In Focus     : No
[MakerNotes]    AF Fine Tune                    : Off
[MakerNotes]    AF Fine Tune Index              : n/a
[MakerNotes]    AF Fine Tune Adj                : 0
[MakerNotes]    AF Fine Tune Adj Tele           : 0
#2
[MakerNotes]    AF Area Mode                    : Auto-area
[MakerNotes]    Phase Detect AF                 : On (51-point)
[MakerNotes]    Primary AF Point                : (none)
[MakerNotes]    AF Points Used                  : (none)
[MakerNotes]    Contrast Detect AF In Focus     : No
[MakerNotes]    AF Fine Tune                    : On (1)
[MakerNotes]    AF Fine Tune Index              : n/a
[MakerNotes]    AF Fine Tune Adj                : -2
[MakerNotes]    AF Fine Tune Adj Tele           : 0
This might explain differences in sharpness.
So far, I haven’t seen anything in the EXIF that explains why there is such a strong exposure difference and I am guessing that one or both might need calibrating.
When I tried to make the second D750 the same as my first, I obviously didn’t go through all the auto focus configuration. I can either make the second camera the same as my first camera, or maybe I should try out whatever settings you prefer on your D850? Or perhaps I should see if there is something to click on to bring both cameras back to the default setting for a starting point.
As to the exposure, I suspect the repair technician never calibrated the meter. Is this something we can do ourselves, or is it best done by a shop? I’ll test this again, setting both cameras to “sunny 16” as soon as I have a pretty sunny day again.


 A simple rule of thumb for minimum shutter speed is the reciprocal of the focal length if everything is static, twice the reciprocal of the subject is moving and three times the reciprocal if you are moving as well. Since the latter tends to be frequently true for us oldies, even when we are stood still, I will often go as far as four times the reciprocal. So, for a 200mm lens, I will not shoot at less 1/800 or 1/1600 second. And, if you need more exposure, crank up the ISO instead of opening the aperture and reducing the DoF - you’ve got DeepPRIME which is good at even 10,000 ISO.