i separated this question from my other to keep it clean for others:
I stumbled across this primenoise behaviour.
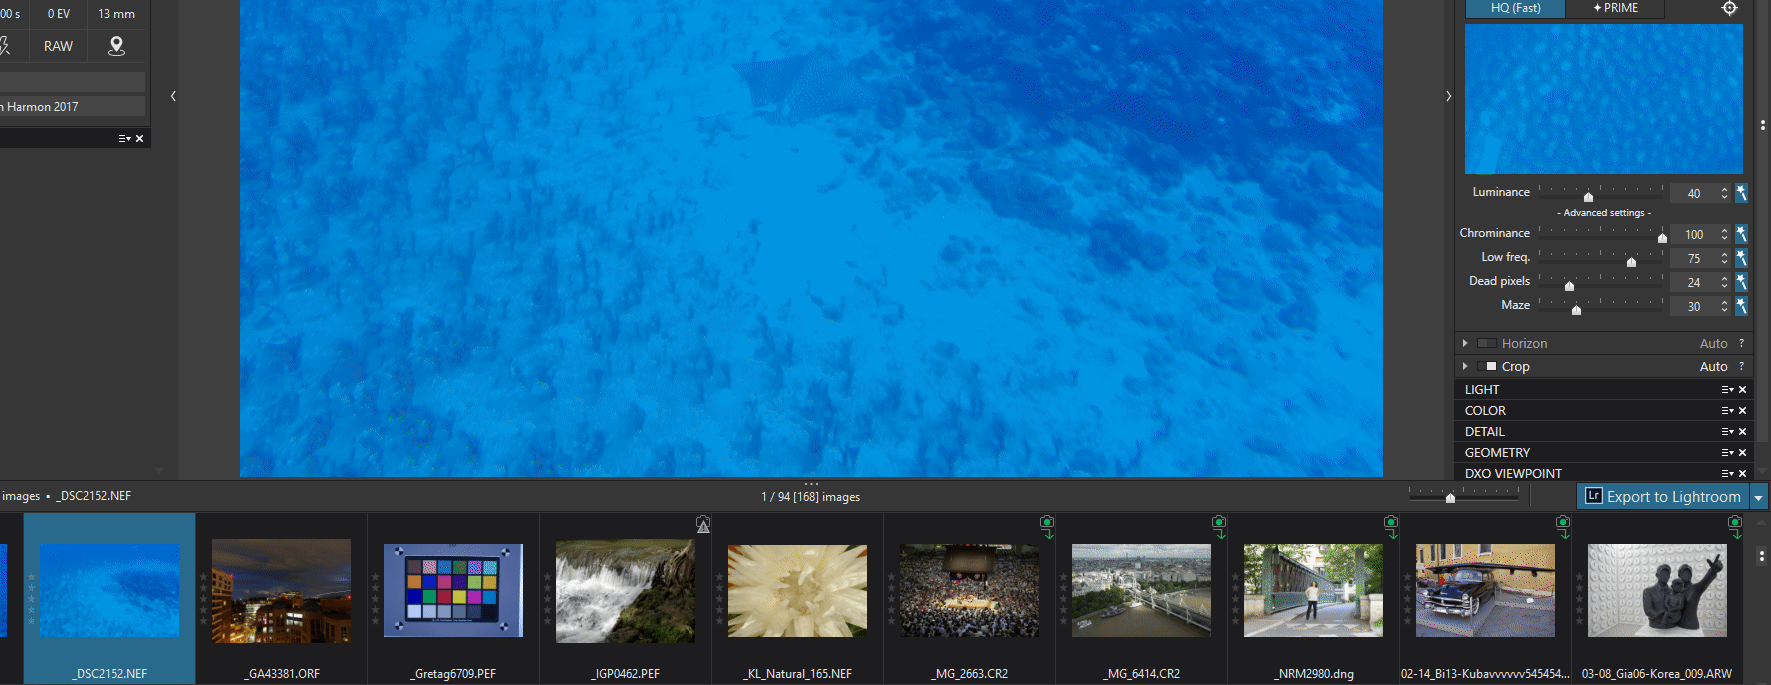
It never changes its initial settings when activated, all type of images (raw files) it has the same values:
the luminance just do 40% ;chrominance 100; low freq. 75; dead pixels 24; maze 30.
Noise is depending on ISO value, Exposure value of a pixel of the sensor, time it took to get that exposure (heating up) and more.
Ive seen no reaction to ISO values: base- to max high (200-6400) in the initial settings of the sliders i can use to manual correct things “PrimeNoiseReduction algoritm” did’t solve automatic. (i know someone who have made presets for every ISO value and sort his images on iso value to process rawfiles at a maximum noise reduction.)
So this raises a new question: how “intelligent” is the automode “magic want” of Prime if its all the same in its settings?
As comparison i have Silkypix who has a ISO value depending setting in noise reduction, (you can see it changes if you run through the iso values.) I don’t say this is proof of intelligent noise reduction. (intelligent the way of only apply what is necessary)
I know Smartlighting does also have just fixed number on the sliderline and under the hood the magic is done.
The hole row of sliders has a “magic want” so if i activate them all something should be happening if i “feed” it different types of rawfiles. ( and i can’t see this in the sliderssettings happening.)
Yes i know: sharpening and noisereduction are two sides of a coin.
But Lens Sharpness doesn’t have a automode as in magic want because its build to get the most out of the body/lens combination optic wise.(the optic module) the sliders are just for personal taste.
Same as Aberration reduction the tool is fully automated if you activate the magic wants and can be on personal taste be overruled.
So i find it difficult to see if i can improve noise/sharpening by manual correction or just be marginal confusing the automated mode of magic wants whom are monitoring the image.
contrast: it would be a enrichment if this tool as three presets made by dxo’s techguys:
low contrast- normal contrast- high contrast. (now its has a “sharpening magic want” in microcontrast but not a general preset choise for contrast level.
You see for each image the value is “auto” but not the same. Yes, for most often auto correction is luminance just do 40 ;chrominance 100; low freq. 75; dead pixels 24; maze 30 but not for all.
“Magic wand” returns the auto value back if you change the correction value manually (this value is not the same with the default one which you can reach by a double click of on slider).
P.S. If you need deeper analysis we can ask @Benoit or @doquocbao for it.
Hi. In fact most of the automatism in denoising is done under the hood: for each picture, according to its characteristics (camera model, ISO setting, etc.), we retrieve associated calibrated noise model to denoise the picture appropriately. Manual settings are there to enable to not fully denoise the picture (as even best denoising have a tendency to give pictures with slightly plastic-like effect when fully applied). Magic wand values are more like recommended values (mostly saying to keep some fine luminance noise, while removing all colored noise), and can be adjusted according to customer tastes.
Ok so it does react to ISO Value only it doesn’t show it in the sliders (much). (Luminance noise is iso depending)
So i would be expecting to see when i have a scenery shot at different iso values/exposures (time of day and thus light) that the 40% is going up or down depending on the iso value and shuttertime. (hotpixels)
ok these are camerasensor tested result on lab test-charts and setups, converted in to de-noise settings to get the cleanest image in general, i understand.
Is this Magic wand-function (toverstaf nl) does scan the image? (i mean when i use the same iso value, exposure time/light circumstances and shuttertime, which are the main cause of noise, on different scenery it is adjusting for that specific scenery?
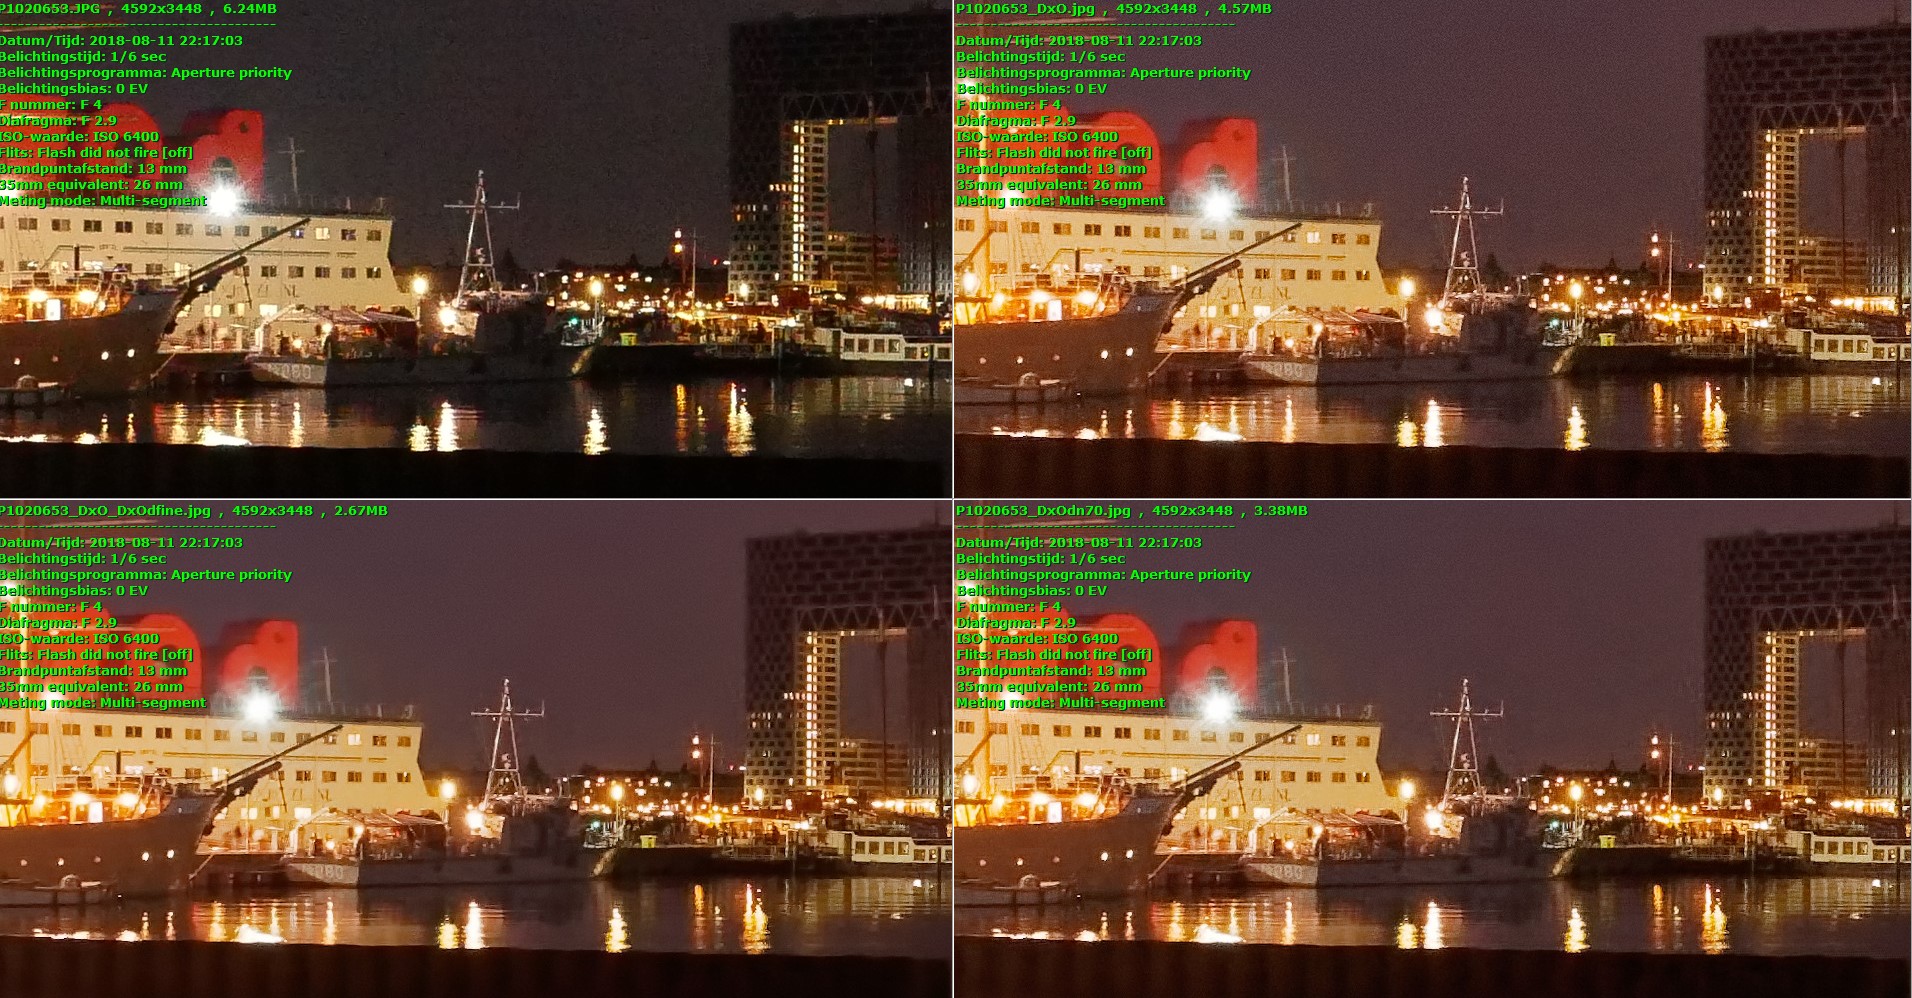
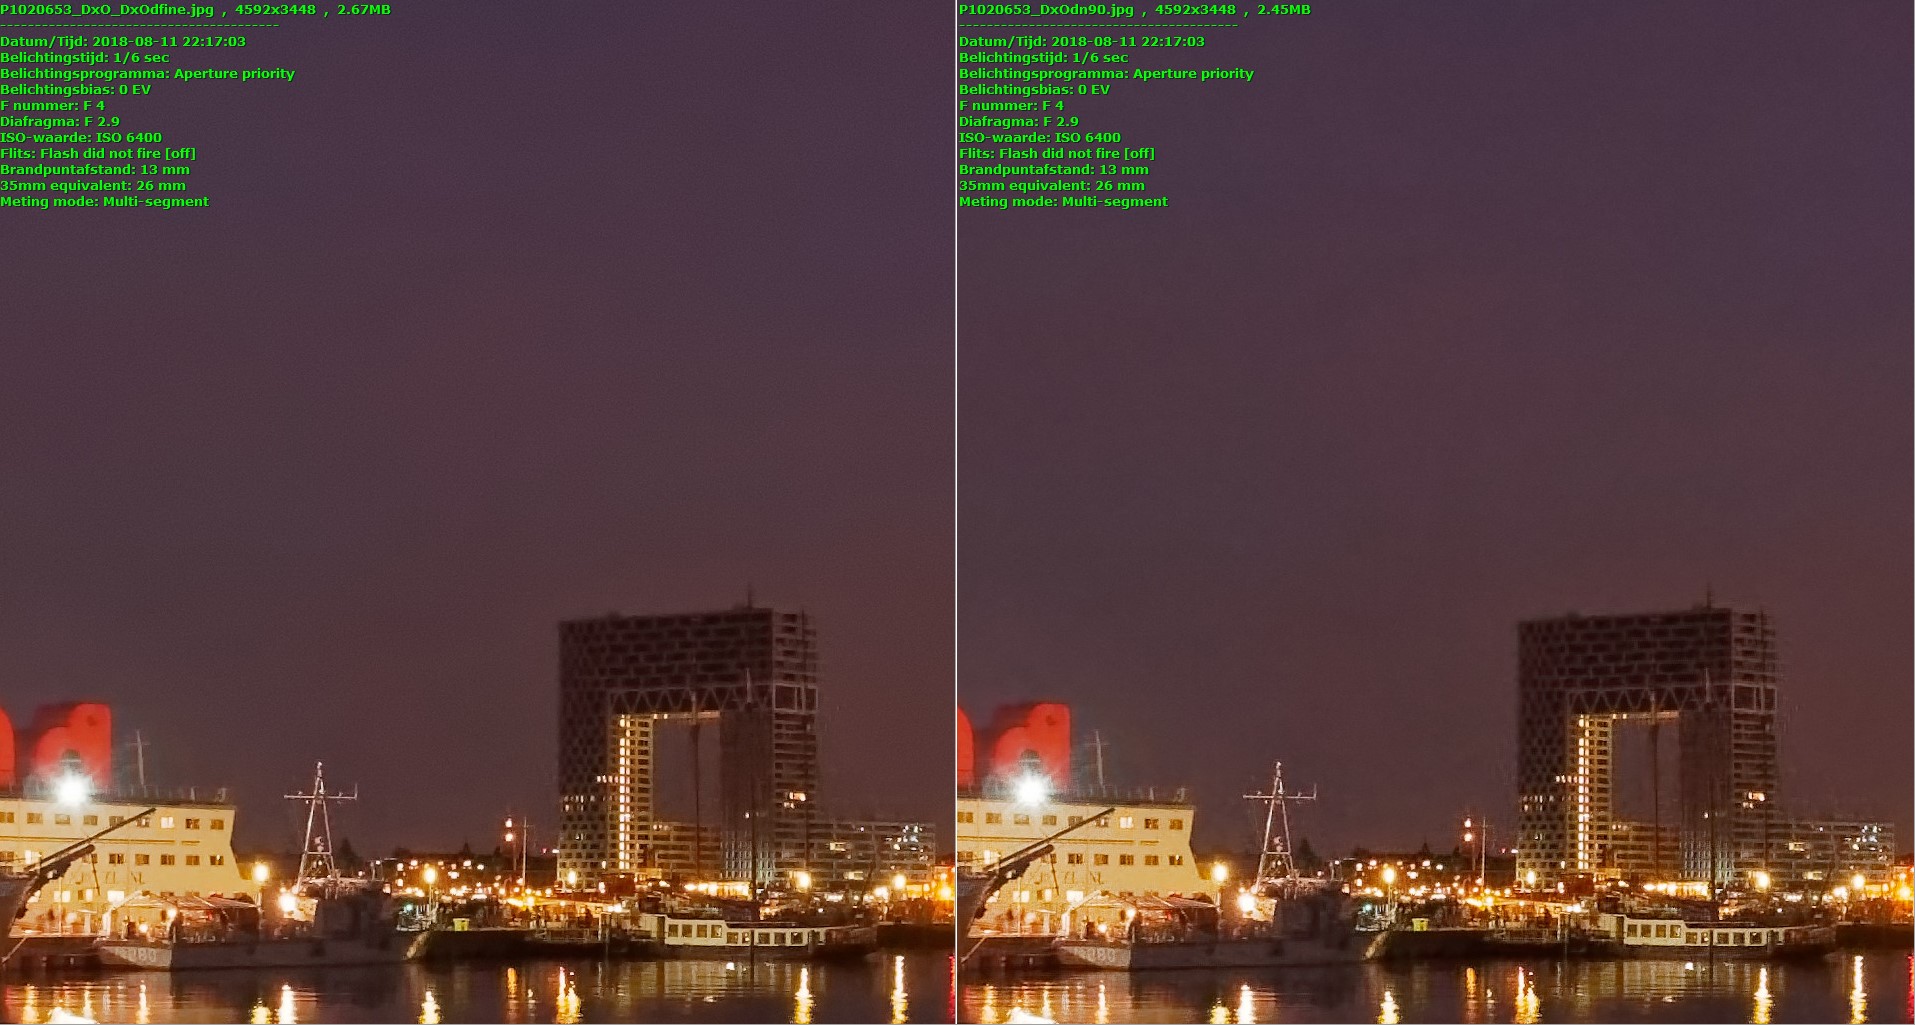
Ok this explains that when i export to application in 16btiff to dfine2 it cleans up even more.
(that algoritm sees the de-noised image as base and start over to clean out all the remaining luminance noise. (that’s why the later exported to jpeg in DxO looks cleaner then the straight export using prime.)
@CaptainPO: is this tutorial also in progress of how to handle the sliders manually?
Until that i think i use the automode’s of prime and Dfine2 if i got noisy images.
Edit: Did test luminanceslider up to 70:
And it is equal to my dxo prime - dfine2- dxo export jpg. So it can be done in one export.
One thing is sticking out: Filesize!
The cleaner the image the lower the filesize!
(can anyone explain this?)
As I understand it, the JPEG compression algorithm works most effectively on photographs depicting large areas with even variations of color and tone. Clearly, a noisy image does not possess these characteristics.
I think of the slider values as relative to the underthehood settings that transpire from iso and whatnot. That we get proposed settings at various values just mean that not all sliders have the same baselind value.
It might be easier to understand if all sliders/values were at 100 (%) when the tool is activated…
I just looked at over 100 different images, daylight, low light, inside, outside, high ISO, low ISO. Not one of them changed. They were all 100,75,24,30. Is it possible the changes you were seeing is implemented for Macs but not PC’s? I’m running on Windows 10.
If you look closely the only number what is changing is “deadpixel”
so non of the other numbers of the sliders is changing. except it jumps from 100 to 75 and 30.
I did a timelaps of my garden from 125iso towards dark.(3200)
Same image lower lights every 30 min so increasing Shutter time and eventually iso value.
All the same value as i wrote down: 40 100 75 24 30. (i could win the lottery with this combination )
Most of them are 200 iso’s no noise and a jump to 2500 noisy but sharp. to noisy and blur (window between so it couldend focus any more outside. 3200 iso very noisy. But no change in numbers doh.)
oh correct:blush:, the white flower image go to 60.
aldoh the emanual doesn’t explain what Maze is.
i expect some thing like group of pixels of the same color to threet the same way.
Here is what will be written in the Local help:
“Maze: Removes maze noise caused by crosstalk.”
So in other words, this is an automatic correction provided for each camera body, at least based on the fact that a camera can be prone to cross talk (loss of sharpness in fine details).
From Bao:
I think I should share few words about the problem that we encounter for which we introduce this slider (and also the auto magic button).
As you know, Raw image is in Bayer form with pattern Gr/R/Gr/R/Gr/R… on one line and B/Gb/B/Gb/B/Gb in the next line…
In a homogeneous region, the Gr and Gb must be close (more precisely the |Gr-Gb| is smaller than noise level). However, due to sensor (such as LeicaM9) and due to particular shooting condition (when there is flare for instant), Gr and Gb are very different in such homogeneous region. In the case of LeicaM9 for instant, it is due to the fact that the red channel has impact on green one. That’s why we call this problem as “CrossTalk”, or a more usage word “Maze noise”.
So if we have CrossTalk problem, in homogeneous regions, a democaising could consider this region as edge/texture and output image is weird.
For the new slider, the higher value it is, the more filtering effect is done.
If this slider is too high (such as in your example : 100 - the maximal value), the filtering attains the maximal, hence we can “destroy” the true signal !
If this slider is too small, we could miss filtering the CrossTalk issue.
We propose an automatic value and calibrated for each camera body (LeicaM9 has automatic value higher than other bodies for example).
I show below a typical example of CrossTalk issue
When MazeNoise slider = 0
Not a VIP club at all. Actually like any other software forums, out consists from 2 parts: 1 - a public one and 2 - a Beta one for a group of beta-testers.
It is a general response and request for a tutorial in manual fine tuning Prime Noise tool.
How to balance between denoising and over -smoothing -mutching -plasticing the image.
I was chewing on this function some more and i think most of us, i am for sure, are confused by the fact that the magic wants selected numbers arn’t that moving around by different images in exposure, ISO, and planes like sky’s or such which tendens to see more grain/noise.
Normally i suspect that if automated noise reduction is calibrated to balance remaining sharpness/details and reduce noise to the most desirable point clean sharp image.
That the noise reduction is aiming for:
fine grain as luminance noise to keep natural look.( it seems that 40% is the aim.)
no color clumbs as chrominance noise (as seen its on 100%)
low freq noise : blotching image. more difficult to get rid of explained here.
dead pixels: this is camera depending: these are non responsive pixels in the sensor. so 0% would be ideal.(it is explained here.
Maze: explained: “Maze: Removes maze noise caused by crosstalk.”
So far its understandable and every denoising is causing a negative effect on a other part of the image. So i suspect that Prime Noise is scanning the image and only applies the type of noise reduction on the places in the image it needs and leaves the parts which don’t need it alone. To remain as much detail as possible. (so it isn’t working global but more local, The “under the hood” work.)
searching for how to handle the manual control of prime noise did’t bring up a lot.
So it would be interesting to see a tutorial which shows the total strenght of the Noise reduction-tool.


 )
) , if you look a little bit closer you’ll see that ‘Maze’ also changes the auto value.