PL5 Repair creates "surprise" straight line selection elements while attempting to create a circular mask!

While processing about 140 photos taken while walking to and back from Cissbury Ring I encountered a problem with the repair option whilst trying to “fix” some camera flare. Unfortunately I have been unable to recreate this problem again today (31/10/2021)!?

But the circumstances of the roblem as I remember them are.

  1. I applied an existing pre-set that I had created some time earlier (on PL4) to one photo and decided that it was a good starting point so applied it to all photos. Unfortunately I cannot remember which pre-set I applied!!!
  2. While scrutinising one of the images I realised that there was a large circle present which was clearly from another part of the image, i.e. the pre-set applied must have included a repair. I removed the repair option, resaved the pre-set as a new name and applied it to all the images.
  3. I noticed that a number of images had lens flare spots so I chose one and started to mark the area to be replaced. Rather than change the brush to a much larger size I stayed with the existing size and stared to copy around the edge of the “flare”.
  4. Fairly quickly a selection line appeared going from the cursor right across the screen to the left and sloping up a bit. This happened numerous times and could only really be captured by photographing the situation with a smartphone camera!

I was able to recreate the problem multiple times on the day of the failure but unable to recreate the problem today!!

What device are you using to draw the masks? A tablet/stylus? A mouse? Something else? What I’m wondering: could it be that you accidentally had pressure applied to the upper left area of the drawing surface or a touch screen at the time?

Egregius A very old Logitech cordless mouse that worked perfectly when I attempted to repeat the failure (unsuccessfully) the following day! As I traced around the outer edge of the flare a selection line would suddenly, “randomly” appear. The really weird photo was simply taking the mouse on a “wander” all over the photo with multiple selection lines appearing throughout the process!!!

I was just about to update the post to say that I did have “trouble” with the mouse yesterday until I realised the problem was with the mouse on my beta test machine (which seemed to stop working, so check batteries, re-assemble, turn on aand off a couple of times and that mouse worked O.K.) and the fault occurred with the trial copy of PL5 on my main machine; both machines have their own mouse and keyboard.

Hello!

@BHAYT could you, please, provide us with that image + sidecar + preset applied?

Please, upload them via upload.dxo.com and let us know when ready.
Thank you
Regards,
Svetlana G.

sgospodarenko

The files are uploading as I write (very slowly because of my bad internet connection) but please remember what I wrote in the original post, i.e. I was an “idiot” and attempted to repeat the test the following day and that has created/corrupted/ … the DOP file.

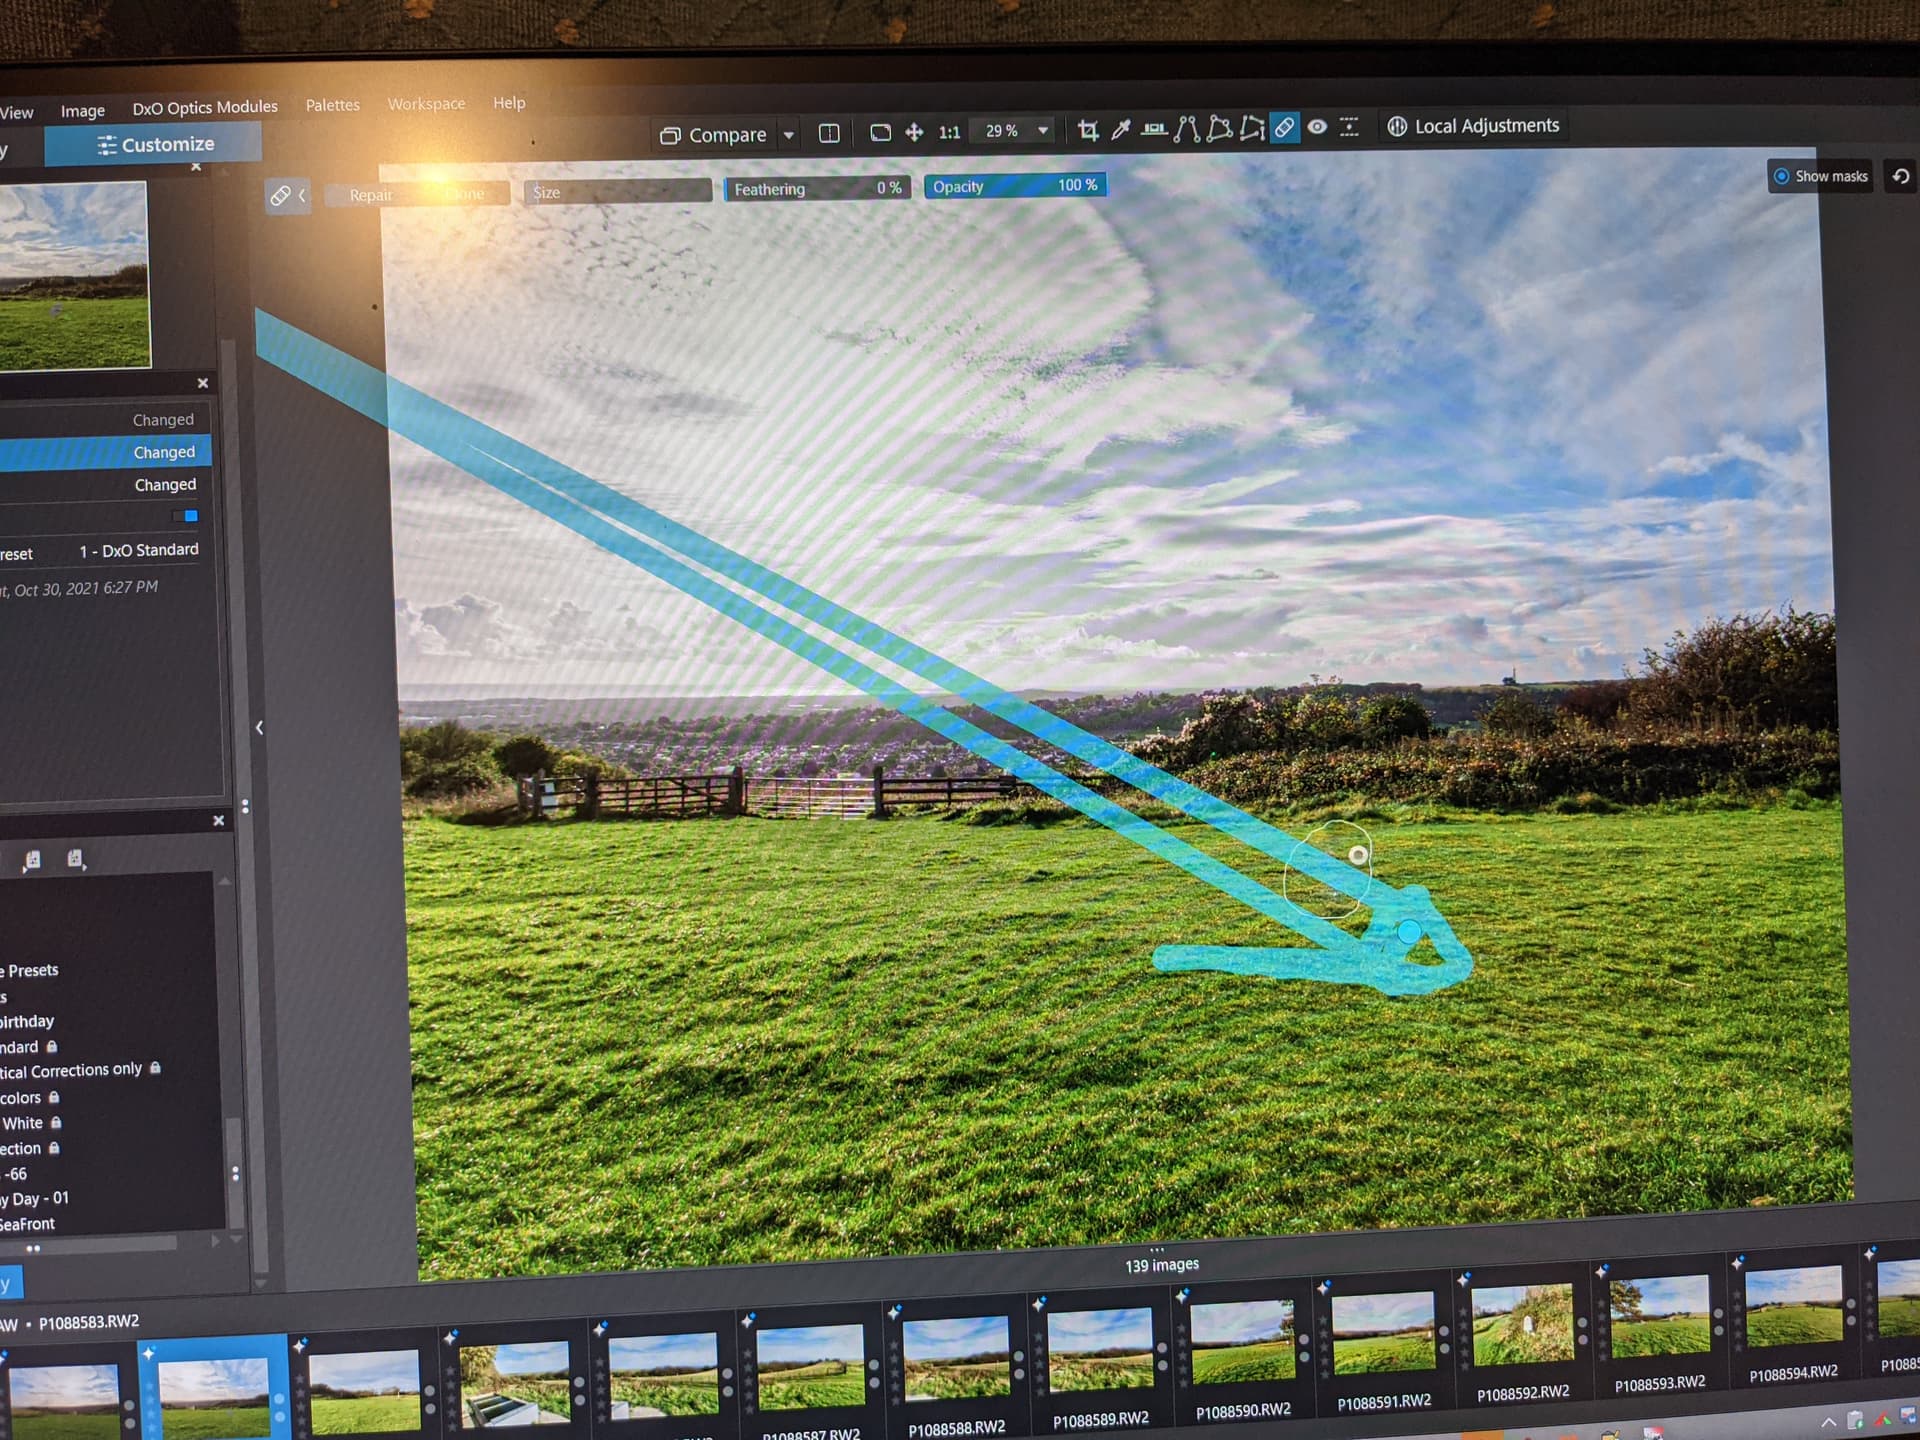
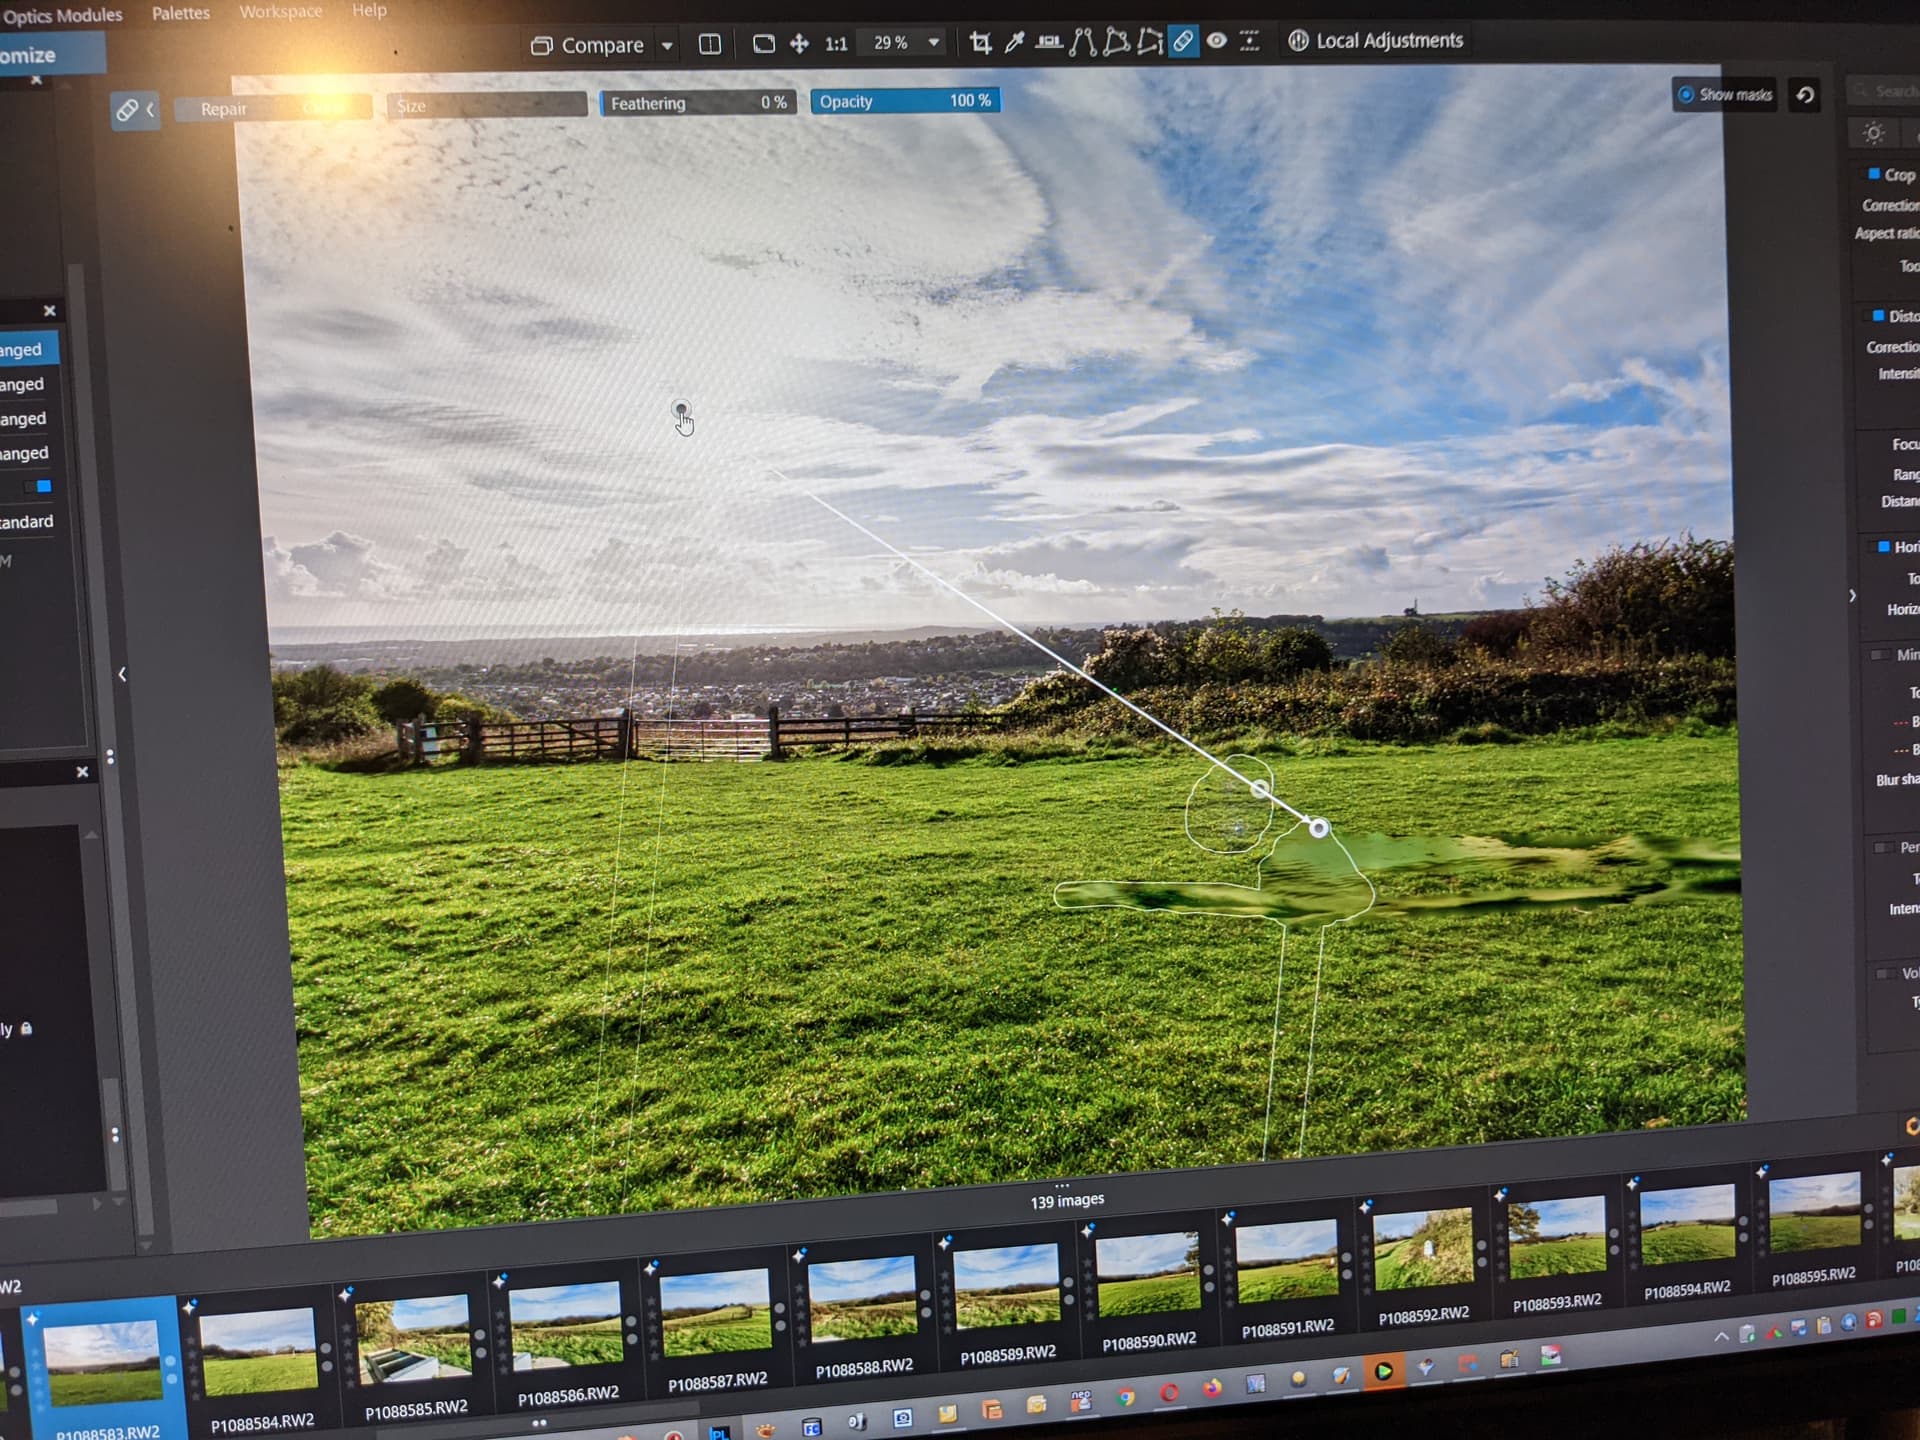
I am sorry that I did not secure the files earlier but I was testing how successfully I could disguise the camera flare rather than whether PL5 worked and simply forgot my IT training, “if it moves snapshot, if it doesn’t move snapshot and it in doubt snapshot”!!!

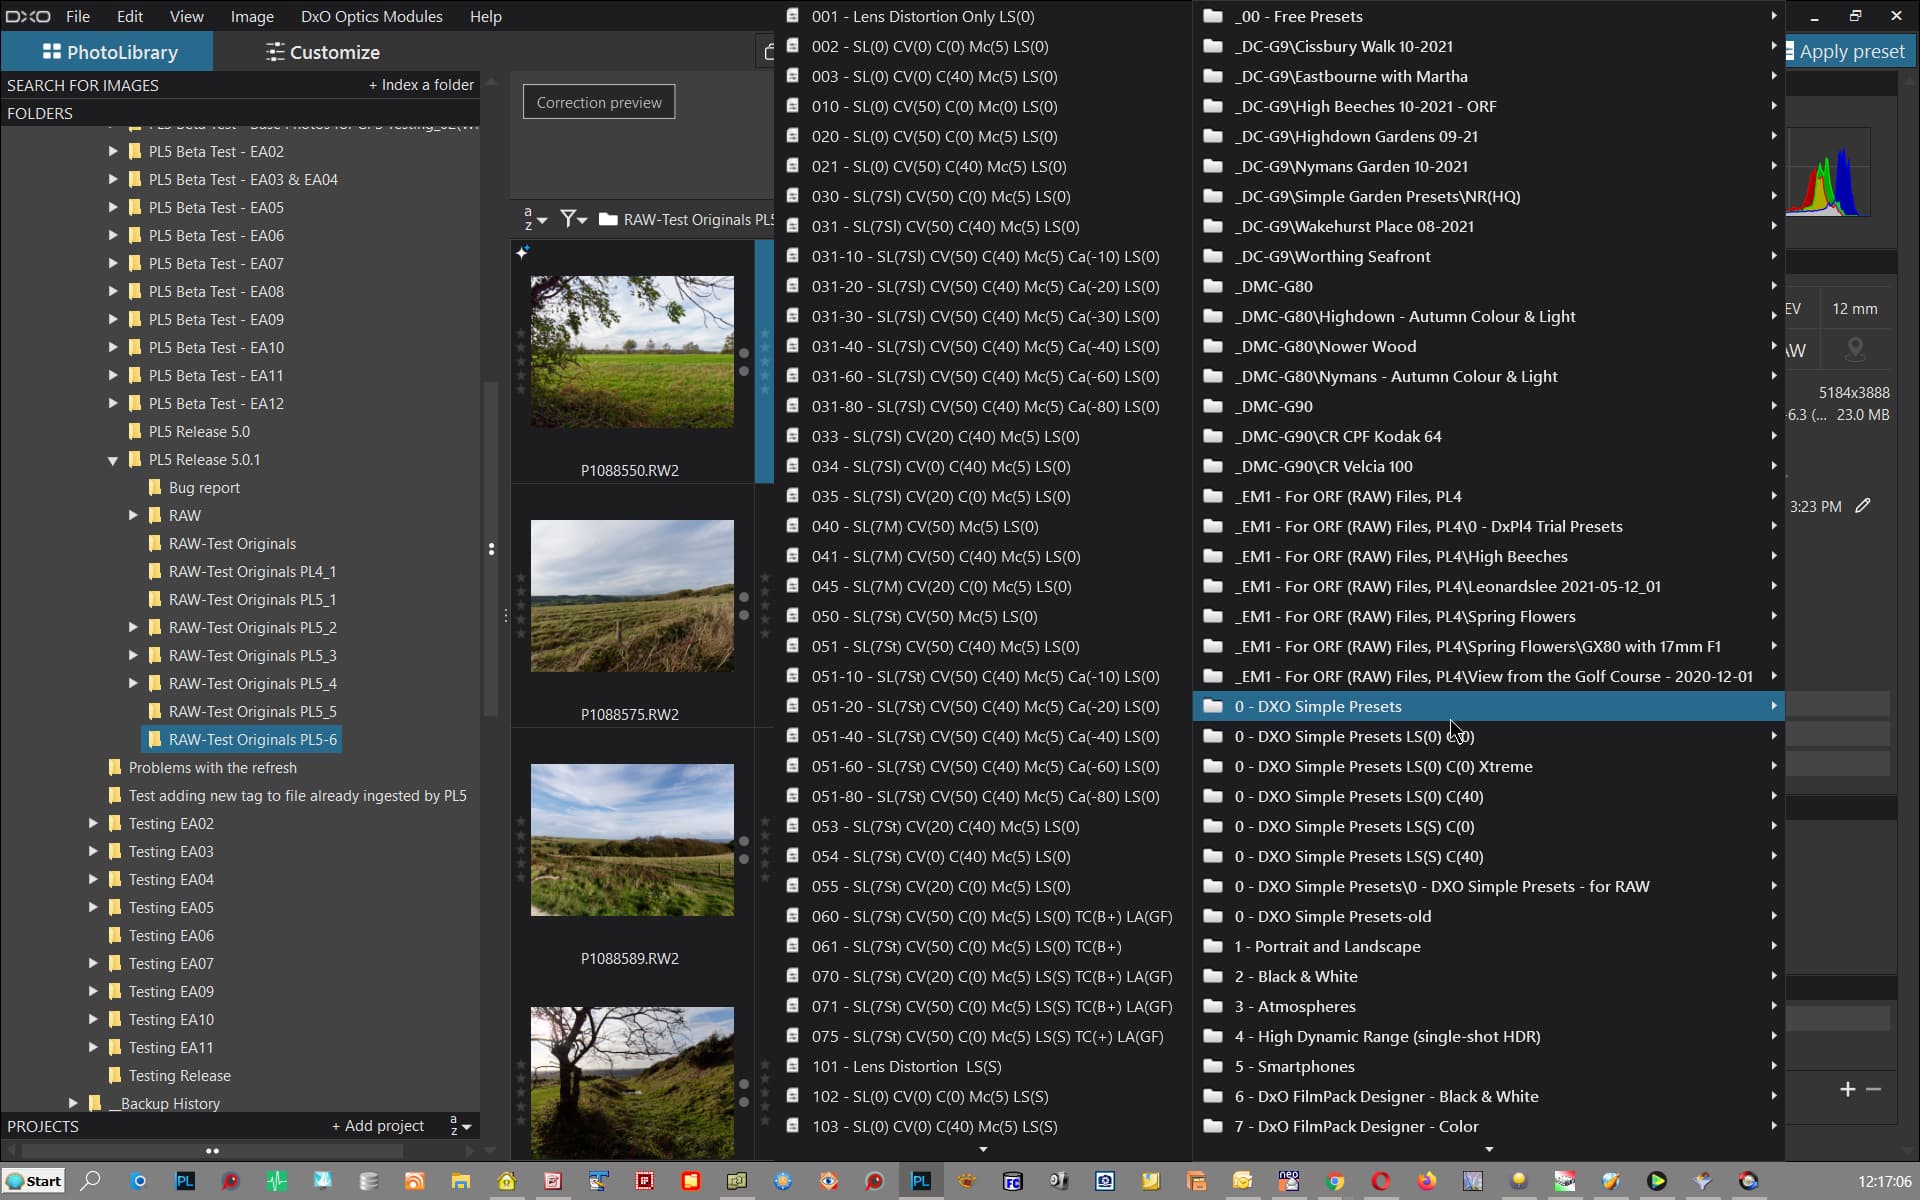
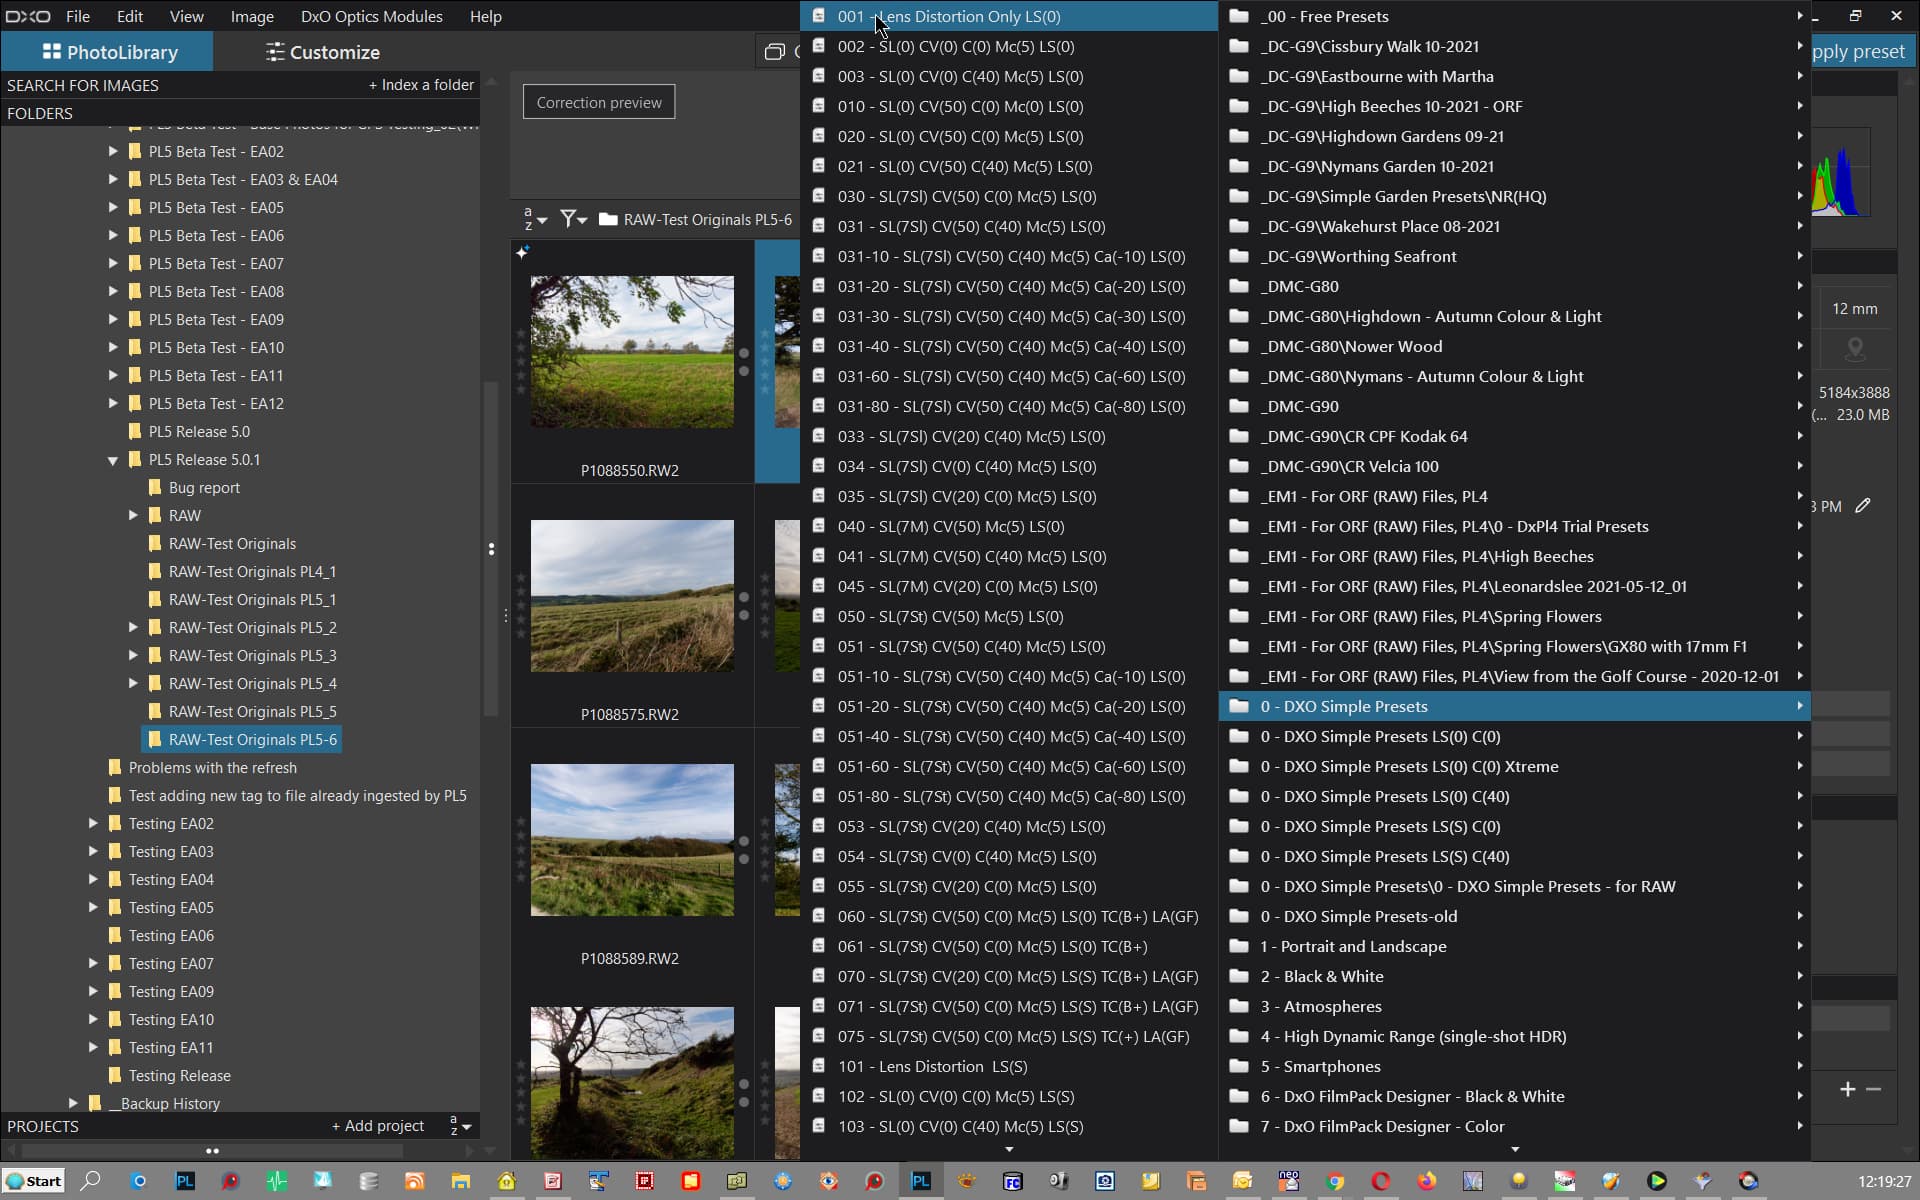
In addition, in the original scenario I applied the modified preset which I created after I had used another preset which appeared to have a repair in it and I cannot recall exactly what pre-set I used!! This was all in the same session and I did not try closing and restarting PL5 then but waited to restart the following day.

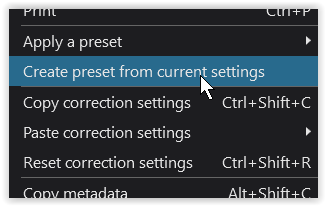
Adding ‘Last preset applied’ and maintaining that in the DOP:-

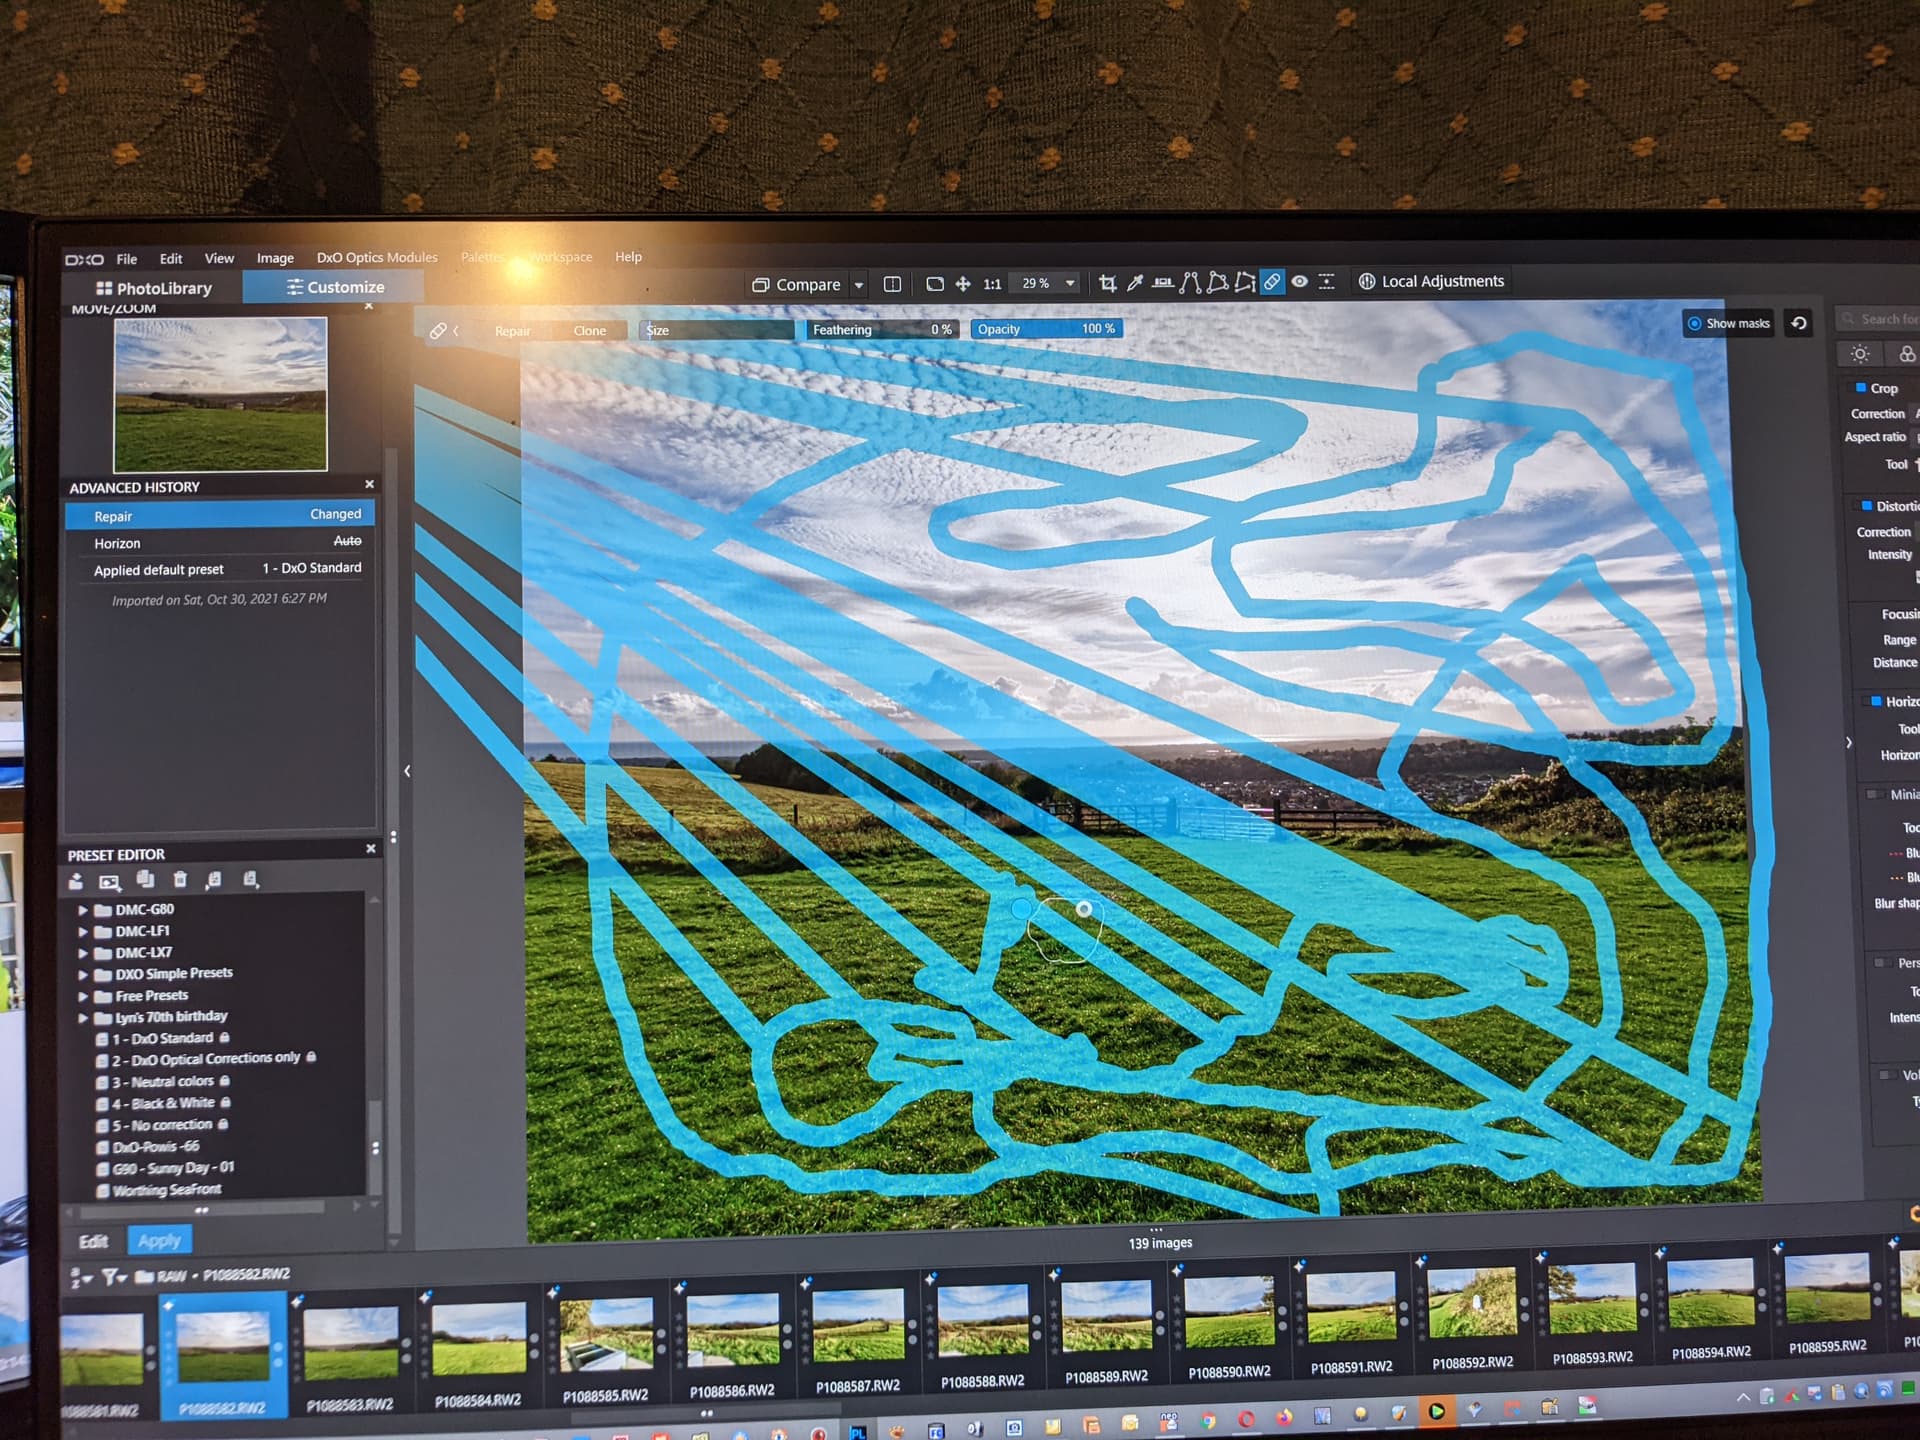
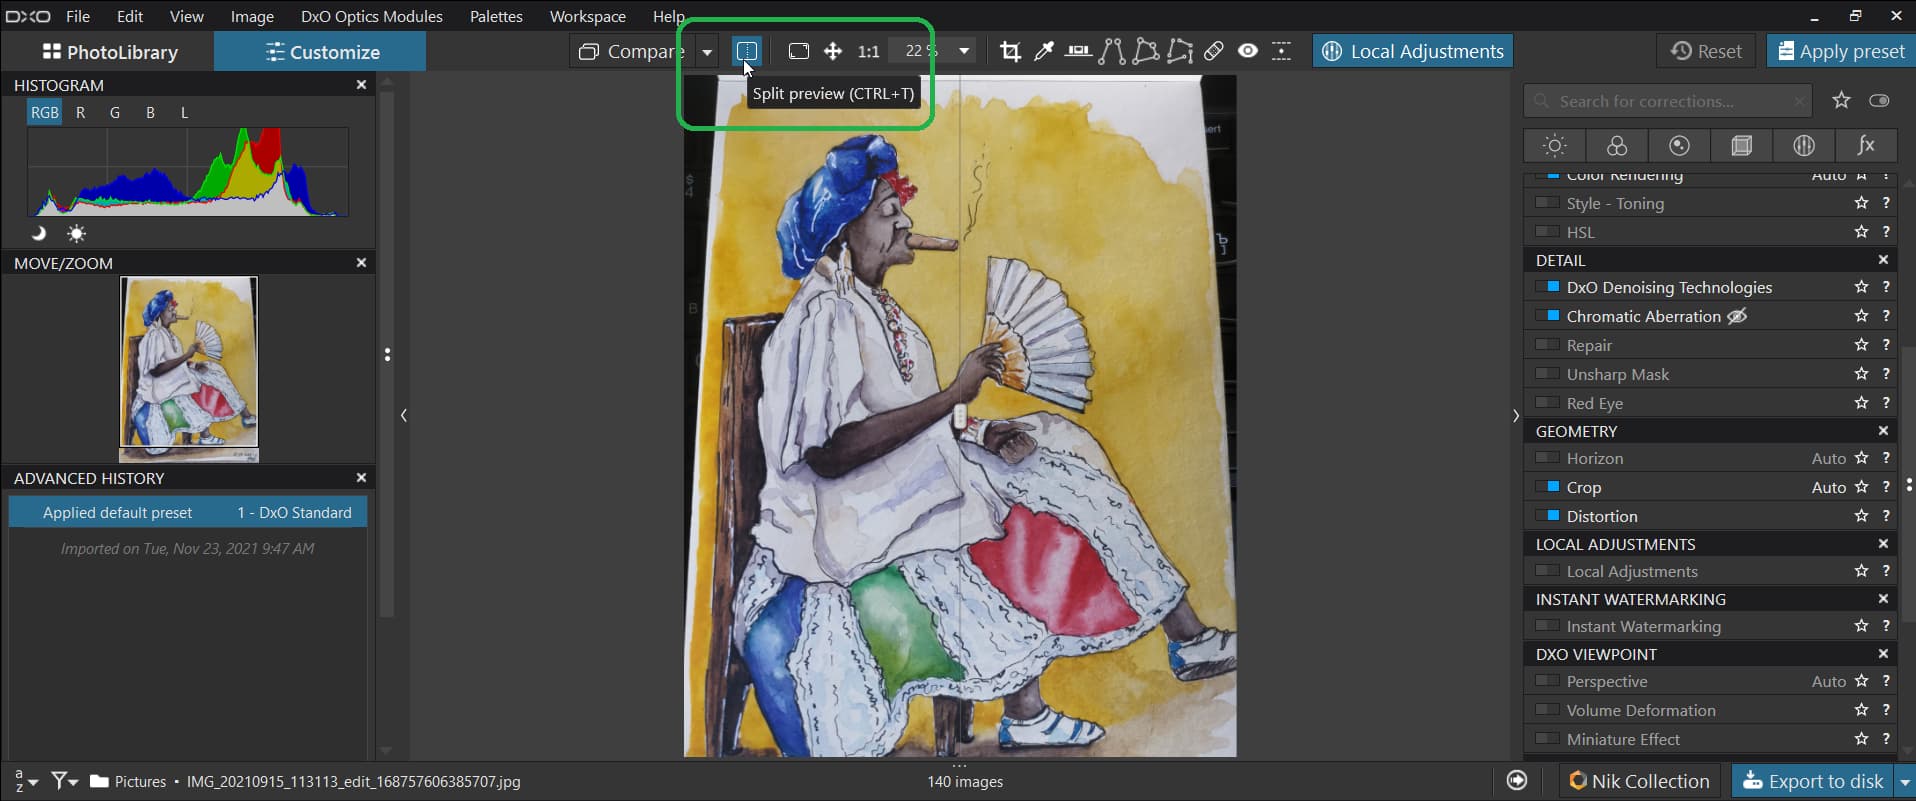
I was about to another topic about the less than useful data displayed in the ‘Advanced History’ and held in the DOP and stored in the database in the ‘StoreSettings’ field in the ‘Items’ structure in the database (albeit I am not sure that this field actually contains an up-to-date copy of the DOP and may simply be an “obsolete” remnant of a bygone design of OpticsPro/PhotoLabs) all of which simply refer to ‘1 - DxO Standard’ as the ‘Applied default preset’ (in my case).

This really conveys little of interest. What would be useful is that the application of any preset is reflected in the DOP which would then always contain the name of the last preset applied (at least) which will then be shown when the photo is re-opened.

I realise that additional changes may then have been applied manually and that these are only reflected in the DOP. In addition another preset or presets may also have been created from the editing of the one photo. In the DOP I am suggesting that the last preset applied or created during the editing of a photo are represented at the very least. But I can see why users may want the complete history preserved.

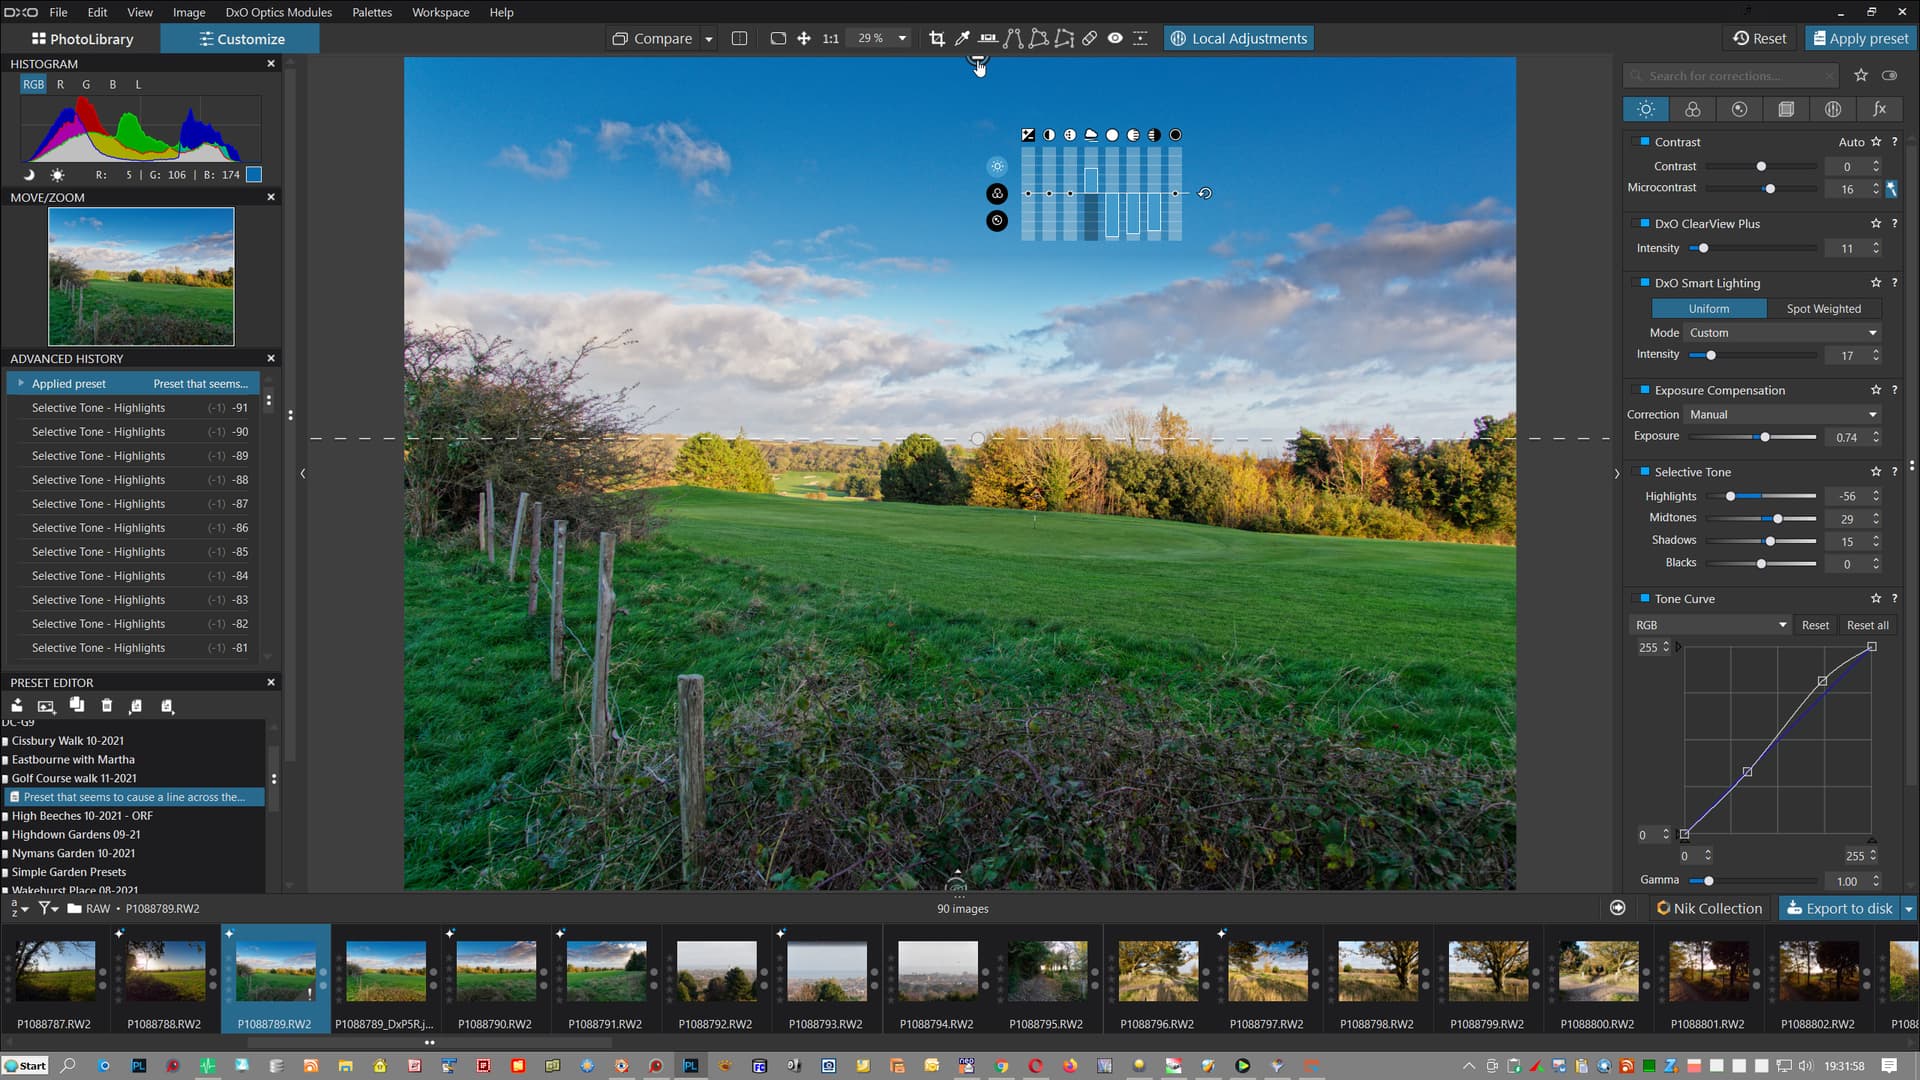
I have just been reading a long post about whether the (Advanced) history should be stored, e.g. in the DOP or xmp sidecar or … Having that would have answered my question about what preset I originally applied ( the Advanced History would have answered that question at the time I created the new preset if I was awake enough to check!).

So I could have checked the Advanced History, but only while the session was still active. If a feature was available I could have secured a duplicate DOP, which would provide alternatives to ‘Virtual Copies’ if the ‘Import Sidecars’ could pick which DOP to import.

But the one feature that should exist is displaying the ‘Last Preset Used’ which imparts some useful information, otherwise there is absolutely no clue as to what preset a photo is actually based upon.

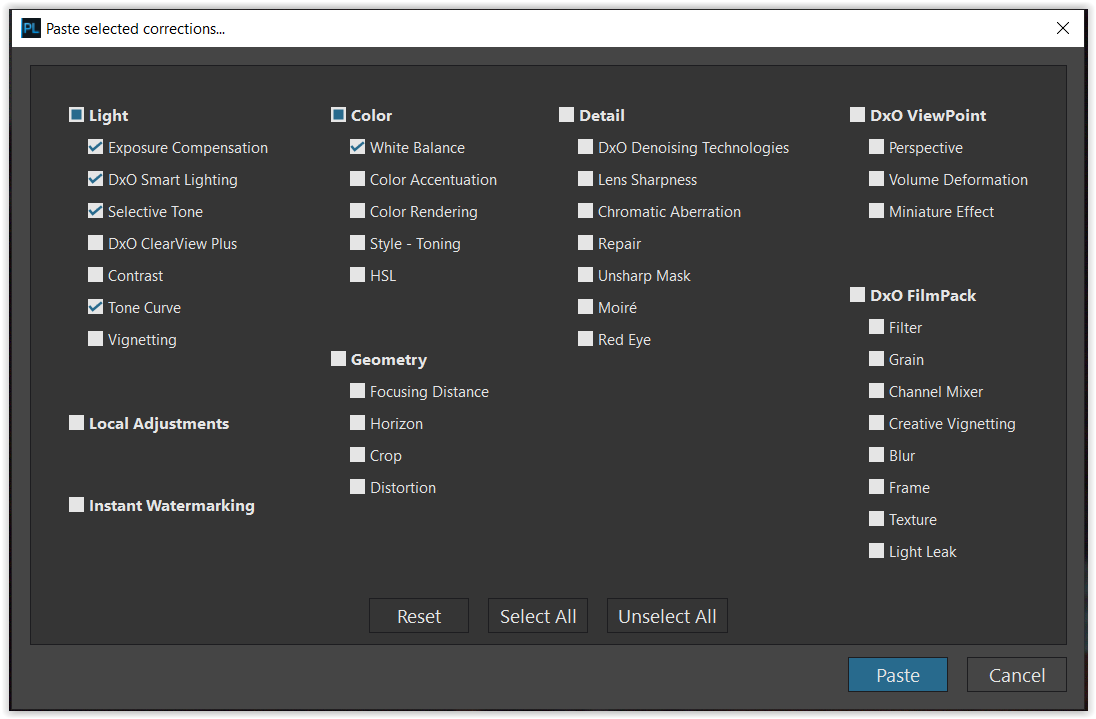
This will still be the case where a photo is adjusted and the ‘Copy correction settings’ used and the ‘corrections’ then ‘pasted’ to one or many other photos. The ‘Pasted correction settings’ do show details of what was copied, but sadly there are no details of what photo was used for the copy and obviously no details of what preset (applied to the original photo) the corrections were based upon!

I realise that this is a complicated issue and the flexibility that I certainly cherish about PL may actually get in the way of implementing a 100% reliable scheme but the current scheme leaves the user “blind” to what they have been doing and how a photo arrived at its current state (once an editing session has finished)!

It is always possible when viewing a photo edited in PL to copy the corrections or create a preset (providing the DOP is still present) and then apply it to another photo but it would be useful to know the heritage of the original photo, if possible. Making a change to PL now will not correct history, old DOPs will still not contain the data but new DOPs could!?

Variants are also possible, i.e. keep the ‘Applied default preset’ and add ‘Last preset used’ and ‘Last Preset created’ (or a list of all presets created which may well be added to in later sessions).

It might also be useful to keep the data about the photo used to create a preset in the preset itself along with the date and time of creation etc., essentially only to complete the circle.

Okay, thank you. Taking your files.

So it looks more like a glitch as I can’t reproduce it either with your preset or sidecar. On your second screenshot I see a very intensive mask which should disappear as soon as you release the mouse, so my question is if the mouse is released there.

Regards,
Svetlana G.

sgospodarenko
I thought that would be the case because I was unable to recreate the problem the following day.

The first and second photo had to be taken with my finger on the mouse because otherwise the mask becomes an outline as shown in the third photo. That mask outline in the third photo appeared lower when I let go of the mouse button and I dragged it upwards so that it was more visible. Capturing the selection photos could only be done with a camera because as soon as the mouse button was released the highly visible mask selection turns into a mask outline.

The second photo (the “crazy” photo) was actually a different photo (it is actually the prior picture to P1088583.RW2, i,e, P1088582.RW2) so once the glitch was in action it occurred on all the photos I tried it on. I cannot remember what happened when I took my finger off the button, it should have turned into a mask but … sorry; I was just “dabbling” when I was supposed to be watching TV with my wife!

I thought that further investigation could wait till another day but the “glitch” occurred because of something that had happened at some point during the session and cleared once the session ended.

1 Like

sgospodarenko
Thank your for your feedback, in my “diatribe” above with respect to the rather “pointless” (in my opinion) display of the ‘Applied default preset’ rather than a more useful (in.my…) ‘Last preset applied’ I stated “I am not sure that this field actually contains an up-to-date copy of the DOP and may simply be an “obsolete” remnant of a bygone design of OpticsPro/PhotoLabs)” when referring to a field in the database.

The only way to verify that fact would have been to compare the contents of a number of fields and although I have software to access the database I wasn’t prepared to go to those lengths.

However, in order to try to reproduce the “glitch” I moved all the DOP files to a subfolder and went to start again but was struck by the fact that the photo appeared to be in an edited state, and appeared to be that way when I applied a preset, closed PL5, deleted the new DOP, opened PL5 etc. etc.

Repeating the test with PL4 (4.3.3) also shows the extreme “fix” I applied to one photo on the restart of PL4 in spite of me repeating the close, delete DOP etc. routine. Renaming the PL4 database and re-opening the files showed no discernible edits, i.e. they were “lost” along with the database!!

So please confirm to me, others may already have been fully aware of this fact (I was certainly aware of the field in the database) that in the absence of a DOP sidecar file PL uses the last edit stored in the database in lieu of the edit stored in the (absent) DOP.

I presume(?) that DOP edits takes precedence over the edits in the database? Is that process controlled by date/timestamps or simply by the existence of the DOP?

Hello @BHAYT ,

The feedback about changing the behavior of History will be analyzed by @StevenL .

As for this one:

  • Yes, I confirm it. As the user can enable/disable the sidecar creation all the corrections applied to the images are stored in DB as well. And yes, it’s controlled by date/timestamps.

Regards,
Svetlana G.

Many thanks sgospodarenko for your response and update. The “of course” comes to mind with respect to the database but it was only recently that I read in the forum that you could just use the database and forego DOP sidecar files.

My previous use of DxO products (from OpticsPro 8 onwards) was very much as one of a number of editors I would launch directly from FastStone Image Viewer or FastRawViewer with no use of the PL PhotoLibrary features at all.

The way I used it meant that I never bothered to investigate the wider features simply concentrating on the editing features that worked for me (and/or that I could make work for me!). That started to change at the beginning of 2021 but I still have some way to go, sorry for my ignorance and thank you for your forbearance.

1 Like

@sgospodarenko Can I please ask you to clarify one issue with respect to DOP versus database timestamps that control which set of data is used, i.e. use the database edits or the DOP edits.

My question is whether the timestamp that is compared is one of the DOP file timestamps (if so it would be useful to know which one) or is it the one of the timestamp fields actually held in the DOP as shown below (if so it would be useful to know which one) or is it one that I have not even considered (if so it would …)!?

Sidecar = {
Date = “2021-11-12T09:45:53.8315848Z”, <---------------------This one perhaps?
Software = “DxO PhotoLab 5.0.1”,
Source = {
CafId = “C61004a”,
Items = {
{
Albums = “”,
CreationDate = “2021-11-12T08:57:18.3327101Z”,
IPTC = {
}
,
Keywords = {
}
,
ModificationDate = “2021-11-12T09:45:53.8295854Z”,
Name = “P1088587.RW2”,
OutputItems = {
}
.
.
.
verrides = {
NoiseRemovalMethod = “DeepRaw2RGB”,
}
,
Version = “16.0”,
}
,
ShotDate = “2021-10-30T15:54:00.6040000Z”,
ShouldProcess = 2,
Uuid = “48D0254B-7E6C-4D86-AB8F-0D3FA8530E88”,
}
,
}
,
Uuid = “DB3540AA-AE6C-44BF-8422-876B2CED2941”,
}
,
Version = “16.0”,
}

Good morning @BHAYT ,

We compare the ModificationDate between each VC in the sidecar vs database.

Regards,
Svetlana G.

Is there any way of improving the navigation of presets:-

@sgospodarenko thank you for the update.

While playing with DOPs I encountered a problem when I wanted to apply a basic preset to a photo. In order to do the test I had moved PL5 to the smaller monitor to the left (1920 x 1200 vs 2560x1440) and when I went to apply the preset I could not make the selection because the menu was on the left (no space on the screen to put the second menu to the right!) and moving the cursor left immediately made the preset menu vanish.

On the main monitor this problem does not exist and on the smaller monitor the only way of achieving the selection is to take the mouse across the monitor on the right until it wraps round to the menu!! This may well be a feature of WIN10 and the DisplayFusion software I run but it is a little odd. For future tests PL5 will be on the larger monitor and the other software on the smaller monitor!!

1 Like

Strange horizontal Line when using ‘Highlight’ adjustment in ‘Selective Tone’ & in a Linear Gradient:-

@sgospodarenko I am not sure where this post belongs or whether this is a bug or an inevitable consequence of interaction between editing settings. The photo was taken yesterday in varying light conditions and I applied a previous preset that helped bring out the sky before making further modifications.

The current settings are a “little” OTT (over the top) but caused a “strange” line to appear across the photo. This line moves down the photo if the ‘Selective Tone’/‘Highlights’ setting is reduced further, i.e. from -56 down to -93 and it moves up the photo if the correction is decreased.

The linear gradient also contains some “extreme” settings but should this line exist!? It is also present in the exported jpg.

The exported jpg was made from another variant which brightened the foreground.

The final settings cause similar lines on other images with a “big” sky.

P1088789.RW2 (23.1 MB)
P1088789.RW2.dop (12.0 KB)

P1088789.RW2.dop (11.2 KB)

Hi Bryan,
the “strange line” you observed is caused by your settings. And you not only see your line moving up or down with pulling the Selective Tone’s Highlight slider, but also with the one in the Local Adjustment / Gradient.

Your adjustments are indeed over the top – and also contradicting.

As your exposure was fine, there was no need to bring it up that far. With the Tone Curve you enhanced the contrast, lifted the Selective Tone’s Midtones, but reduced the Highlights heavily. Then in the Local Adjustment / Gradient you pulled the Highlights almost down and exagerated the contrast with ClearView. The result is far from a smooth gradient.

Suppose you are on PL5, I tried something.


VC1 → P1088789.RW2.dop (112,1 KB)

Apart from changes to the vignetting and removing a few sensor spots

  • I adjusted the exposure with the Smart Lighting / Spot Weighted Tool,
  • brought the lower part up with a Gradient (mask corrected with manual eraser),
  • adjusted the thornes in the foreground with a Control Line (mask corrected with negative CL),
  • manipulated the sky with a Control Line.

While I tried to keep it more believeable, you will adjust to your taste
(don’t judge from the Forum’s rendering).

1 Like

Good morning, Bryan!

  • You see this ‘split’ line because this option is enabled:

You can get rid of the line if you switch it off.

Regards,
Svetlana G.

@sgospodarenko The split screen option that you show, with the sliding bar, is currently only available in ‘Local Adjustments’ and ‘Full screen preview’ but not in the normal view (on my Win10 version of PL5.0.1) and is not then transferred to an export. The line(s) I encountered are horizontal and rather “arbitrary” in position.

I hinted that they could be “artefacts” generated by PL5 as a result of the “slightly” OTT settings I had been playing with and while this may be the case I would still like PL5 engineers to investigate whether they could be avoided if the algorithms were changed.

In the meantime @Wolfgang has kindly pointed out how badly edited the photo was and then undertaken a lot of carefully balanced edits to improve on the original photo while avoiding going over the top as I had.

Wolfgang, you are right that the rendered image on the PL5 forum was not showing as well as it should and it appeared much better when I set up a directory with the original RAW and your DOP which contained my original edits and your edits as a Virtual Copy. I have uploaded a jpg from your setting (reduced to 1920 etc.) to see what happens!

With respect to you comments and settings I would like to ask a few questions now before studying the changes further later. The photo was actually taken at +0.66EV because someone didn’t check the settings, it then changed a few photos further on (when I realised)!!

  1. You commented on some sensor spots! How did you detect these? The UV lens filter has some dust inside and out and should have been cleaned before our walk. However, this lens became heavily contaminated with dust and has only just been cleaned by Olympus so I need to check that out and check the sensor (It is a second hand camera!?)

  2. You state “The result is far from a smooth gradient.” How did you determine that? Certainly the high peaks for red, blue and green in my OTT edit are just that (OTT).

  3. You made a change to the ‘Vignetting’/‘Preservation’ setting from the ‘Auto’ of 50 to 90, why?

Many thanks for your valuable feedback it is appreciated but I want to get closer to your result with (just) a fraction more OTT but without the need for as many ‘Local Adjustments’ so that I can create a preset that will be useful for all similar photos (snapshots) taken during my walk. I need to be careful with the OTT aspect because the older I get the more my perception of contrast will change (decline).

I originally went to PhotoLab (or its predecessor actually) because I could “improve” my photos quickly, ‘Local Adjustments’ provide a lot of adjustment features particularly for those “special” photos but I am looking for a “quick(ish)” fix mainly because I am rarely able to pick the “best” time to take a photo so suffer with respect to the light available, the direction of the light, location of the sun etc…

My rendering of your version, reduced to 1920 in FastStone viewer.

@Wolfgang Why?

Sorry my response reminded me of our 3 year old Granddaughter and her Why… Why … But if you don’t ask you don’t get told so Why!?

1 Like

Also not being young any more, I suggest to use the best monitor that fits your needs (you can afford).
How many of you uses a big or dualscreen mode and hoe many is working on tablet/laptop? - #82 by Wolfgang – It’s Your interface to the digital picture world.

Concerning presets – there are some tips in this Forum about ‘full’ and ‘partial’ presets. As I never made one, you’d better start a search → Search results for 'presets' - DxO Forums.
– Maybe simply choose a ‘representative’ pic for your series, apply some basic adjustments and copy them to the other ones.


and / or
Screen Shot 11-23-21 at 02.36 PM

Ok, enough of the preface – PL’s histogram shows your exposure was fine (well, some leeway left to the right – could have had more exposure compensation in your cam). But been an afternoon shot, I tried to keep the ‘mild’ light in post.

  • ‘sensor spots’
    When I pulled the exposure to see what’s in the pic, I could spot something – and repaired it.
    Now, as I copied ‘my version’, deleted those repairs and scrutinized them carefully / compared instantly, I could identify tiny bits of clouds in the otherwise blue gradient.
    → I’d better be careful with late night editing! :slight_smile:
    Completely forgot about your UV-filter – no, at F5 you shouldn’t see anything like spots (maybe some general diffusion like from a dusty front lens and not using a lens hood).

  • ‘far from a smooth gradient’
    Well, how to explain? … [ May I ask you to also check → Understanding Selective Tone control - #61 by WitheringtonM ] … The Selective Tone sliders do overlap (not sure, but I think also those in the Local Adjustment tools). Anyway, this functionality can lead to confusion.
    Interestingly this “strange line” appeared first roughly in the middle of your gradient – a result of your settings. It looked like a tone value separation, similar to when reducing tonal values and turning a linear gradient into steps with slightly pronounced ‘edges’.


    Luminosity 255-0 in steps.tif (1,1 MB)

  • ‘Vignetting/Preservation’
    Checking the blue sky at some point, the corners appeared brighter. Instead of adding an additional vignette, I checked the auto-vignetting-setting and changed that to taste.
    – Make a VC, set it back to Auto and see, what you prefer.

@Wolfgang thank you for your response I currently use a old Dell U2515H ( 25" 2560 x 1440) as the main monitor and an old HP Z24i (24" 1920 x 1200) as a second monitor

Creating presets has never worried me and at the time of OpticsPro 11 I created a large number of presets (now a total of 560 including DxO presets) some with titles like

051-10 - SL(7St) CV(50) C(40) Mc(5) Ca(-10) LS(0).preset.
051-20 - SL(7St) CV(50) C(40) Mc(5) Ca(-20) LS(0).preset
051-40 - SL(7St) CV(50) C(40) Mc(5) Ca(-40) LS(0).preset
051-60 - SL(7St) CV(50) C(40) Mc(5) Ca(-60) LS(0).preset
051-80 - SL(7St) CV(50) C(40) Mc(5) Ca(-80) LS(0).preset
053 - SL(7St) CV(20) C(40) Mc(5) LS(0).preset
054 - SL(7St) CV(0) C(40) Mc(5) LS(0).preset
055 - SL(7St) CV(20) C(0) Mc(5) LS(0).preset
050 - SL(7St) CV(50) Mc(5) LS(0).preset
051 - SL(7St) CV(50) C(40) Mc(5) LS(0).preset

I will leave you to figure out what the settings are but it is not very difficult. However, with the coming of PhotoLab new features started to arrive and it became harder to use these cryptic mnemonic acronyms, plus PhotoLab tends not to like handling long preset names.

So I am not unhappy creating presets and the partial application gives the opportunity to apply part of a preset. This may help with creating a “library” of ‘Tone Curves’. The strategy you suggest is the one I typically use i.e. starting with a preset from a similar type of shoot.

The reason for my post was that after starting out that way I pushed the adjustments a little too far (just a tad!!) and encountered a problem!

I am glad that the sensor spots were not what they might have been.

With respect to the gradient that is something I need to understand and experiment with further but I am still concerned that while avoiding the problem I encountered is an acceptable solution I am still concerned that there actually is an underlying problem that could be “fixed”?

I understand the vignette issue and will keep an eye on it in the future.

One issue that I have with PL is that the histogram does not revert when undertaking a comparison between the original and the new render. It does change when comparing between VCs but with other packages that I have used a ‘before’ and ‘after’ compare includes the histogram.

I will use your settings to provide a reference in this case and see what I can do that is a little less extreme! Thank you for the time spent developing my photo, sadly it was not a particularly exciting photo, I have much better (as in more interesting) photos from a longer walk up the same path which ends at Cissbury ring, the site of a Neolithic flint mine which later became an Iron Age hillfort.

Just out of interest I have included 3 rendered photos of a scene taken from Cissbury ring. The first uses a variant of your settings, the second a slightly too strong variant of mine (the sky is too blue) and the third a lightly modified JPG image from my Pixel 4a (mods were horizon and CV(20)). Unfortunately PL5 does not handle Pixel RAW images at all!!