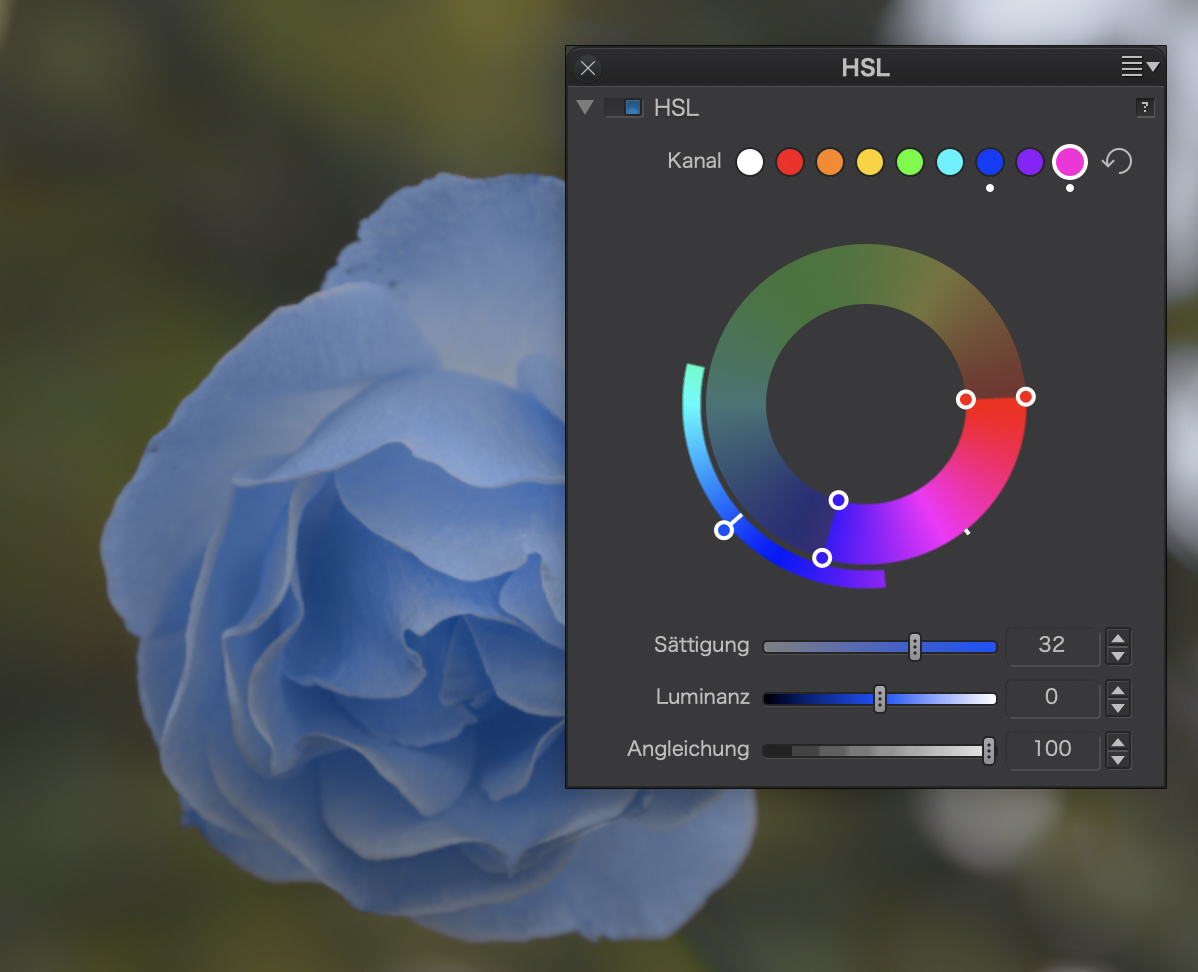
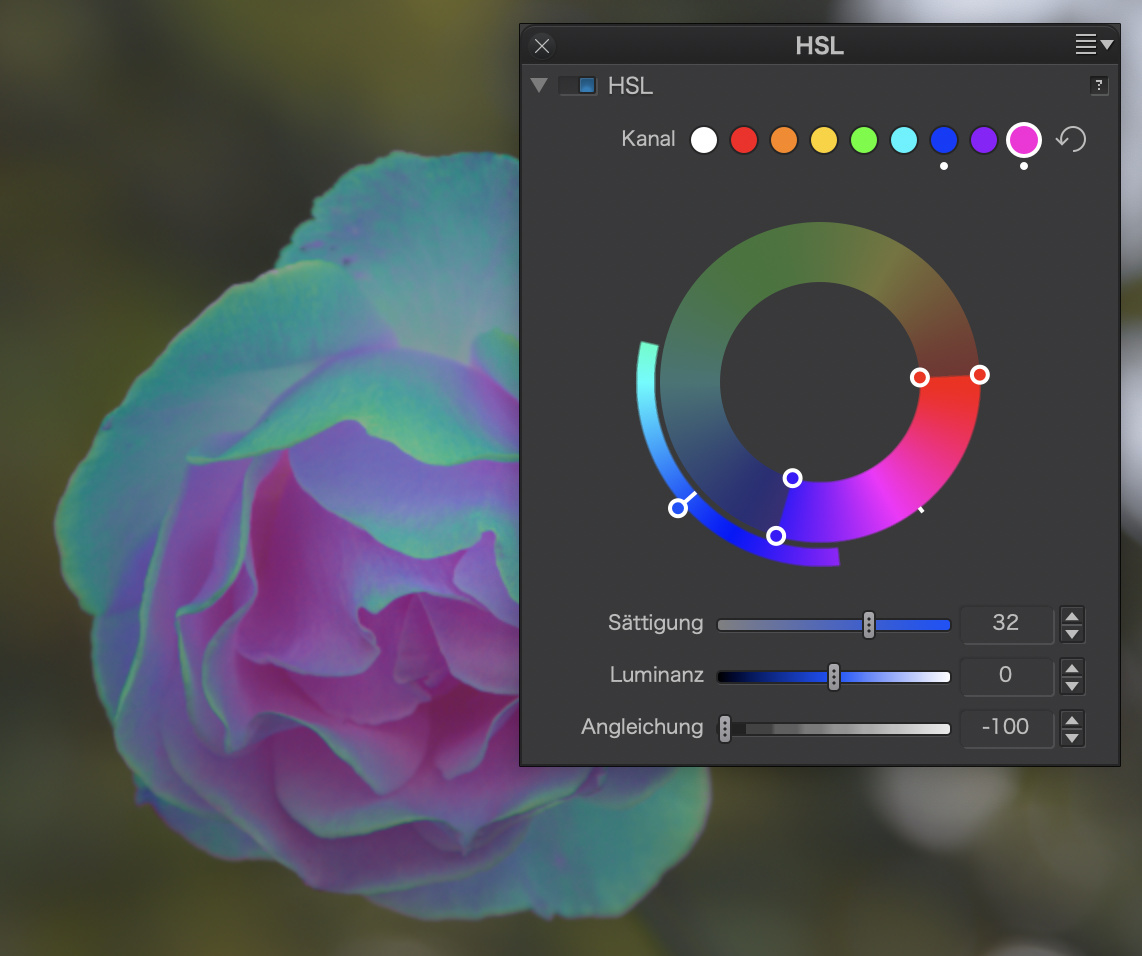
The new HSL looks incredibly useful, although a color picker would have been nice. I like the color range adjustability. But I have questions…
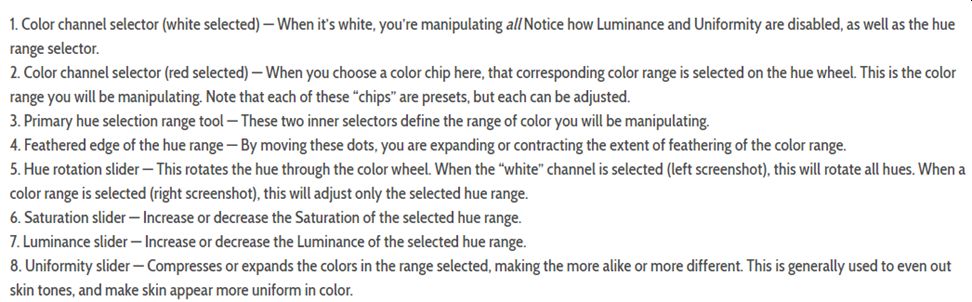
For each selectable color, the inner ring points and outer ring points. What does adjusting them do? It looks as though the inner ring points adjust color range, and the outer ones are maybe feathering?
What does ‘uniformity’ do?
Is there any way to add color ranges?
Thanks!
This gives you a demo on how the tool works (near the end of the video)
I’d already watched it. Nothing about uniformity. Do you know what that does? Also a bit sketchy on inner and outer points.
Have you read the manual?
Here is Pascal’s updated tutorial which now included PL3. Search for PL3 to find all updates specific to this version. You can also search specifically for Uniformity and there is an explanation of its purpose.
Mark
2 Likes
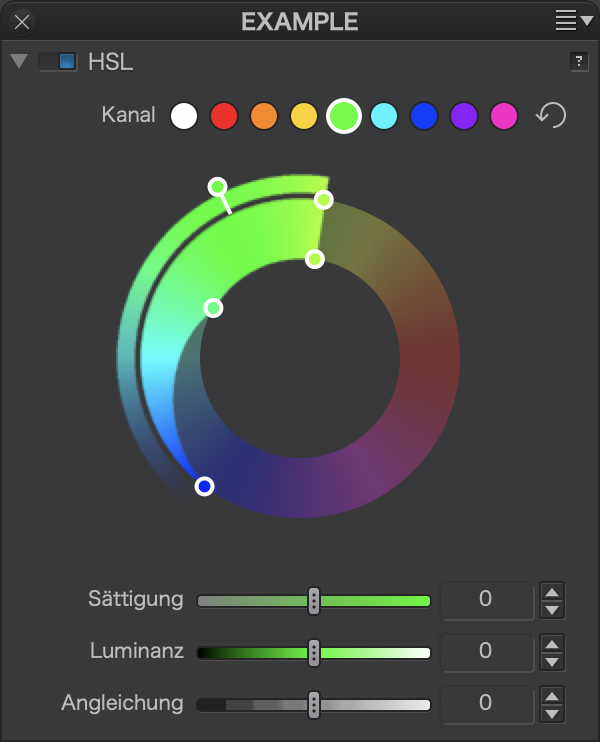
Outer points delimit the colour range that will be at least partly influenced.
Inner points delimit the colour range that will be fully influenced.
Uniformity: High values will modify the respective area in a fairly uniform way while low values allow for some variation.
Notes: the area between inner and outer points is an area of transition from 100% influence to 0% influence. It can be understood as a feather or roll-off from the inner range.
- Example “soft” filter - includes colours below and beyond the inner range to a variable degree. If inner range is set to green, some yellows and reds can be included as well as cyans and blues (depending on how far out you pull the outer points)
- Example: “hard” filter - excludes colours below and beyond the inner range. Just green!
Illustration
the magenta line depicts a setup with a steep edge (example 2) between green and yellow and a gentle roll-off (example 1) between green and blue. In the HSL tool. this looks like that:
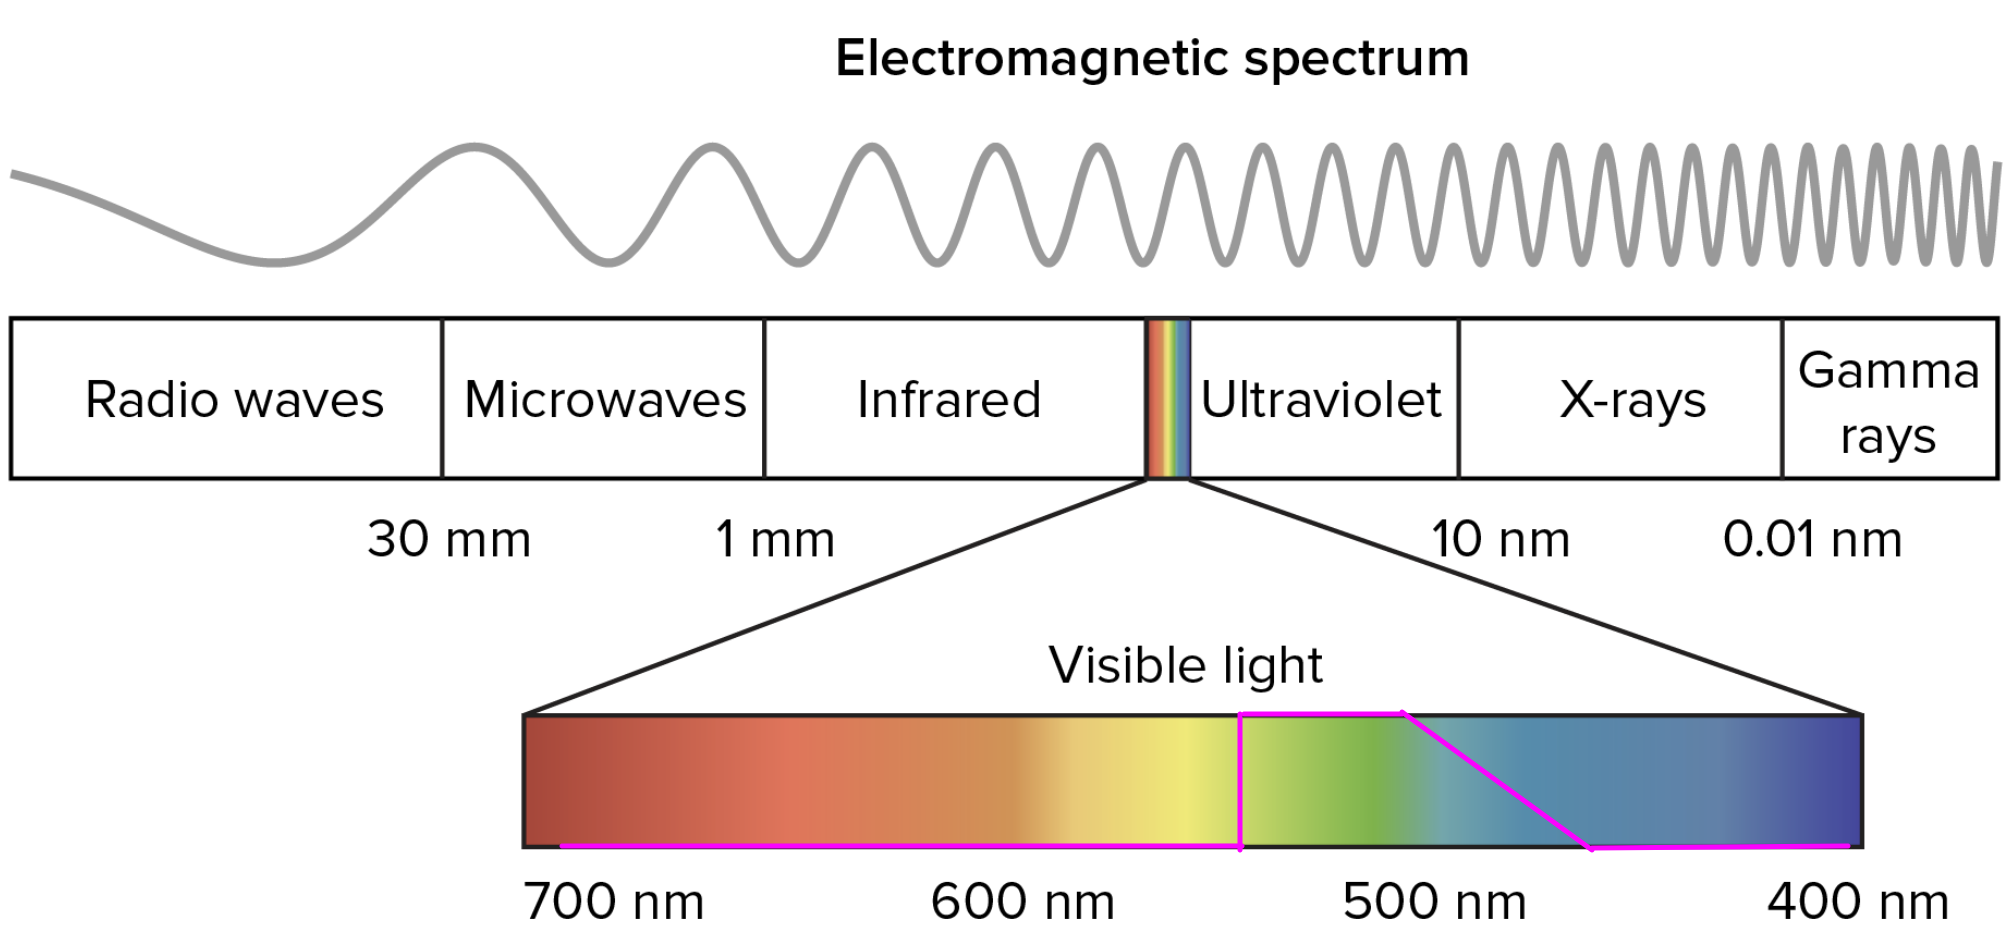
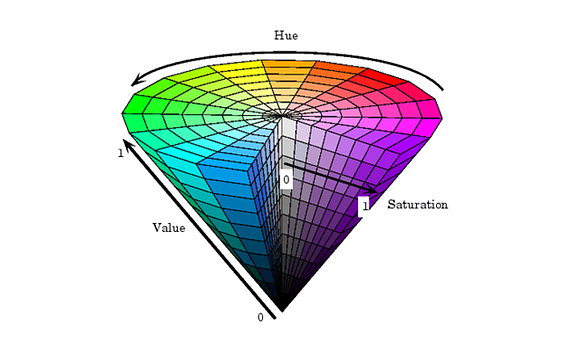
Note: The colour wheel wraps the colours of the rainbow around a circle. If we did this in real, we’d have no radio waves, WLAN or X-ray and we’d not be able to cook meat over a fire…
About uniformity: Check these:
2 Likes
Uniformity: sort of feathering, determins colors of the same or next to the hue point. (shade variations) (use ?)
inner point makes the wide of the area of hue you want to change.
outerpoints does the feathering also blending overlay so to speak.
see video
edit:
Some extra info:
The new power of this tool have 9 slots 8 of them have in the start/default setting a round around the colorwheel:
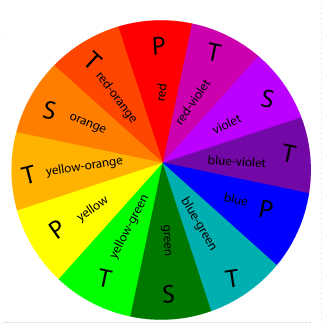
slot 1: white; is behaving as a WB.(covers the hole hue-range) and the 9 channels can all act as white channel but the first is preset/fixed as such.
slot 2 RED, slot 3 Orange, Slot 4 Yellow slot 5 (green but not second step morebright green) slot 6 bluegreenisch and slot 7 blue, slot 8 and 9 violet and red violet.
Perfectly round for startingpoints.
Each slot i can modify in colorposition(sliding along Hue) using the colorwheel part moving the hole tool around.
Using the sliders to do the saturation and brightnes. (Uniformity is a sort of feathering, picking up color who arn’t the same but close => shades of the same color.)
When i picked the right colorrange on the huescale i can replace that color by turning the outer ring to that color i want to fill that place.
And to fine tune this behaviour i can widen or close the basic uniformity (feathering)
And do the fine tuning in the sliders if needed.
And the beauty of it all is a can do this 8 times!
So you can pick any area of Hue(color) in this:
And change that color in something else.( change Value(brightnes) or Saturation) or replace by an other color in Hue and change that in Value and Saturation.
(don’t forget the possibility to desaturate a object of a color which is more or less homogene but not typical one of the basics.)
It’s a powerfull tool but not a fixer of all color problems: in combination with local adjustment very interesting.
like a filter color as you used to use in the film day’s in front of your lens or flashgun. (white dot)
Or replace a color(group) /part of hue with an other part of the hue. And brighten/darken or saturate/desaturate.
2 Likes
Nice explanation! Yes, I’m aware of how the radiation spectrum works. Yet another note: there is no ‘purple’ in the rainbow (try it with sunlight and a prism). It’s an artifact of our retinas (absence of green) - so not only is there radiation spectra not represented, but there is a representation of non-spectra.
But it seems to work for figuring, say, complementary colors.
Thanks!
It does indeed look to be quite powerful. Not expecting it to do everything. My primary use is to dim sky illumination from towns over the horizon in astro long exposures (lucky for me they mostly use sodium). I usually do this in Photoshop. Either an adjustment layer and a graduated mask or duplicate layers, make HSV changes on one, then graduated mask - both ways are kind of a PITA.
Hi Bob,
Along with excellent info provided above - this DxO article might be useful;
Your guesses appear to be spot on !
John M
4 Likes
Hy john,
Did you spot the new tutorial from dxo?
DxO PhotoLab 3:The Colorfull Innovation with PhotoJoseph
It is a nice buildup from theory to practical use.
(mostly i find his video’s a bit chaotic which enhances my own chaotic mind in to a wild spin of what ifs and if then’s. So i loose primairy line and proned to skip parts of his video😂)
But this one is great in it’s flow and information speed.
(I need to go out for new images to proces but geesh the moeson is started out here. There is less air between the drops then i like. So i settle for youtube… 

3 Likes
Thanks for the link. The tutorial is pretty nice. When he illustrated the Uniformity setting for skin tones, his edit of the portrait emphasised for me the importance of having HSL as part of selective correction on a layer. Hopefully this will happen for PL3. I won’t upgrade until this happens 
1 Like
Thank you, Peter (and @Sigi) - - Yes, I have just watched that video … and found it very useful in helping my understanding of this new tool.
{ Do you actually mean that you are in a location that has monsoons ?! - - Or, is it just heavy rain ? }
John
Heavy rain during the daytime nothing like floods or such.
my car screenwipers are automated and they changed in “high speed”, which nearly never needed, in the morning… dreadful wake-up. And i got wet every time i left the house… 
Now i was the hole time in a sports building inside beautiful weather outside, some morning frost and i was playing badminton… awell tomorow work starting again. so no camera day this week.
1 Like
The difference seems pretty small ! What exactly are their respective strengths and interactions ?
Did see the HSL explaination?
Start watching from 6:30 of the colorfull innovation …
it is taking color/hue less or more around your selection of color.
if you need more 'feathering" use the wheel outer pins to spread the hue effected area.
The larger the angle like 90 degres is nearly no “feathering” and 120 degres is much more in hue overlap.
start with the hue which you think to want and desaturate compleet effected color gets “grey”.
use the wheel pins and uniformity slider to cover the colorrange you want to effect in “grey”
Then return saturation to normal and start adjusting.
But I’m none the wiser, I’m afraid (probably a little narrow-minded  ). My question was about the difference between “feathering with — or without — Uniformity” vs “feathering with outer points”…
I think it’s about the pins selecting only other hueparts to effect and the “uniformingslider” is turning yellow pixels with some orange or redisch pixels around those in to a plane yellow making it “one color”
If you watch the skintone selection with a desaturared selection proces to get the skin, which is a mix of red yellow orange, and when you have selection you can turn the nearly same colors/hue to the selected hue getting a homegene colorplane. Say for the argument it is yellow.
You are basicly replacing yellowisch colors with yellow by increasing the uniformity.
Lowering is allowing more just near yellow pixels in the yellow range.
Also usefull for sky enhancement.
Vibrance or blue saturating can turn sky in to blotchy spots. By using the uniformity slider you can smooth out the "blue"of the sky
Just play with the slider.
If I understand correctly, the uniformity slider increases or decreases the color variation within the selected range. More uniformity means fewer color transitions (e.g., taking red out of a model’s skin, making the color more uniform across the face). Less uniformity means the transitions become stronger, more clearly defined.
Feathering causes any changes you’ve made to diminish at the edges of the selected color range - so that they have less of an effect on neighboring colors. It aims for more precise control over color changes and more gentle transitions at the boundaries.
I found PhotoJoseph’s tutorial to be very useful! I’m looking forward to experimenting more with my own photos.
2 Likes
Thank you all for your efforts to clarify these concepts 