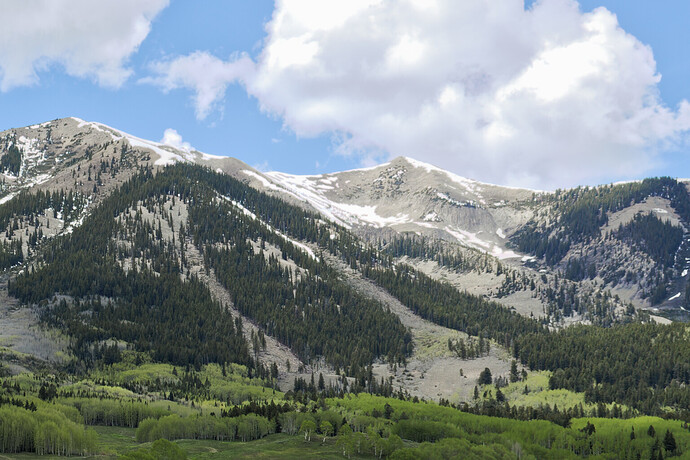
Pink artifacts with "Landscape" preset

I’m sorry I don’t have a link because it is something that I devised myself, based on my knowledge of the original Zone System, just “inverted” for digital positive images instead of negative film.

It goes something like this…

Learn about your camera

  1. Use RAW mode and switch to manual exposure (f/10 aperture is a good starting point) :stuck_out_tongue_winking_eye:
  2. Determine the dynamic range of your camera (link to the DxOMark site for my camera mine works out at around 14 stops)
  3. Using spot metering mode, take a shot at standard exposure of something white with texture
  4. Take a series of shots, decreasing the shutter speed at ⅓ stop intervals, to around +3 stops
  5. Take a shot at standard exposure of something black with texture
  6. Take a series of shots, increasing the shutter speed at ⅓ stop intervals, to around -5 stops
  7. Take all these shots into DxO and determine at which exposure it becomes impossible to recover either shadow or highlight detail. This will confirm the published dynamic range
  8. Note the maximum possible over-exposure before losing highlight detail. Shadow detail can be recovered easier than highlight detail. On my camera, I determined it to be at +3 stops but I prefer to use +2⅔ to be on the safe side.

Now you have the starting point for avoiding blown highlights, especially in contre-jour shots.

For taking pictures

  1. Use spot metering mode (and zoom in if you can) to take a reading from the brightest part of the scene.
  2. Forget about the shadows, they will have to fall where they will depending on the dynamic range of your camera
  3. Adjust the exposure compensation. This can be done in two ways…
    a) preset the exposure compensation to whatever your determined limit is then use that reading
    b) take the reading first and then adjust the compensation dial afterwards
  4. Reframe the image and shoot it

Processing

Use your favourite software to extract as much detail as possible, knowing that you will not have to “fix” blown highlights :smiley:

N.B.
Make sure your screen is properly calibrated and the brightness set to around 80cd/m2 for the best chance of your images being correctly balanced

@Joanna
There isn’t anything like a zone system involved.
What’s wrong using the blinkies?

George

The image you see on the back of the camera is a JPEG version, which is restricted in the dynamic range it can cope with, so the blinkies start when there is plenty more headroom in a RAW image.

Certainly, it means you shouldn’t get blown highlights if you avoid the blinkies but you are not going to be limiting the amount of shadow detail recoverable from a RAW file by under-exposing.

Thank you, Joanna

Adam’s zone system is often cited, even in digital photography, where many things have been fixed by a manufacturer and are therefore less malleable than in analog/chemical photography.

The most important thing (imo) is to expose to the (almost) right, and how this is done does not matter as long as we shoot raw - blinkies being the least desirable method, because we can never be sure what cameras do to get them, also in relation to respective light characteristics and image styles.

In demanding cases, I use UniWB…until camera manufacturers come up with raw histograms, which might never happen :scream_cat:

Totally agreed. ETTR is essentially what my procedure achieves. Unfortunately, many photographers don’t seem to want to go to the trouble of determining the range and capabilities of their digital cameras, they just want to point and shoot because “we can fix it all in post-processing” :crazy_face:

Unfortunately, it looks like UniWB is not an option unless you have one of a very limited number of camera models What is UniWB? | DSLRBodies | Thom Hogan

Tom’s files are one thing, but there is more. Here are two examples of how to get a uniWB file.

I’ve used two of the methods described on these sites and found that the one step approach works well, but takes some effort. The easy approach mentioned in Luijk’s text can work nicely, although not super precisely. It does not really matter though, a few percent are barely visible as seen in a histogram.

HI @obetz,
I don’t agree, and most arguments are mentioned already by other posters. Blown highlights are o.k. if you intend to expose so, but normally you avoid them. If you prefer to have detail in highlights, you need a proper exposure. A wrong WB can be enough to get highlight clipping, even with a more or less correctly exposed image. In some cases the software can correct it, but it cannot “invent” colours when the information in more than 1 channel is lost, right? If you start with a preset that makes it worse and than expect HL recovery to do the job, that will be too much.
You get a big toolset, you pick the screwdriver and next complain that it does a poor job in driving the nail in the wood.

1 Like

I don’t understand. UniWB seems to be NO WB corrections. If the coefficient is set to 1 than the original values don’t change.

George

Let us return to some of the original post - I’ve added numbers for reference only.

Comments

  1. I think that your opinion is as good as mine as far as the evaluation of beauty and usefulness goes. In fact, the pink is there and the question is whether you want it gone or not. You want it gone and so do I. Difference being you want someone else to do it, and I’d try to do it myself. Therefore, I increased the issue to make my proposal to use LA more visible.
  2. It would definitely be nice if PhotoLab could handle such effects automatically and maybe it will one day. On the other hand, I also want to be in command and PhotoLab offers tools that help me realise visions, intentions and whatnot. Technical quality is nice to have, but it neither increases or reduces the “message” of an image. Not all images need a message though. A holiday photo is a holiday photo and serves a different purpose than a war photo for example…

as I wrote, neither my image nor my equipment. Besides, I disagree: Photolab is a tool to rescue images not exposed correctly by accident or lack of experience.

the color cast is there if you only apply the preset, without ClearView Plus.

As I wrote in the OP, the main contributor is smart lighting, not ClearView.

But let’s just state that I consider this a defect and you think it’s not so bad, and end the discussion with that.

I’m able to work around this problem.

Now DxO has to decide whether or not it’s worth to investigate this issue and improve the algorithm.

I fully agree. There are several settings not really belonging to “film” taken out deliberately to film pack. Rather annoying.

You might find it useful for that purpose but I would guess, for the vast majority of users, sometimes that might be possible, but there will always be images that are unrescuable and any digital image that is over-exposed to the point where the highlights are blown out and showing markers is never going to be as good as it could have been with the correct exposure.

But that is because you chose a preset that included a rendering for a different camera than the one it was shot on.

I have examined the preset you used and, yes, it is different from all the others in that group in that it has a specific camera rendering instead of the default for the camera used. (@Marie you light like to take a look at this anomaly)

I have taken a copy of that preset and edited it to change the rendering to the default for the camera used. Here it is…

5 - Landscape - Standard.preset (4,9 Ko)

I took your file and reset it to have absolutely no adjustments. I did not apply any preset, apart from the “2 - DxO Optical corrections only” one. Then I applied Spot -measured Smart Lighting and a couple of other minor adjustments, which gave me this result…

Smart lighting is not at fault, unless you use misuse it.

The only “defect” is the wrong camera rendering in the preset you used but that takes all of ten seconds to correct.

There is nothing wrong with any algorithm, just a simple, easily corrected, mistake in the preset. If you want to take the time and effort, you could even replace the preset with my corrected one.

Here is my version of your DOP file with both your original edits and mine…

Pink_artifacts.CR2.dop (28,1 Ko)

But it does contain all sorts of advanced settings. Although, if you realise that FilmPack is not just about film emulations, it is worth every extra cent.

1 Like

supporting DxO and using it’s software since 2 years now intensively …

PL Elite is sold as premium version. – Competing with professional software it should be complete
and not crippled down by ‘outsorcing’ important contrast settings or basics like SkyLight Filter to
FilmPack or full geometrical corrections to ViewPoint. – There is no ‘light’ version of Lightroom …

2 Likes

I agree. I think they market this way to have several affordable price points. As examples, you can purchase the hobbled Essential version, the Elite Version, the Elite version with either FilmPack or Viewpoint, and the Elite version with both.

I have always felt the Elite version with Viewpoint and Filmpack Elite should be the only version available . All these choices cause confusion among new users. .They want to know why they can’t do something only to find out it requires an upgrade or an add-in.

Unfortunately, the whole Elite suite is expensive compared to most of DXO’s competitors offerings. After having used it for close to four years I think it is a bargain, but new users will be more skeptical and cautious.

It would be better if DXO could offer the entire Elite suite, without the standalone versions of ViewPoint and FilmPack. as a single option and at a better price point than when purchasing all three. After all , these add-ins are already imbedded in PhotoLab. Many, if not most, PhotoLab Elite users probably don’t even use the standalone version of Viewpoint and Filmpack.

Mark

1 Like

The available now for 270.- at the bottom of the page that you get when you click on “buy” for PhotoLab.
The price is good, but it’s a limited time offer…

Yes, it a good price, but unfortunately, even on sale the Elite suite is expensive compared to most of its competition. I believe its worth the price, but others may prefer cheaper alternatives.

On a different note, claiming 100% compatibility with Adobe Lightroom Classic. is a double edged sword. It won’t mean the same thing to everybody, and it is not clear exactly what DXO is trying to suggest by saying it is 100% compatible…

Mark

… it can only mean that PL and Lr can interact, not more. Lightroom can handle files that PhotoLab can not, which is just one of the main pain points of PL.

Also, 270.- pays about two yearly subscriptions of the Photo plan. The comparison is not quite fair though. Feature sets don’t match and the products target different user groups…but we’re getting off-topic, sorry for that.

That is as much my fault as yours.

Mark

1 Like