That depends on which settings were included in the preset.
One of the B&W presets…
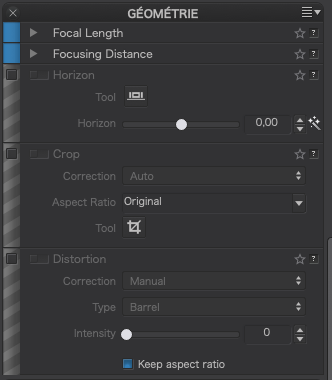
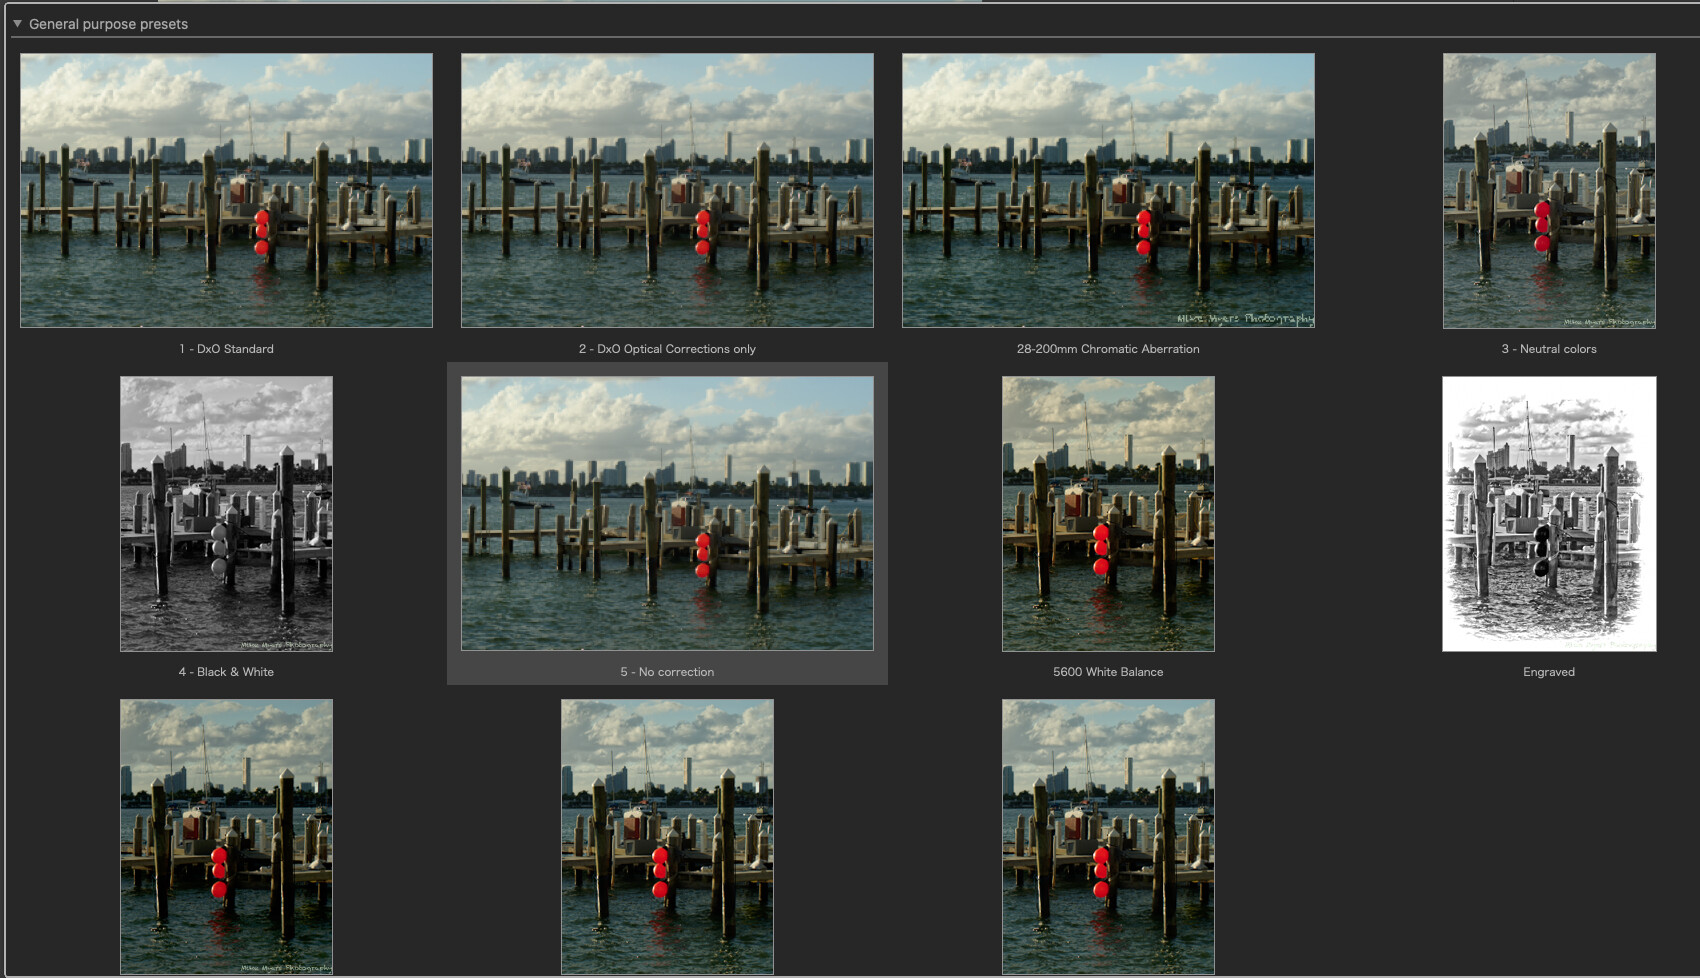
The Standard preset…
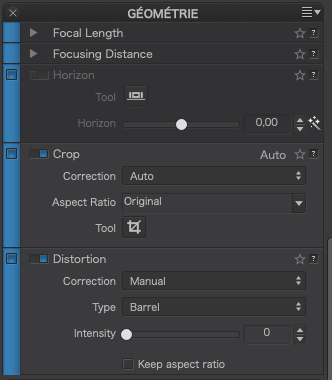
The blue strip on the left indicates that setting is included.
It’s the same on Mac…
That depends on which settings were included in the preset.
One of the B&W presets…
The Standard preset…
The blue strip on the left indicates that setting is included.
It’s the same on Mac…
So, I need to turn OFF the “Standard” Preset function of “Crop”, and then save it as a new Preset maybe titled “no-crop” ??
Thank you - I most likely will buy Film Pack Elite in the near future.
If I start with a B&W negative, can Film Pack Elite do most of the things in a dng file, that Nik Collection would do when adjusting to save the output as a ‘tiff’ ?
Essentially, yes. You start by duplicating the existing preset and then editing it.
Word of warning, whatever you do, don’t remove the tone curve from any preset you edit, there is a bug which occurs if you do and which DxO are currently fixing.
I have never been without it, buying it in a bundle deal when I got PL. IMO, well worth the money.
Yes. you should be able to do everything apart from using the Nik presets. What’s more, because of the way it is integrated into PL, it feels no different to using anything else that is part of PL.
I’m learning the most by taking new images in RAW format, and using the tools that all of you and PhotoJoseph have been teaching. While thinking about this, I was wondering about the previous 10 or 20 years worth of digital photos that I’ve taken. Back then I didn’t understand RAW, so they were all shot in jpg format, with whatever camera I had with me. I enjoyed taking photos in India the most, as they were so… unusual to me.
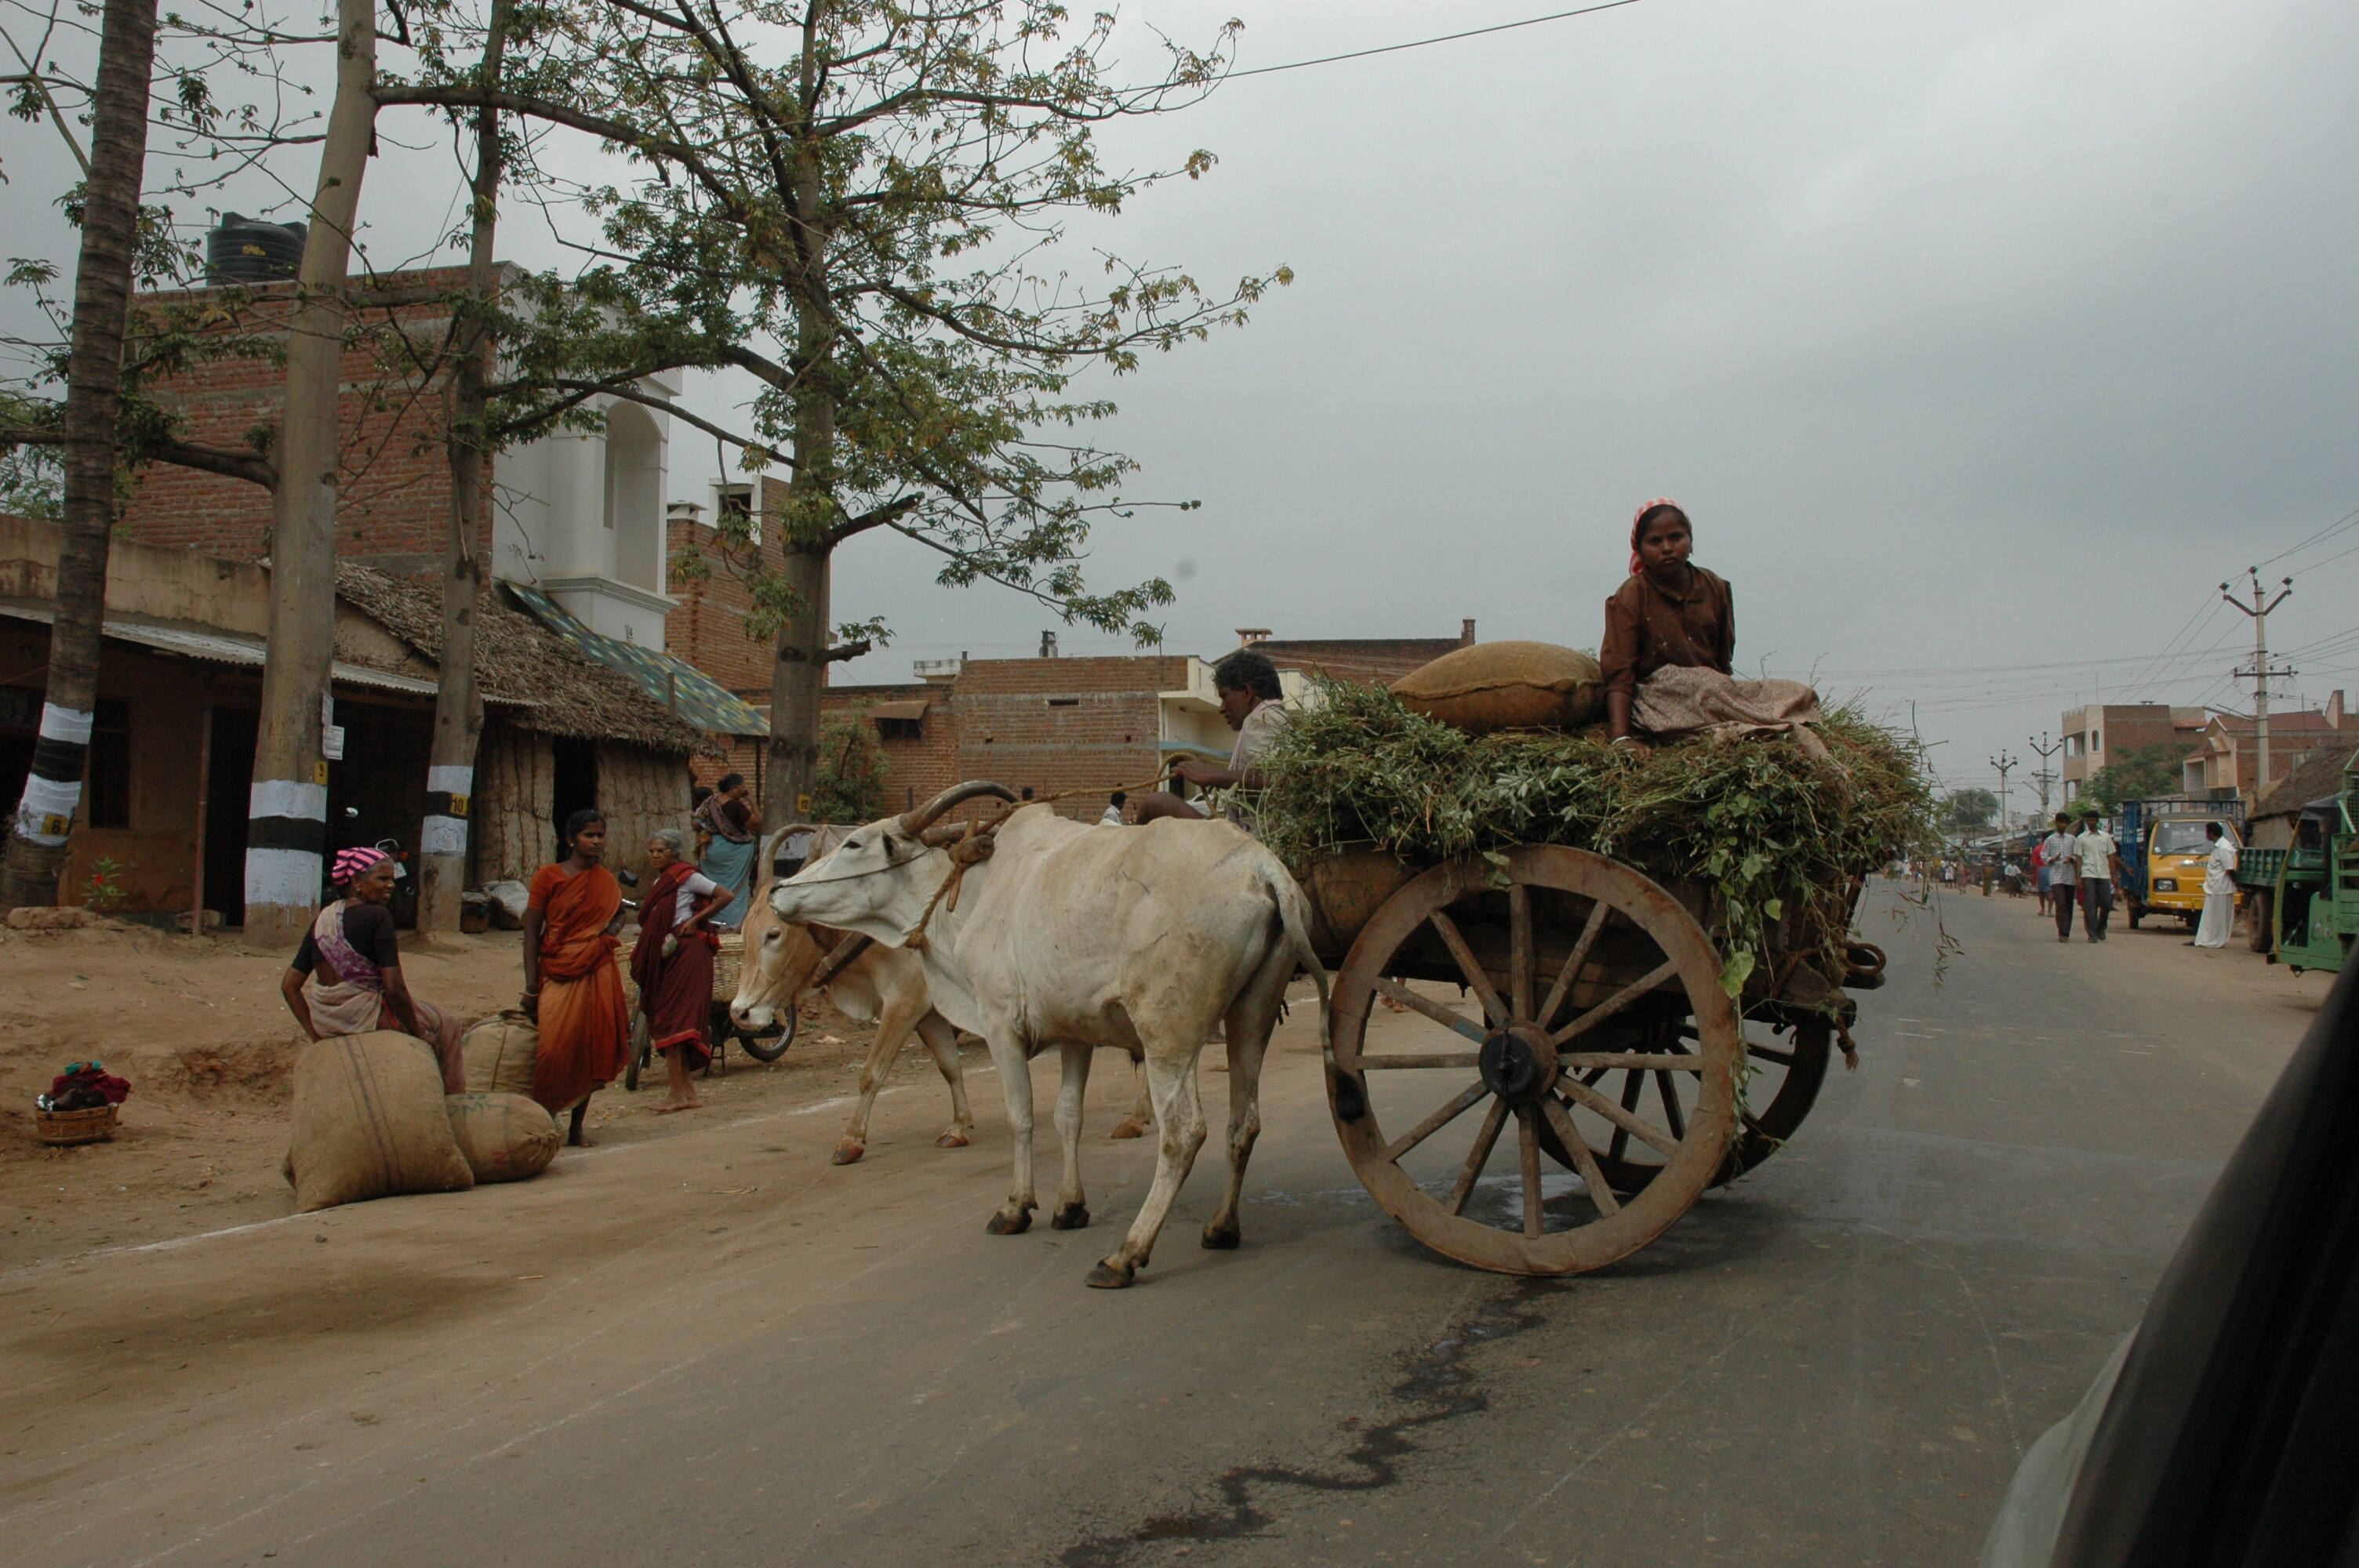
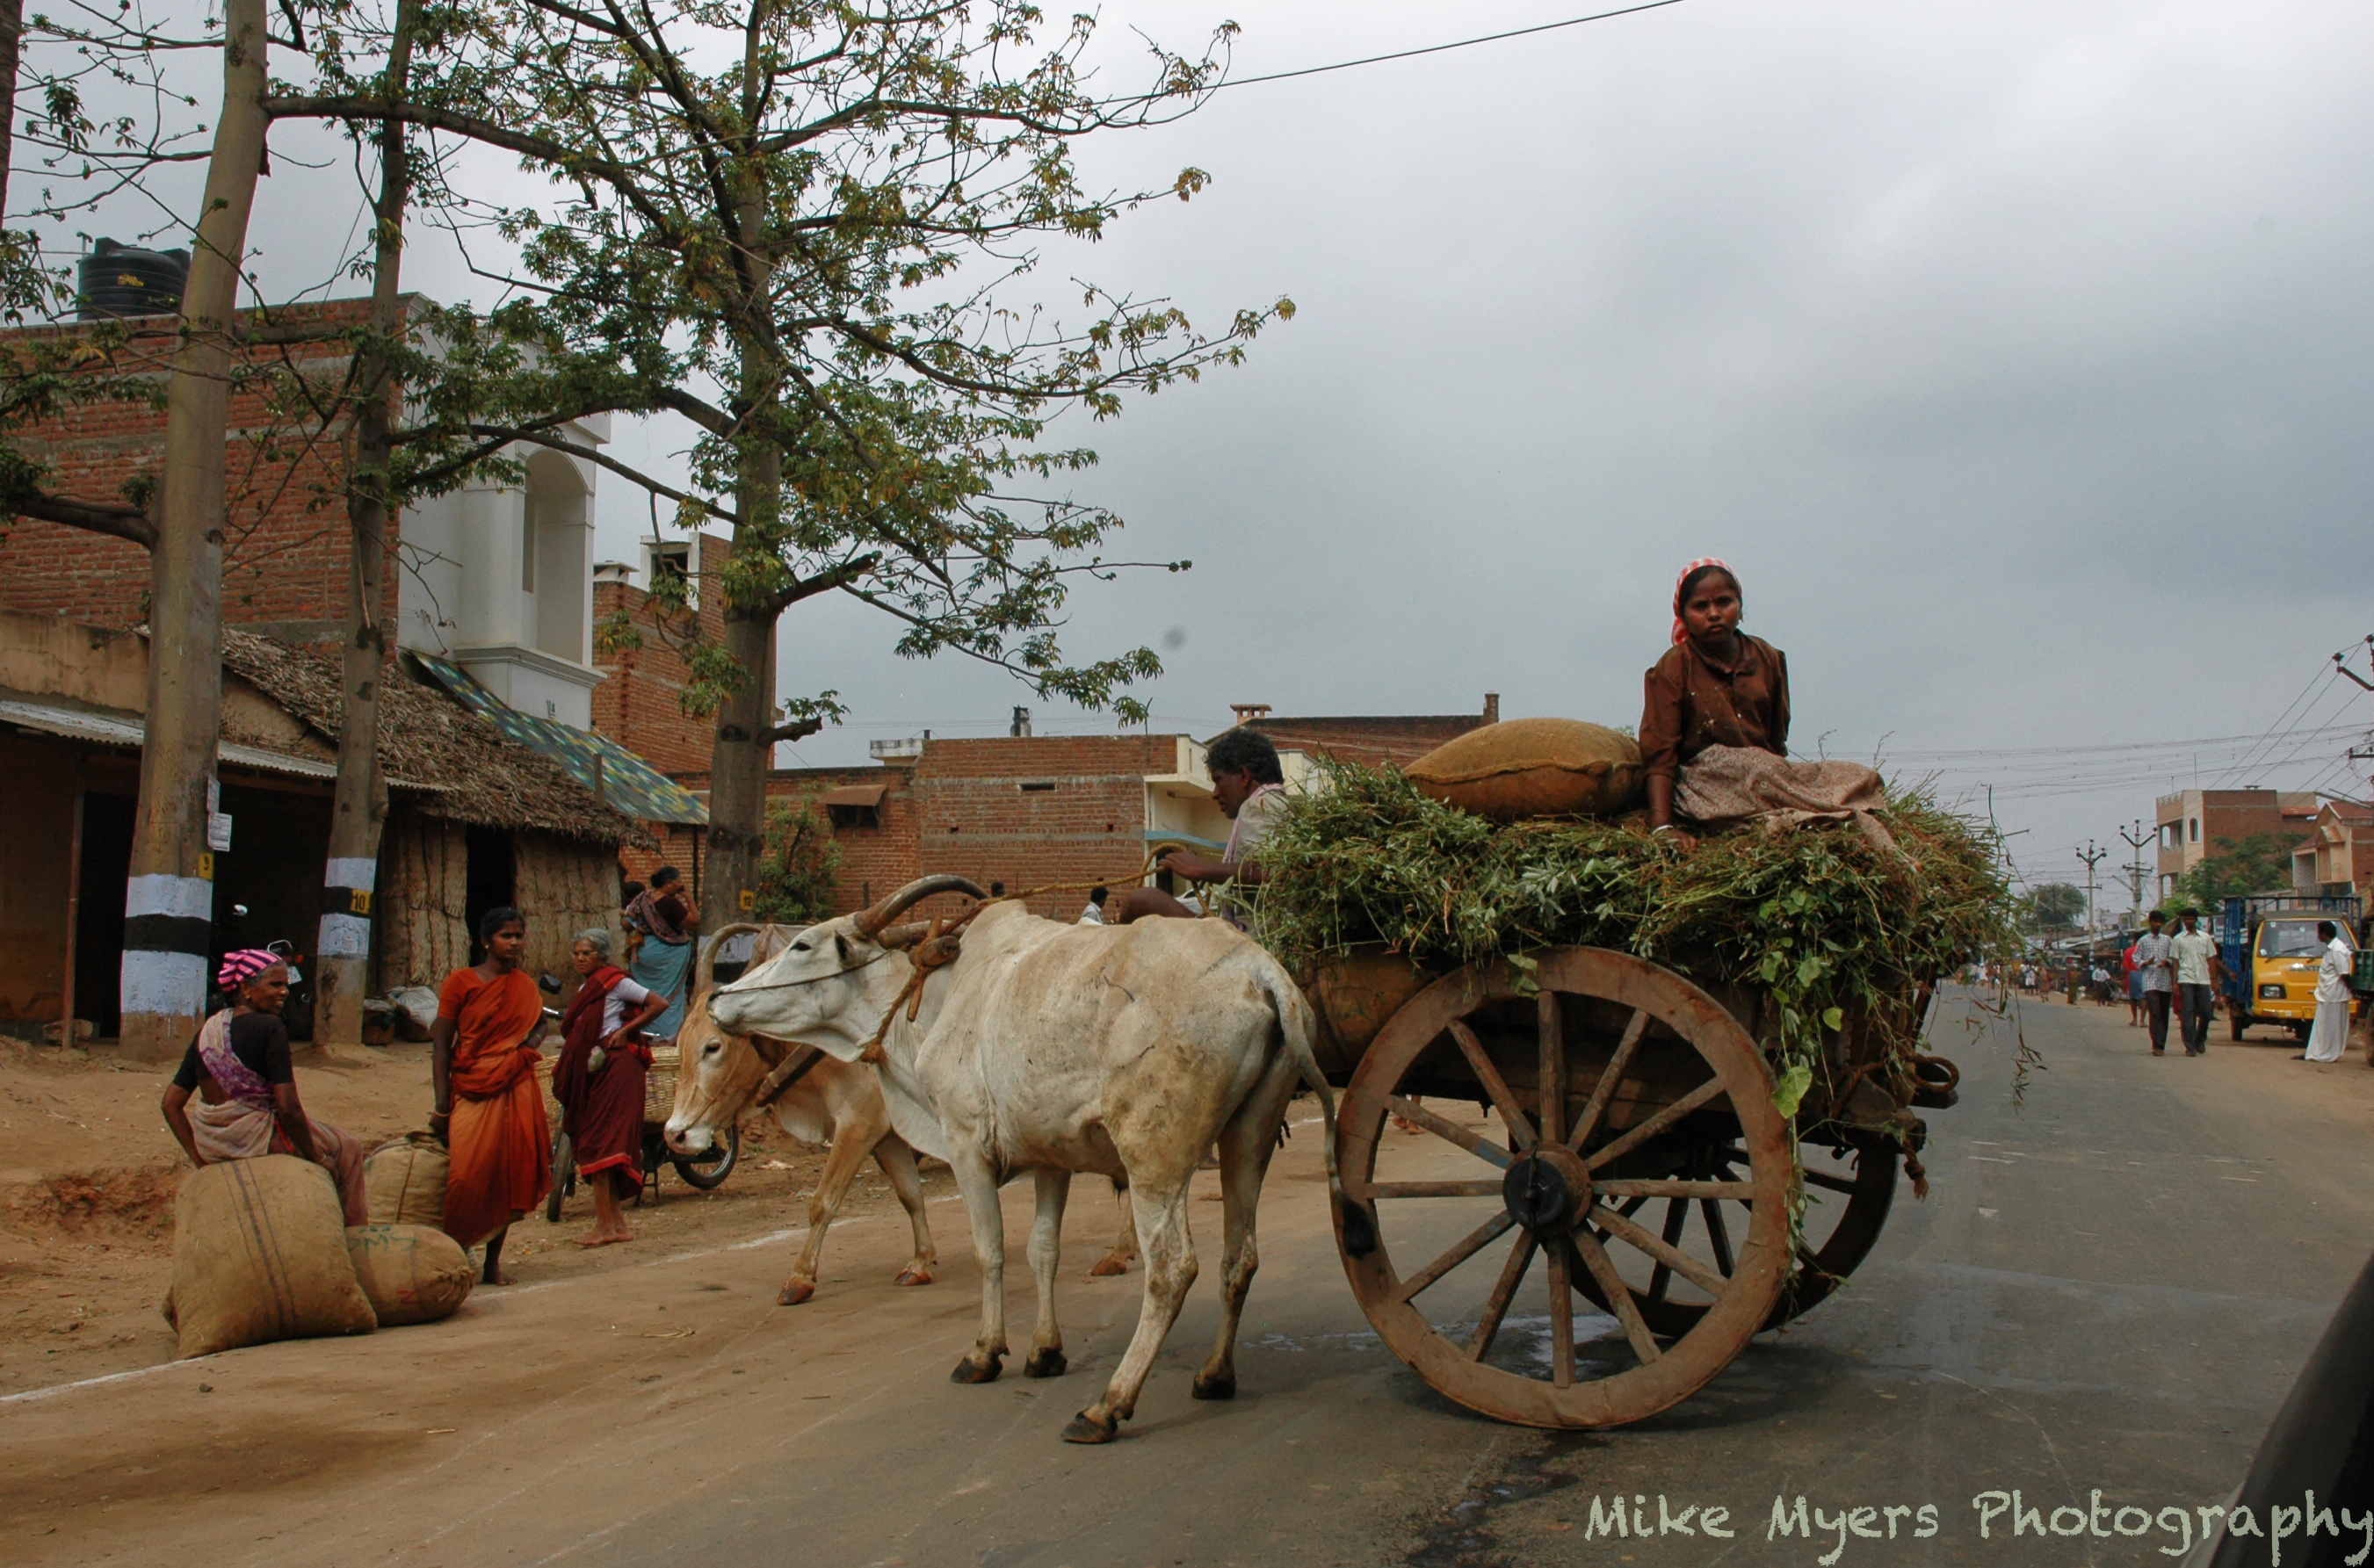
I went looking through them a couple of hours, and found a photo from 2005 that I remember liking, but not knowing how to make it look good. I think I was using an old copy of Lightroom at the time. I copied it to a new folder, and tried to improve it, without losing the “flavor”. - a dry, dusty day in India, bright clothing but not much of anything else. I saw the scene out of a car window and shoved my Nikon D70 out a ways (but not quite far enough).
I’ll post the original file here, if anyone wants to see what they can do with it. It’s not RAW, so none of the raw tools including DeepPrime will work. It’s not what I would call “sharp” nowadays, but it’s typical of what I was able to do back then. The lens was very inexpensive, and it was limited in what it could do - or maybe I was just limited in what I knew how to do with it.
If not already noted – always EXPORT your images as sRGB, either for web or for printing. That’s the normal case.
Only when you want something printed as FineArt print etc and/or the printshop is asking for AdobeRGB colour space (check the printshop’s recommendations), you do so. – Only then you have to live with your screen’s limitations.
Normally, sRGB colour space is perfect for you, as it suits your monitor (100% sRGB, see manual).
Make sure, your screen is properly calibrated – accordingly to your monitor settings!
Example:
Let’s say, your monitor is set to factory settings (e.g. 6.500 Kelvin, 120 cd/m², Gamma 2.2)
and you are happy with that ( your choice ! ), but now, in the calibration process
you simply get a poor icc-profile.
you may check with independent, proved test images like the one from DataColor
see http://www.northlight-images.co.uk/printer-test-images/plus I upload a good monitor test for you (check # 12 and 14)
Eizo_Monitortest.zip (522,4 KB)
You might think that’s the normal case but it’s not what I do for printing.
I usually export as ProPhotoRGB and then either I or the printshop output the file to the printer with the correct profile for the printer/paper/ink combination being used to make the print.
It’s a bit like assigning a colour temperature to a RAW file - it’s there but it can be changed.
Joanna,
this is a suggestion to Mike.
I know you are working differently, me too. 
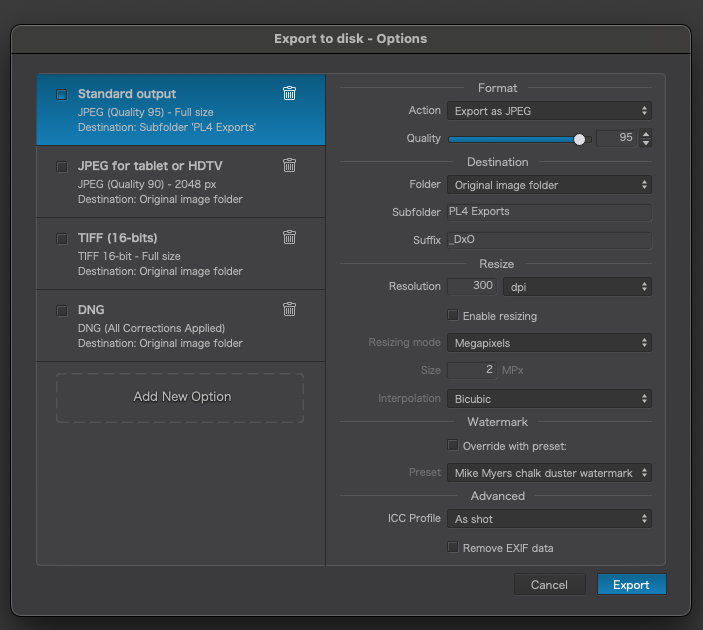
I first asked where, and how, do I accomplish this? Here are my export settings:
Now I see it’s a choice in ICC profile. Thank you!!
Can I make this my default setting?
It’s already YOUR ‘default’ setting.
You can change it or – maybe better for you – below you can
Add new Option
BTW, please check again PhotoLab 4 with X-rite i1Display Studio display calibrator . I added 2 links
have fun, Wolfgang
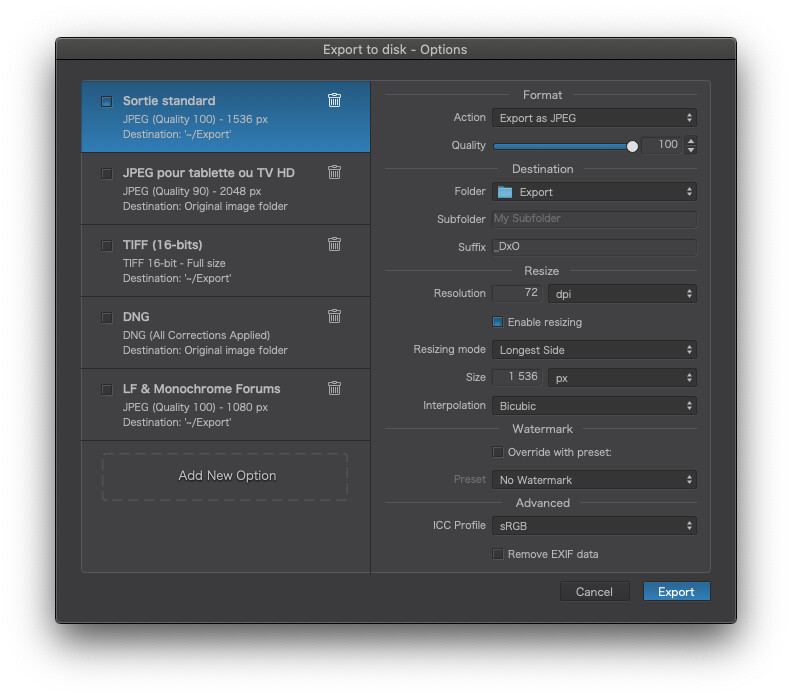
Here is my export to jpeg for posting on the web in discussions, etc, where I don’t want the full size…
Note the resolution, which doesn’t change the size of the image in pixels, only needs to be 72.
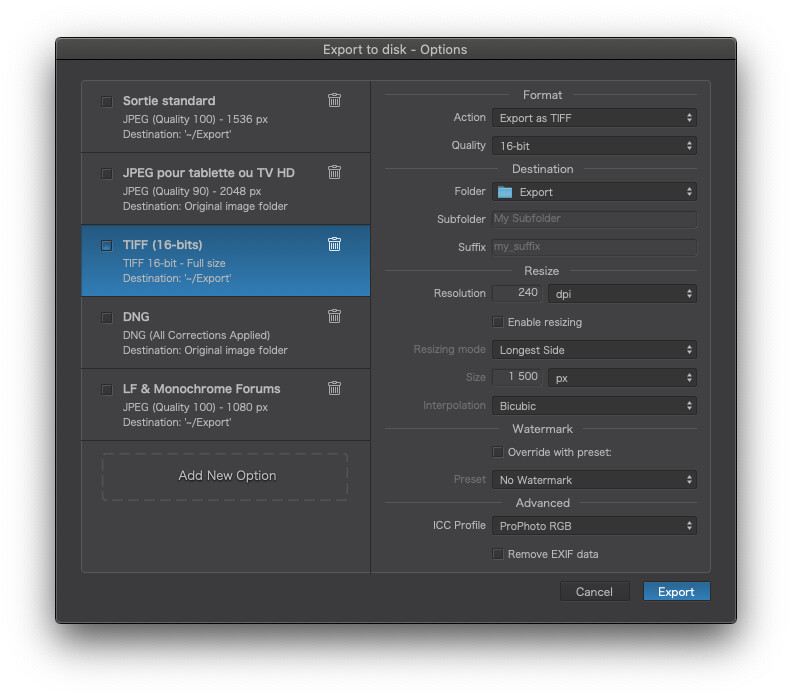
And here is my export to TIFF for printing through ColorSync…
Here I use 240ppi as the resolution because it is adequate for most prints at normal viewing distance.
In both cases, I output to an Export folder under my home folder, to avoid confusing myself with exported files all over the place which I am going to delete anyway as soon as I’ve used them.
Since you don’t do it the standard way, you might not know this, but the default for exports is to create a sub-folder within the folder for the originals, titled PL Exports, which prevents the confusion of all the exports going into the same folder as the originals. That’s what I’ve been doing. I know where to find them, and it’s easy enough to delete the PL Exports folder later.
Oops - Error: You can’t open the application “Eizo-test.exe” because Microsoft Windows applications are not supported on macOS."
Can’t agree 
for me Originals folder is only original, and all my developing results get a proper name for each file and will be stored in different folders outside original folder for example \Poster or \Kalender
You will not find one way fits every users method of operation
@mikemyers
Is it the zip-file, that you cannot open or the extracted exe-file?
If due to MAC OS, you will have to live without.
Since you don’t do it the standard way, you might not know this, but the default for exports is to create a sub-folder within the folder for the originals, titled PL Exports, which prevents the confusion of all the exports going into the same folder as the originals. That’s what I’ve been doing. I know where to find them, and it’s easy enough to delete the PL Exports folder later.
Yes expert! I’m pretty sure, Joanna knows what she is doing. So …
I think using the term “export” along with my name is outrageous!!!
…but thanks for the smile!
If I can learn 1/50th of what Joanna knows, I will be thrilled!
we are not on twitter here
What effect happens depending on the setting for resolution? I assume this has something to do with printers, not screens? I was under the assumption that the device that is receiving the information already has its own pre-set resolution. Is that incorrect?
Since the image size is already set by the number of pixels, what is the purpose in selecting a number for “resolution”? If the image is to be resized (that box is checked) I see the image size, in pixels, has already been set.
(I’ve never paid any attention to the “resolution” setting - instead, I have been setting the number of pixels I wanted for the (longest) image size.
Hello,
to relieve my princess of printing and image processing  I will share a link, hoping it finds your benevolence.
Print Resolution: What Is It And Why Is It So Important? - Chilliprinting
!!! Information in the link seems not to be correct…see statement of Joanna !!!
Your most devoted servant 
Greetings