I cannot say for sure but my understanding is that the software you use for editing in the AdobeRGB space (like PhotoLab) gets sort of magicked into sRGB on the way to the monitor, unless it’s an AdobeRGB capable monitor, where no magic is involved.
All I know is that my digital pictures taken in AdobeRGB, or 5" x 4" transparencies scanned into ProPhotoRGB, look good on my monitor and produce stunning 40" x 32" prints.
As I said before, a lot of this coloury, spacey, techy stuffy is way beyond my pay grade. I just do what I’ve always done and it works as long as I choose the widest gamut possible at the taking/scanning stage.
What a lovely word. I’ll have to add that to my list of sillinesses
1 Like
herman
(Leica M9 | iPhone 15 Pro | iMac M1 | PL, FP, VP)
226
Raw data is just that, raw data.
It has no color space attached, it is just everything the sensor registers.
When you set in-camera aRGB or sRGB it affects only the JPG generated in-camera.
As long as you shoot in raw you don’t have to worry about camera RGB settings.
You may be shooting raw + JPG, in that case the camera RGB setting is applied to the JPG.
DxO PhotoLab uses internally the Adobe RGB color space.
You may be viewing the DxO screens using an sRGB monitor (as I do).
That means that you can not see all color gradations DxO is creating.
If that is a problem or not depends on what you want.
I would say that when you create images for web-use it should be no problem at all as you see the images in sRGB as does the rest of the world (remember that sRGB is the web standard).
Just make sure that you export images in sRGB.
When you want to produce paper print things become slightly more complicated but if you would like to discuss that you’d better start a new topic, it is an entirely different can of worms
I guess I wasn’t thinking. Since I’ve stopped using ‘jpg’ and I’m leaving the camera in ‘raw’ all the time, that setting is meaningless unless and until I take some photos in ‘jpg’ for whatever reason. I was looking at “the trees”, and not “the forest”. (I guess if the camera is set to ‘raw’ only, that “rgb” setting should be grayed out, like other inappropriate seting selections are.).
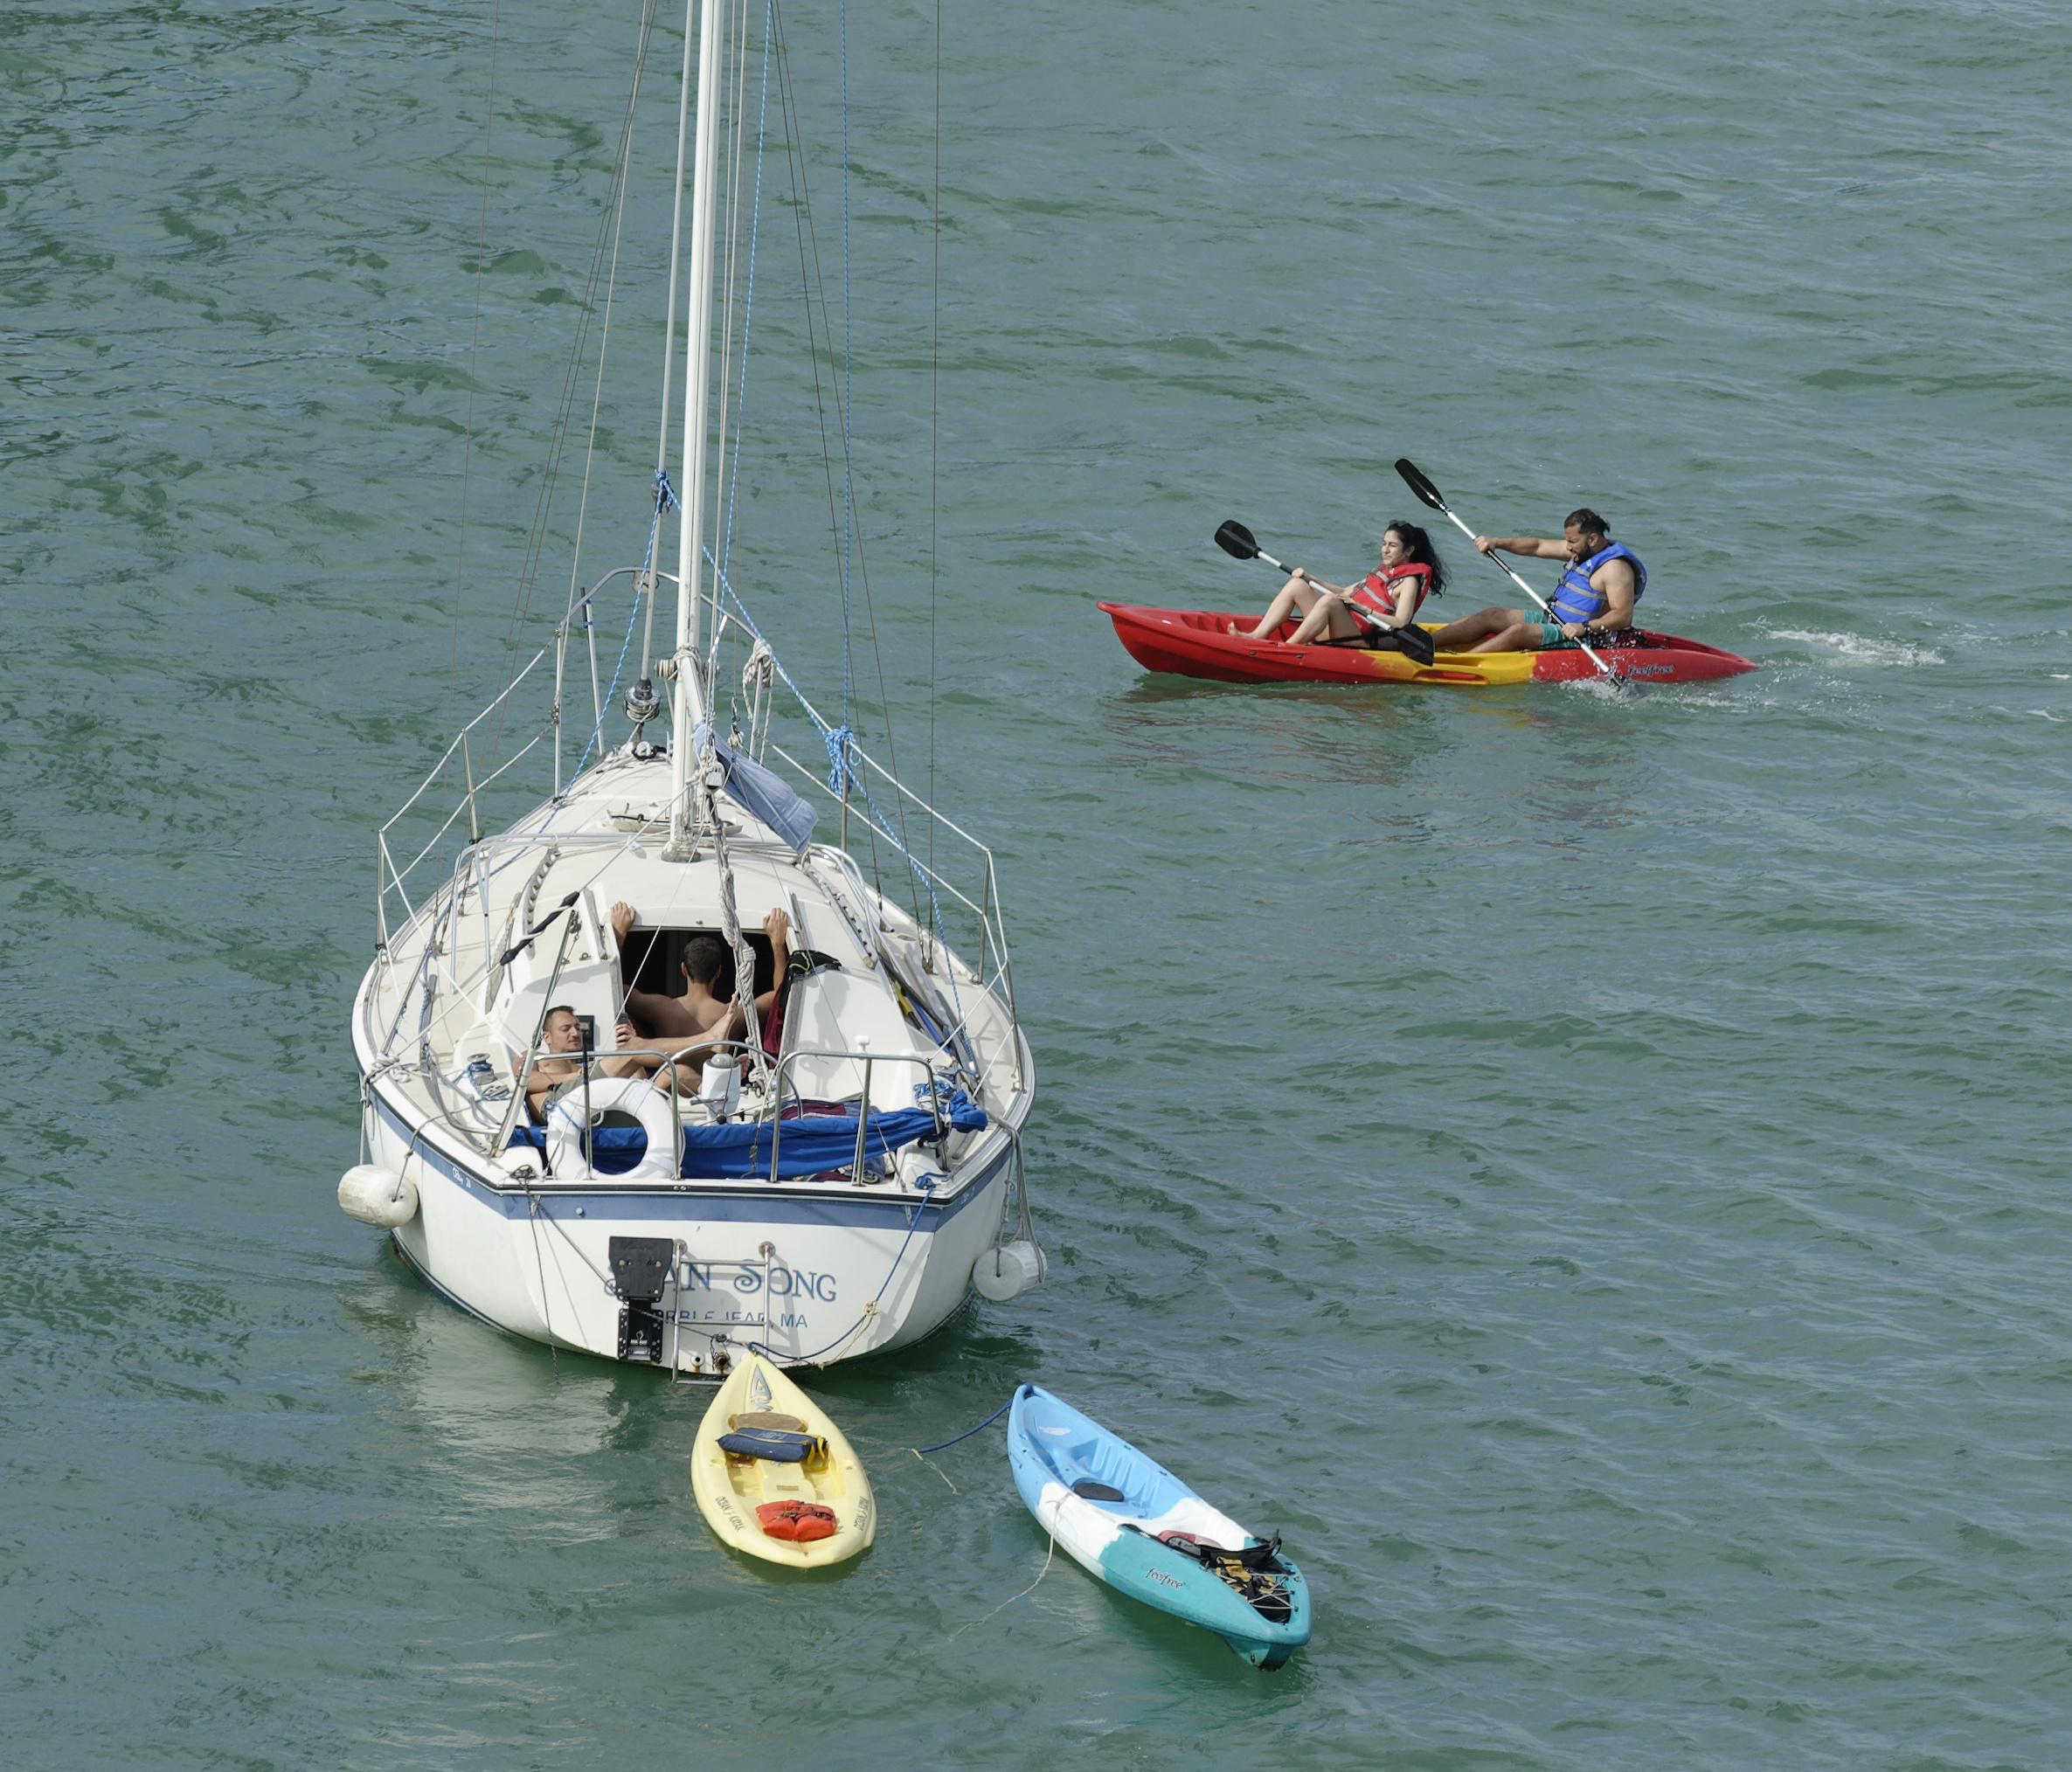
Just to confirm, I took this image as ‘raw’, and I now understand PL4 does its work in AdobeRGB. When I finish editing, it will be shown on my sRGB ASUS display. I hardly ever print my images, but if I wanted to, I can only see it in sRGB because of my display, but when it gets sent out for printing, they will use AdobeRGB. They will interpret the image data differently than what I saw. Unless I was to purchase an AdobeRGB monitor, I guess I’m “stuck” with that situation, despite all my effort in calibration - or am I missing something?
Something else -
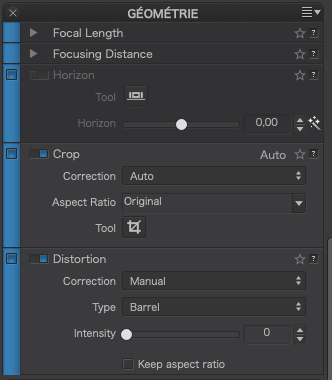
Curious if this is supposed to happen. I took this photo this morning, and copied it to the iMac around noon, culling out all the poor images. Then, on the iMac, I did some basic cropping, then put it away until I could finish it in the evening on the ASUS.
I worked on it for half an hour or so, until I thought it was finished. I got curious what it would look like in black&white, so I changed the preset. Interesting, but by comparison, boring. So I changed the preset back to Standard.
My question - everything I had done to optimize the image was still there, except the cropping. It went back to the full-size image. Is this a bug, or is this the way it’s supposed to work?
herman
(Leica M9 | iPhone 15 Pro | iMac M1 | PL, FP, VP)
229
It will be rendered differently for sure.
Please do never assume a printer / paper / ink / whatever combination will render the entire ARGB (or even sRGB) spectrum of colors.
The whitest white will be determined by the paper and the incident light, almost never the 6500 K where both ARGB and sRGB are based on.
The color gamut will only partly cover sRGB on one end and it may exceed sRGB (or ARGB) on another part of the spectrum.
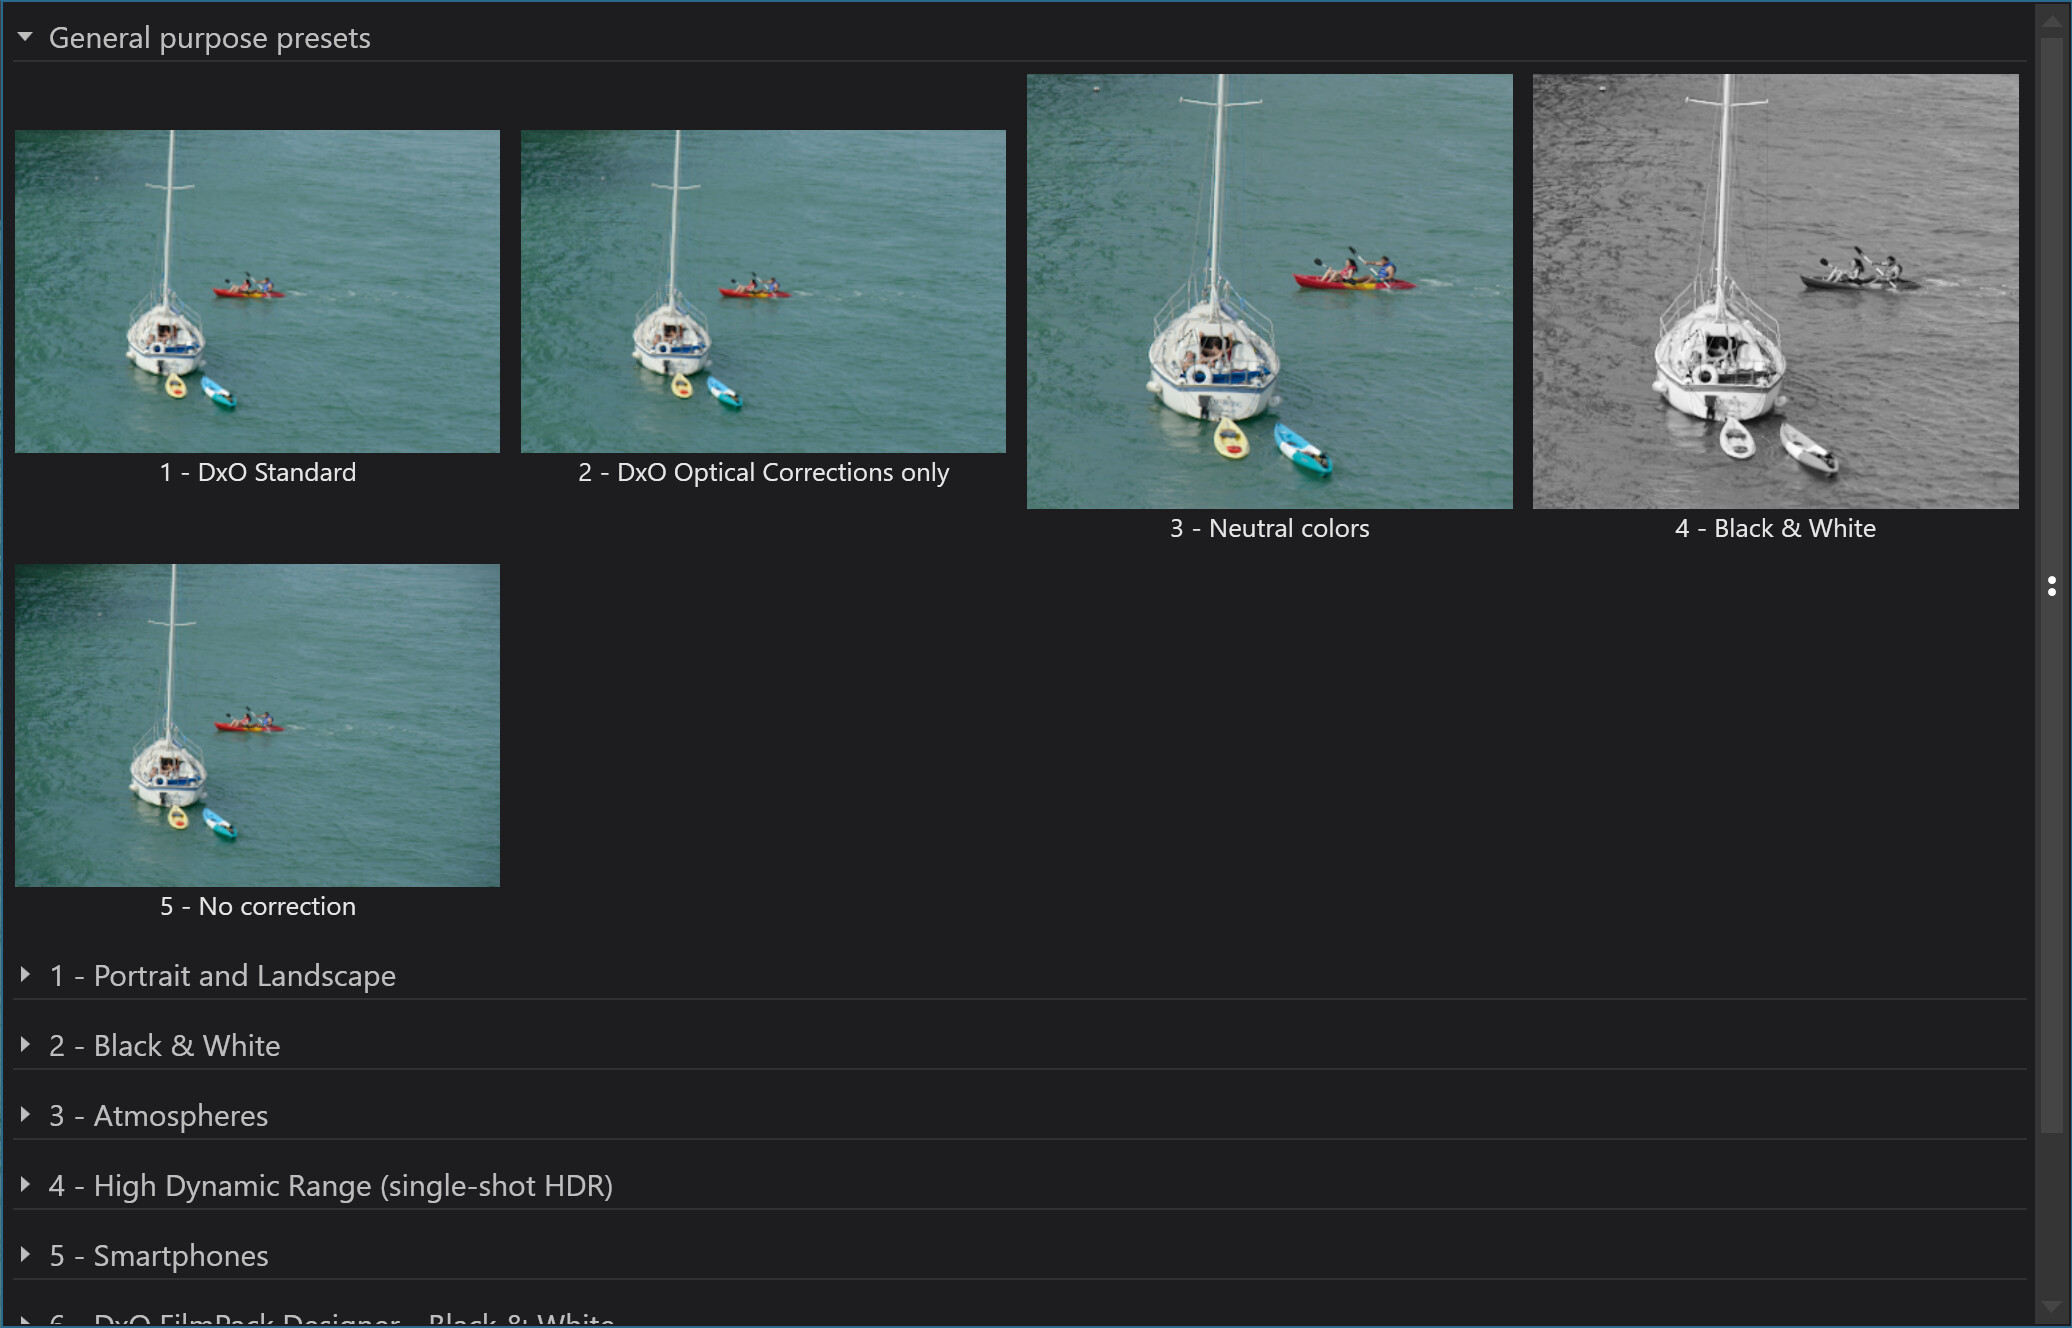
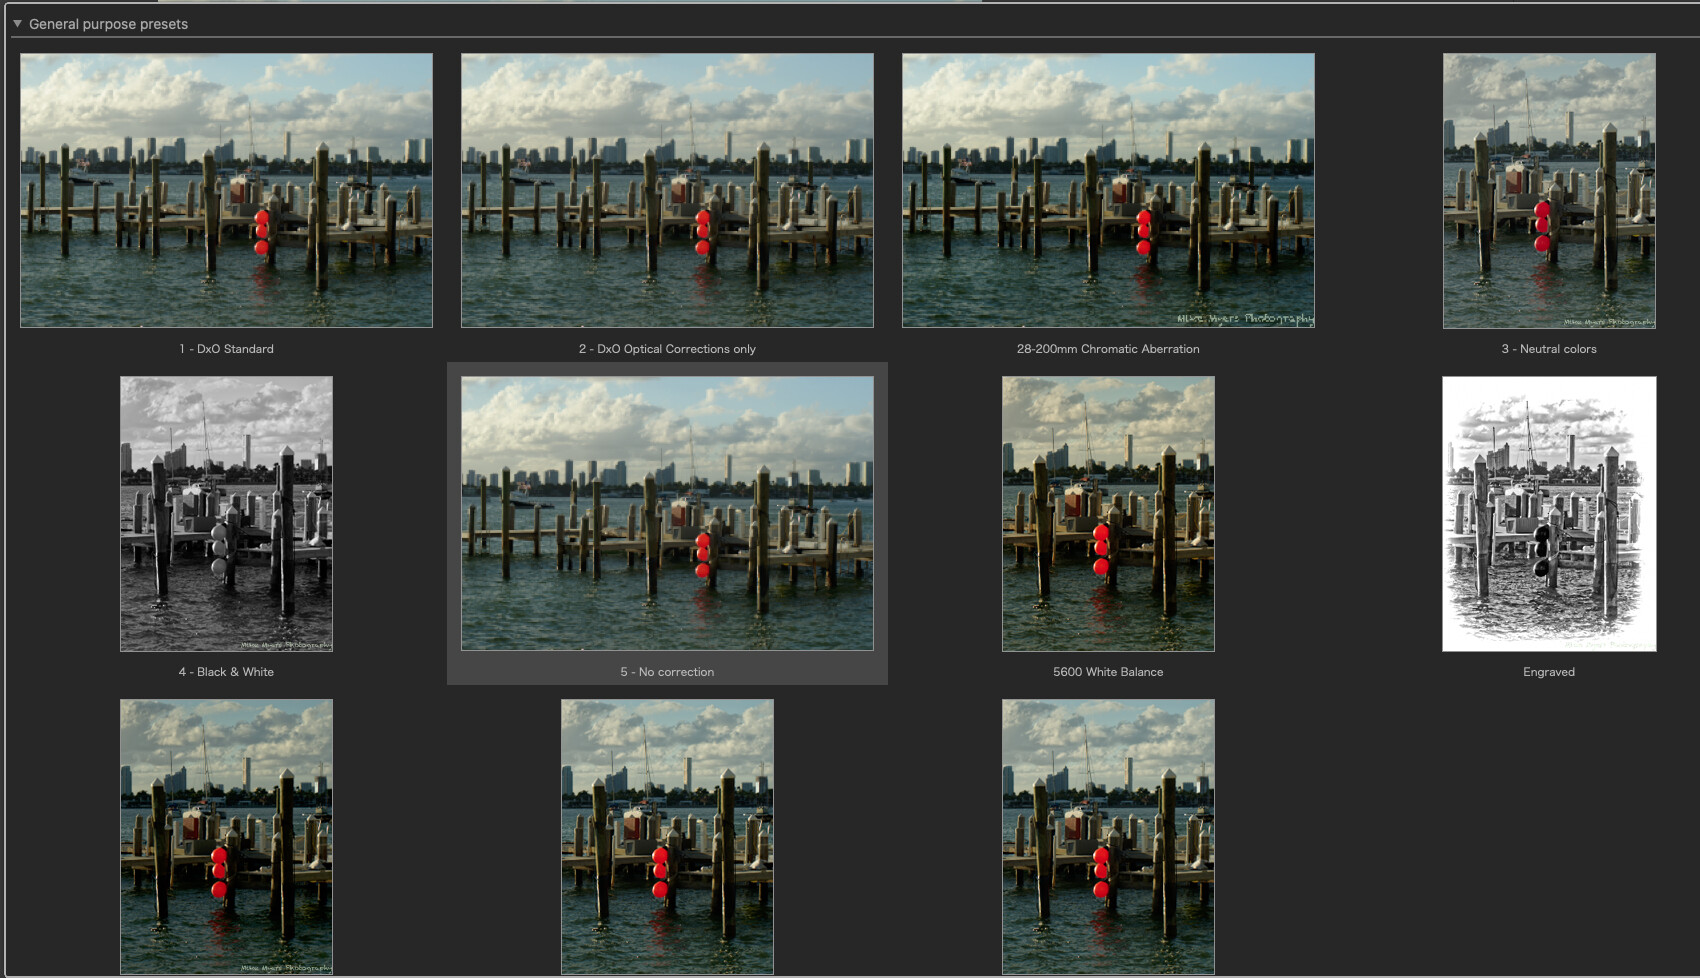
On my Windows system, when I click the Apply preset thingy, it opens a dropdown box giving previews of the various presets. The previews show if the cropping is applied or not. Is this not the case on your Mac?
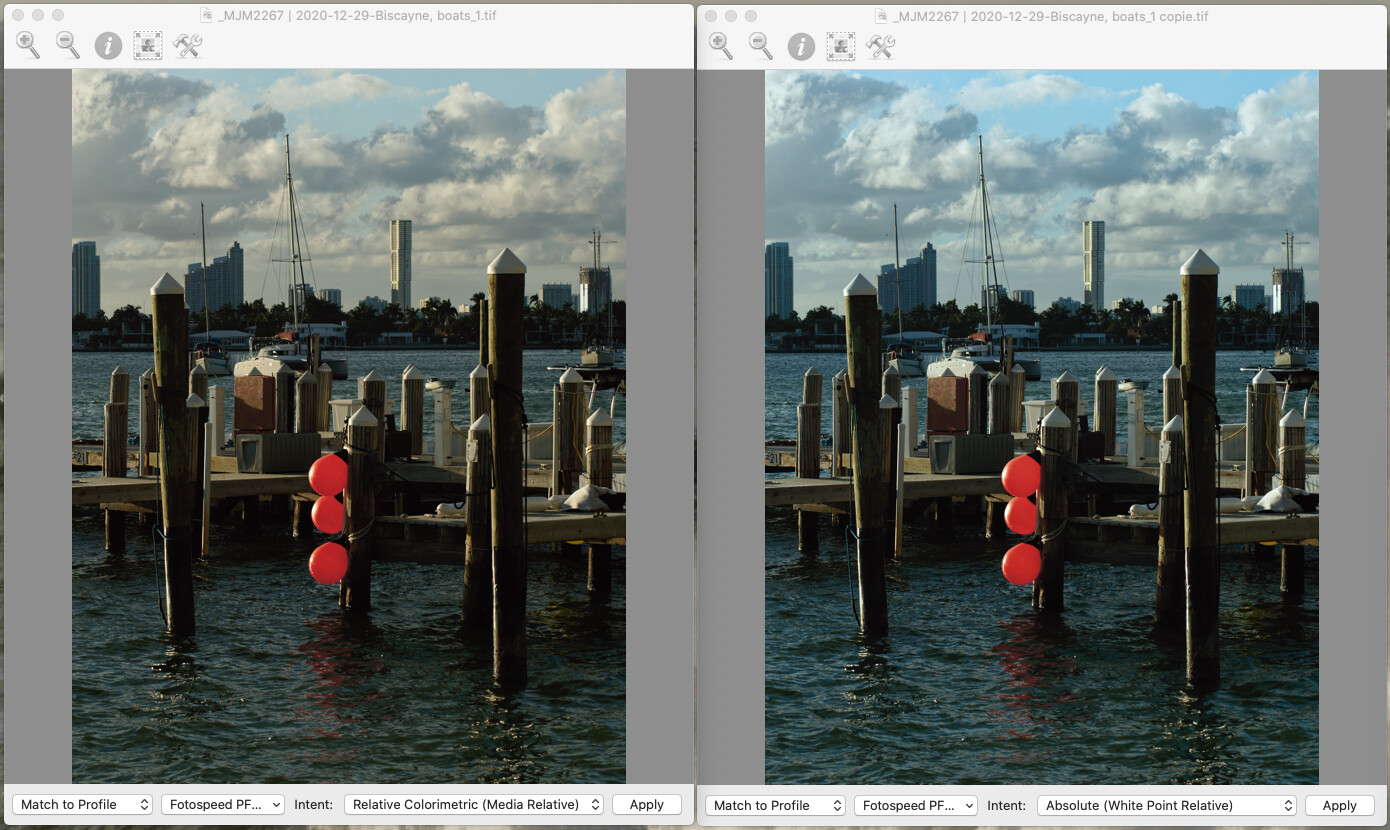
Something that some folks have asked for in PL is to be able to do “soft proofing”. This is a window that shows how the image should look when it is output to a certain device or printer. What it does is to translate the values produced by a selected profile and adjust the display to give the impression of what the colours and tones will look like if you were looking at them on the target medium.
macOS has a ColorSync utility that, if you open a file with it, shows you a soft proof of whichever profile you select for a given rendering intent.
Provided you have used a correctly profiled screen, the image should be as you want to see it printed. Then you export it to a tiff or jpeg for printing, with the AdobeGRB profile.
Then your printer should apply the correct profile for their paper/ink combination and the printer driver will “translate” the colours to match.
Applying a profile to a bitmap file is a bit like suggesting a colour temperature when you take a RAW.
This is because you chose a “full” preset, which overwrites all tool settings applied so far. The only way to avoid stomping all over stuff like this is to use partial presets, which only change specific settings.
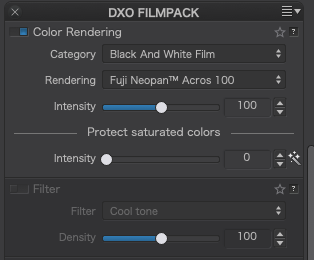
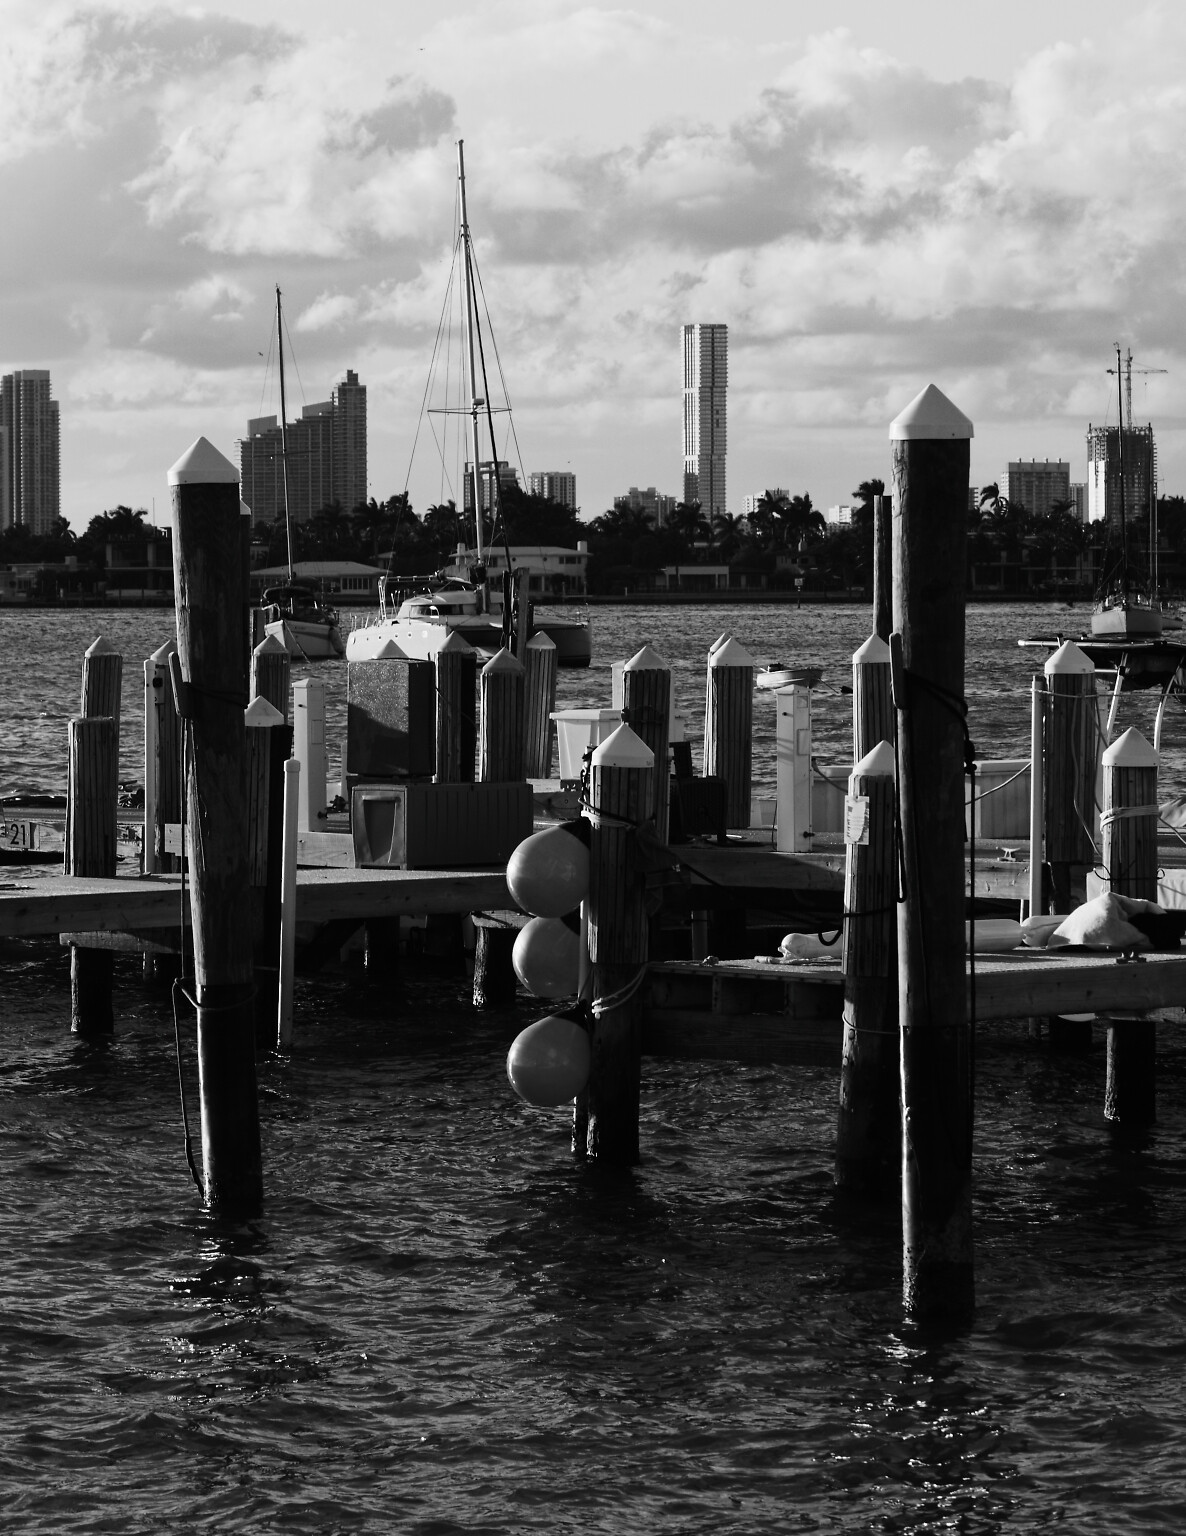
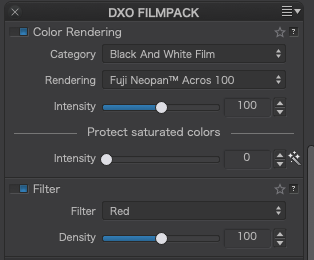
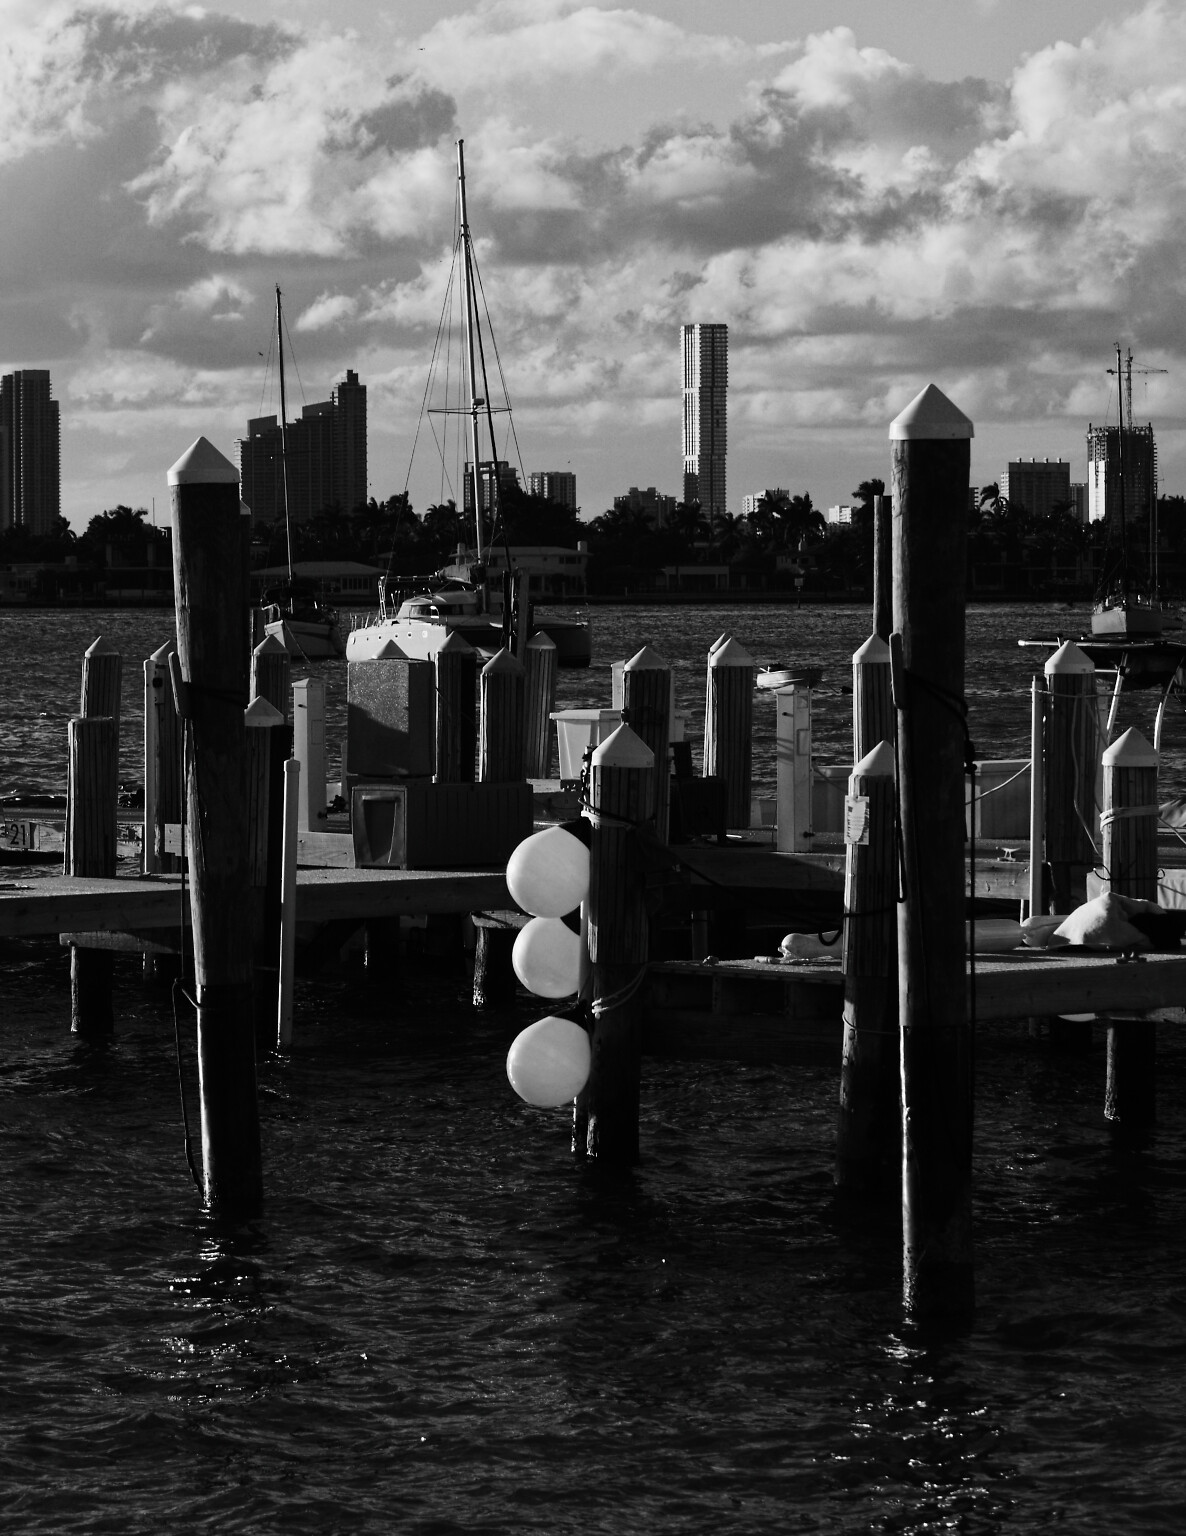
One of the advantages of getting FilmPack Elite is that you get the channel mixer and coloured filters.
Here’s a straightforward conversion to the Fuji. Neopan™ Acros 100 film emulation with no filter…
That part worked fine. It was only when I returned to the default (Standard) setting that the cropping was lost. I just re-opened the same image, clicked “Presets”, and all five choices were cropped. I click on Black & White, and I get the cropped image in Black & White. Then I click on Presets again and click on DxO Standard - the image opens, in color, cropped, then instantly the crop is removed and I’m again looking at the full image.
If it worked going to B&W, seems to me it should have worked again when I went back to Standard.
herman
(Leica M9 | iPhone 15 Pro | iMac M1 | PL, FP, VP)
233
On my Windows box I can see that already in the preset previews, see attached screenshot.
If you do not see this on your Mac it may be another difference between Windows and Mac implementations.
Thank you - I most likely will buy Film Pack Elite in the near future.
If I start with a B&W negative, can Film Pack Elite do most of the things in a dng file, that Nik Collection would do when adjusting to save the output as a ‘tiff’ ?
Essentially, yes. You start by duplicating the existing preset and then editing it.
Word of warning, whatever you do, don’t remove the tone curve from any preset you edit, there is a bug which occurs if you do and which DxO are currently fixing.
I have never been without it, buying it in a bundle deal when I got PL. IMO, well worth the money.
Yes. you should be able to do everything apart from using the Nik presets. What’s more, because of the way it is integrated into PL, it feels no different to using anything else that is part of PL.
I’m learning the most by taking new images in RAW format, and using the tools that all of you and PhotoJoseph have been teaching. While thinking about this, I was wondering about the previous 10 or 20 years worth of digital photos that I’ve taken. Back then I didn’t understand RAW, so they were all shot in jpg format, with whatever camera I had with me. I enjoyed taking photos in India the most, as they were so… unusual to me.
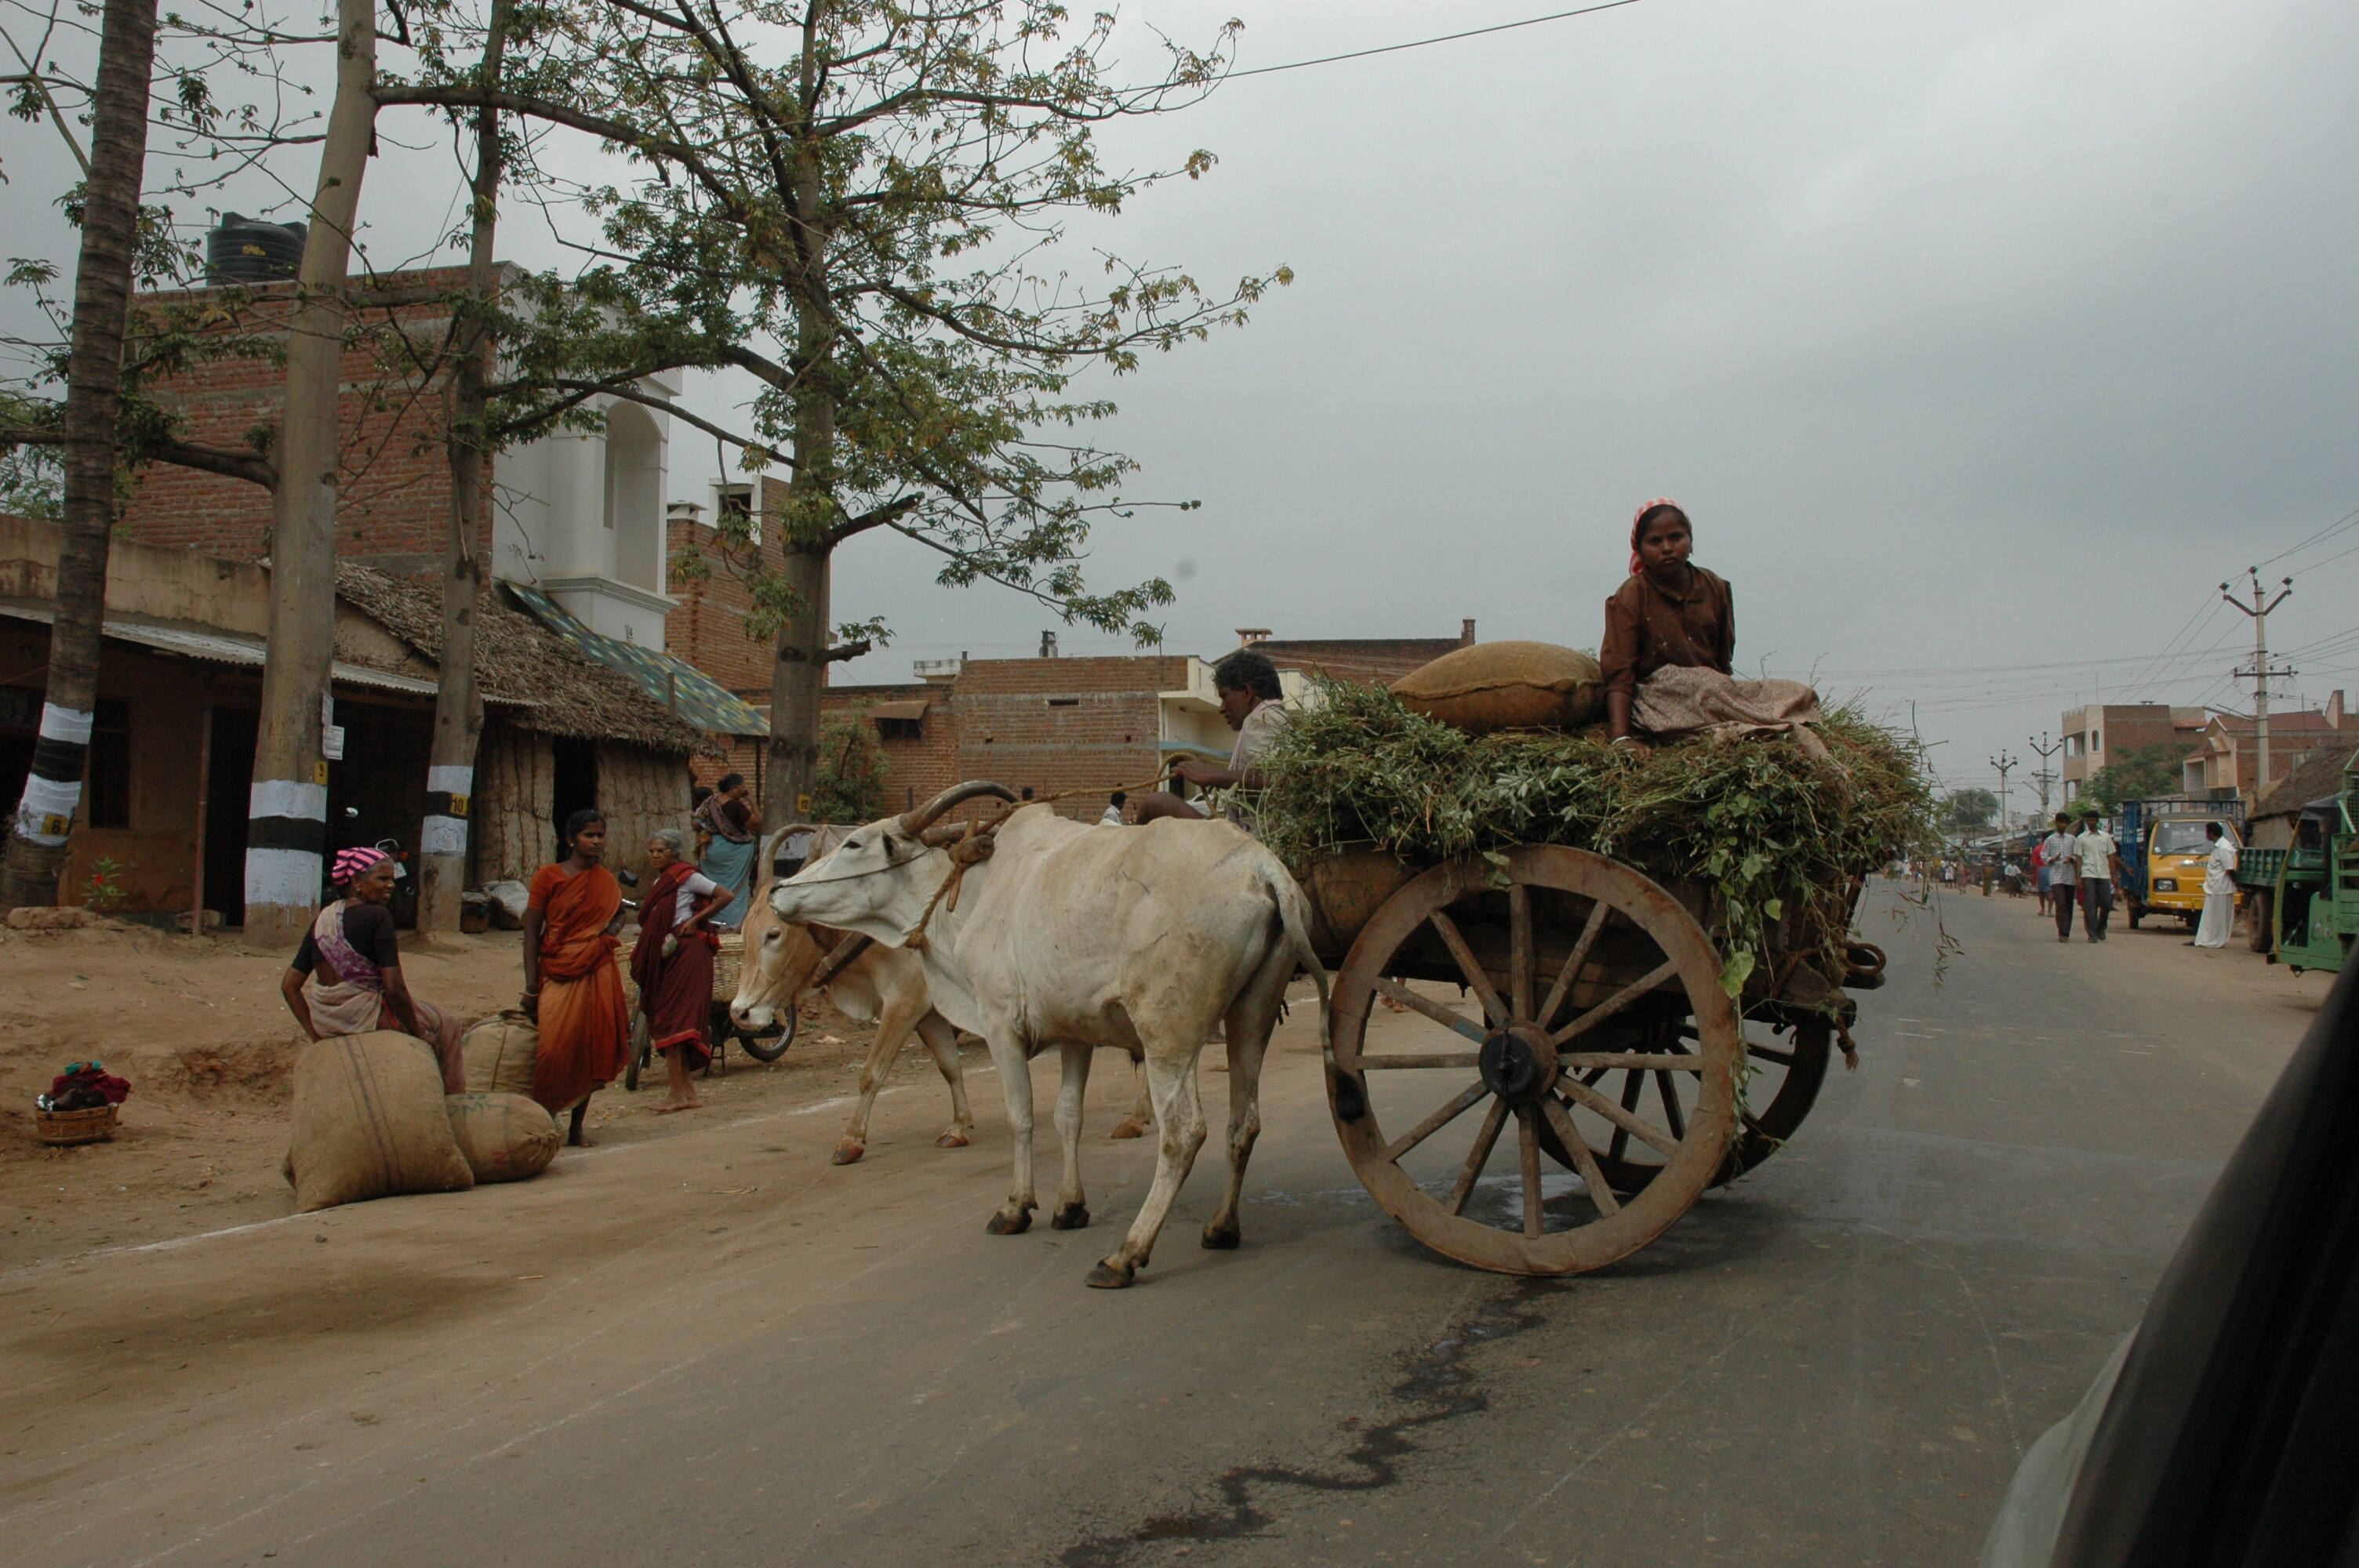
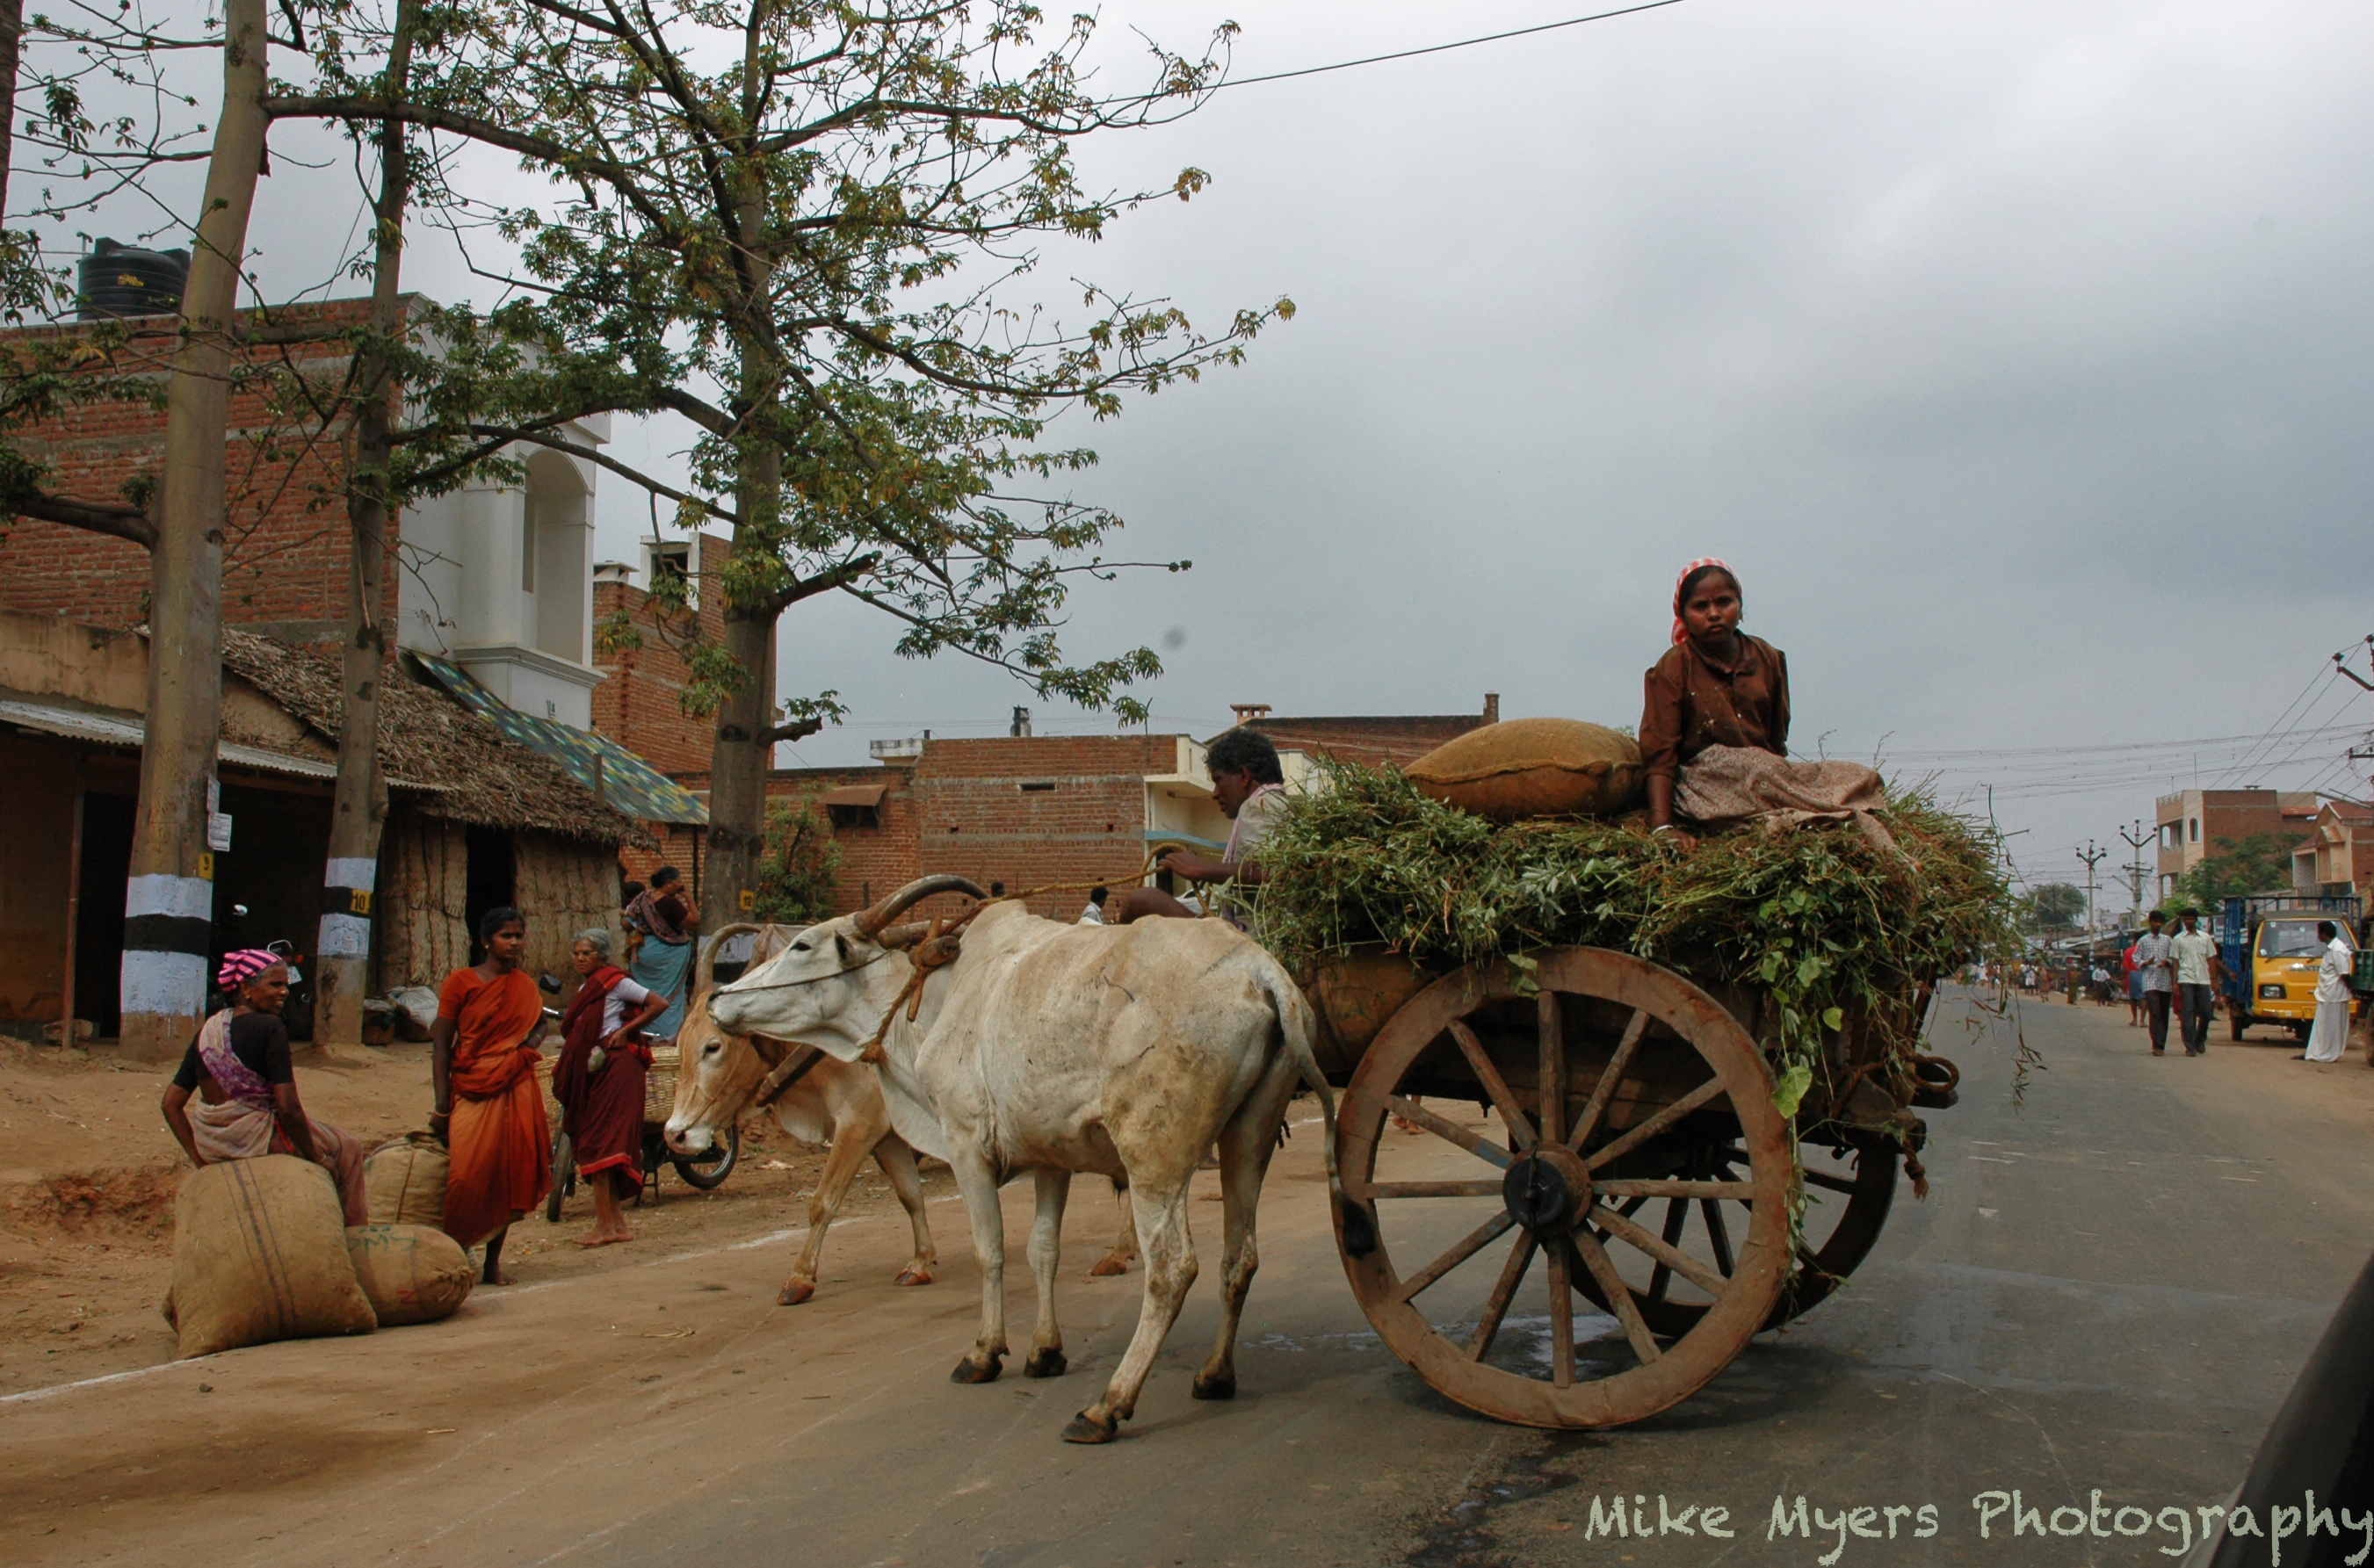
I went looking through them a couple of hours, and found a photo from 2005 that I remember liking, but not knowing how to make it look good. I think I was using an old copy of Lightroom at the time. I copied it to a new folder, and tried to improve it, without losing the “flavor”. - a dry, dusty day in India, bright clothing but not much of anything else. I saw the scene out of a car window and shoved my Nikon D70 out a ways (but not quite far enough).
I’ll post the original file here, if anyone wants to see what they can do with it. It’s not RAW, so none of the raw tools including DeepPrime will work. It’s not what I would call “sharp” nowadays, but it’s typical of what I was able to do back then. The lens was very inexpensive, and it was limited in what it could do - or maybe I was just limited in what I knew how to do with it.
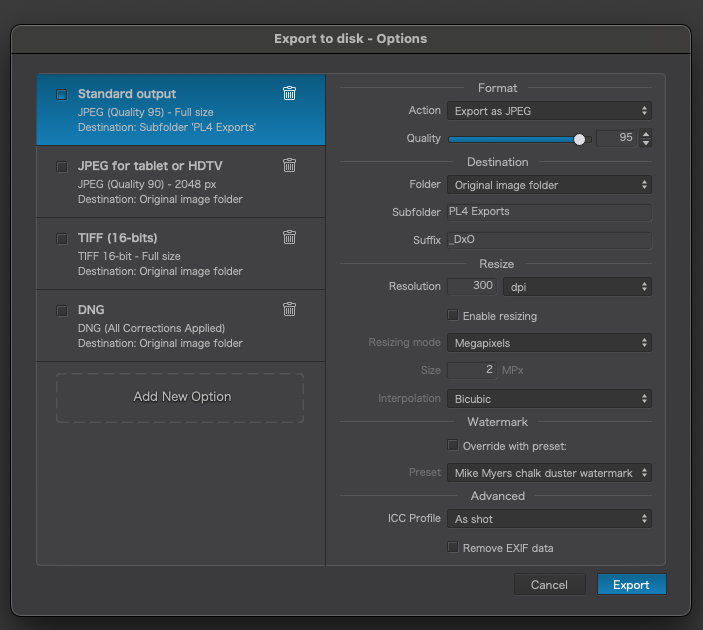
If not already noted – always EXPORT your images as sRGB, either for web or for printing. That’s the normal case.
Only when you want something printed as FineArt print etc and/or the printshop is asking for AdobeRGB colour space (check the printshop’s recommendations), you do so. – Only then you have to live with your screen’s limitations.
Normally, sRGB colour space is perfect for you, as it suits your monitor (100% sRGB, see manual).
Make sure, your screen is properly calibrated – accordingly to your monitor settings!
Example:
Let’s say, your monitor is set to factory settings (e.g. 6.500 Kelvin, 120 cd/m², Gamma 2.2)
and you are happy with that ( your choice ! ), but now, in the calibration process
you choose different settings,
adjust contrast, R-G-B and luminance to other values
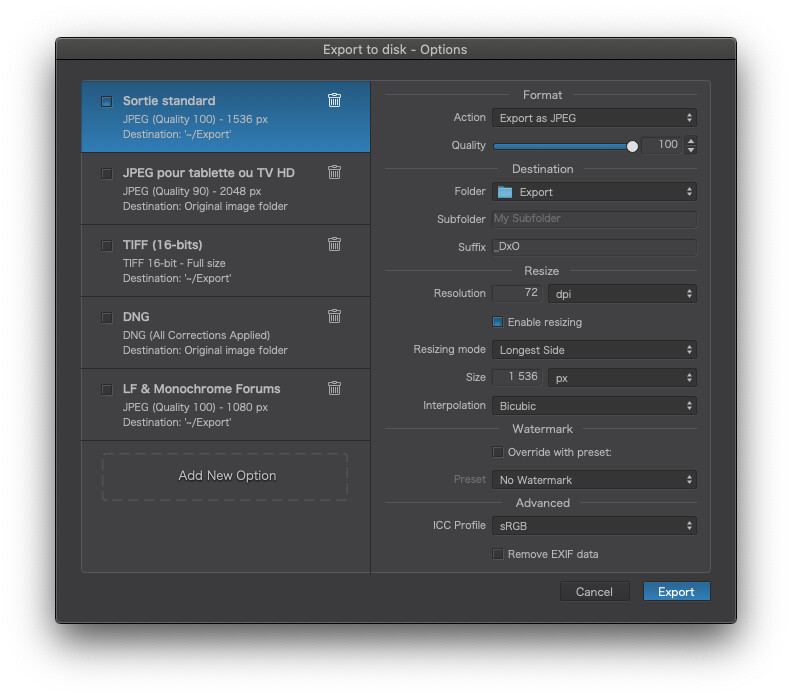
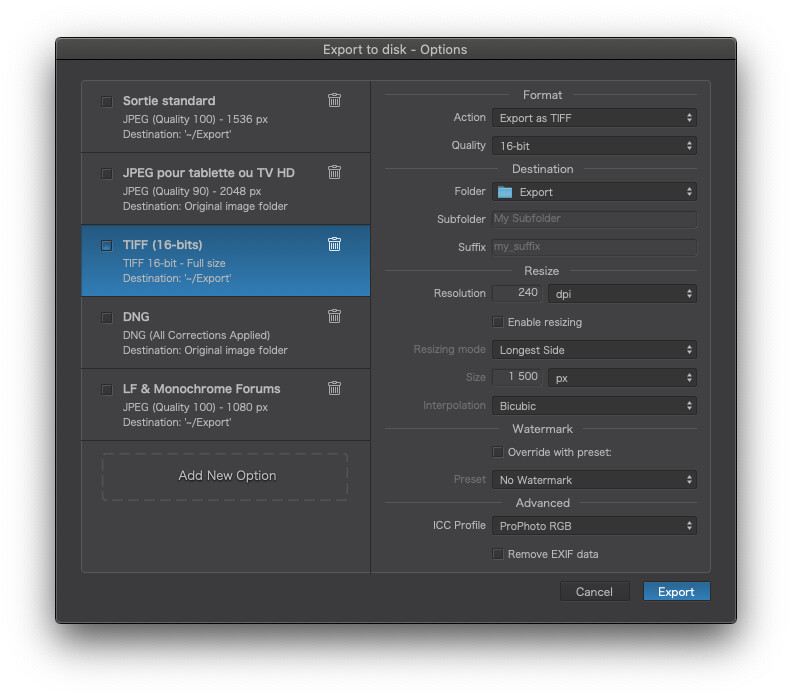
You might think that’s the normal case but it’s not what I do for printing.
I usually export as ProPhotoRGB and then either I or the printshop output the file to the printer with the correct profile for the printer/paper/ink combination being used to make the print.
It’s a bit like assigning a colour temperature to a RAW file - it’s there but it can be changed.
Here I use 240ppi as the resolution because it is adequate for most prints at normal viewing distance.
In both cases, I output to an Export folder under my home folder, to avoid confusing myself with exported files all over the place which I am going to delete anyway as soon as I’ve used them.