Wow Mark, thats very generous 
Mark, a big THANK YOU
Tous les presets de FilmPack sont disponibles avec le plugin intégré à PhotoLab dans le rendu des couleurs (options FilmPack). Sauf les rendus Designer qui sont appelés par le bouton “Appliquer un autoréglage” dans la barre commande en haut de l’écran.
All of the FilmPack presets are available with PhotoLab’s built-in plugin for color rendering (FilmPack options). Except the Designer renderings that are called by the “Apply preset” button in the command bar at the top of the screen.
Don’t thank me just yet. I did one and it only took a minute or two. I just need a block of time. I’m also not sure where to put them so others can access them. I’ll have to figure that part out. I didn’t check to see how big it is but I’m pretty sure each preset is fairly small in size. If I’m going to distribute them, even for free, I’m probably going to have to see if I can put the registered trademark symbol in the name, and whether that will create a naming problem for Macs and PCs.
Mark
Before you do too much work, Mark … there’s an easy way to preview all the FilmPack-related film-types;
- Within Color Rendering, select, say, “Color negative films …”
- Then select the first Rendering type (“Adox Color Implosion”) … it will be applied to the image for your assessment
- Then, with your cursor still on the Rendering option-box, simply press Down-Arrow to scroll thru all available film types.
- Ditto for Color Positive Films … etc
Regards, John M
PS. If you decide to stick with your preset approach then remember to create them as Partial presets.
2 Likes
I was thinking about creating presets and share them.
For this I would:
- start with an empty partial preset to make sure local corrections are not reset
- look at the actual file and figure out if I can automatically generate the rest (I hate repetitive work)
- publish the result on Github with a Creative Commons license that allows commercial usage and encourage other people to contribute updates, fix errors or come up with an even cooler idea
Yes, thanks. I saw your post. It was more a general idea on how to create and share own presets, e. g. with variations in strength, without having to do everything manually…
very kind to do.
Very easy: create a gmail account and you get 15Gb cloud storage for free.
and you can open it for downloading by sharing.
I hold down an scrolled to the end, then i realized you just select one filter ánd apply that and with a arrow so scroll up or down to change the filter which is automatic aplied.
Still a need trick 
Good thinking, sins we have a new category you can put the link there when you ready.
About partial presets, did any one some on contrast? like:
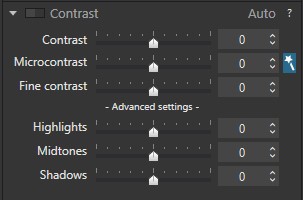
Not the common one’s as low mid and high on one slider as contrast is but more fine tuned one’s
which includes micro and fine settings?
most of the time i just fiddle a bit until i am satisfied (i am to impatient to look through al the possibilities behind all tools  ) but a partial preset list to apply only for contrast for portrets, landscape, buildings, sundowns, That could be usefull.
(like the NIK’s black and white filters can do)
But it’s still just a list. Using the down arrow, (on a PC) does nothing. And yes they would be partial presets.
This is how I preview film emulations. I don’t know why the down arrow does nothing for you, Mark - it works for me and does not require that I keep the mouse cursor on the Rendering box; it only requires that selecting a film emulation be the last operation I performed. (The arrow keys will continue to control and adjust whatever you last selected until you select something else or undo a different operation.)
I use DxO software on Windows 10. When I use the up and down arrow keys to change a setting, I see the results immediately.
1 Like
I got it now, but I still think presets may be more useful then scrolling through all of the choices to preview them one at a time.
Mark
I’ve created 9 partial presets, which only change the film type, as an initial test. It only took around 10 minutes to create all 9 of them. They are very small, only 660+ bytes each. They work on my desktop, but I will copy them to my laptop to test there as well. Can’t do anymore right now, but the effort is much smaller than I thought it would be. Once I have finished and tested everything I will zip them up and make them available, at no cost, to whoever would like them, including DXO.
Mark it
1 Like
Just curious, Mark: How is it different ?
John M
Instead of scrolling through them one by one to see the effect of each on your image, you can view the general affect of each film type in the preset previews, visually compare them, and directly select the one you prefer. Yes, some of the film types may be more difficult to choose on the small preset previews (that’s true of almost all preset previews), but we can still get a general idea how each one differs without having to scroll from a list. I think presets would allow us to select a film type faster and act as a memory jogger in future editing sessions. It doesn’t replace the other method, it just adds additional flexibility.
Mark
OK - Gotcha … Thx, Mark.
John
I should be done in a couple of days. I’m almost half way through.
Mark
I’ve finished creating the FilmPack partial presets for PhotoLab. I just need to do more comprehensive testing before I’m ready to make them available to others. DXO had already created 39 color and b&w Filmpack Designer presets for PhotoLab. I created an additional 82 film presets representing all the FilmPack film types as well as the 5 Generic film types already included in PhotoLab, Of course for them to work, Filmpack has to be installed.
Mark
5 Likes