With a thousand apologies as I am sure my inability to solve this is my fault, but it isn’t for want of searching.
When I take a frame in portrait orientation the two lines in the force parallel tool are horitonal not vertical. That is they are parallel to the short edge of the frame - correct in landscape but unhelpful in portrait. I can’t find how to make them vertical in a portrait frame, ie parallel to the long edge of the frame.
You can also simply do not take care of the default lines displayed and directly draw them where you want.
And this is true for all tools of this palette, and Horizon.
Wether my pic is in portrait or landscape orientation, the force parallel lines always turn up vertically,
(what they should do – and I can grab & move them where ever I want).
Check, if you have set your cam to play back ‘portrait pics’ vertically without the need to turn the cam. That’s the only thing I can image.
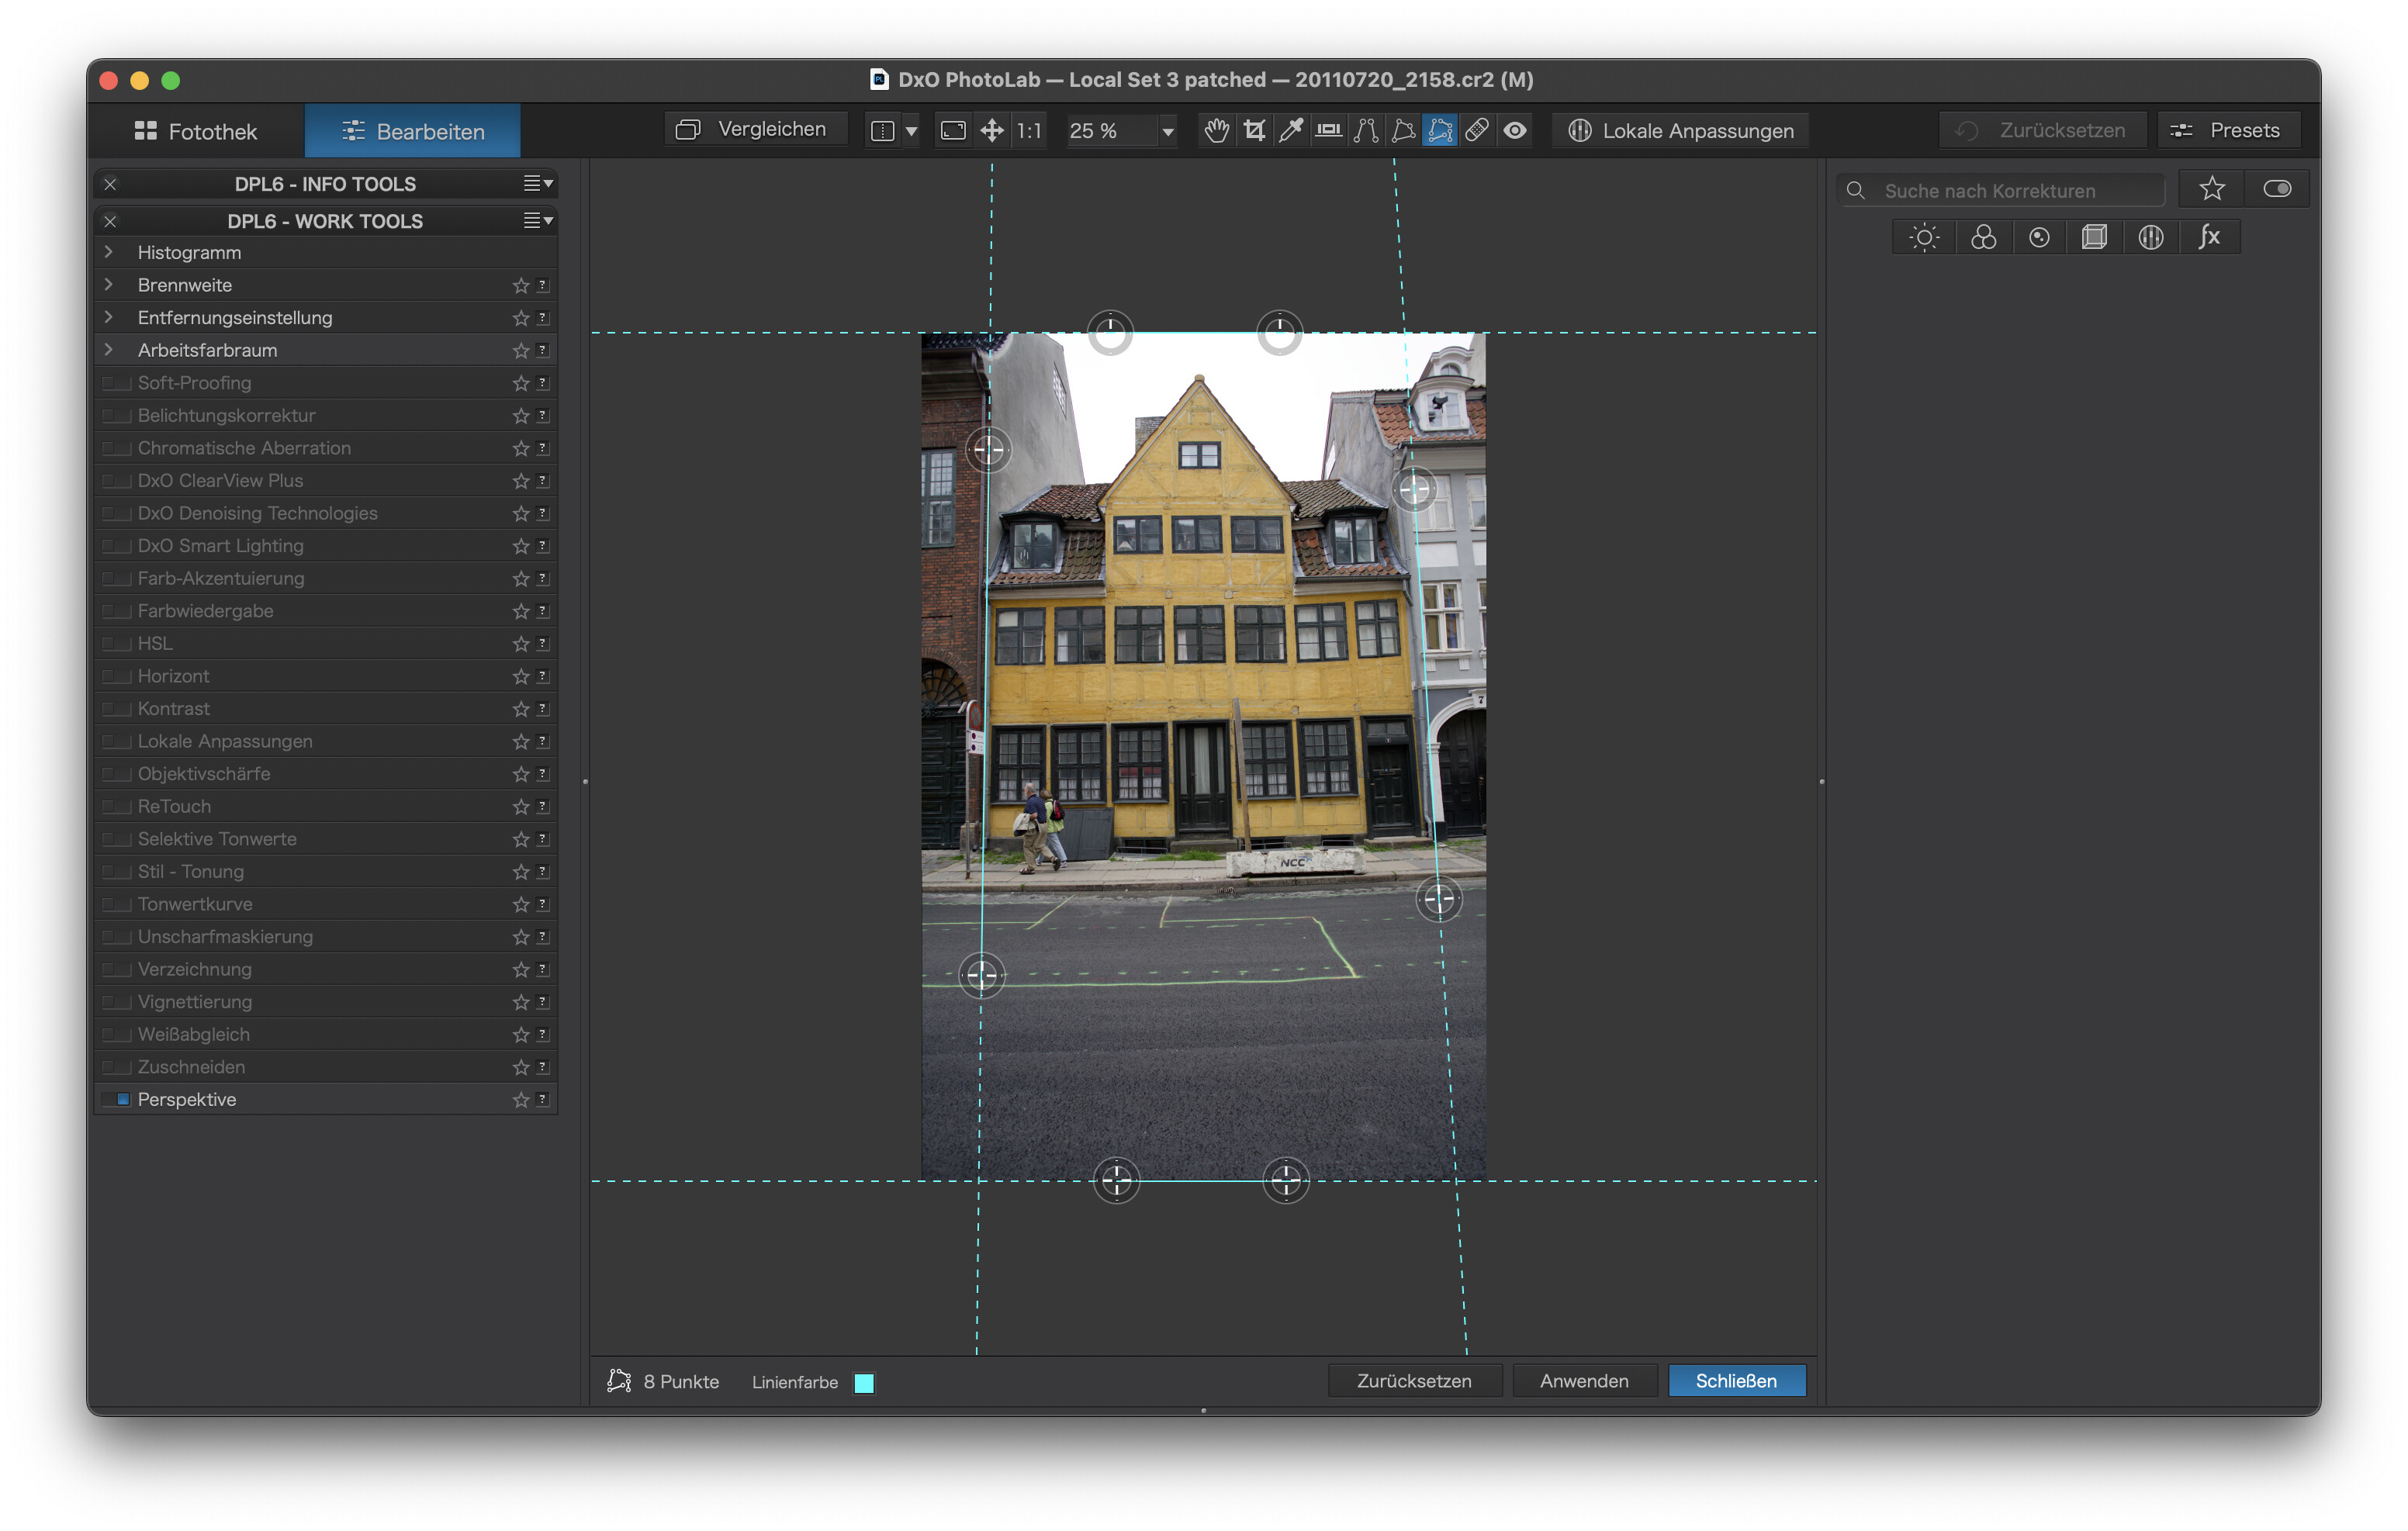
A handy tip (on Windows version) is to activate the Perspective tool by clicking on the “Magic Wand” - and then click on your sub-tool of choice (say, Force Parallel) - and PL will auto-place the the guide lines … which it often does quite well - typically useful as a valid starting point.
…works on Macs too. You can use the dropdown selector of the perspective tool to select vertical, horizontal or full correction.
I often use the perspective tool by selecting the type of correction first and then clicking on the magic wand. Sometimes, the tool places the lines in strange places, but that’s easily corrected by dragging the lines to where I want them.
Another tip - for a bit more authenticity - is to set the intensity slider at 75% … It avoids making the correction look fake … and can be easily be increased if that’s what the circumstance requires.
I never make (architectural) verticals truly vertical in the image frame, if the view point is below the midpoint of the building. If you make them truly vertical, the building looks as if it’s leaning towards you. A common fault even in professional architectural photography - and yet the Ancient Greeks understood this feature of forced perspective.
By the way I’ve had no similar problems with the perspective frame tool. Maybe it’s something to do with the way Fuji (if Andrew is who I think) identifies rotated images?