Same here! So many twists and so many questions about how to know when you’re dreaming.
1 Like
I went for a walk down Lincoln Road this afternoon. I found several things I found interesting, a better view of the theater that @Joanna found I should capture to show off the building, several scenes that intrigued me, and finally a way to test Joanna’s suggestion of how to adjust the exposure when there is something like a sunset in the photo.
I’ll start with an image that I imagined, as I couldn’t really see it - but PhotoLab brought out what I was thinking. Actually, without PhotoLab, I have no idea how I could have done this. I knew what I wanted the second I saw it, but wasn’t sure I could manipulate it the way I needed.
780_0176 | 2022-11-24.nef (28.2 MB)
780_0176 | 2022-11-24.nef.dop (13.7 KB)
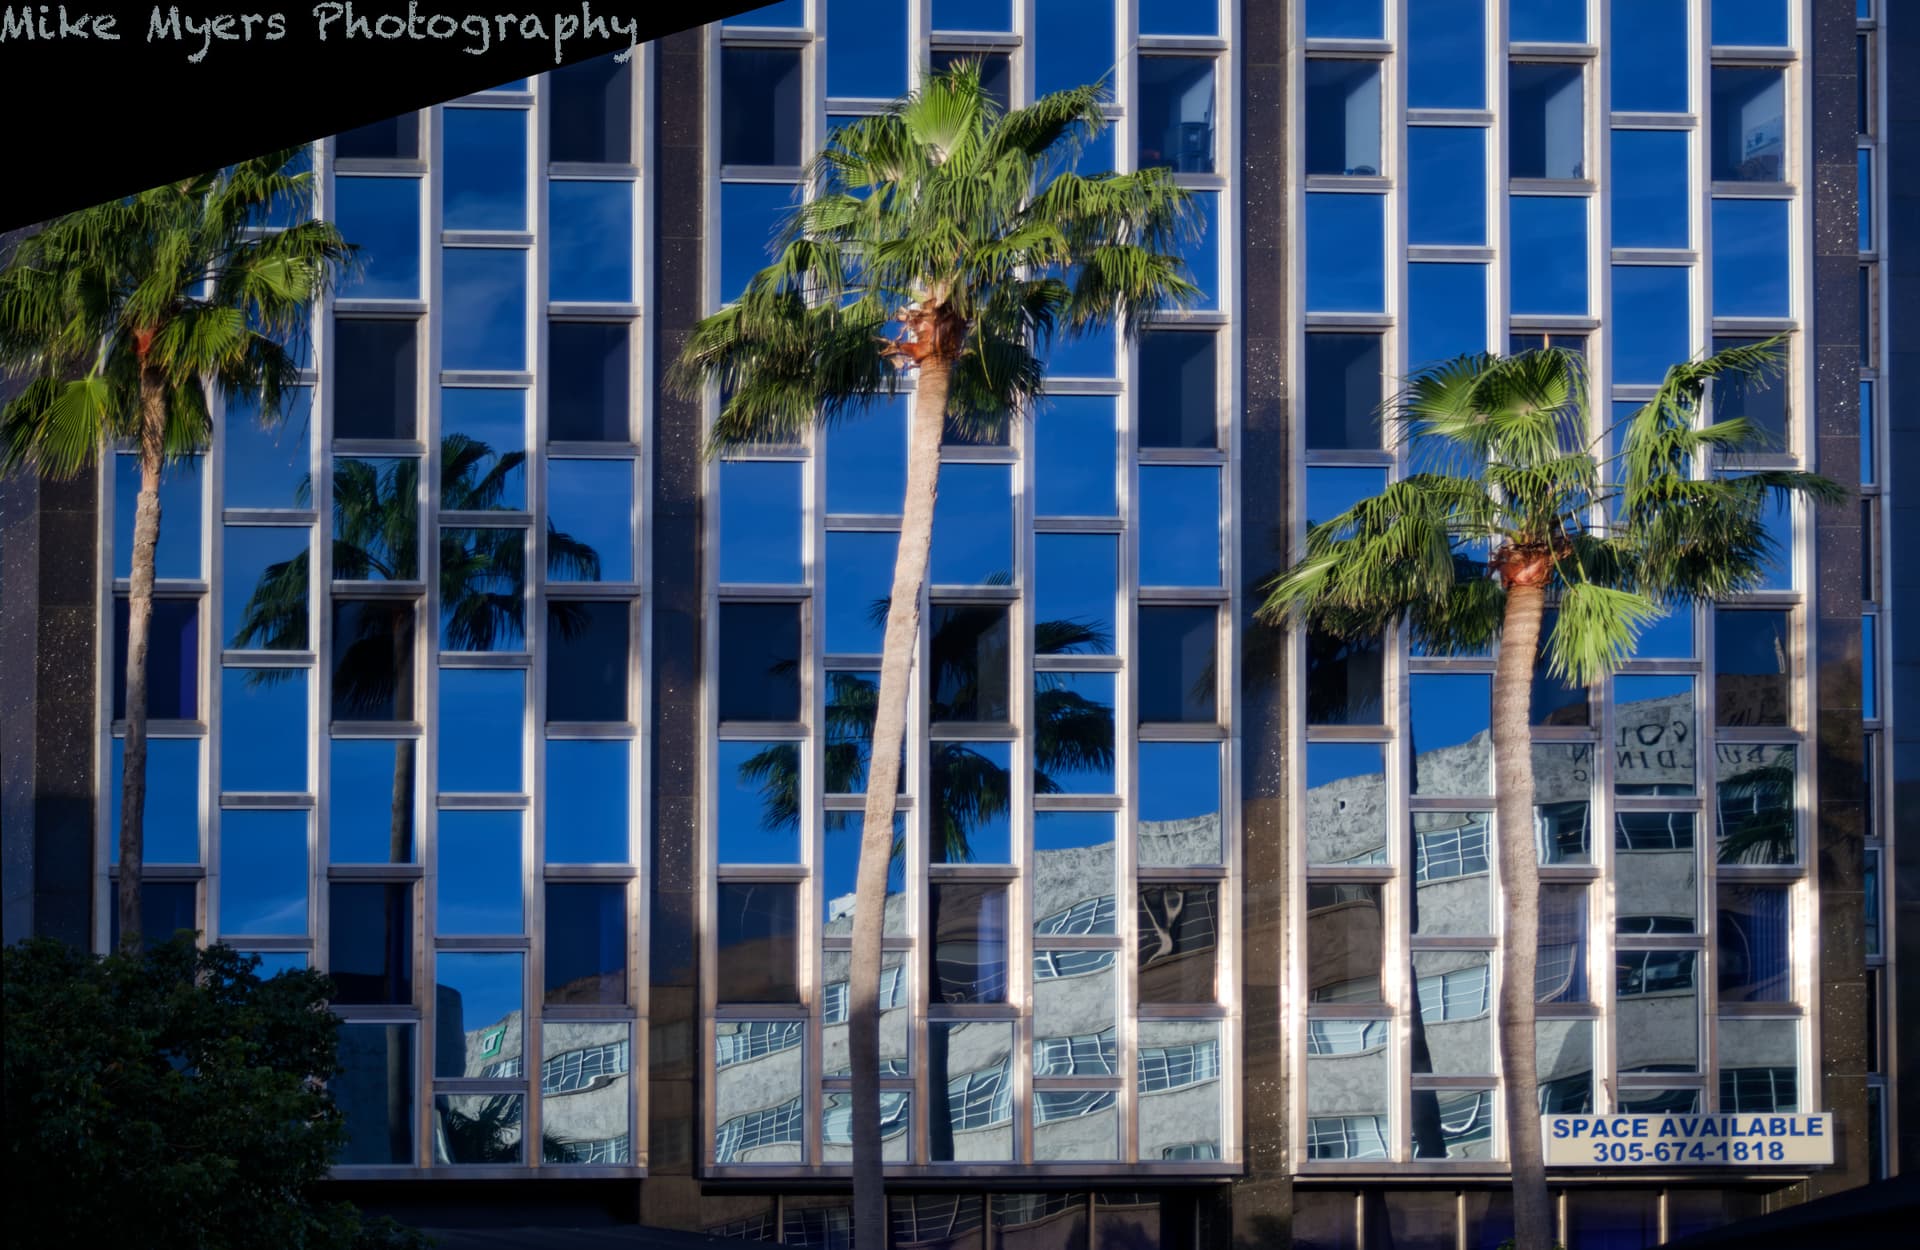
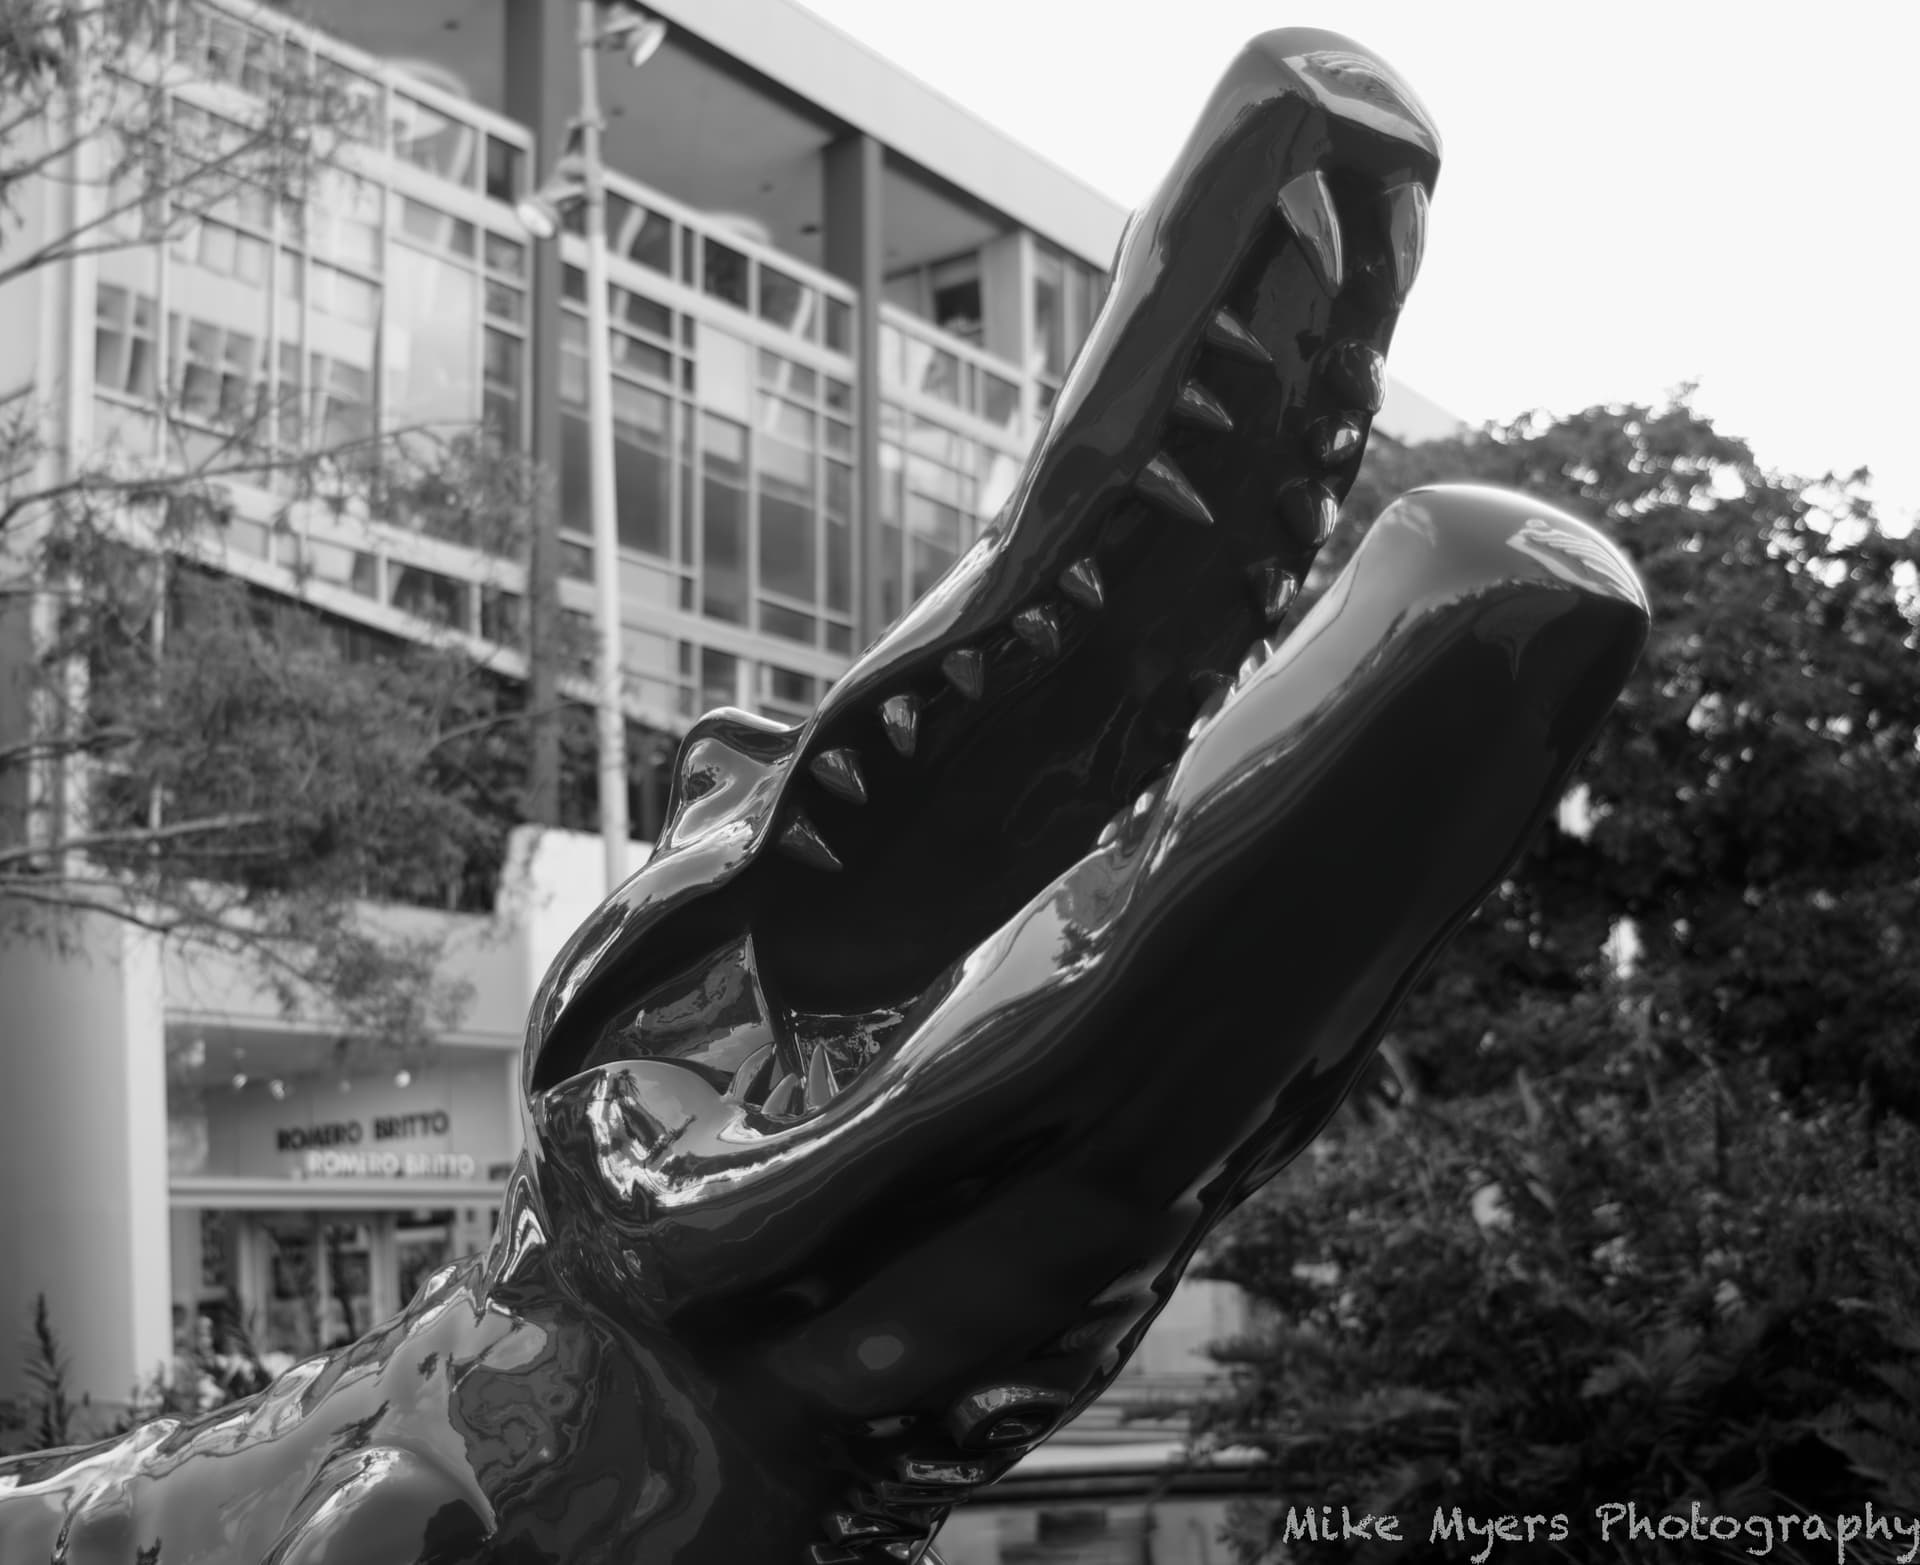
I saw this image, and spent what seemed like forever to make it into something I could post here and send to people. Lots of angles to shoot from, but only one that I liked, and I thought it was more effective in b&w than color - as a color image, the color took over the whole image, and everything else was secondary. I loved all the reflections too. One limitation of my small Nikon zoom is it isn’t very fast. I was able to shoot at f/3.8 but it didn’t put the background as out of focus as I hoped for.
Oh, and I was going to just convert to b&w, but my first attempt looked ugly. Once again I went back to “Fuji Neopan Acros 100” and the image instantly came to life the way I hoped it would. I learned about this film from @Joanna, and in the future, if I start shooting film again, I wonder if this is still available in 35mm. Anyway, here’s the image:
780_0154 | 2022-11-24.nef (26.5 MB)
780_0154 | 2022-11-24.nef.dop (13.8 KB)
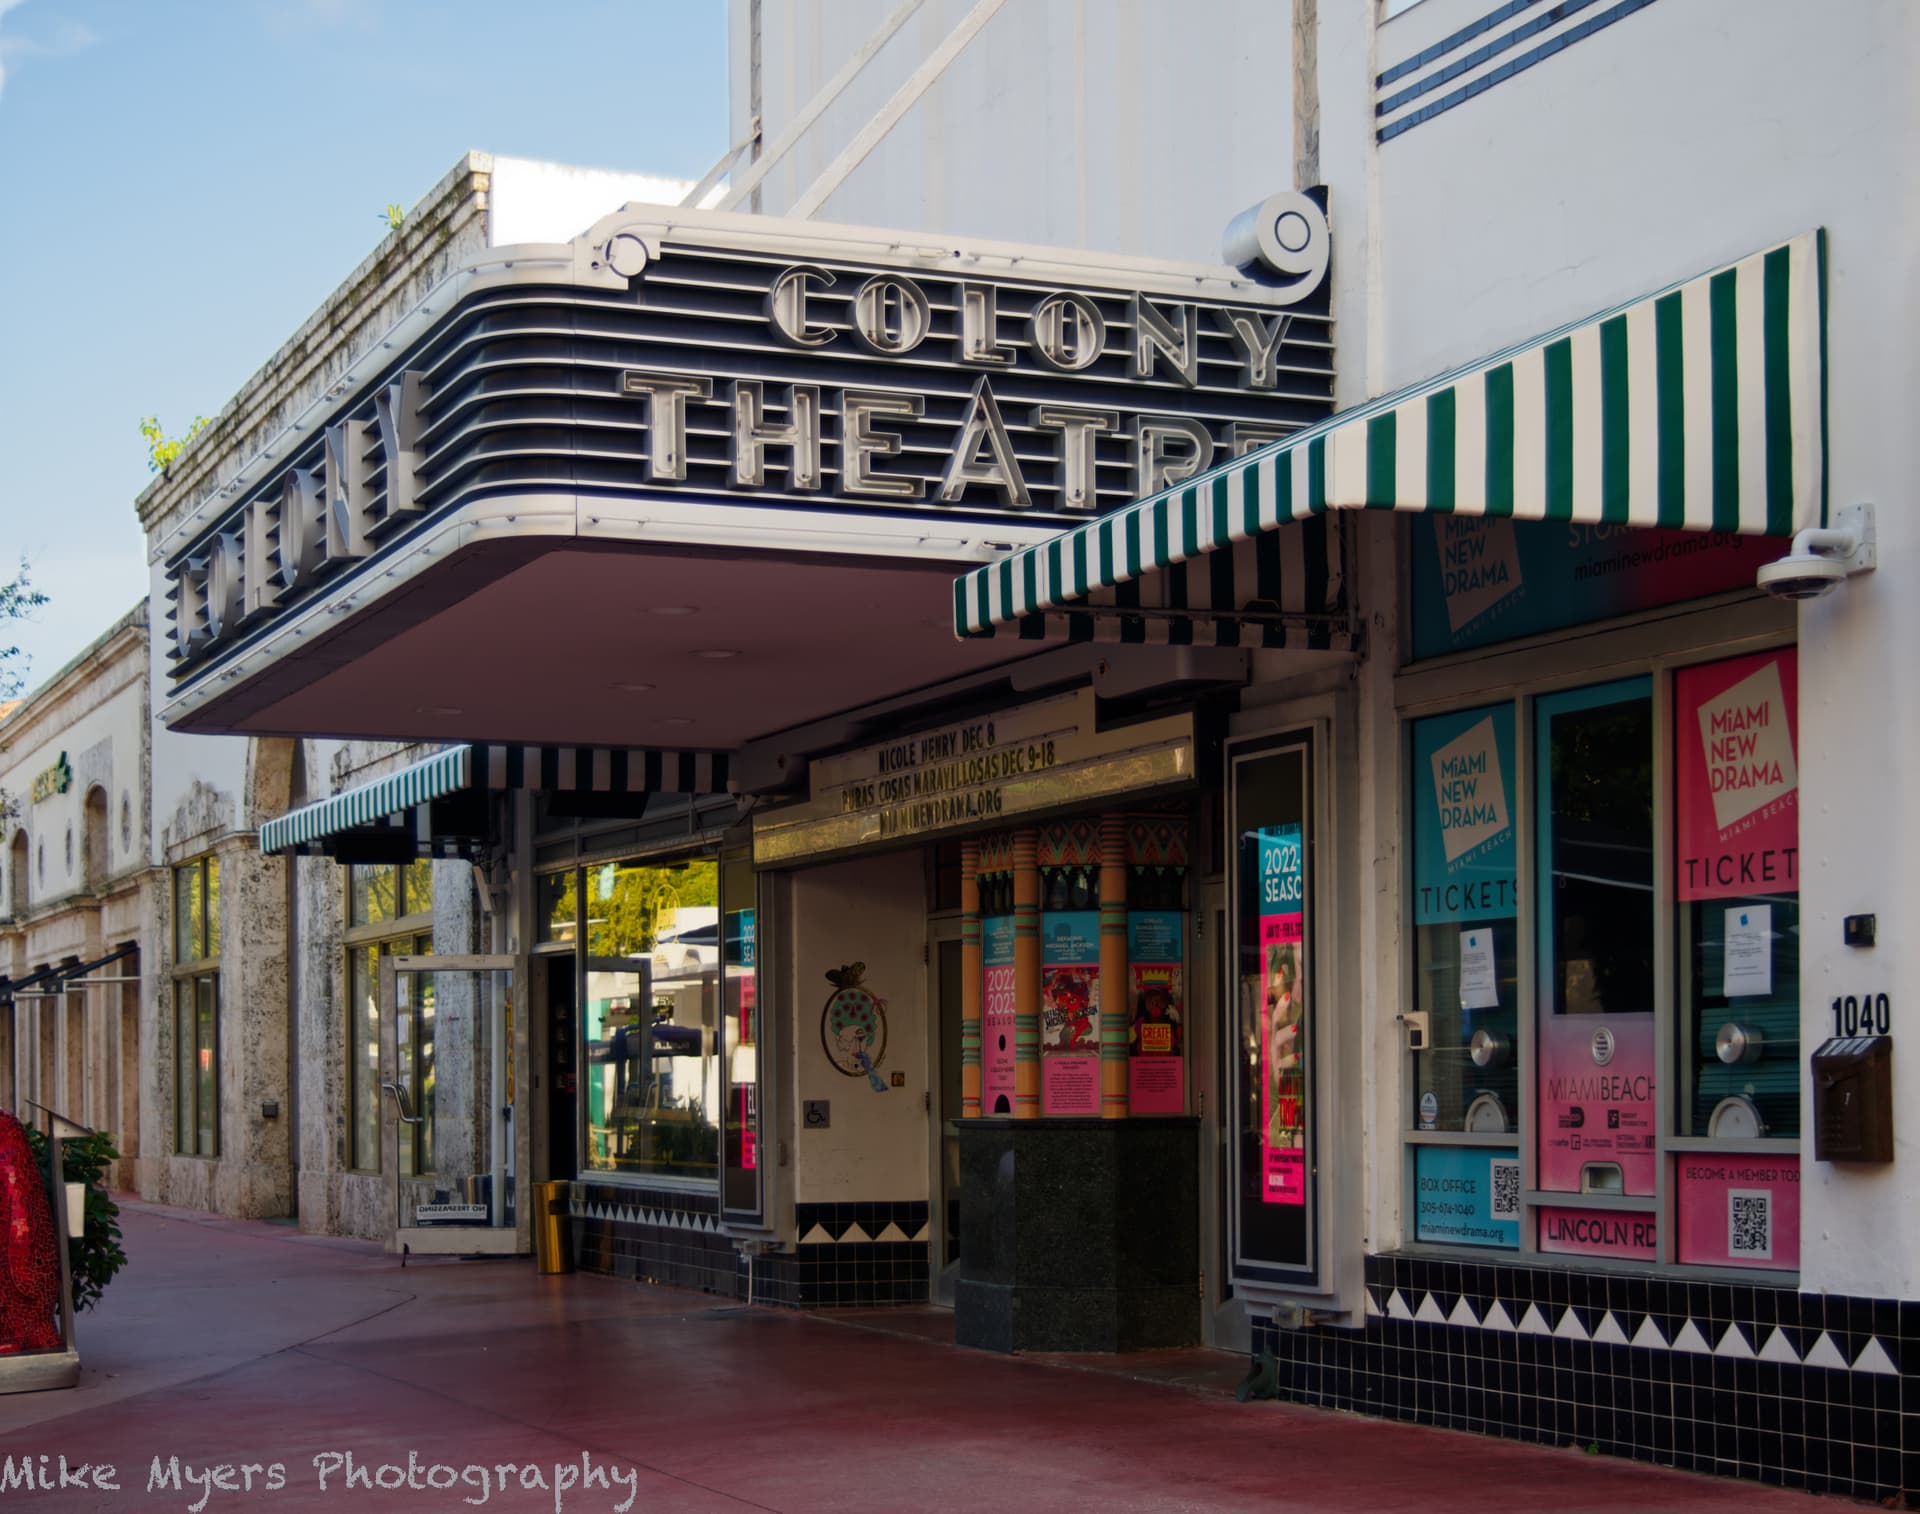
Theater photo for @Joanna.
Sorry about the “stuff” at the bottom left. To get the view I wanted of the theater, I couldn’t get rid of it. I did remove my photojournalist cap, but I thought it was best to get the theater look good - and with today being Thanksgiving, I didn’t have any crowds to fight in getting a clean image. I did take photos that showed the top of the building, but this view looked better. It’s probably the best photo I’ve yet taken of the theater, but with no people, there is no "action. Maybe I’ll post my “action” photo after this one, or maybe tomorrow I will try to do better.
780_0158 | 2022-11-24.nef (27.3 MB)
780_0158 | 2022-11-24.nef.dop (20.1 KB)
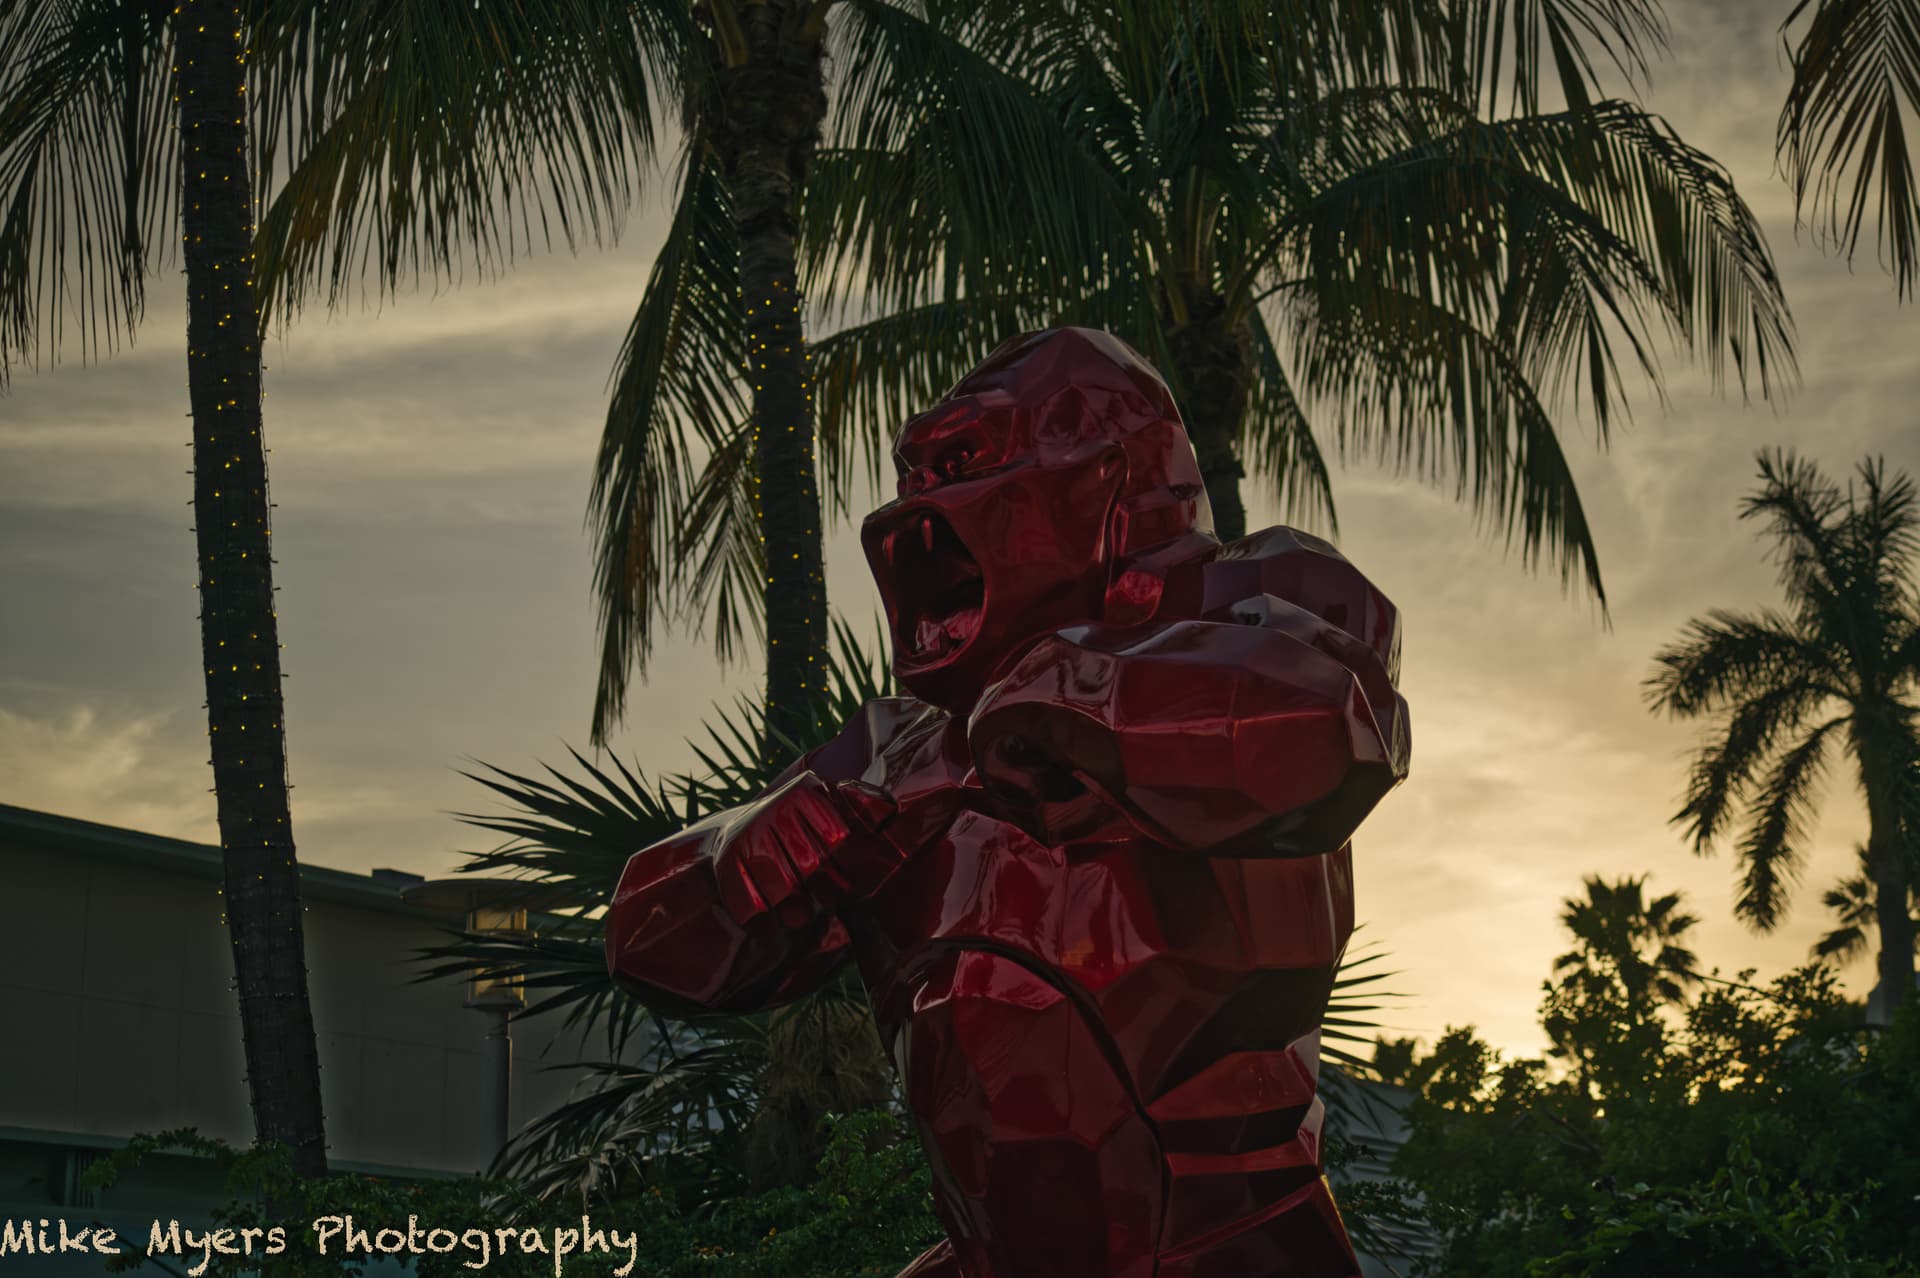
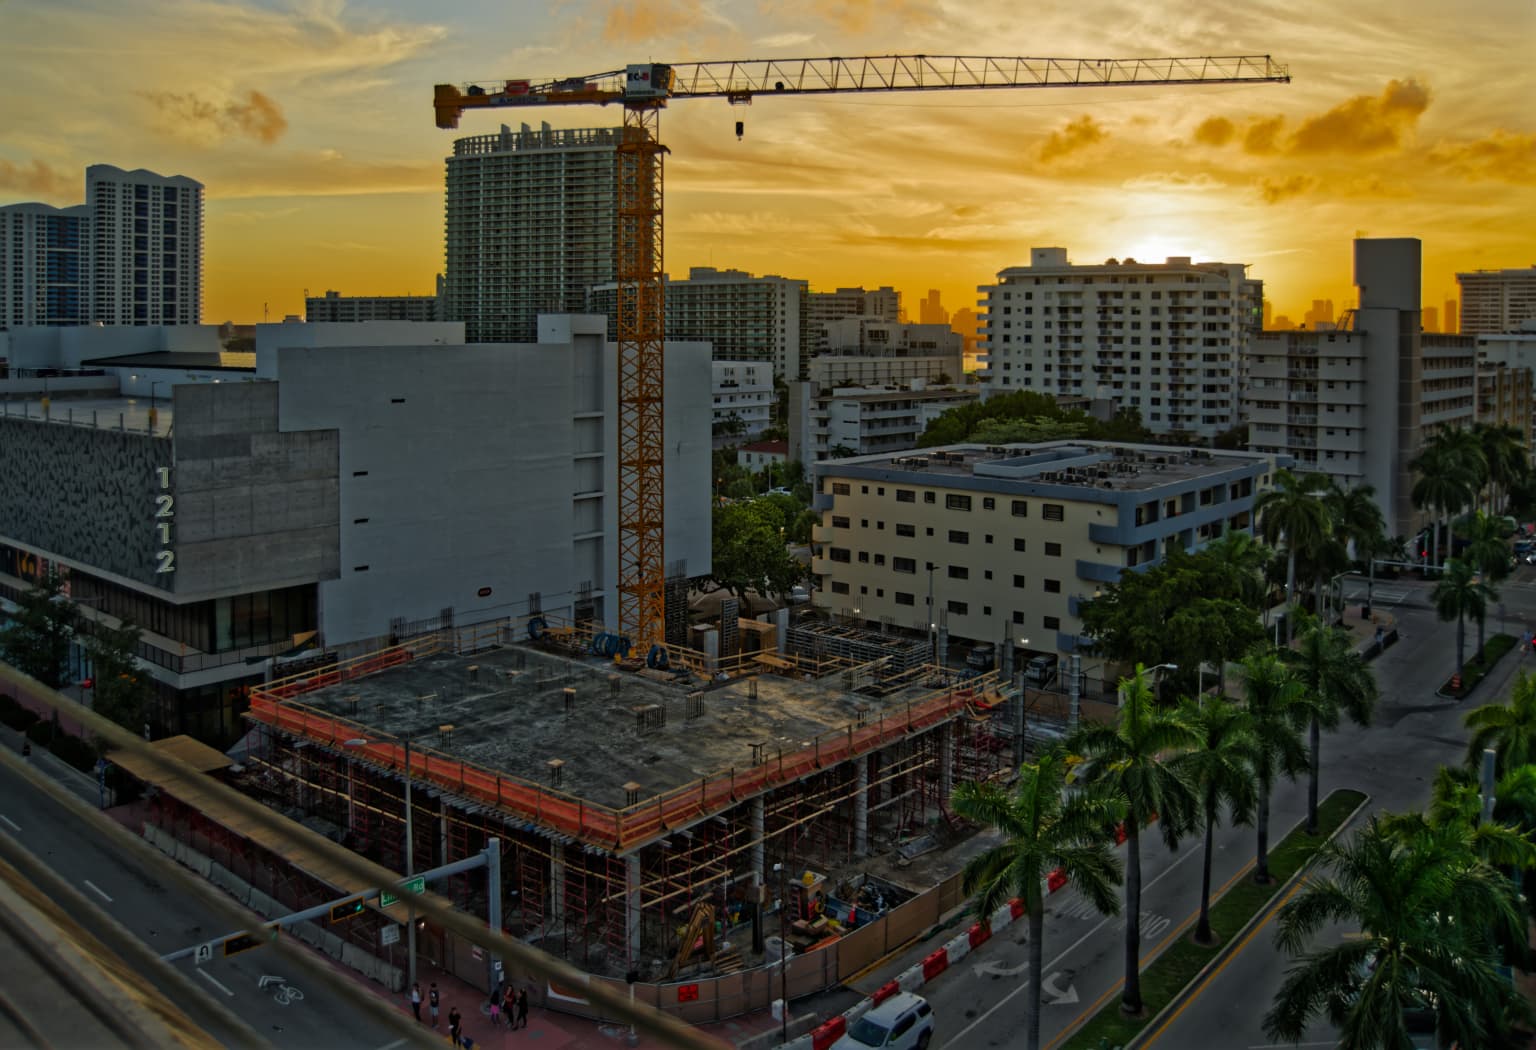
One last photo, mostly as a question. The sun had just gone down below the trees. I set the exposure as +1.7 so the brightest part of the sky should turn out almost, but not quite, burnt out. According to PhotoLab, that worked - the over-exposure shows as tiny “blue” dots on my screen, so the sky there is right on the verge of being blown out. I had recomposed to create the image I wanted, which looked like a black silhouette in front of a mostly dark sky. The photo came out infinitely better than what I expected, so maybe I did this correctly? Curious what people think - if I did this right, I’ll know better what to do next time.
780_0194 | 2022-11-24.nef (25.2 MB)
780_0194 | 2022-11-24.nef.dop (14.4 KB)
One last thought - I am beginning to wonder if I could have done all this with my M10. The D780 has all the right tools, and a lovely viewfinder. The meter is precise, and accurate, and it apparently has a good spot meter, or at least one that is adequate for measuring sunsets. I suspect I could make either camera work, but the Nikon is a more accurate “tool”.
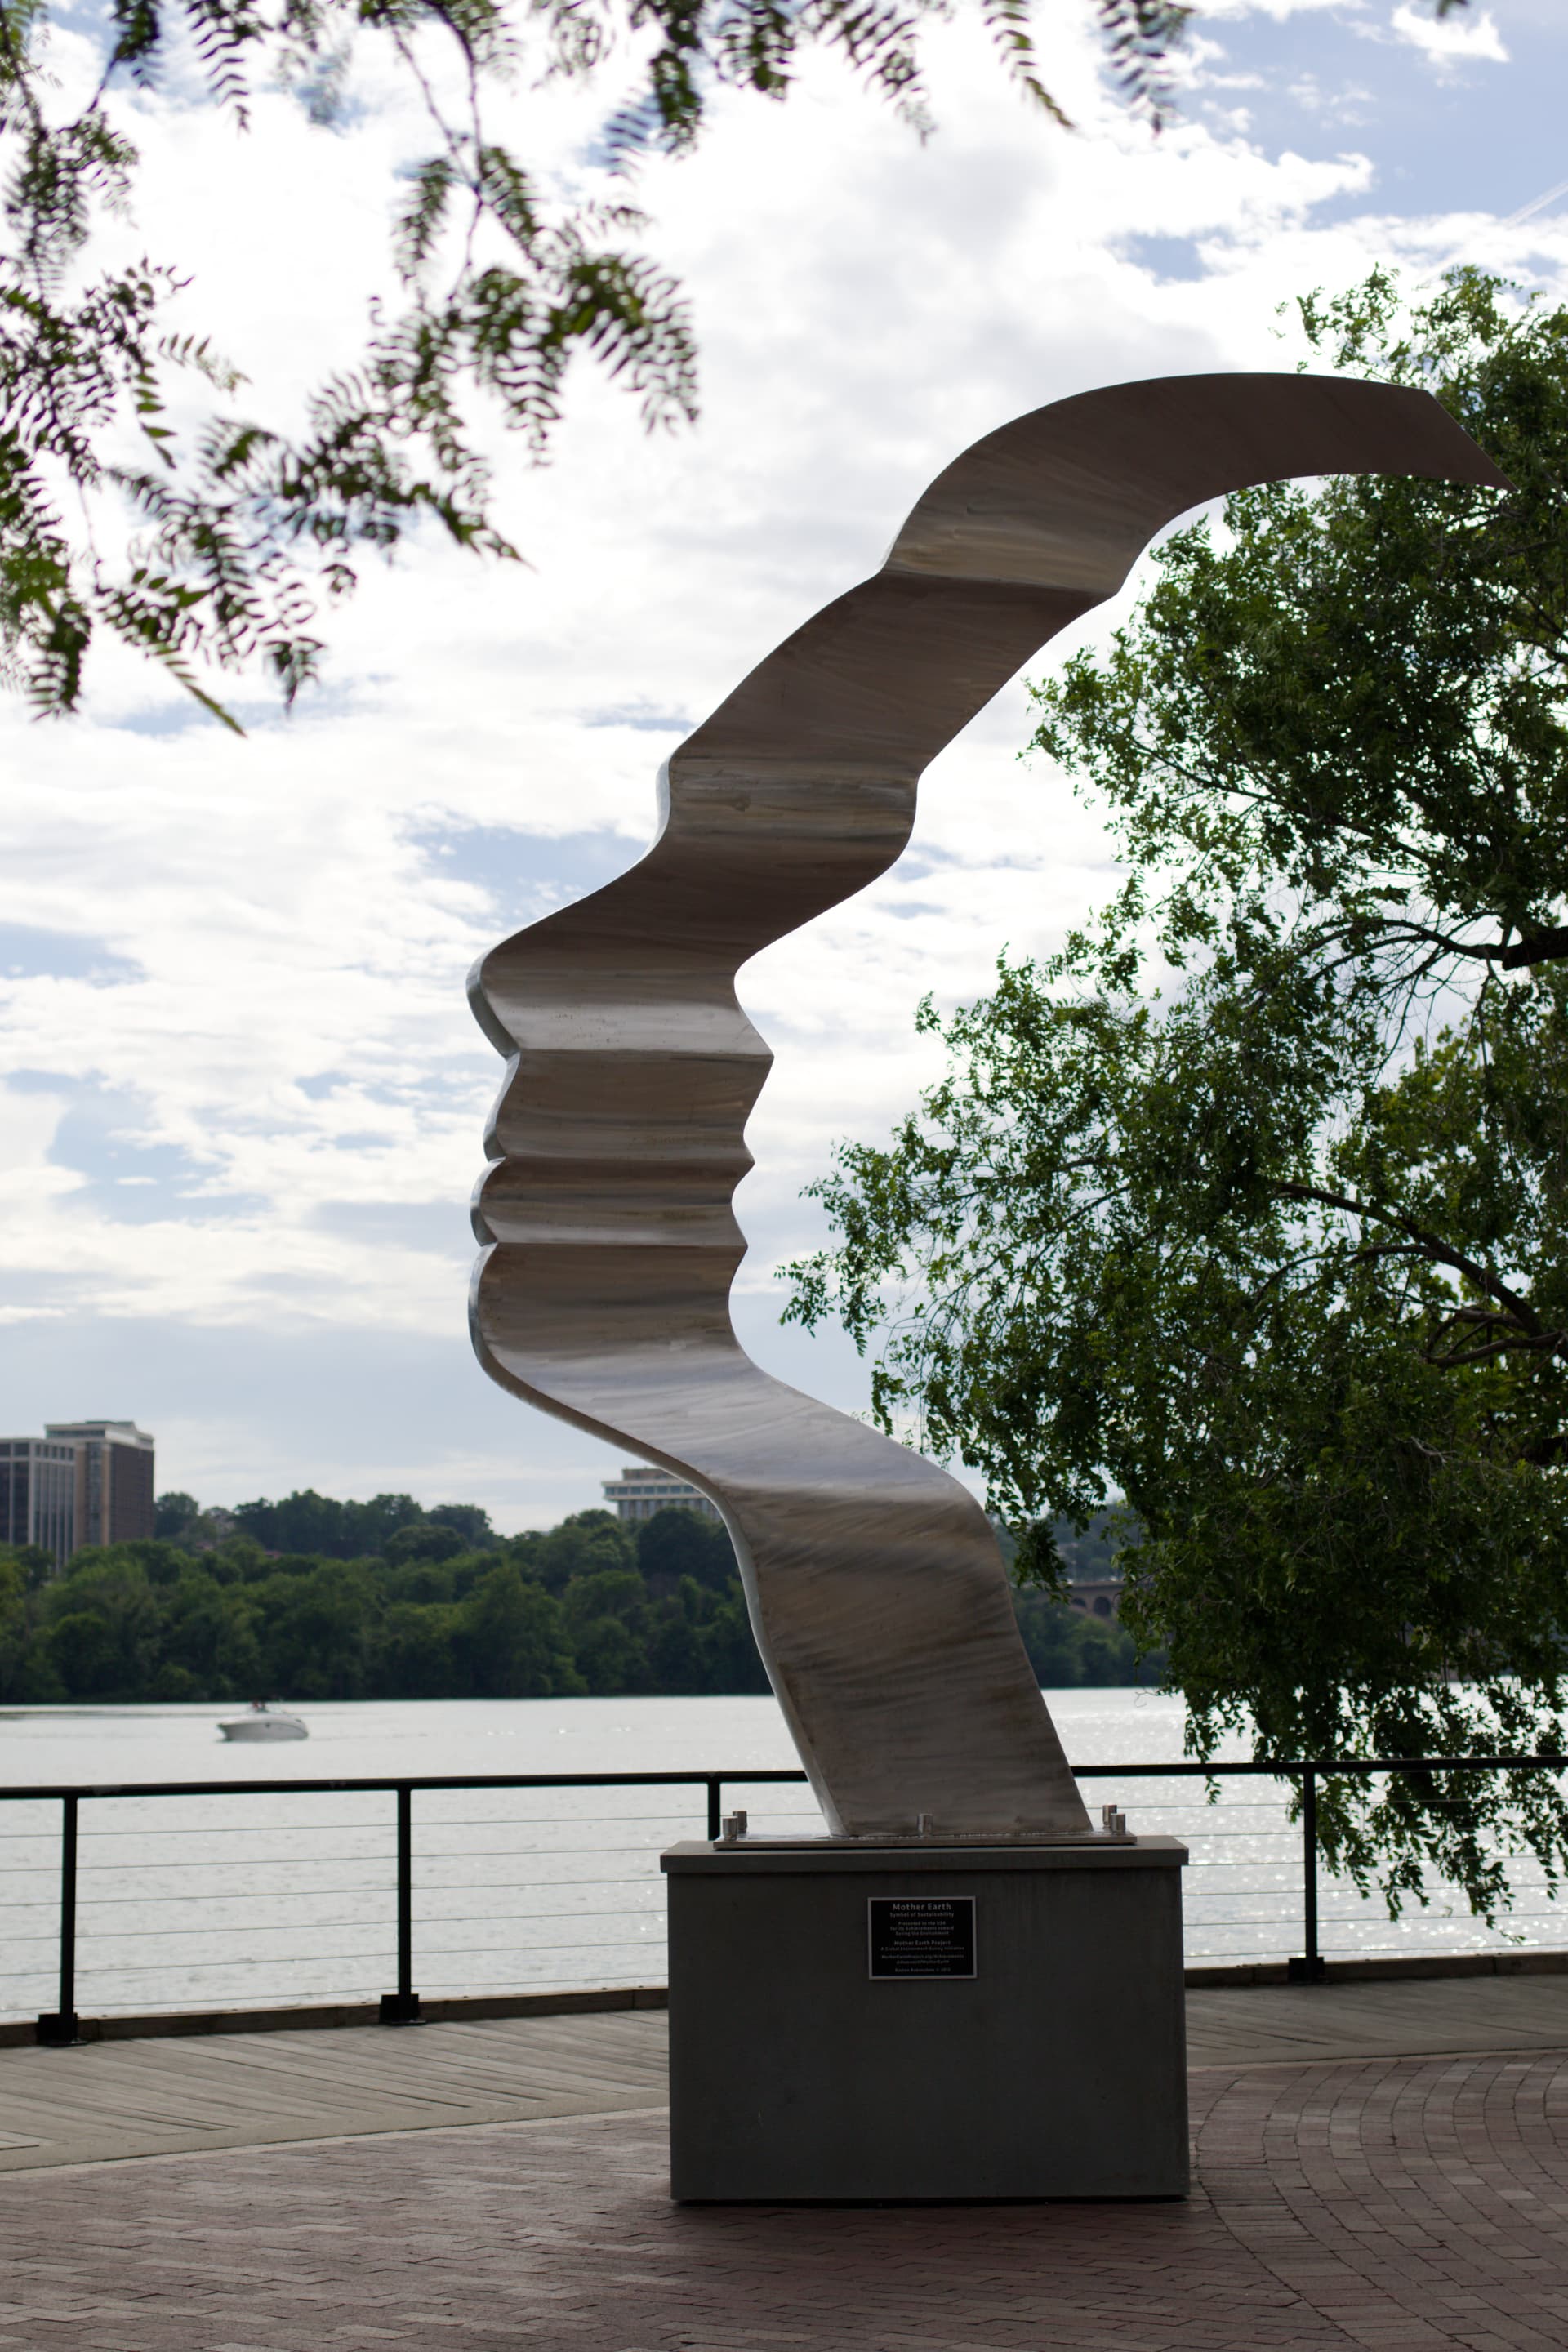
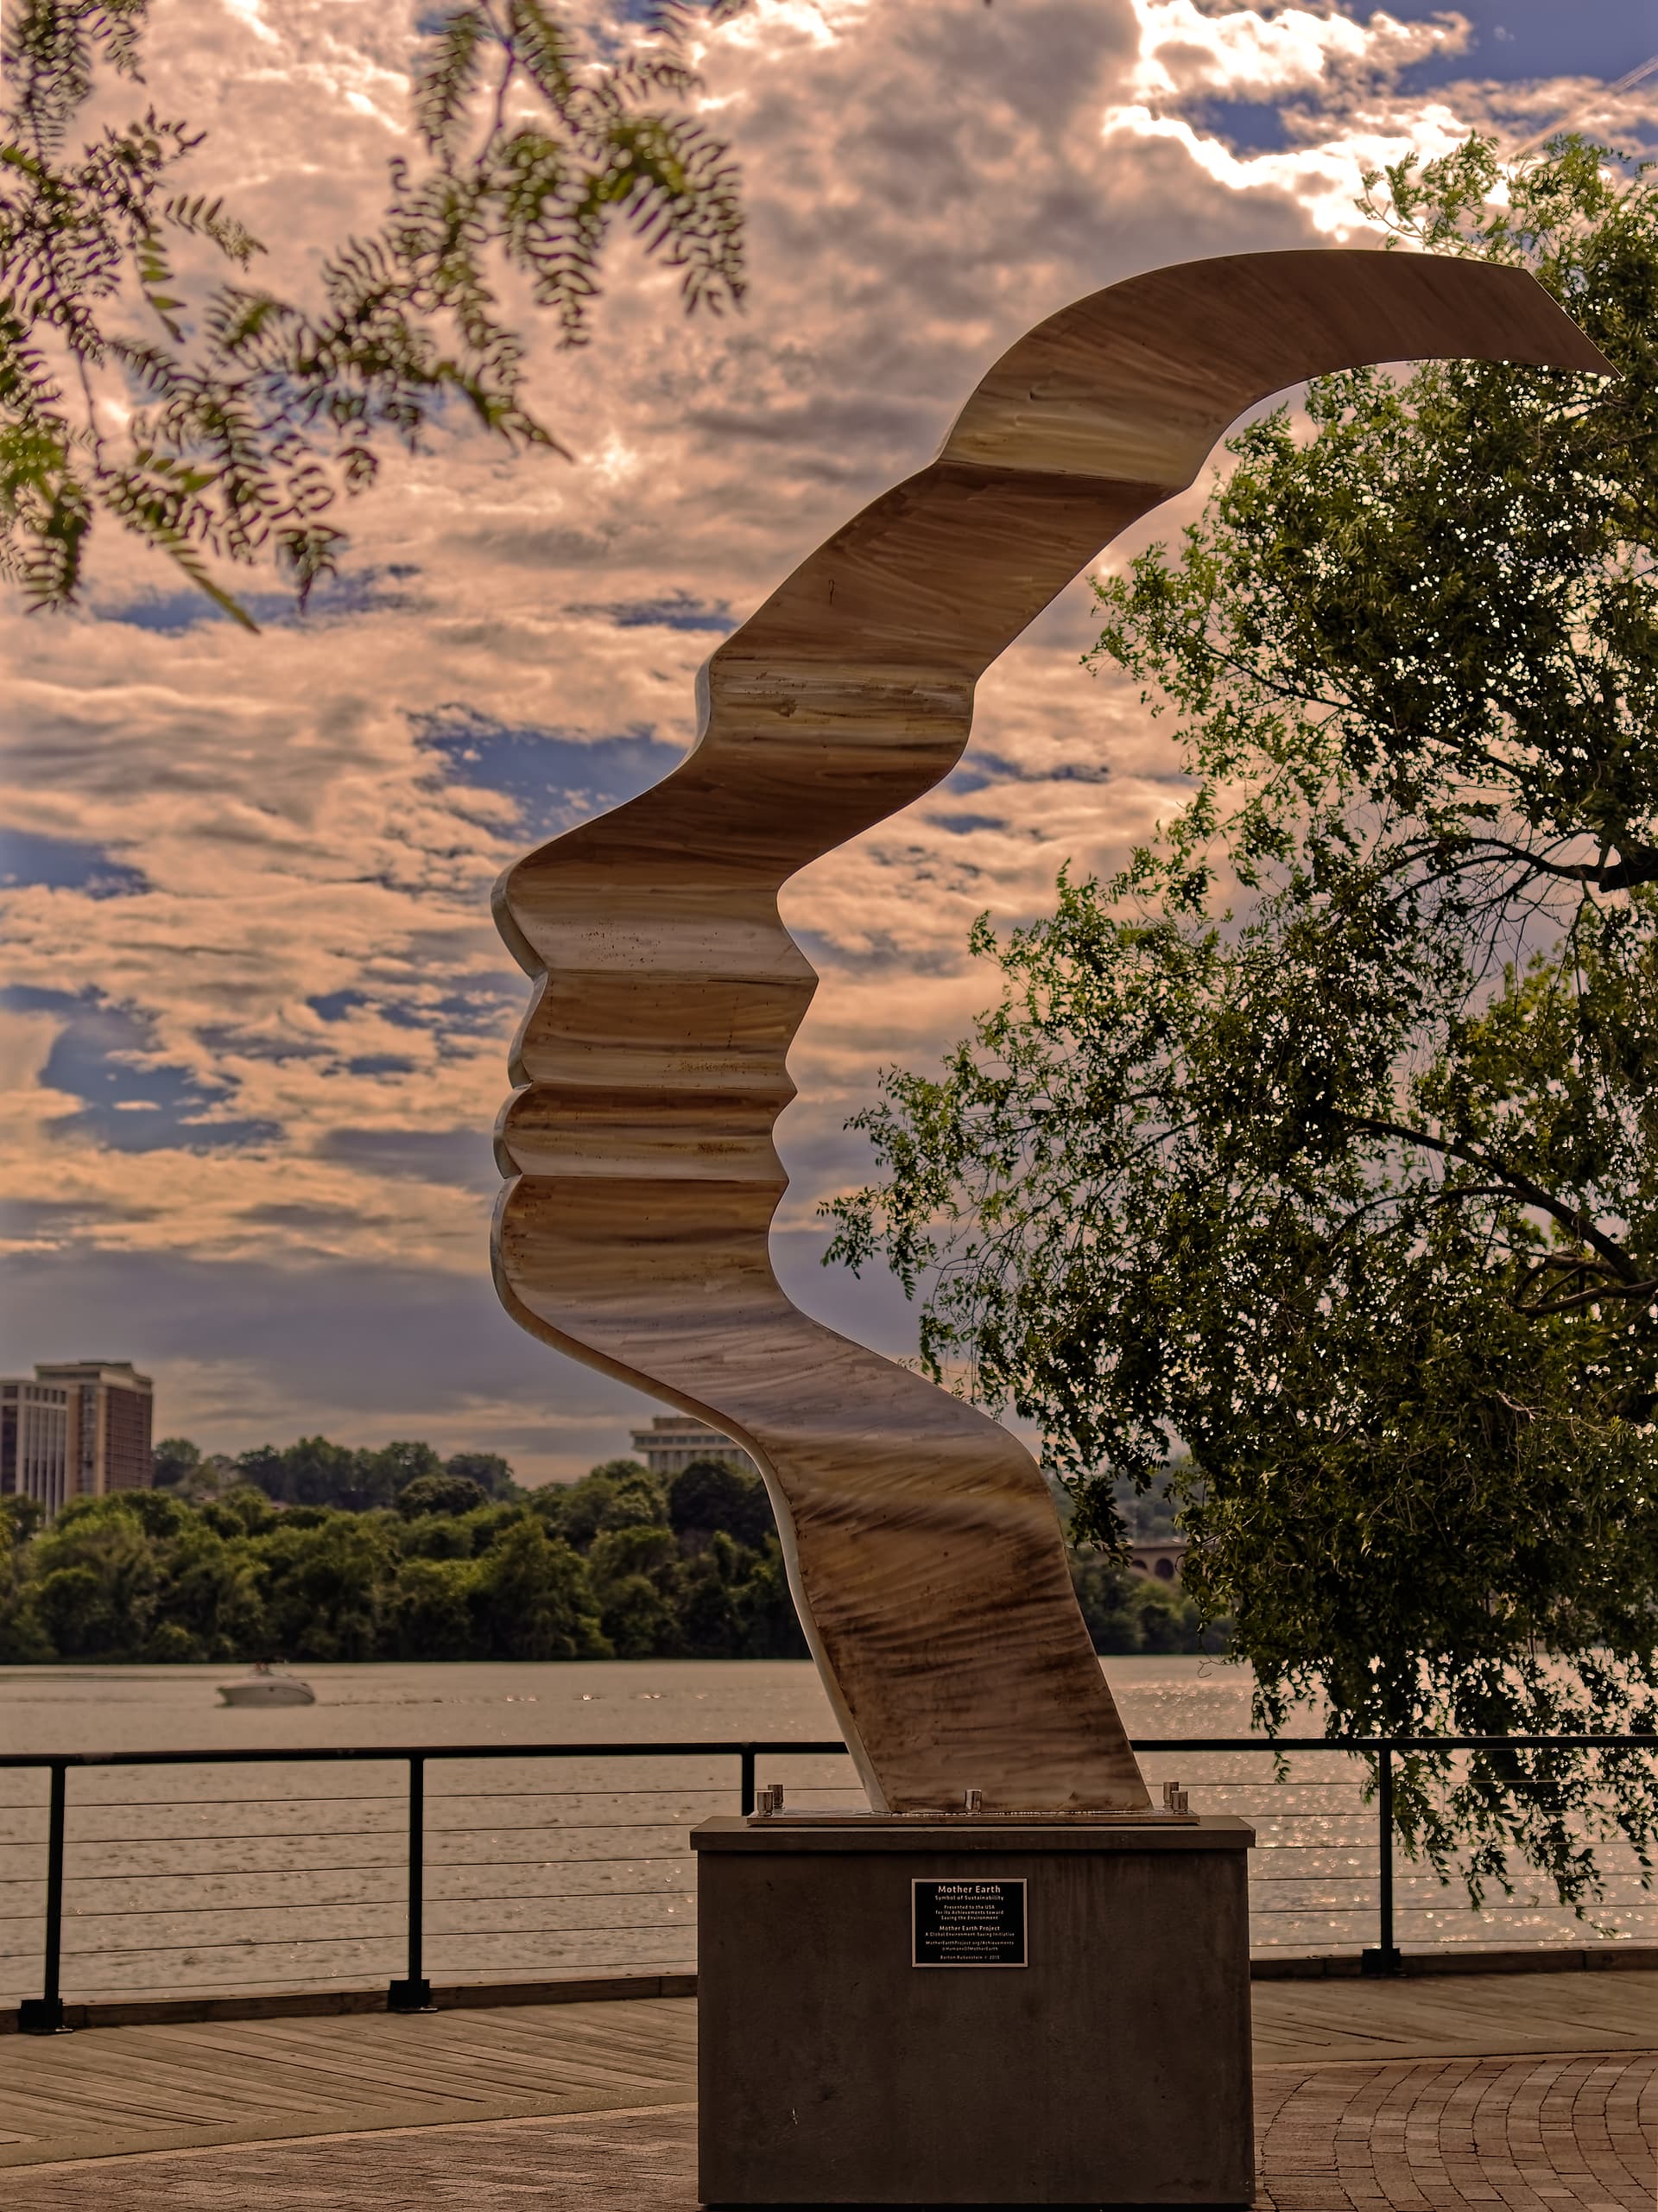
This is an image I captured over five years ago. The first version is from the completely unprocessed raw file. The second is the processed version, of course. One of the reasons I really like the processed version is because of the completely unaltered cloud formation to the right of the face outline sculpture, which by pure luck adds some definition to the lips, the nostrils, and even to the eye and eyelid, The opening in the tree branches even vaguely defines the location and shape of the ear and the leaves and branches hair. This particular version was edited in December of 2020 using PhotoLab 4.
The sculpture is from the Mother Earth project and is located in the Georgetown section of Washington D.C. That is the Potomac River in the background. Unfortunately I no longer have the .dop file, but I have uploaded the raw file.
Mark.
IMG_9975.CR2 (25.2 MB)
1 Like
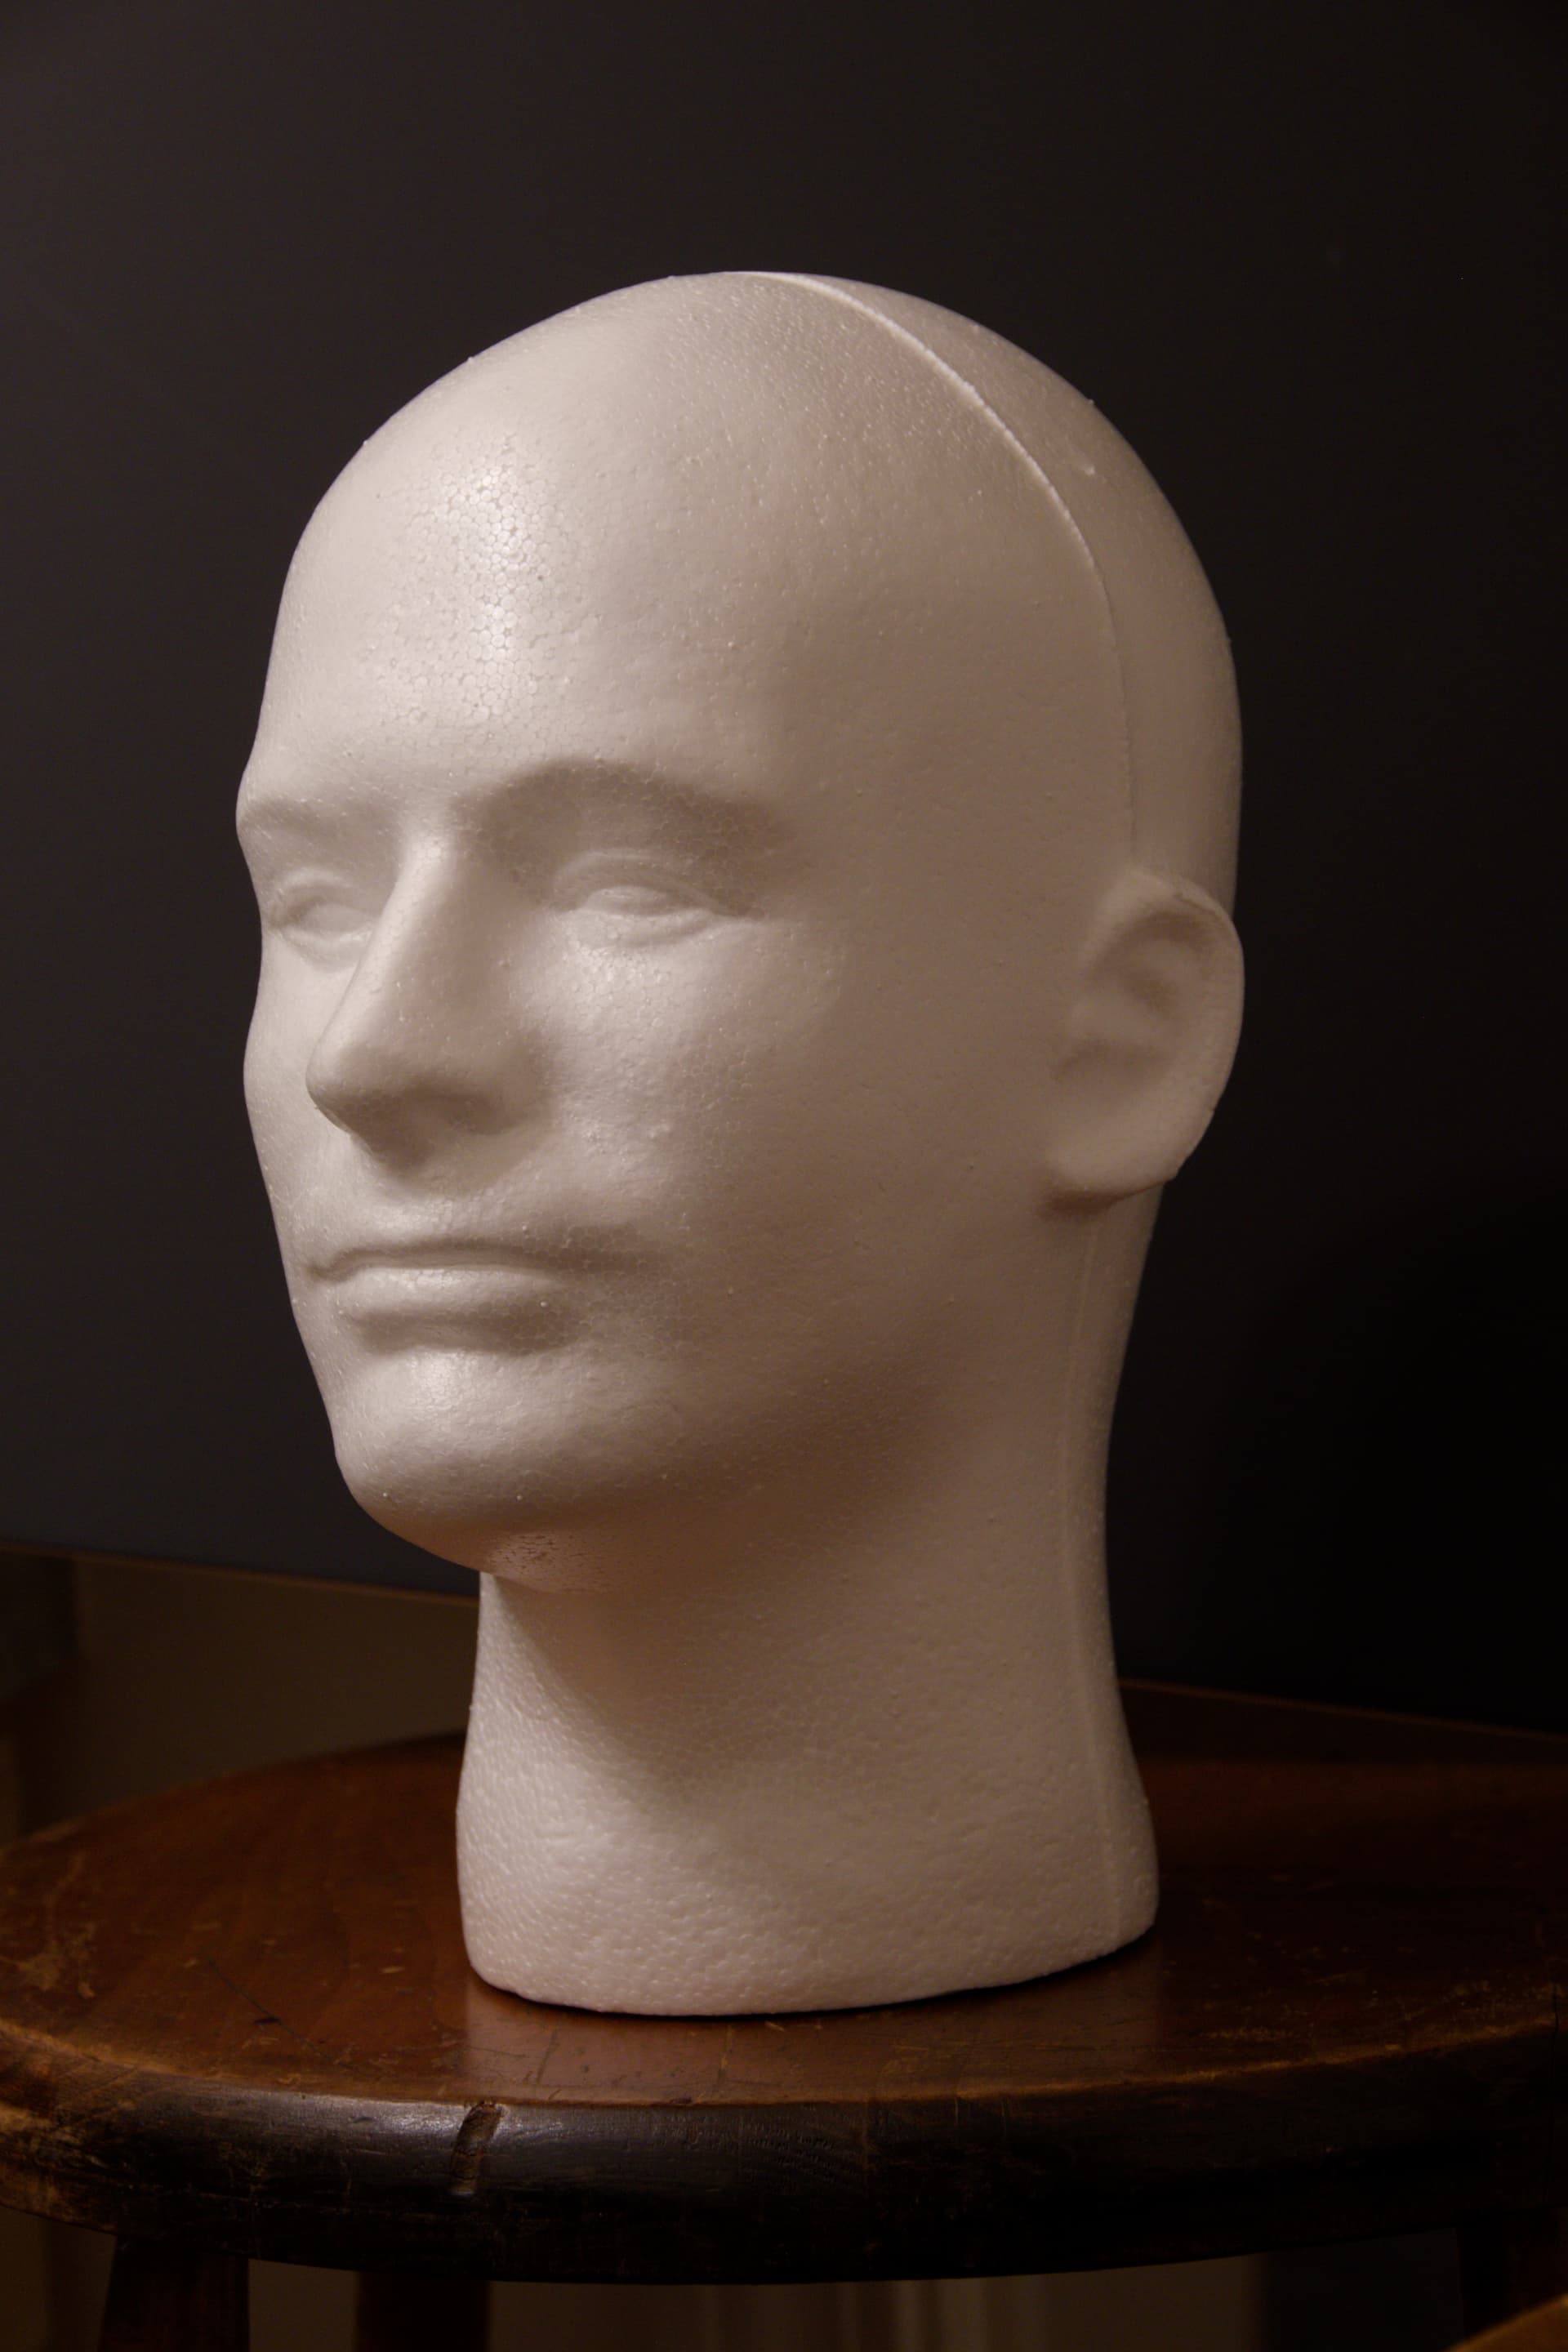
This next one was a very interesting exercise for me. I have posted it here before. I thought it might be an appropriate example for this thread. The raw file of the foam head is not mine. It was presented on a different site as a challenge to see how creative we could be using it. All the edits were done in PhotoLab 4 Elite. No other software was used.
Unfortunately due an an unplanned mishap I deleted the .dop file and didn’t realize it until it was no longer recoverable which distressed me significantly. I checked the original thread where I presented this image and found I had not uploaded the files there. I’ve attached the raw file here in case someone else wants to attempt this.
This is the descriptive text from my original post from March of 2021. Unfortunately it doesn’t contain as much detail as I hoped it would.
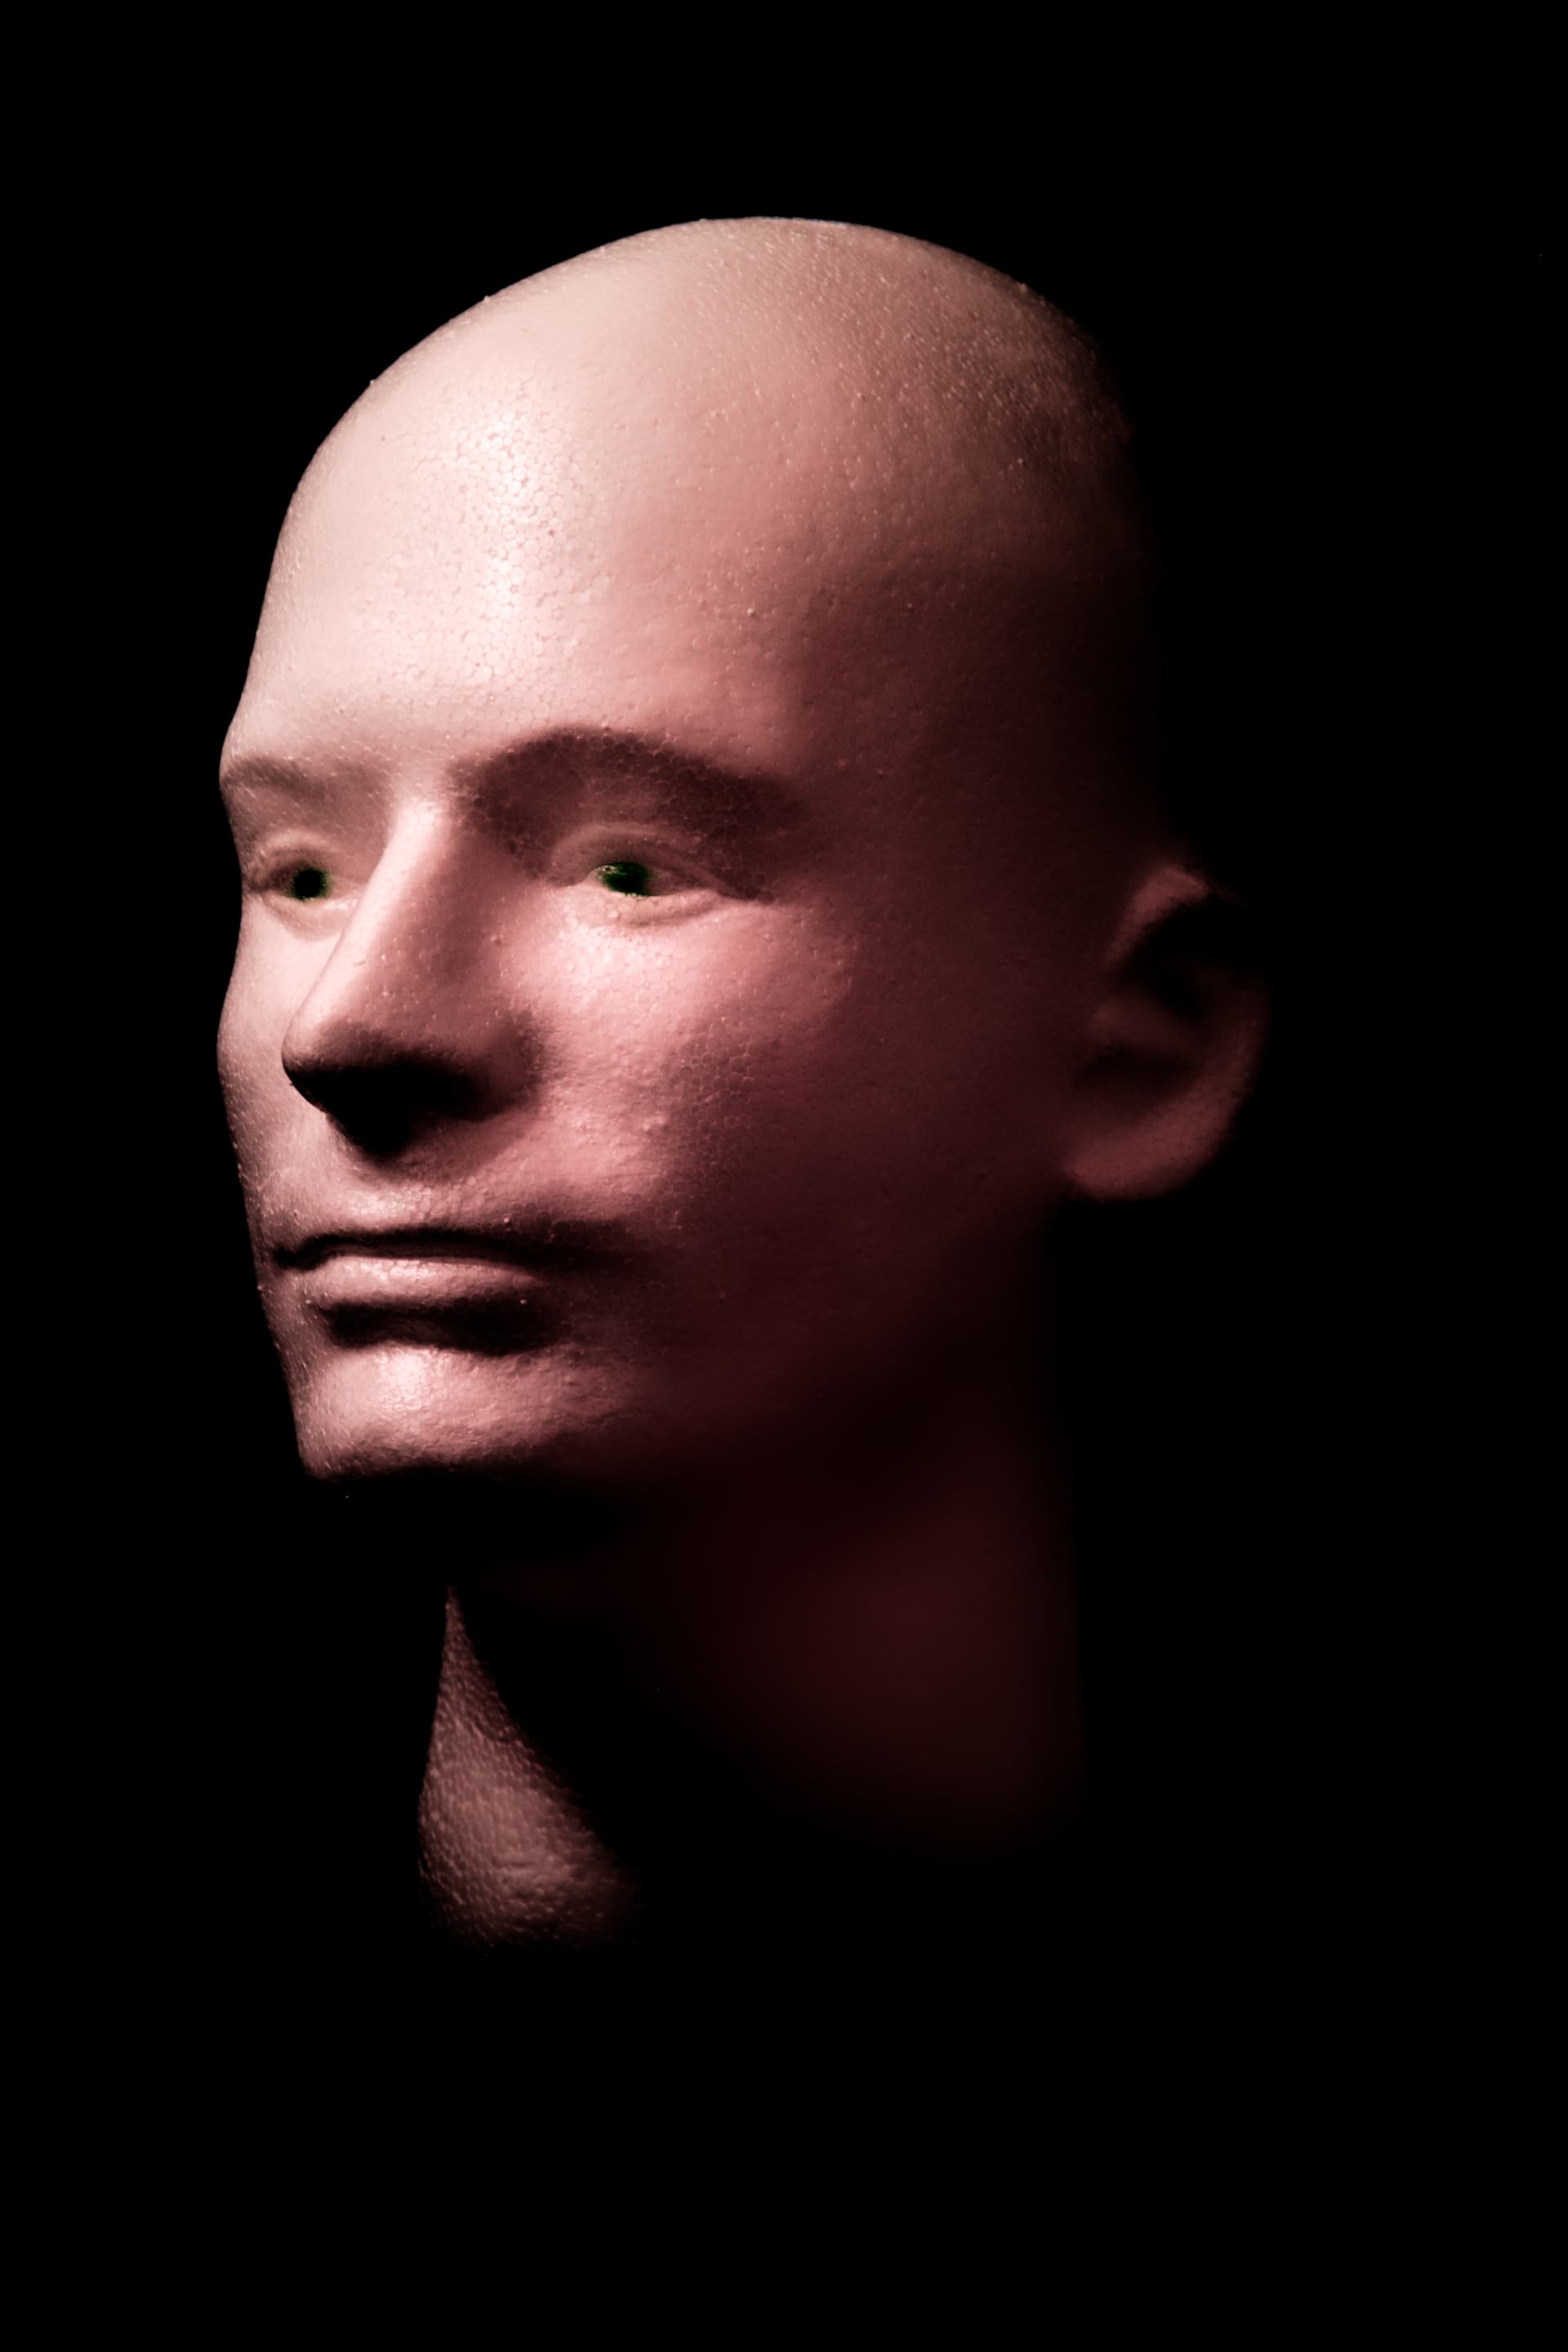
“I decided to make the head much more life like. I removed the seam from the top of the head, played with the skin tones, softened skin textures, gave him pupils, emphasized the brows, and played with lighting effects. I tried to make the background a more velvety black. All edits were done in PhotoLab 4 with most of them using control points. The skin tones were mostly modified using the HSL color wheel.”
I think this example demonstrates how powerful PhotoLab can be even though it does not support true layers.
Mark
500_0115.NEF (22.8 MB)
1 Like
Now you know why I suggested you take your 780 out for the next three months. The through the lens viewfinder gives you a better chance to frame your image and exclude what you don’t want in the image. I found this myself when I changed from a rangefinder camera to a reflex camera.
Pleased to see you are now taking pictures for yourself and not that pesky publisher. Big grin!
1 Like
Simply amazing ![]()
![]()
Thanks Joanna. I really wish I had the .dop file to share. I had never done anything like this with any software before or since. If I recall correctly, from start to finish it took me less than a half hour which surprised me at the time because there were so many different things to do and I was experimenting with techniques I had never tried before. I may attempt this again to recreate a .dop file. If I do, I will share it here.
Mark
Because of my cruise ship photo a couple of weeks back, I’ve been searching for a wider wide-angle lens. I thought 24mm was plenty, but I wanted 21 - and while I eventually found a 21mm (actually three of them) for my Leica, over the past week I’ve been telling myself that I really ought to buy one for my 780, not the M10. Found several, read Ken Rockwell’s review, along with other reviews, and it is now on order:
https://www.kenrockwell.com/nikon/20f28ais.htm
It’s manual focus, but for 20mm I don’t think that’s going to be a problem.
You were right about one thing - the 780 in my hands is starting to feel just as comfortable as the Leica, which I didn’t expect. Also, manual mode and all that goes with it is starting to feel completely normal, it just organizes what I need to think about before capturing an image.
Thanks to you, and the others who agreed with you.
No need to thank me. I was just hoping to push in the right direction so that you could find out for yourself. To me that is a better way of learning rather than somebody saying. You should do this or that.
Just keep enjoying your newfound interest.
20mm? OK… give it a few weeks and then you will seriously ponder on getting a 16mm. ![]()
Isn’t there something in the Nikon world that is similar to the Canon 16-35mm L lenses?
Far better, auto-focus - https://www.bhphotovideo.com/c/product/1082607-REG/nikon_20mm_f_1_8g_fx_lens.html
1 Like
I’ve got a Voigtlander 15mm for my M10. About the Nikon world - probably, but I didn’t really look. The 21mm for the Voigtlander was just under $700, and I didn’t want to spend that right now. The Nikon lens was only $330, so I didn’t have to think much about it. I doubt I’ll have much use for it, but I’ve said that before…
One more photo from yesterday, using what you all (especially @Joanna!!) have taught me about how to deal with sunsets:
780_0195 | 2022-11-24.nef (25.1 MB)
780_0195 | 2022-11-24.nef.dop (69.7 KB)
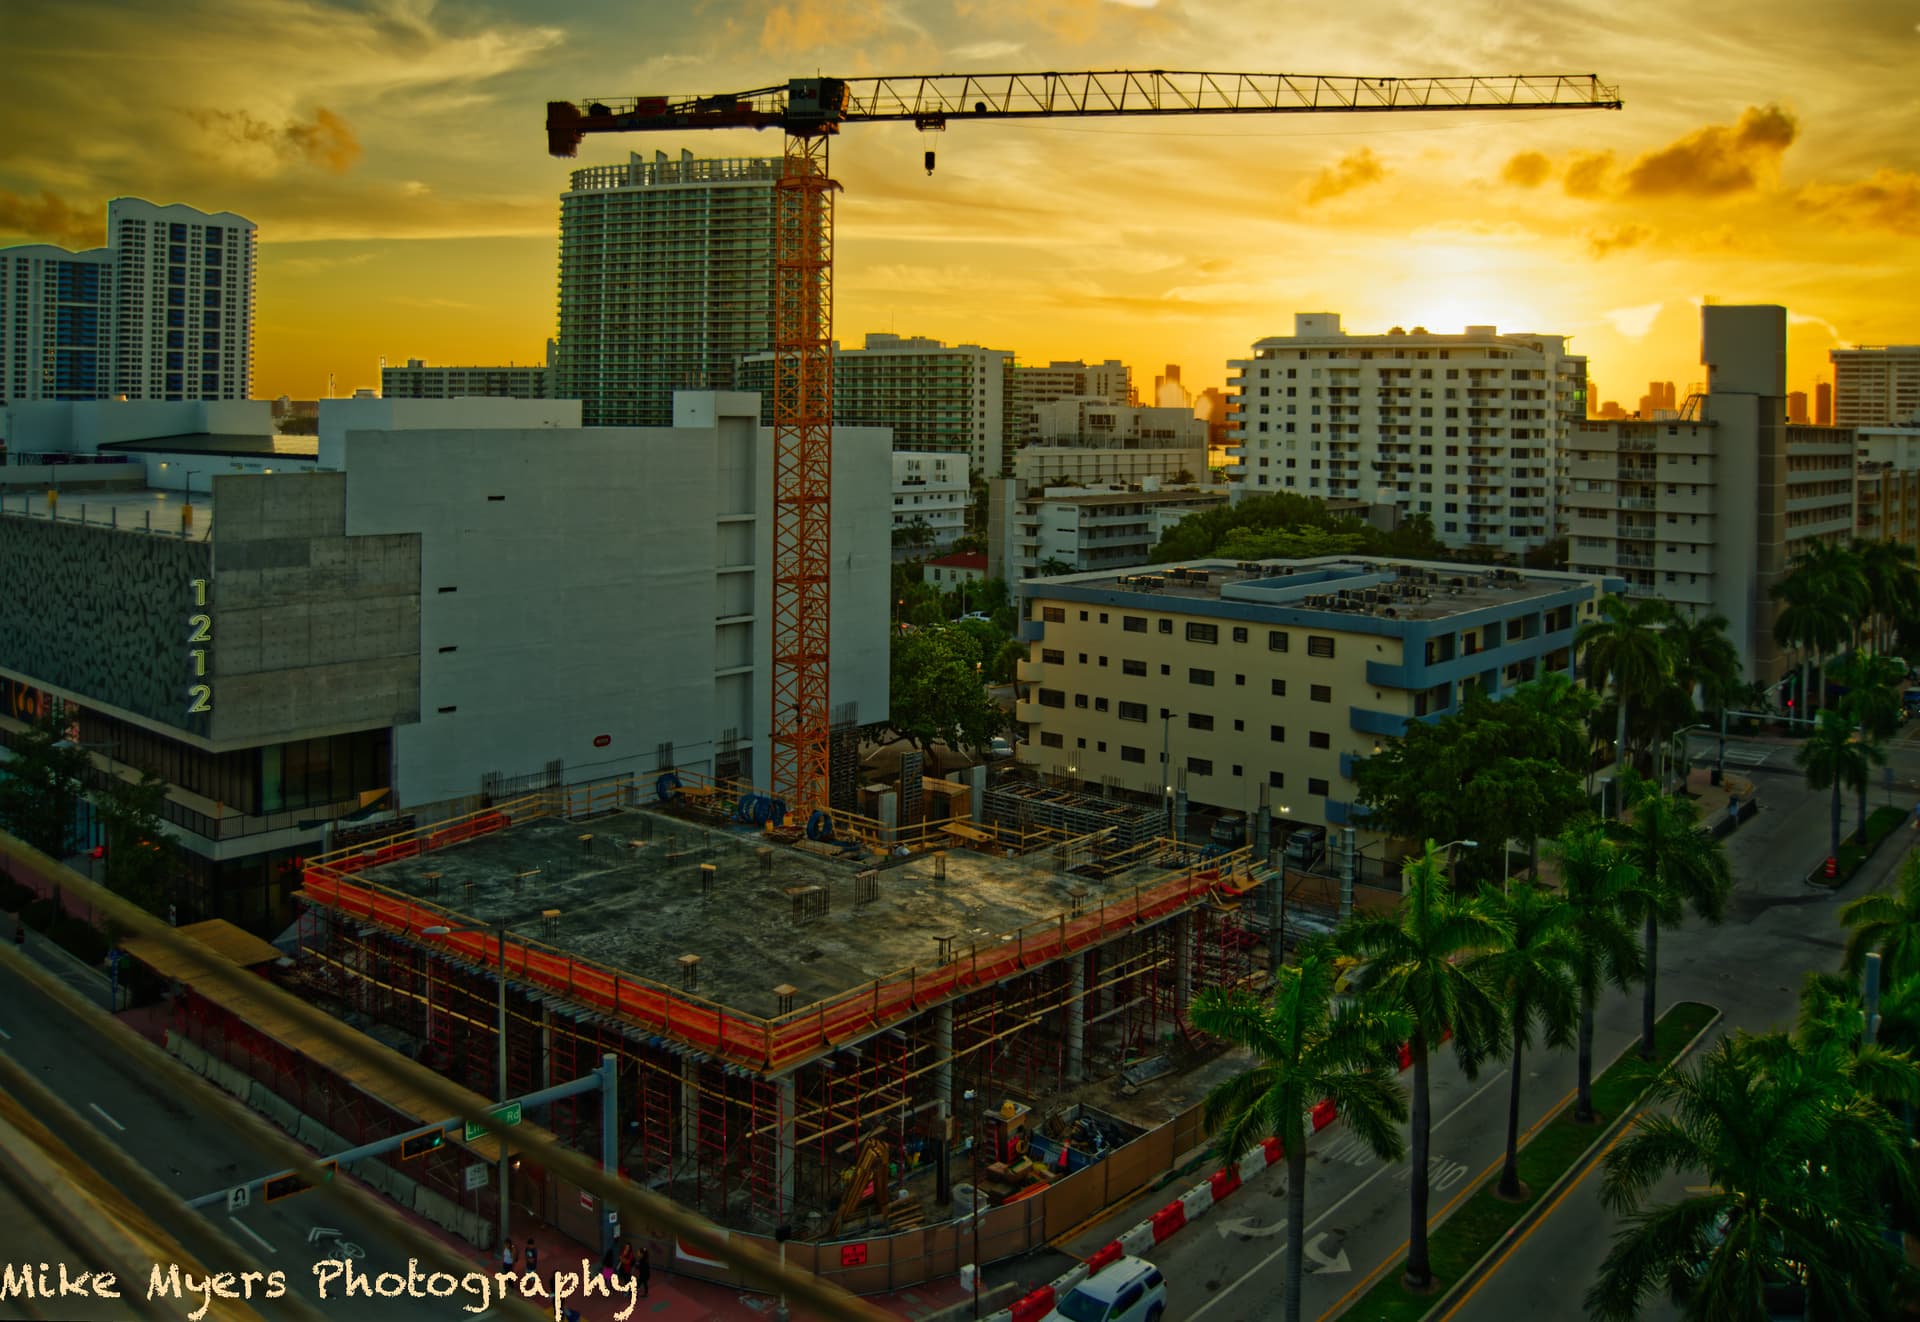
I’m sure I have a lot yet to learn, but two weeks ago I could NOT have done this.
2 Likes
Mike,
OMG, are you becoming an artist? I never thought I would see this day come. ![]()
Mark
2 Likes
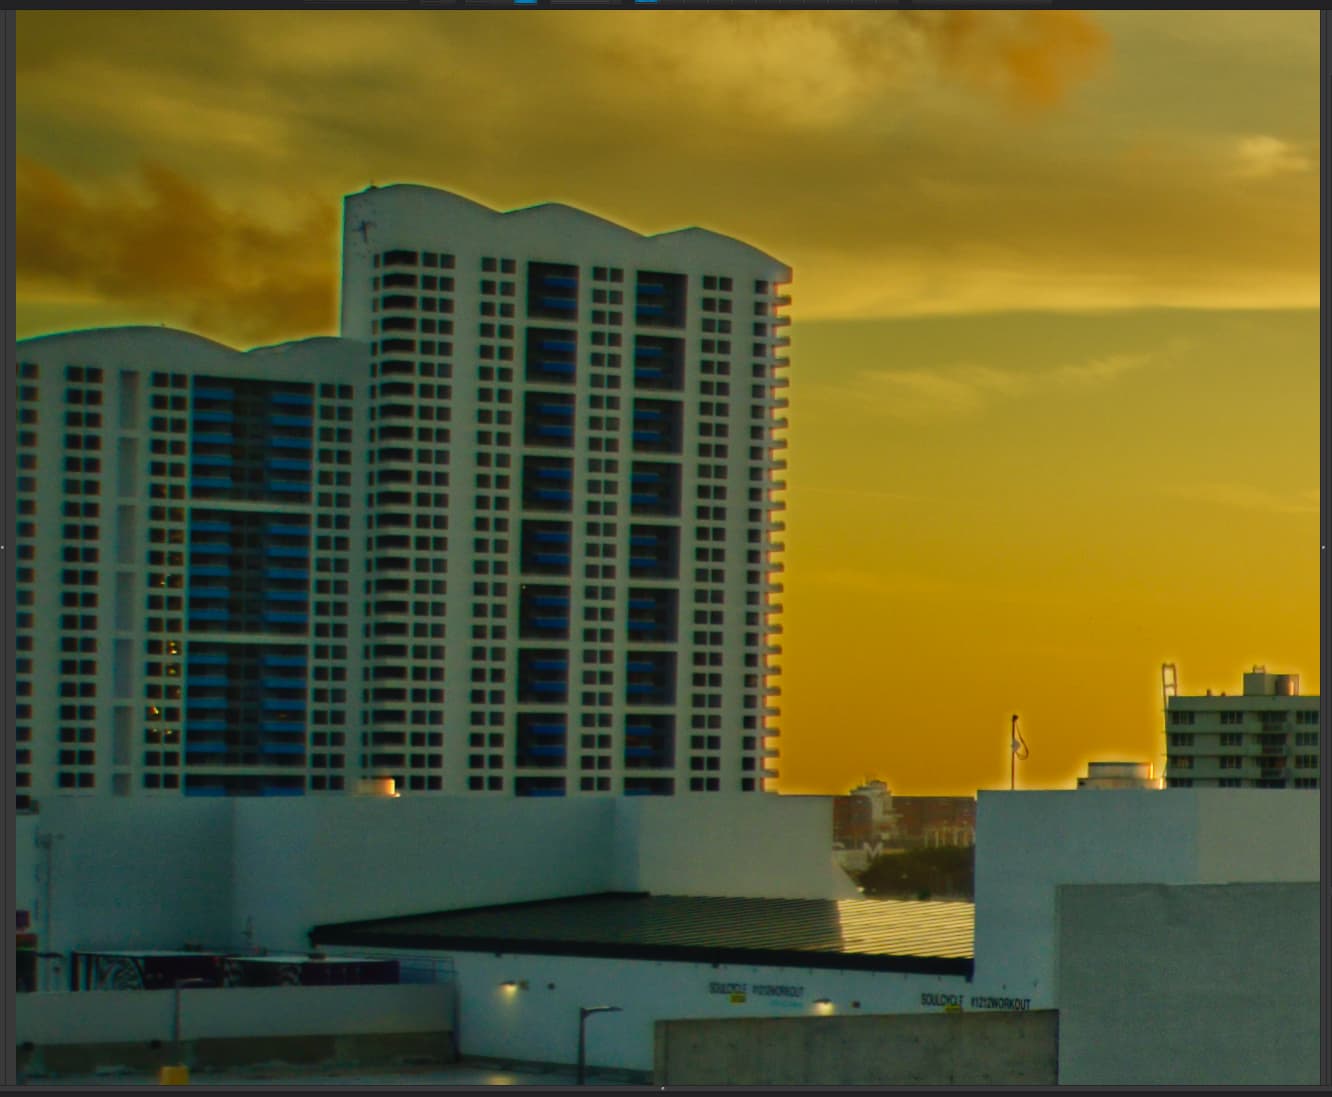
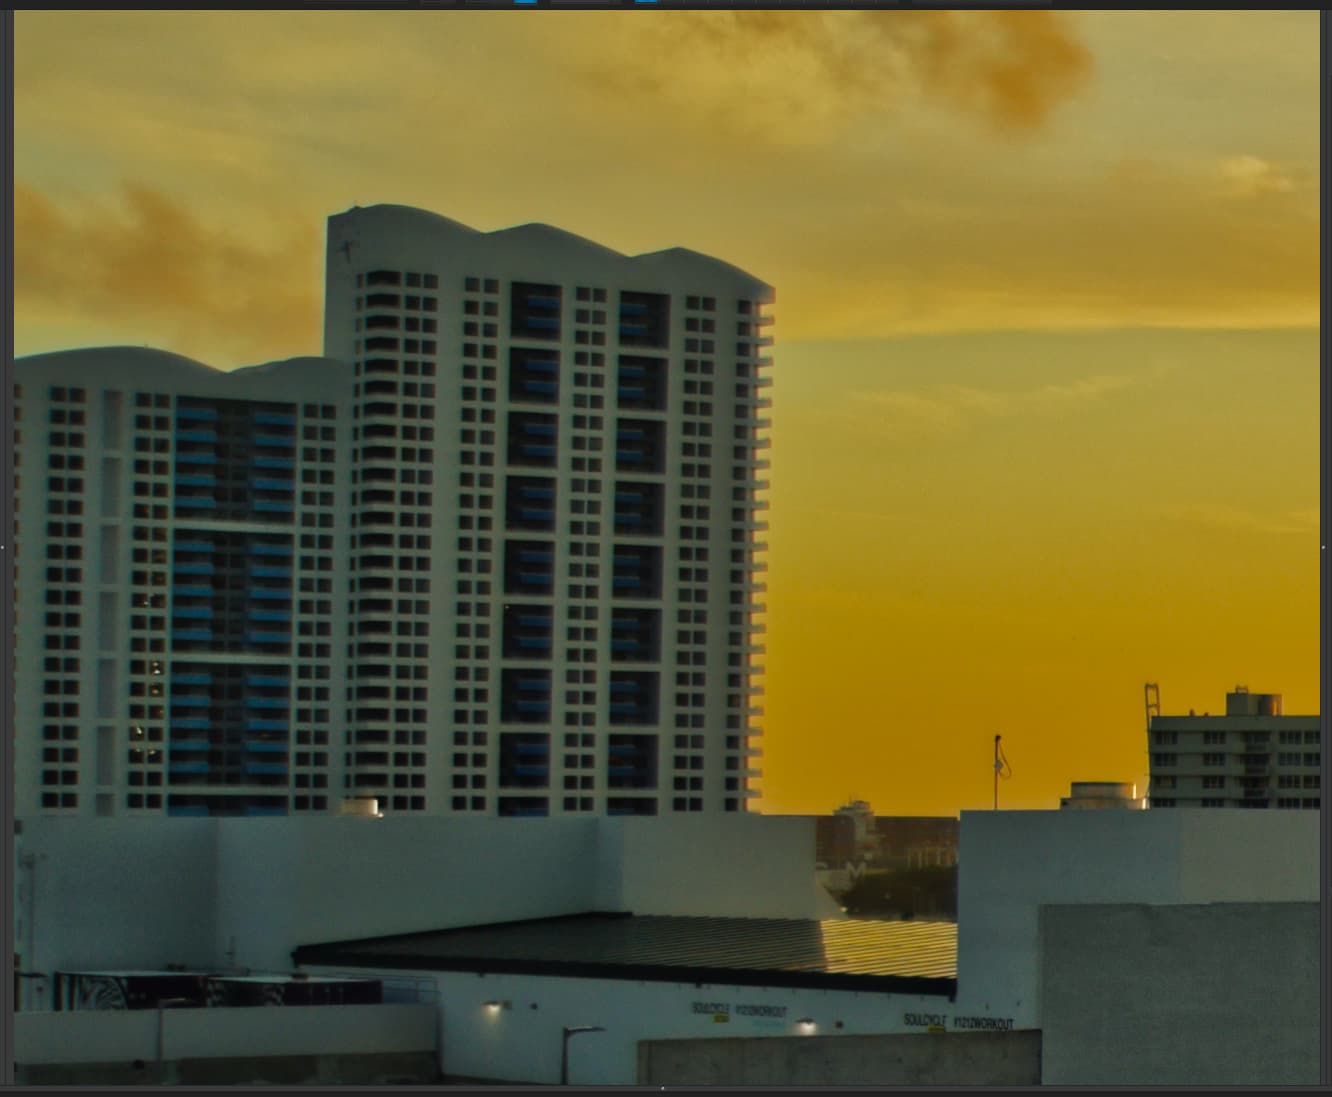
I find your heaven a bit “green” in some places. What about this version? I know, it has nothing to do with the reality at this time, but I like the mood and colors.
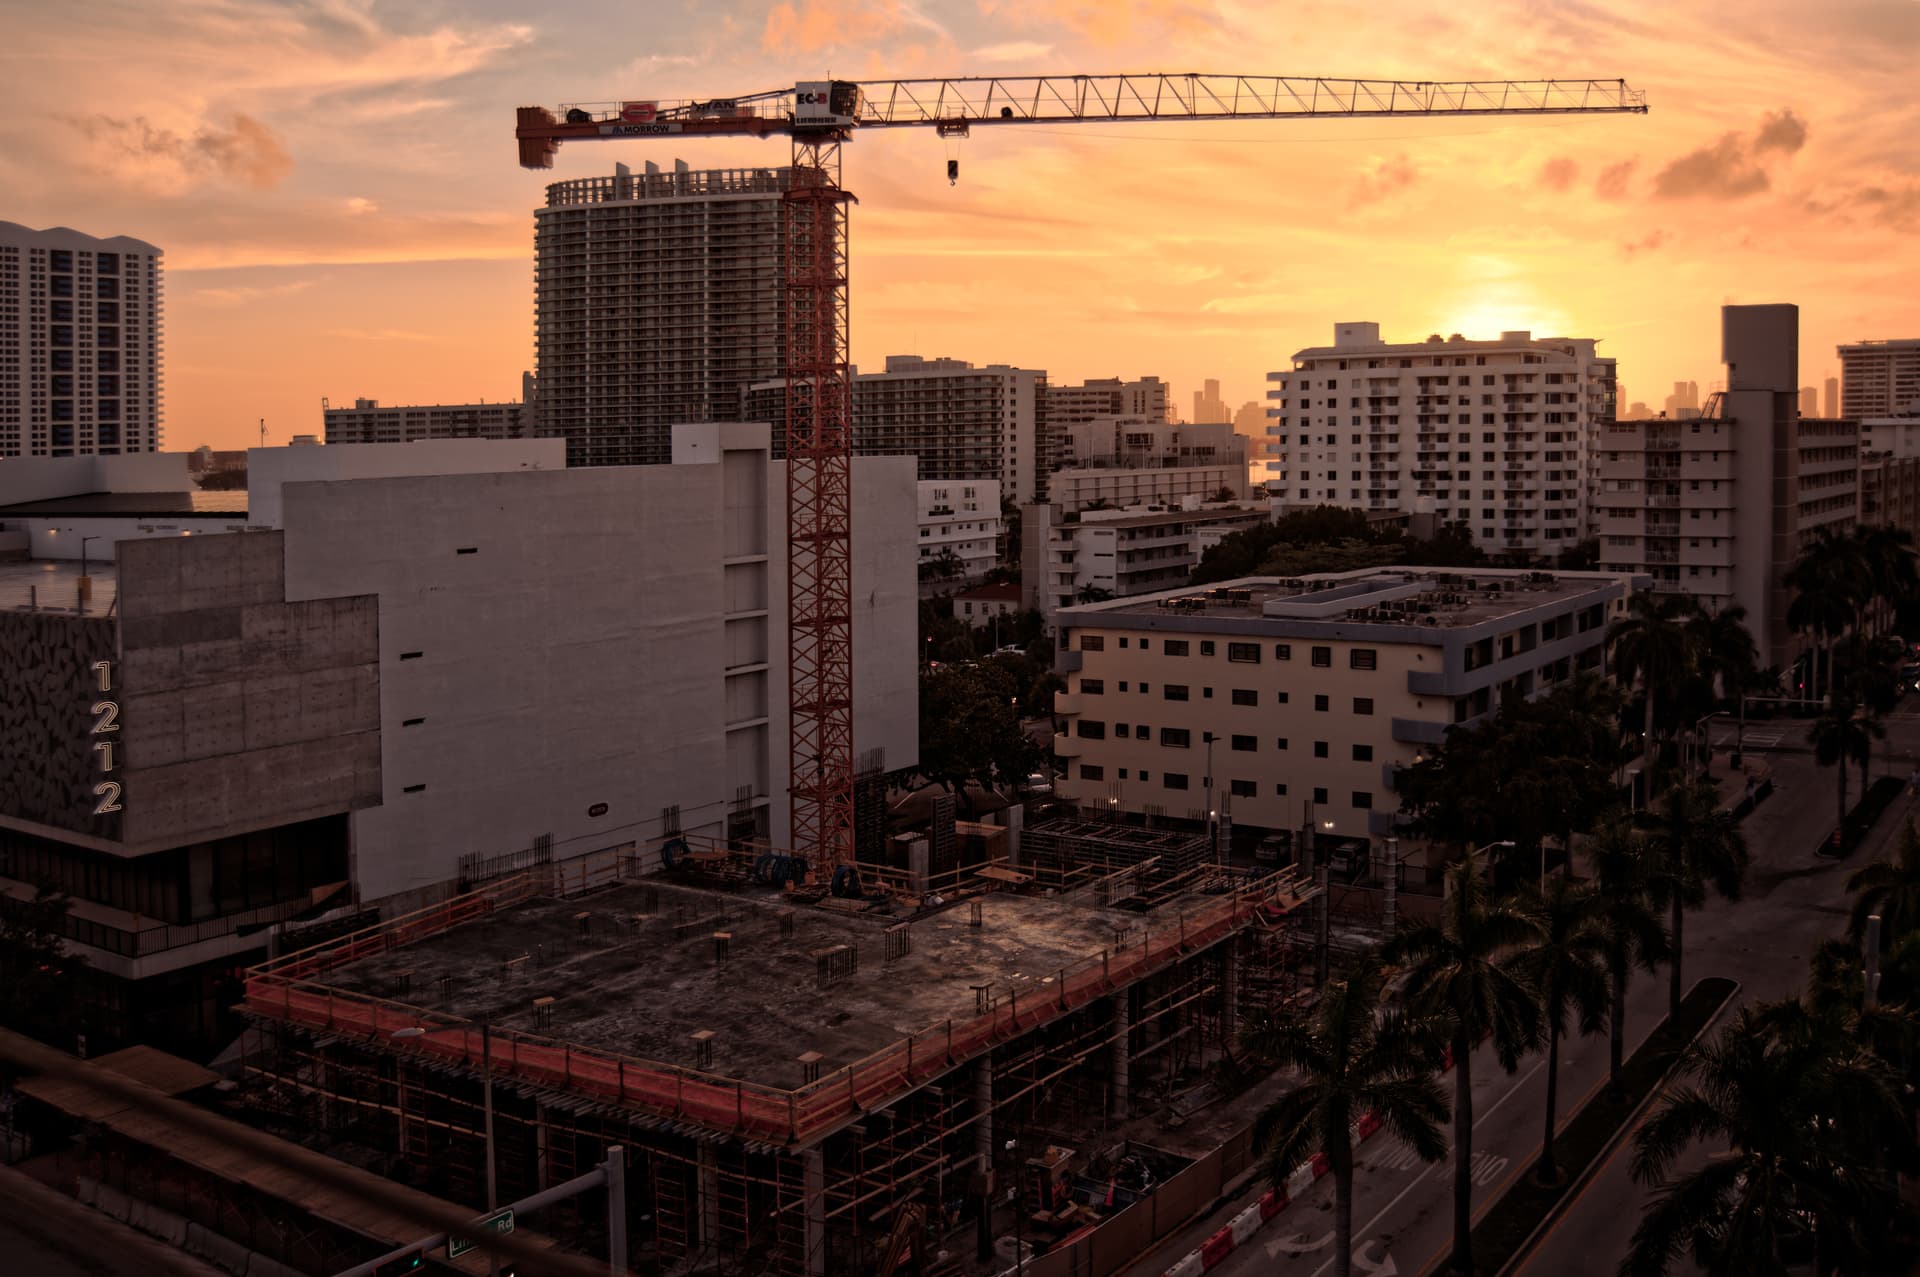
Superb effort. Helen and I both think this makes a good, interesting image.
I just want to address a couple of technical problems due to your choice of tools:
-
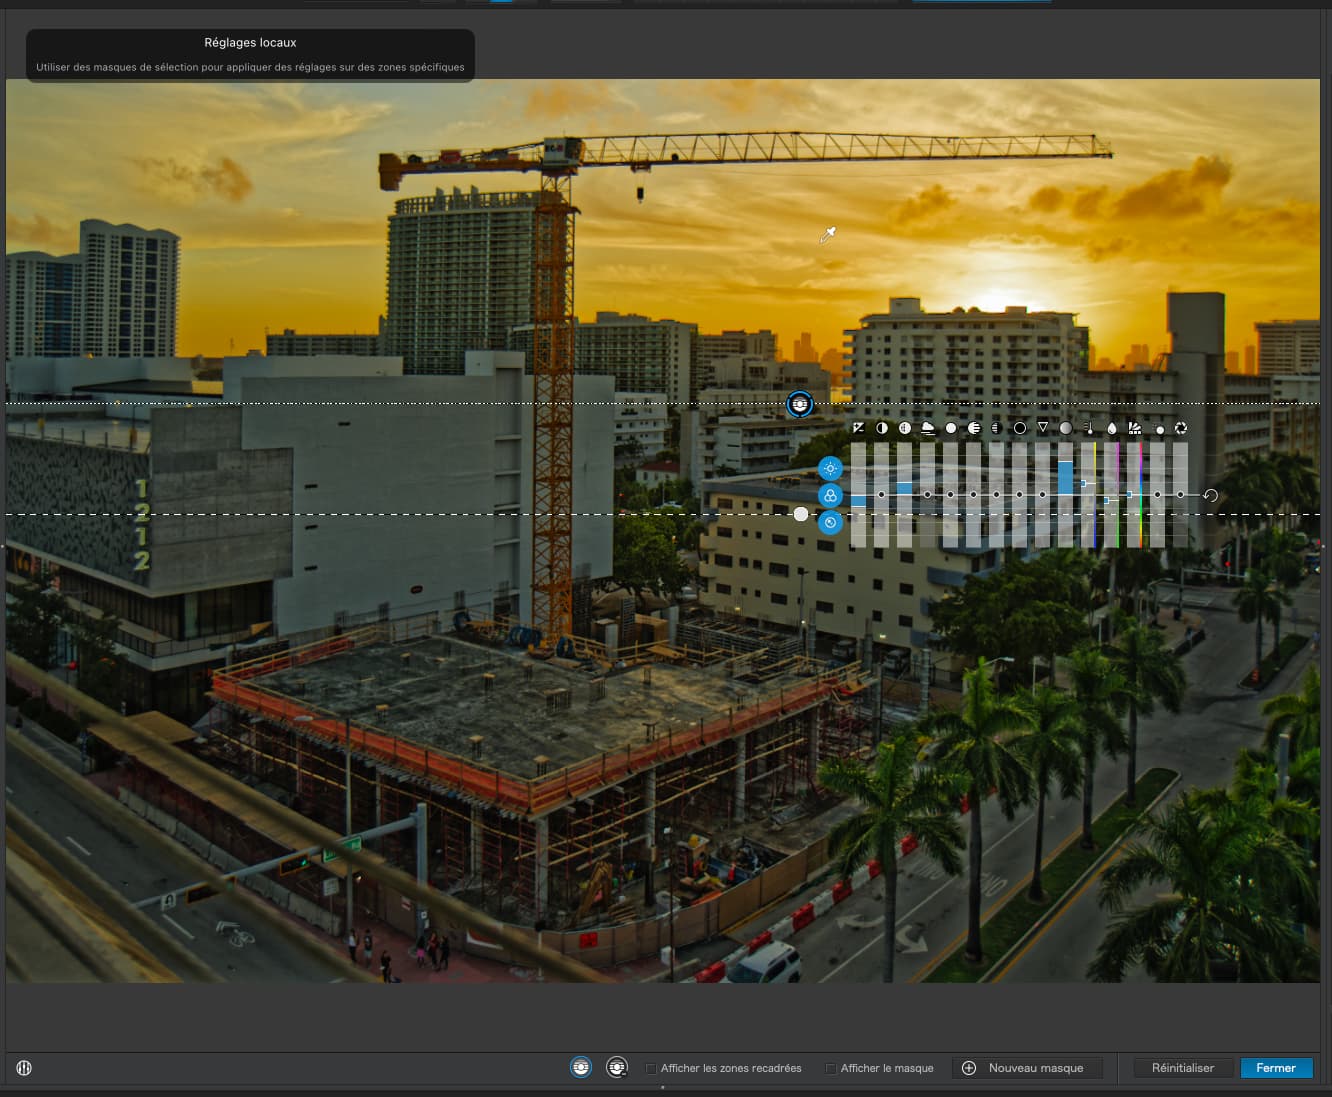
You used the Auto-mask in an attempt to increase saturation and detail in the sky, which it did. Bu, unfortunately (not your fault) it didn’t cope with the transition everywhere…
This is a known problem, which always used to bug me - until DxO invented the Control Line tool, which yields a much more refined edge…
And here is how I applied it…
-
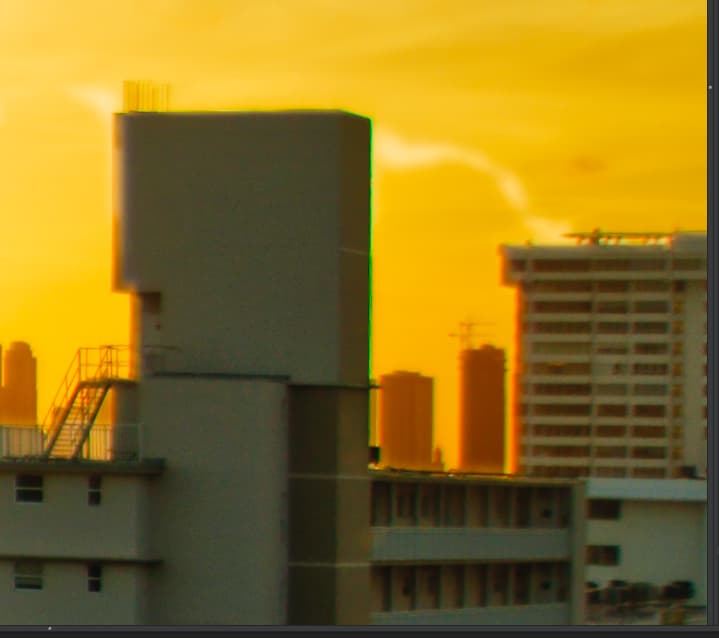
For the lens you are using, which has no module, you need to apply a lot of chromatic aberration correction. I had the same problem with my unsupported 28-200mm lens. With your lens, it is most obvious around the edges.
Standard correction (as you had it)…
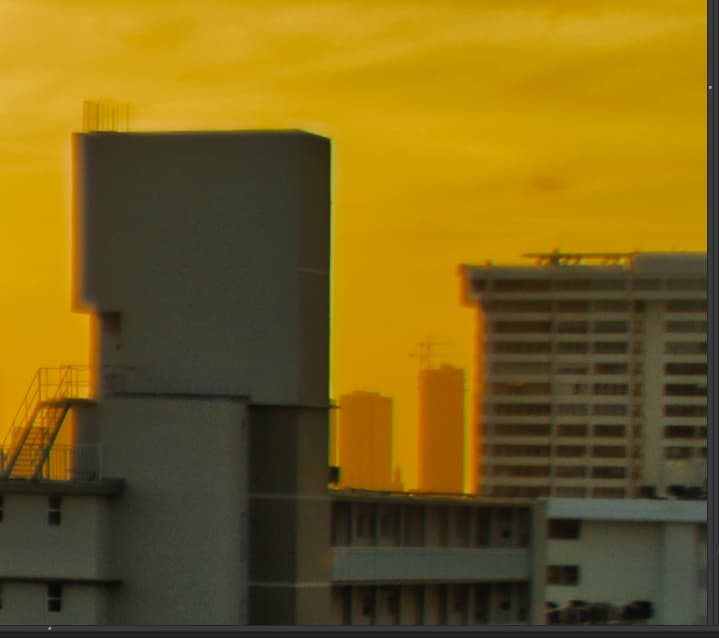
Full correction (200/12)…
It’s not perfect but that is purely down to the lens quality and the lack of a DxO lens module.
-
Smart Lighting. The size and shape of the zones the you create can greatly affect how many extra adjustments you need to make to other luminosity tools.
You did this…
I did this…

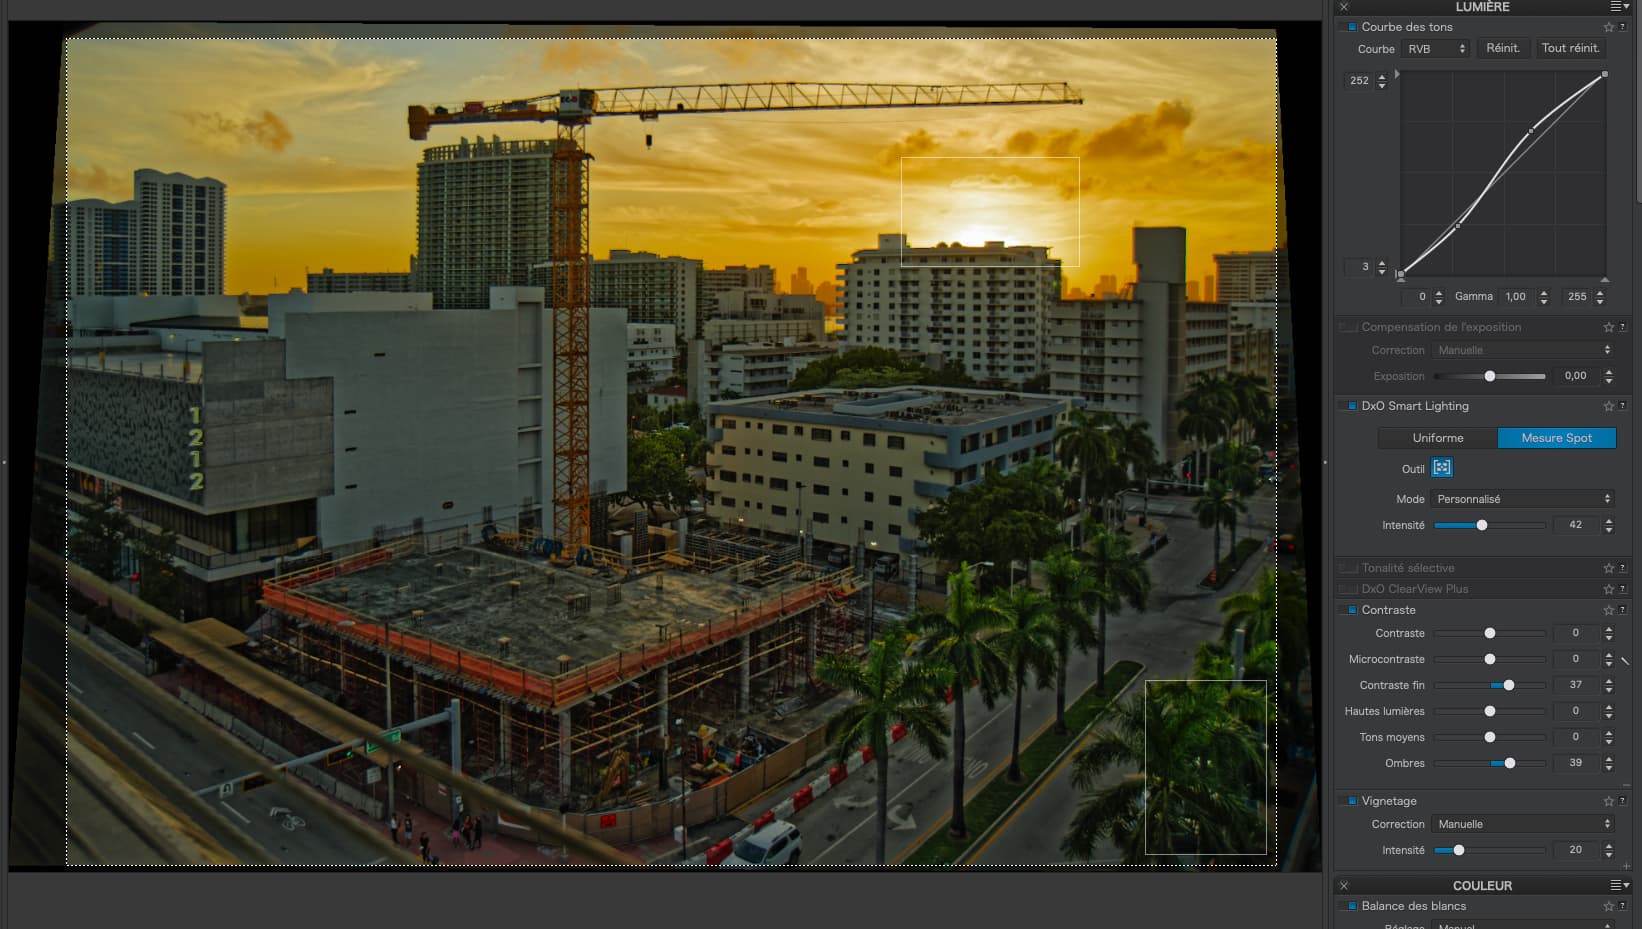
You need to practise changing the shape and size of the zones to see what effect they give and don’t try to be too minimalist in the area you cover. Some overlap to the surrounding tones can have surprisingly dramatic influences (sometimes for the better)
Oh, and the perspective line on the left side was just a tad off ![]()
All in all though, a great effort. Well done.
Here’s the DOP with my version added…
780_0195 | 2022-11-24.nef.dop (88,1 Ko)
Hmmm. Interesting. I find your rendering to have a strong, overall, magenta cast. Possibly there is a compromise to be had to the G/M colour balance?
I took a white balance pipette reading from the building “under the sun”…

… which should be fairly neutral…
That gave me 6497/-6, which seems to give a much more balanced version, between the two - at least according to my eye…
Although I still prefer the slightly warmer 7174 the Mike used, but with the -6 for G/M