New user, couple of questions

Welcome, Michael,

I’m using the Win10 version, but I’ll answer your questions;

Here’s what’s included in the Details panel;
image

The reason you’re not seeing them may be that you have a number of other panels fully expanded, such that the Details panel has been pushed down, out of site. You should be able to find it if you scroll down the RHS palette.

Alternatively; choose the DxO Standard layout, from the Workspaces tab - and add the Details panel by selecting it from the Palettes tab.

There are a number of corrections (for example, Lens Sharpness) where the result of the correction cannot be seen unless the image is displayed at 75%, or more.
These corrections have a “crossed-thru eye” symbol to indicate this:
image

The Noise Reduction algorithms, tho, cannot be seen on-screen until the image is exported - this is because of the extensive resources required to render the results.
Instead, a small sample of the image can be selected, to see the result just on that small area.
image

A decent GPU will help - and adequate memory goes a long way too.

First complete your crop then press (the Mac equivalent of) Ctrl+R to rotate clock-wise - or Ctrl+L for anti-clockwise.

Yes, and No.

Yes, there’s the DxO ClearView too.
No in the sense that it’s not equivalent to LR’s Clarity tool … ClearView is far superior !

Yes, there’s the White Balance tool to correct colour casts … and the HSL (Hue, Saturation and Luminance) tool to adjust/change colours any way you fancy.

HtH - John M

1 Like

Hi welcome,

Clarity as in non sharpening saturation can be done with finecontrast or tonecurve black side pulldown.
Detail extraction , Dehaze, clearviewplus.

Color correction: HSL, saturation and vibrance, temp hue in local corrections.
Profiles.

Peter

2 Likes

Oh, one more thing

What does Micro contrast really do? It seems kind of like Texture to me?

That’s tremendously helpful, thank you!

I only had a handful of Raw files to test out because most of my stuff has been in JPG but I’m going to shoot some sparrows in the yard today to get some more testing in.

I’d actually done a 30 day trial a few months ago and after ten minutes I gave up because I didn’t know how it worked and I decided to stick to Lightroom. So this time I had to buy it outright, but after digging in on a few shots, I am really blown away.

One other question I thought of, how does the catalogn system work? Any tips on the best way to store your photos?

As I say that, I’ll have to test if my speed issues were compounded by my storage. I have my photos on a Samsung T7 external drive. Shooting an R5 with big hefty files, maybe that’s why it’s a tad sluggish? Perhaps I should have the files on my Mac drive while editing and then move them to external after? Is that possible? Will Photolab still no where they are? I get confused when the videos say you don’t need to import.

When i am at home i can show you the difference.
In the meantime try search with magnification symbol “clearview” this will show some earlier post about this.

Peter

There is no catalogue system. PhotoLab simply read your images from the folders you have organised them into on disk.

Personally, I have a folder hierarchy of…

Pictures
    Place (or event)
        Year
            Month
                Day
1 Like

In some respects it’s similar to Lightroom’s texture slider. It also seems to have an effect on edge definition. I wouldn’t exactly call it a sharpening tool, but when I use it I do find I require less additional sharpening. Micro contrast is one of my favorite tools in PhotoLab.

Mark

1 Like

Michael,

Have you purchased yet, or are you still using the trial version? If you are still using the trial version, you might want to consider holding off on your purchase for several more weeks. Photolab 5 will be released sometime during the second half of October. if you’ve already purchased you may not be entitled to a free upgrade.

Mark

2 Likes

ok: (Don’t be blown away by all details just read and try for your self then you will see the light.)
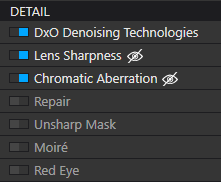
there are two “microcontrast” tools.
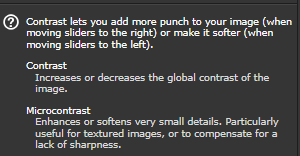
1 the slider : “microcontrast” which the manual says:

Citaat Microcontrast : also known as “local contrast,” it can be measured in small homogeneous regions that the software automatically detects. Improving the local contrast provides results that are similar to the sharpness correction, without the disadvantage of generating artifacts around the edges. Microcontrast brings out the details and gives the image more “bite.” It is ideal for landscape, architectural, and industrial photos.

So it global sharpens the image by adding microscopic “blackdots” around edges of color in colorplanes. It enhances the non uniformity of the image and wile it adds “black” dots the color looks more saturated. (not comparable with CPL-filter which only saturate)
2 clearviewplus:

Citaat The DxO ClearView Plus tool automatically eliminates atmospheric haze in both RAW and JPEG files.

What this tool does is using Microcontrast and other contrast types to enhance colors and structures get rid of haze in the mean time. (less agressive in sharpening then “microcontrast”)
then we have “dehaze” by tone curve: basicly adding blacklevel, dragging lower luminance to “black”.
no sharpening only saturation.
Fine contrast:

CitaatThe Fine contrast slider brings out or softens medium-sized details, and is gentler in its effects than the Microcontrast, slider, making it appropriate to use with portraits.

Less deep blacks are here enhanced and bigger spots/dots as it seams of nearblack which is less agressive in sharpening so better to use in skin and skinlike (small color nonuniformity and dips and dimpels) structures as stucked walls.

And we have to connect your naming to dxo’s tools:
Clarity is sharpening and saturating colors so connects to microcontrast and thus “clearviewplus” (so Dehaze is build in clearview by using less agressive means to saturate.)

Dehaze (less sharpening): curvetone blacklevel pull, and maybe fine contrast slider.
and we have “blacks” in selective tone. that just pulls down or raises the lowest part of the histogram/luminance. (deepshadows)

Now we establish the toolset we can test what it does:
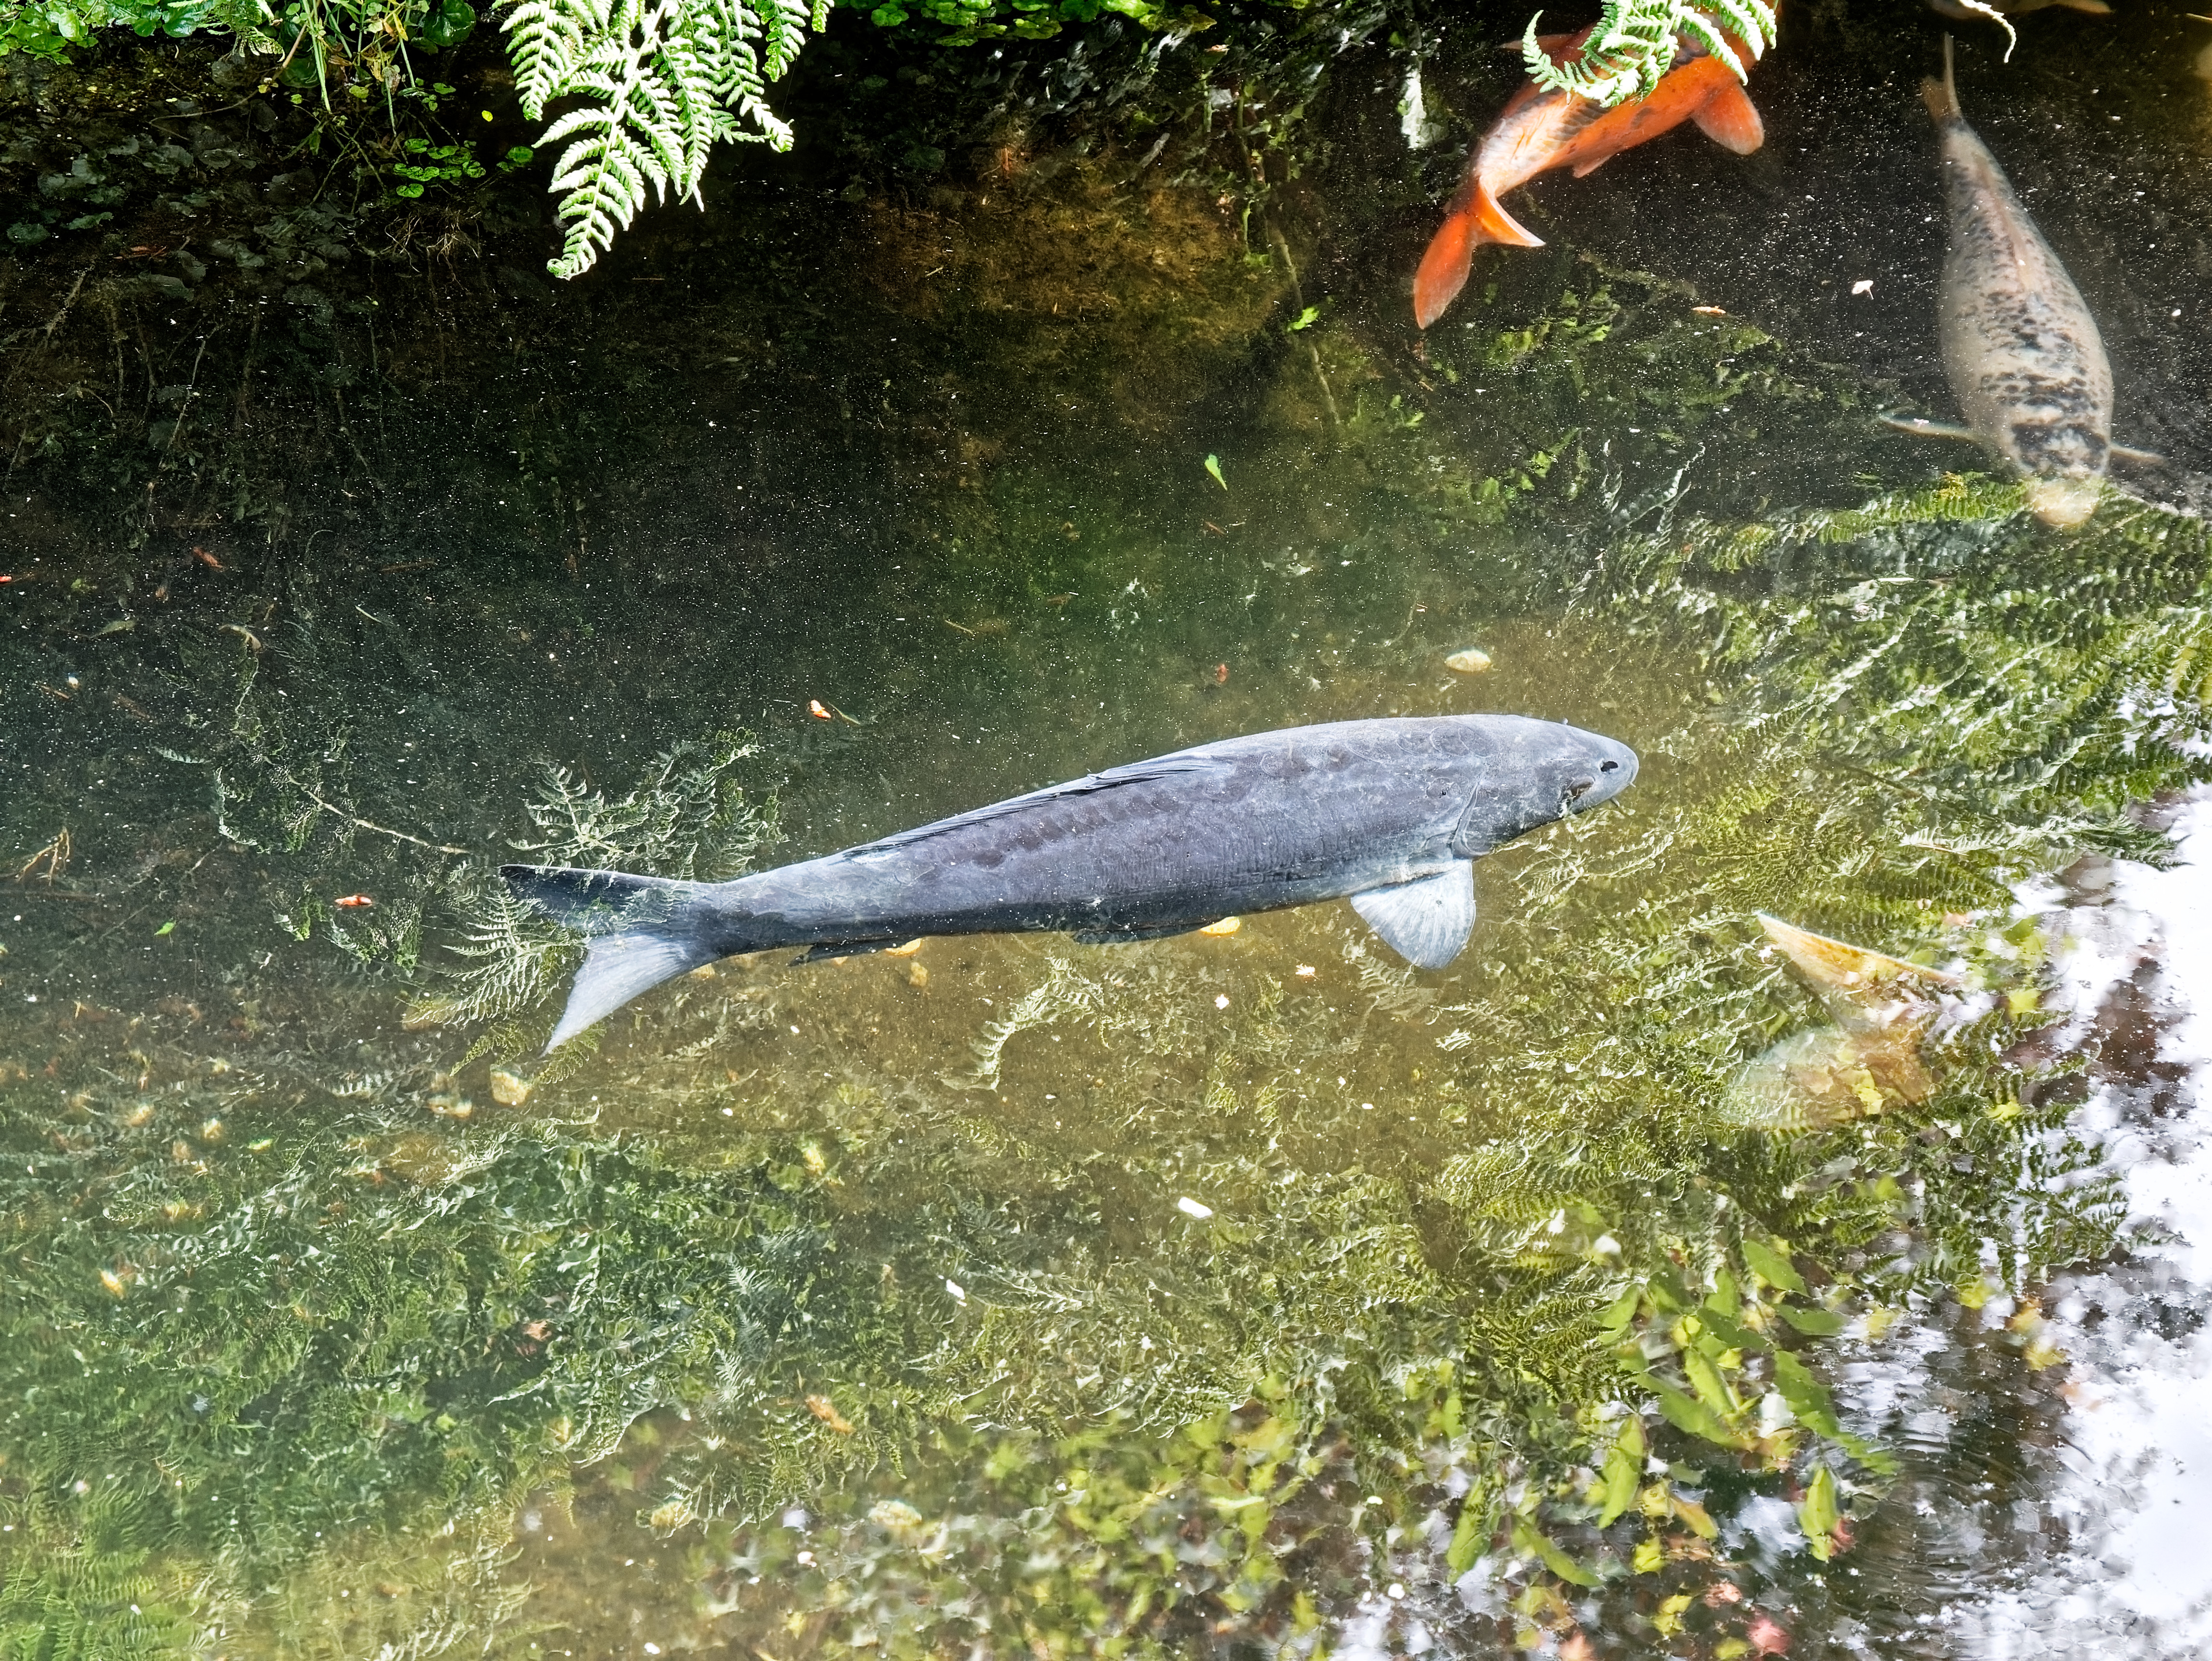
image 1 clearview at max: it tries to identify the “details” and objects which need structure and dehazing.


Not bad but still to much sharpenend. (note i over do this to show.)
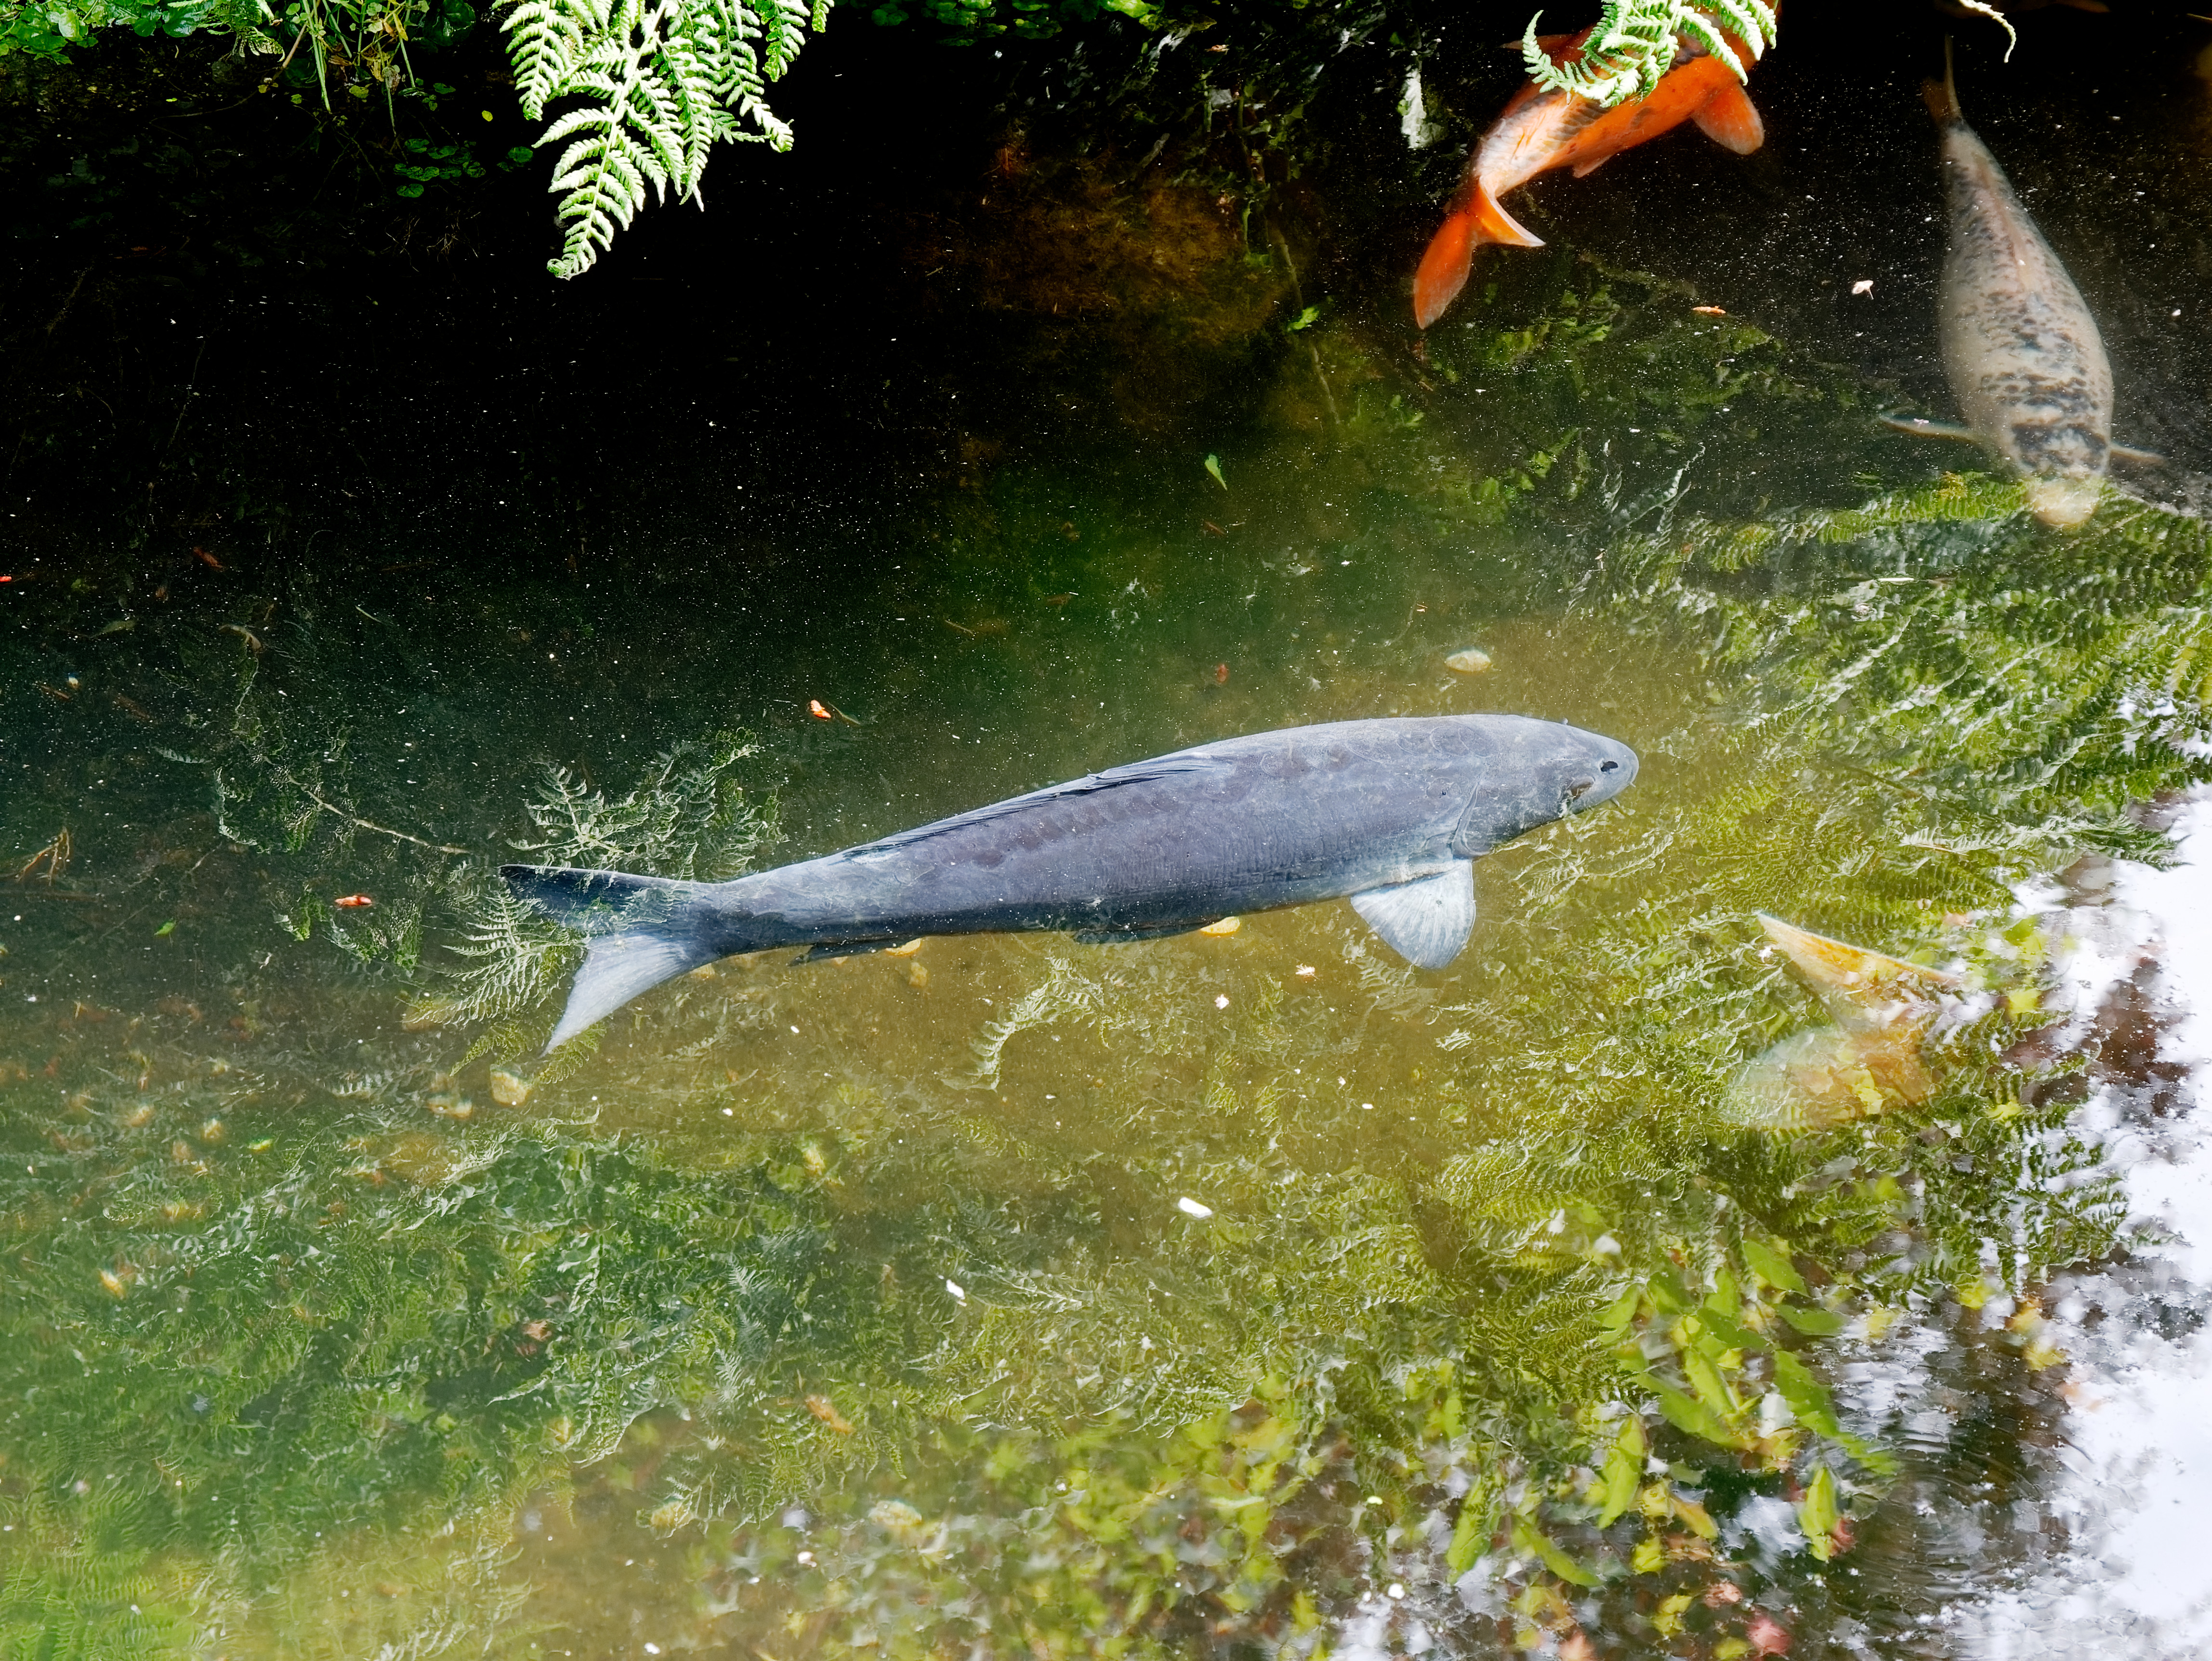
image 2 blunt plane microcontrast slider at 100%

this does no “blacklevel” dehazing kind of saturation only structure see the tonality is more “hazy”.
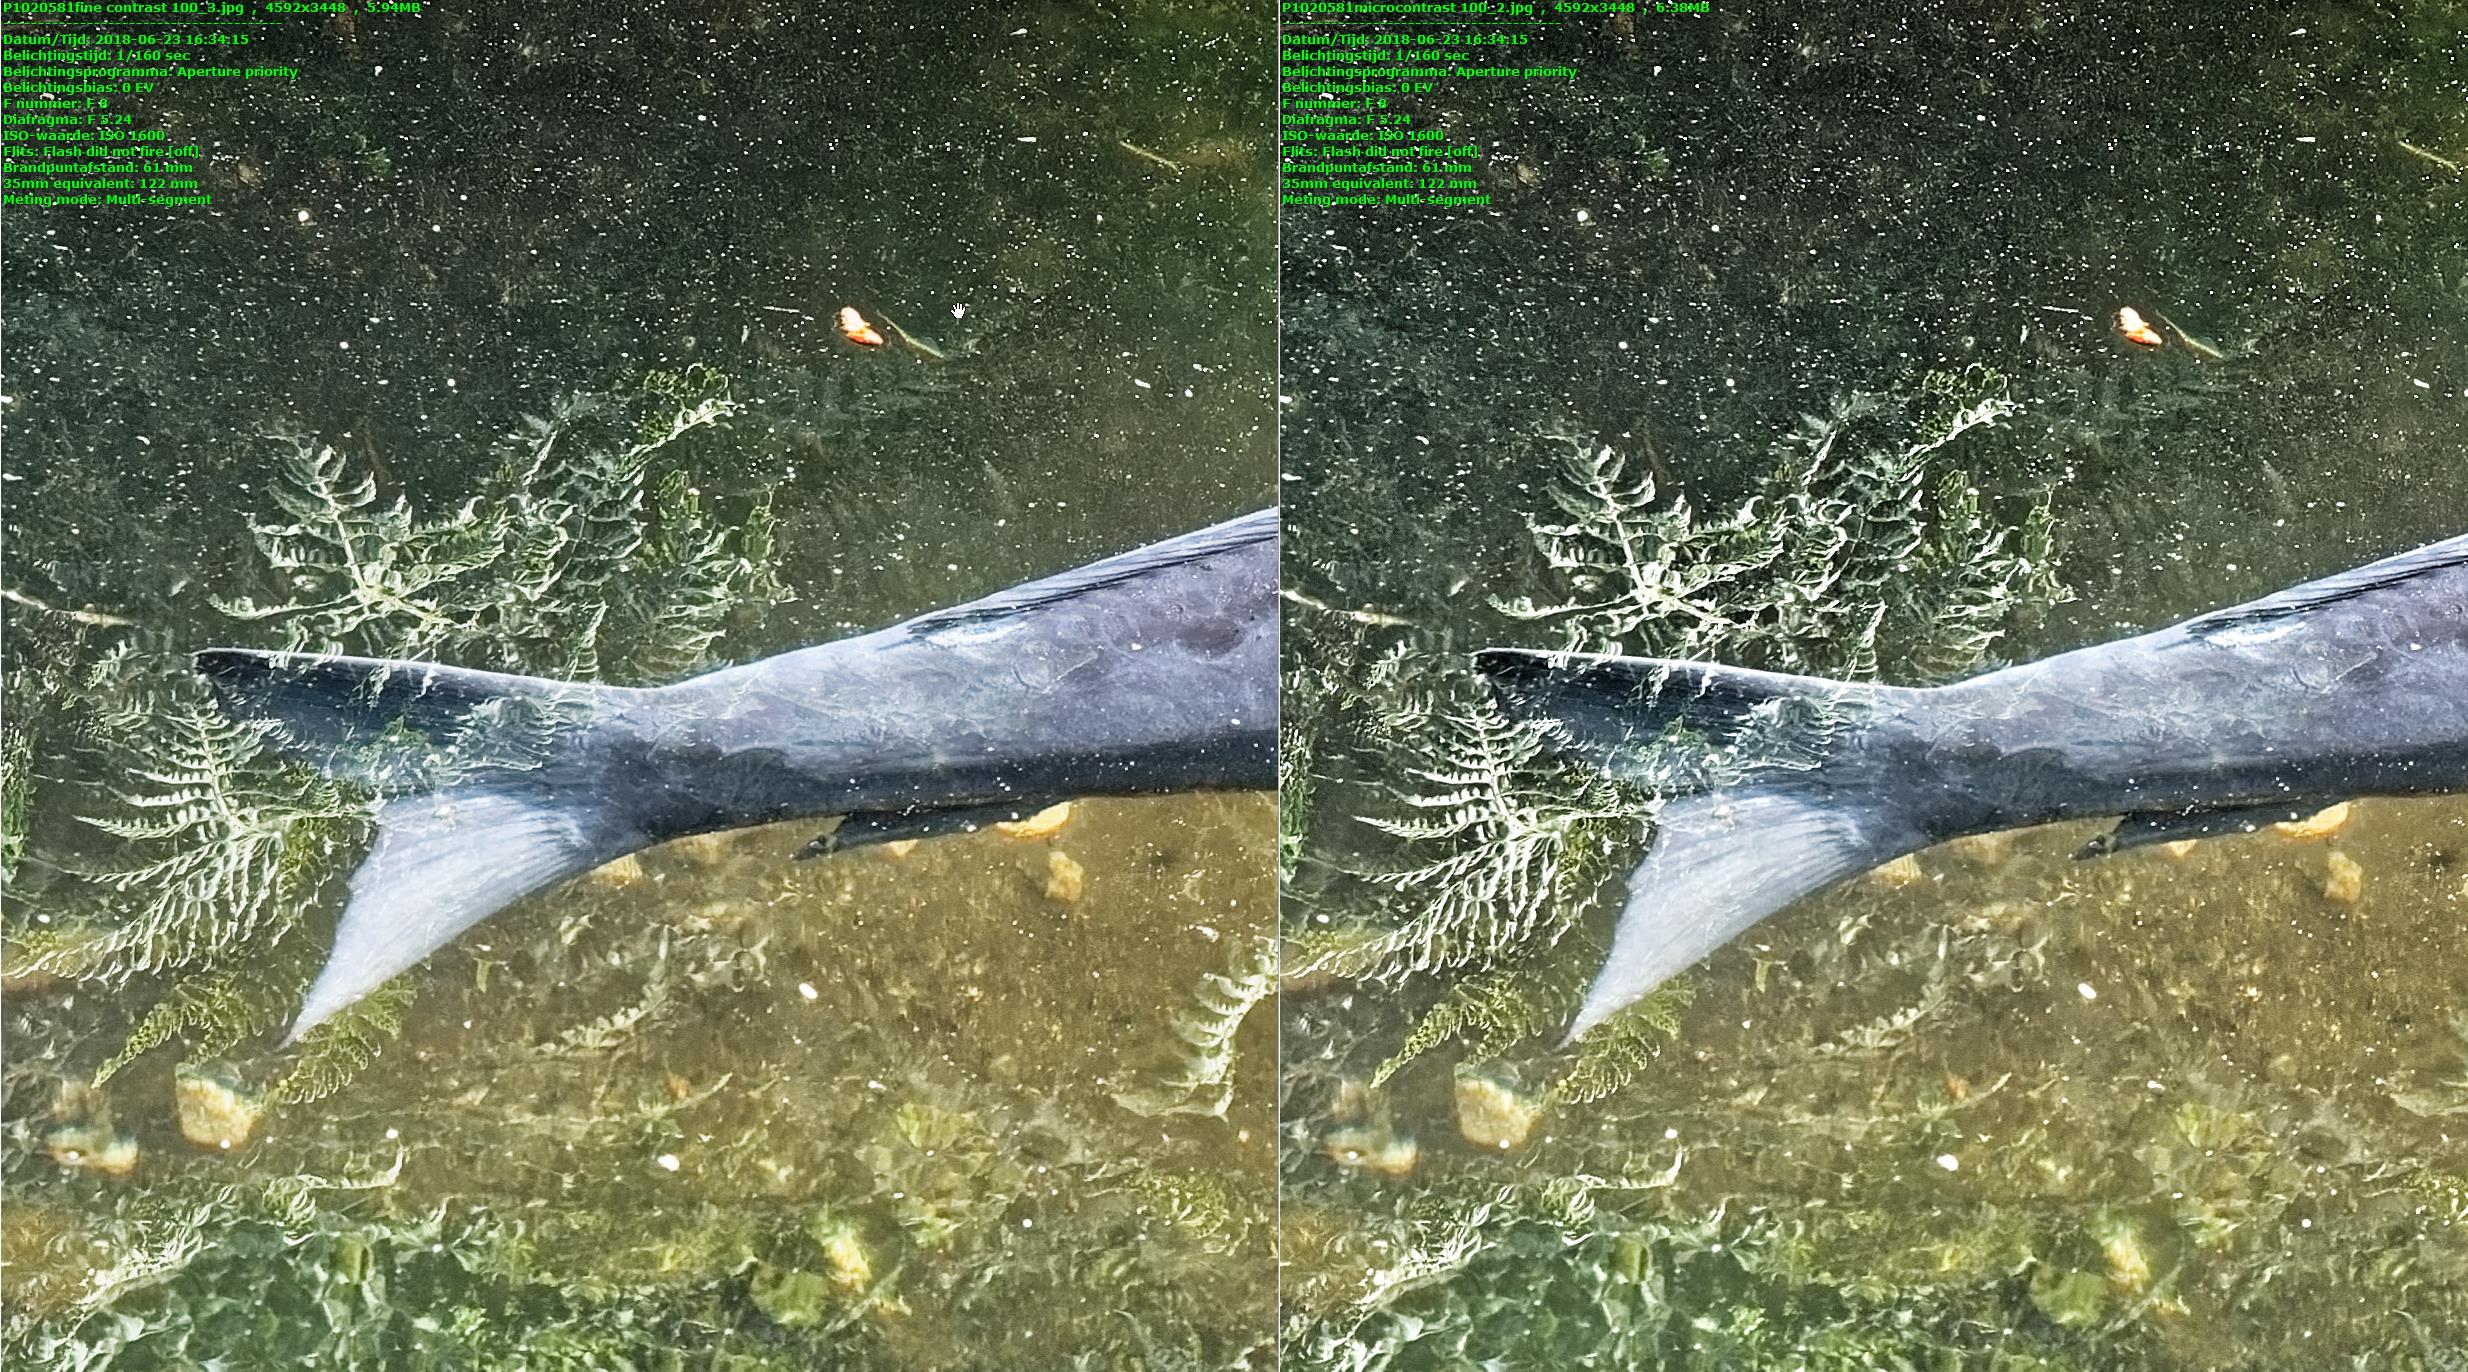
image 3: Fine contrast: less sharpening then microcontrast but stil more hazy then clearview.
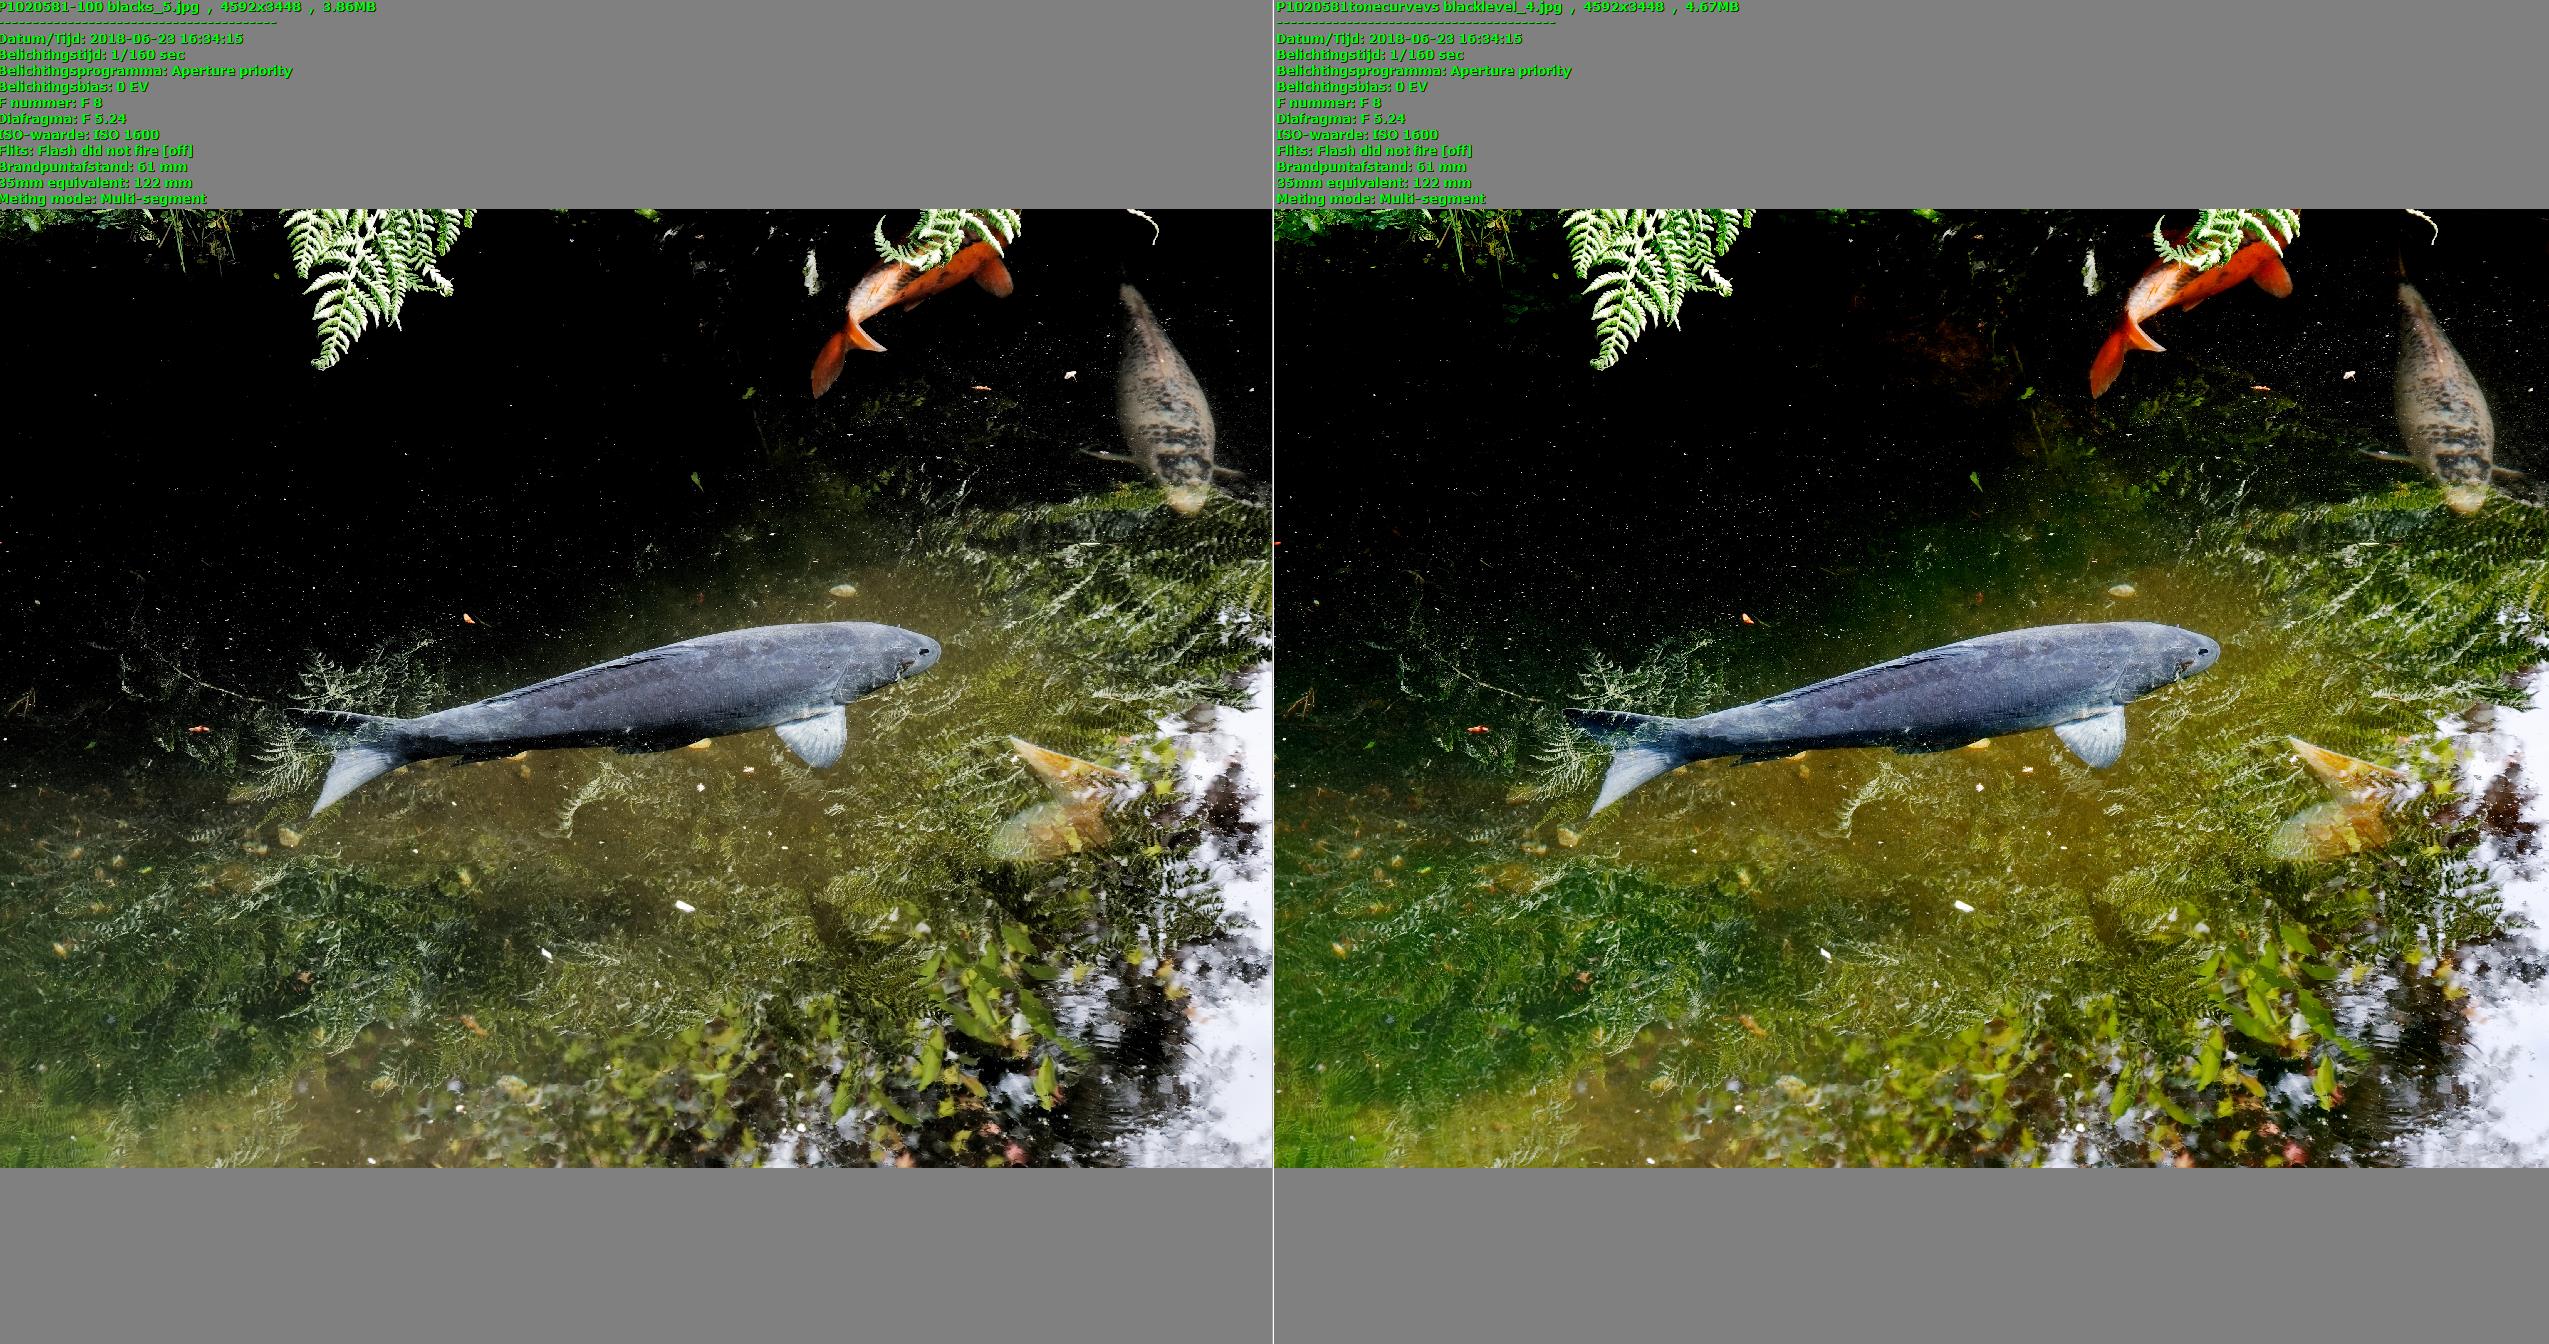
see this compare:

fine ,left, is less steep in contrast, softer.
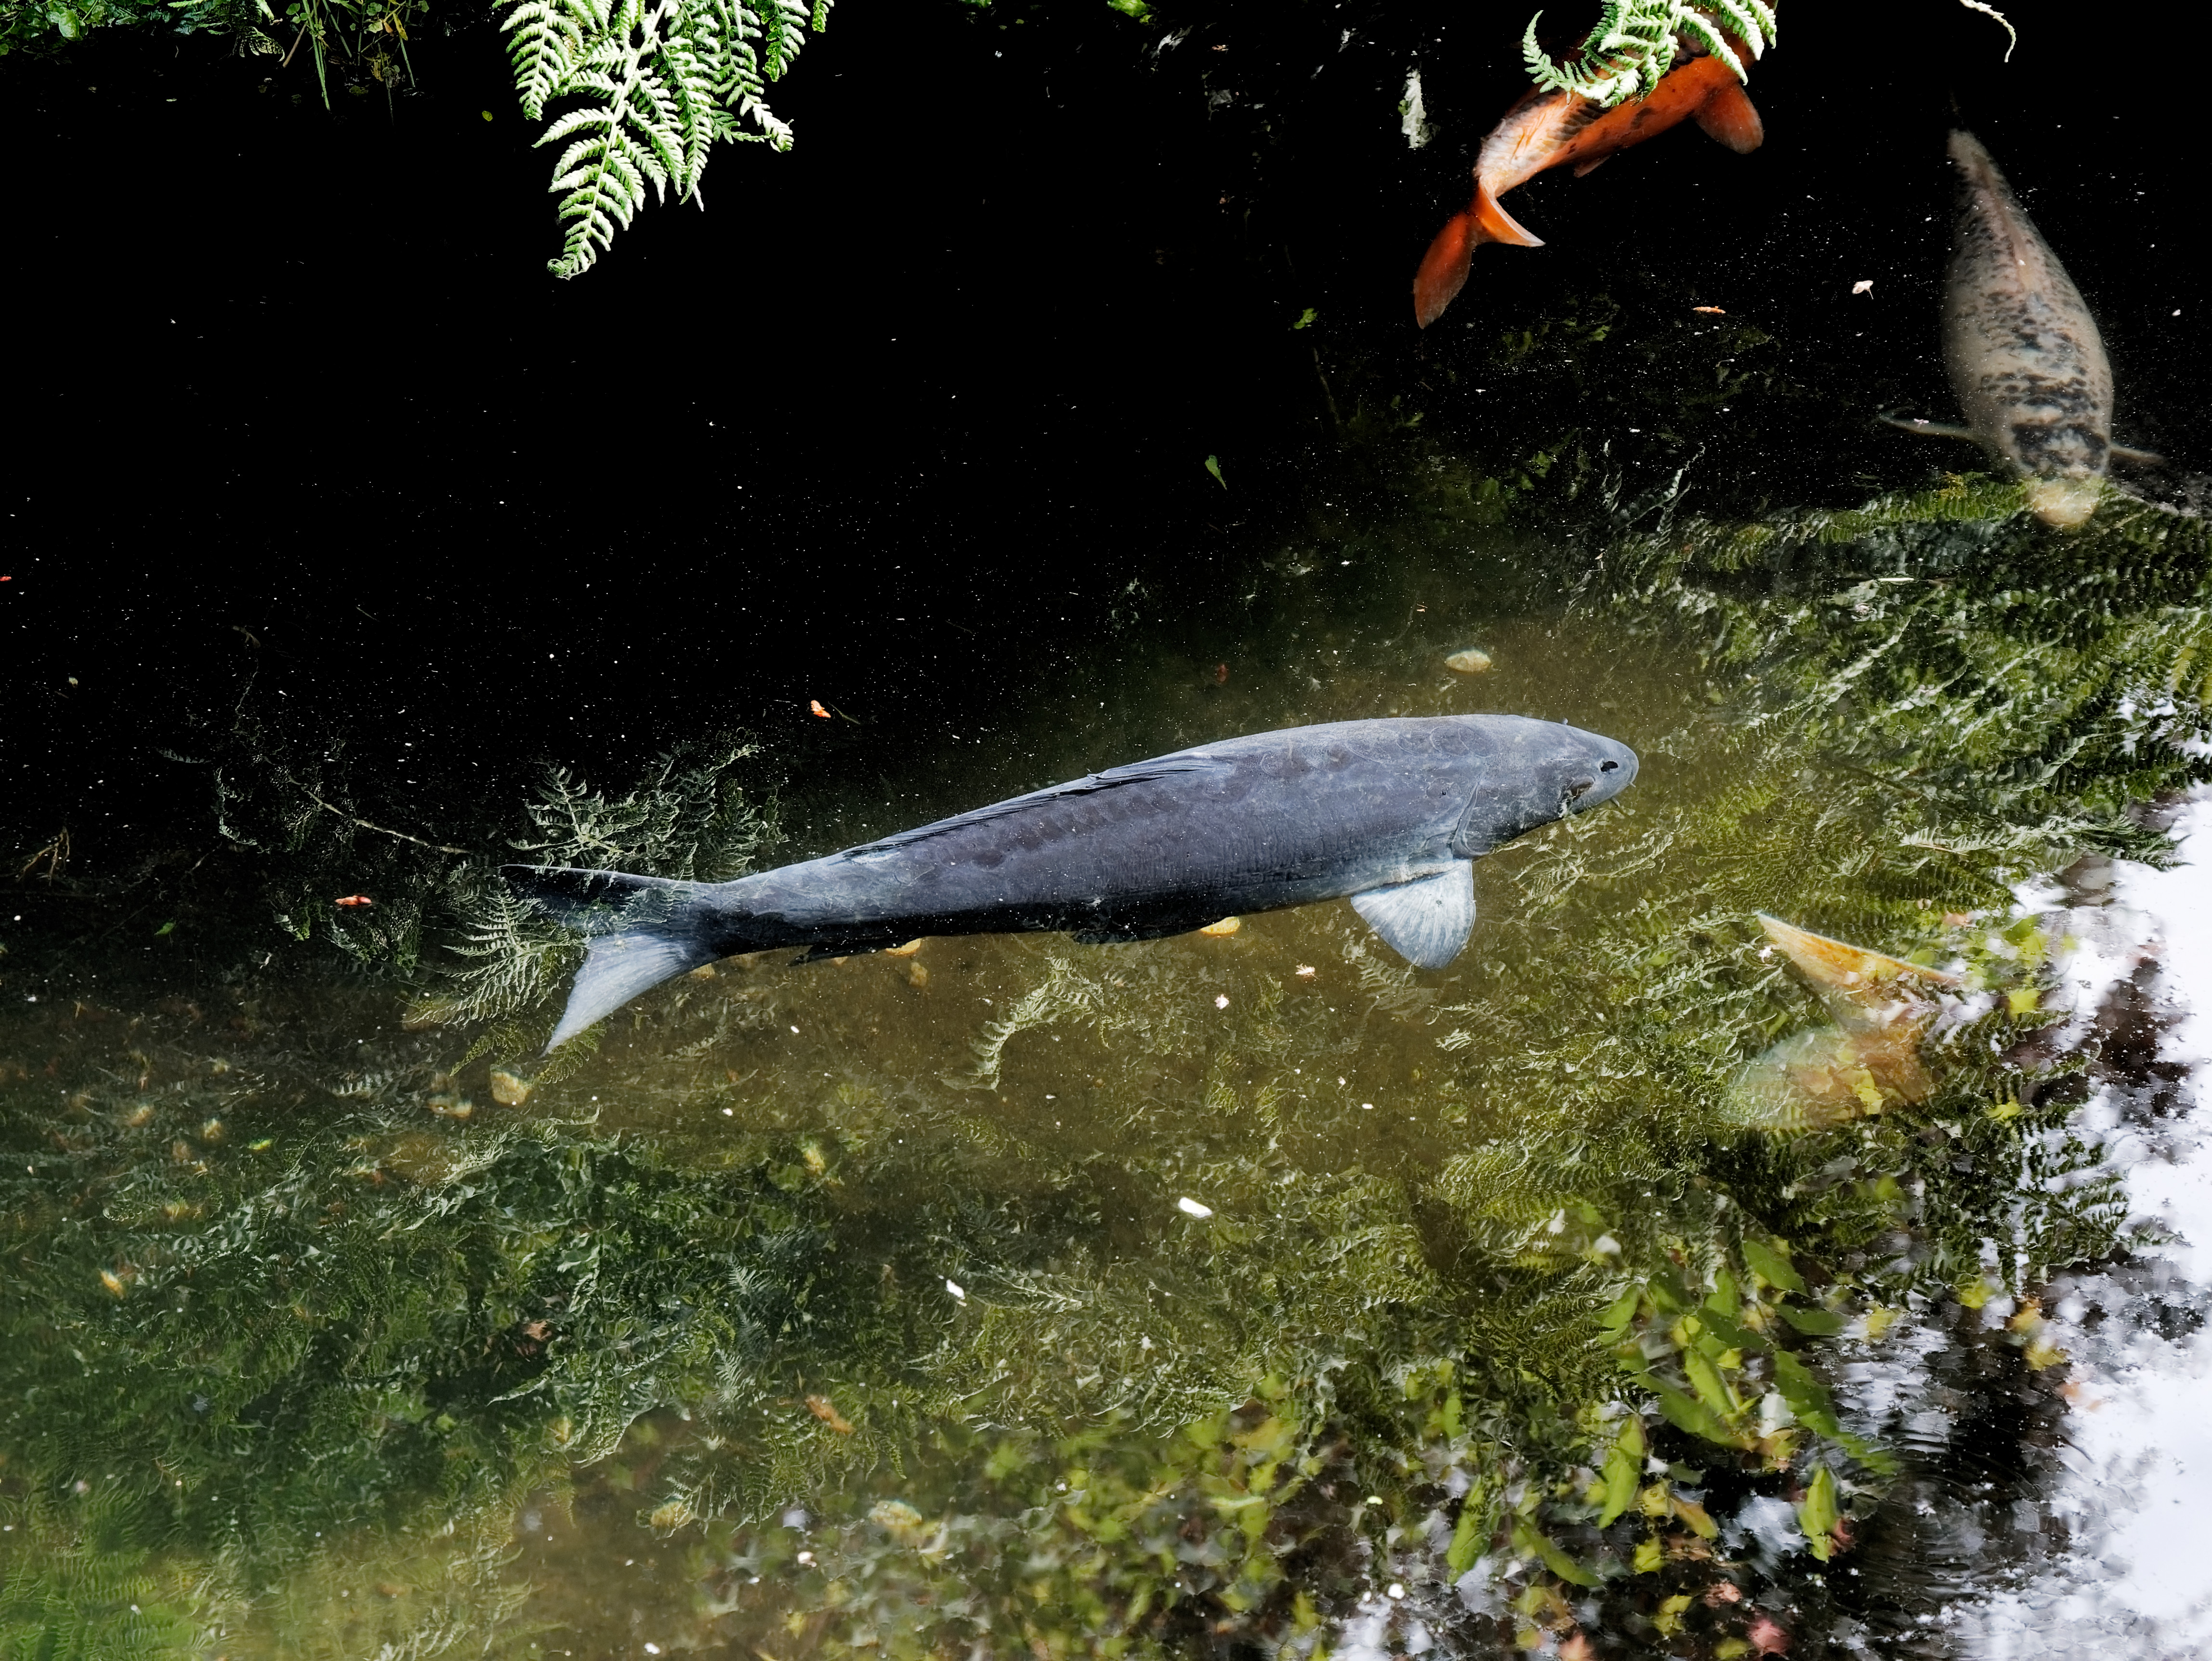
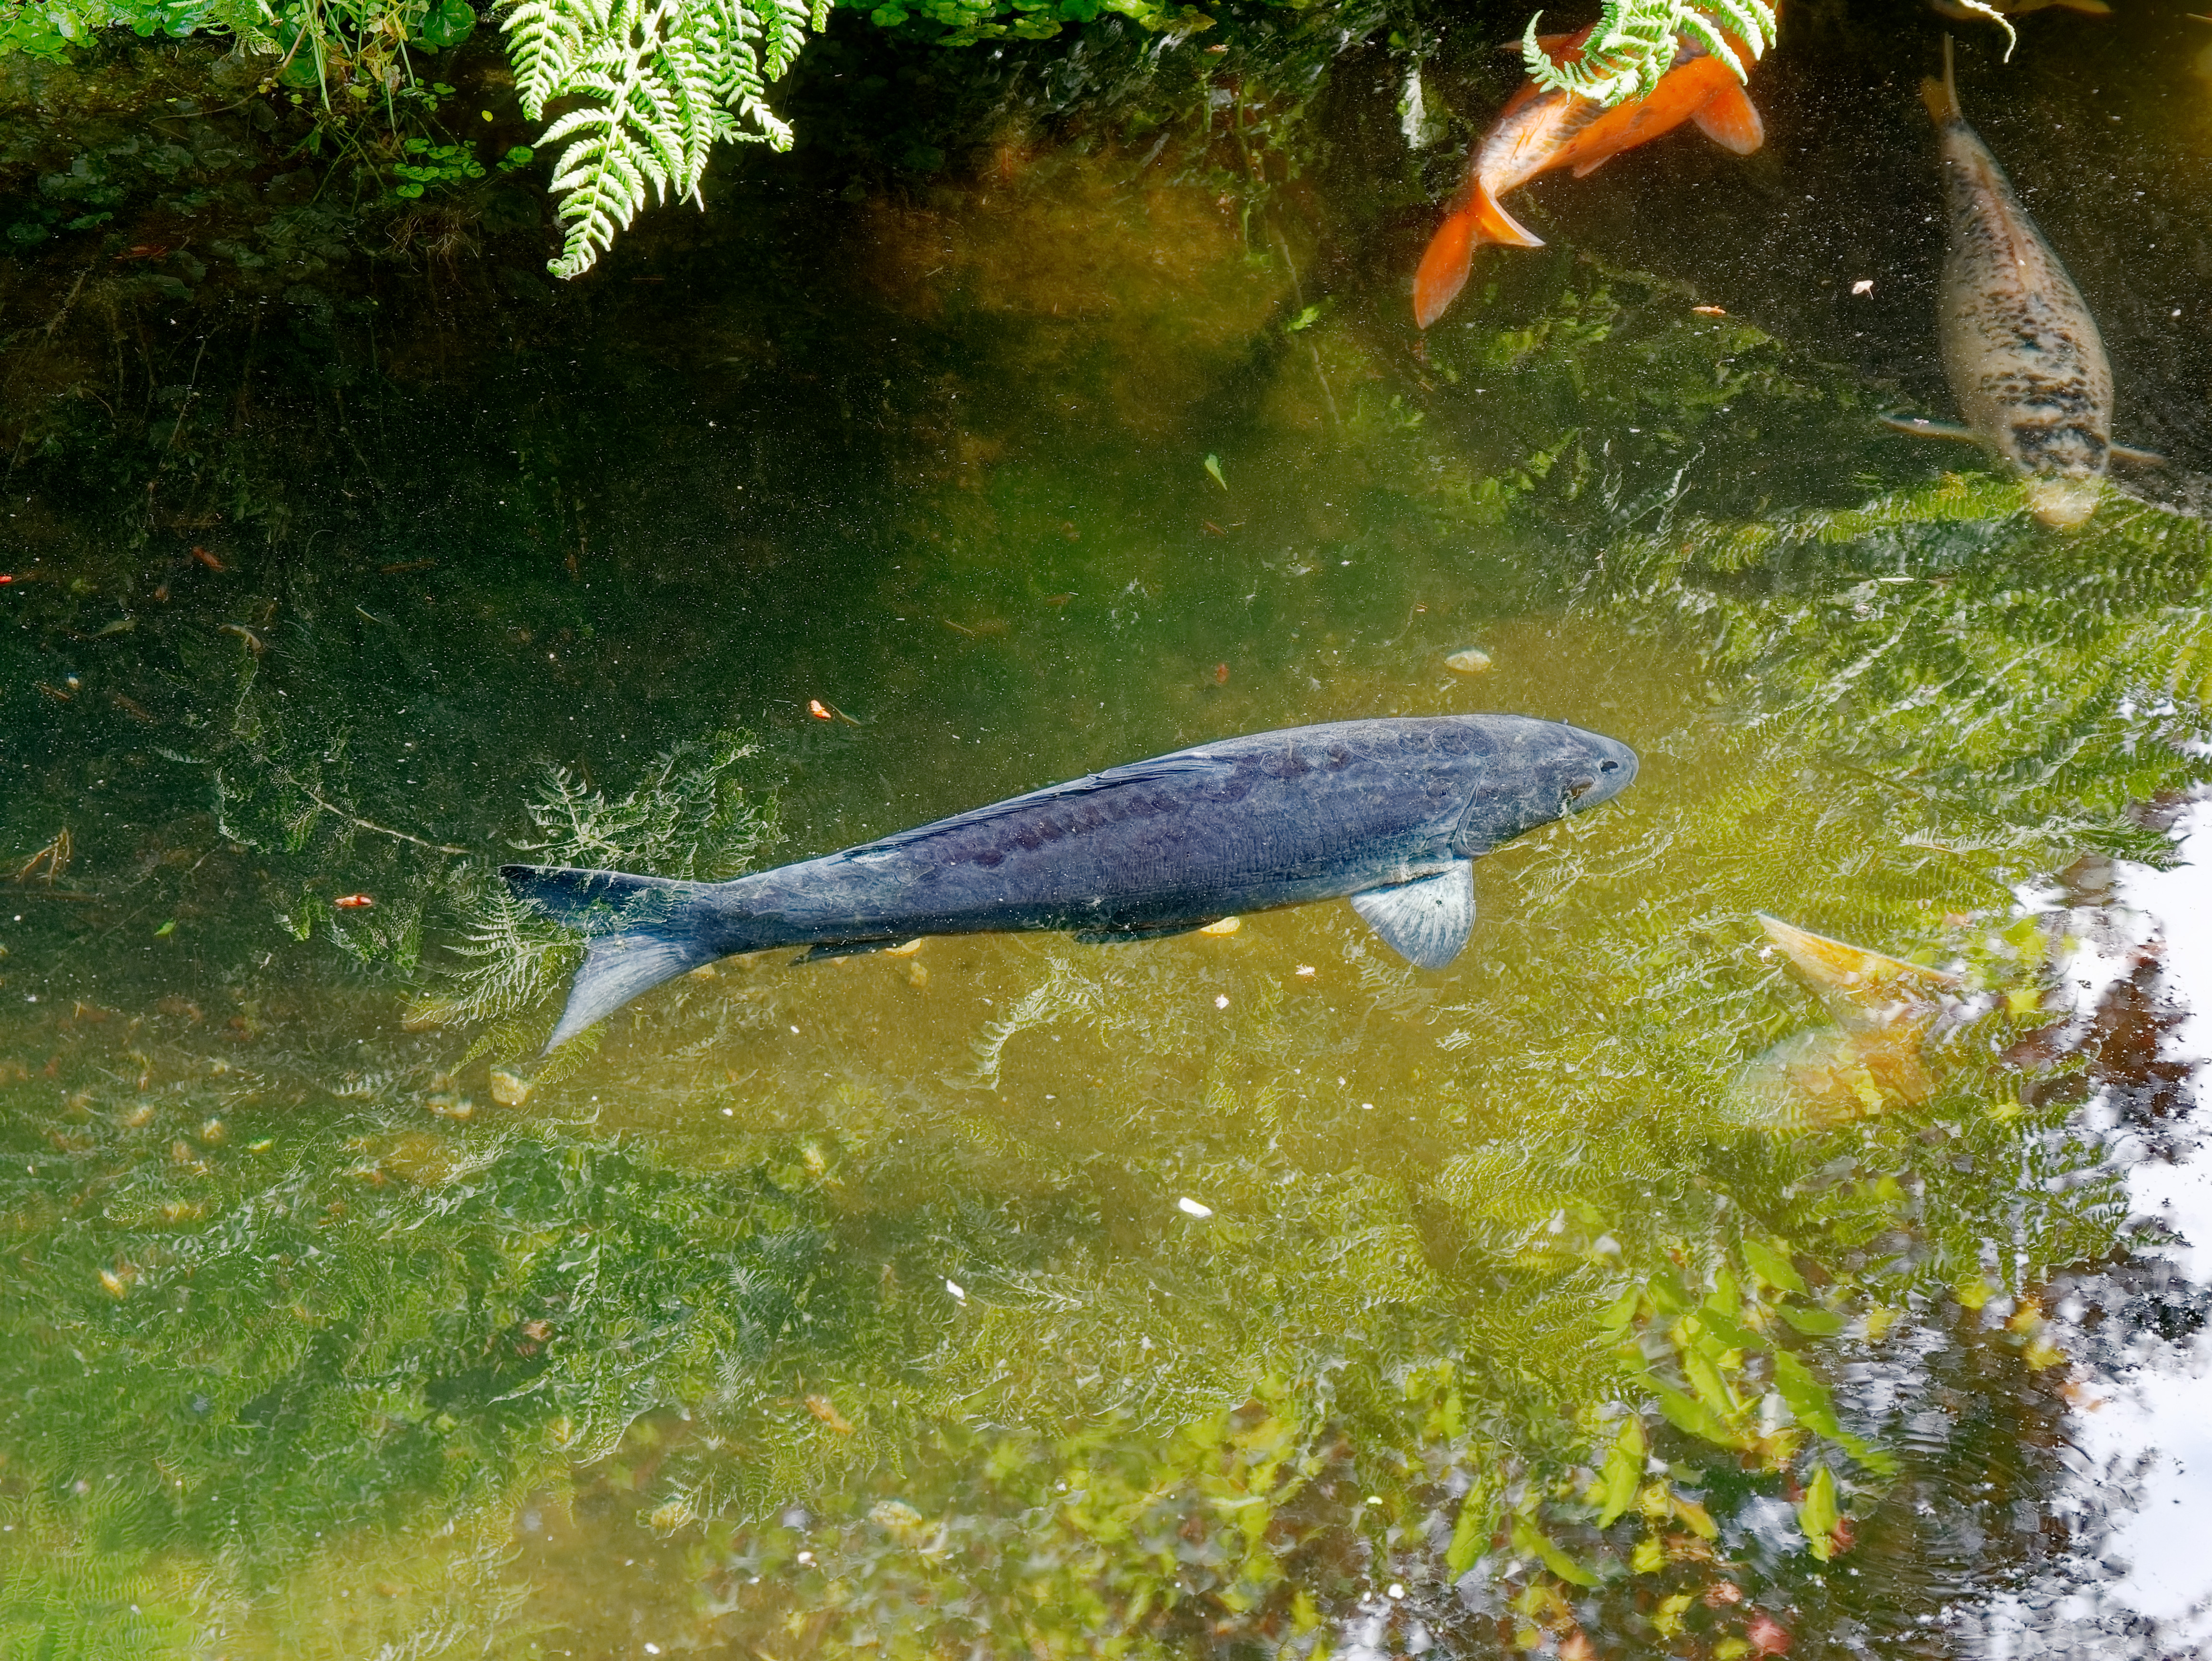
image 4 tonecurve, aka dragging blacklevel point.

Kind of “Dehaze” function , it saturates colors without active sharpening.
image 5 blackslider:

note -100 means you drag down deepshadows to black
a bit like tonecurve but more luminance based and less saturating:
i dragged down tonecurve to match -100 blacks see the key difference:

Ok now it starts to be interesting:
sliders have -100 and +100 so we can play with that to countereffect some “smart tools” like clearview.
small video how i combined some tools
endresult:


(note the goal was to dehaze and sharpen as much as possible without overpush it. like i used a CPL filter.)

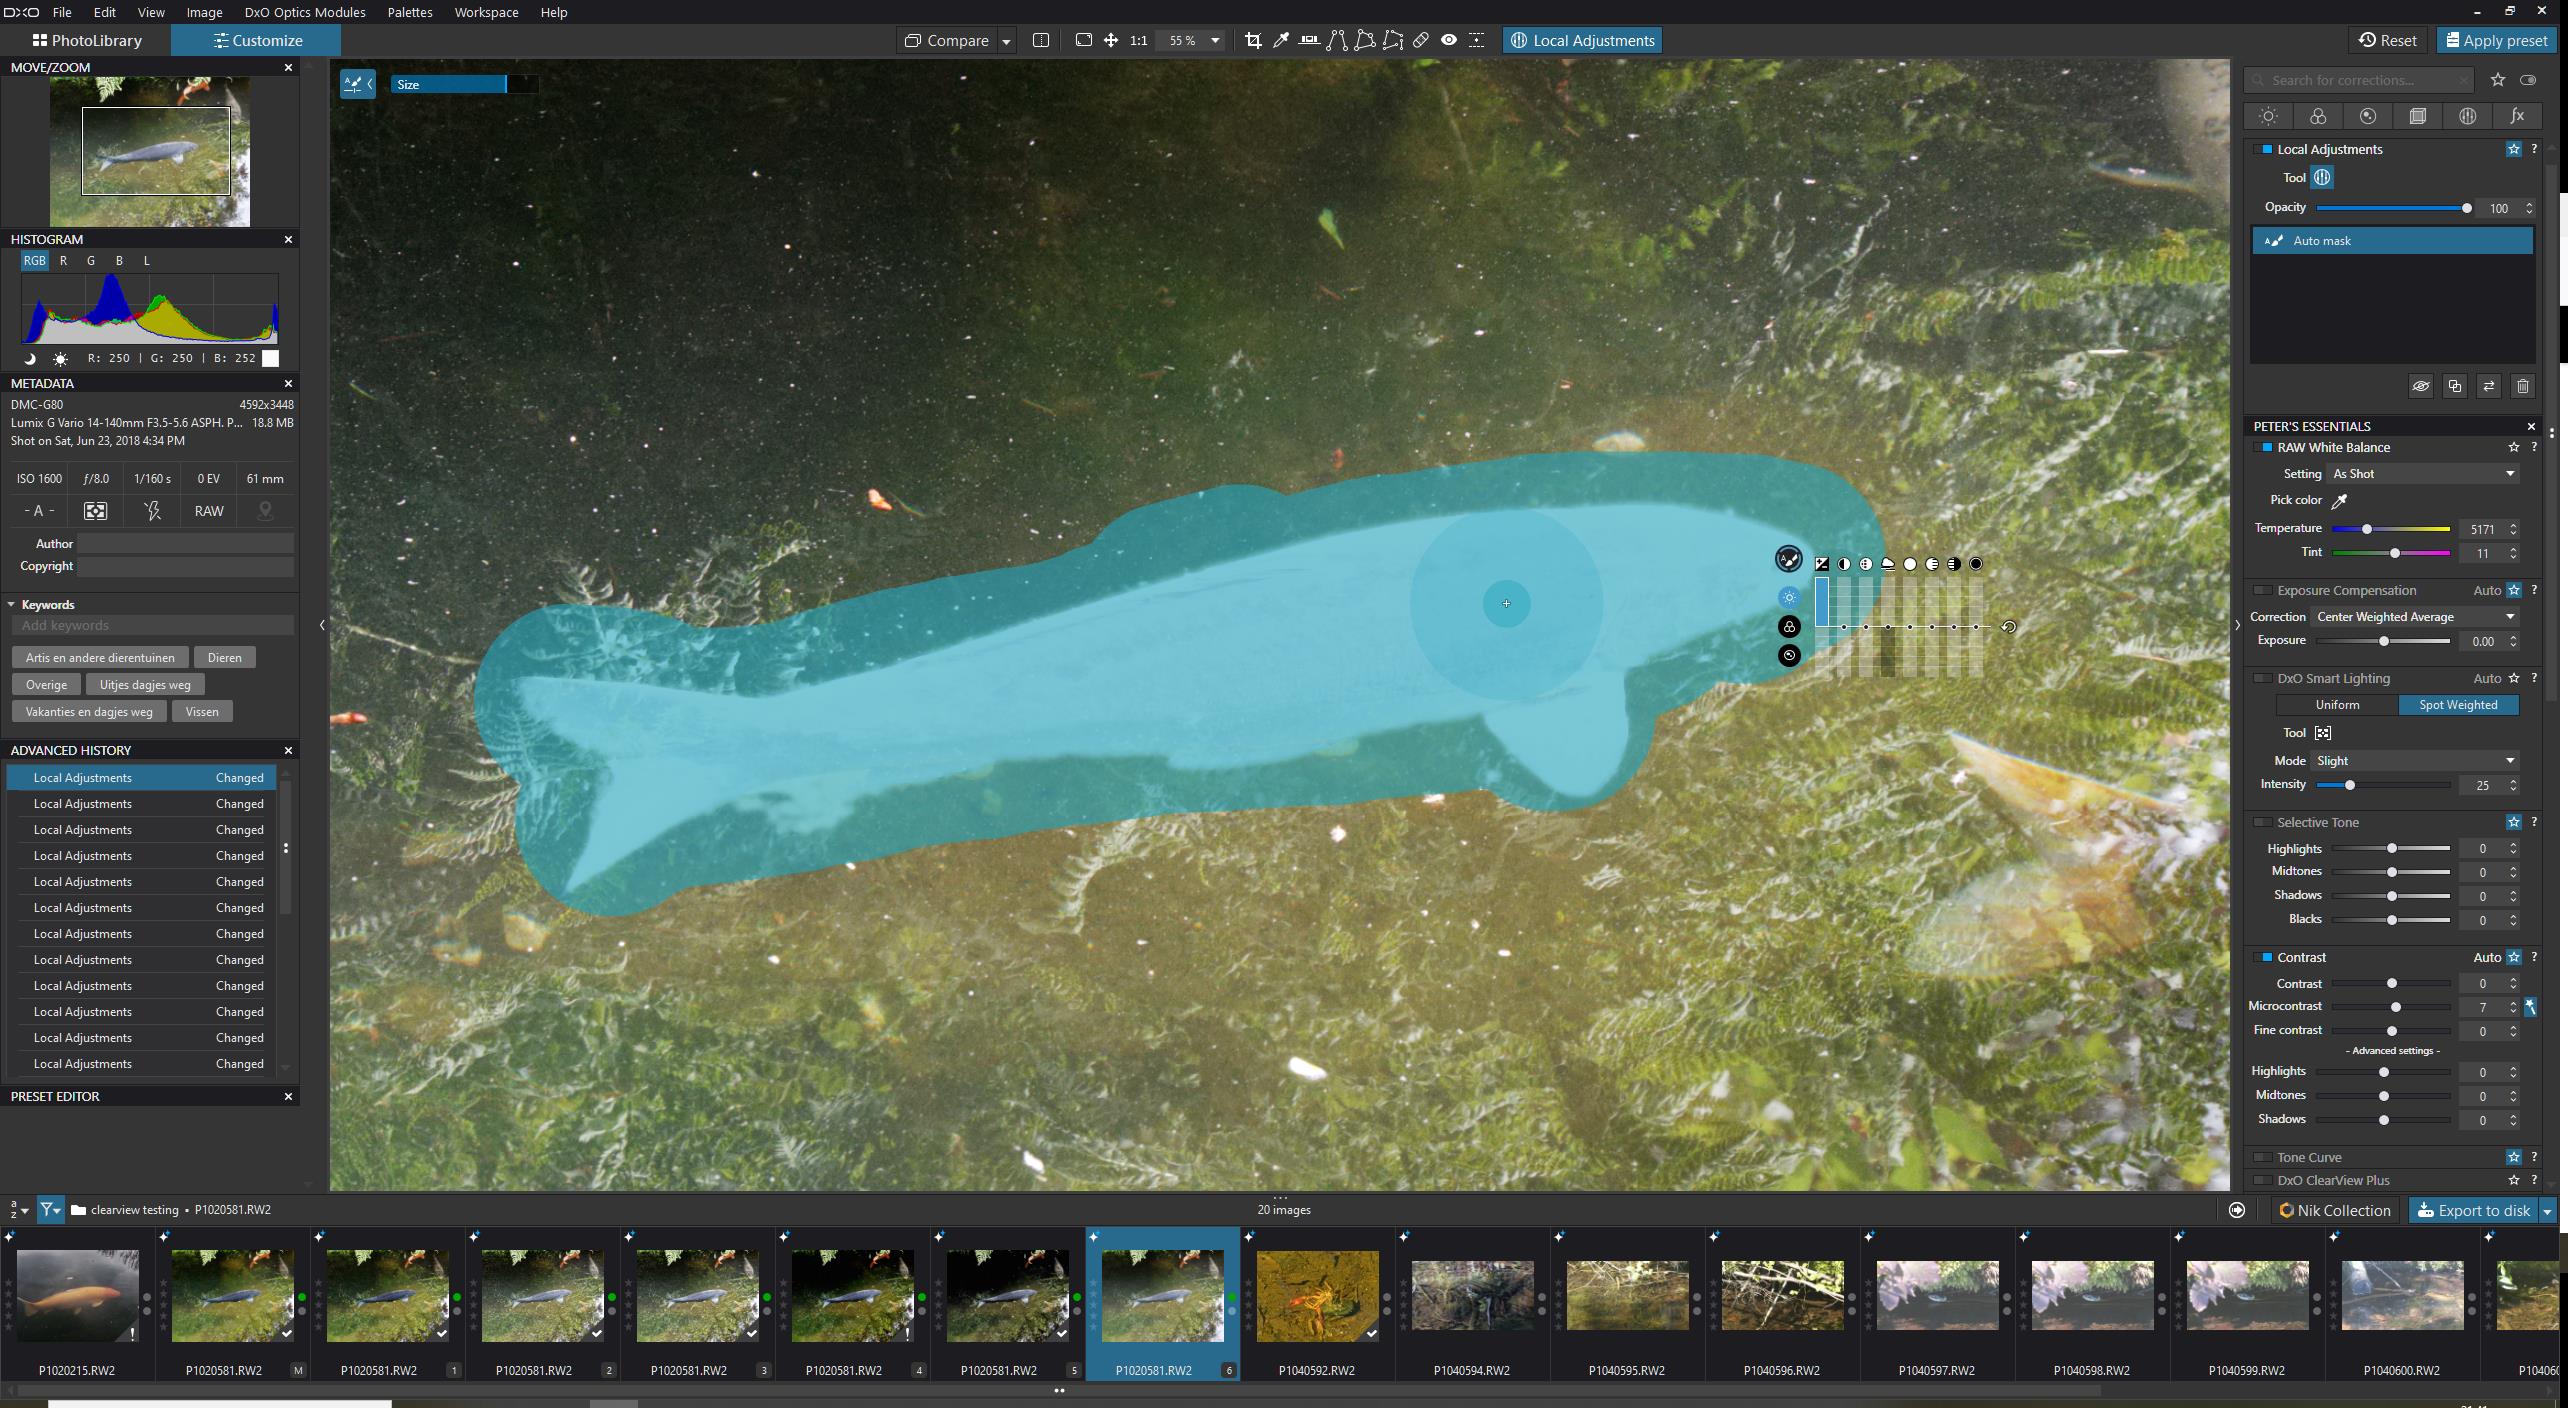
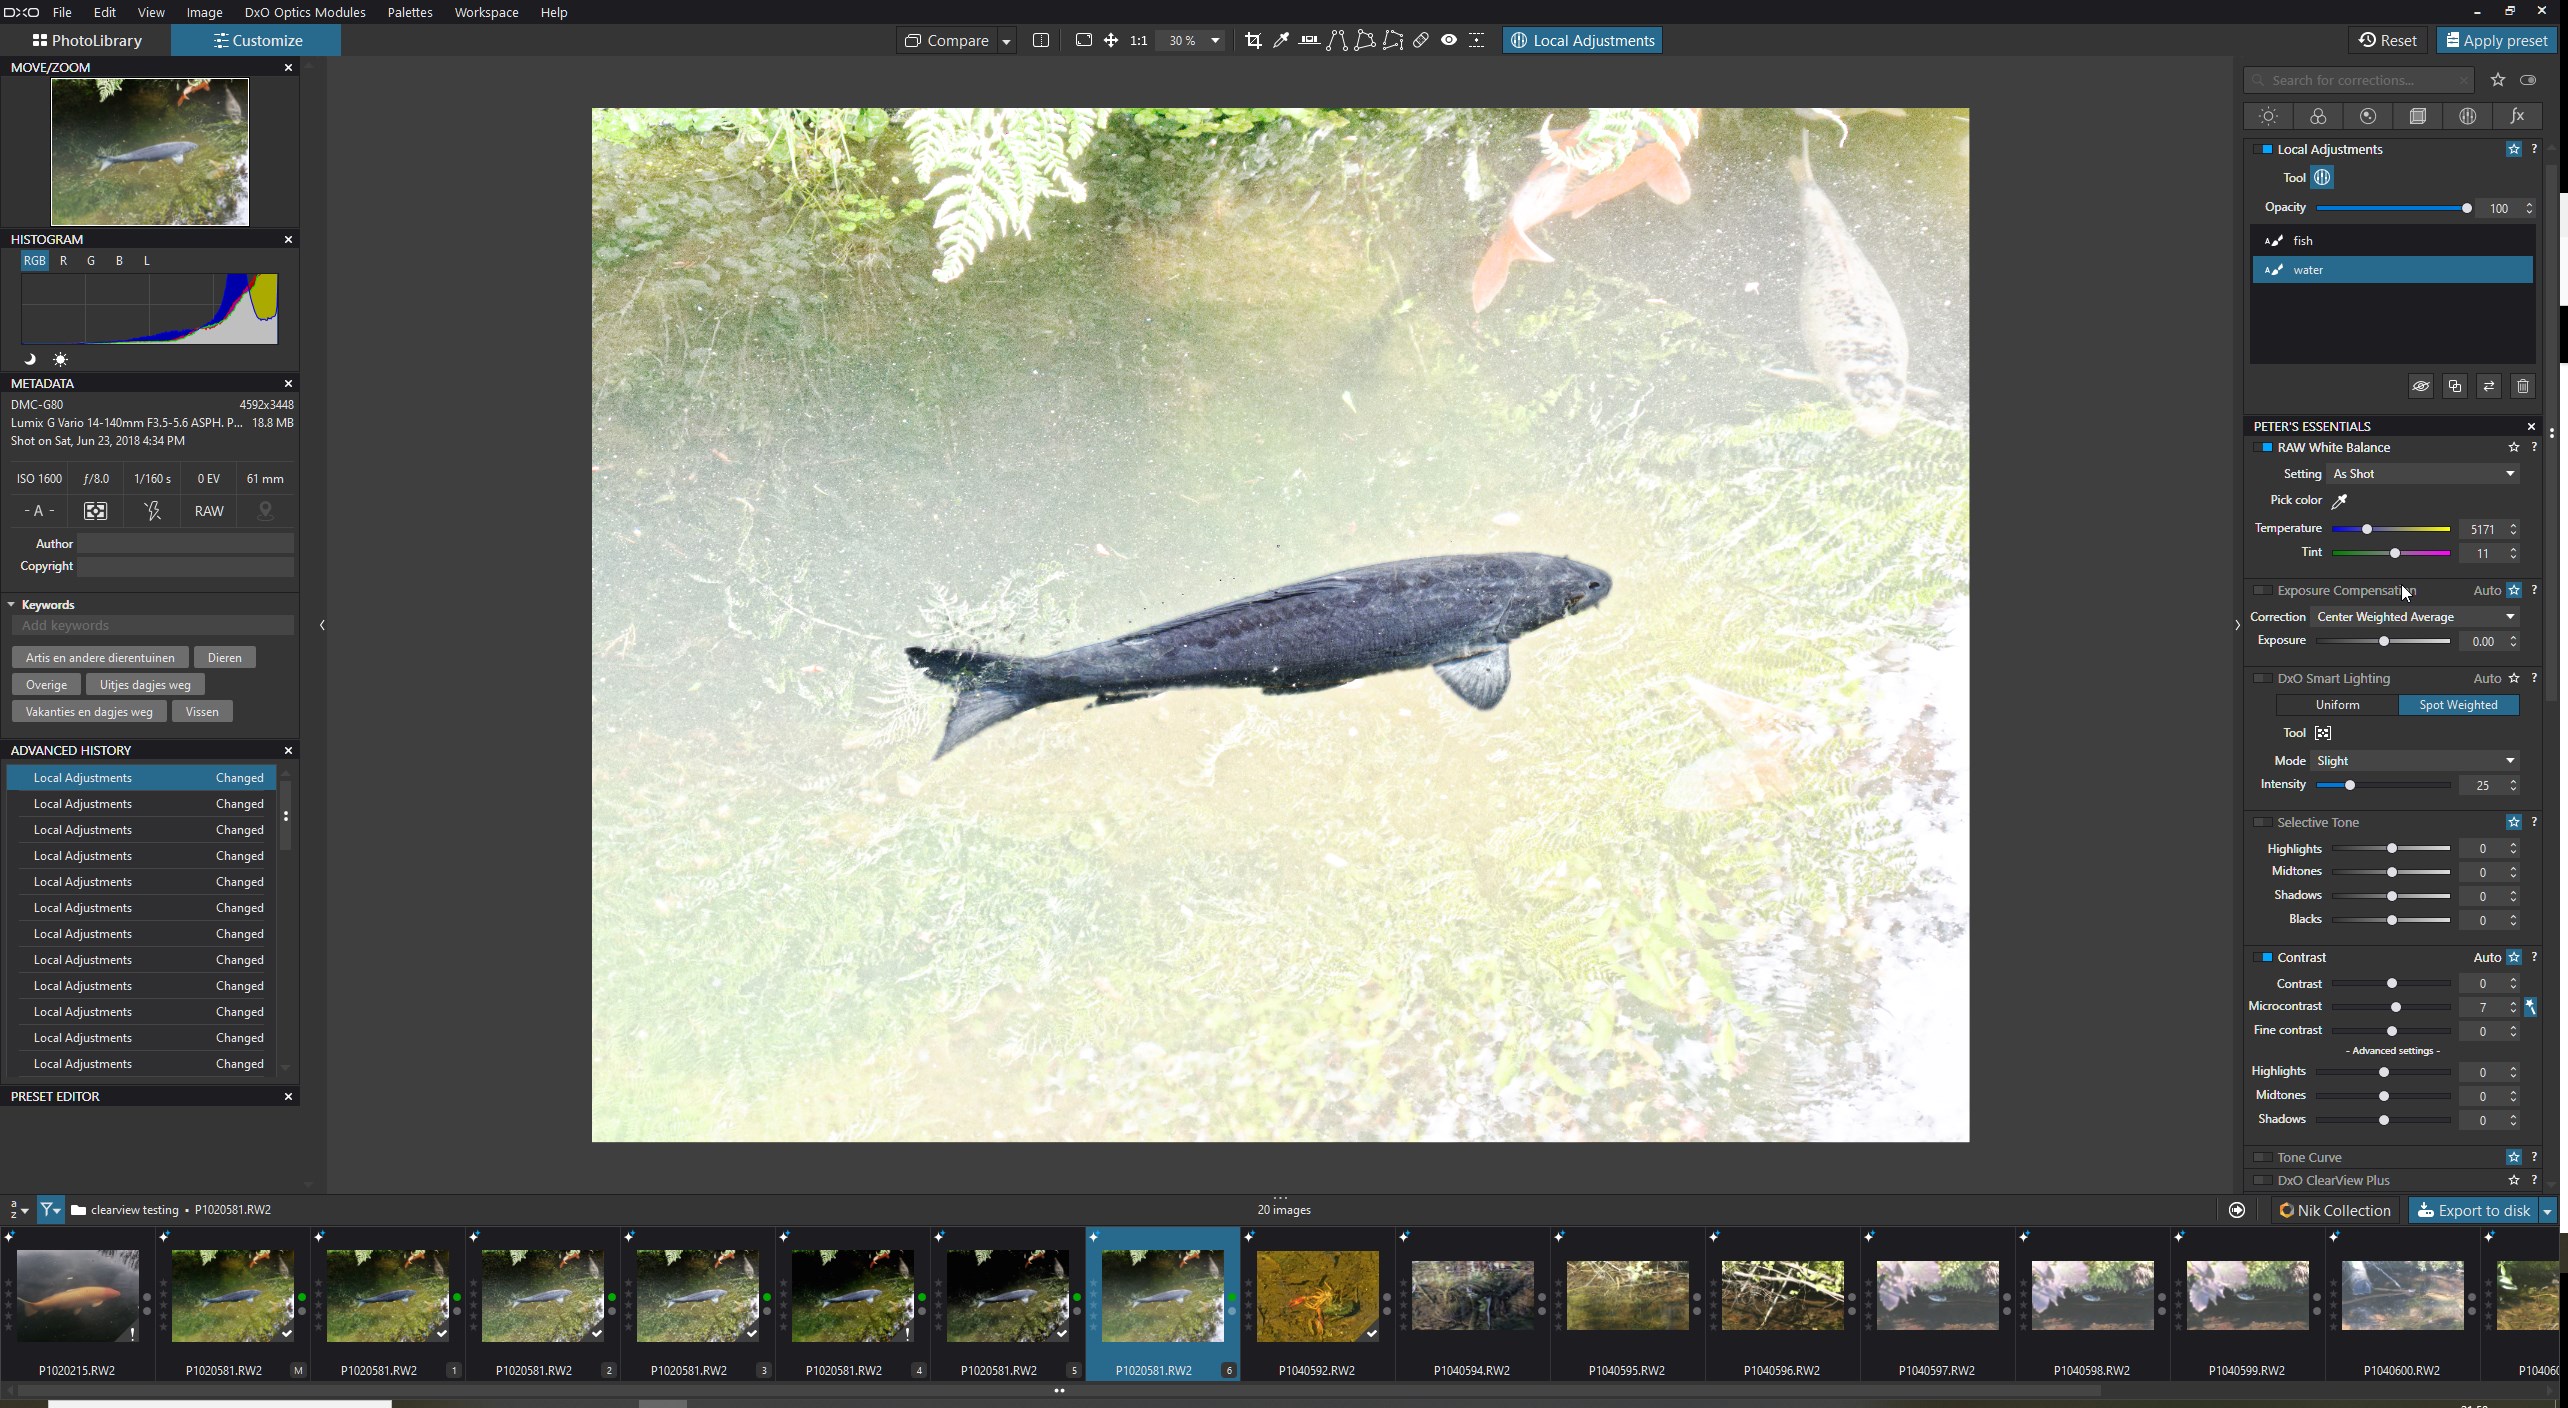
And as bonus we have microcontrast and clearview in the local adjustments so what is did globally over the image with negative microcontrast you can do also in masking.
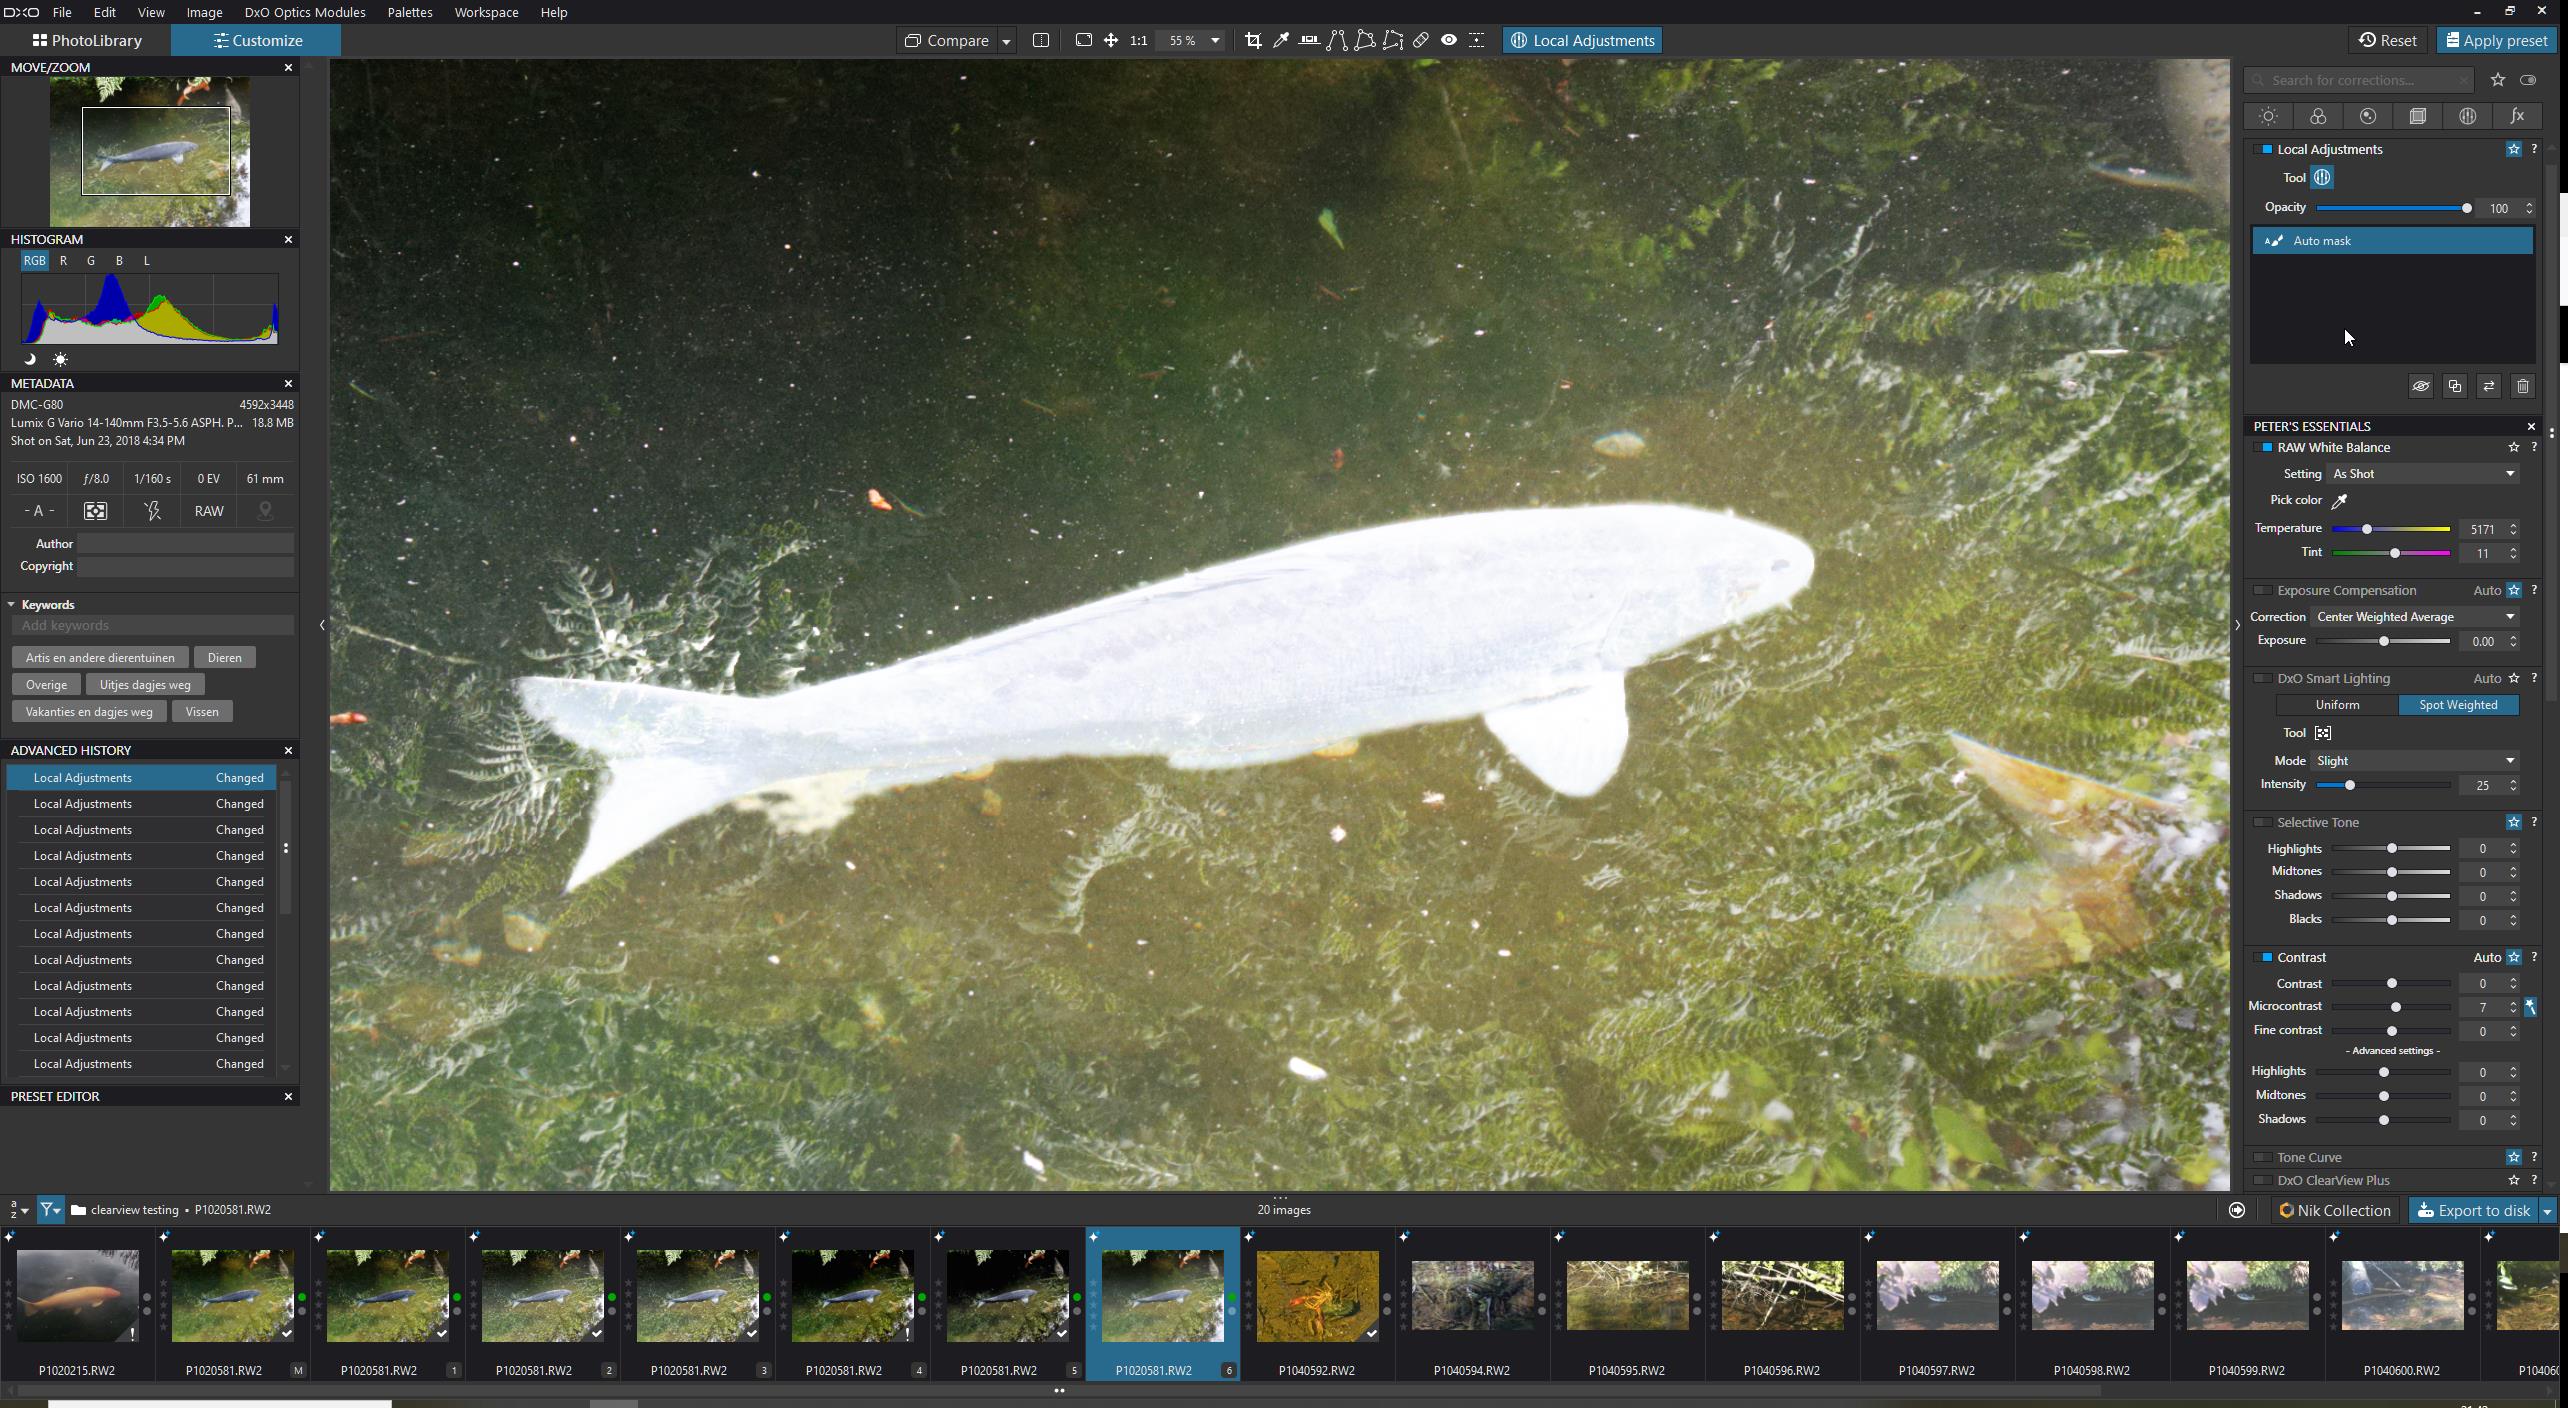
Automask: using exposure slider to see selection:


and the selection

and then copy and invert mask.
adjust abit:

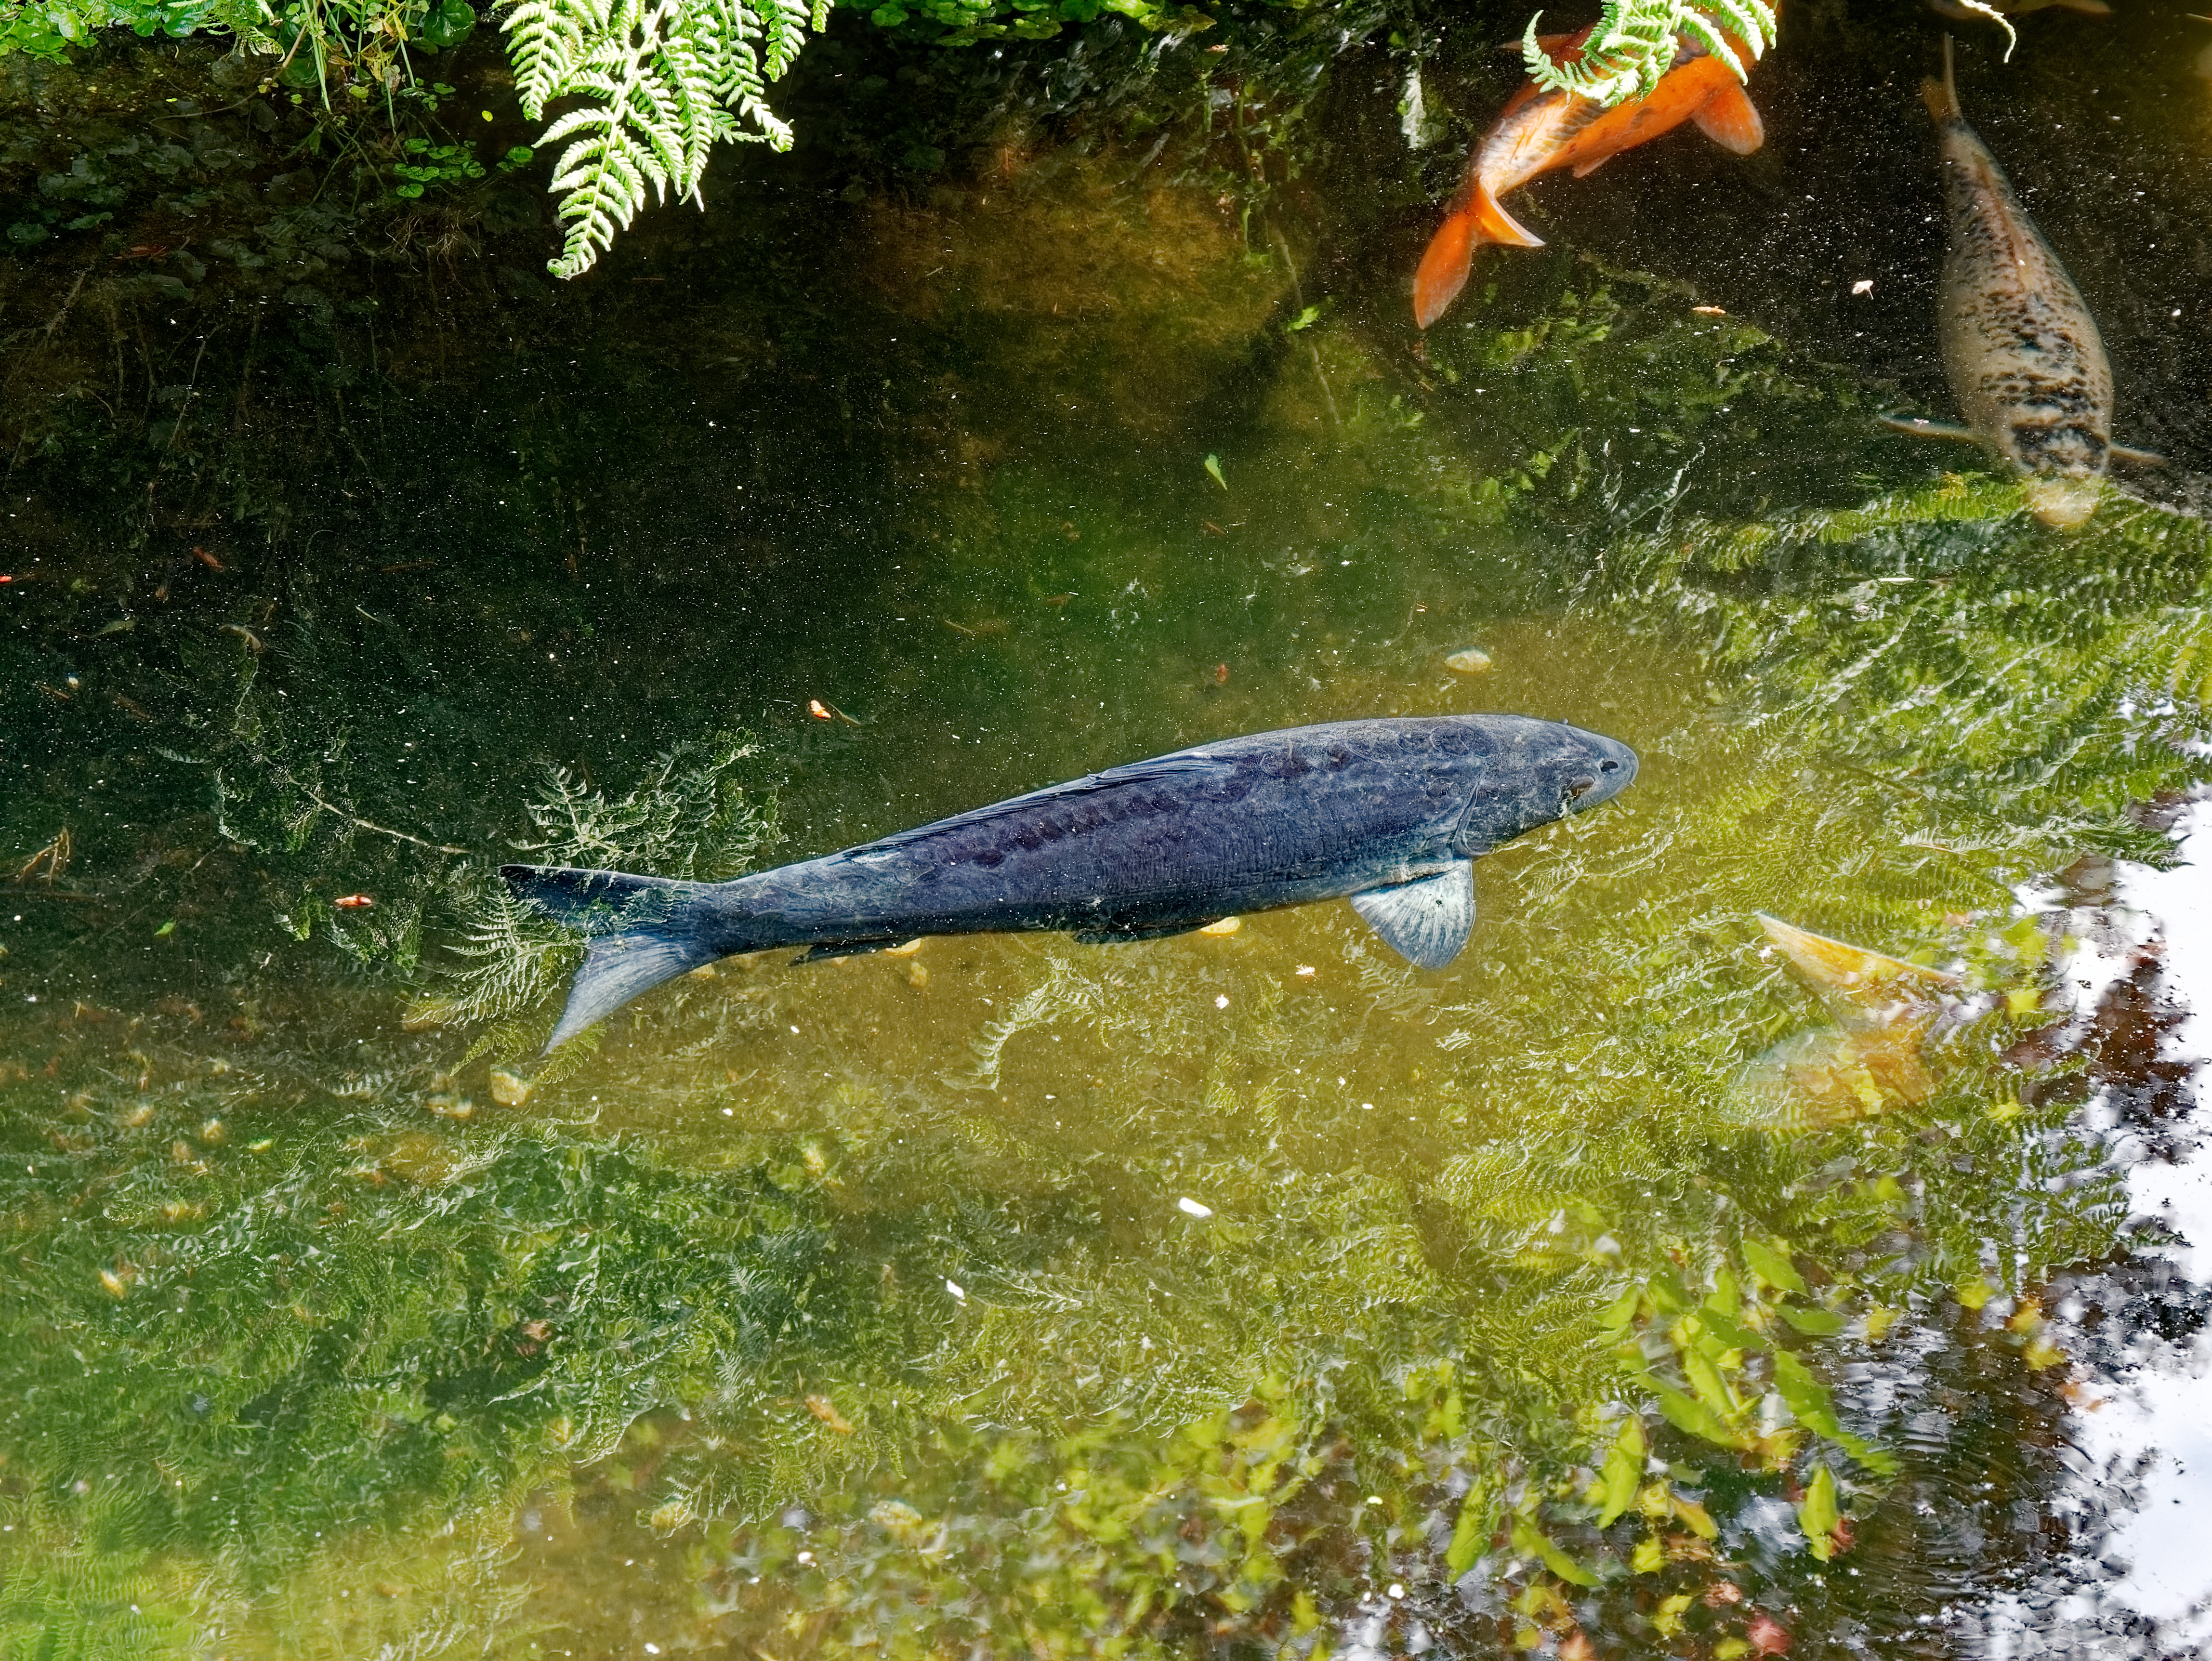
18 clearviewplus and -34 blacks on the water
fish 37 clearviewplus and 63 microcontrast and 32 sharpnes just to show difference of “global editing”

if you skip 18 clearview in water and only blacks then you have only sharpening on the fish.
Use controlpoints and you can even do more manipulation. (but that’s an other learning chapter … :grin:)

(And no i didn’t just found this out by just working on images, i did a lot of testing and comparing extreme values of sliders so i notised the hidden differences better and then used those insight’s to my advantage.)(edit sounded wrong, i ment when you just work on images you don’t unlock all the goody’s.)

Regards Peter
(click on image to download for better viewing)

4 Likes

Ah dang! I literally googled if Photolab 5 was coming out and didn’t see anything about it, but I already purchased. Hopefully they’ll do a solid and upgrade me for free considering I paid full price for 4 with no sales or anything.

i would ask in front by support for this matter.

1 Like

DXO releases the next version of Photolab during the latter half of October every year.

Mark

1 Like

Click on the “?” … image
image

John M

1 Like

That’s super useful, thank you

A week of use and another question I can’t find an answer to -

I’m working with colour adjustment…

I see there’s a Style - Toning tool but I can’t click on Split Toning. It’s greyed out, any ideas?

Also under HSL, there’s no place to actually change the hue that I can find? Ive got a bird photo and don’t like the shade of blue that the sky is. How can I manipulate that blue?

Hi John,

When I use Control L or Control R, it rotates the photo a full 90 degrees. Is there a way to just move it incrementally to straighten something out?

Split Toning is only available if you have Film Pack.

You can change the blue sky by using the HSL tool. Look at the manual for details on how to use it.

Use the Horizon tool - looks like a spirit level.

The easiest way is controlpoint’s.
Find the color who you want to change ad a controlpoint, hit “m” to see mask better.
Add more points and use ctrl or alt(alway’s forget which) to create a negative to block out things you won’t want to effect.

Turn back to normal view by hitting “m” again and by using exposure max plus or min or saturation to min you can expose the masking effective area.
Hit rest of controlpoint menu and start adjusting. All point’s are connected so the sky is equally modified.

Lightroom combines rotation and straightening in one tool. PhotoLab provides 2 tools for this purpose (and more, if you also count the perspective tool);

  • Use Ctrl+L or Ctrl+R to apply 90degree turns of the image.

  • Use the Horizon tool to straighten a horizon - or to make minute adjustments to the visual-level of an image. As @KeithRJ notes; the horizon tool looks like a spirit-level … You’ll find it on the toolbar;
    image … Click on the tool then draw a line across the horizon and it will be perfectly flat/straight.
    – You can also use sliders on the panel interface to make manual adjustments:
    image - 
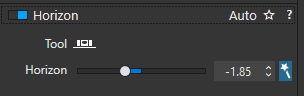
but, try the “magic wand” first.

John M

1 Like