New in DxO PhotoLab 6.1

Checking out the “New Features” in the 6.1 update …

Color Management specific;

-1. A new option has been added in the export dialog window to protect saturated colors (useful when exporting to a narrower color space)

image … If “ON” the result is equivalent to the on-screen PSA slider = 50.

  • Previously, the Protect Saturated Colors Algorithm was applied automatically (when Soft Proofing was activated and/or during the Export-to-Disk process) … This behaviour was catching-out unsuspecting users when they were not aware - particularly for images with saturated colors - that what they were seeing on-screen within-PL (without Soft Proofing activated) may not be the same as what they see when viewing the exported image on the same monitor.

  • Now, application of the Protect Saturated Colors Algorithm is a user-specified option - but only ON (for the same result as was previously automatically applied) or OFF … Which I don’t reckon is any improvement in behaviour at all … because, see the next point.

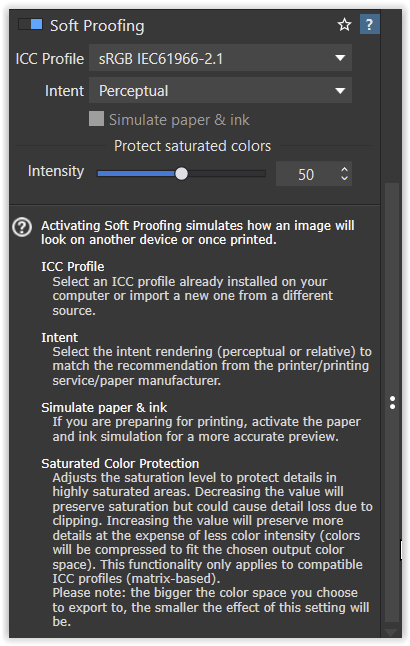
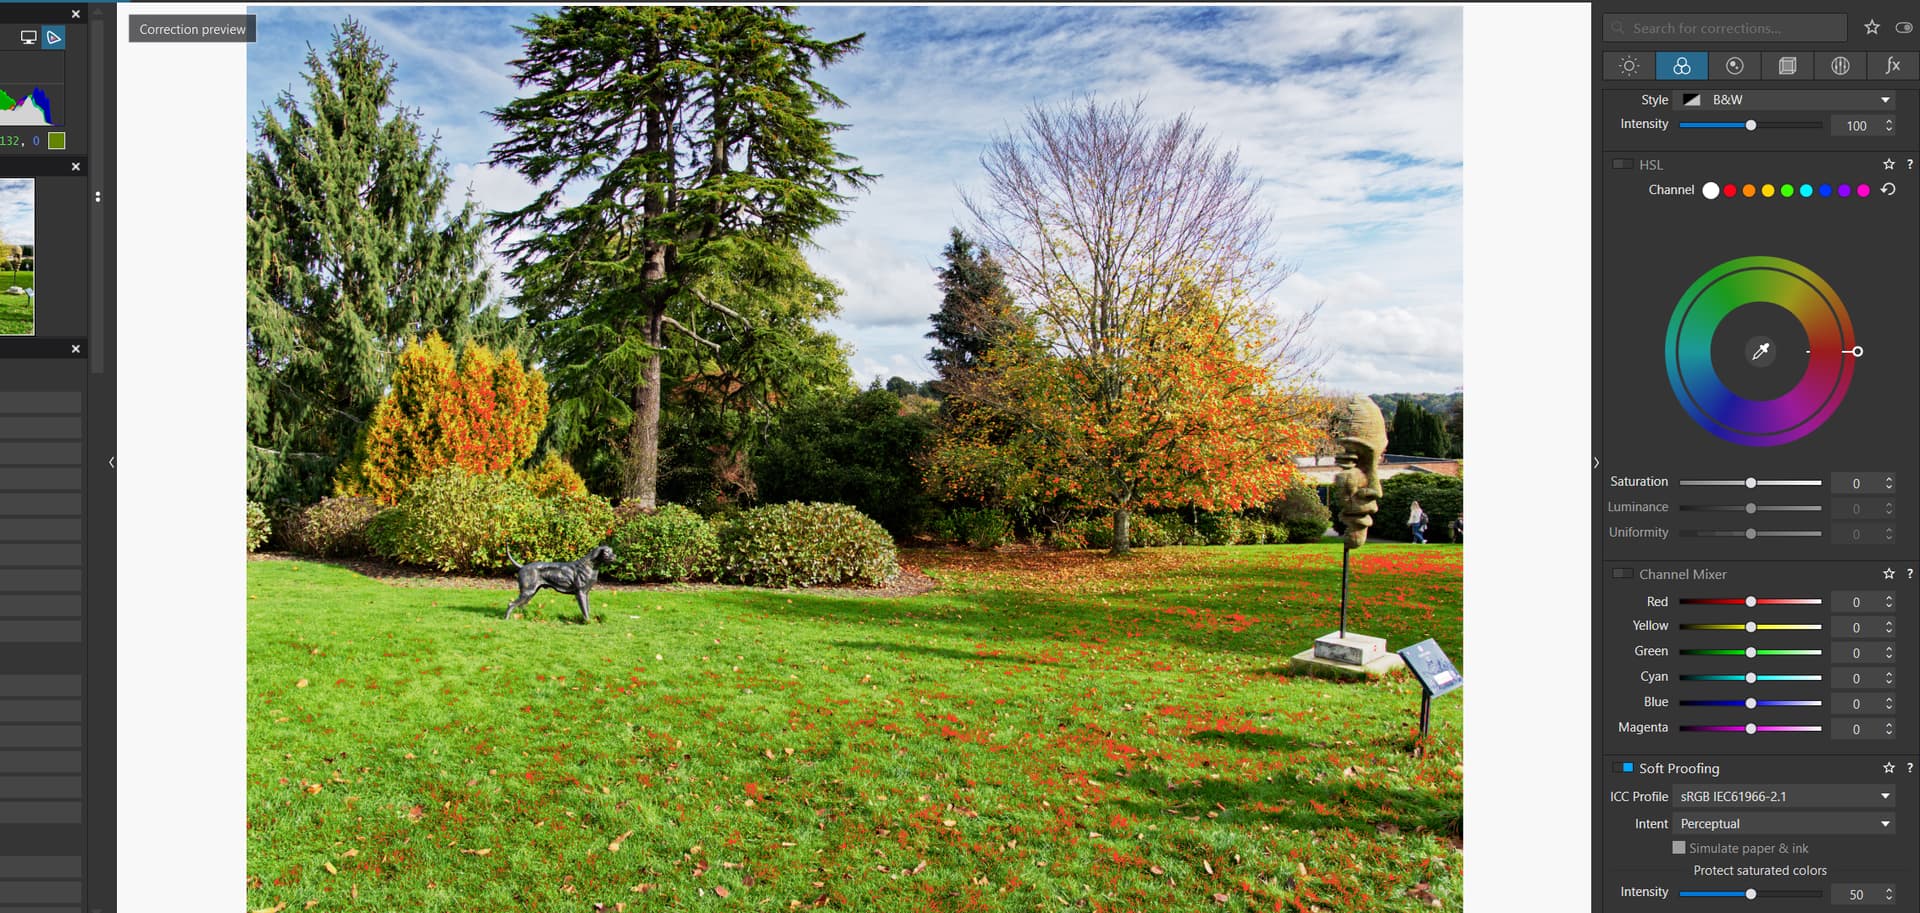
-2. A new slider to protect saturated colors has been added in Soft Proofing (This additional slider helps you protect saturated colors in Soft Proofing, when using a display ICC profile with a narrower color gamut.)
image

  • By default, the setting for this slider is “50” … which results in the same “strength” being applied to the instance of the Protect Saturated Colors Algorithm that we see on-screen within-PL as is applied during the Export-to-Disk process.

  • In other words, this is identical to the result that was previously applied automatically.

  • I have no idea why anyone would want/need to set this slider to anything other than the default setting of 50 … because that would not be reflected in the image exported to disk … because, with Protect Saturated Colors option in the Export dialogue = ON, the “strength” is fixed at 50.

  • I don’t see how this is supposed to make anything easier/more obvious for the unsuspecting user who is not aware of the importance of Soft Proofing even for the simple & typical case where one is working on an sRGB-limited monitor and exporting to disk for consumption on a monitor of that very same capability (?!)

John M

1 Like

Others;

-1. The cropped areas are now displayed when using the ReShape tool, ReTouch tool and Local Adjustments

  • This all works well, but it’s not immediately obvious that an outline of the cropped area is only visible when this option is activated; image … Why would one have it OFF ?!
  • And, closing any of these tools (for a cropped image) leaves it in a state where it’s not refitted to the screen … which is a minor annoyance.

-2. Shapes’ outlines for the ReTouch tool are now more visible

  • Comparing with PLv5, I couldn’t discern any difference in the outlines (?)

-3. The ReTouch tool’s shapes are now kept when activating/deactivating the “show mask” option

  • I wasn’t able to work out what this meant … Any one ?

-4. The intensity slider (in the ‘Color rendering’ palette) is now limited to 100 when using the DxO Wide Gamut working color space

  • That’s true in implementation - but I don’t understand what the implications are (?)

-5. Fixed an issue where moving images and sidecars with Windows Explorer could fail

  • This sounds interesting (and pertinent to my workflow - tho, not via Win Explorer) … but I haven’t had a chance to play with this yet, to understand what it means.

John M

John,

I just tried it. The adjustment range of that slider is much more subtle when set for Wide Gamut, and using it has no automatic affect on the Protect Saturated Colors slider like when using the Legacy .color space. More confusion, I’m afraid.

Mark

More buttons and sliders = longer feature list :grin: and more voodoo to debate about.

Yeah - I’ve been trying to find some/any selection for Category&Rendering that might auto-assign a slider setting for PSC Intensity (with WCS = Wide Gamut and the “Magic Wand” activated) … No luck so far !

I wonder what the point/purpose of this change is ?

John M

1 Like

@Musashi Thank you for delivering the promised changes to keyword handling

which yields

         <dc:subject>
            <rdf:Bag>
               <rdf:li>b</rdf:li>
               <rdf:li>a</rdf:li>
               <rdf:li>m</rdf:li>
               <rdf:li>x</rdf:li>
               <rdf:li>y</rdf:li>
               <rdf:li>z</rdf:li>
            </rdf:Bag>
         </dc:subject>
         <photoshop:SidecarForExtension>RW2</photoshop:SidecarForExtension>
         <tiff:Orientation>1</tiff:Orientation>
         <exif:DateTimeOriginal>2022-10-22T16:06:32.953+00:00</exif:DateTimeOriginal>
         <lr:hierarchicalSubject>
            <rdf:Bag>
               <rdf:li>b|a</rdf:li>
               <rdf:li>b|a|m</rdf:li>
               <rdf:li>b|a|m|b</rdf:li>
               <rdf:li>x</rdf:li>
               <rdf:li>y</rdf:li>
               <rdf:li>z</rdf:li>
            </rdf:Bag>
         </lr:hierarchicalSubject>

for keywords x, y, z, a|m|b (or a>m>b).

Not as good as my proposal at Win 10 PL5.3.1 - Use Keyword Format Templates instead of just reverting to the pre-PL5.2.0 keyword format and Keyword Format Templates - A more flexible way of working with keywords in DxPL but better than what was previously on offer with PL5.2.0 onwards!

2 Likes

And don’t forget: Finally the Nikon D100 is supported! :)))

1 Like

And the “launching” into ‘Customize’ has been restored.

1 Like

I’ve just spent a puzzled second or so trying to find the Toggles for the Out-of-Gamut warnings;

Discovered they’ve been moved: image
Now at the TOP of the Histogram … I wonder why ?

John M

This is a “very good thing” (for those of us who move {Image+Sidecar} combos around, from outside of PhotoLab) … PL is no longer as “aggressive” in tidying up orphaned Sidecar files - it’s now back to behaving like PLv5 did :+1:

Note: I would still not risk using File Explorer to move more than 1 pair of {Image+Sidecar} combos from the folder on which PL is currently focused … as there’s no guarantee that FE will move them in strict pairs !

John M

Good question. Maybe to not to confuse them with the clipping toggles?

Mark

1 Like

I wonder, were there any promised additions to 6.1 that were not delivered?

Mark

@John-M does the following seem correct to you

  1. Turn on the ‘Destination … warning’ and select ‘Soft Proofing’ and I get

  1. Turn off ‘Soft Proofing’ and I get

which makes sense.

  1. Turn ‘Soft Proofing’ back on and the highlight for the ‘Destination … warning’ is illuminated (which goes with the state of the ‘Soft-Proofing’ selection) but no sign of the warning on the image and

  1. To restore the actual ‘warning’ I need to 'Toggle the icon again! Shouldn’t the toggle return to its state before soft proofing was de-selected rather than to the ‘Off’ state!? (it’s a long way from the bottom right to the top left of the screen!!). Yes it is possible to select ‘Soft-Proofing’ first and then do the “toggling” on the 'Toggle …" icon but …

Yes - I was promised, during Beta stage, that the inconsistency in usage of keyboard control keys to manage changes to Size & Feathering for the ReTouch tool would be resolved … with suggestion, then, that the standard Control+Scroll & Shift+Scroll would be enabled as well (to restore consistency with other cases where Size and/or Feathering can be changed).

image … This abomination works ONLY for ReTouch !!

John

This case is working as expected for me, Bryan … Your screenshot was cut-off on the LHS - so I cannot quite see your OoG toggle selection - but I suspect it may not be as you intended (?)

Yes, that would be ideal - but the developer would have had to save and restore that state … and I guess they didn’t think of that !

John

@John-M Sorry about truncating, apparently there are pills you can take for that but …, a bit sad, don’t the developers ever try using the product for real (albeit some of my tests are somewhat surreal, there are probably pills for that as well)l!

1 Like

It should default to ON, but I can see wanting to have it OFF if one is only working within the confines of the cropped area. This might also speed up rendering? Or just be an attempt to please everyone?

I agree with your comments about Protect Saturated Colors being manually controlled differently in soft proofing vs. export. I previously understood what PL was doing, and now I am confused. Could it be that enabling PSC in export now applies the algorithm exactly as it is configured in soft proofing, with its set intensity - even if soft proofing is off? Fortunately, the user guide has been updated to show that the answer is YES!

The export option is described this way in the user guide:

  • Checked box and softproofing profile: saturated color protection is applied, with the value applied to the color protection slider in the softproofing subpalette.

Excellent! But couldn’t that be made more clear in the user interface??

Here’s the thing: if you select “same as soft proofing,” the checkbox stays checked but is grayed out, meaning PSC is automatically applied as in the soft proofing subpalette. But if you select an ICC profile independent of what is in Soft Proofing, you can turn PSC on or off as you wish. Why would you want to do that? This seems to be only somewhat explained in the soft proofing section of the user guide:

  • Saturated Color protection: this slider only applies to matrix based ICC profiles and, so only display profiles, not printer profiles. Set at 50 by default, the slider lets you alter saturation and details in saturated portions. By reducing the value (to the left), the slider maintains saturation to the detriment of the details and, To the right, the details are preserved to the detriment of the vivacity of the colors. Note that the Export menu has a checkbox for Protection of Saturated Colors, which lets you apply (or not) the slider effect to the exported images.

So it seems that the export dialog checkbox always pertains to what’s in the soft proofing module. It becomes fixed if using “same as soft proofing” for ICC profile, which is less confusing and seems to confirm what I’m reading here.

Here’s what I suspect DxO is trying to do here: people complained that the automatic PSC algorithm was confusing, so they provided a way to turn it off completely and give total control to the user. Now the removal of out-of-gamut warnings is completely in our hands and one need not be “caught out” if exporting to a small color space that’s the same as the monitor is calibrated for. But in so doing they have introduced greater complexity. Explanatory notes in the export dialog window and the Soft Proofing subpalette could be more helpful.

There is an explanation with the softproof


but not with the export, suppose as it ‘relies’ on the softproof setting.


BUT … (as John-M stated in post #1)

While in the preview with softproof on and setting this new PSC slider to 0, 50 (default) and 100
I can see colour changes in those highly saturated colours, but no difference between the exported JPEGs / TIFFs, all outputs looking identical.

Then setting this PSC slider to 50, export and compare the preview / softproof to all outputs,
only at 50 (default) the softproof looks identical to all outputputs,
→ which means, the PSC slider setting is NOT mirrored with export,
contradicting the explanation in the new online user guide.

So, there is something wrong.

All exports were set as
grafik
( didn’t check “Same as Soft Proofing” )
New in DxO PhotoLab 6.1 - #20 by Wolfgang

[ To countercheck I undid that checkmark, exported the file
and now the output was identical with the preview / softproof / PSC slider set to “0”. ]


After reading the whole afternoon DxO’s “How to …” and the new online guide, there is nothing mentioned anymore about the none-customizable PSC Algorithm, but this new PSC slider … as quoted.

To me, it doesn’t make sense at all to introduce a variable setting for the preview / softproof, which only works at the (50) default setting.

@DxO_Support-Team – please take note

2 Likes

What a bother. I guess I’ll be setting my export ICC profile to “same as soft proofing” for now. Have you tested to see if that applies the PSC slider setting to the export image?

No, I didn’t – will check now …


“Same as Soft Proofing” does it correctly (checked with PSC set to 0, 50 and 100 with TIFF and JPEG)
… so, it’s a bug with
Screen Shot 12-08-22 at 08.21 PM

1 Like