The two images have been converted by NLP from raw files I took - photographing a Kodacolor 400 negative I had exposed and developed in 1978.
Of course, the late summer aspen leaves could be spruced up a little to make the images more palatable for modern/digital times, where colours cry out loud.
You should generate an own Preset for negative conversion. It is not suitable for you ? The advantage is such a conversion, that you should select the proper film material in the Filmpack tool.
I think the Filmpack made particularly to support the scanned images characteristics. Any general negative scanning Preset certainly will produce worse color fidelity.
…using NegativeLab Pro in Lightroom requires no special preset, NLP does it all.
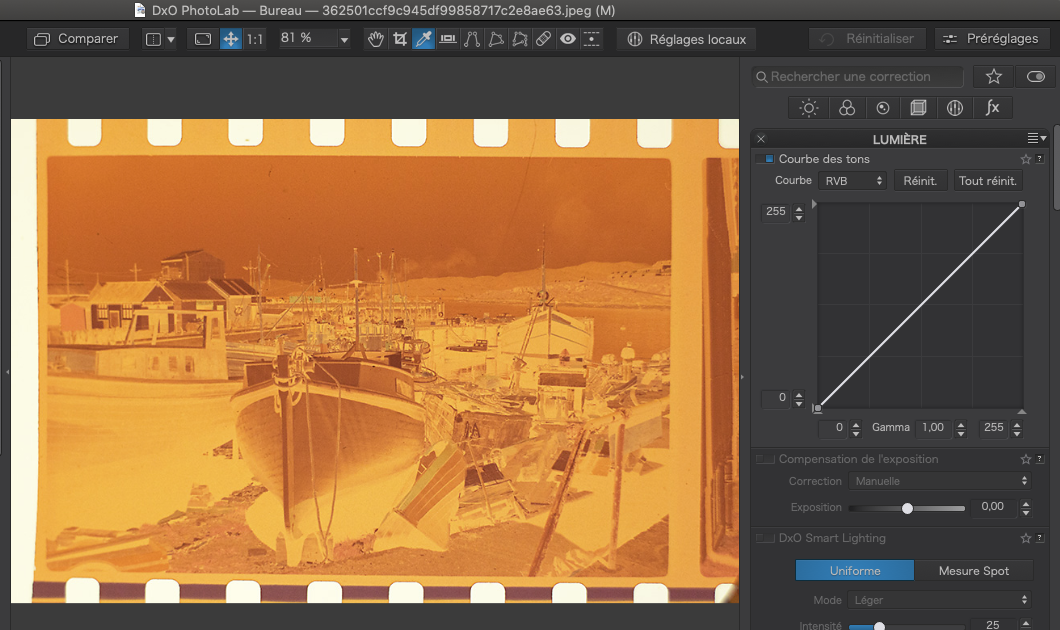
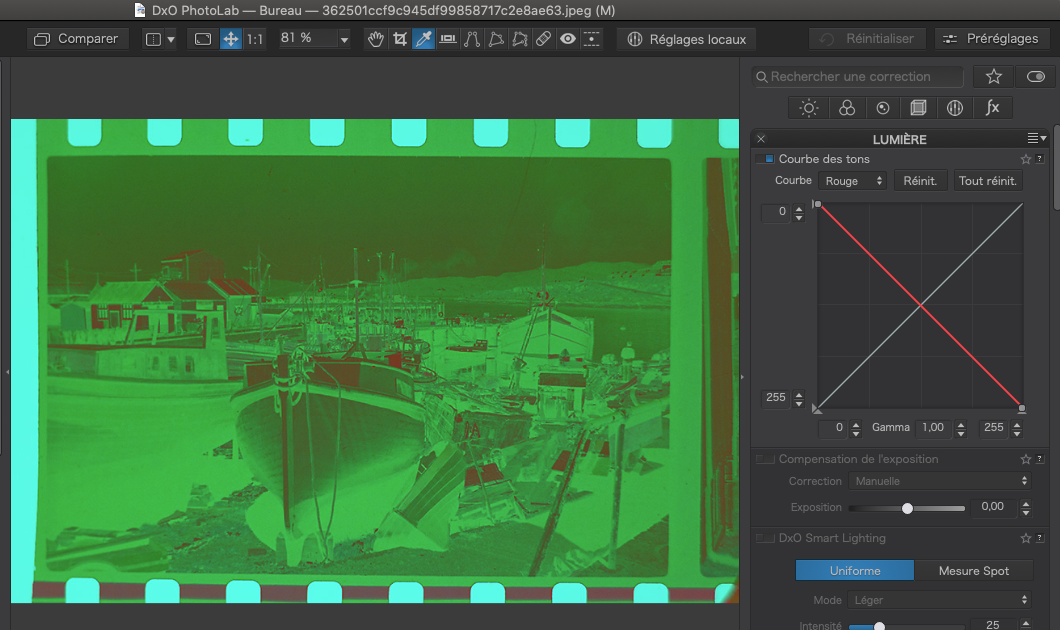
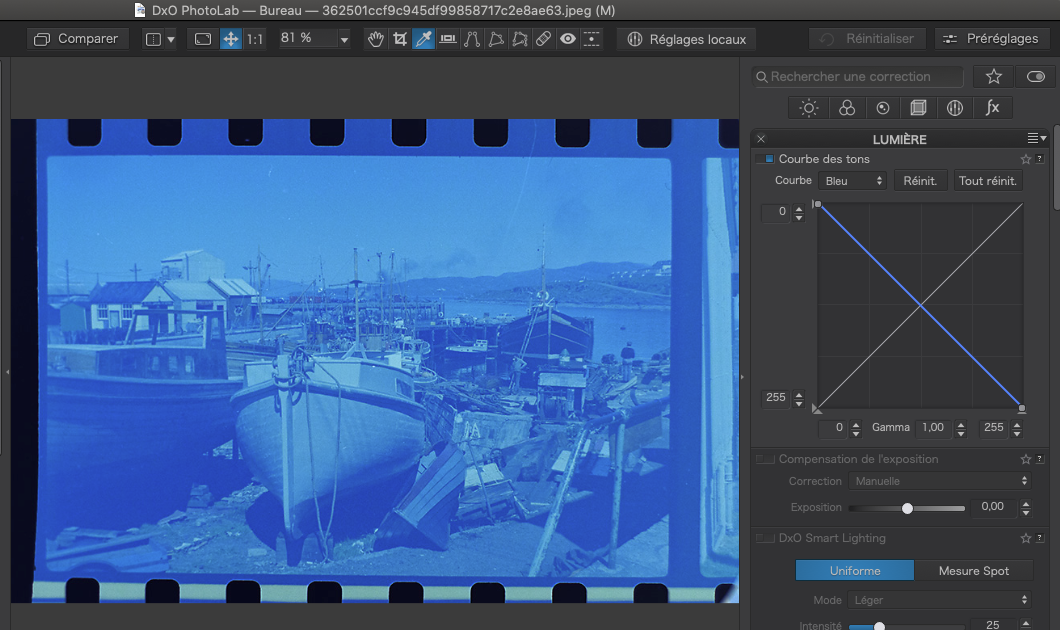
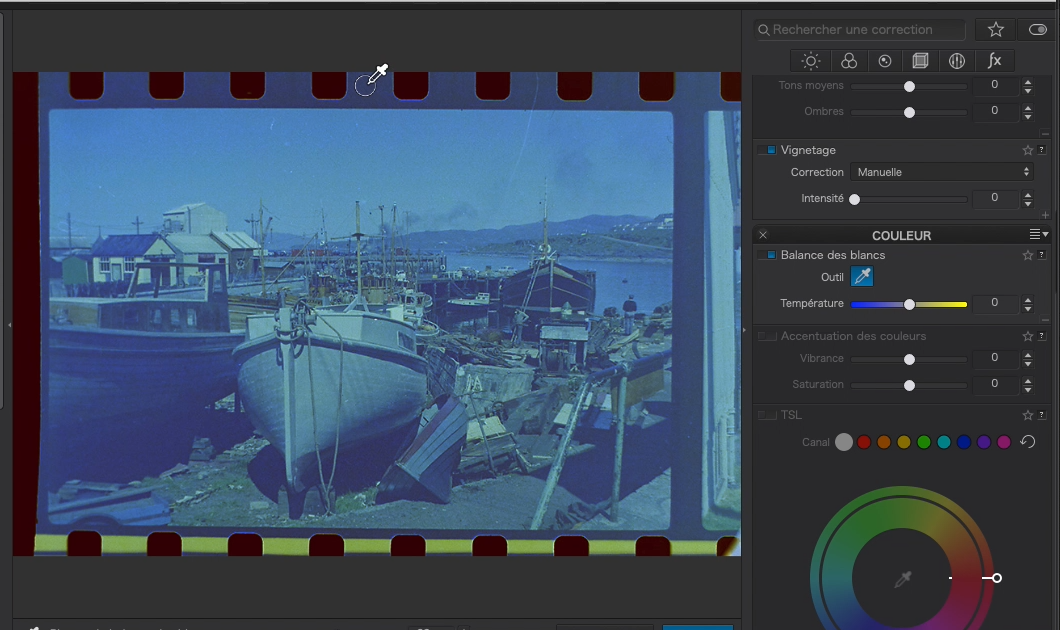
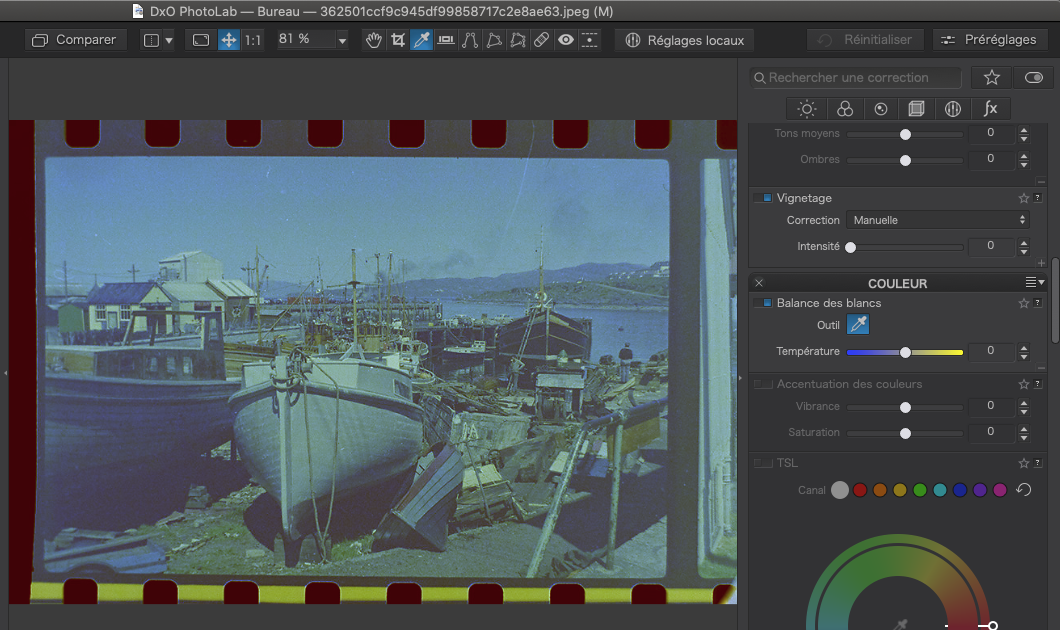
For tests in DPL, I indeed have a preset that just flips the R, G and B lines in the tone curve tool from / to \ - which I found easier to use than flipping the RGB curve.
I found that setting up several presets does not necessarily speed up customizing because I had to adapt settings to exposure variations too, not only to film brand and model and iso and possibly variations in development by the original labs etc.
As for results, both NLP and manual processing deliver good results that can then be refined in one of the NIKs…
Hello,
If this can be helpful to all the negative conversion people:
There is a live talk today with Smugmug/Flickr HERE. In the youtube description you will find a link to a blog post about it.
Have a nice day
Hi, I’ve only just caught up with this thread. This would be not only a really useful addition to PL but would also help make it a one stop shop program.
I presume color or B & W negatives would be scanned to produce the files for processing. My Epson scanner has scanning options for color and B & W negatives.
I haven’t tried scanning negatives, but if the Epson options are good, would a conversion option in PL be needed?
…imagine taking photos of your negatives. Many of us have decent cameras that can serve to reproduce film negatives with high quality and in less time than a scanner takes. Negative conversion would be a nice complement for people who shoot film.
Thanks, I just learned something; using a camera as a scanner. I can see the speed advantage, but isn’t the cost of a decent camera, a light box, etc. a little high for a hobbyist like me?
Only you will be able to decide if the camera you own can also photograph a negative
Appetite comes with eating, you can always start small to see if things work for you.
As for processing, you can check a few starters like this:
The Epson options are good but not necessarily good enough for high quality publication. NegativeLab Pro and other programmes are very useful - especially with archive negatives scanned with something like the Hasselblad Flextight scanners. Currently I have to go back into Lightroom just to use the plug in. It would be great to be able to do everything in PL.
1 Like
m-photo
( Marc (macOS Sonoma on MBP16" Intel))
12
Hello
I am now also diving into the negative “scan” and conversion ocean now.
I do not use Lightroom anymore so Negative Lab Pro is not an option.
Yesterday I stumbled on this “small” but effective App: FilmLab.
My main problem is to remove the strong orange colour cast from the negative.
I might encounter other “problems” with other types of negatives… who knows.
I do not want to spend much time on one single photo, so I like the fact this tool make good correction automatically.
My workflow (I am still using the 14 days trial) is:
take the best picture possible of the negative (RAW)
open the RAW with PhotoLab to process it with DeepPrime
export as a DNG
open and process it with FilmLab
I wish DxO would provide the necessary tools in a future update of FilmPack
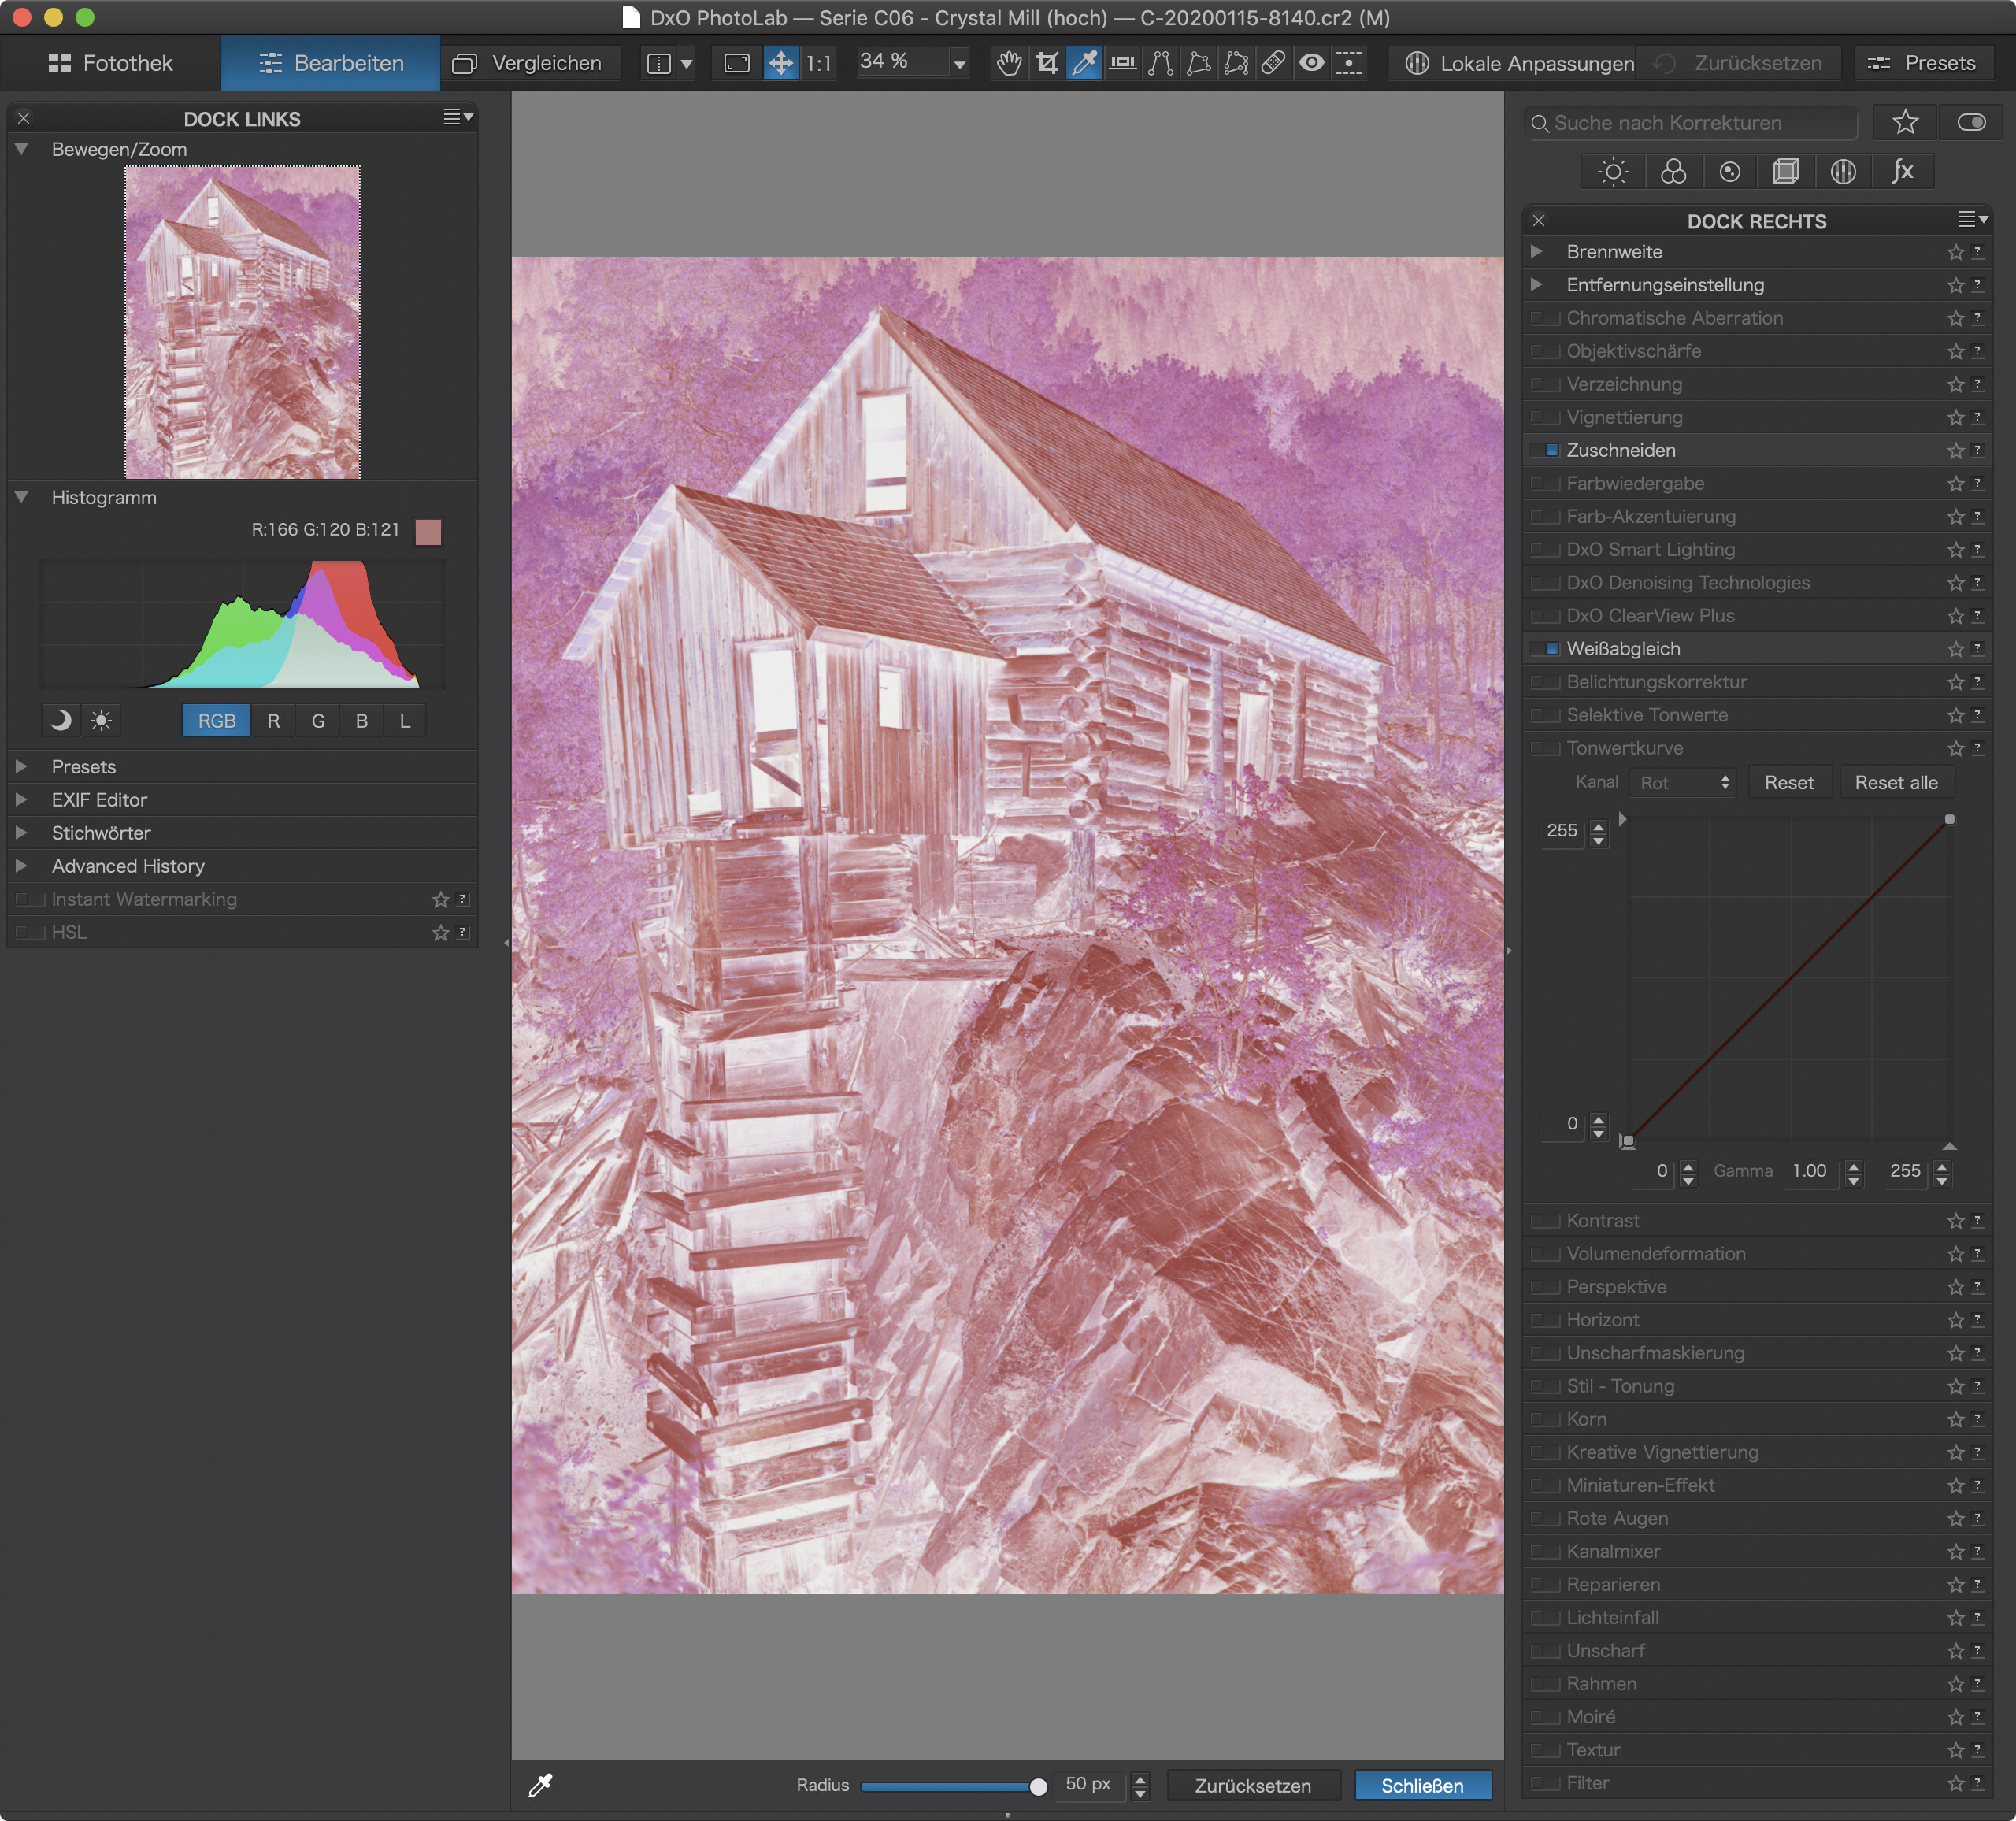
At this point, You can either continue with the original image (but be aware that a lot of the sliders now act in reverse) or export to DNG to get a “fresh start” with the now positive image.
It’s not perfect but it can be done with only PhotoLab and a bit of patience
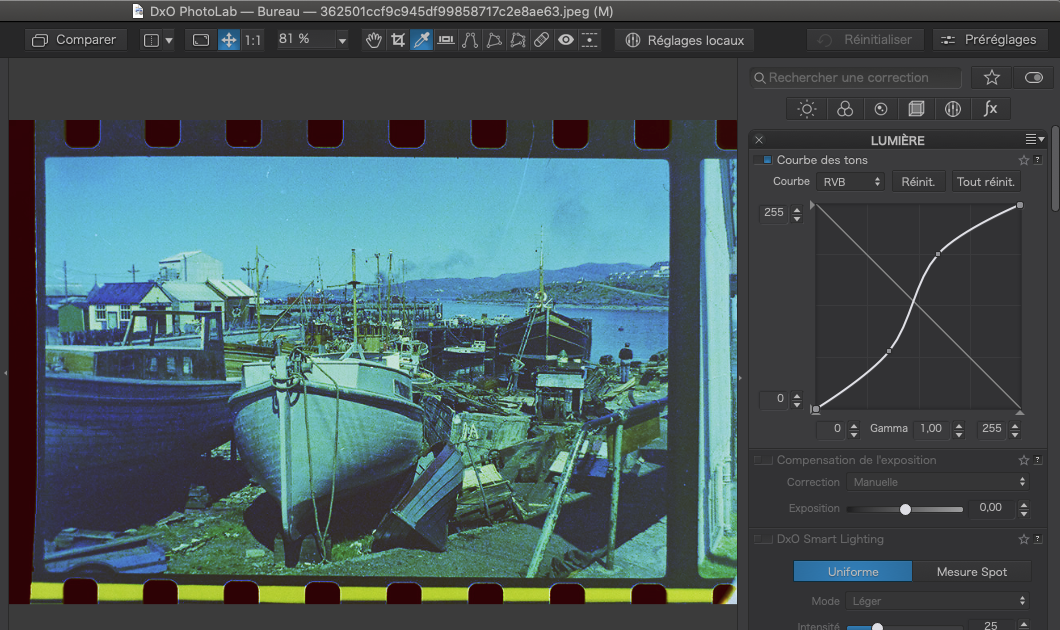
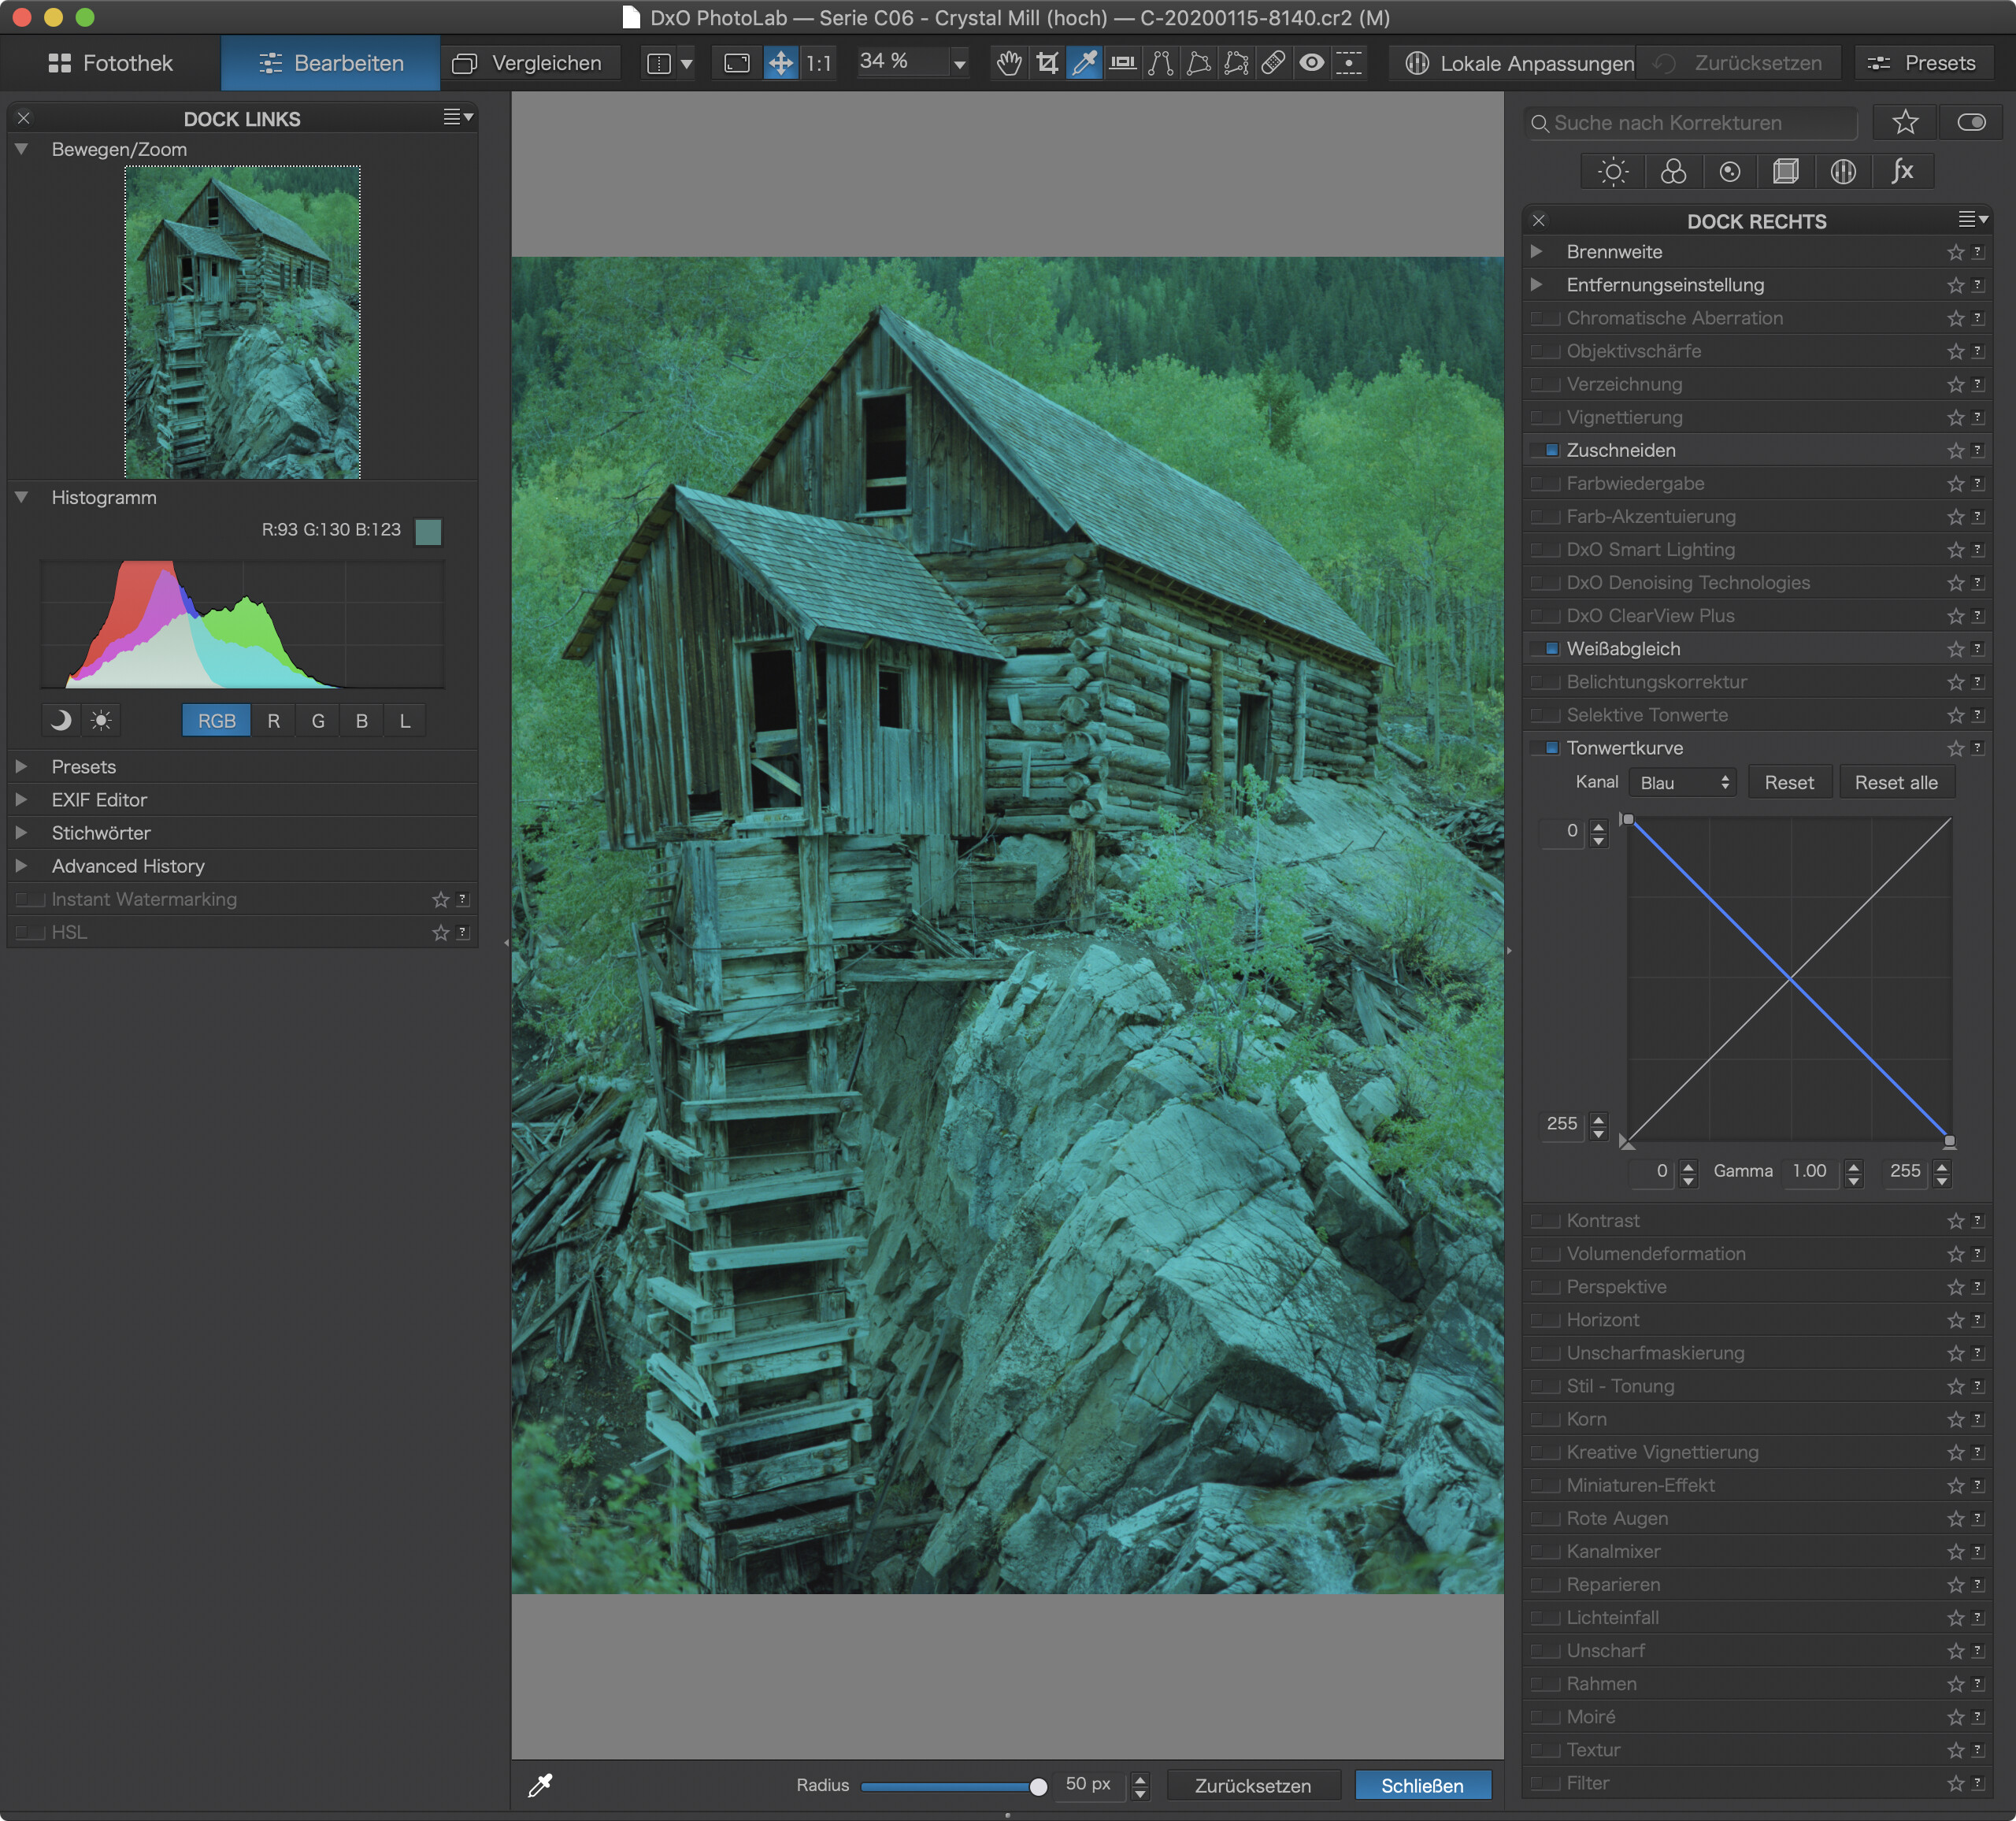
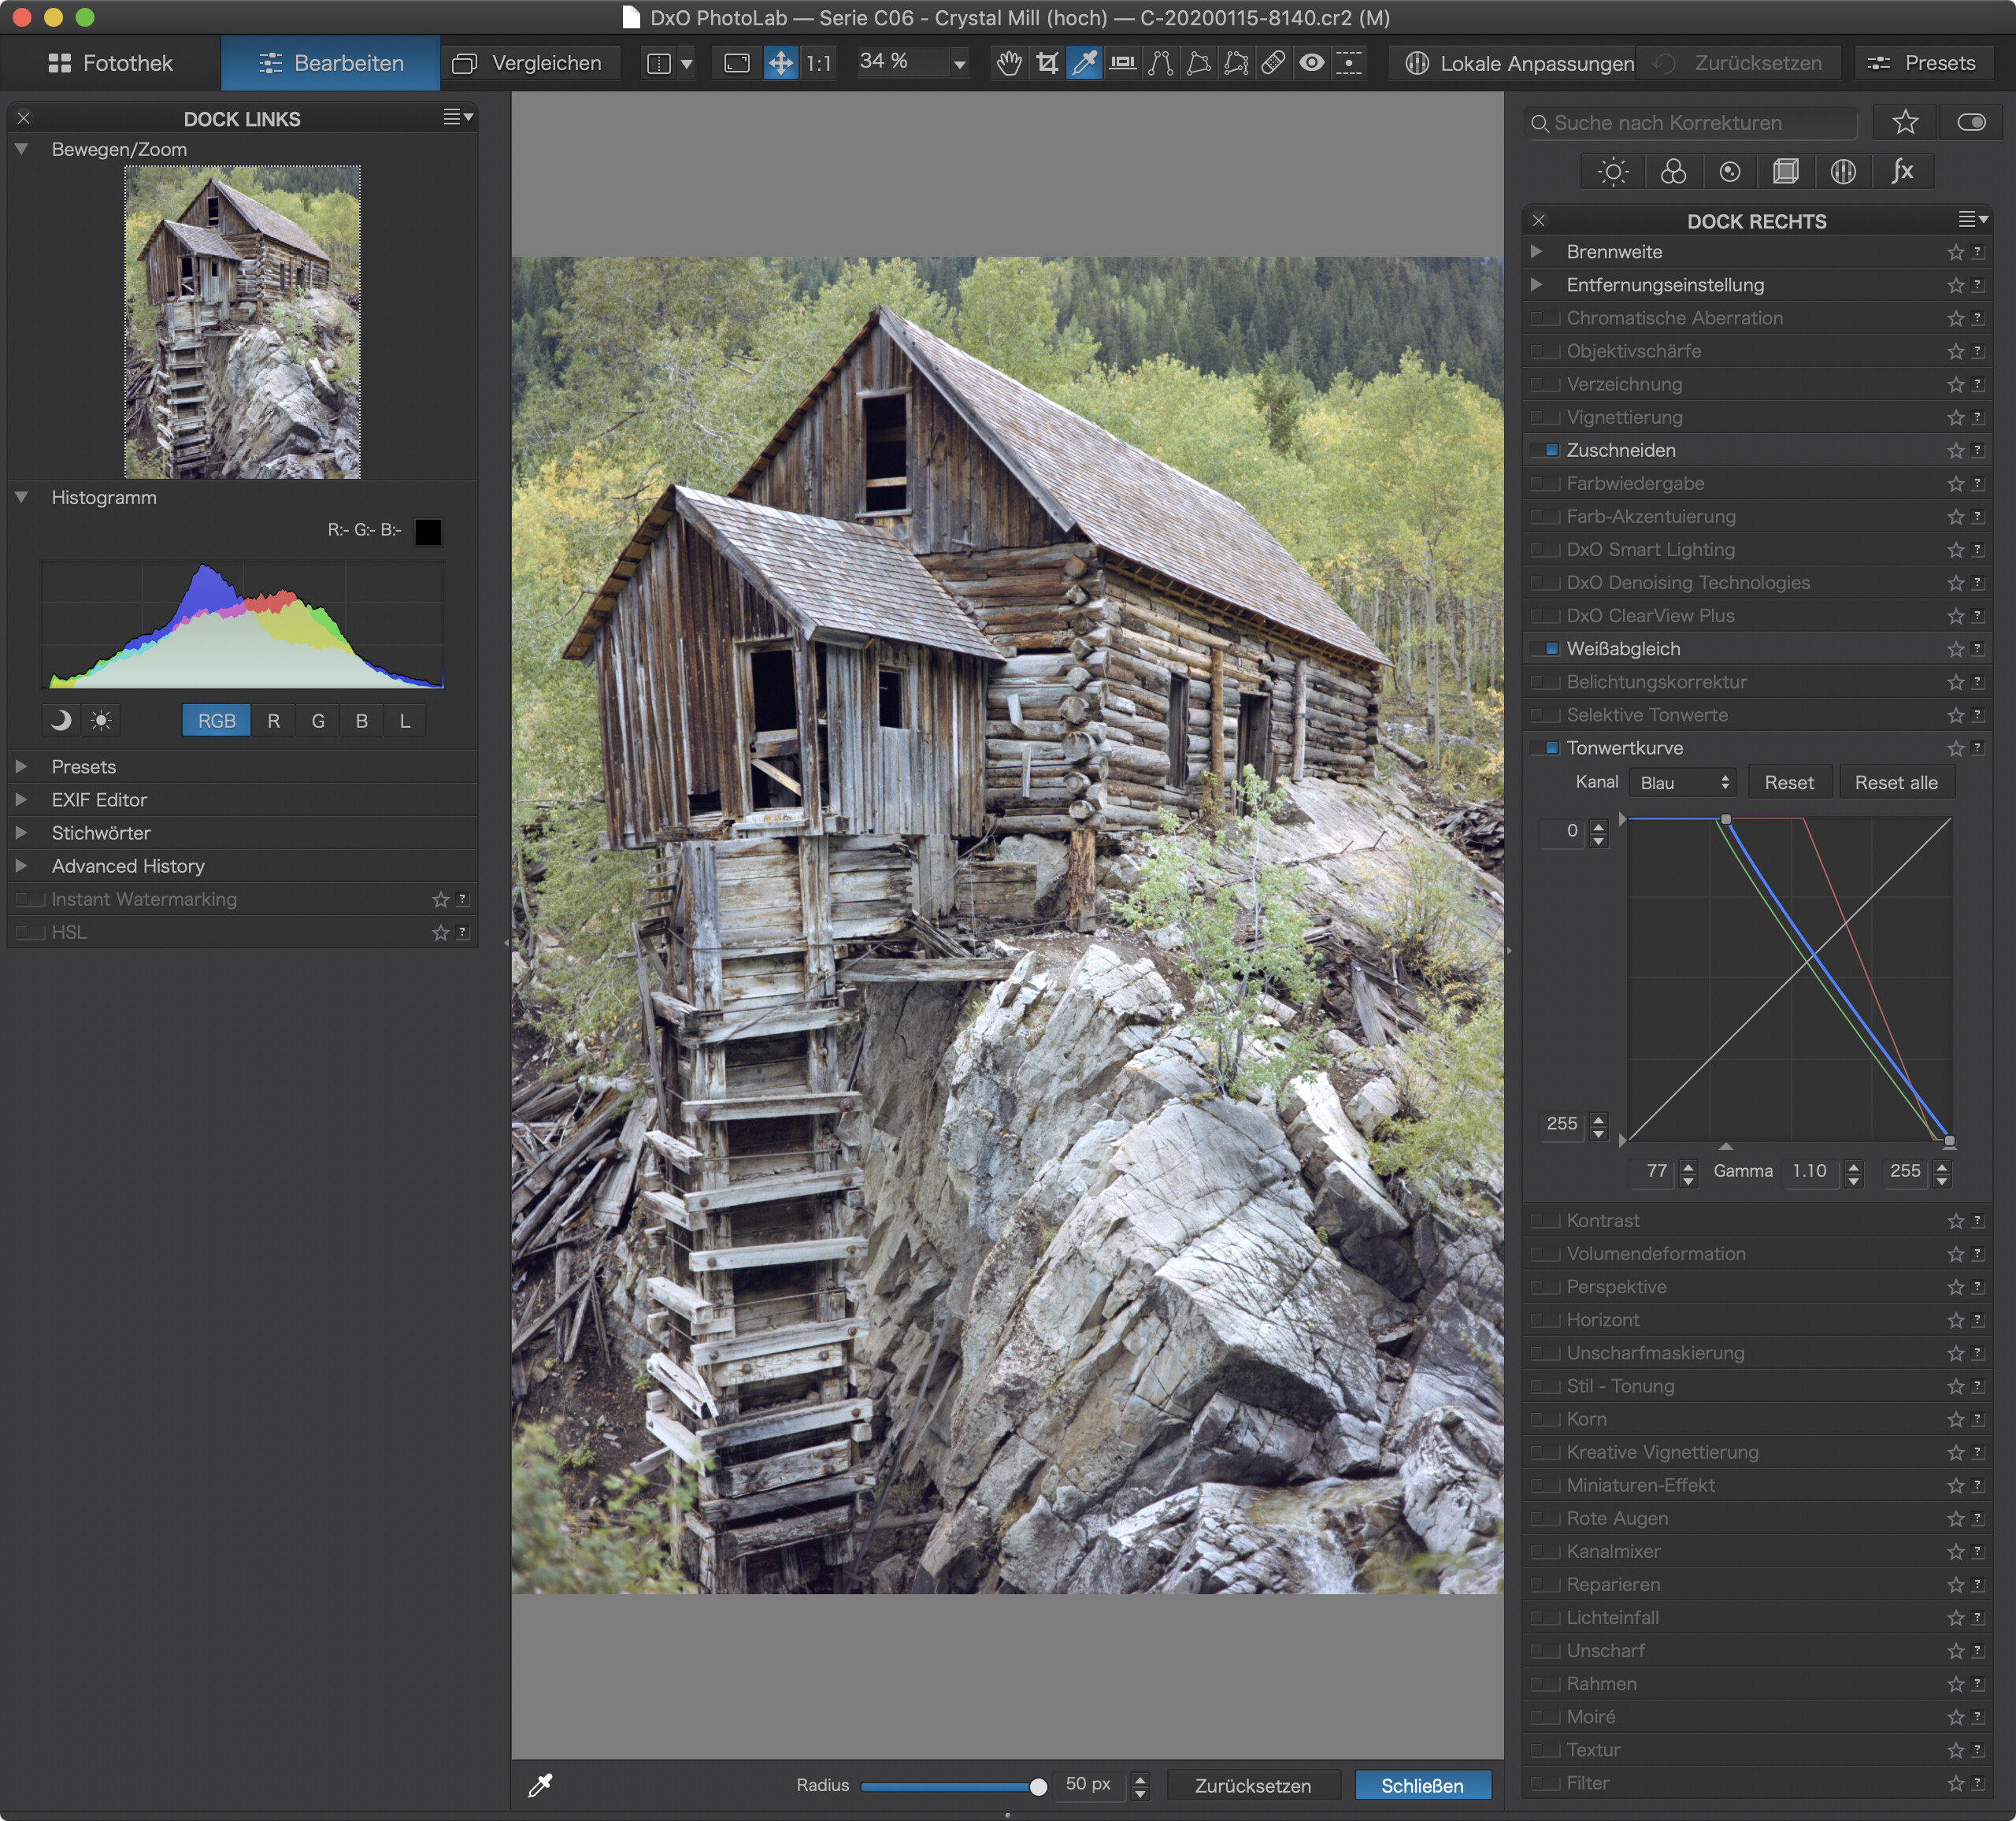
R, G and B tonecurve endpoints shifted,
slight gamma change to G and B curves
Note how few settings needed a change.
Shot taken in 1978 with a Mamiya 645 and Sekor 80mm lens on Kodak Gold 400.
Image needs to be flipped horizontally because I shot the emulsion side.
4 Likes
m-photo
( Marc (macOS Sonoma on MBP16" Intel))
15
Thank you @Joanna & @platypus
I will give it a try during my next “negative” session.
Hopefully we can get some “help” from PhotoLab in the future ( @StevenL ?) to win some time and also have the cursor behaving normally and not reverse.
m-photo
( Marc (macOS Sonoma on MBP16" Intel))
16
Hello dear negatives fans Is there a reason not to invert « all » channels instead of R, G and B separately ?
I did invert the « all » channel, adjusted the WB and playing with SmartLighting and Clearview helps for contrast and light.
I found that inverting the coloured curves makes it easier to get the targeted colours in the image. Note that the main operations for removing colour casts etc. is in these curves. All other settings can be left as is or need only slight touches.
1 Like
m-photo
( Marc (macOS Sonoma on MBP16" Intel))
18
Hello,
Thanks again for your inputs.
I was able to test and try a bit and it is “okay” to work with PL. But it is far from great.
I have a question… I have no experience with films and just trying to get the best results.
I know the film itself has grain.
Some of my pictures really look awful… and I guess it is the quality of the negative with combination of the photographer itself
Is someone in the mood to look at one of my raw file to give me a feedback ? I will share the file in PM only.
Bumping as someone currently searching for a good negative inversion method. I’m a Dxo Photolab and Filmpack user, love it for my digital photography.
Just about to start scanning some old negatives with a JJC negative light/carrier kit, and initially a Panasonic LX15 (may upgrade to a macro lens on a Panasonic G9 if the JJC equipment works well).
Being able to put RAW shots of the negatives straight into DxO will be invaluable.